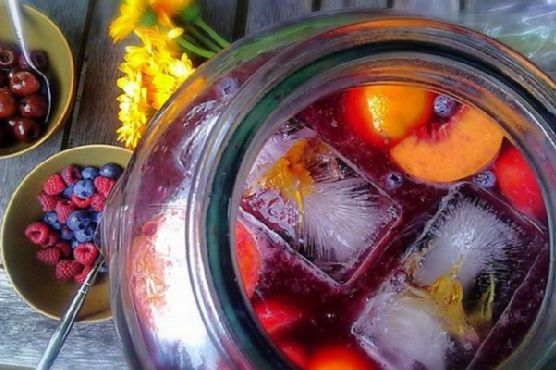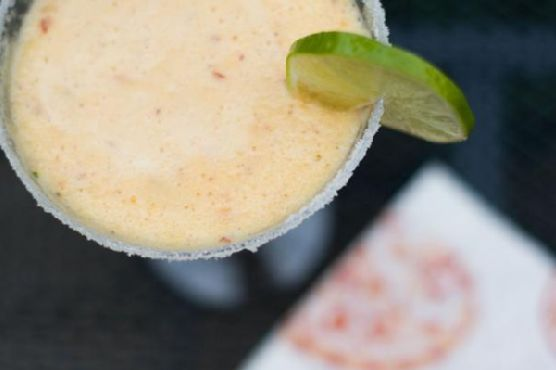
Fresh Peach Margarita With Lime Sugar
Intro
There’s something incredibly nostalgic about sipping on a refreshing cocktail that takes you back to warm summer evenings and gatherings with loved ones. The Fresh Peach Margarita with Lime Sugar does just that. It reminds me of the time I spent at my grandmother’s house in the heart of peach country, where the air always smelled of fresh fruit. We would sit on her porch and watch the sunset, savoring the sweetness of ripe peaches. This margarita is a delightful blend of those cherished memories and the vibrant flavors of peach and lime, offering a unique twist on the classic margarita.
Why You’ll Love It
This Fresh Peach Margarita is not just another cocktail; it’s an experience. The combination of juicy peaches and tangy lime sugar creates a harmony of flavors that’s both refreshing and invigorating. You’ll love the way the lime sugar adds a zesty kick to the sweet peach and smooth tequila, making each sip feel like a mini-vacation. Whether you’re hosting a summer party or simply enjoying a quiet evening at home, this margarita is sure to delight your taste buds and transport you to sunnier days.
Ingredients
- Ice
- 1 lime (juice)
- Lime sugar (1/2 teaspoon of finely minced lime zest and 1/4 cup granulated sugar)
- 1 ounce orange liquor
- 1 ripe peach, peeled and sliced
- 1 ounce peach schnapps
- 1 tablespoon sugar
- 2 ounces silver tequila
Instructions
- Add 1/2 teaspoon of finely minced lime zest to 1/4 cup granulated sugar and set aside for about 30 minutes, stirring occasionally.
- For a pretty presentation, coat the rims of the glasses you are using with lime sugar. Do this by rubbing the rim with a lime wedge and then placing the rim into a plate that has the sugar in it until the rim is coated.
- Place all ingredients into the blender and puree until smooth.
- If the mixture is too thick, add a little cold water to achieve the desired consistency.
- Either chill all ingredients before making or add some ice cubes after you have made the margarita and stir it until it is as cold as you like.
- Strain it into your glasses or serve on the rocks, as per your preference.
Tips
For the best flavor, use ripe peaches that are in season. They will be sweeter and more flavorful. If peaches aren’t available, frozen peaches can be used as a substitute. To enhance the lime flavor, consider adding a splash of lime juice directly into the margarita mixture. If you’re a fan of spicy drinks, try adding a dash of chili powder to the rim of your glass along with the lime sugar for an extra kick.
Variations & Substitutions
If you want to mix things up, consider using different fruits. Mango or pineapple can be excellent substitutes for peach, offering a tropical twist. You can also experiment with flavored tequilas or use a splash of coconut rum for a different flavor profile. For a non-alcoholic version, simply omit the tequila and schnapps and replace them with peach juice or nectar.
Storage
If you have any leftover margarita mix, store it in an airtight container in the refrigerator for up to two days. Before serving, give it a good stir or shake, as the ingredients may settle. It’s best enjoyed fresh, so try to consume it as soon as possible for the best taste.
FAQ
Can I make this margarita ahead of time?
Yes, you can prepare the lime sugar and slice the peaches ahead of time. However, for the freshest taste, it’s best to blend the margarita just before serving. If you must make it in advance, store it in the refrigerator and give it a good stir before serving.
What can I use if I don’t have a blender?
If a blender isn’t available, you can use a cocktail shaker. Muddle the peach slices in the shaker to release their juice, then add the rest of the ingredients with ice and shake well. Strain into your glass and enjoy.
Nutrition
While this cocktail is a treat, it’s worth noting that it contains sugar and alcohol, so enjoy it in moderation. The inclusion of fresh fruit does provide some nutritional benefits, such as vitamins and antioxidants from the peaches.
Conclusion
The Fresh Peach Margarita with Lime Sugar is a delightful way to celebrate the flavors of summer. Its vibrant taste and beautiful presentation make it the perfect addition to any gathering or a relaxing evening at home. I hope this recipe brings you as much joy as it has brought me, conjuring memories of sun-drenched days and cherished moments with loved ones. Cheers to creating new memories with every sip!
Related update: Fresh Peach Margarita With Lime Sugar
Related update: Spiced Apple Cider