
One chilly Tuesday evening, I found myself rummaging through the pantry, desperate for something that would warm the soul and fill the bellies of my family. You know those days when the weather outside is just plain miserable, and you need a hug in a bowl? Enter: my Chicken Stew For The Soul. It’s not just any stew—it’s packed with cozy spices and creamy coconut milk, making it both comforting and slightly exotic. Plus, it’s a one-pot wonder, which means less time scrubbing dishes and more time savoring every bite. Honestly, it might just be the ultimate excuse to whip out those spices you’ve got tucked away in the back of your cupboard.
Jump to Recipe
What You’ll Need
This recipe keeps things straightforward with ingredients you probably have at home, except for maybe a couple of spice stars. No need for a fancy shop run!
- Chicken – the heart of the stew
- Mustard seeds
- Cinnamon stick, broken
- Cardamoms
- Ginger-garlic paste
- Sliced onion
- Curry leaves
- Green chillies
- Ground coriander
- Red ground chilli
- Ground turmeric
- Cubed potatoes
- Coconut milk
- Garam masala
- Salt
- Lemon juice
- Chopped fresh coriander
How to Make Chicken Stew For The Soul
- Sliced onions, slit the chillies, and cube those potatoes like a pro. Keep them aside for later.
- In a heavy-bottomed pan (or pressure cooker for speed demons), heat some oil. Toss in mustard seeds until they splutter with joy.
- Add the cinnamon stick and cardamoms. Stir until the air is filled with their warm, inviting aroma.
- Now, throw in the onions, curry leaves, and green chillies. Sauté until the onions are soft and fragrant.
- Introduce the ground coriander to the party, followed by the marinated chicken. Stir well so the chicken gets to know its new spicy friends.
- Cover and let the magic happen. When the chicken is halfway through its transformation, add the cubed potatoes.
- Once the chicken is nearly done, stir in the garam masala, salt, and coconut milk. Let it all simmer until everything is cooked to perfection.
- Turn off the heat, sprinkle with fresh coriander, and let the lemon juice add a zing. And remember, stir it with love!
- Serve hot, preferably with freshly made appams or any bread that’s handy. Don’t forget to savor the aroma before diving in!
Cook’s Notes
Ah, the little things that make a difference! First off, make sure your spices are fresh. If they’ve been lurking in the cupboard since last year, they might need replacing. When stirring the spices and chicken, be patient and let them mingle—it’s where the flavor magic happens. This stew is forgiving, so if you accidentally over-simmer, it only gets better. Leftovers? Yes, please! They’ll taste even richer the next day. Store in an airtight container in the fridge for up to three days or freeze for later.
Make It Your Own
Here are a few variations to keep things interesting:
- Swap the chicken for crispy tofu if you’re going plant-based. Trust me; the spices still shine through.
- If you’re out of coconut milk, try almond milk for a nutty twist, though it won’t be as creamy.
- Add a handful of spinach or kale at the end for a pop of color and nutrition.
- Up the lemon juice for a tangier finish, balancing the creaminess of the coconut milk.
If you try this, I’d love to hear how it turns out—drop a comment or tag me! Your kitchen adventures fuel my culinary soul!
Goes Well With
If you want to round out the meal, here’s what I’d pair it with over on meaghanmoineau.com:
Related update: Chicken Stew For The Soul
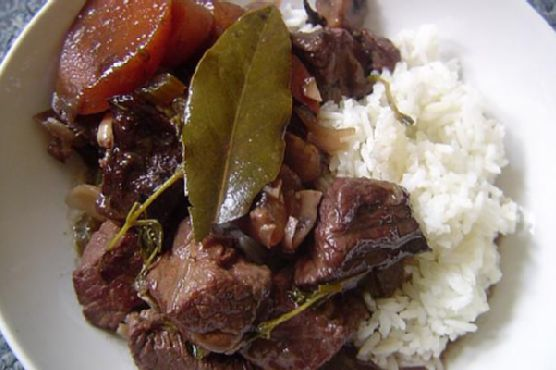
It was one of those early autumn evenings when the crisp air nudged me to cook something warm and comforting. I’d spent the day navigating a world of to-do lists, errands, and a minor kitchen mishap involving a forgotten batch of cookies. By the time evening rolled around, I needed a dish that felt both grounding and indulgent without demanding my whole evening. That’s when I remembered my trusty Boeuf Bourgignon. It’s the kind of dish that fills your home with a rich, savory aroma and makes you feel like a culinary wizard when, really, it’s the ingredients doing all the magic. This recipe is delightfully forgiving, turning a few humble staples into a cozy masterpiece after a good long simmer in the oven.
Jump to Recipe
What You’ll Need
This ingredient list might look a little long, but trust me, you probably have a lot of these things already hanging out in your pantry.
- Button mushrooms
- Butter
- Un-smoked bacon
- Vegetable oil
- Boneless, well-trimmed beef chuck
- Yellow onion
- Shallots
- Carrots
- Black salt and pepper
- Flour
- Cognac
- Beef stock
- Unsweetened cocoa powder
- Garlic cloves
- Fresh thyme
- Fresh flat-leaf parsley leaves
- Tomato paste
- Bay leaf
How to Make Boeuf Bourgignon
- Preheat your oven to 160°C (325°F). It’s a slow roast, so let the warmth seep through every corner of your kitchen.
- In a pan, sauté the mushrooms in butter until they’re brown and soft, filling the air with that delicious earthy aroma. Set them aside for later.
- In a deep-bottomed pot or casserole, sauté the bacon in a tablespoon of oil over moderate heat for about 2 to 3 minutes until it’s lightly browned. Use a slotted spoon to set it aside.
- Crank up the heat in the same pan until the fat is almost smoking, then sauté the beef in batches. Let it brown on all sides before adding it to the bacon. Remember, no crowding!
- Lower the heat to medium and in the same glorious fat, toss in the onions, shallots, and carrots. Cook them until the carrots are tender and the onions are translucent.
- Add these veggies to the beef and bacon mix. Pour out the sautéing fat — it’s done its duty.
- Return the beef to the casserole and sprinkle with flour. Toss it all around until the beef is lightly coated and there are no white flour traces left.
- Reintroduce the bacon and veggies, seasoning with salt and pepper. Stir in the cognac and enough beef stock to barely cover the meat.
- Add the garlic, thyme, parsley, tomato paste, and bay leaf. Bring the mixture to a gentle simmer on the stove, letting all the flavors start to marry.
- Cover the casserole and set it in the oven. Cook for 2 1/2 to 3 hours. An hour in, add the mushrooms and stir in the cocoa powder for a secret touch of depth.
- Return to the oven until the meat is so tender, it practically begs for a fork.
Cook’s Notes
A few things to keep in mind: Make sure to dry the beef thoroughly before browning. Wet beef won’t brown properly, and we want that lovely crust! If you’re short on time, you can prep the veggies and bacon ahead of time, making the final preparation faster. This dish gets even better the next day, so don’t hesitate to make it ahead and let the flavors deepen overnight. Store leftovers in an airtight container in the fridge for up to three days.
Make It Your Own
The beauty of Boeuf Bourgignon is its versatility. Here are some ideas to switch it up:
- Swap the beef with crispy tofu for a vegetarian twist that’s just as hearty.
- Try using red wine instead of cognac for a deeper, more robust flavor profile.
- Add a handful of pearl onions during the last hour of cooking for a delightful pop of sweetness.
- For a smoky kick, use smoked bacon instead of un-smoked.
If you try this, I’d love to hear how it turns out — drop a comment or tag me! Whether you’re cooking for one or a crowd, I hope this Boeuf Bourgignon becomes a staple in your cozy-weather repertoire just as it is in mine. Dig in and savor the warmth!
Goes Well With
If you want to round out the meal, here’s what I’d pair it with over on meaghanmoineau.com:
Related update: Boeuf Bourgignon
Related update: Chicken Stew For The Soul
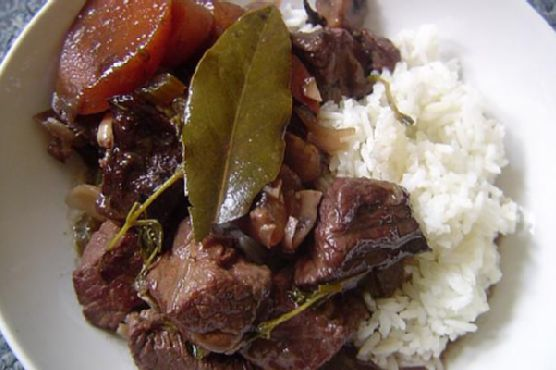
Picture this: It’s a chilly Tuesday evening, and I’m standing in my kitchen with an insistent craving for something rich, hearty, and French. You know the type of night where you want to curl up with a bowl of something warm that takes you far, far away? Enter Boeuf Bourgignon. Trust me, it’s not just for fancy dinner parties or trying to impress your in-laws. The beauty of this dish lies in its depth of flavor, which tastes like hours of work but is mostly just a long, slow simmer. This isn’t a quick weeknight meal, but it’s perfect for a lazy weekend when you just want the house to smell amazing. And hey, it’s an excuse to open some cognac. Cheers to that! Jump to Recipe
What You’ll Need
Chances are you already have most of what you’ll need to create this masterpiece. The list is straightforward, but a few ingredients really make this dish sing.
- Button mushrooms
- Butter
- Uns-moked bacon
- Vegetable oil
- Boneless well-trimmed beef chuck
- Yellow onion
- Shallots
- Carrots
- Black salt and pepper
- Flour
- Cognac
- Beef stock
- Unsweetened cocoa powder
- Garlic cloves
- Fresh thyme
- Fresh flat-leaf parsley leaves
- Tomato paste
- Bay leaf
How to Make Boeuf Bourgignon
- Preheat your oven to 160°C (325°F). Get excited—you’re about to make magic happen.
- In a skillet, sauté the mushrooms in butter until they’re brown and soft. This is where the richness begins. Set these beauties aside.
- In a deep-bottomed pot or casserole, sauté the bacon in 1 tablespoon of oil over moderate heat. Give it 2 to 3 minutes to get a light browning. Remove with a slotted spoon and keep aside.
- Crank up the heat until the remaining fat is almost smoking, then it’s time to brown the beef. Do this in batches so each piece gets a nice sear without crowding. All sides should be browned—not sweated.
- Add the browned beef to your reserved bacon. Let them mingle together like old friends.
- Reduce the heat to medium, and in the same fat, toss in onions, shallots, and carrots. Cook until the carrots start softening and the onions begin to caramelize lightly.
- Add the softened veggies to your beef and bacon mix. Pour out the excess sautéing fat from the pot.
- Return the beef mixture to the casserole. Sprinkle flour on top and toss to ensure every piece of beef has a light coating of flour. Stir until the flour cooks through and none of it is visible.
- Add the reserved bacon and veggie mix back in, seasoning with black salt and pepper to taste. Stir in the cognac and enough beef stock to just barely cover the meat.
- Add garlic, thyme, parsley, tomato paste, and bay leaf. Bring this sumptuous mix to a gentle simmer on your stovetop.
- Cover the casserole and place it in the oven. Cook for about 2 1/2 to 3 hours, giving you plenty of time for a glass of wine and a good book.
- About an hour into cooking, retrieve your casserole from the oven. Mix in the reserved mushrooms and stir in the unsweetened cocoa powder. This secret ingredient adds an extra layer of depth, trust me.
- Return the dish to the oven. The stew is ready when the beef is fork-soft and your kitchen smells like a dreamy French bistro.
Cook’s Notes
This dish is forgiving, but here are a few tips to keep in mind. Don’t rush the browning of the beef; it builds the flavor base for the entire stew. If you’re making this ahead, it tastes even better the next day as the flavors meld together beautifully. Store any leftovers in an airtight container in the fridge for up to three days. Reheat gently on the stove or in the microwave. And in case of spills or splatters, just embrace it as part of the cooking adventure!
Make It Your Own
- Go vegetarian: Swap the beef for crispy tofu or a mix of hearty root vegetables like parsnips and potatoes.
- No cognac? Use a dry red wine instead for a slightly different but equally delicious flavor profile.
- Spice it up: Add a pinch of cayenne or smoked paprika for an unexpected kick.
- Herb it up: Experiment with rosemary or tarragon if you don’t have thyme on hand.
If you try this, I’d love to hear how it turns out—drop a comment or tag me! Cooking is all about sharing and connecting, so don’t be shy. Bon appétit!
Related update: Boeuf Bourgignon
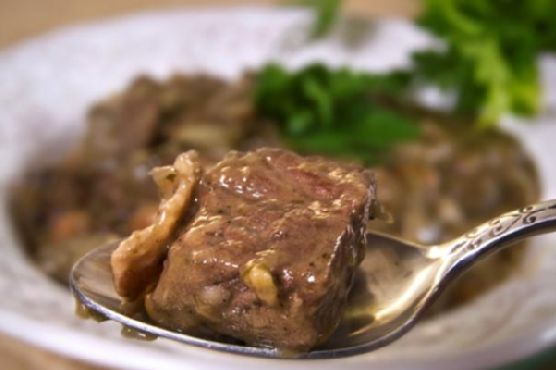
Picture this: It’s a chilly Tuesday evening, and I’ve just managed to duck out of the rain and into my cozy kitchen. My cat, Oliver, is curled up on the windowsill, and the whole place is alive with the soft patter of raindrops. It’s the kind of night that calls for something deeply comforting, something that can fill not just the belly but also the soul. Enter Classic Boeuf Bourguignon — my go-to when I crave something hearty and a tad bit indulgent but without spending hours in the kitchen. Honestly, the magic of this dish lies in its ability to transform simple ingredients into something truly extraordinary. The smell of beef simmering with red wine and herbs is, quite literally, poetry in a pot. Plus, it’s the kind of recipe where you can pop it all into a Dutch oven, let it work its magic, and you’ll still have time to catch up on that new series everyone’s been talking about.
Jump to Recipe
What You’ll Need
Just a heads-up: You might already have most of these tucked away in your pantry, and the rest? Well, they’re worth the trip to the store. Trust me.
- Bacon – Adds a smoky depth to the dish.
- Olive oil
- Beef stew meat – The star of the show.
- Garlic
- Diced onion
- Fresh thyme
- Bay leaves
- Parsley
- Pearl onions
- Button mushrooms
- Carrot
- Red wine – Go for something you’d drink.
- Beef broth
- All-purpose flour
- Salt and pepper
How to Make Classic Boeuf Bourguignon
- Preheat your oven to 400°F (200°C). Get that Dutch oven ready – it’s about to work its magic.
- Heat olive oil over medium heat and toss in the bacon. Let it sizzle for about 2-3 minutes until it’s just perfectly cooked. Transfer the bacon out with a slotted spoon and let it hang out on the side.
- Pat the beef dry with paper towels for a better browning. Crank up the heat to medium-high, throw the beef into the bacon fat, and let it sear for 4-5 minutes until every piece is gloriously browned. Spoon them out and set aside.
- Lower the heat back to medium. Toss in the carrots, garlic, onions, parsley, thyme, and bay leaves. Give them a good stir for about 2-3 minutes. Out they go with the slotted spoon, into a separate dish.
- Add pearl onions and mushrooms to the Dutch oven. Sauté them until the onions start to brown and the mushrooms become tender. Move them to the dish with the bacon.
- Return the beef to the pot and sprinkle one tablespoon of flour over it. Give it a good toss to coat. Season generously with salt and pepper. Pop it in the oven for about 4-5 minutes to develop a gorgeous crust.
- Remove the pot from the oven and set it on the stovetop. Pour in the red wine and deglaze, scraping up all those tasty bits. Add the beef broth, bring it to a gentle simmer.
- Introduce the carrot, onion, and spice mixture back into the pot. Lower the heat, cover, and let it simmer away for an hour, filling your kitchen with the most intoxicating aroma.
- After an hour, add the pearl onions, mushrooms, and bacon. Continue to simmer, allowing the beef to tenderize further, about another 30 minutes.
- Use a slotted spoon to fish out the solids and set them aside. Crank up the heat; let the sauce come to a rapid boil.
- In a small bowl, mix the remaining tablespoon of flour with two tablespoons of sauce. Stir until smooth and lump-free. Add to the pot, stirring constantly until the sauce thickens.
- Remove the bay leaves and thyme sprigs. Discard them. Return the solids to the pot, stirring to coat evenly with the enriched sauce. Serve warm, perhaps over a bed of egg noodles or rice if you’re feeling it.
Cook’s Notes
Let’s talk practicalities. This dish is one of those gems that get even better the next day — so if you can resist not devouring it all, it’s perfect for leftovers. Store it in an airtight container in the fridge, and when you reheat, just do it gently over low heat to keep that beef tender and juicy. If you’re prepping ahead, you can cook everything up to the point just before adding the flour in step 10. Refrigerate and proceed with the sauce thickening when you’re ready to serve. Also, don’t skimp on the wine. A good wine makes all the difference. Taste as you go, and adjust the seasoning if needed.
Make It Your Own
Feel free to get creative and put your own spin on this classic:
- Vegetarian Twist: Swap out the beef for hearty mushrooms like portobello or cremini, and use vegetable broth instead of beef.
- Poultry Option: Switch the beef out for chicken thighs. They’re just as comforting and cook a bit quicker.
- Root Veggie Addition: Try adding some parsnips or turnips along with the carrots for a little extra earthy sweetness.
- Herbaceous Flair: Add rosemary or sage for an aromatic twist that complements the wine beautifully.
If you try this, I’d love to hear how it turns out — drop a comment or tag me! Sharing your kitchen adventures makes my day. Plus, who knows, your twist might just inspire someone else!
Related update: Classic Boeuf Bourguignon
It was one of those weeks where everything seemed a bit too chaotic, and the weather was veering into that crisp, cozy fall vibe that just screams for comfort food. I was rummaging through my pantry, trying to figure out what on earth I could throw together without needing a last-minute grocery run. There it was, a can of chickpeas and some cauliflower that had been patiently waiting for their moment to shine. Enter the Cauliflower Chickpea Stew: a dish that’s hearty, full of flavor, and surprisingly easy to whip up. It’s one of those recipes that feels like a warm hug after a long day, plus it’s packed with spices that make your kitchen smell absolutely divine. Definitely a go-to for those nights when you need something nourishing but not overwhelming to make.
Jump to Recipe
What You’ll Need
I love this recipe because it relies on pantry staples but still feels a bit exotic thanks to the spices. Chances are you already have most of this hanging around your kitchen.
- Olive oil
- Brown rice
- Twice the amount of water to rice
- Garlic cloves
- Turmeric
- Salt & pepper
- Onion
- Canned tomatoes
- Tomato puree
- Fresh cm ginger
- Fresh chili
- Cinnamon
- Garam masala
- Paprika
- Sweet potatoes
- Lemon (juice)
- Additional water
- Cauliflower
- Canned chickpeas
How to Make Cauliflower Chickpea Stew
- Start by heating some olive oil in a large saucepan over high heat. You’ll want it shimmering but not smoking.
- Crush your garlic cloves and toss them in the pan with a generous pinch of turmeric, salt, and pepper. Fry for about a minute until everything is golden and fragrant.
- Add the brown rice, stirring occasionally. Let it fry for 4-5 minutes until the grains become slightly translucent.
- Pour in water (twice the amount of your rice) and bring it to a boil. Once boiling, reduce the heat to low-medium and let it simmer for 30 minutes. The rice should be tender and the water absorbed.
- While the rice does its thing, chop your onion, sweet potatoes, and cauliflower into bite-sized pieces. Grate the ginger and finely slice the chili.
- In another pot, heat more olive oil and sauté the onion until it’s soft and just starting to brown.
- Add the canned tomatoes, tomato puree, grated ginger, chili, cinnamon, garam masala, and paprika. Stir this mix for a couple of minutes until it’s well blended and aromatic.
- Throw in the sweet potatoes and stir them to coat in the sauce. Let them cook for about 5 minutes.
- Add the cauliflower and canned chickpeas, followed by a splash of water to help everything come together. Simmer for about 15 minutes until the veggies are tender but not mushy.
- Squeeze in the juice of a lemon, give it one last stir, and taste to adjust the seasoning as needed.
- Serve the stew over the cooked brown rice, and you’re ready to dig in!
Cook’s Notes
This stew is pretty forgiving, which is what makes it perfect for busy weeknights. A couple of things to keep in mind:
- Be sure not to rush cooking the garlic and spices at the beginning. This step is key for building flavor.
- Leftover stew keeps beautifully in the fridge for up to three days. Just reheat gently on the stove or microwave.
- If you’re prepping ahead, you can chop the veggies and have them ready to go in the fridge—makes the actual cooking a breeze!
- Remember that simmering times can vary depending on the size of your veggie chunks, so keep an eye on them to achieve that perfect tender texture.
Make It Your Own
This stew is a canvas for your creativity. Here are a few ways to switch it up:
- Swap the sweet potatoes for butternut squash if that’s more your style.
- Use coconut milk instead of water for a creamier, richer stew.
- Add spinach or kale at the end for some extra greens.
- Top with a dollop of Greek yogurt for a tangy finish.
If you try this, I’d love to hear how it turns out—drop a comment or tag me! Your feedback makes my day and helps others find their new favorite cozy meal. Happy cooking!
Related update: Cauliflower Chickpea Stew
Related update: Classic Boeuf Bourguignon

So, picture this: It’s a Tuesday evening, and I’m standing in my kitchen feeling utterly uninspired. You know those days when you’ve got a fridge full of nothing and everything? Yeah, that was me. The weather hinted at the first signs of fall, and my lazy bones craved something cozy yet bright—something that would wrap me up like a warm blanket but not put me in a food coma. Enter this Lemon Chickpea & Tomato Stew. It’s the kind of dish that checks all the boxes: fast (you’ll have it on the table in under an hour), flavorful (hello, lemon zest), and so satisfying you’d think it took all day. Trust me, once you make it, your taste buds will thank you, and you might just find a new weeknight staple.
Jump to Recipe
What You’ll Need
This stew is a pantry hero—you probably have most of the ingredients hiding in your kitchen already.
- 2 tablespoons of olive oil
- 1 large shallot, chopped
- 3 garlic cloves, minced
- 2 cans of chickpeas, drained and rinsed
- 1 jalapeno chili, sliced
- 1 teaspoon of dried oregano
- 2 bay leaves, broken
- 1/2 teaspoon of crushed red pepper
- Salt & pepper to taste
- 4 cups of chicken broth
- Zest and juice of 1 fresh lemon
- 1 cup of dried oven tomatoes
- 2 cups of fresh spinach, loosely packed
How to Make Lemon Chickpea & Tomato Stew
- In a large saucepan, heat the olive oil over medium heat. You’ll know it’s ready when the oil starts shimmering like a mirage.
- Add the shallot and garlic, stirring them into the warm oil until they soften and become fragrant, about 5 minutes.
- Toss in the chickpeas, jalapeno, oregano, bay leaves, and crushed red pepper. Season with salt and pepper. Stir frequently, letting those chickpeas get a little crispy and golden, about 5-7 minutes. Keep an eye out—they might try to escape the pan!
- Pour in the chicken broth, lemon zest, and lemon juice. Bring everything to a happy boil, then reduce the heat and let it simmer until the broth is reduced by half, around 20 minutes.
- Stir in the oven-dried tomatoes, garlic, and spinach. Simmer for another 5 minutes, just until the spinach wilts into the stew. Goodbye, bay leaves—you’ve done your job, so remove them.
- Give it one last taste for seasoning, adjust if necessary, and serve hot with warm crusty bread to soak up every last drop.
Cook’s Notes
First things first, don’t rush the browning of your chickpeas. That’s where a lot of the flavor magic happens. If you can, make sure the broth you’re using is low-sodium so you can control the salt levels. This stew is even better the next day, so feel free to make it ahead and store it in the fridge for up to 3 days. Just reheat it gently on the stovetop. If it’s a bit too thick, splash in a little extra broth or water.
Make It Your Own
- Vegetarian version: Swap the chicken broth for vegetable broth, and you’re good to go.
- Spicy kick: Double the jalapeno if you’re feeling bold. You can also add a dash of cayenne.
- Protein boost: Stir in some cooked shredded chicken or crispy tofu just before serving.
- Herbal twist: Add fresh basil or cilantro at the end for an extra layer of flavor.
And there you have it! If you try this, I’d love to hear how it turns out—drop a comment or tag me. Enjoy your cozy bowl of goodness!
Related update: Lemon Chickpea & Tomato Stew
Related update: Enchiladas Verdes (Green Enchiladas)
Related update: Carrot and Coriander Soup
Related update: Cauliflower Chickpea Stew
Last Tuesday was one of those days where everything felt a little off-kilter. You know, the kind where your morning coffee just doesn’t hit right, and your afternoon is a blur of tasks that never seem to end? By the time dinner rolled around, I was craving something that would transport me far from the daily grind—something warm, comforting, and just a tad exotic. Enter: paella. Not only is it a dish that sounds fancy enough to impress, but it’s surprisingly simple to whip up. It’s got this amazing way of bringing a little Spanish sunshine to your table, even on the dreariest of evenings. Plus, it’s a one-pan wonder, so less time spent cleaning up means more time for Netflix or a good book. Trust me, once you’ve tasted this, you’ll see what all the fuss is about. Jump to Recipe
What You’ll Need
If your pantry’s got some basics and your local grocery store has a seafood section, you’re pretty much set. I love that this recipe starts with stuff you likely already have on hand!
- Smoky paprika
- Dried oregano
- Kosher salt
- Black pepper
- Chicken wings
- Littleneck clams
- Solid chorizo sausage
- Shrimp
- Extra virgin olive oil
- White diced onion
- Diced garlic
- Italian parsley leaves
- Whole .5 oz tomatoes
- Canned Spanish short grain rice
- Water
- Saffron
- Salt and pepper
- Green peas
- Lemon wedges
How to Make Paella for Four; A Wonderful Spanish Mixed Seafood Stew
- Start by mixing the smoky paprika, dried oregano, kosher salt, and black pepper. Rub this spice mix all over the chicken wings and let them chill in the fridge for an hour. This is where the magic begins—infusing the chicken with all those bold, earthy flavors.
- Take the chicken out of the fridge about 30 minutes before you’re ready to cook. They should be close to room temp, which helps them cook evenly.
- Heat half of the olive oil in your trusty 12-inch All-Clad stainless steel pan over medium-high heat. Toss in the chorizo rounds and let them sizzle away until they’re browned and fragrant. Remove them from the pan and set aside.
- Add the rest of the oil to the pan, then brown the chicken on all sides, savoring that sizzling sound. Once they’re golden brown, take them out and keep them with the chorizo.
- Turn the heat down to medium and add the onions, garlic, and parsley. This is your sofrito—a flavor-packed base that’s the heart of the dish. Cook until the onions are translucent and everything smells irresistible, about 2-3 minutes.
- Next, add the crushed and drained tomatoes. Give everything a good stir and let it cook for about 3 minutes until the flavors meld together.
- Stir in the rice, making sure it’s all cozy with the sofrito, for about 2 minutes. You want each grain to be coated with that delicious base.
- Return the sausage and chicken to the pan. Pour in the hot water and bring the mixture to a gentle simmer, cooking for about 5 minutes. Give it a stir now and then to keep everything mingling nicely.
- Now, place the clams artfully atop the rice. Resist the urge to stir! You want them just so.
- Let the paella cook for another 5 minutes, then position the shrimp, tails up, so they can steal the show. Continue to cook for about 10 minutes, until the clams have popped open, the shrimp are a lovely pink, and the rice is fluffy yet moist.
- Finally, check for socarrat. With a fork, gently feel the bottom of the pan. If you detect that legendary crispy crust, you’re golden. If not, crank up the heat for 30-45 seconds to get that perfect crackling finish, then serve immediately.
Cook’s Notes
Here are a few little nuggets of wisdom to ensure your paella is perfecto:
- If you’re short on time, you can season the chicken and let it sit while you prep the rest of the ingredients. It won’t be exactly the same, but life necessitates shortcuts sometimes!
- Leftovers? Pop them in an airtight container and they’ll keep in the fridge for up to two days. Paella is one of those dishes that tastes even better the next day, I promise.
- Be patient with the socarrat. It’s the best bit, but it requires a little trust in the process. If you don’t hear a slight crackle when you turn up the heat, give it a bit more time.
Make It Your Own
Feeling creative? Here are some twists to make this paella uniquely yours:
- Swap out the chicken wings for crispy tofu to make a pescatarian version.
- Substitute the clams with mussels if that’s what you’ve got on hand or prefer.
- Feeling spicy? Use a hot chorizo for an extra kick.
- Not a fan of saffron? Add a pinch of turmeric for a golden hue without the floral notes.
If you try this, I’d love to hear how it turns out—drop a comment or tag me! Your feedback keeps this kitchen creativity going. Enjoy the taste of Spain at your own table!
Related update: Paella for Four; A Wonderful Spanish Mixed Seafood Stew
Related update: Cheese Pork Chops

I was in the middle of a chilly Tuesday evening, the kind where you’re just craving something warm and hearty, and I found myself staring at a package of venison stew meat in my fridge. You know those days, right? The ones where you want comfort food without all the fuss? That was me. I didn’t want to wait forever for flavors to meld, and I certainly wasn’t in the mood for a culinary marathon. Enter this venison stew — it’s that perfect blend of savory goodness, with tender chunks of venison and veggies that practically hug you from the inside. It’s simple enough to throw together on a weeknight, but tastes like it’s been simmering all day.
Jump to Recipe
What You’ll Need
I love how this recipe doesn’t require a grocery cart full of fancy ingredients. Chances are, you’ve already got most of these at home, especially if you’re a fan of hearty stews!
- Venison stew meat
- 4 stalks celery
- 1 can mushrooms
- 1 green bell pepper
- 1 cup flour plus 3 tbsp
- 2 tablespoons beef bouillon
- Water
- Potatoes
- Onion
- Baby carrots
How to Make Venison Stew
- Begin by cutting all your veggies and the venison into 1-inch pieces. Grab a bowl and dredge the venison in a mix of flour, salt, and pepper until it’s nicely coated.
- Heat a splash of vegetable oil in a large pot over medium-high heat. Add the venison and let it brown on all sides. You’re looking for a nice, golden crust here — that’s flavor!
- Once browned, add the beef bouillon and enough water to cover the meat. Bring it to a boil, then reduce the heat and let it simmer for about 2 hours. This is where the magic happens, and the meat gets tender.
- After 2 hours, toss in all the veggies: carrots, celery, mushrooms, potatoes, and bell pepper. Let everything simmer together for another 30 minutes, until the veggies are nice and tender.
- Mix 3 tablespoons of flour with 1 cup of cold water. Stir it into the stew to thicken. Give it a few minutes, and you’ll see it transform into a rich, heartwarming dish.
Cook’s Notes
Okay, here’s the thing — patience really is a virtue with this stew. Letting the venison simmer for a full two hours ensures it’s melt-in-your-mouth tender. If you’re in a pinch, you can reduce the simmering time, but it won’t be as tender. As for storage, this stew actually tastes even better the next day. Just keep it in an airtight container in the fridge, and it’ll last for about 3 days. You can also freeze it for up to 3 months. Just make sure to let it cool completely before freezing.
Make It Your Own
- Swap the venison for beef if that’s what you have on hand — just as delicious!
- For a veggie twist, replace the meat with chickpeas and add extra mushrooms for a hearty vegetarian version.
- Add a splash of red wine while simmering for an extra depth of flavor.
- Throw in some parsnips or turnips if you’re in the mood for an earthy undertone.
If you try this, I’d love to hear how it turns out — drop a comment or tag me! It’s one of those dishes that just feels like a warm hug, and I hope it brings you as much comfort as it does me. Happy cooking!
Related update: Venison Stew
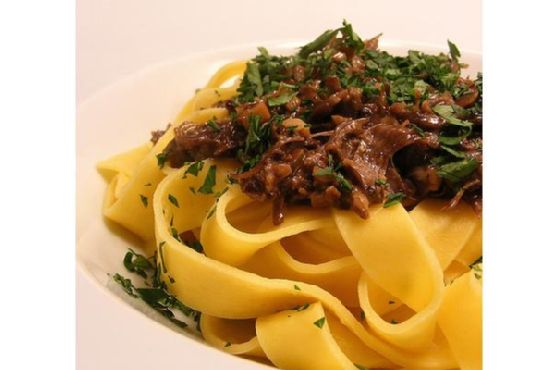
I’ve got to tell you about this time when I found myself staring into the abyss of my pantry, a little uninspired and a lot hungry. It was one of those dreary afternoons where the rain just wouldn’t let up, and all I craved was something rich and comforting to fill the house with warmth — and let’s be honest, something that would have me coming back for seconds. That’s when I remembered the oxtails tucked away in the freezer, just waiting for their moment. A few hours later, my kitchen was filled with the deep, savory aroma of Oxtail Ragout simmering away, and let me tell you, it was glorious. This recipe is the kind of comfort food that hugs you from the inside out, and while it might sound fancy, it’s pretty straightforward and oh-so-worth it.
Jump to Recipe
What You’ll Need
This ingredient list is a pantry’s best friend. You’re likely to have most of this stuff already, and the flavors all come together to create something magical.
- Oxtails
- Flour
- Salt
- Pepper
- Paprika
- Hot fat (like vegetable oil or lard)
- Onion, chopped
- Garlic, minced
- Bell pepper, diced
- Whole allspice
- Whole bay leaf
- Tomato juice
- Water
- Lemon juice
How to Make Oxtail Ragout
- In a small bowl, mix together 1 teaspoon of salt, some freshly cracked pepper, paprika, and enough flour to lightly coat the oxtails. Roll the oxtails in this seasoned flour mixture until they are fully covered.
- Heat some hot fat in a heavy-bottomed pot over medium-high heat. Add the floured oxtails and brown them thoroughly on all sides. You’re looking for a deep, golden crust that’s almost irresistible.
- Once browned, toss in the chopped onion, minced garlic, and diced bell pepper. Stir everything around until the onions are translucent and the garlic is fragrant but not burned.
- Add in the whole allspice and bay leaf, followed by the tomato juice and enough water to cover the oxtails. Give everything a good stir to combine.
- Bring the pot to a gentle simmer, then cover it up and let it do its thing for about 3 hours. You’re aiming for the kind of tenderness where the meat practically falls off the bone.
- Once the oxtails are melt-in-your-mouth tender, fish out the allspice and bay leaf. Stir in a splash of lemon juice to brighten the flavors, and you’re done!
Cook’s Notes
I’ve learned a few things the hard way, so here are some tips to keep in mind. Be patient with the browning process; it’s where a lot of the flavor develops. Don’t rush it! If you want to make this ahead, the ragout tastes even better the next day once the flavors have had a chance to deepen. Just store it in the fridge and reheat gently. Leftovers can be kept in an airtight container for up to 3 days, or frozen if you want to hoard this goodness for a rainy day.
Make It Your Own
Here are a few variations to keep things interesting or to cater to different tastes:
- Swap the tomato juice for red wine if you’re looking for a richer, more robust flavor.
- Add diced carrots and celery for a bit more veggie goodness and texture.
- Try using smoked paprika for a deeper, smokier flavor profile.
- If you’re feeling adventurous, throw in a dash of hot sauce for a little heat.
If you try this, I’d love to hear how it turns out — drop a comment or tag me on social media. Your kitchen adventures are half the fun for me!
Related update: Oxtail Ragout
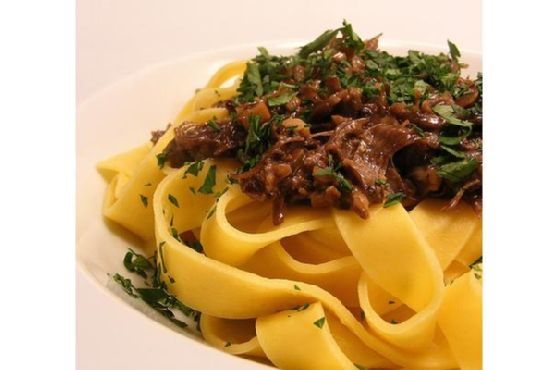
It was one of those chilly, rainy afternoons when the sky couldn’t quite decide if it wanted to drizzle or pour, and I found myself leaning into the kind of comfort cooking that warms you from the inside out. I’d been craving something rich and flavorful, the kind of dish that makes your whole home smell like a cozy hug. Enter: Oxtail Ragout. Trust me, this recipe is a keeper. It’s the kind of meal that feels like a culinary project, but it’s actually more about letting the ingredients do their thing while you kick back. You get meltingly tender meat and a sauce that’s so good you’ll want to sop it up with a hunk of crusty bread. Plus, the prep is minimal, so it’s perfect for those days when you want something special without spending the whole day in the kitchen.
Jump to Recipe
What You’ll Need
One of the best parts? You might already have most of these goodies hanging out in your pantry or fridge. Here’s what you’ll need to gather:
- Oxtails
- Flour
- 1 teaspoon of salt
- Pepper
- Paprika
- Hot fat (like vegetable oil or lard)
- 1 large onion, chopped
- 2 cloves of garlic, minced
- 1 bell pepper, chopped
- Tomato juice
- 1 whole bay leaf
- 1 whole allspice berry
- Water
- Lemon juice
How to Make Oxtail Ragout
- In a shallow dish, combine 1 teaspoon of salt, a few grinds of pepper, paprika, and some flour. This seasoned flour is where the magic starts, giving the oxtails a flavorful crust.
- Roll the oxtails in the seasoned flour until they’re well coated. Shake off any excess so you get a nice, even crust.
- Heat some hot fat in a large pot over medium-high heat. Brown the oxtails thoroughly on all sides. You want them deeply caramelized — think golden and fragrant.
- Once browned, add the chopped onion, minced garlic, and bell pepper to the pot. Stir them around, scraping up any delicious bits stuck to the bottom, until they start to soften and smell amazing.
- Pour in enough tomato juice to cover the oxtails, then add the whole bay leaf and allspice. Top it off with a splash of water to ensure everything is nicely submerged.
- Bring the mixture to a gentle simmer, then cover the pot. Let it do its thing for about 3 hours, checking occasionally to ensure it stays at a low simmer.
- When the meat is fall-off-the-bone tender, remove the bay leaf and allspice berry. Stir in a splash of lemon juice to brighten the flavors, adjusting seasoning to taste.
Cook’s Notes
This dish is pretty forgiving, but here are a few tips to make things even smoother:
- Don’t rush the browning process. It’s where a lot of the flavor comes from, so take your time.
- If you don’t have tomato juice, you can use crushed tomatoes or even a bit of tomato paste mixed with water.
- This ragout tastes even better the next day, so feel free to make it ahead. It stores well in the fridge for up to 3 days.
- If you’re wondering about leftovers, they freeze beautifully for up to 3 months. Just reheat gently on the stove.
Make It Your Own
- Swap the oxtails for short ribs if you’re in the mood for something different but equally delicious.
- Add a handful of chopped carrots or celery for extra veg power and a bit of sweetness.
- If you like a bit of heat, throw in a pinch of red pepper flakes with the garlic and onions.
- For a smoky twist, use smoked paprika instead of regular paprika.
If you try this, I’d love to hear how it turns out — drop a comment or tag me! Nothing makes my day like seeing your creations. Enjoy every rich, saucy bite!
Related update: Oxtail Ragout
Related update: Green Beans with Pearl Onions and Salmon

It was one of those foggy evenings in San Francisco where the mist hangs thick like a cozy, damp blanket. I was craving something that would bring all the warmth of the ocean into my little kitchen, something that felt like a tight hug for the soul. Enter: San Francisco Cioppino. This dish is not just a seafood stew; it’s a symphony of fresh catches and bold flavors that feel both hearty and impressively easy. You’ll find this cioppino is perfect for those nights you want to channel your inner fisherwoman without having to dive into the deep blue yourself. Trust me, it’s worth every delicious drop.
Jump to Recipe
What You’ll Need
You may be surprised to learn that despite sounding fancy, this ingredient list is mostly straightforward and filled with things you might already have. The key is in the freshness — it makes all the difference.
- Fresh canned tomatoes
- Clams
- Dry white wine
- Cooked freshly Dungeness crabs
- White fresh fish
- Fresh basil
- Fresh parsley
- Garlic
- Black fresh ground pepper
- Olive oil
- Fresh oregano
- Raw shrimp
- Scallops
- Tomato paste
- Yellow onion
How to Make San Francisco Cioppino
- Start by prepping the star of the show: the crabs. Gently remove the legs and claws, then break the body in half, making sure to keep as much of the “crab butter” (the delightful yellow center) as you can. Set the crab pieces aside and press the crab butter through a sieve into a small bowl. Set aside.
- For the clams, place them in a pan and add 1 cup of dry white wine. Cover and steam over medium heat for about 5 minutes, until their shells open wide like they’re waving hello. Discard any clams that refuse to open, then strain the stock through a cheesecloth and keep the liquid gold that’s left.
- Now, in your trusty 8-quart saucepan, heat up some olive oil. Toss in the onions and garlic, letting them dance over medium heat until they’re soft but not brown — think of it as just waking them up.
- Stir in the fresh canned tomatoes, tomato paste, the rest of your wine, pepper, herbs, and that flavorful clam stock you reserved. Partially cover the pot and let it simmer for a solid 20 minutes, letting those flavors mingle and get cozy.
- Add in your seafood: the fish, scallops, shrimp, crab, and the sacred crab butter. Simmer for about 5 minutes, but resist the urge to stir, as you want the fish to stay whole and proud. Then, add the clams and heat for another scant minute.
- Top with fresh parsley and serve immediately from the pot while everything is still joyously warm and inviting.
Cook’s Notes
Here’s the deal: freshness is key with cioppino, especially with the seafood. If you can get it from the market the day of, do it. As for the wine, choose a decent dry white that you’d actually enjoy sipping — it makes a big difference. And remember, don’t stir the stew after adding the fish. You want those chunks intact for a beautiful presentation. Leftovers can be stored in the fridge for up to two days and gently reheated over low heat. If you’re making it ahead of time, keep the seafood separate until you’re ready to serve, and add it in the last 5-6 minutes of reheating.
Make It Your Own
Here’s where you can play around with this seaside classic:
- Swap the white fish with salmon for a richer flavor.
- Trade the scallops for mussels if you fancy a different texture.
- Add a pinch of red pepper flakes for a bit of a kick.
- Use a splash of Pernod instead of wine for a slight anise twist that pairs beautifully with seafood.
If you try this, I’d love to hear how it turns out — drop a comment or tag me! Let’s keep sharing those warm, delicious moments. 🌊🍅🍲
Related update: San Francisco Cioppino
Related update: Curry-Braised Chicken
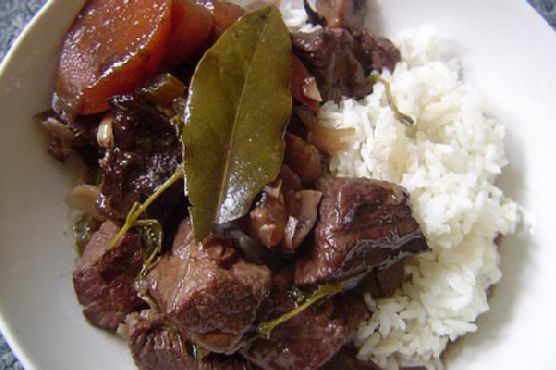
Picture this: It’s a chilly weekday evening, and I find myself staring into the abyss of my pantry, longing for something hearty, something that feels like a warm hug after a long day. My eyes land on a bottle of cognac, nestled between spices and canned goods, and a light bulb goes off. Boeuf Bourgignon. It’s one of those dishes that sounds fancy but is deceptively simple — perfect for a night when I want to impress myself (or my family) without breaking a sweat. This recipe is rich in flavor, comforting, and surprisingly doable. Trust me, once you’ve got a pot of this simmering on the stove, the cozy aroma alone will make you feel like a culinary genius.
Jump to Recipe
What You’ll Need
It’s amazing how such a luxurious meal can come together with things you probably already have. You might need a quick trip for beef stock or fresh herbs, but that’s about it.
- Button mushrooms
- Butter
- Un-smoked bacon
- Vegetable oil
- Boneless well-trimmed beef chuck
- Yellow onion
- Shallots
- Carrots
- Black salt and pepper
- Flour
- Cognac
- Beef stock
- Unsweetened cocoa powder
- Garlic cloves
- Fresh thyme
- Fresh flat-leaf parsley leaves
- Tomato paste
- Bay leaf
How to Make Boeuf Bourgignon
- Preheat your oven to 160°C (325°F). This is crucial for getting that low and slow cook that makes the beef melt-in-your-mouth tender.
- In a pan, sauté the button mushrooms in butter until they’re brown and soft. Set them aside. You’re going to love their nutty aroma.
- In a large, deep-bottomed pot, sauté the bacon in 1 tablespoon of oil over moderate heat for 2 to 3 minutes. You’re looking for a light brown color that brings out the bacon’s savory goodness.
- Remove the bacon with a slotted spoon and set it aside. Don’t clean the pan — that bacon fat is flavor gold.
- Reheat the pan until the fat is almost smoking, then sauté the beef in batches. Give the pieces space to brown properly on all sides, and resist the urge to stir too soon.
- Add your browned beef to the reserved bacon. Lower the heat to medium.
- In the same flavorful fat, add the onions, shallots, and carrots. Cook them until the carrots soften and the onions are translucent.
- Combine the cooked veggies with the beef and bacon. Pour out the excess fat, but don’t wipe the pot — every bit of flavor is needed.
- Return the beef mixture to the pot. Sprinkle on the flour and toss everything to coat. Stir until the flour has cooked and you see no white traces.
- Season with salt and pepper, then stir in the cognac and just enough beef stock to barely cover the meat.
- Add the garlic, thyme, parsley, tomato paste, and bay leaf. Bring everything to a simmer on the stove.
- Cover the pot and set it in the oven. Cook for 2 ½ to 3 hours, checking about an hour in to add the mushrooms and stir in the cocoa powder, which gives a subtle depth of flavor.
- The stew is ready when the meat is fork-soft and your kitchen smells like heaven.
Cook’s Notes
Don’t be shy with the cognac. It adds such a lovely depth, but if it’s not your thing, red wine works in a pinch. Be sure to use a heavy-bottomed pot or casserole dish that can transition from stovetop to oven seamlessly. If you make this ahead, it only gets better the next day — those flavors really come together after a night in the fridge. Reheat gently on the stove, adding a splash of water or stock to loosen things up if needed.
Make It Your Own
- Swap the beef chuck for lamb shoulder for a different take on this classic stew.
- If mushrooms aren’t your thing, try adding pearl onions instead — they’ll add a lovely sweetness.
- Replace the bacon with pancetta for a slightly different, yet delicious, flavor profile.
- Make it vegetarian by using hearty vegetables like potatoes and turnips. Replace beef stock with a veggie version, and skip the bacon.
If you try this, I’d love to hear how it turns out — drop a comment or tag me! Enjoy the cozy vibes and maybe a glass of wine while you’re at it. Cheers to the perfect night in!
Related update: Boeuf Bourgignon
Related update: San Francisco Cioppino
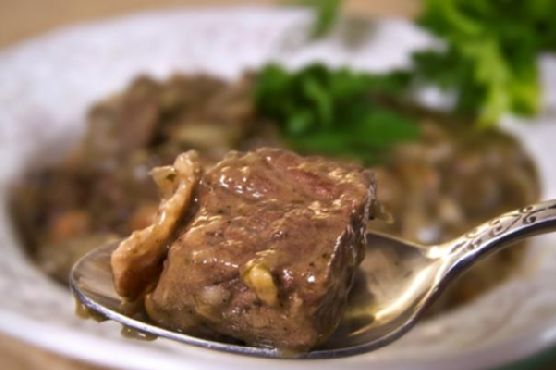
So there I was, staring at my pantry with the kind of determination only a rainy Wednesday could bring. The day called for something hearty, something that would fill the kitchen with warmth and the kind of smell that makes you sigh with happiness. Enter: Classic Boeuf Bourguignon. I know, it sounds like something you’d only order at a fancy French restaurant, but trust me, it’s totally doable at home. Plus, this dish is the culinary equivalent of a hug — rich, savory, and oh-so-comforting. The best part? You probably have most of the ingredients already lounging in your kitchen. It’s the perfect answer to a mid-week dinner dilemma that deserves a little extra love.
Jump to Recipe
What You’ll Need
Just a handful of ingredients stand between you and this French classic. Heads up: you’ll want to grab a good bottle of red wine. Cooking with wine is all about using what you’d actually want to drink!
- Bacon
- Olive oil
- Beef stew meat
- Garlic
- Diced onion
- Fresh thyme
- Bay leaves
- Parsley
- Pearl onions
- Button mushrooms
- Carrot
- Red wine
- Beef broth
- All-purpose flour
- Salt and pepper
How to Make Classic Boeuf Bourguignon
- Preheat your oven to 400°F (200°C). This is when the kitchen starts to get cozy.
- In a large Dutch oven, heat a splash of olive oil over medium heat. Add the bacon and sauté for 2-3 minutes until cooked and fragrant. Use a slotted spoon to keep the bacon separate for now.
- Pat the beef dry with paper towels (not a glamorous job, but it helps the meat brown, so don’t skip it). Increase heat to medium-high, add the beef to the bacon fat, and cook for 4-5 minutes until browned. Set the beef aside in a separate dish.
- Return the heat to medium and toss in carrots, garlic, onions, parsley, thyme, and bay leaves. Sauté for 2-3 minutes, just until you can smell the magic happening. Transfer this to its own dish.
- Add pearl onions and mushrooms to the Dutch oven. Sauté until the onions begin to brown and the mushrooms are tender. Scoop them up and let them hang out with the bacon.
- Return the beef to the pot and dust it with a tablespoon of flour. Toss it around — you want it fully coated. Sprinkle with salt and pepper, then pop the pot in the preheated oven for 4-5 minutes to let the flour set.
- Back to the stovetop! Pour in the red wine to deglaze the pan, scraping up those delicious brown bits. Add the beef broth and bring to a simmer over medium heat.
- Add the carrot, onion, and herb mix back into the pot. Reduce the heat, cover, and let it simmer for an hour. This is when you can catch up on your favorite show or get some chores done (or not!).
- After an hour, add the pearl onions, mushrooms, and bacon. Let everything simmer together for another 30 minutes, until the beef is tender and practically melts in your mouth.
- Use a slotted spoon to remove the solids — trust me, they’re not going far. Increase the heat and bring the sauce to a boil.
- Mix one tablespoon of flour with two tablespoons of sauce in a small bowl until smooth. Stir this back into the pot, working quickly to avoid lumps. Let the sauce thicken while stirring constantly.
- Remove the bay leaves and thyme sprigs — they’ve done their job. Add the solids back into the pot and stir to coat everything evenly in that luscious sauce. Serve warm over a bed of egg noodles or rice. Bon appétit!
Cook’s Notes
Here are some little nuggets of wisdom to make this dish a breeze:
- If you’re planning to make this ahead, stop after simmering the beef for the first hour. You can refrigerate it overnight, and then continue the next day with the rest of the steps.
- Leftovers? Lucky you! This dish actually tastes even better the next day as the flavors meld together. Keep it in an airtight container in the fridge for up to three days.
- Don’t have a Dutch oven? Any heavy-bottomed pot that can go from stovetop to oven will work.
Make It Your Own
One of the best things about cooking is making a dish fit your life. Here are some ways to tweak this classic:
- Swap the beef stew meat for lamb for a slightly different twist on flavor. It’s delicious.
- Vegetarian? No problem! Use crispy tofu instead of beef and vegetable broth instead of beef broth.
- If you don’t have red wine, try using an equal amount of robust beef broth and a splash of balsamic vinegar to mimic the depth of flavor.
- For a more rustic feel, add some hearty root vegetables like parsnips or potatoes with the carrots.
So there you have it — the Classic Boeuf Bourguignon that’s just as perfect for a special dinner as it is for a cozy weeknight in. If you try this, I’d love to hear how it turns out — drop a comment or tag me! Happy cooking!
Related update: Classic Boeuf Bourguignon