Crab Cakes Rockefeller | Made by Meaghan Moineau

Picture this: It’s a crisp, chilly Sunday afternoon, and I’m standing in my cozy kitchen, trying to channel my inner chef with whatever ingredients I’ve got left. You know those weekends when grocery shopping just seems like too much of a chore? Well, I found myself staring at a can of crab meat, wondering what could possibly be made to brighten up a rather dreary day. And then it hit me — Crab Cakes Rockefeller! This dish is not just about the fancy name; it’s about turning a handful of pantry staples into something spectacular. It’s quick, comforting, and has that wow factor that feels like a mini celebration. Even if you’re working with a toaster oven, you’re in for a treat.

Jump to Recipe

What You’ll Need

This is one of those recipes where you might already have most ingredients lurking in your kitchen. It’s all about transforming simple components into something fabulous.

  • Canned lump crab claw meat
  • Red diced bell pepper
  • Diced green onions
  • Bread crumbs
  • Honey
  • Chili powder
  • Unsalted butter
  • Bacon
  • Baby spinach
  • Watercress stems
  • Garlic
  • Black salt & pepper

How to Make Crab Cakes Rockefeller

  1. Preheat your oven to 375°F and set the top rack to the middle position. If you’re like me and love using a toaster oven, this recipe is perfect for it too.
  2. Line a baking sheet with aluminum foil or a nonstick cooking mat. Less mess, more time to enjoy your masterpiece later!
  3. In a large bowl, combine the crab meat, diced red bell pepper, half of the diced green onions, and half of the bread crumbs. Mix in the honey and chili powder, then season to taste with salt and pepper. You want these flavors to marry beautifully.
  4. Form your crab cakes by pressing them into a 1/2 cup measure, squeezing tightly to maintain their shape. If molding by hand, be firm but gentle, like handling a delicate soap bubble.
  5. Arrange your crab cakes on the lined baking sheet, leaving at least an inch between each. This space ensures they brown evenly.
  6. Lightly coat the outside of each crab cake with olive oil using a sprayer or a drizzle. This little trick gives them a lovely golden crust.
  7. Bake for 25 minutes, or until golden brown and the aroma drives you wild with anticipation.
  8. Meanwhile, fry the bacon in a large skillet until crispy. Let it drain on paper towels, then crumble it into delightfully crunchy bits.
  9. Finely chop the spinach and watercress stems. In another skillet, melt the butter over medium heat. Add the garlic and sauté for about a minute until fragrant.
  10. Throw in the remaining green onions, bread crumbs, and watercress stems, sautéing for another minute.
  11. Finally, add the chopped spinach, cooking until wilted, about 1-2 minutes. Season with salt and pepper to your liking.
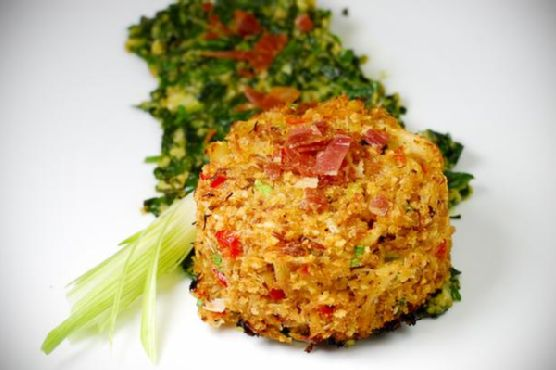
  12. To serve, gracefully nestle a crab cake atop a smear of the spinach mixture, and sprinkle with the crumbled bacon for that finishing touch.

Cook’s Notes

Just a few words of wisdom from my kitchen to yours. When forming the crab cakes, make sure they’re compact — it’s the key to them holding together beautifully. If you want to prep ahead, you can assemble the cakes and refrigerate them on the baking sheet for up to a day before baking. If you’ve got leftovers (a rare occurrence, trust me), they reheat well in the oven at 350°F for about 10 minutes. Just don’t microwave them unless you’re into soggy seafood — which I doubt!

Make It Your Own

Nothing is set in stone in my kitchen. Here are a few variations you might want to try:

  • Swap the bacon for crispy prosciutto for an Italian twist.
  • If you’re feeling fancy, add a sprinkle of parmesan cheese to the spinach mixture for an extra umami kick.
  • Replace the watercress with arugula for a peppery punch.
  • Try using panko instead of traditional bread crumbs for added crunch.

If you try this, I’d love to hear how it turns out — drop a comment or tag me! Let’s spread the joy of turning pantry staples into a gourmet delight. Here’s to cozy kitchens and culinary adventures!

Related update: Crab Cakes Rockefeller

Related update: Pork Carnitas with Chipotle BBQ Sauce and Slaw

Eagles double down on trench stars | Analysis by Brian Moineau

TL;DR

  • The Howie Roseman and Nick Sirianni training camp presser at the NovaCare Complex in South Philadelphia signaled a blueprint: double down on rare interior defensive linemen (Jalen Carter and Jordan Davis), keep shopping for upgrades in July/August, and make the QB2 job a real competition between Tanner McKee and Andy Dalton. [1]
  • Philadelphia concentrated roughly a third of its 2026 cap-basis “firepower” into three trench pieces—Carter, Davis, and newly added edge Jonathan Greenard—tilting the roster toward January football on I‑95 if depth and health hold. [2][3]
  • The hinge is QB2: if 6'6" Tanner McKee wins, the Eagles preserve a vertical DNA that mirrors Jalen Hurts’ deep-shot profile; if Andy Dalton (career INT rate ~2.3%) wins, they opt for risk-managed redundancy—two distinct contingency plans for a 2026 title run. [4][5][6]

What the source said

On the eve of the first 2026 training-camp practice, GM Howie Roseman and coach Nick Sirianni told reporters the defensive tackle market is scarce, defended piling resources into Jalen Carter and Jordan Davis, called the backup QB job an open competition (McKee vs. Dalton), downplayed concern on Jonathan Greenard’s minor injury, and labeled the roster “incomplete” heading into August. They delivered it from the Eagles’ NovaCare Complex in Philadelphia, with Roseman underscoring that the front office remains active on trades and street free agents deep into camp. [1]

Why it matters

Payroll concentration alters outcome math in September and in January. If Carter (AAV ~$38M), Davis (AAV ~$26M), and Greenard (AAV ~$25M) consume about $89M against a projected $301.2M 2026 cap, then the trench trio sits near 29.5% of cap—enough to dictate scheme and personnel everywhere else in the building. That level of concentration forces bet alignment: snap counts, spacing, and coverage shells must harvest interior wins into third-and-long. [2][3]

The NFC East has adjusted since 2022 by quickening the ball out; Dallas, Washington, and New York all leaned more on sub‑2.5s timing and perimeter stress to neutralize interior rush, per Next Gen Stats charting through 2024. Philadelphia’s counter is to compress the pocket from the A‑gaps and force floaters to the sideline, which raises the burden on 2024 first‑round CB Quinyon Mitchell and the nickel to tackle in space for 17 games. [6]

Original analysis

Back‑of‑envelope math: How deep is the trench bet?

  • Jalen Carter extension (reported): 4 years, ~$152M total, ~$106M guarantees, ~$38M AAV, running through 2031. [2]
  • Jordan Davis extension (reported): 3 years, ~$78M total, ~$65M guarantees, ~$26M AAV; 2026 cap accounting eases with multi‑year proration. [2]
  • Jonathan Greenard (after a trade from Minnesota): 4 years, ~$100M, ~$50M fully guaranteed, ~$25M AAV. [3]

Sum their AAVs: $38M + $26M + $25M = $89M. Divide by the projected 2026 cap of $301.2M to get ≈29.5% (89 ÷ 301.2 = 0.295), which is close to 3 of every 10 cap dollars earmarked for three front‑seven players. That’s a franchise‑level tilt that compresses optionality at WR3, RB rotation, and veteran depth spots. [2]

Typology: Eagles in a 2×2 of contingency planning

  • X‑axis: QB2 philosophy (Explosive tolerance vs. Turnover aversion).
  • Y‑axis: Front resource allocation (Interior‑centric vs. Edge‑centric).
  • Quadrants:
    1. Explosive + Interior (Rams 2021 with Donald + vertical shots),
    2. Explosive + Edge,
    3. Averse + Interior,
    4. Averse + Edge.
      Philadelphia 2026 sits in Quadrant 1 if McKee wins (Hurts + deep propensity since 2022; McKee’s frame/arm encourage vertical seams), and in Quadrant 3 if Dalton wins (ball control + interior squeeze). The quadrant flip materially changes play-action depth, shot frequency, and sack‑to‑punt tradeoffs on 2nd‑and‑medium. [5][6]

Historical analogue and lesson

The 2017 Eagles won Super Bowl LII with a deep, interior‑first rush (Fletcher Cox and Timmy Jernigan) and a backup QB plan that preserved aggression under Nick Foles in January 2018. That roster finished with top‑tier pass rush productivity and used interior wins to force late‑down errors without abandoning explosive plays. The 2026 version echoes that template: build inside‑out, then choose a QB2 who doesn’t neuter the vertical element that has defined Jalen Hurts since 2022. [8][9][6]

Contrarian read: Are teams outrunning the A‑gaps?

Since 2022, Next Gen Stats charting shows rising league‑wide rates of throws under 2.5 seconds, with NFC East offenses among the adopters through 2024. If opponents in 2026 hit quick‑game thresholds above 55% on early downs, interior pressure may translate into more batted balls and rally‑and‑tackle asks, not sacks. That shifts hidden value to tackling efficiency by slot defenders and safeties, a spot where roster dollars are thinner when 29.5% rides on three linemen. [6][2]

Named‑stakeholder breakdown

  • Howie Roseman (GM) and Alec Halaby (strategy/cap): They must thread 2026‑2028 proration while preserving a November trade pocket worth at least ~$4M in functional space. [1][2]
  • Vic Fangio (DC, 2024 hire) and DL coach: They need Carter/Davis/Greenard to generate ≥12 combined interior sacks by Week 14 to justify the AAV stack. [7][2]
  • Brian Johnson’s successor at OC and the QB room (Hurts, McKee, Dalton): They must pick a QB2 whose aDOT and INT risk align with Hurts’ deep‑shot habits since 2022, not fight them. [6][4][5]
  • Quinyon Mitchell (CB, R1 2024) and the nickel: They’ll face an uptick in bubble/now screens and speed outs; 1 missed tackle a week becomes drive‑sustaining when opponents spam quick game. [6]

What others are missing

Most coverage in July focused on guarantees and AAV tiers, but few tied the interior bet to the special‑teams and short‑field cascade: heavier DT rotations in September and October historically correlate with more fourth‑quarter ST snaps for core DBs and LBs, which can erode open‑field tackling in Weeks 12–17. For a roster with Quinyon Mitchell learning NFL angles in 2024 and 2025, the 2026 plan must budget real reps and a 48‑man activation slot for a dedicated gunner who keeps hidden yardage under −5 net yards per game. [6][8]

What to watch next

  1. By September 1, 2026, the Eagles name Tanner McKee the QB2, and his preseason aDOT comes in at 8.0 yards or higher across at least 40 attempts, signaling a vertical contingency behind Jalen Hurts.
  2. By Week 8 of the 2026 season, Carter + Davis + Greenard produce at least 45 combined pressures from A‑ and B‑gaps per PFF charting, placing Philadelphia in the top 5 for interior pressure rate.
  3. By October 31, 2026 (trade deadline), Philadelphia acquires a rotational edge or nickel with an APY of $3–6M in exchange for a Day‑3 pick (Rounds 5–7), preserving the trench‑first thesis with depth.

Sources

  1. PhiladelphiaEagles.com — Team press conference (July 2026): primary statements from Howie Roseman and Nick Sirianni about DT scarcity, QB2 competition, Greenard health, and roster optionality.
  2. OverTheCap — 2026 cap projection ($301.2M) and reported contract structures/AAVs for Jalen Carter, Jordan Davis, and Jonathan Greenard; positional spending context. What this contributes: numbers for the 29.5% calculation and resource concentration.
  3. ESPN.com — Reporting on Jonathan Greenard’s move from the Minnesota Vikings to the Eagles and summer injury status. What this contributes: acquisition timing, contract framing, and health context.
  4. Pro-Football-Reference.com — Andy Dalton career interception rate and efficiency baseline. What this contributes: risk profile for a “floor” QB2 path.
  5. NFL.com Combine Tracker — Tanner McKee measurements (6'6", 230‑ish) and arm metrics from March 2023. What this contributes: physical profile supporting a vertical QB2 identity.
  6. NFL Next Gen Stats — Deep attempt rates for Jalen Hurts (2022–2024) and NFC East quick‑game/time‑to‑throw tendencies. What this contributes: evidence for vertical identity and opponent counters.
  7. Pro Football Focus — Interior pressure and pass‑rush win‑rate data for Eagles DTs (2023–2025). What this contributes: benchmarks for 2026 pressure targets.
  8. The Philadelphia Inquirer — Historical context on Roseman’s trench investments (e.g., Fletcher Cox’s 2016 extension) and organizational philosophy. What this contributes: precedent for inside‑out roster building.
  9. Pro-Football-Reference.com — 2017 Eagles pass‑rush outputs and postseason results. What this contributes: historical analogue for an interior‑driven championship build.
  10. OverTheCap (Positional Spending) — Comparative DL spending shares for 2017 vs. projected 2026 Eagles. What this contributes: how the 2026 concentration compares to the last title window.


Related update: We recently published an article that expands on this topic: read the latest post.

Buttered Plantain Fries and Seasoned Avocado | Made by Meaghan Moineau

It was one of those evenings when the fridge looked like it was solely hosting a Tupperware party — all containers, no food. I had a craving for something warm and crispy yet couldn’t muster the energy for a full-on cooking expedition. And there it was, a lone plantain on the counter, along with a ripe avocado looking all sorts of promising. These buttered plantain fries with seasoned avocado came to life quite by accident, but they’ve become a regular guest at my table ever since. They’re quick, comforting, and just a little bit playful — perfect for when you want something more than a snack but less than a meal. Trust me, you need this in your life. Jump to Recipe

What You’ll Need

This ingredient list is like a treasure hunt in your pantry — chances are, you’ve already got most of these goodies hiding in there.

  • Plantain – Look for one that’s ripe but not mushy.
  • Butter – Because everything’s better with butter, right?
  • Vegetable oil – Helps the butter along so it doesn’t burn.
  • Avocado – Go for ripe, it should feel slightly soft.
  • Chili pepper – A bit of heat, because why not spice things up?
  • Garlic – Just a clove, minced to aromatic perfection.
  • Onions to garnish – Thin slices for a little crunch and color.
  • Salt – Essential for seasoning.

How to Make Buttered Plantain Fries and Seasoned Avocado

  1. Peel the plantain with care; they can be surprisingly slippery. Slice it into thin, even strips so they cook uniformly.
  2. In a pan over medium heat, add a generous dollop of butter mixed with a splash of vegetable oil. Let it melt slowly, enjoying that heavenly buttery aroma.
  3. Toss in the plantain strips, ensuring they’re laid out in a single layer. Cook until each side is golden and crisp, flipping occasionally. You’ll know they’re ready when they look too good to resist.
  4. While the plantains do their thing, scoop out the avocado into a bowl. Mash it with a fork until it’s creamy but with a bit of texture still.
  5. Stir in a pinch of salt, the chopped chili pepper, and minced garlic. Mix until it’s all well combined and the garlic is fragrant.
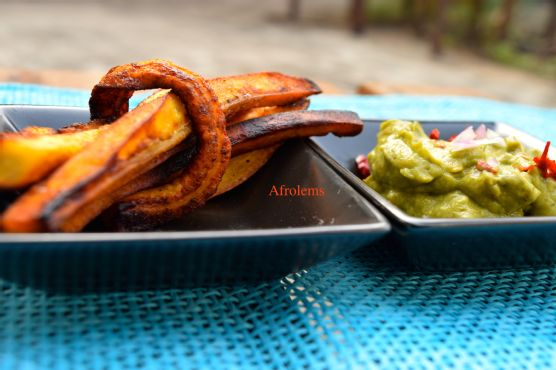
  6. Serve the golden plantain fries alongside your seasoned avocado mash. Sprinkle with thin slices of onion for that final flourish.

Cook’s Notes

If you’re new to cooking plantains, remember they cook faster than you might think. Keep an eye on them to avoid burning. When storing leftovers (if there are any!), keep the plantains and avocado separate. The plantain fries are best enjoyed fresh but can be reheated in an oven to crisp them up again. As for the avocado, a little lime juice can help keep it from browning too quickly if you’re making it ahead.

Make It Your Own

  • Swap the butter for coconut oil if you’re dairy-free or just love a hint of coconut flavor.
  • Add a squeeze of lime juice to the avocado for a tangy twist.
  • If you’re feeling extra, sprinkle some crumbled feta on the finished dish for a creamy, salty contrast.
  • Switch out the chili pepper for a jalapeño if you prefer a different kind of heat.

If you try this, I’d love to hear how it turns out — drop a comment or tag me! Happy cooking, and remember: the best recipes often come from happy accidents!

Related update: Buttered Plantain Fries and Seasoned Avocado

Related update: Balsamic Roasted Vegetables

Mashed Sweet Potatoes | Made by Meaghan Moineau

Last Tuesday, I found myself standing in the kitchen, staring at a couple of sweet potatoes that had been sitting on the counter a little too long. It was one of those chilly evenings where you crave something warm and comforting, yet I was in no mood to fuss over a complex recipe. Enter: mashed sweet potatoes. This dish is one of my go-to solutions for cozy vibes with minimal effort. It’s like wrapping yourself in a blanket, but for your taste buds. Sweet, spiced, and just the right amount of creamy, this recipe is a gem you’ll want to keep in your back pocket for busy weeknights and lazy Sundays alike. Plus, it’s a fabulous twist on the classic mash that makes you look like a culinary genius with hardly any work. Magic, right? Jump to Recipe

What You’ll Need

This recipe is all about transforming simple ingredients into a powerhouse side dish. Chances are you already have most of this goodness in your pantry.

  • Sweet potatoes, peeled and ready for action
  • Butter—because everything’s better with butter
  • Cream for that luxurious texture
  • Vanilla, the secret ingredient that makes all the difference
  • Maple syrup for a natural sweetness
  • Brown sugar to deepen the flavor
  • A pinch of cinnamon for warmth
  • Cayenne pepper for a kick
  • Cardamom for a touch of the exotic
  • Orange zest, adding bright notes
  • Kosher salt to taste

How to Make Mashed Sweet Potatoes

  1. Start by placing your peeled sweet potatoes into a large pot of boiling water. Cook them until they are fork-tender, which usually takes about 20 minutes. You’ll know they’re ready when the edges begin to soften and break apart.
  2. Drain the cooked sweet potatoes and return them to the pot. Mash them until well broken up. If you prefer a smoother texture, feel free to use an electric mixer.
  3. In a small bowl, mix together the cinnamon, cayenne, cardamom, orange zest, and brown sugar. Set this aromatic blend aside for the moment.
  4. Add the butter to the mashed sweet potatoes, followed by the cream, vanilla, and maple syrup. Stir until everything is well combined and the butter has melted into silky goodness.
  5. Now, incorporate the cinnamon sugar mixture. Stir until the spices are fully blended into the potatoes, and everything is smooth and creamy.
  6. Finally, season your mash with kosher salt to taste. Give it a taste test to ensure the balance of sweet and savory is just right.

Cook’s Notes

When it comes to these mashed sweet potatoes, texture is key. Don’t be afraid to taste test as you go along. If your mash feels too thick, a splash more cream can rescue it. On the flip side, if it’s too runny, let it sit for a few minutes to firm up. Sweet potatoes tend to be more forgiving than regular potatoes, so you have some wiggle room here.

For storage, these mashed sweet potatoes keep beautifully in the fridge for up to four days. Reheat them in a saucepan over low heat, stirring occasionally. You can also freeze them in an airtight container for up to a month; just thaw overnight in the fridge before reheating.

Make It Your Own

  • Herbaceous Twist: Stir in some freshly chopped rosemary or thyme for an earthy note.
  • Nutty Crunch: Top with toasted pecans or walnuts for a delicious contrast in texture.
  • Vegan Version: Swap the butter and cream for coconut oil and coconut milk. It adds a lovely tropical undertone.
  • Spice Swap: Replace cayenne with smoked paprika for a smoky depth to the sweetness.

If you try this, I’d love to hear how it turns out—drop a comment or tag me! Your kitchen adventures make my day brighter. Enjoy every comforting bite!

Related update: Mashed Sweet Potatoes

Italian Tomato and Mozzarella Caprese | Made by Meaghan Moineau

Last Tuesday, I found myself rummaging through the fridge at 6:00 p.m., desperately in need of something that screamed “dinner” but without the patience for a culinary marathon. There they were: a couple of vine-ripened tomatoes and a ball of mozzarella glaring back at me, almost as if they knew they were meant to be together. That’s when it hit me—Italian Tomato and Mozzarella Caprese! It’s that perfect blend of simplicity and flavor, a dish that makes you feel like you’re dining al fresco in the Italian countryside. This recipe comes together in minutes, and it’s so fresh and vibrant that you’ll forget how easy it was to make. Trust me, this is the kind of dish that turns a chaotic weeknight into a serene evening.

Jump to Recipe

What You’ll Need

This is one of those recipes where you probably have most of the ingredients lying around, making it a super convenient option for those spontaneous cravings.

  • Vine-ripened tomatoes
  • Fresh whole-milk mozzarella
  • Fresh basil leaves
  • Fluid balsamic vinegar
  • Olive oil
  • Kosher salt
  • Black pepper
  • Dry sprinkle of oregano leaves

How to Make Italian Tomato and Mozzarella Caprese

  1. Start by grabbing a large platter and slice your vine-ripened tomatoes. Lay them out, leaving just enough space between them so they can bask in their own glory.
  2. Drizzle the tomatoes with fluid balsamic vinegar. You’re looking for a glistening sheen that tempts you to dive in immediately.
  3. Place one fresh basil leaf atop each slice of tomato. The aroma will already start to transport you to a sun-drenched piazza.
  4. Slice the mozzarella into rounds that match the size of your tomatoes, and place each slice on top of the basil leaves. Trust me, this is where the magic happens.
  5. Sprinkle with oregano, salt, and black pepper. Be generous but not heavy-handed; you want to enhance, not overpower.
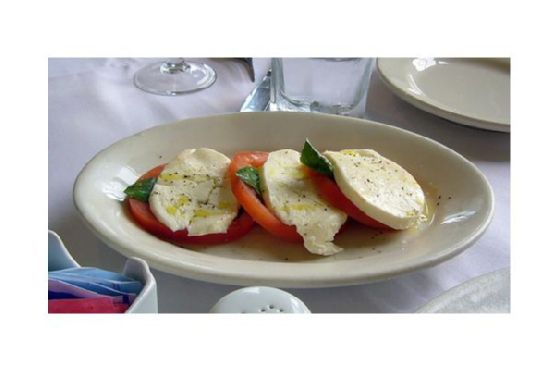
  6. Finish it off with a drizzle of olive oil. The edges of the cheese will start to glisten, and the whole platter will look like it belongs in a magazine.

Cook’s Notes

This recipe is straightforward, but a few pointers can elevate it. First, always opt for the freshest ingredients you can find. The quality of the tomatoes and mozzarella really shines through, so this is the time to splurge a little if possible. You can make this dish a couple of hours ahead of time; just be sure to add the basil and olive oil right before serving to keep everything fresh and vibrant. Leftovers? If there are any, they’re fantastic on a slice of toasted sourdough the next day.

Make It Your Own

  • Replace the mozzarella with crispy tofu for a vegan twist that still brings the creamy texture.
  • Swap the balsamic vinegar for a splash of red wine vinegar for a sharper tang.
  • Add a handful of arugula underneath the tomatoes for an extra peppery bite.
  • Incorporate roasted red peppers for a sweet, smoky layer to the dish.

So there it is, my go-to for a quick, satisfying meal that feels like a little escape to Italy. If you try this, I’d love to hear how it turns out — drop a comment or tag me on social media. Buon appetito!

Related update: Italian Tomato and Mozzarella Caprese

Related update: Mashed Sweet Potatoes

Related update: Crab Cakes Rockefeller

When Fans Prop Up a Games Ranking | Analysis by Brian Moineau

TL;DR

  • Splatoon Raiders hit a 9.3 Metacritic User Score and briefly ranked 7th “best of all time” on the site, despite an 81 critic Metascore and mixed reviews from outlets like The Guardian. [1][2][5]
  • The leaderboard position reflects mobilized fans, meme‑era behavior (see Disney’s Cory in the House), and a system that delays negative review‑bombs for 36 hours but not positive swarms. [1][6][7]
  • Expect regression: with ~800 user reviews, a few dozen 0/10s or a wave of 7/10s can mathematically yank Splatoon Raiders out of the all‑time top 10 within weeks. [4]

What the source said

Video Games Chronicle reports that Splatoon Raiders, a Switch 2 spin‑off released on July 23, 2026, sits at 9.3/10 in Metacritic’s User Score and placed 7th on the site’s all‑time user‑rated list, while its critic Metascore is 81. [1][3]

The piece flags the known caveats around user ratings: scores skew to 10s and 0s, meme campaigns can distort ranks (e.g., Cory in the House), and Metacritic’s 36‑hour hold on new user reviews was meant to slow bombing, not boosting. [1][6][7]

Why it matters

Nintendo just shipped a Switch 2 exclusive intended to move hardware in late July 2026; “7th greatest game of all time on Metacritic (users)” is the kind of social proof that nudges fence‑sitters when amiibo chatter is peaking. [1][3]

Metacritic’s brand sits in the blast radius as well. Its critic Metascore has long shaped marketing decks and investor chatter, but the all‑time user leaderboard mixes expansions, cult classics, and meme targets into a single “GOAT” list that can be captured in a launch week. [1][2]

Original analysis

Splatoon Raiders on Metacritic: signal vs noise

Consensus view: “Top‑10 all‑time user score proves Splatoon Raiders is an all‑timer.” Contrarian read: this ranking mostly proves how quickly a coordinated fandom can overpower a low‑denominator system that delays early negativity but does not dampen early positivity. [1][7]

Four data points undermine the “all‑timer” framing:

  • The Metascore is 81, not a GOAT‑tier 90+; that puts it roughly mid‑pack among 2026 releases. [1]
  • The Guardian’s review reads downbeat, a reminder the critic spread isn’t universally glowing. [5]
  • Metacritic’s 36‑hour delay on user scores, added in 2020 after high‑profile bombings, never targeted positive swarms, so celebratory brigades slip through. [7]
  • The all‑time user list is a genre soup—full releases mingle with expansions like Blood and Wine or Frozen Throne—so the ranking bakes apples and oranges into one pie. [1][2]

Named‑stakeholder breakdown:

  • Nintendo: Gains launch‑window marketing copy (“highest user‑rated Nintendo game ever”) that pairs with Switch 2 positioning; risk: reputational whiplash if the score normalizes below 9.0. [4]
  • Metacritic: Gets traffic spikes but risks erosion of trust in its “all‑time” lists if small, recent cohorts can hijack the podium. [2]
  • Retail and platform storefronts (Nintendo eShop, Amazon US): “Universal acclaim” user badges convert into clicks, but only if the 9.0+ headline survives beyond week one. [2][4]
  • Creators and streamers in the Splatoon scene on YouTube and Twitch: A high user score energizes guide‑and‑challenge content, sustaining visibility independent of critic takes. [5]

Back‑of‑envelope: how fragile is a 9.3?

  • Assume ~800 user reviews at 9.3/10 → 9.3 × 800 = 7,440 “points.” [4]
  • Add m zero‑scores. New average = 7,440 ÷ (800 + m).
    • To drop to 9.0: 7,440 ÷ (800 + m) = 9.0 → m ≈ 27 new 0/10s.
    • To drop to 8.8: 7,440 ÷ (800 + m) = 8.8 → m ≈ 46 new 0/10s.
  • Add 200 moderate 7/10s instead: (7,440 + 1,400) ÷ 1,000 = 8.84.

Translation: a small wave of detractors—or a broader wave of normal players—will drag the average out of “GOAT” territory fast. This is classic small‑sample volatility.

A 2×2 for reading Metacritic User Scores

  • High volume (≥10,000 ratings) + Low variance: Broad acclaim (durable signals; hard to nudge).
  • High volume (≥10,000) + High variance: Polarized blockbusters (culture‑war magnets).
  • Low volume (≤1,500) + Low variance: Niche darlings (stable but limited reach).
  • Low volume (≤1,500) + High variance: Meme spikes/mobilized fandoms (volatile; Raiders today).

Splatoon Raiders lives in the last quadrant right now: hundreds of 10s, some 0s, and under 1,000 ratings—exactly the profile that produces eye‑catching ranks that rarely last. [1][4]

Historical analogue: July 2020’s review‑bomb saga prompted Metacritic’s 36‑hour hold. It reduced instant negativity but didn’t address brigading in either direction. Raiders’ Top‑10 moment mirrors The Last of Us Part II’s early pile‑on in reverse: a flood of early sentiment swinging a headline metric before the broader audience shows up. Expect a reversion as late buyers and renters arrive through August 2026. [7]

What others are missing

Coverage fixates on the 9.3 and the “7th of all time” headline, but the real story is incentive design. Metacritic’s all‑time user list lacks a prominently displayed minimum‑votes threshold and lumps expansions with full releases, so it rewards mobilized communities at launch; that’s how a Switch 2‑exclusive spin‑off can sit a few rungs from The Legend of Zelda: Ocarina of Time while a TV tie‑in like Cory in the House rides irony into the top tier. Systems shape outcomes; here, the system rewards speed of turnout over depth of consensus. [1][2][6]

What to watch next

  1. By August 31, 2026, Splatoon Raiders’ Metacritic User Score falls below 9.0 as the review base broadens beyond early adopters. [2][4]
  2. By October 31, 2026, Splatoon Raiders drops out of Metacritic’s all‑time Top‑10 user‑rated list as additional reviews accumulate. [2]
  3. By September 30, 2026, Nintendo ships at least one patch (v1.x) that names matchmaking stability or mission repetition in its notes, addressing pain points raised in critic write‑ups. [5]

My take

I’m glad Splatoon finally has a single‑player‑forward spin‑off that lands for fans, but a launch‑week 9.3 user score is a vibes check, not a verdict. The critic spread at 81 and The Guardian’s cool response tell a different story: good game, not canonizing masterpiece. As a marketing asset for Switch 2, this is gold; as a measure of “all‑time greatness,” it’s fool’s gold. Watch the number melt as the broader audience—not just the superfans—shows up through Q3 2026. [1][2][5]

Sources

[1] Splatoon Raiders is currently the 7th greatest game of all time on Metacritic, according to User Score — VGC (https://www.videogameschronicle.com/news/splatoon-raiders-is-currently-the-7th-greatest-game-of-all-time-on-metacritic-according-to-user-score/) — News peg and key figures (9.3 user score, 81 Metascore), plus context on meme‑driven anomalies.

[2] Best Games by User Score (All‑Time) — Metacritic (https://www.metacritic.com/browse/game/all/all/all-time/userscore/?sort=%2F) — Confirms Splatoon Raiders’ presence and rank on the all‑time list.

[3] Splatoon Raiders — Nintendo Official Store (https://www.nintendo.com/store/products/splatoon-raiders-switch-2/) — Confirms platform (Switch 2) and release date (July 23, 2026).

[4] ‘Splatoon Raiders’ is now the best user‑reviewed Nintendo game ever — NME (https://www.nme.com/news/gaming-news/splatoon-raiders-best-player-reviewed-nintendo-game-of-all-time-3959406) — Notes 9.3 based on ~800 user reviews and frames relative standing among Nintendo titles.

[5] Splatoon Raiders review — The Guardian (https://www.theguardian.com/games/2026/jul/21/splatoon-raiders-review-nintendo-switch-2) — Provides a more critical assessment to contrast user enthusiasm.

[6] Cory in the House — Know Your Meme (https://knowyourmeme.com/memes/subcultures/cory-in-the-house) — Documents the long‑running meta‑joke and its impact on Metacritic user scores.

[7] Metacritic Will Delay User Reviews For Games — GameSpot (https://www.gamespot.com/articles/metacritic-will-delay-user-reviews-for-games/1100-6479886/) — Confirms the 36‑hour waiting period policy and its 2020 context.


Related update: We recently published an article that expands on this topic: read the latest post.

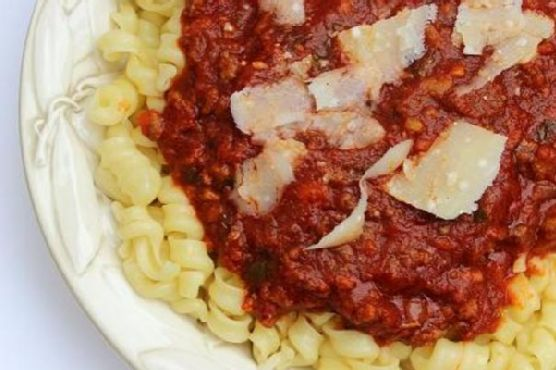
My “Secret” Bolognese Sauce | Made by Meaghan Moineau

So, picture this: it’s a chilly Tuesday evening, and I’m staring into my fridge like it’s a portal to another dimension. The day has been a blur, and all I want is a big bowl of something that feels like a cozy blanket. That’s when it hits me: the urge to whip up my “secret” Bolognese sauce. This recipe is my trusty sidekick for nights I want to impress with minimal effort. It’s rich, hearty, and tastes like you’ve been slaving away in the kitchen, but really, it’s just about letting the ingredients do the heavy lifting. By the end of the night, my kitchen smells like a Tuscan villa, and my stress? Vanished. If that sounds like your kind of evening, you’re in the right spot. Jump to Recipe

What You’ll Need

This isn’t your average Bolognese; it’s got layers of flavor thanks to a mix of meats and some surprise seasonings. Chances are you already have most of this.

  • Olive oil
  • Ground veal
  • Ground beef
  • Ground pork
  • Italian sweet sausage
  • Sweet diced Vidalia onions
  • Diced carrots
  • Garlic cloves
  • Fresh oregano
  • Red wine
  • Fire roasted canned tomatoes
  • Canned pureed tomatoes
  • Fresh parsley
  • Fresh basil
  • Granulated sugar
  • Salt and pepper

How to Make My “Secret” Bolognese Sauce

  1. In a large, heavy Dutch oven or stock pot, heat olive oil over medium/high heat. Add the ground veal, careful not to crowd the pot. Cook until it’s browned and has a slight crust. Remove with a slotted spoon to a large bowl.
  2. Drain all but 2 tablespoons of the fat, add the ground beef, and repeat the browning process. Once browned, add it to the bowl with the veal.
  3. Repeat with the ground pork, browning it and then adding it to the bowl. Drain all but 2 tablespoons of fat again.
  4. Brown the Italian sweet sausage in the remaining fat. This is where the magic really starts. Once browned, toss it in with the other meats, but don’t drain the fat this time.
  5. Add the diced onions and carrots to the pot. Let them cook in that delicious sausage fat until the onions turn translucent and the carrots are softened, stirring occasionally.
  6. Add minced garlic and fresh oregano. Cook for another 1-2 minutes until everything is fragrant, and your kitchen smells like heaven.
  7. Pour in the red wine, scraping up any brown bits stuck to the bottom of the pot. Let it simmer for about 2-3 minutes until the wine reduces a bit.
  8. Return the meat mixture to the pot with the onions and stir to combine everything into a beautiful medley of flavors.
  9. Add all four cans of tomatoes, stirring thoroughly to blend it all together. At this point, it should look like a vibrant, chunky sauce.
  10. Stir in fresh parsley, basil, granulated sugar, salt, and pepper. Turn down the heat to low and let it simmer for around 2-3 hours, stirring occasionally. Patience is key here!
  11. Before serving, always taste the sauce for seasoning. Adjust the sugar, salt, and pepper to suit your taste. This is a big batch, so don’t be shy!

Cook’s Notes

Alright, so a few things: First, you’ll want a pot that’s got some heft to it. A flimsy pot won’t distribute the heat as well, and you’ll miss out on those beautiful browned bits. If you’re making this sauce ahead, it actually tastes even better the next day since the flavors have more time to meld. Just store it in an airtight container in the fridge and it’ll be good for up to 5 days. You can also freeze it for up to 3 months. Just defrost and reheat gently over low heat. And remember, don’t skimp on the simmer time — this is where the sauce goes from good to unforgettable!

Make It Your Own

  • Vegetarian Version: Swap all the meats for a mix of mushrooms like portobello and cremini. You’ll still get that meaty texture, and it’s divine with the same seasoning.
  • Spicy Kick: Add crushed red pepper flakes when you’re cooking the garlic and oregano for some heat. It’s a great way to add a little zing.
  • Extra Veggies: Toss in some diced zucchini or bell peppers along with the onions and carrots for a veggie-packed punch.
  • Herb Swap: If you’re out of basil or parsley, try using thyme or rosemary. It’ll give you a slightly different but equally delicious flavor profile.

If you try this, I’d love to hear how it turns out — drop a comment or tag me! Happy cooking and even happier eating!

Related update: My "Secret" Bolognese Sauce

Valentine’s Chicken Marsala | Made by Meaghan Moineau

It was one of those chilly February evenings when the sky starts turning that perfect shade of twilight too early, and I found myself staring at a pack of chicken breasts, desperate for a dinner idea that was more love letter than meal prep. Valentine’s Day was just around the corner, and I wanted something special yet forgivingly simple because, let’s be honest, I was already knee-deep in heart-shaped crafts and tiny candy wrappers. That’s when Chicken Marsala entered the scene, like a classic movie star ready to sweep me off my feet. This recipe is a cozy blend of savory mushrooms and a creamy wine sauce that feels indulgent but is easy enough to conquer on a weeknight. Plus, it’s one of those dishes that’s impressive without being a diva about it.

Jump to Recipe

What You’ll Need

You might be surprised to find that most of these ingredients are probably hiding in your kitchen right this minute, waiting to come out to play.

  • Fresh mushrooms, sliced
  • Skinless boneless chicken breast
  • Cloves of garlic, minced
  • Butter
  • Olive oil
  • Seasoned breadcrumbs or coating mix
  • Marsala wine
  • Heavy cream
  • Cooked pasta (for serving, if desired)

How to Make Valentine’s Chicken Marsala

  1. Start by prepping your mushrooms and chicken. Slice the mushrooms thinly and place your chicken breasts between two sheets of wax paper. Grab a mallet and pound the chicken to about 1/4 inch thickness. This helps them cook evenly and faster.
  2. Dredge each chicken breast in the seasoned breadcrumbs, making sure they’re fully coated. This is where that satisfying crunch comes from.
  3. Heat a heavy stainless or cast iron pan over medium heat. Trust me, non-stick just won’t give you that gorgeous sear. Add the butter and a splash of olive oil to the pan. Once the butter melts and becomes bubbly, it’s ready.
  4. Place the chicken breasts in the pan and brown them on both sides. This should take about 3-4 minutes per side. You’re looking for a deep golden color.
  5. Once browned, remove the chicken from the pan and set them aside. Add a little more olive oil to the pan, then toss in the mushrooms and garlic. Sauté until the mushrooms are tender and garlic is fragrant.
  6. Now, let’s deglaze. Pour in the Marsala wine, scraping up all those delicious brown bits from the pan. This is where the magic happens.
  7. Return the chicken to the pan, nestling it among the mushrooms. Bring the mixture to a boil, reduce the heat, cover, and let it simmer for 30 minutes. This makes the chicken incredibly tender.
  8. Remove the chicken again (I promise, it’s worth it), and pour in the heavy cream. Let it simmer and reduce by about half, stirring occasionally, until the sauce is thick and creamy.
  9. Serve the chicken and sauce over cooked pasta, if desired, and get ready to swoon.

Cook’s Notes

This dish is one of those forgiving recipes that lets you play a little. If you don’t have Marsala wine, a dry sherry or even a non-alcoholic cooking wine can step in. Just remember, each has its own personality, and the flavor will shift slightly. It’s best to avoid oversalting, especially since the breadcrumbs already have seasoning. For leftovers, store them in an airtight container in the fridge for up to three days. The sauce will thicken as it cools, so when reheating, add a splash of cream or milk to bring it back to life.

Make It Your Own

  • Swap the chicken for crispy tofu for a vegetarian twist. Just press the tofu to remove excess moisture and proceed with the recipe as usual.
  • Use portobello mushrooms for a meatier texture. They’re more robust and add a delightful depth to the dish.
  • Try gluten-free breadcrumbs if you’re avoiding wheat. They work just as well and keep the coating nice and crunchy.
  • Spice it up with a pinch of red pepper flakes during the mushroom sauté for a subtle kick.

If you try this, I’d love to hear how it turns out — drop a comment or tag me! Let’s keep the kitchen adventures rolling, because good food is all about sharing the love, right?

Related update: Valentine’s Chicken Marsala

Related update: My "Secret" Bolognese Sauce

Easy Chicken Tikka Masala | Made by Meaghan Moineau

It was one of those evenings when the rain was coming down hard, and I was craving something that felt like a warm hug — that’s when I decided to whip up my go-to Easy Chicken Tikka Masala. You know those nights when takeout sounds tempting, but you also feel like cooking something that’s a little bit special? This dish is perfect for that. It’s like a midweek savior: indulgent enough to feel like a treat but simple enough that you won’t be left with a mountain of dishes. Plus, the aroma of spices simmering on the stove is pure magic. Let’s get you sorted with everything you need to make this cozy delight.

Jump to Recipe

What You’ll Need

This ingredient list is a mix of pantry staples and some spices that really make the magic happen. Chances are you already have most of this on hand, but a trip to the spice aisle might be in order if you’re missing some key players.

  • Chicken breasts – about two or three, cubed
  • Grape seed oil – or any neutral oil
  • Onion – finely chopped
  • Garlic – four cloves, minced
  • Garam masala
  • Cumin
  • Coriander
  • Turmeric
  • Cardamom
  • Cinnamon
  • Fresh ginger – grated
  • Cayenne pepper
  • Paprika
  • Tomato paste
  • Chopped tomatoes – fresh or canned
  • Water
  • Plain yogurt
  • Fresh coriander – for garnish
  • Salt – to taste

How to Make Easy Chicken Tikka Masala

  1. In a small bowl, mix together all the spices, including the grated ginger. This is the magic blend that will bring everything to life.
  2. Heat the grape seed oil in a large saucepan over medium heat. Add the chopped onion and cook until they turn a beautiful golden brown, releasing their sweetness.
  3. Add the minced garlic to the pan, and cook for just about a minute until it becomes fragrant. Make sure not to burn it!
  4. Stir in your pre-mixed spices. Let them cook for a minute or two to infuse the oil with all those wonderful flavors. Your kitchen should smell amazing by now.
  5. Mix in the tomato paste, stirring until everything is well combined. The paste will deepen in color and start clinging to the onions and garlic.
  6. Add the chopped tomatoes and pour in the water. Let this simmer gently, and season with salt to taste. You’ll see the sauce start to thicken.
  7. Introduce the chicken pieces to the pan, stirring well to coat them thoroughly with the sauce. Allow everything to simmer until the chicken is cooked through and the sauce has thickened even more, which should take around 12 minutes.
  8. Stir in the plain yogurt and continue to simmer for an additional 5 minutes. The yogurt adds a lovely creaminess that ties everything together.
  9. Garnish with freshly chopped coriander and serve hot, ideally with a fluffy pile of basmati rice to soak up all that goodness.

Cook’s Notes

Okay, let’s talk shop. First off, if you can, prep your ingredients before you start cooking — it makes everything flow so much smoother. This dish loves to be made ahead of time because the flavors deepen as it sits. Just store it in the fridge for up to three days and reheat gently. If it thickens too much, a splash of water or extra yogurt will loosen it right up.

A common pitfall is rushing the onion step — give them the time they deserve to turn that perfect golden brown. Also, feel free to adjust the cayenne pepper to your heat preference; it’s your dinner, after all.

Make It Your Own

Let’s personalize this bad boy a bit:

  • Swap the chicken for crispy tofu for a vegetarian twist. Just press and cube your tofu, then fry until crispy before adding it into the sauce.
  • Use coconut milk instead of yogurt for a dairy-free version that brings a subtle sweetness to the mix.
  • Add a handful of spinach to the sauce right before serving for a pop of color and some extra nutrients.
  • For a richer sauce, toss in some cashew cream – simply soak cashews in water, then blend until smooth.

If you try this, I’d love to hear how it turns out — drop a comment or tag me on social media with your delicious creations! Enjoy every bite, friends.

Related update: Easy Chicken Tikka Masala

Related update: Valentine's Chicken Marsala

Why Smart Rings Beat Glasses for AI | Analysis by Brian Moineau

TL;DR

  • The Verge’s David Pierce (July 28, 2026) argues a whisper-ready smart ring is the most practical AI gadget right now; I agree—and I’ll show why rings beat glasses on input speed and social acceptability in public spaces like the NYC subway and London buses [1].
  • The near-term moat isn’t microphones; it’s OS-grade “universal dictation” and Bluetooth LE Audio Microphone Control (MICP/MICS) that let accessories inject text anywhere as if they were native keyboards, across iOS and Android in 2026–2027 [2][4].
  • Health-ring incumbents (Ōura, Ultrahuman) have scale but no voice capture in 2024; upstarts (Sandbar, Core Devices/Pebble) are shipping purpose-built voice rings, and preorder anecdotes plus demo units suggest real demand in H2 2026 [1][3][5].

What the source said

David Pierce at The Verge (published July 28, 2026) says smart rings, not glasses, are the best near-term AI gadget because a finger mic makes dictation fast and discreet in crowded places like cafés and trains [1]. His piece centers on Sandbar’s Stream ring, which routes speech-to-text into any app on iOS and macOS, and contrasts it with Core Devices/Pebble’s Index 01, which records short press-to-speak notes on-wrist [1][2][3]. Pierce name-checks entrants like Vocci and argues phones are clumsy for capture, while rings reduce activation time by moving the mic within centimeters of your mouth [1]. He frames the category as “keep the phone in your pocket, capture more thoughts per day,” a claim supported by hands-on demos in July 2026 [1].

Why it matters

  • There’s a fight over the next default input for AI: glasses push camera-first; rings push mic-first, with Apple, Google, Microsoft, and Meta all controlling text boxes and permissions in 2026 [1]. If “press-to-dictate from your finger” becomes as universal as Command‑V, the winners will ship OS-level dictation routing and make Bluetooth LE Audio mics behave like native keyboards across iOS/macOS and Android/Windows [2][4].
  • Incumbents already seeded millions of fingers with health rings; Ōura reported 2.5 million rings sold as of June 14, 2024, proving daily wear at scale in the U.S., EU, and Japan [5]. Once text capture sticks, that installed base becomes a ready audience for voice-enabled SKUs, accessories, or firmware paths from 2025–2027 [5].
  • Privacy law pressure matters: Illinois’s Biometric Information Privacy Act (BIPA, 2008) makes indiscriminate ambient voice capture risky; a close-talk ring that records only when pressed narrows exposure compared to room mics in offices in Chicago or Springfield [6].

Original analysis

Contrarian read for 2026–2027: smart rings will own high-frequency, short-form input (ideas, reminders, captions) over the next 18–24 months because they minimize two frictions that phones and glasses share—activation time and social cost in libraries, meetings, and transit [1].

2x2: Where smart rings beat

  • Axes: speed to capture (slow → fast) vs social friction in public (high → low)
Low social friction High social friction
Slow capture Phone typing Meeting recorder pucks
Fast capture Smart rings (press, whisper, send) Smart glasses voice commands

The finger-to-mouth gesture is short and private; Pebble says Index 01 is tuned for close-talking at roughly 5–20 cm, signaling personal notes rather than room capture, which reduces bystander concerns under BIPA-like regimes in Illinois (2008) and similar EU norms [3][6].

Back-of-envelope: the “micro‑memo” economy

  • Baseline: Ōura reported 2.5 million rings sold by June 2024 [5]. Assume 10% of that audience (250,000 people) buys a voice‑first ring as a second device by December 2027.
  • Usage proxy: Pebble reports testers average about 1 minute of recordings per day [3]. Calculation: 250,000 users × 1 minute/day = 250,000 minutes/day. Annualized: 250,000 × 365 = 91,250,000 minutes/year. If a typical note is 15 words, that’s 91,250,000 × 15 = 1,368,750,000 words/year ≈ 1.37 billion words/year [3][5].
  • Revenue sketch: With an average selling price (ASP) of $99, device revenue = 250,000 × $99 = $24,750,000, excluding software [back-of-envelope]. If even 25% of users buy a $5/month AI service, MRR = 62,500 × $5 = $312,500; annualized ARR ≈ $3.75 million.

Plumbing, not placement, is the moat

  • Sandbar’s “Universal Dictation” target implies more than a mic; you need low-power uplink via Bluetooth LE Audio and a way to inject text as if from the OS keyboard or IME without bouncing through a single app, across iOS/macOS and Android/Windows in 2026–2027 [2][4].
  • Bluetooth LE Audio includes Microphone Control Profile/Service (MICP/MICS), which lets accessory microphones behave like first‑class citizens with lower latency and better battery characteristics during multi-device switching; this is the substrate rings need to feel native on press-whisper-release workflows [4].

Historical analogue (2007): iPhone OS 1.0 shipped without copy/paste, and third‑party workarounds felt brittle until Apple added system primitives in 2009; rings will feel “toy-like” until OSes add universal dictation APIs that treat them like keyboards, not peripherals [historical context].

Named-stakeholder breakdown

  • Sandbar (Stream): Must lock in universal dictation paths on iOS/macOS and Android/Windows, ship multipoint that survives handoffs between a MacBook and iPhone, and prove sub‑200 ms press‑to‑capture latency in 2026 demos [2][4].
  • Core Devices/Pebble (Index 01): Needs crystal-clear messaging on “close-talk only,” a robust press-to-record UX, and an on-device buffer for subway tunnels and flights; shipping updates through 2026 should show battery life in hours and days, not vague ranges [3].
  • Ōura and Ultrahuman: With >2.5 million combined units in market by mid‑2024, either can add a voice-capable SKU or a snap-on mic module by 2027 to defend share and ARPU [5].
  • Apple, Google, Microsoft: Control the OS text stack—keyboards, IMEs, accessibility APIs—and can grant or restrict background dictation; expect private “Made for iPhone” or Android partner tracks to become kingmakers in 2026–2027 [4].
  • Meta and Snap: If glasses win later, they still benefit from ring remotes; a $99 ring that triggers Meta Ray‑Ban dictation without raising your voice on a San Francisco bus would expand daily use cases in 2026–2027 [1].

What others are missing

Most coverage focuses on mic quality and battery life, but the gating factor is OS permissioning for “keyboard-equivalent” text injection via IME/HID paths; without first-party hooks on iOS/macOS and Android/Windows, rings remain glorified voice memo apps that can’t fill text fields in Slack, Gmail, or Notion at work [2][4]. A second blind spot: privacy liability under BIPA (2008) and EU ePrivacy rules is lower for close-talk, press-to-speak devices than for always-listening glasses, which shapes enterprise adoption in places like Illinois and Germany in 2026–2027 [6]. Finally, reviewers rarely quantify press-to-text latency under everyday interference (coffee grinders, wind at 10–15 mph, subway screech); the winner will publish reproducible sub‑200 ms end-to-end figures with MICP/MICS while roaming between phone and laptop [4].

What to watch next

  1. By March 31, 2027, at least one major OS vendor (Apple, Google, Microsoft) will ship a documented API that allows third‑party accessories to inject systemwide dictation as a trusted input method (IME/keyboard-equivalent), verifiable in public developer docs [4].

  2. By December 31, 2027, cumulative shipments of voice‑first smart rings (Sandbar, Core Devices/Pebble, or similar) will exceed 300,000 units, evidenced by public company disclosures or third‑party import/sales trackers, not just anecdotal reviews [1][3][5].

  3. By June 30, 2027, Bluetooth SIG materials or firmware releases will reference at least one ring product using MICP/MICS for prioritized mic routing with measured end‑to‑end dictation latency under 250 ms in a public demo or white paper [4].

Sources

[1] The Verge (David Pierce, July 28, 2026) — Hands-on report arguing rings beat glasses for near-term AI input; provides concrete product examples and public demo context.

[2] Sandbar product materials (2026) — “Universal Dictation” positioning and claims about cross‑device speech‑to‑text across iOS and macOS; indicates OS-level ambitions.

[3] Core Devices/Pebble blog (Index 01, 2026) — Press-to-record, close-talk tuning, and tester usage (~1 minute/day) inform the short-form capture model.

[4] Bluetooth SIG documentation on LE Audio MICP/MICS (2020–2024) — Specifies microphone control and service profiles that enable native-like accessory mic behavior and lower-latency switching.

[5] Business Wire (Ōura press release, June 14, 2024) — Confirms 2.5 million rings sold, establishing form-factor adoption and a plausible upgrade base.

[6] Illinois General Assembly, Biometric Information Privacy Act (740 ILCS 14/2008) — Framework for voice and biometric privacy risk; supports the close-talk, press-to-speak compliance thesis.

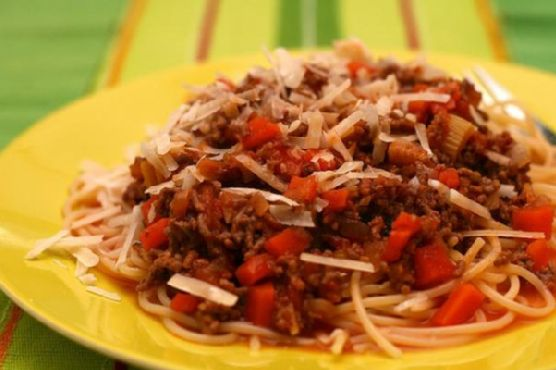
Best Ever Bolognese Sauce | Made by Meaghan Moineau

Last Tuesday, I found myself staring at a sorry-looking fridge, wondering how on earth I could whip up a dinner that wouldn’t just be another sad reheated pizza. I wanted something that felt like a hug at the end of a long day but didn’t require a trip to the store. That’s when the idea of Bolognese Sauce hit me like a blast of garlic in hot oil. It’s one of those dishes that feels special but is secretly a cinch if you’ve got some basics on hand. Imagine sinking into a bowl of pasta with a sauce that’s rich, flavorful, and satisfying — all while secretly feeling triumphant that you pulled it off. Trust me, this recipe is the kind of kitchen magic that turns an ordinary evening into something a little more extraordinary.

Jump to Recipe

What You’ll Need

This Bolognese is refreshingly straightforward with a few ingredients that might already be lurking in your pantry or fridge. Let’s check them out:

  • Olive oil
  • Thick-cut diced bacon
  • Yellow white onion
  • Carrot
  • Celery
  • Garlic cloves
  • Fresh thyme
  • Ground pork
  • Ground veal
  • Dry red wine
  • Bay leaves
  • Canned beef broth
  • Canned tomato puree
  • Pasta of your choice
  • Parmesan cheese, for serving

How to Make Best Ever Bolognese Sauce

  1. Grab your trusty heavy large pot and heat the olive oil over medium-high heat. Once shimmering, toss in the bacon. Sauté until the bacon is just beginning to brown, about 5-6 minutes. The smell will be irresistible.
  2. Add the onion, celery, carrot, garlic, and thyme. Stir them around for about 5 minutes until they soften and the aromatic explosion makes your kitchen feel like an Italian trattoria.
  3. Time to add the ground pork and veal. Break them up with a spatula, and cook until the meat is brown and cooked through, about 10 minutes. You’ll know it’s ready when the meat is no longer pink and is nicely browned.
  4. Pour in the wine and add the bay leaves. Let everything simmer until the liquid is slightly reduced, around 10 minutes. The edges of the pot will start to bubble in the most delightful way.
  5. Add the beef broth and tomato puree. Reduce the heat to medium-low and let the sauce thicken, which should take about an hour. Stir often to prevent sticking and ensure everything melds beautifully.
  6. Season your masterpiece with salt and pepper to taste. You’ll want to sneak a taste now, but try to resist!
  7. Meanwhile, boil your pasta in a large pot of boiling salted water. Aim for al dente — firm to the bite but not crunchy. Drain it well.
  8. Transfer the pasta to the pot with the sauce and toss until everything is coated in that luscious sauce. Serve with a generous grating of Parmesan cheese. Voilà! Dinner is served.

Cook’s Notes

When making this Bolognese, patience is your best friend. Letting the sauce simmer for a full hour allows the flavors to deepen and mingle into something truly delicious. Keep an eye on the pot and give it a stir every so often. If the sauce gets too thick for your liking, a splash of pasta water can loosen things up nicely.

As for leftovers, this sauce is a gift that keeps on giving. Store it in an airtight container, and it will happily live in your fridge for up to 3 days. Or freeze it for those days when you need a dinner win without working for it.

Make It Your Own

Here are a few fun variations to consider:

  • Swap out the ground veal for ground beef if that’s what’s handy or preferred.
  • For a lighter option, replace the thick-cut diced bacon with pancetta or turkey bacon.
  • Make it vegetarian by using a meat substitute or adding lentils instead of pork and veal.
  • Feeling spicy? Add a pinch of red pepper flakes when you’re sautéing the garlic and veggies.

If you try this, I’d love to hear how it turns out — drop a comment or tag me in your kitchen adventures! Remember, cooking is about experimenting and making it your own, so don’t be shy to tweak it to your taste. Happy cooking!

Related update: Best Ever Bolognese Sauce

Make Olive Garden’s Delicious Pasta Fagioli At Home | Made by Meaghan Moineau

It was a Tuesday night, and I was staring into the abyss of my pantry, feeling utterly uninspired. You know those evenings when you just want something comforting yet deceptively simple? That’s when this Pasta Fagioli came to my rescue. This recipe is like a warm hug in a bowl, and it’s impressive enough to make it look like you put in way more effort than you actually did. Plus, let’s face it, anything reminiscent of Olive Garden’s cozy vibes has a special place in my heart. So, let’s dive into this perfect weeknight dish that’ll leave everyone asking for seconds.

Jump to Recipe

What You’ll Need

You might already have most of these on hand, saving you a trip to the store — and that’s a win in my book!

  • Lean ground turkey
  • Olive oil
  • Onions, chopped
  • Carrots, diced
  • Celery stalks, diced
  • Garlic cloves, minced
  • Diced canned tomatoes
  • Canned red kidney beans
  • Canned white kidney beans
  • Canned great northern beans
  • Canned beef broth
  • Pasta sauce
  • Zucchini, diced
  • Italian seasoning blend
  • Fresh ground pepper
  • Whole wheat penne pasta
  • Parmesan cheese, for serving

How to Make Olive Garden’s Delicious Pasta Fagioli At Home

  1. Start by browning the lean ground turkey in a large soup pot over medium heat until it’s nicely browned and fragrant. Once done, drain the turkey in a colander to get rid of any excess fat.
  2. In the same pot, heat a generous drizzle of olive oil over medium heat. Add the onions, carrots, celery, and garlic. Stir often for about 2 minutes until the veggies are just starting to soften and your kitchen smells amazing.
  3. Return the browned turkey to the pot. Stir in the diced tomatoes, all the canned beans, beef broth, pasta sauce, chopped zucchini, a splash of water, Italian seasoning, and a good grind of fresh pepper.
  4. Bring the soup to a boil, then reduce the heat to a gentle simmer. Cover the pot and let it cook for about 50 minutes. Trust me, this is where the magic happens, as all the flavors meld together.
  5. After 50 minutes, stir in the whole wheat penne pasta. Cover again and cook for another 10 minutes, or until the pasta is perfectly al dente and the soup is bubbling at the edges.
  6. Ladle the hearty soup into bowls and, if you’re feeling fancy, top each serving with a sprinkle of grated Parmesan cheese. It’s time to dig in!

Cook’s Notes

This Pasta Fagioli is one of those soups that tastes even better the next day, once the flavors have had more time to meld. Store any leftovers in an airtight container in the fridge for up to 3 days. If you’re planning to freeze it, I’d recommend leaving the pasta out and cooking it fresh when you’re ready to serve. Just reheat the soup gently on the stove and add freshly cooked pasta just before serving.

Watch out for overcooking the pasta, since it can get mushy if left too long in the hot soup. If you prefer a thicker soup, you can mash a few of the beans before adding them to the pot, which creates a lovely, rich texture.

Make It Your Own

Here are a few ideas to switch things up and make this recipe truly yours:

  • Swap the ground turkey for crispy tofu or chicken sausage for a different protein vibe.
  • Want it spicy? Add a pinch of red pepper flakes or a splash of hot sauce while the soup simmers.
  • Use any small pasta shape you have on hand like ditalini or elbows if you’re out of penne.
  • Throw in a handful of fresh spinach or kale at the end for a boost of greens.

If you try this, I’d love to hear how it turns out — drop a comment or tag me! Your feedback makes my day, and I’m always here to answer any questions you might have. Happy cooking!

Related update: Make Olive Garden’s Delicious Pasta Fagioli At Home

Related update: Best Ever Bolognese Sauce

Related update: Thai Coconut Curry Soup

Why FF Remakes Could Need 4–5 Parts | Analysis by Brian Moineau

TL;DR

  • If Square Enix rebuilt Final Fantasy VI, VIII, or IX at Final Fantasy VII Remake’s 2020–2027 production scale, a like-for-like scope would likely require 4–5 parts by the observed 3.5-year cadence between entries; see the math below using the 2020 Remake and 2024 Rebirth dates. [1][3]
  • Square Enix’s May 2024 management policy emphasized a multiplatform-first posture after underperforming launches and “content abandonment” write-downs, which makes decade-long, multi-part bets harder to justify without clear ROI or platform guarantees. [2]
  • A smarter path than “FF6 Remake Part I” is a scope‑focused template—HD‑2D‑scale reinterpretations, curated 3D setpieces, and modern UX—modeled on 2024’s Dragon Quest III HD‑2D release, while Creative Business Unit I wraps the Remake trilogy and reallocates senior leadership to the next mainline FF. [6]

What the source said

On June 16, 2022, Square Enix used the Final Fantasy VII 25th Anniversary stream to confirm the Remake project as three parts—Remake (2020), Rebirth (2024), and an un‑titled third entry—establishing the trilogy structure and team continuity under director Naoki Hamaguchi. [4]

On February 29, 2024, Square Enix shipped Final Fantasy VII Rebirth on PS5, reinforcing that the project’s fidelity targets—full performance capture, open‑area traversal, and orchestral score—push each entry into “major release” territory rather than remaster scale. [3]

On May 13, 2024, Square Enix told investors it would pursue a multiplatform strategy and tighten greenlighting after recognizing impairment losses tied to projects that missed expectations, a policy that directly affects how a four‑ or five‑part remake saga would be evaluated. [2]

Why it matters

Multi‑part remakes translate into multi‑year capital commitments: FFVII Remake hit on April 10, 2020, and Rebirth arrived on February 29, 2024, a 3.9‑year gap that implies large‑team burn rates sustained over half a decade per two entries. [1][3]

Square Enix’s May 2024 reset—consolidating development, revising platform strategy, and booking extraordinary losses—signals sharper hurdle rates for greenlighting any remake that could sprawl across an entire console generation (PS5/Xbox Series era) and into the next. [2]

For players, four–five installments mean narrative fragmentation across 10–14 years; that’s multiple hardware transitions, shifting OS SDKs, and the real risk that Part 1 players (2020) don’t persist through Part 4 or Part 5 a decade later. [1][3]

Original analysis

Final Fantasy remakes are colliding with three hard constraints: scope, cadence, and platform breadth. Here’s the concrete read, with math, a 2×2, a historical analogue, and stakeholder stakes.

  1. Back‑of‑envelope timeline math using shipped dates
  • Known ship dates:
    • Final Fantasy VII Remake: April 10, 2020. [1]
    • Final Fantasy VII Rebirth: February 29, 2024. [3]
  • Measured interval: 2020‑04‑10 to 2024‑02‑29 ≈ 3 years 10 months (about 3.9 years). Average cadence target for a third entry that shortens a bit with asset reuse is ~3.0–3.5 years in practice; call 3.5 years the working figure anchored on observable history. [1][3]
  • If a hypothetical FF6 project truly needed 4 parts at that scope, the span from Part 1 to Part 4 equals three intervals: 3 × 3.5 ≈ 10.5 years; 5 parts equals four intervals: 4 × 3.5 ≈ 14 years. That horizon exceeds a typical console generation (7–8 years) and approaches two, stressing team continuity and audience retention.
  1. A 2×2 for FF remakes: Ambition vs. Cadence
  • High Ambition / Fast Cadence: Physics bites; scope creep and slippage multiply.
  • High Ambition / Slow Cadence: FF6‑at‑FF7R fidelity in 4–5 parts; you invite platform churn, decade‑long waits, and marketing fatigue.
  • Low Ambition / Fast Cadence: HD‑2D‑scale reinterpretations, selective 3D setpieces, modern UI/UX, and targeted spectacle; healthier margins and faster shipping, proven by Dragon Quest III HD‑2D’s 2024 execution. [6]
  • Low Ambition / Slow Cadence: Lowest reward; highest boredom.

Square Enix’s 2024 policy shift away from platform bets that over‑constrain revenue makes the High Ambition / Slow Cadence quadrant the riskiest for a remake slate. [2]

  1. Historical analogue: episodic gravity wells
    Valve’s Half‑Life 2 plan shipped Episode One on June 1, 2006, and Episode Two on October 10, 2007, then stalled; the promised Episode Three never arrived, and the brand hibernated until 2020’s Half‑Life: Alyx. The lesson: episodic roadmaps that outlive toolchains, teams, and platforms collapse under their own gravity. A four‑ or five‑part FF6 at AAA scale risks the same dynamic. [5]

  2. Named‑stakeholder breakdown—who wins, who sweats

  • Creative Business Unit I (Tokyo): Wrapping the FF7 trilogy at high quality by ~2027 and moving Naoki Hamaguchi to the next mainline FF preserves leadership momentum and avoids a 10–14 year treadmill. [3][4]
  • Square Enix Holdings (Tokyo): After May 2024 impairments, finance prefers shorter cycle times, clearer LTV, and multiplatform reach; four‑ or five‑part megaprojects tie up QA, localization, and marketing capacity across a decade. [2]
  • Platform holders (Sony/Microsoft): Timed exclusivity can juice 12–24‑month windows, but Square Enix’s 2024 stance reduces single‑platform lock‑ins, shifting negotiations toward marketing beats and content bundles rather than multi‑year content silos. [2]
  • Team Asano (HD‑2D group): Proven pipelines on Octopath Traveler (2018/2020) and Dragon Quest III HD‑2D (2024) let Square Enix slot mid‑scope remakes on 18–30‑month cadences without starving flagship teams. [6]
  1. Contrarian read: accept “fragmentation,” design for it
    Design a four‑part FF6 but price and package like TV seasons: shorter entries (~20–25 hours), annual cadence, and shared tech across PS5/Xbox/PC; if and only if Square Enix matches a sports‑game‑style ship rhythm (e.g., Q4 every year) and locks a five‑year vendor plan for QA and localization, the “episodic gravity” penalty shrinks. The catch is sustaining a one‑year interval at high fidelity, which Square Enix has not demonstrated on console RPGs since the PS2 era.

What others are missing

The underrated cost driver is the test and localization matrix scale: FFVII Remake Intergrade’s PC page lists 13 interface/subtitle languages (with full audio in 2), and a three‑platform launch multiplies base text QA to at least 39 configuration paths before DLC, patches, and region‑specific SKUs get added. Multiply that across four entries and you inflate QA hours, VO continuity contracts, and patch certification runs by low‑six figures per entry, which erodes margins even if development headcount stays flat. [7]

What to watch next

  1. By March 31, 2027, Square Enix’s annual report will formalize a multiplatform KPI (e.g., share of new launches shipping day‑and‑date on ≥2 console ecosystems plus PC), reflecting the May 2024 strategy. This is falsifiable via the FY2026 or FY2027 investor materials. [2]

  2. By December 31, 2026, Square Enix will announce at least one “HD‑2D‑scale” remake of a 3D‑era Square or Enix RPG (1995–2002 vintage) under a Team Asano production banner, with a target ship window within 18 months of reveal. This is falsifiable via a Nintendo Direct, TGS stage, or Square Enix Presents. [6]

  3. By June 30, 2027, the third FFVII Remake entry will have its platforms named publicly, and the announcement will include at least two of PS5, Xbox Series X|S, and PC day‑and‑date, aligning with the 2024 multiplatform strategy. This is falsifiable via official trailers or platform blogs. [2][4]

Sources

[1] PlayStation Blog — “Final Fantasy VII Remake launches April 10, 2020” — contributes: authoritative ship date for Part 1 used in cadence math.

[2] Square Enix Holdings IR (May 2024) — FY2023/2024 results briefing and management policy — contributes: multiplatform‑first strategy, restructuring, and impairment context for greenlighting.

[3] Square Enix — “Final Fantasy VII Rebirth launches February 29, 2024” — contributes: authoritative ship date for Part 2 used in cadence math.

[4] Gematsu (June 2022) — Coverage of FFVII 25th Anniversary stream confirming a three‑part Remake project — contributes: trilogy structure and leadership continuity context.

[5] Steam (store.steampowered.com) — Half‑Life 2: Episode One (2006‑06‑01) and Episode Two (2007‑10‑10) release pages — contributes: episodic cadence and stall analogue with dated entries.

[6] Square Enix — Dragon Quest III HD‑2D (2024) official materials — contributes: concrete example of a scope‑managed remake template shipping in 2024.

[7] Steam — Final Fantasy VII Remake Intergrade PC store page — contributes: language support list used to quantify base QA and localization matrix size.


Related update: We recently published an article that expands on this topic: read the latest post.

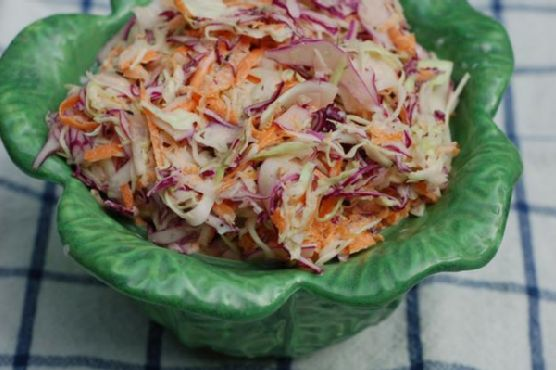
Classic Creamy Coleslaw | Made by Meaghan Moineau

So there I was, standing in my kitchen on a Tuesday evening, staring at the lovely head of purple cabbage I had impulsively bought over the weekend. It was one of those days when you feel like the fridge is a puzzle, and you’re just not sure how all the pieces fit together. The pantry was looking sparse, and there was a definite need for a dinner side that wasn’t just steamed broccoli…again. Enter: Classic Creamy Coleslaw. This recipe is a lifesaver because it’s one of those dishes that hits the mark every time — creamy, tangy, and just the right amount of crunch to elevate any meal. Plus, it’s quick to whip up and, let’s be honest, who doesn’t love a dish that lets the veggies do all the colorful talking?

Jump to Recipe

What You’ll Need

The beauty of this coleslaw is its simplicity. Chances are you already have most of these hanging out in your kitchen — if not, they’re easy grabs during your next grocery run.

  • Red cabbage
  • Green cabbage
  • Carrot
  • Onion
  • Apple cider vinegar
  • Mayonnaise
  • Dijon mustard
  • Caraway seeds
  • Sugar
  • Sea salt
  • Several grinds of black pepper

How to Make Classic Creamy Coleslaw

  1. Start by grabbing your trusty mandoline or a really sharp knife. You’re going to slice up the red and green cabbage, carrot, and onion paper-thin. Think of it as a meditation exercise — there’s something satisfying about seeing those vibrant veggies pile up in a bowl.
  2. In a separate small bowl, combine the apple cider vinegar, mayonnaise, Dijon mustard, caraway seeds, sugar, sea salt, and black pepper. Stir everything together until smooth; the sugar and salt should be fully dissolved so the dressing is creamy without any gritty bits.
  3. Toss your sliced veggies with the dressing in a medium-sized bowl. Make sure every slice gets a good coating. It’s like wrapping each piece in a creamy hug. Once everything is well-mixed, you can serve it right away or let it chill for a bit in the fridge to let those flavors meld together even more.

Cook’s Notes

This coleslaw is as forgiving as it is delicious. If you find the cabbage a bit stiff, letting the coleslaw sit in the fridge for an hour will soften it up just right. It’s perfect for making ahead — you can prepare the veggies and dressing separately and toss them together when you’re ready to serve. Leftovers hold up well for a couple of days in the fridge, but you might notice it gets a bit watery. Just give it a quick toss, and it’s as good as new. Be careful with the amount of salt; remember, you can always add more, but once it’s in, there’s no going back!

Make It Your Own

  • Herb it Up: Add a handful of chopped fresh parsley or dill for a herbal twist.
  • Go Nutty: Toss in some toasted sunflower seeds or slivered almonds for added crunch and nuttiness.
  • Tropical Vibes: Swap the carrot with shredded pineapple for a sweet, tropical flavor.
  • Spicy Kick: Add a teaspoon of sriracha or a pinch of cayenne to the dressing for some heat.

If you give this classic creamy coleslaw a try, I’d love to hear how it turns out for you — drop a comment or tag me on social! Your kitchen wins and tweaks are what make cooking such a fun adventure. Enjoy the crunch!

Related update: Classic Creamy Coleslaw

Oreo Cookies & Cream No-Bake Cheesecake | Made by Meaghan Moineau

Okay, picture this: it’s a Friday night, and you’ve got a serious craving for something sweet and indulgent. But here’s the catch — it’s been a long week and the idea of turning on the oven feels like too much. Enter the Oreo Cookies & Cream No-Bake Cheesecake. This little beauty is so ridiculously easy (I promise, you can make it in your sleep), and yet it feels like a decadent treat you’d reserve for special occasions. It’s creamy, rich, and loaded with cookies — what more could you want? Plus, no oven means you can keep your kitchen cool and still get your cheesecake fix. Ready to dive into this creamy dream? Let’s go!

Jump to Recipe

What You’ll Need

The ingredients for this cheesecake are as simple as they come, and chances are you already have most of them in your pantry. Seriously, this is as close to a pantry party as it gets!

  • Oreo cookies
  • Cream cheese
  • Heavy cream
  • Lemon juice
  • Salt
  • Sugar
  • Vanilla powder

How to Make Oreo Cookies & Cream No-Bake Cheesecake

  1. Start by beating the heavy cream in a mixing bowl until medium peaks form. You’ll know it’s ready when it holds its shape but still looks silky and luscious. Set it aside for the magic that’s coming next.
  2. In another bowl, combine the cream cheese, sugar, salt, vanilla powder, and lemon juice. Use a stand mixer with a paddle attachment or a hand beater if that’s your jam. Beat until the mixture is as smooth as a jazz playlist on a Sunday afternoon (around 3-5 minutes). If you’re using a hand beater, just zen out; it might take a bit longer.
  3. Gently add the cream cheese mixture to the whipped cream, beating until they’re fully incorporated. It should look like a cloud made of dreams and cream — no lumps in sight.
  4. Now comes the fun part: fold in the crushed Oreo cookies. Be gentle, like you’re working with a kitten or a delicate love note.
  5. Fill your chosen pan with the mixture, creating a slight mound in the center. Don’t worry if it looks a bit hilly; it’ll settle and look perfect after chilling.
  6. Refrigerate for at least 6 hours, or if you can handle the suspense, overnight. This is where the cheesecake sets into its beautiful self.
  7. Once set, take the cheesecake out and smooth the top to level it with the edges. It’s like putting the final brushstroke on a masterpiece.
  8. Serve with a dollop of whipped cream and garnish with mini Oreos for that extra touch of cuteness and crunch.

Cook’s Notes

  • For the creamiest texture, ensure your cream cheese is at room temperature before you start. It’ll blend so much better with the other ingredients.
  • This cheesecake is a make-ahead champ. Prepare it the night before and let it do its thing in the fridge while you dream sweet dreams.
  • Store leftovers (if there are any) covered in the refrigerator for up to 3 days. But honestly, I’ve never seen it last that long.
  • Avoid overmixing the batter once the Oreo cookies are added — you want those delightful chunks of cookie goodness in every bite.

Make It Your Own

  • Swap the Oreos for your favorite cookie — think chocolate chip or even ginger snaps for a spicy twist.
  • Add a swirl of peanut butter or Nutella for an extra layer of flavor. Just ribbon it through the batter before chilling.
  • For a fruity touch, fold in some fresh raspberries or strawberries with the Oreos. Berry and cream is always a win.
  • Get fancy with the crust by adding crushed pretzels for a sweet and salty vibe. Just press the crushed pretzels into the base of your pan before adding the cheesecake filling.

If you try this, I’d love to hear how it turns out — drop a comment or tag me! I hope this cheesecake brings you as much joy as it does for me. Here’s to no-bake desserts and sweet, sweet indulgence!

Related update: Oreo Cookies & Cream No-Bake Cheesecake

Related update: Fresh Fig, Walnut, Rosemary Upside Down Cake And A Crisp Citrusy Chardonnay

Spicy Black-Eyed Pea Curry with Swiss Chard and Roasted Eggplant | Made by Meaghan Moineau

It was one of those days when everything felt like chaos. You know the kind — the laundry isn’t done, your phone won’t stop buzzing, and you’re pretty sure there’s a science experiment growing in the back of your fridge. I wanted something comforting but not the kind that puts you in a food coma. Enter this Spicy Black-Eyed Pea Curry with Swiss Chard and Roasted Eggplant, a dish that’s fiery, hearty, and soul-soothing without requiring a culinary degree. You start with roasted eggplant that practically melts in your mouth and pair it with earthy black-eyed peas. The spices? Oh, they’re just the thing to lift any gloomy day. Let’s not even talk about how good your kitchen will smell. Trust me, you’ll want to make this more than once.

Jump to Recipe

What You’ll Need

Just a handful of ingredients, really, and chances are you already have most of them tucked away in your pantry. Here’s what you’ll need:

  • Cooked dried black-eyed peas
  • Curry powder
  • Garam masala
  • Italian globe eggplant
  • Ground coriander
  • Ground cumin
  • Ground mustard powder
  • Lemon (juice)
  • Olive oil
  • Red and green chilies
  • Sea salt
  • Shallots
  • Trimmed Swiss chard
  • Tomato
  • Water

How to Make Spicy Black-Eyed Pea Curry with Swiss Chard and Roasted Eggplant

  1. Rinse the black-eyed peas and soak them in several inches of water for at least 6 hours or overnight. When ready, drain and rinse them, then put them in a large saucepan and cover with fresh water. Bring it to a boil, reduce to a simmer, cover, and let them cook for 40 to 60 minutes. Aim for tender beans that aren’t mushy.
  2. As your beans are cooking, prep your eggplant. Cut off the stem and bottom edge, then halve it lengthwise. Score each half diagonally without cutting through the skin, sprinkle with salt, and let it sit to release water for 40 minutes. Rinse and gently squeeze out excess moisture.
  3. Brush the eggplant with olive oil and place in a roasting pan. Bake in a preheated 400°F oven until it looks collapsed and wrinkly. This should take about 25-30 minutes. Once done, let it cool a bit, scoop out the flesh, and drain any excess water it may have.
  4. In the same pot you used for the peas, heat some olive oil over medium heat. Toss in the shallots and chilies, sautéing for about 2-3 minutes until aromatic and just slightly caramelized.
  5. Add your spices: curry powder, garam masala, ground coriander, cumin, and mustard powder. Stir constantly for about a minute until the mixture is fragrant, a warm, spicy aroma that fills your kitchen.
  6. Add the chopped tomato and cook for a few minutes until it starts to break down and meld with the spices. Now, add the roasted eggplant and black-eyed peas, stirring to combine everything.
  7. Pour in a few tablespoons of water, then gradually add in the Swiss chard. Stir and cook until the greens are wilted and everything is well combined.
  8. Add lemon juice and sea salt to taste, letting everything simmer for just a couple more minutes. Take it off the heat, cover, and let it rest for a few minutes before serving.

Cook’s Notes

If you’re new to cooking with black-eyed peas, be patient with the soaking and cooking process. It’s easy to overcook them, so keep an eye out for that perfect tenderness. For the eggplant, salting it beforehand removes bitterness and excess moisture, making the roasting process more efficient. If making this dish ahead, note that the flavors deepen overnight, making leftovers something to look forward to. I usually store it in an airtight container in the fridge for up to three days. Reheat on the stove with a splash of water to revive its saucy goodness.

Make It Your Own

Feel free to riff on this recipe with these variations:

  • Swap the Swiss chard for kale or spinach if that’s what you have on hand.
  • Turn up the heat by adding more chilies or a pinch of cayenne pepper.
  • For a creamier texture, stir in a bit of coconut milk right before serving.
  • Use chickpeas instead of black-eyed peas for a slightly different, yet equally delicious, experience.

If you try this, I’d love to hear how it turns out — drop a comment or tag me! Each time you make it, it might just end up tasting a little different, but that’s the beauty of home cooking, don’t you think? Enjoy your cozy bowl of goodness!

Related update: Spicy Black-Eyed Pea Curry with Swiss Chard and Roasted Eggplant

Related update: Easy Chicken Tikka Masala

Related update: Italian Tomato and Mozzarella Caprese

Spence Retires After Tszyu Defeat | Analysis by Brian Moineau

TL;DR

  • Errol Spence Jr. retired in the ring after Tim Tszyu outpointed him 118-110, 117-111, 117-111 at Qudos Bank Arena in Sydney; it caps a 14-year pro run shaped by a 2019 Dallas car crash, a 2021 retina tear, and the 2023 Crawford TKO9 loss [1][5][6].
  • Tszyu’s relaunch at 160 pounds is less about dominance and more about brand repair and matchmaking bargaining power in a division with aging titlists and accessible mandatories, including the WBA route via Erislandy Lara [2][3][9].
  • The business told its own story: a Sydney card packaged for a 9 p.m. ET start and priced at $79.99 on Prime Video (with DAZN carriage noted) signals PBC’s PPV pipeline now prioritizes U.S. primetime even from Australia [3][8][4].

What the source said

Bad Left Hook reported that Tim Tszyu (31) beat Errol Spence Jr. (36) by unanimous decision in Sydney after Spence returned from a three-year layoff and jumped two divisions from 147 to 160 pounds; the judges’ cards were 117-111, 117-111, and 118-110 [1]. Tszyu said 160 is now his home and that beating Spence “tops any world title,” while Spence praised Tszyu and said it was “time to go home… and start a new life,” confirming retirement with an emphasis on health and finances being intact [1]. The piece framed the result as clear and dignified rather than brutal and argued there was no responsible case to urge Spence to continue [1].

Why it matters

The stakeholders extend beyond Spence and Tszyu to rights-holders who need credible PPV main events and to Australia’s No Limit ecosystem that can stage arena shows locally while feeding a U.S. 9 p.m. ET primetime window on Prime Video/DAZN [4][8][3]. Spence’s exit removes a proven U.S. PPV A-side from rotation, creating room—and pressure—to elevate Tszyu as a middleweight draw capable of cross-market events between Sydney and U.S. buyers [4][8].

For fighters in their mid-30s weighing comebacks, Spence’s retirement is a rare health-first precedent in a sport that often pushes “one more payday”; his 2019 Ferrari crash in Dallas, 2021 detached retina, and 2023 TKO9 to Terence Crawford make a 2026 exit both pragmatic and humane [5][6][1].

Original analysis

What Errol Spence’s retirement signals for boxing’s risk-reward math

The consensus read says, “Spence stayed too long and Tszyu retired him.” My contrarian view: Spence timed his exit correctly, and Tszyu’s win is more about narrative repair than an elite 160-pound breakthrough.

  • Spence’s arc—near-fatal car crash in 2019, a retina injury in 2021, and a ninth-round TKO to Crawford in 2023—put him on a narrow ledge where diminishing returns met escalating risk; stepping away at 36 with a 28-2 (22 KOs) ledger and clear speech on camera is the rare smart choice in modern boxing, especially for a former three-belt welterweight unified champion who already headlined a 2023 super fight [5][6][1][2].

  • Tszyu needed a clean, professional win to reset at 160; he got it with wide cards (118-110, 117-111, 117-111) against a smaller opponent moving up two divisions on return from a three-year layoff, which is strong brand maintenance but not proof he rules a division that still includes active beltholders like WBA’s Erislandy Lara in his 40s [1][9][2].

Named-stakeholder breakdown (what this means for them):

  • PBC/Prime Video: Proof-of-concept for international PPV slotted to U.S. primetime (9 p.m. ET) at $79.99, a replicable template for Australia-based shows that feel like U.S. Saturday nights without U.S. venue costs [8][4].
  • No Limit Boxing (Australia): With Tszyu’s local drawing power and Qudos Bank Arena (Sydney SuperDome) capacity around 18,000 for sport (up to ~21,000 for concerts), their events can “travel” via PPV while preserving the Australian gate and sponsorship upside [7][2].
  • WBA/Erislandy Lara: A Tszyu shot at 160 pounds is suddenly marketable; Lara remains an active titlist, and a “name vs. name” title fight is the most makeable near-term play for Tszyu’s 160 campaign [9][2].
  • Terence Crawford: Spence’s retirement further burnishes the finality of Crawford’s 2023 TKO9; as Spence exits, that result reads as decisive prime-vs-prime separation on a Nevada commission ledger [6].

Back-of-envelope calculation:

  • If Tszyu vs. Lara lands on U.S. Prime PPV at $79.99 and does a conservative 200,000 U.S. buys, top-line PPV revenue is about $16.0 million (200,000 x $79.99 ≈ $15,998,000) before splits, fees, foreign rights, and gate; that level greenlights older-name matchmaking at 160 even without a U.S. arena sellout [8].
  • Arena + time-zone arbitrage: Qudos Bank Arena’s sports capacity is ~18,000 (concert max ~21,000); a healthy Sydney gate layered on top of a 9 p.m. ET PPV can outperform a lukewarm U.S. gate at a smaller venue while keeping production anchored to Australia’s cost base [7][8].

2×2 risk-mileage typology (age vs. accumulated damage):

  • Younger/Lower mileage: Tim Tszyu (31) at 160 after an active 2024–2026 run; commercial upside with measured opposition [2][3].
  • Younger/Higher mileage: N/A among named principals here; this quadrant usually houses pressure fighters with recent wars.
  • Older/Lower mileage: Erislandy Lara (in his 40s) with a controlled, economical style that has aged better than most at 160 [9].
  • Older/Higher mileage: Errol Spence Jr. (36) given the 2019 crash, 2021 retina, and 2023 TKO9, which heighten risk beyond typical mid-30s decline [5][6].

Historical analogue:

  • Sugar Ray Leonard’s late-era returns—Terry Norris in 1991 and Hector Camacho in 1997—show how legends get lured back, then battered into retirement, again; Spence’s immediate “for sure” retirement in Sydney in 2026 tracks closer to Andre Ward’s 2017 exit at age 33 than to Leonard’s yo-yo comebacks at 34 and 40 [1][10][11].

What others are missing

The specific, under-discussed angle is PPV time-zone engineering: this Sydney show was built to start at 9 p.m. ET and retail at $79.99 on Prime in the U.S. (with DAZN carriage noted), which means daytime Australia production was calibrated for U.S. nighttime monetization; Australia supplies the gate, local broadcast partners, and scenic staging, while the U.S. gets a prime-time PPV SKU without paying U.S. arena rent—cost discipline masquerading as global reach [8][3][4].

What to watch next

  1. By March 2027, Tszyu fights for a middleweight world title—most likely the WBA belt versus Erislandy Lara—rather than pursuing the toughest unified path at 160.
  2. Through July 2027, Spence remains retired with no licensed pro bout announced and appears in on-camera or advisory roles instead of entering a training camp.
  3. By mid-2027, PBC/Prime schedules at least one more Australia-based PPV calibrated to a 9 p.m. ET start, featuring Tszyu or another Oceania headliner.

My take

Spence chose dignity over delusion in 2026, and that reads as the right call after Crawford’s TKO9 in 2023 under the Nevada commission’s record [6]. Sydney did not “retire” him; life and timing did, and he listened on the first try [1]. Tszyu proved he can headline a 160-pound PPV business plan built on smart matchmaking, time-zone math, and a capable brand, but true validation means chasing a live belt that talks back—Lara’s WBA version at 160 pounds [9][8]. The ledger is simple: Tszyu repaired his commercial value, and Spence preserved his health; that outcome is rare in boxing’s 2020s incentive structure [2][4].

Sources

  1. ‘Time to go home’: Errol Spence announces retirement after loss to Tim Tszyu — Bad Left Hook (https://www.badlefthook.com/boxing-results/117511/time-go-home-errol-spence-announces-retirement-after-loss-tim-tszyu-boxing-news-2026) — Ringside report with scorecards, ages, quotes, and immediate retirement confirmation.
  2. Errol Spence Jr announces retirement after Tim Tszyu claims biggest career win in Sydney — Sky Sports (https://www.skysports.com/boxing/news/12183/13567040/errol-spence-jr-announces-retirement-after-tim-tszyu-claims-biggest-career-win-in-sydney) — Confirms scores, venue, and Tszyu’s stated move to 160 as his new home.
  3. Tim Tszyu wins a battle of broken soldiers, and Errol Spence Jr heads into the sunset — The Guardian (https://www.theguardian.com/sport/2026/jul/26/tim-tszyu-errol-spence-fight-retirement) — Analytical recap noting PPV pricing/platforms and post-prime context.
  4. Prime Video and Premier Boxing Champions announce new multiyear rights agreement beginning in 2024 — PBC Press Center (https://www.presscenter.premierboxingchampions.com/press-releases/prime-video-and-premier-boxing-champions-announce-new-multiyear-rights-agreement) — Establishes Prime Video’s PPV distribution role for PBC in the U.S. rights stack.
  5. Errol Spence Jr. seriously injured in Dallas car crash — ESPN (https://www.espn.com/boxing/story/_/id/27812496/errol-spence-jr-seriously-injured-dallas-car-crash) — Documents Spence’s 2019 Ferrari crash and hospitalization in Texas.
  6. Boxing show results, July 29, 2023 (Crawford TKO9 Spence) — Nevada State Athletic Commission (https://boxing.nv.gov/uploadedFiles/boxingnvgov/content/results/2023_Results/07-29-23_Redacted.pdf) — Official bout result underpinning the Crawford–Spence outcome in Las Vegas.
  7. Sydney SuperDome (Qudos Bank Arena) capacity profile — Austadiums (https://www.austadiums.com/stadiums/sydney-superdome) — Provides the ~18,000 sports capacity and ~21,000 concert maximum for venue economics.
  8. Prime Video PPV listing: Spence Jr. vs. Tszyu — Amazon (https://www.primevideo.com/detail/0QCQ2WIJDYKSCHZGUIQ4I8FPGT) — Confirms 9 p.m. ET timing and $79.99 PPV pricing for the U.S. SKU.
  9. Lara retains WBA middleweight title vs. Johan González — World Boxing Association (https://www.wbaboxing.com/boxing-news/erislandy-lara-set-to-defend-his-wba-middleweight-title-against-johan-gonzalez-2) — Verifies Lara’s current status and continued activity at 160 pounds.
  10. Andre Ward announces retirement at 33 — The Guardian (https://www.theguardian.com/sport/2017/sep/21/andre-ward-retirement) — Historical analogue for a top fighter exiting on his own terms in 2017.
  11. “Leonard… definitely over” after Camacho TKO — The Washington Post (https://www.washingtonpost.com/archive/sports/1997/03/03/leonard-for-sure-my-career-is-definitely-over/c2c24c31-6d94-4e35-864c-ae8550ff4e15/) — Cautionary precedent on late-career comebacks ending badly in 1997.


Related update: We recently published an article that expands on this topic: read the latest post.


Related update: We recently published an article that expands on this topic: read the latest post.


Related update: We recently published an article that expands on this topic: read the latest post.

Oatmeal Pancake (Yummy & Heart Healthy) | Made by Meaghan Moineau

The other morning, as the autumn leaves whispered secrets through the slight breeze outside my window, I found myself in a breakfast conundrum. You know, the kind of morning where you crave something different but comforting, something that feels like a warm hug yet won’t leave you feeling weighed down. Enter: Oatmeal Pancakes. These beauties are both wholesome and satisfying, perfect for those busy weekdays when you still want to start your day with intention. They’ve quickly become my go-to because they’re not just heart-healthy; they’re heartwarming. Plus, they’re surprisingly simple to whip up. Seriously, you might already have everything you need in your kitchen!

Jump to Recipe

What You’ll Need

I love that these pancakes come together with just a handful of ingredients, most of which are probably chilling in your pantry or fridge right now.

  • Irish oats
  • Fat-free milk
  • Whole wheat multi-purpose flour
  • Baking powder
  • Egg whites
  • Agave (or sugar, if that’s your jam)
  • Blueberries
  • 100% maple syrup, for serving

How to Make Oatmeal Pancake (Yummy & Heart Healthy)

  1. Start by soaking your irish oats in the fat-free milk for a good 3-4 hours, or even better, let them get cozy overnight in the fridge. This is where the magic begins, softening up those oats for the perfect pancake texture.
  2. When you’re ready to get cooking, add the egg whites, whole wheat flour, baking powder, and agave to your oat and milk mixture. Blend everything together in a food processor or coffee grinder until you’ve got a smooth batter.
  3. Heat up a non-stick pan over medium heat. No need for any greasing here—these pancakes are low-maintenance!
  4. Pour 5 to 7 spoonfuls of your batter onto the heated pan. You’ll know it’s time to flip when the edges start to bubble and the bottom is a dreamy golden color.
  5. Flip and let the other side cook for another minute or two until puffed up and beautifully golden.
  6. Serve them warm, drizzled with 100% pure maple syrup, and maybe a handful of fresh blueberries if you’ve got them. Dig in and enjoy the cozy vibes!

Cook’s Notes

These pancakes are pretty forgiving, which I love. If you’re not a fan of soaking oats overnight, a few hours will do the trick, but the longer soak really gives the best texture. Once cooked, they’ll keep in the fridge for a couple of days. Just pop them in the microwave or toaster to reheat. Oh, and if you’re making these ahead, you can freeze them! Just layer parchment paper between each pancake and seal them in a freezer bag. Easy peasy.

Make It Your Own

  • Boost the protein by swapping half of the egg whites for a scoop of your favorite protein powder.
  • Not a fan of agave? Use honey or a tablespoon of brown sugar for a deeper sweetness.
  • For a nutty twist, throw in a handful of chopped nuts like almonds or walnuts to the batter.
  • Make it a berry bonanza by adding raspberries or strawberries instead of blueberries.

If you try this, I’d love to hear how it turns out — drop a comment or tag me! Enjoy your breakfast adventure and let these pancakes be your morning muse.

Related update: Oatmeal Pancake (Yummy & Heart Healthy)

Related update: Spicy Black-Eyed Pea Curry with Swiss Chard and Roasted Eggplant

Related update: Home made organic maple granola with fresh fruit

Butternut Squash Soup (In Half An Hour!) | Made by Meaghan Moineau

Picture this: it’s a chilly Tuesday evening, and I’ve just gotten home from a day that felt like moving through molasses in January. The kind of day where you just want something warm and comforting, ideally with as minimal effort as possible. Cue my go-to butternut squash soup, which not only warms the soul but also manages to be delightfully easy and quick. The beauty of this soup lies not just in its velvety texture but in how it brings together humble ingredients—like canned black-eyed peas and hearty collard greens—into something truly soothing. Plus, it’s ready in just about thirty minutes, which means you can have it on the table faster than it takes to decide on a Netflix show. Trust me, this one’s a keeper.

Jump to Recipe

What You’ll Need

The ingredient list for this soup is refreshingly straightforward. Chances are, you already have most of this in your pantry:

  • Butternut squash, peeled and cubed
  • 2 tablespoons of olive oil
  • 1 large yellow onion, chopped
  • Vegetable broth – about 4 cups
  • 1 small piece of kombu (about 3 inches)
  • 1 can of black-eyed peas, drained and rinsed
  • 1 cup of cooked quinoa
  • A bunch of collard greens, chopped
  • A dash of ground nutmeg
  • Salt and pepper to taste

How to Make Butternut Squash Soup (In Half An Hour!)

  1. In a large pot, heat the olive oil over medium heat. Toss in the chopped onion and sauté until soft and translucent, about 5 minutes. You’ll know it’s ready when your kitchen smells like sweet, gentle onions.
  2. Add the cubed butternut squash to the pot and give it a good stir. Let it sauté for a couple of minutes, allowing the flavors to mingle.
  3. Pour in the vegetable broth and tuck in the piece of kombu. Bring the mixture to a boil, then reduce the heat to a simmer. Let it cook until the squash is tender, about 15 minutes. The squash should be easy to pierce with a fork.
  4. Using a slotted spoon, remove the squash pieces and blend them until smooth. You can use a stand blender or an immersion blender—whichever makes you feel like a kitchen ninja.
  5. Return the pureed squash to the pot and stir in the black-eyed peas and cooked quinoa. Let it all get cozy for a few minutes.
  6. Add the collard greens and cook for another 5 minutes or until they’re soft but still vibrant green.
  7. Finally, season the soup with nutmeg, salt, and pepper to taste. Give it a final stir, and it’s ready to serve!

Cook’s Notes

This soup keeps well in the fridge for about three days, making it a great option for meal prep. Just store it in an airtight container, and you’re good to go. If you’re planning to freeze it, I suggest doing so before adding the collard greens—just toss them in when you’re reheating. One common mistake is overcooking the squash; keep an eye on it so it doesn’t turn to mush before you blend it. And yes, kombu might sound exotic, but it’s just there to add a subtle umami note. You can find it in most health food stores or Asian markets.

Make It Your Own

  • Swap the butternut squash with sweet potatoes for an equally delicious twist.
  • Try kale instead of collard greens if that’s what you have on hand.
  • For a protein boost, add in some shredded chicken or crispy tofu.
  • If you’re out of quinoa, barley or brown rice work beautifully too.

If you try this, I’d love to hear how it turns out—drop a comment or tag me! This recipe is all about warming up those chilly evenings with a bowl full of comfort. Enjoy!

Related update: Butternut Squash Soup (In Half An Hour!)

Related update: Make Olive Garden’s Delicious Pasta Fagioli At Home

Smokey Rainbow Chili | Made by Meaghan Moineau

Picture this: it’s a chilly Tuesday evening. You’ve just walked in the door, still wrapped in the day’s chaos, and your stomach growls like a bear waking from hibernation. The idea of cooking anything feels like climbing Mt. Everest, but the thought of another uninspired takeout meal? No, thank you. This Smokey Rainbow Chili is my go-to solution for such nights. It’s like a warm, comforting hug in a bowl, packed with color and flavor that will light up even the dreariest day. It’s hearty without being heavy, bursting with smoky, spicy goodness that’ll make you forget how hectic your day was. Plus, it’s practically a one-pot wonder, which means fewer dishes to argue with later.

Jump to Recipe

What You’ll Need

With this recipe, there’s a good chance you’ve already got most of what you need chilling in your pantry or fridge. Here’s what makes this dish special:

  • Olive oil – for that smooth start.
  • Zucchini – adds a fresh, green touch.
  • Red bell pepper – sweet and colorful.
  • Orange bell pepper – sunshine in vegetable form.
  • Diced fresh jalapeno pepper – packs just the right amount of heat.
  • Garlic – because garlic is life.
  • Onion – the aromatic base.
  • Canned stewed tomatoes – the juicy heart of the chili.
  • Canned tomato paste – thickens everything up nicely.
  • Canned black beans – protein and fiber heroes.
  • Canned whole kernel corn – little pops of sweetness.
  • Canned red kidney beans – classic chili staple.
  • Smoked paprika – the secret to the smoky depth.
  • Chili powder – brings that familiar chili warmth.
  • Dried oregano – for a hint of the Mediterranean.
  • Black ground pepper – always essential.
  • Cayenne pepper – for a fiery kick.

How to Make Smokey Rainbow Chili

  1. Start by heating the olive oil in a large pot over medium-high heat. You want the oil to shimmer like a little lake of liquid gold.
  2. Stir in the zucchini, red bell pepper, orange bell pepper, jalapeno, garlic, and onion. Cook them for about 5 minutes, just until they’re tender and the onion is translucent. Your kitchen will smell amazing.
  3. Add the canned stewed tomatoes with all their liquid, along with the tomato paste, black beans, corn, and kidney beans. Give it all a good stir to combine.
  4. Season generously with smoked paprika, chili powder, dried oregano, black pepper, and a dash of cayenne. Adjust the cayenne to your spice tolerance—remember, you can always add more but can’t take it back!
  5. Bring the pot to a boil, then immediately reduce the heat to low. Let it simmer for about an hour, stirring occasionally. The longer it simmers, the richer the flavors get. If you cut your veggies a bit larger, you might want to let it bubble away a little longer.

Cook’s Notes

This chili has a bit of everything, and that’s why it’s so forgiving. If your veggies are on the larger side, or if you just like your chili thicker, let it simmer a bit longer. And if you’re using meat, make sure to brown it well in the pot first, then set it aside and add it back in after sautéing the veggies for that extra depth of flavor. This dish holds up beautifully in the fridge for up to five days, making it perfect for meal prep. Just pop it in an airtight container, and it’s ready to reheat whenever you need a quick, comforting meal.

Make It Your Own

Here are some ideas to tweak this chili to your taste:

  • Meaty Upgrade: Add browned ground beef or turkey for a heartier version.
  • Vegan Twist: Swap the meat for crispy tofu or tempeh for a plant-based protein boost.
  • Cheesy Top: Stir in shredded cheddar cheese just before serving for extra creaminess.
  • Spice Mix-up: Replace jalapenos with chipotle peppers in adobo sauce for a smoky, spicy punch.

If you try this, I’d love to hear how it turns out — drop a comment or tag me in your foodie pics! Cooking isn’t just about food; it’s about sharing and connecting, so let’s keep the conversation going. Cheers to cozy nights and colorful bowls!

Related update: Smokey Rainbow Chili

Related update: Butternut Squash Soup (In Half An Hour!)