
So, picture this: it’s a chilly Tuesday evening, and I’m staring into my fridge like it’s a portal to another dimension. The day has been a blur, and all I want is a big bowl of something that feels like a cozy blanket. That’s when it hits me: the urge to whip up my “secret” Bolognese sauce. This recipe is my trusty sidekick for nights I want to impress with minimal effort. It’s rich, hearty, and tastes like you’ve been slaving away in the kitchen, but really, it’s just about letting the ingredients do the heavy lifting. By the end of the night, my kitchen smells like a Tuscan villa, and my stress? Vanished. If that sounds like your kind of evening, you’re in the right spot. Jump to Recipe
What You’ll Need
This isn’t your average Bolognese; it’s got layers of flavor thanks to a mix of meats and some surprise seasonings. Chances are you already have most of this.
- Olive oil
- Ground veal
- Ground beef
- Ground pork
- Italian sweet sausage
- Sweet diced Vidalia onions
- Diced carrots
- Garlic cloves
- Fresh oregano
- Red wine
- Fire roasted canned tomatoes
- Canned pureed tomatoes
- Fresh parsley
- Fresh basil
- Granulated sugar
- Salt and pepper
How to Make My “Secret” Bolognese Sauce
- In a large, heavy Dutch oven or stock pot, heat olive oil over medium/high heat. Add the ground veal, careful not to crowd the pot. Cook until it’s browned and has a slight crust. Remove with a slotted spoon to a large bowl.
- Drain all but 2 tablespoons of the fat, add the ground beef, and repeat the browning process. Once browned, add it to the bowl with the veal.
- Repeat with the ground pork, browning it and then adding it to the bowl. Drain all but 2 tablespoons of fat again.
- Brown the Italian sweet sausage in the remaining fat. This is where the magic really starts. Once browned, toss it in with the other meats, but don’t drain the fat this time.
- Add the diced onions and carrots to the pot. Let them cook in that delicious sausage fat until the onions turn translucent and the carrots are softened, stirring occasionally.
- Add minced garlic and fresh oregano. Cook for another 1-2 minutes until everything is fragrant, and your kitchen smells like heaven.
- Pour in the red wine, scraping up any brown bits stuck to the bottom of the pot. Let it simmer for about 2-3 minutes until the wine reduces a bit.
- Return the meat mixture to the pot with the onions and stir to combine everything into a beautiful medley of flavors.
- Add all four cans of tomatoes, stirring thoroughly to blend it all together. At this point, it should look like a vibrant, chunky sauce.
- Stir in fresh parsley, basil, granulated sugar, salt, and pepper. Turn down the heat to low and let it simmer for around 2-3 hours, stirring occasionally. Patience is key here!
- Before serving, always taste the sauce for seasoning. Adjust the sugar, salt, and pepper to suit your taste. This is a big batch, so don’t be shy!
Cook’s Notes
Alright, so a few things: First, you’ll want a pot that’s got some heft to it. A flimsy pot won’t distribute the heat as well, and you’ll miss out on those beautiful browned bits. If you’re making this sauce ahead, it actually tastes even better the next day since the flavors have more time to meld. Just store it in an airtight container in the fridge and it’ll be good for up to 5 days. You can also freeze it for up to 3 months. Just defrost and reheat gently over low heat. And remember, don’t skimp on the simmer time — this is where the sauce goes from good to unforgettable!
Make It Your Own
- Vegetarian Version: Swap all the meats for a mix of mushrooms like portobello and cremini. You’ll still get that meaty texture, and it’s divine with the same seasoning.
- Spicy Kick: Add crushed red pepper flakes when you’re cooking the garlic and oregano for some heat. It’s a great way to add a little zing.
- Extra Veggies: Toss in some diced zucchini or bell peppers along with the onions and carrots for a veggie-packed punch.
- Herb Swap: If you’re out of basil or parsley, try using thyme or rosemary. It’ll give you a slightly different but equally delicious flavor profile.
If you try this, I’d love to hear how it turns out — drop a comment or tag me! Happy cooking and even happier eating!
Related update: My "Secret" Bolognese Sauce
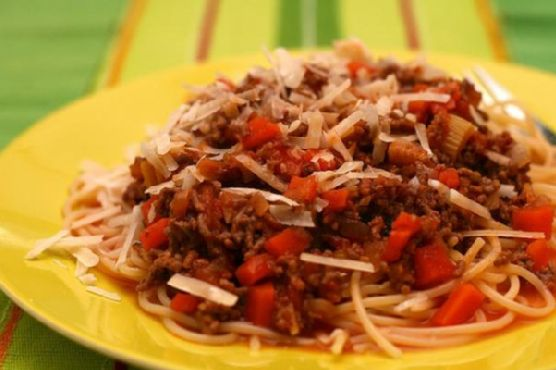
Last Tuesday, I found myself staring at a sorry-looking fridge, wondering how on earth I could whip up a dinner that wouldn’t just be another sad reheated pizza. I wanted something that felt like a hug at the end of a long day but didn’t require a trip to the store. That’s when the idea of Bolognese Sauce hit me like a blast of garlic in hot oil. It’s one of those dishes that feels special but is secretly a cinch if you’ve got some basics on hand. Imagine sinking into a bowl of pasta with a sauce that’s rich, flavorful, and satisfying — all while secretly feeling triumphant that you pulled it off. Trust me, this recipe is the kind of kitchen magic that turns an ordinary evening into something a little more extraordinary.
Jump to Recipe
What You’ll Need
This Bolognese is refreshingly straightforward with a few ingredients that might already be lurking in your pantry or fridge. Let’s check them out:
- Olive oil
- Thick-cut diced bacon
- Yellow white onion
- Carrot
- Celery
- Garlic cloves
- Fresh thyme
- Ground pork
- Ground veal
- Dry red wine
- Bay leaves
- Canned beef broth
- Canned tomato puree
- Pasta of your choice
- Parmesan cheese, for serving
How to Make Best Ever Bolognese Sauce
- Grab your trusty heavy large pot and heat the olive oil over medium-high heat. Once shimmering, toss in the bacon. Sauté until the bacon is just beginning to brown, about 5-6 minutes. The smell will be irresistible.
- Add the onion, celery, carrot, garlic, and thyme. Stir them around for about 5 minutes until they soften and the aromatic explosion makes your kitchen feel like an Italian trattoria.
- Time to add the ground pork and veal. Break them up with a spatula, and cook until the meat is brown and cooked through, about 10 minutes. You’ll know it’s ready when the meat is no longer pink and is nicely browned.
- Pour in the wine and add the bay leaves. Let everything simmer until the liquid is slightly reduced, around 10 minutes. The edges of the pot will start to bubble in the most delightful way.
- Add the beef broth and tomato puree. Reduce the heat to medium-low and let the sauce thicken, which should take about an hour. Stir often to prevent sticking and ensure everything melds beautifully.
- Season your masterpiece with salt and pepper to taste. You’ll want to sneak a taste now, but try to resist!
- Meanwhile, boil your pasta in a large pot of boiling salted water. Aim for al dente — firm to the bite but not crunchy. Drain it well.
- Transfer the pasta to the pot with the sauce and toss until everything is coated in that luscious sauce. Serve with a generous grating of Parmesan cheese. Voilà! Dinner is served.
Cook’s Notes
When making this Bolognese, patience is your best friend. Letting the sauce simmer for a full hour allows the flavors to deepen and mingle into something truly delicious. Keep an eye on the pot and give it a stir every so often. If the sauce gets too thick for your liking, a splash of pasta water can loosen things up nicely.
As for leftovers, this sauce is a gift that keeps on giving. Store it in an airtight container, and it will happily live in your fridge for up to 3 days. Or freeze it for those days when you need a dinner win without working for it.
Make It Your Own
Here are a few fun variations to consider:
- Swap out the ground veal for ground beef if that’s what’s handy or preferred.
- For a lighter option, replace the thick-cut diced bacon with pancetta or turkey bacon.
- Make it vegetarian by using a meat substitute or adding lentils instead of pork and veal.
- Feeling spicy? Add a pinch of red pepper flakes when you’re sautéing the garlic and veggies.
If you try this, I’d love to hear how it turns out — drop a comment or tag me in your kitchen adventures! Remember, cooking is about experimenting and making it your own, so don’t be shy to tweak it to your taste. Happy cooking!
Related update: Best Ever Bolognese Sauce

Picture this: It’s a Wednesday night, and I’ve got a craving — not just any craving, but a very specific desire for something that feels lavish but doesn’t require me to spend two hours in the kitchen. That’s when I think of Béarnaise sauce. It’s rich, velvety, and makes any dish feel like it’s straight out of a fancy restaurant. Whether I’m drizzling it over grilled steak or spooning it onto roasted vegetables, it’s the magic touch that elevates a meal from “meh” to “marvelous.” Plus, the whole process feels like a fun science experiment with all the whisking and bubbling. Seriously, once you nail this, you’ll never go back to store-bought.
Jump to Recipe
What You’ll Need
Let’s talk ingredients. Chances are, you already have most of these hanging out in your kitchen. It’s all about bringing them together in a way that sings.
- 1/2 cup melted butter
- 1/4 cup dry white wine
- 3 egg yolks
- 1 tablespoon lemon juice
- 1 tablespoon chopped parsley
- Salt and pepper to taste
- 2 tablespoons minced shallots
- 1 teaspoon chopped fresh tarragon
- 1 tablespoon tarragon vinegar
How to Make Béarnaise Sauce
- In the top of a double boiler, whisk together the egg yolks and lemon juice. It’ll look thick and creamy, almost like a custard that’s waiting to be transformed.
- Place this over simmering water, making sure the water doesn’t actually touch the bowl. We want gentle heat, not a sauna for our eggs.
- Slowly stream in the melted butter while whisking constantly. You’ll see the mixture start to thicken and get glossy in the process. This part feels like magic! Keep it slow, and your sauce won’t break.
- Season with salt and a generous grind of pepper. Add the tarragon, shallots, parsley, vinegar, and the white wine. Whisk until everything is beautifully blended and the sauce has a lush, velvety texture.
- Keep whisking for another minute or so, allowing the flavors to meld together. You’ll know it’s ready when the sauce clings to the back of a spoon and smells like something you’d get at a five-star joint.
Cook’s Notes
Here’s the deal: Béarnaise sauce can be a bit temperamental, but don’t let that scare you. The key is patience and whisking. If you find your sauce is getting too thick, whisk in a teaspoon of warm water to loosen it. Also, remember that this sauce doesn’t love to wait around; make it just before serving for the best texture and flavor.
- If you’re not serving it immediately, keep it warm in a thermos or a warmed bowl. Just avoid reheating directly on the stove as it tends to separate.
- This sauce is best fresh, but if you have leftovers, store them in the fridge and use within a day. Gently reheat it in a double boiler, whisking vigorously to bring it back together.
Make It Your Own
- Herb Swap: Not a fan of tarragon? Swap it out for basil or dill for a different herbal note. Each will give your Béarnaise a unique twist.
- Citrus Twist: Replace the lemon juice with orange or lime for a subtle citrus variation.
- Spicy Kick: Add a pinch of cayenne or a dash of hot sauce for a spicy Béarnaise that pairs beautifully with grilled meats.
- Vegan Alternative: Use vegan butter and replace egg yolks with a tablespoon of nutritional yeast and a teaspoon of cornstarch for a plant-based version.
If you try this, I’d love to hear how it turns out — drop a comment or tag me! Béarnaise sauce has this wonderful way of making any dish feel like a special occasion. So go ahead, treat yourself!
Related update: Béarnaise Sauce
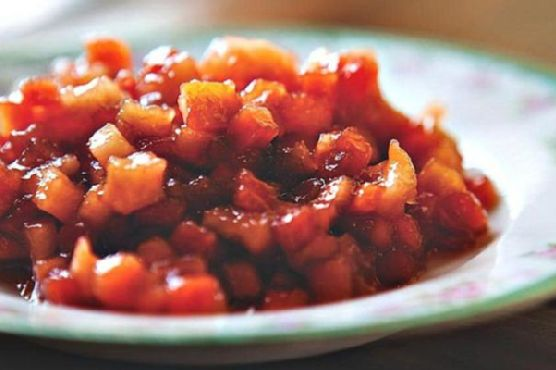
I was standing in my kitchen one chilly October morning, staring at a basket of apples and pears I’d picked up from the farmer’s market the day before. You know those mornings when the air is crisp, and everything feels just a little bit cozier? That’s when it hit me: a warm, spiced fruit compote that could double as a breakfast topping or a dessert treat was exactly what I needed. This Fall Fruit Compote is the kind of recipe that fills your kitchen with the scent of cinnamon and makes you feel like you’re swaddled in a warm blanket. It’s quick to whip up, requires only a few staple ingredients, and the result is pure comfort.
Jump to Recipe
What You’ll Need
The beauty of this recipe is its simplicity — you probably have most of these items on hand already. Here’s what you’ll need to get that cozy feeling wafting through your kitchen:
- 2 tablespoons butter
- 2 cups diced honeycrisp apples
- 2 cups diced pears
- 1/2 cup dried cherries
- 1/4 cup apple cider vinegar
- 1/2 cup apple juice, plus more as needed
- 1/3 cup brown sugar
- 1 cinnamon stick
How to Make Fall Fruit Compote
- Melt the butter in a medium saucepan over high heat. As it melts, breathe in that nutty aroma — that’s your first sign of deliciousness to come.
- Add the diced honeycrisp apples, diced pears, dried cherries, apple cider vinegar, apple juice, brown sugar, and the cinnamon stick. Your kitchen will start smelling like a fall wonderland. Stir everything well.
- Cook for about 5 minutes, letting the fruit soften slightly and the flavors mingle together. You want the liquid to begin bubbling up around the edges.
- Lower the heat to medium and continue to cook for a few more minutes. Keep stirring occasionally until the fruit is tender and the liquid has mostly evaporated. If it seems like the fruit might stick, add a little more apple juice to keep everything cozy and moist.
Cook’s Notes
Let’s talk about a few things that can make or break your compote. First, the type of apple matters — honeycrisps are perfect here for their sweet-tart flavor and firm texture. If you don’t have dried cherries, dried cranberries can step in as a worthy substitute. Remember, the compote will thicken as it cools, so don’t fret if it seems a bit saucy when you take it off the heat. If you’re planning ahead, you can make this compote up to a week in advance and just store it in an airtight container in the fridge. When you’re ready to serve, a gentle reheat on the stove will do the trick. And hey, it’s not just for potato latkes; try it over pancakes, waffles, or even vanilla ice cream!
Make It Your Own
Here are some fun ways to tweak this compote and make it yours:
- Swap the dried cherries for golden raisins for a different layer of sweetness.
- Substitute the apple cider vinegar with balsamic vinegar for a deeper, richer flavor profile.
- Add a splash of bourbon or rum just before serving for a boozy warmth.
- Throw in a handful of chopped walnuts or pecans for a bit of crunch and nutty warmth.
If you try this, I’d love to hear how it turns out — drop a comment or tag me! Your kitchen is about to smell amazing, and I can’t wait for you to experience it. Enjoy every warm, sweet, and spicy bite!
Related update: Fall Fruit Compote
Related update: Broccoli Oatmeal Breakfast Casserole
Related update: Easy Homemade Apple Fritters
Related update: Béarnaise Sauce
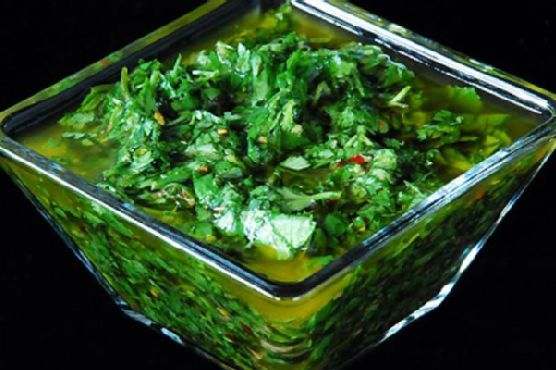
It was one of those evenings when the fridge light flickers on to reveal a collection of *almosts* — almost enough of this, almost enough of that. As I stood there contemplating the remnants of the weekend’s cooking adventures, the memory of a tangy, herby sauce came to mind, something quick yet transformative: Chimichurri. Perfect for those nights when you crave something more than just a meal — a bright, green punch of flavor to enliven whatever protein you can scrounge up. Plus, it’s one of those recipes that’s practically foolproof and endlessly adaptable. Trust me, your taste buds will thank you, and your fridge’s odds and ends might just disappear in the best way.
Jump to Recipe
What You’ll Need
I love this ingredient list because chances are, you already have most of these lying around! Here’s what you’ll need to whip up some magic:
- Parsley – the base of our green goodness
- Cilantro – for that citrusy zing
- Garlic cloves – because what’s a sauce without garlic?
- Red wine vinegar – sharp and tangy
- Olive oil – rich and smooth
- Salt – to balance and enhance
- Black fresh ground pepper – for a touch of warmth
- Red pepper flakes – a hint of heat
- Capers – optional, but they add a lovely brininess
How to Make Chimichurri
- Chop the parsley and cilantro until they’re finely minced, releasing a vibrant, fresh aroma. Toss them into a medium mixing bowl.
- Mince the garlic cloves and add them to the bowl, stirring until these aromatic delights are evenly distributed among the greenery.
- Pour in the red wine vinegar, then sprinkle in the salt, black pepper, and red pepper flakes. Stir gently, letting the fragrance of the vinegar meld with the herbs.
- Slowly drizzle in the olive oil, stirring as you go, until everything is well-coated and glistening. The mixture should be thick, not soupy, holding together beautifully.
- Let the chimichurri sit for about 30 minutes. As it rests, the flavors will meld together, creating that punchy, tangy blend that’s oh-so-addictive.
Cook’s Notes
Chimichurri is all about balance and personal preference. If you find the sauce too tangy, add a bit more olive oil. Too mild? A pinch more salt might do the trick. I like to make it ahead of time and let it sit in the fridge overnight — the flavors just seem to get better. Store any leftovers in a tightly sealed jar in the refrigerator; it should stay fresh for about a week. Just give it a good stir before using it again. And remember, this isn’t just a sauce for meats; drizzle it over roasted veggies or even mix it into your scrambled eggs for a herby twist.
Make It Your Own
- Swap the cilantro for fresh mint for a refreshing spin that’s perfect over lamb.
- Add a teaspoon of lemon zest for a citrusy burst that pairs beautifully with grilled fish.
- Incorporate some finely chopped shallots for a subtle sweetness and depth.
- Replace red wine vinegar with apple cider vinegar for a slightly sweeter, fruitier undertone.
If you try this, I’d love to hear how it turns out — drop a comment or tag me in your photos! Let’s see those creative tweaks and the delicious results. Happy saucing!
Related update: Chimichurri
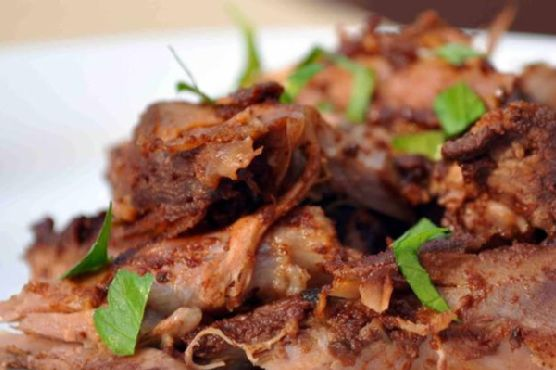
It was one of those days when the weather couldn’t make up its mind – gloomy clouds threatening rain one moment, only to break into streams of sunlight the next. I found myself aimlessly wandering the aisles of my favorite local grocer, craving something rich and warming. Lamb in Red Mole Sauce – that’s the dish that came to mind. It’s the kind of meal that feels like a cozy blanket after a long day but also carries a bit of flair, like you’ve spent hours crafting something special just for you (even if, honestly, the oven does most of the work). When you take that first bite and the tender lamb mingles with the smoky, spicy mole, it’s pure magic. Trust me, you’ll want to give this recipe a go, especially when you need a little pick-me-up that feels just a tad indulgent.
Jump to Recipe
What You’ll Need
This ingredient list is a little trip to flavor town with a Mexican twist. The beauty? You might already have most of these in your pantry, and the rest are definitely worth the hunt.
- Dried chipotle peppers
- Pasilla peppers
- Plum tomatoes
- Garlic
- Oregano
- Cinnamon
- Sesame seeds
- Pepper
- Canola oil
- Mexican chocolate
- Salt
- Tomato sauce
- Lamb shoulder
- Salt and pepper for seasoning
How to Make Lamb In Red Mole Sauce
- Begin by soaking the dried chipotle peppers in hot water until they soften up. Once soft, remove the seeds and stem. This is where the magic begins.
- In a blender, puree the softened chipotles, roasted pasilla peppers, plum tomatoes, and garlic until smooth. Set this flavor bomb aside for later.
- Grab a small skillet and toast the oregano, cinnamon, sesame seeds, and pepper until your kitchen smells like a spice market in Mexico – fragrant and irresistible.
- In a saucepan, heat some canola oil. Add the pureed vegetable mix, the freshly toasted spices, chocolate, salt, and tomato sauce. Stir everything together and let it simmer gently until the chocolate melts and the sauce is well blended. If it looks like it’s getting too thick, a splash of water will do the trick.
- Meanwhile, in a large skillet, heat more oil. Season the lamb shoulder liberally with salt and pepper. Sear it on all sides until a glorious brown crust forms. This step is where flavor meets texture.
- Place the browned lamb on a piece of heavy-duty aluminum foil. Pour the mole sauce over the top, making sure it’s nicely coated. Seal the foil tightly – doubling up is a smart move to keep all those juices in.
- Bake in the oven at 325°F for 3-4 hours. When you open that foil, the lamb should be so tender it practically falls off the bone. Succulent perfection.
Cook’s Notes
Cooking this dish is like an art, where patience is rewarded with flavors that are deep and layered. The sauce should be thick but pourable; add water if it gets too sturdy. If you’re making this ahead, you can prepare the mole sauce a day in advance and just warm it up when needed. As for leftovers, they keep well in the fridge for up to three days and taste even better the next day as the flavors meld. Just ensure you reheat gently to prevent the lamb from drying out.
Make It Your Own
While I adore the traditional flavors in this dish, there’s always room for a little personalization:
- Swap the lamb for pork shoulder if that’s more your style, but keep the cooking time the same to ensure tenderness.
- For a vegetarian twist, use large portobello mushrooms in place of lamb, adjusting the cooking time to just an hour.
- If spicy isn’t your thing, sub the chipotle peppers with guajillo peppers for a milder kick.
- Want to add a bit more crunch? Garnish with toasted pumpkin seeds and fresh cilantro before serving.
If you try this, I’d love to hear how it turns out—drop a comment or tag me! Whether you’re savoring it solo or sharing with friends, I hope this dish brings you as much joy as it’s brought me. Happy cooking!
Related update: Lamb In Red Mole Sauce
Related update: Broccoli and Cheese Phyllo Pie
Related update: Chimichurri
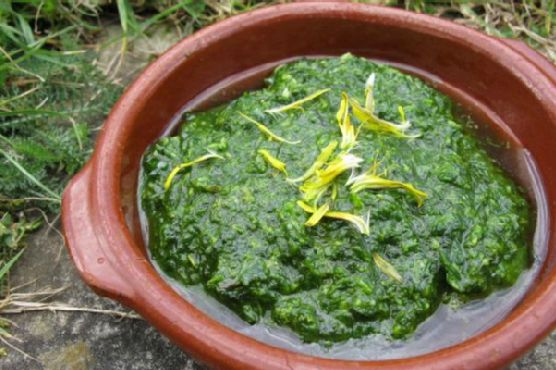
Picture this: it’s a sunny Saturday morning, and I’m wandering through my backyard, coffee in hand, when I notice these bright, cheerful dandelion heads smiling up at me. Normally, I’d think of them as weeds, but today, they spark an idea. What if I harness their vibrant energy into something delicious? That’s how I stumbled upon the magic of dandelion pesto. It’s one of those recipes that sounds a bit daring, but trust me, it’s a total game-changer. Perfect for when you want something quick but with a twist of the unexpected. The fresh bite of dandelion greens mixed with the nutty richness of pine and macadamia nuts, rounded off with a zesty lemon kick—seriously, you’ve got to try this.
Jump to Recipe
What You’ll Need
I love this recipe because it’s both adventurous and practical. Chances are, you’ll already have most of these ingredients hanging out in your kitchen or garden, just waiting to show off.
- Dandelion greens — freshly foraged, if you can!
- Fresh basil leaves
- Spinach
- The petals from dandelion flowers
- Garlic — the more, the merrier!
- Sea salt — to taste
- Pine nuts
- Macadamia nuts — they add a buttery smoothness
- Enough extra virgin olive oil to bind the sauce together
- Lemon — juice, not zest
- Nutritional yeast flakes — for that cheesy vibe without the cheese
How to Make Dandelion Pesto
- Start by washing the dandelion greens well in a solution of water and raw cider vinegar. Use a couple of tablespoons of vinegar to about a litre of water. This will help remove any lingering bitterness.
- Wash and spin dry all the greens. You want them dry enough to not water down your pesto but still glistening with freshness.
- Pop all the ingredients into a pestle and mortar or, for a quicker route, a food processor. Blitz until nearly smooth, but I like to leave it a bit chunky. The texture gives it a homemade charm.
- Taste and adjust the seasoning. Maybe a pinch more salt or a drop more lemon juice? It’s all about finding that balance that dances on your tongue.
- And that’s it! It’s simple, a little bit scrummy, and oh so rewarding.
Cook’s Notes
Here’s the deal with dandelions: you want them young and tender. As they age, they can turn bitter, and no one wants that. Also, make sure you’re picking from areas that aren’t sprayed with pesticides—keep it organic! If you’re making this ahead, store your pesto in the fridge in an airtight container with a slick of olive oil on top to keep it from browning. It’ll last about a week, but I doubt it’ll stay uneaten for that long. And if you have leftovers, toss it with pasta, spread it on a sandwich, or even swirl it into soup for an herby punch.
Make It Your Own
- Swap the pine nuts for walnuts if you want a more robust, earthy flavor.
- Add a handful of parmesan if you’re not keeping it vegan—it adds a creamy depth.
- If you’re out of spinach, arugula can step in for a peppery twist.
- Feeling spicy? Throw in a pinch of red pepper flakes for a little heat.
If you try this, I’d love to hear how it turns out—drop a comment or tag me in your pesto adventures! Happy foraging and blending!
Related update: Dandelion pesto
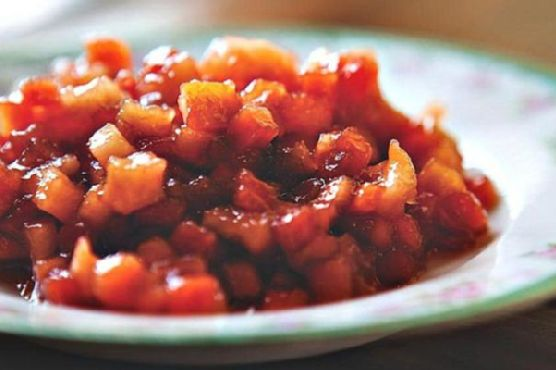
Picture this: It’s a crisp Saturday morning in late October, and the air smells like fallen leaves and the promise of something delicious bubbling on the stove. I’d just come back from the local farmers’ market with a basket full of honeycrisp apples and ripe pears, when I had this sudden inspiration to make something that feels like a warm hug for your taste buds. That’s how this Fall Fruit Compote came to life! It’s the perfect combination of sweet and tangy with a hint of spice from the cinnamon, making it a cozy companion for just about any dish. Whether you’re spooning it over pancakes, pairing it with savory potato latkes, or just nibbling it straight from the jar (guilty as charged), this compote is a must-try for the season.
Jump to Recipe
What You’ll Need
This recipe is all about embracing the flavors of fall, with ingredients that are probably hanging out in your pantry already or easy to snag at the store.
- Butter – for that rich, dreamy base
- Diced honeycrisp apples – sweet and crispy, the star of this show
- Diced pears – a soft, juicy partner for the apples
- Dried cherries – they add a pop of color and tartness
- Apple cider vinegar – just a splash to bring out the flavors
- Apple juice – keeps everything juicy and flavorful
- Brown sugar – for a deep, molasses-y sweetness
- Cinnamon stick – the essential fall spice
How to Make Fall Fruit Compote
- Melt the butter in a medium saucepan over high heat until it starts to bubble and sizzle. You want that nutty aroma to fill the air.
- Toss in the diced apples, pears, and dried cherries, followed by the apple cider vinegar, apple juice, brown sugar, and cinnamon stick. Give it all a good stir to make sure everyone’s getting along in the pot.
- Cook this fruit medley for about 5 minutes. The apples and pears should start to soften, and the cherries will begin plumping up.
- Lower the heat to medium. Let it cook for a few minutes more, keeping a watchful eye as the liquid reduces and the fruit becomes tender. Stir occasionally to prevent sticking.
- If the mixture looks like it’s drying out too quickly, trickle in a bit more apple juice. You want the fruit tender and the liquid mostly gone, leaving a thick, syrupy goodness.
Cook’s Notes
Alright, here’s the scoop on perfecting this compote. First off, keep an eye on your heat levels. It’s easy for the sugars to burn if the heat’s too high, especially towards the end when the liquid is nearly evaporated. If you’re making this ahead, know that it keeps wonderfully in the fridge for up to a week. Just pop it in a jar or airtight container. When you’re ready for a warm serving, a quick zap in the microwave or a gentle reheat on the stove works like a charm. And remember, if you find yourself with leftovers (rare, but it happens), this compote is a dream swirled into yogurt or spread over toast.
Make It Your Own
Get creative and switch things up with these ideas:
- Swap the dried cherries for dried cranberries for a tarter twist.
- Add a splash of bourbon or rum for a grown-up, boozy version.
- For a spicier kick, throw in a pinch of ground ginger or nutmeg with the cinnamon.
- Use maple syrup instead of brown sugar for a different layer of sweetness.
If you try this, I’d love to hear how it turns out — drop a comment or tag me! Enjoy the cozy vibes, and happy cooking! 🍎🍐
Related update: Fall Fruit Compote
Related update: Ginger Cookies- gluten free, soy free, vegan
Related update: Dandelion pesto
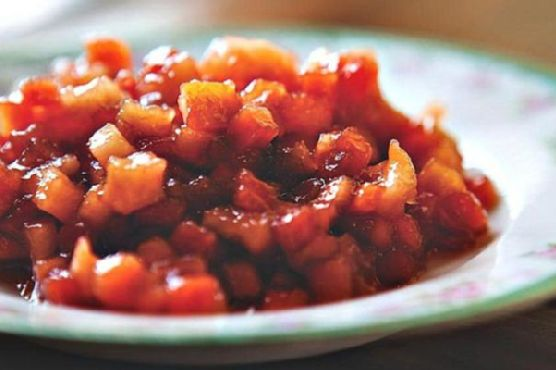
I recently found myself staring at a couple of Honeycrisp apples on my kitchen counter, feeling the first whispers of autumn in the air. You know the days when you can finally break out your sweaters but you still need sunglasses? That’s when my mind started tiptoeing towards something warm and cozy. I mean, what could be better than making a quick, delightful fall fruit compote that ties together all the best flavors of the season? The best part? You don’t need a culinary degree to whip this up. It’s a simple, heart-warming recipe that gives you that “kitchen hero” feeling without the sweat. Plus, it pairs perfectly with so many things, like crispy potato latkes or a dollop of ice cream.
Jump to Recipe
What You’ll Need
Trust me, chances are you already have most of this in your pantry or fridge. The real stars here are the cozy, autumnal ingredients that just sing when they’re together.
- 2 tablespoons of butter
- 2 cups of diced honeycrisp apples
- 1 cup of diced pears
- 1/2 cup of dried cherries
- 1/4 cup of brown sugar
- 1 tablespoon of apple cider vinegar
- 1 cup of apple juice
- 1 cinnamon stick
How to Make Fall Fruit Compote
- Start by melting the butter in a medium-sized saucepan over high heat. You’ll know it’s ready when it starts to smell nutty and divine.
- Once the butter is melted, toss in those diced apples, pears, dried cherries, vinegar, apple juice, brown sugar, and the cinnamon stick. Give it a good stir to coat everything in buttery goodness.
- Let it cook for about 5 minutes. You want the mixture to start bubbling, and the smell will be pure fall magic.
- Turn the heat down to medium and let it simmer for a few more minutes, just until the fruit is tender and the syrupy liquid has mostly reduced. If things start to stick, splash in a little more apple juice to keep it all juicy and lush.
- Once it’s all tender and gorgeous, you’re done! Serve warm and enjoy the fruit-laden spoonfuls of autumn joy.
Cook’s Notes
Let’s chat about some practical tidbits to make your compote experience as smooth as butter. First off, don’t forget that compote thickens as it cools, so don’t worry if it looks a little saucy at first. If you’re planning to serve it later, just warm it up slightly before serving to get back that perfect consistency. If you find yourself with leftovers, pop them in a sealed container in the fridge, and it will stay happy for about a week. This compote is perfect to make ahead of time, especially if you’re planning to dazzle some guests a day or two later.
Make It Your Own
Let’s play around with this compote base because, trust me, versatility is its middle name.
- Swap out the apples for ripe peaches if they’re still in season. They add a lovely, juicy dimension.
- Try cranberries instead of dried cherries for a tarter twist. A little zing never hurt anyone!
- For a boozy touch, replace half the apple juice with a splash of bourbon or rum. It makes things just a little more grown-up.
- Add a pinch of ground ginger or nutmeg for extra warmth and spice. Your taste buds will thank you.
If you give this autumnal delight a go, I’d love to hear how it turns out — drop a comment or tag me in your fall feasting pics! Happy cooking, friend!
Related update: Fall Fruit Compote
Related update: Chocolate Chip Peanut Butter Mallow Dessert Bars