
It was one of those chilly fall evenings when the air was crisp, and the leaves crunched underfoot like potato chips. I was rummaging through the fridge, looking for something cozy and satisfying yet simple enough not to turn dinner into a late-night affair. You know, the kind of weeknight dinner that lets you sit down with a glass of wine before you’ve completely run out of energy? Harvest Hash was my answer. This dish is everything I love about fall on a plate: sweet, savory, and just a little bit indulgent with crispy bacon and caramelized apples. It’s one of those dishes that makes you feel like you’ve done something special, even if you’re tired, and the best part is, it’s all done in about 30 minutes.
Jump to Recipe
What You’ll Need
The beauty of this recipe is in its simplicity. Chances are, you already have most of these ingredients lounging around in your kitchen, waiting for their moment to shine.
- 2 medium sweet potatoes, peeled and cubed
- 4 slices of bacon, cut into bite-sized pieces
- 1 small red onion, diced
- 2 honeycrisp apples, cored and diced
- 2 tablespoons extra-virgin olive oil (EVOO), divided
- Kosher salt, to taste
How to Make Harvest Hash
- First things first, get your oven preheating to 400°F. This helps everything cook evenly and gives those sweet potatoes a head start to become perfectly tender.
- In a large bowl, toss the cubed sweet potatoes with one tablespoon of EVOO and a good sprinkle of kosher salt. Make sure each piece is nicely coated, then spread them out on a baking sheet in a single layer.
- Roast the sweet potatoes for about 10-15 minutes until they’re tender but still hold their shape. You’ll know they’re ready when you can pierce them easily with a fork without them falling apart. Set aside when done.
- While the sweet potatoes are doing their thing, heat the remaining tablespoon of EVOO in a large frying pan over medium heat. Toss in the bacon pieces and let them cook until they start to get crisp and release their delicious fat.
- Add the diced red onion to the pan and sauté until they’re soft and tender. The onions will soak up some of that bacon goodness, making them irresistible.
- Next, add the diced apples and cook for another 3-4 minutes. They’ll become slightly golden and fragrant, adding a lovely sweetness to the mix.
- Stir in the roasted sweet potatoes and cook everything together for another 6-8 minutes. Let the edges of the sweet potatoes and apples get a little crispy — this is where the magic happens.
- Serve it up warm alongside a juicy ham steak, and you’ve got yourself a feast that tastes like fall on a plate.
Cook’s Notes
This dish is pretty forgiving, which is why I love it for those busier nights. Remember not to overcrowd your baking sheet with sweet potatoes; otherwise, they’ll steam rather than roast. Store leftovers in an airtight container in the fridge for up to three days. Reheat in a skillet to bring back some crispness, or pop in the microwave for convenience. If you’re planning ahead, you can roast the sweet potatoes a day before and store them until you’re ready to complete the dish.
Make It Your Own
- Vegetarian Version: Skip the bacon and use smoked paprika to bring in that smoky flavor.
- Pumpkin Spice Twist: Sprinkle a pinch of cinnamon and nutmeg when you add the apples for a cozy spice blend.
- Protein Boost: Stir in cooked, shredded chicken when you add the sweet potatoes.
- Vegan Delight: Swap out the bacon for crispy tofu cubes and use coconut oil instead of EVOO.
If you try this, I’d love to hear how it turns out — drop a comment or tag me! Cooking is all about sharing, after all. Enjoy these fall flavors!
Related update: Harvest Hash

Picture this: It’s a Tuesday evening, and I’ve just gotten home after a day that felt like a whirlwind. The sun is setting, casting a golden hue over my kitchen, and I’m in the mood for something satisfying yet not too complicated. Enter my trusty Chimichurri Skirt Steak with Grilled Asparagus. It’s got that zingy, herby kick from the chimichurri that makes everything feel a little more special, and the whole meal comes together in a way that feels more weekend than weeknight. You’ll be surprised at how the bold flavors and the simplicity of the dish make it an absolute favorite for any night. Let’s dive in and make some magic happen. Jump to Recipe
What You’ll Need
This ingredient list is a breeze, and I bet you have most of these at home already. The stars here are definitely the fresh herbs and that gorgeous skirt steak.
- Skirt steaks
- Flat leaf parsley
- Fresh mint leaves
- Fresh oregano leaves
- Garlic cloves (4 to 5, depending on your garlic love level)
- Chili pepper flakes
- Kosher salt
- Lemon juice
- Olive oil
- Red wine vinegar
- Shallot
- Green and white asparagus
- Black freshly cracked pepper
How to Make Chimichurri Skirt Steak with Grilled Asparagus
- In your food processor, throw in everything for the chimichurri sauce except the olive oil. Give it a few pulses until it’s all well chopped and mixed together.
- Keep that processor running and slowly drizzle in the olive oil until the mixture is a harmonious blend. You want it smooth but still a bit rustic.
- Reserve half of this vibrant green sauce for later; it’s going to be the hero when you serve.
- Season your skirt steaks generously with salt and freshly cracked pepper on both sides.
- Spoon the other half of the chimichurri over the steaks, getting them good and marinated. Let them hang out and soak up the flavors for at least 30 minutes, or if you can, overnight in the fridge.
- Preheat your grill to a comfy 350 to 400°F. Let it warm up while you prep your veggies.
- In a large resealable plastic bag, toss in both the green and white asparagus. Add a drizzle of olive oil, a couple of smashed garlic cloves, and a sprinkle of salt and pepper. Seal the bag and shake it like you mean it.
- Place the asparagus in a grill basket to keep things neat, then set both the steak and basket directly over the hot grill.
- Gently toss the asparagus occasionally to ensure even grilling, and baste them lovingly with the garlic olive oil mixture. They’ll be ready in about 10 minutes, with some nice char marks.
- Grill your skirt steak to your preferred doneness, usually 5 to 8 minutes per side. Let it rest for 10 minutes post-grilling to keep all those juices in.
- Slice the steak against the grain into long strips, arrange them on a serving platter, and spoon that reserved chimichurri sauce over the top. Serve alongside the perfectly grilled asparagus.
Cook’s Notes
First off, let your steak rest after grilling. It’s tempting, but patience is key here for juicy, flavorful meat. If you’re marinating, overnight is king for maximum flavor, but 30 minutes will do if you’re in a pinch. As for leftovers, they keep well for a couple of days in the fridge. The steak is delightful cold or quickly reheated, and the chimichurri can be a flavor booster for other dishes.
Make It Your Own
- Swap the skirt steak for a flank steak if that’s what you have on hand. Just keep in mind the cooking time might vary slightly.
- For a vegetarian twist, use portobello mushrooms instead of steak. Marinate and grill them the same way for a hearty, satisfying meal.
- Feeling a little wild? Add a handful of cherry tomatoes to your asparagus mix for a burst of color and extra sweetness.
- If mint isn’t your thing, basil works beautifully here for a different but equally delicious twist.
If you try this, I’d love to hear how it turns out — drop a comment or tag me! Sharing food experiences makes them all the more enjoyable. Happy grilling!
Related update: Chimichurri Skirt Steak with Grilled Asparagus
Related update: Harvest Hash

Last Tuesday, I found myself staring at the fridge at 7 a.m., coffee in hand, trying to muster some inspiration for breakfast before the day spiraled into chaos. There they were: a half-empty bag of potato tots, some bell peppers, and a few eggs that desperately needed a purpose. In that moment of breakfast indecision, Easy Weekday Breakfast Muffins were born. These muffins are the perfect balance of savory, cheesy goodness, and they’re surprisingly simple to whip up. Plus, they can be made ahead, making those rushed weekdays just a tad more bearable. Trust me, once you try these, weekday mornings will feel like a breeze.
Jump to Recipe
What You’ll Need
Most of these ingredients are probably lounging in your kitchen already, just waiting to become something delicious.
- Bell pepper, chopped
- Eggs – 6 of them, whisked
- Milk – just a splash
- Small onion, chopped
- Potato tots – because who doesn’t love them?
- Salt and pepper, to taste
- Shredded cheese – the more, the merrier
- Turkey – diced or shredded
How to Make Easy Weekday Breakfast Muffins
- Preheat your oven to 350°F (180°C). This gives you time to prep everything while it heats up.
- In a medium-sized bowl, whisk together the eggs and a splash of milk until they’re well combined and a lovely shade of pale yellow.
- Fold in the chopped bell pepper and onion. Season this mixture with a good pinch of salt and a couple of cracks of pepper.
- Stir in a generous handful of shredded cheese. This will add that irresistible gooeyness and flavor.
- Lightly grease a muffin tin or line it with muffin cups, then fill each cup halfway with the egg mixture.
- Drop a few pieces of turkey into each cup. It’s like a little protein surprise!
- Place a single potato tot in the center of each cup, pressing it lightly into the egg mixture.
- Sprinkle a bit more shredded cheese on top of each muffin for that golden, bubbly top.
- Pop the muffin tin into the oven for about 20 minutes, or until the muffins are set and the tops are gloriously golden.
- Let them cool for a few minutes before serving or storing for later.
Cook’s Notes
If you’re short on time in the morning, these muffins can be made the night before and stored in the fridge. Just reheat them in the microwave for about 20-30 seconds, and they’ll taste like you just pulled them out of the oven.
- When whisking the eggs, ensure they’re completely blended to avoid any streaks of egg whites in your muffins.
- These muffins keep well in the fridge for up to 3 days. For longer storage, freeze them and thaw overnight in the fridge before reheating.
- Be careful not to overfill the muffin cups. They’ll expand as they cook, and you don’t want egg mixture overflowing in your oven!
Make It Your Own
- Swap the turkey for crispy tofu for a vegetarian version that’s just as satisfying.
- Try adding cooked bacon bits to each muffin for an extra savory kick.
- Use different cheeses like sharp cheddar or feta for a flavor twist.
- If you’re feeling a bit adventurous, sprinkle some chopped jalapeños into the mix for a spicy morning pick-me-up.
If you try this, I’d love to hear how it turns out — drop a comment or tag me! Breakfast doesn’t have to be a hassle; let’s make it delicious and fun together.
Related update: Easy Weekday Breakfast Muffins
Related update: Chimichurri Skirt Steak with Grilled Asparagus

Picture this: It’s a sweltering summer afternoon, the kind where even the shade feels warm, and all you can think about is finding a way to cool down. I was sprawled out on my couch, contemplating the mysteries of life and my growing need for something refreshing. That’s when the idea hit me — a Green Tea Fruit Medley Smoothie! This drink is the perfect blend of rejuvenating and hydrating, with just enough sweetness from the fruit to make you feel like you’re indulging in a treat. The best part? It’s incredibly easy to whip up, which means more time for lounging and less time in the kitchen.
Jump to Recipe
What You’ll Need
You’re in luck because the ingredient list for this smoothie is delightfully simple. Chances are, you might already have most of these in your kitchen.
- 1 cup of boiling water
- 3 green tea bags
- 1 cup of fresh berries (I love using a mix of blueberries and strawberries!)
- 1/2 cup of pineapple juice
- 1/2 cup of vanilla yogurt
- A handful of ice cubes
How to Make Green Tea Fruit Medley Smoothie
- Start by preparing your tea. Steep the 3 green tea bags in 1 cup of boiling water for about 5 minutes. You’re looking for a nice, rich golden color and that earthy, aromatic green tea scent wafting through your kitchen.
- After the tea has steeped, gently squeeze out the bags to get every last bit of flavor, then discard them.
- In a blender, combine the brewed tea, fresh berries, pineapple juice, vanilla yogurt, and ice cubes. Blend until the mixture is smooth and creamy. You’ll know it’s ready when it has a luscious, thick consistency and a vibrant color.
Cook’s Notes
When it comes to making this smoothie, the key is the balance of flavors. If you find the smoothie too tart, add a bit more vanilla yogurt for sweetness. On the flip side, if it’s too sweet, a splash more of green tea can do wonders. If you’re preparing this ahead of time, store it in the fridge for up to a day, but give it a good shake before drinking as it might separate slightly. And remember, the freshest berries will give you the best flavor, so if you’re using frozen ones, let them thaw a bit first.
Make It Your Own
- Need a protein boost? Swap out the vanilla yogurt for Greek yogurt.
- Looking for a tropical twist? Add a handful of mango chunks instead of or alongside the berries.
- For a dairy-free version, use coconut yogurt — it adds a nice subtle flavor that pairs surprisingly well with the green tea.
- If you’re a mint fan, toss in a few fresh mint leaves for an extra refreshing kick.
If you try this, I’d love to hear how it turns out — drop a comment or tag me! There’s nothing like sharing a refreshing moment with friends, even if it’s virtually. Stay cool, my friends!
Related update: Green Tea Fruit Medley Smoothie

It was one of those frenzied Wednesdays — you know the type — when the clock seems to mock you with its speed and your stomach growls louder than a lawnmower next door. The day had been a whirlwind of errands and work, leaving just enough time to ponder the eternal question: what’s for dinner? Enter my lifesaver — the Brown Sugar and Balsamic Glazed Pork Loin. With just a handful of pantry heroes and a slow cooker doing the heavy lifting, this dish is like a warm hug at the end of a chaotic day. The pork comes out tender and juicy, coated with a glossy glaze that’s sweet and tangy. It’s comfort food at its finest, and the best part is, it feels like you’ve put in way more effort than you actually have.
Jump to Recipe
What You’ll Need
This recipe is blessedly simple, and chances are, you already have most of the ingredients lounging in your kitchen. Here’s the lineup you need to gather:
- Boneless pork loin
- Ground sage
- Salt
- Pepper
- Garlic
- Water
- For the Glaze:
- Brown sugar
- Cornstarch
- Balsamic vinegar
- Soy sauce
How to Make Brown Sugar and Balsamic Glazed Pork Loin
- First, channel your inner artist and combine the ground sage, salt, pepper, and garlic in a small bowl. This is your flavor magic dust.
- Give your pork loin a good massage with the spice mix. This is key to infusing all those delicious flavors deep into the meat.
- Place the seasoned pork loin in your trusty slow cooker. Add half a cup of water — this will keep the pork moist and happy during its long, slow sauna.
- Set your slow cooker to low and let it work its magic for 6-8 hours. Your kitchen will start to smell amazing, and you’ll feel like a culinary magician.
- About an hour before the pork is done, gather your glaze ingredients and combine them in a small saucepan. Give it a good stir while heating so the cornstarch dissolves, and the mixture thickens to a lovely glossy glaze. You’ll know it’s ready when it coats the back of a spoon.
- Now comes the fun part: brush the pork with this delightful glaze two or three times during the last hour of cooking. Each sweep adds another layer of rich, tangy sweetness.
- Serve the pork with the remaining glaze on the side, because let’s be real — you’ll want to drizzle that stuff on everything!
Cook’s Notes
So, a couple of things to keep in mind: if your pork loin is on the smaller side, check for doneness a little earlier. Overcooking is the enemy of juiciness. If you’re in a pinch and don’t have ground sage, you can wing it with dried thyme or rosemary. They’re not identical but will still dance nicely with the other flavors. Leftovers? Toss slices in a sandwich or wrap, or simply reheat them gently, covered, in the oven or microwave. The glaze keeps well in the fridge, too, so you can drizzle it on everything from roasted veggies to your morning eggs.
Make It Your Own
Let’s talk variations because options are always a good thing:
- Swap out the pork for a chicken breast or thighs. Just adjust the cooking time as chicken will cook faster.
- If you’re feeling adventurous, try using maple syrup instead of brown sugar for a different kind of sweetness.
- For a spicy kick, add a teaspoon of chili flakes to the glaze.
- Vegetarian? Use a firm tofu block. Press, marinate, and then cook as directed.
If you try this, I’d love to hear how it turns out — drop a comment or tag me! There’s nothing more satisfying than knowing you’ve helped someone else enjoy a stress-free, delicious meal. Happy cooking!
Related update: Brown Sugar and Balsamic Glazed Pork Loin

So, picture this: I just got home after a dreary, rainy day, and all I wanted was a slice of something indulgent, something that instantly warms you up from the inside. That’s when I remembered my Irish Whiskey Pie recipe. It’s a comfort wrapped in a buttery crust, with a deliciously rich filling that makes you feel like you’re being hugged by a cozy blanket. The best part? It’s one of those pies that seems super fancy but is actually pretty easy to pull off. Trust me, once you try it, you’ll be making excuses to bake it over and over again. Oh, and if you’re in a rush to dive into the pie-making, go ahead and Jump to Recipe
What You’ll Need
Don’t worry, this list looks longer than it feels. Chances are you already have most of it chilling in your pantry—or, you know, your liquor cabinet.
- Condensed milk
- Cornstarch
- Egg yolks
- Light brown sugar
- Homogenized milk
- Pastry flour
- Salt
- Unsalted butter
- Vodka
- Water
- Irish whiskey
How to Make Irish Whiskey Pie
- For the crust, sift the pastry flour and salt together in a large bowl. This is the backbone of your pie, so make sure it’s all airy and smooth.
- Using a food processor, pastry blender, or two knives—whatever floats your boat—cut the butter into the flour until you have a crumbly, pebbly texture.
- Add water and vodka a little at a time, mixing after each addition until the dough just comes together. Trust me, you’ll know when it happens.
- Form the dough into a ball, cut it in half, and flatten each half into a disc. Wrap them in wax paper and refrigerate for at least half an hour. Freeze one for later—you won’t regret having a backup!
- Preheat your oven to 375°F. Roll out one disc of the pastry on a well-floured surface to fit a 9-inch pie plate. Trim and crimp the edges to make it look all pretty.
- Prick the bottom with a fork, wrap it with tin foil, and fill it with pie weights or dried beans. Bake for 25 minutes in the oven’s center.
- Remove the weights and foil, and bake for another nine minutes until the crust turns golden brown and smells like heaven. Let it cool while you whip up the filling.
- For the filling, whisk together the condensed milk, cornstarch, and salt in a medium-sized bowl. Add egg yolks one at a time, whisking thoroughly after each addition. Set aside.
- Melt butter over moderate heat in a saucepan. Add brown sugar and let it bubble slightly, giving off a glorious caramel aroma.
- Slowly whisk in the homogenized milk, then add the egg mixture gradually, whisking constantly to avoid scrambling those yolks.
- Bring it all to a boil, stirring the whole time. Once boiling, let it cook for about a minute until it’s thick and luscious.
- Remove from heat and stir in the Irish whiskey—it’s the star of the show, after all. Pour the filling into your cooled pie shell, cover with plastic wrap, and refrigerate for at least four hours to set.
Cook’s Notes
Here’s a pro tip: if you’re making this pie ahead, leave the whipped cream off until just before serving. It helps keep everything fresh and light. Store any leftovers covered in the fridge. They’ll keep for a couple of days, assuming you don’t devour the whole thing in one sitting. Also, don’t rush the cooling process—give the pie its chill time in the fridge, or the filling might not set properly. Patience is key here!
Make It Your Own
- Swap the Irish whiskey with a smooth bourbon for a different kind of warmth and aroma.
- Add a tablespoon of cocoa powder to the filling for a chocolatey twist that complements the whiskey perfectly.
- Introduce a spiced element by sprinkling a dash of nutmeg or cinnamon into the filling for a cozy, holiday vibe.
- Try a graham cracker crust instead of traditional pastry for a sweeter, more rustic taste.
If you try this, I’d love to hear how it turns out—drop a comment or tag me on social media! Your feedback makes my day and helps me keep sharing recipes you’ll love. Enjoy your baking adventure!
Related update: Irish Whiskey Pie

It was a chilly Tuesday evening, and my fridge was looking pretty bare. You know those nights when you just stand there, door open, hoping for inspiration to strike? That was me. But then, hiding behind some leftover lettuce, I found a head of cauliflower and half a leek. It was like a culinary “Aha!” moment. I remembered a soup I improvised once that was so comforting and cheesy, it felt like a warm hug in a bowl. Cauliflower, Leek, and Cheddar Cheese Soup to the rescue! It’s so simple, you might not even need to make a grocery run, and it’s rich and satisfying without being heavy. Plus, it’s a fabulous way to sneak in those veggies.
Jump to Recipe
What You’ll Need
Surprisingly, this soup calls for ingredients you might already have lurking in your kitchen. Simple but mighty, these ingredients come together to make a creamy delight:
- 1 head of trimmed cauliflower
- 1 leek, sliced
- Olive oil
- 1 teaspoon fresh thyme
- 2 cloves garlic, minced
- 1 tablespoon Worcestershire sauce
- 4 cups vegetable broth
- 1 cup fat-free evaporated milk
- 2 cups shredded cheddar cheese
How to Make Cauliflower, Leek and Cheddar Cheese Soup
- Start by heating a splash of olive oil in a large saucepan over medium heat. Toss in the sliced leeks and let them cook for about 5 minutes. You want them softened and a little caramelized, filling your kitchen with that sweet, oniony aroma.
- Next, add the chopped cauliflower, minced garlic, fresh thyme, Worcestershire sauce, and pour in the vegetable broth. Give it a good stir, and bring the soup to a simmer. Let it bubble away gently over medium-low heat for 30 to 40 minutes, until the cauliflower is so tender it practically falls apart.
- Take the pot off the heat. Now for the fun part—puree the soup until it’s silky smooth. You can do this with an immersion blender right in the pot or in batches using a regular blender. Just be careful with hot liquids!
- Once your soup is blended, return it to the saucepan, and stir in the evaporated milk and 2 cups of cheddar cheese. Place it back on medium heat for just 3 to 5 minutes, stirring until the cheese melts into the soup and it’s all dreamy and creamy.
- Pour it into bowls and finish with a sprinkle of cheddar cheese on top for a little extra indulgence. Enjoy your cozy creation!
Cook’s Notes
This soup is super forgiving. If you find it a bit too thick after blending, just add a splash more broth until you reach your desired consistency. It keeps well in the fridge for about 3 days, making it a great make-ahead meal. Reheat gently on the stove to avoid any separation. Freezing isn’t ideal because of the cheese and milk, but it can work in a pinch—just expect a slightly different texture.
Make It Your Own
- Spice it up by adding a pinch of cayenne or smoked paprika for a little heat and depth of flavor.
- If you’re a meat lover, throw in some crispy bacon bits on top just before serving. It adds a delightful crunch!
- For a vegetarian twist, substitute the Worcestershire sauce with soy sauce to keep it plant-friendly.
- Swap the cheddar for a sharp blue cheese if you’re feeling bold and want a tangy kick.
If you try this, I’d love to hear how it turns out—drop a comment or tag me in your cozy creations! Remember, cooking is all about making it suit your taste and enjoying the process. Happy cooking!
Related update: Cauliflower, Leek and Cheddar Cheese Soup
Related update: Minted Pea & Spinach Soup
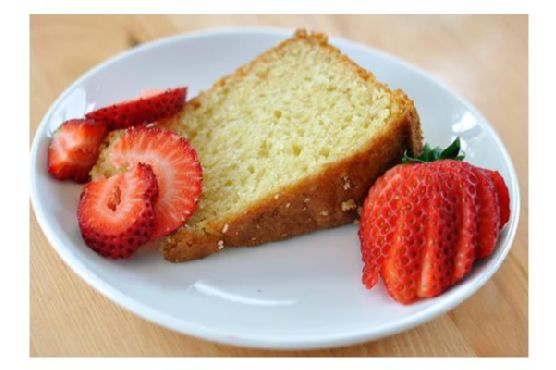
Some days, you just need a cake that feels like a warm hug, you know? It was one of those dreary Sunday afternoons when I found myself staring at the contents of my pantry, craving something sweet but not too fussy. The kind of cake you can whip up without a trip to the store, and this Yogurt Cake was the answer. It’s the sort of bake that feels like it should take a whole afternoon but actually comes together in just an hour. Light and airy with just a hint of nutmeg, it’s a comforting treat that’s perfect for any day of the week — especially when life is a little hectic and you need a quick, no-brainer dessert.
Jump to Recipe
What You’ll Need
This cake is all about simplicity. Chances are you already have most of these ingredients hanging out in your pantry or fridge:
- Full-fat yogurt
- Olive oil
- Sugar
- Eggs
- Vanilla
- Flour
- Baking powder
- Baking soda
- Salt
- Nutmeg
How to Make Yogurt Cake
- Preheat your oven to 350°F. Trust me, you don’t want to forget this step and then wait impatiently while the batter sits there looking at you.
- Lightly grease a 9-inch springform pan with baking spray or a little bit of oil. Then, line the bottom with parchment to avoid any sticky situations.
- In a good-sized bowl, whisk together the yogurt, olive oil, sugar, eggs, and vanilla. The mixture should be smooth and slightly frothy.
- Now, sprinkle the flour, baking powder, baking soda, salt, and nutmeg over your wet ingredients. Stir until you’ve got a smooth batter that’s lump-free. Don’t go overboard with stirring, though — just enough to bring it all together.
- Pour the batter into your prepped pan. Slide it into the oven and let the magic happen for 50 to 60 minutes. If it looks like the top is browning too fast, just cover it with some foil.
- The cake is done when a tester or toothpick inserted in the center comes out clean. Let it cool on a rack for about 10 minutes before removing it from the pan.
Cook’s Notes
Here’s a little tip: make sure your eggs and yogurt are at room temperature for the best texture. And don’t skip the parchment paper lining — it makes removing the cake so much easier. If you’re planning to serve it later, this cake stays wonderfully moist for up to three days when tightly wrapped and stored at room temperature. You can also freeze slices wrapped individually — they’ll keep for about a month.
Make It Your Own
- Berry Burst: Fold in a cup of fresh or frozen berries (no need to thaw) for a burst of fruity goodness.
- Citrus Twist: Add the zest of a lemon or orange to the batter for a citrusy kick.
- Nuttier Flavor: Swap out some of the olive oil for melted coconut oil if that’s more your vibe.
- Spice It Up: Add a teaspoon of cinnamon along with the nutmeg for a spicier, warmer flavor profile.
If you try this, I’d love to hear how it turns out — drop a comment or tag me! Let’s make baking fun and delicious together, one yogurt cake at a time. Happy baking!
Related update: Yogurt Cake
Related update: Irish Whiskey Pie
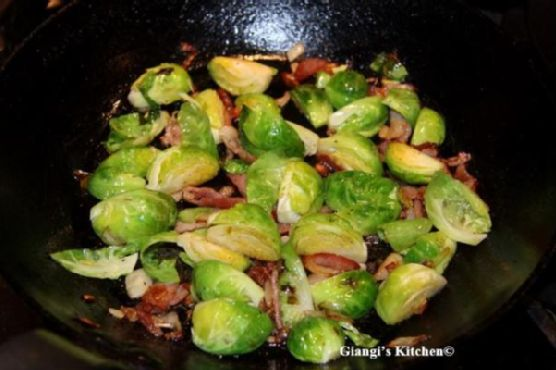
It was one of those evenings where I’d just gotten home from a long day, opened the fridge, and sighed at its contents — or lack thereof. You know what I’m talking about, the classic weeknight scramble where you’re too tired to go out but still want something comforting and a tad bit fancy. That’s when I spotted a lonely pack of bacon and some brussels sprouts I’d forgotten about. A lightbulb moment ensued, and this dish was born out of necessity, quickly becoming a household staple. It’s one of those meals that feels a bit impressive but is ridiculously easy to throw together. Plus, the crispy bacon pairs so perfectly with the tender brussels sprouts and sweet shallots. Trust me, this dish is a game-changer for lazy evenings.
Jump to Recipe
What You’ll Need
Chances are you already have most of this hanging around your kitchen. Just a few ingredients that combine to make magic happen:
- Bacon – the soul of this dish
- Brussels sprouts – trimmed and ready to shine
- Lemon juice – for that bright, zesty finish
- Salt and pepper – essentials, of course
- Shallot – it adds a sweet, delicate flavor
How to Make Brussels Sprouts with Bacon and Shallots
- In a large skillet, toss in the chopped bacon. Cook over medium heat until it’s golden brown and your kitchen smells like pure heaven.
- Next, add the shallots to the skillet. Let them mingle with the bacon, cooking until tender and translucent.
- Crank up the heat to high and introduce the brussels sprouts to the party. Sauté them until they develop that irresistible golden crust, making sure to stir occasionally so they don’t stick.
- Finish with a squeeze of lemon juice and season generously with salt and pepper. Give it all a good toss, letting every ingredient get cozy.
- Serve immediately, preferably with a grin because you just made something delicious with minimal effort.
Cook’s Notes
A couple of things I’ve learned along the way: First, do not overcrowd your skillet. This is a surefire way to end up with soggy sprouts, and nobody wants that. If you’re making a larger batch, definitely work in batches. As for storage, leftovers can be popped in an airtight container and kept in the fridge for a couple of days. Reheat them in the skillet to keep that crispiness alive. Pro tip: if you’re making this for a crowd, you can prep everything in advance and then do the actual cooking just before serving. It’s quick enough that even last-minute is doable!
Make It Your Own
Feeling like switching things up? Here are a few ideas:
- Swap the bacon for crispy pancetta or prosciutto for an Italian twist.
- Try adding a splash of balsamic vinegar instead of lemon juice for a deeper flavor.
- Throw in some toasted pine nuts or almonds for an extra crunch.
- If you’re vegetarian, swap the bacon for crispy tofu — trust me, it works!
If you try this, I’d love to hear how it turns out — drop a comment or tag me! Remember, the best recipes are the ones you make your own. Happy cooking!
Related update: Brussels Sprouts with Bacon and Shallots

Okay, so picture this: It’s a chilly autumn afternoon, and I’ve just returned from the farmer’s market with a bag full of crisp, tart apples. I’m totally in the mood for some fall baking therapy, but I need something that doesn’t have me glued to the oven for hours. Enter these adorable Brandy-Apple Mini Pies with Cornmeal Crust. They’re the perfect mix of cozy and impressive, with a buttery, cornmeal crust that crumbles just right and a filling that’s sweet with a hint of boozy warmth. They’re just the ticket for a quick baking session that still feels special—plus, they make your whole kitchen smell like the best parts of fall. And the best part? They’re mini, so you can totally have more than one. Intrigued? Jump to Recipe
What You’ll Need
You’re in luck, because there’s a good chance you’ve got most of these goodies chilling in your pantry or fridge already. Here’s what you’ll need:
- 1 cup all-purpose flour
- 1/2 cup yellow cornmeal
- 1/4 cup powdered sugar
- 1/2 tsp salt
- 1/4 cup vegetable shortening
- 3-4 Tb. ice water
- 3 cups green diced tart apples (like Granny Smith)
- 1/2 cup unsalted butter
- 2 Tb. brandy
- 1/2 cup brown sugar
- 1 tsp pumpkin pie spice
- 1 Tb. sugar
How to Make Brandy-Apple Mini Pies With Cornmeal Crust
- Start by tossing the flour, cornmeal, powdered sugar, and salt into your food processor. Pulse it a couple of times to mix everything together.
- Cut the shortening into small cubes and add it to the processor. Pulse again until the mixture resembles coarse crumbs.
- Add 3 tablespoons of ice water and pulse until the dough starts to come together. If it looks a little dry, add another tablespoon of water.
- Lay out a sheet of plastic wrap and turn the dough onto it. Divide it into two pieces—one larger and one smaller, about 80/20 split.
- Shape each piece into a disk, wrap them snugly, and pop them into the fridge for at least 30 minutes.
- While the dough chills, peel and dice your apples. Preheat your oven to 425°F.
- In a small saucepan over medium heat, blend together the butter, brandy, brown sugar, pumpkin pie spice, and sugar. Stir until it simmers, then pour this sweet mixture over the apples, tossing to coat.
- Take the larger dough disk out of the fridge and roll it out on a well-floured surface to about 1/8 inch thick.
- Use a drinking glass with a 3-4 inch rim to cut out circles of dough. Press these into your muffin tins. Gather and re-roll the dough scraps to get 14-16 crusts.
- Fill each mini crust with a generous scoop of the apple mixture.
- Roll out the smaller dough piece and use a cute 2-3 inch cookie cutter to make tops. Place these over each pie and brush with any leftover syrup from the apple bowl.
- Bake for 15 minutes, then lower the oven temp to 350°F and bake an additional 15 minutes. If they look perfectly golden after the first 15, cover them with foil to prevent over-browning.
- Cool the pies completely in the muffin tin before attempting to remove them. Trust me, no one wants to see these beauties fall apart!
Cook’s Notes
Silicone muffin pans are your best friend here—they make getting the pies out a breeze. If you’re using metal pans, gently run a sharp knife around the edges, and oh-so-carefully ease each pie out into your hand one at a time. If you’re eyeing a full-size pie instead of minis, just double the apples and syrup. Roll out the dough into a bottom crust and top, bake at 425°F for 30 minutes, then 350°F for another 30.
Make It Your Own
- Swap the brandy for a splash of bourbon or whiskey for a deeper, smokier flavor.
- Try using pears instead of apples for a sweet, juicy twist.
- Add a handful of chopped pecans to the apple mixture for some nutty crunch.
- Sprinkle a little coarse sea salt on top before baking for that sweet-salty combo we all secretly obsess over.
If you give these mini pies a spin, I’d love to hear how they turn out for you! Drop a comment below or tag me in your delicious creations. Happy baking!
Related update: Brandy-Apple Mini Pies With Cornmeal Crust
Related update: Yogurt Cake
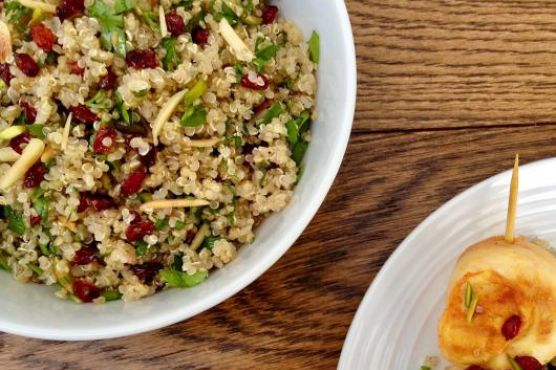
Picture this: It’s a Tuesday evening, and I’ve just emerged from a whirlwind day of meetings and errands. My energy is zapped, but my taste buds are clamoring for something a bit more exciting than my standard, last-minute pasta. I glance at my pantry, and there it is—a trusty bag of quinoa. This little grain (or seed, to be precise) is my go-to for nights like these when I want something nourishing yet packed with flavor. That’s where my Quinoa Salad with Barberries & Nuts comes into play. It’s a delightful dance of textures and tastes—fluffy quinoa, tangy barberries, and crunchy nuts, all mingling with fresh herbs. Bonus: It’s ready in a flash and makes me feel like a kitchen wizard every single time.
Jump to Recipe
What You’ll Need
Trust me, most of these ingredients are likely chilling in your pantry or fridge already. It’s the *bold* ones that make this dish pop, so don’t skip those!
- Quinoa – the base of our salad
- Water
- Salt
- Olive oil
- Barberries – these little gems add a tart kick
- Slivered almonds
- Slivered pistachios
- Coriander
- Mint
How to Make Quinoa Salad with Barberries & Nuts
- Start by rinsing the quinoa thoroughly in a sieve under cold running water. This step is crucial to remove that pesky bitterness. Drain well.
- Next, pour boiling water over the drained quinoa in a medium saucepan. Add a good pinch of salt, give it a stir, and cook over medium-low heat. You’re looking for the quinoa to be tender but with a slight bite. Drain it again using the sieve.
- While your quinoa is doing its thing, pick over the barberries, rinse them gently in a sieve, and dry them on some kitchen paper. Easy peasy.
- Now, let’s get those nuts toasted. Heat a tablespoon of olive oil in a saucepan over medium heat. Toss in the almond slivers first until they’re a light golden hue—then add the pistachios.
- With the nuts nicely toasted, add the rest of your olive oil and throw in the rinsed barberries. Cook them just until they’re shiny and looking a bit puffed up, which is when they release their tangy aroma.
- Reserve a tablespoon of the barberry and nut mixture, along with a tablespoon of the chopped coriander and mint, for our final flourish.
- Mix the remaining nut and barberry blend with the quinoa and herbs. Pop it all back into the pot and place over low heat. Cover it up and let it cook for about ten minutes until it’s steaming and thoroughly heated.
- Finally, turn your quinoa creation into a serving dish. Fluff it up with a fork, add a drizzle of olive oil, and a twist of black pepper if you’re feeling it. Sprinkle with the reserved barberry-nut mix and herbs. Serve it up either as a main or a side—your choice!
Cook’s Notes
Here’s the thing about this salad: it’s super forgiving and versatile. If you’ve never worked with barberries before, you might find them at a specialty grocery store or online. They’re worth the hunt, trust me. When it comes to leftovers, this salad holds up well for up to three days in the fridge. Just be sure to store it in an airtight container. If you’re planning to make it ahead, keep the garnish separate and mix it in just before serving to maintain that fresh, crunchy vibe.
Make It Your Own
Customizing this salad is a breeze. Here are a few ideas to get you started:
- Swap the barberries for dried cranberries or cherries if you prefer something sweeter.
- Try adding crispy tofu to make it a more filling main dish.
- Substitute the almonds and pistachios with hazelnuts and walnuts for a different nutty profile.
- If you’re into greens, throw in a handful of arugula or baby spinach for extra color and nutrients.
If you try this, I’d love to hear how it turns out—drop a comment or tag me! Let’s get cooking and make the everyday extraordinary.
Related update: Quinoa Salad with Barberries & Nuts
Related update: Brussels Sprouts with Bacon and Shallots

Picture this: It’s Wednesday evening, and you’re staring into the abyss of your fridge, wondering how you’ll whip up something delicious without diving into another takeout night. We’ve all been there, right? This moment is precisely when Ditalini with Peas swoops in like a culinary superhero. It’s got the comfort factor of pasta, a delightful pop of sweetness from peas, and the creamy, golden goodness of ricotta and turmeric. Plus, it’s one of those meals where you can almost hear your inner voice singing “I can’t believe it’s not takeout!” as you serve it up. If that sounds good to you, you’re in for a treat.
Jump to Recipe
What You’ll Need
This ingredient list is refreshingly simple, and I’m willing to bet you already have most of these in your pantry or fridge. It’s all about combining these humble ingredients into something greater than the sum of its parts.
- Coarse sea salt
- Ditalini pasta
- Freshly ground black pepper
- Ham, diced
- Olive oil
- Onion, finely chopped
- Pancetta, diced
- Parmesan or Grana Padano cheese, grated
- Ricotta cheese
- Turmeric, dissolved in 2 ladles of water
How to Make Ditalini with Peas
- Start by placing your onion in the olive oil, which is still cold. Cook it gently, adding a teaspoon of water now and then to prevent browning. You’re aiming for it to become soft and translucent, about 10 minutes.
- Once the onion is ready, introduce the peas to the party. Add just enough water to cover them, then season with salt and pepper. Cook until the peas are tender. Fresh peas might take anywhere from 5 to 15 minutes, depending on their size and freshness, while frozen peas will need about 10 minutes.
- As the peas reach their peak of tenderness, toss in the diced pancetta and ham. Give everything a good stir, then turn off the heat. This is where the magic begins.
- Pour in the turmeric-infused water and add the ricotta, sieving it through a colander. Stir until the ricotta melts into the liquid, creating a luscious golden sauce. Keep this mixture warm while you cook the pasta.
- Cook the ditalini according to the package instructions. Reserve some of the pasta water before you drain it, just in case you need to loosen the sauce later.
- With the pasta drained, immediately toss it into the saucepan with your glorious sauce. Stir until every little piece of ditalini is coated, then serve hot with a generous sprinkle of grated Parmesan or Grana Padano.
Cook’s Notes
Let’s chat about the little things that make a big difference. First, be gentle with the onion and remember that patience is key; you want them soft and flavorful, not browned. When it comes to water, trust your instincts—add as needed to keep things from sticking but not so much that you drown the flavor. If your final dish feels a bit dry, that reserved pasta water you saved is a lifesaver for loosening things up. Leftovers? They’re a joy to have and reheat beautifully with a splash of water or olive oil.
Make It Your Own
This recipe is as versatile as your imagination. Here are some ideas to switch things up:
- Swap the ham and pancetta for crispy tofu to keep it vegetarian while maintaining that satisfying protein punch.
- Add a kick of heat with a sprinkle of red pepper flakes during the onion sauté for those who love a bit of spice.
- Replace the peas with asparagus or broccoli for a different green vibe — just cut them small so they cook in about the same time.
- Use smoked paprika instead of turmeric for a smokier, earthier flavor profile.
If you try this, I’d love to hear how it turns out—drop a comment or tag me! Cooking is all about sharing the love, and I can’t wait to see how you make this dish your own. Happy cooking, friends!
Related update: Ditalini with peas
Related update: Korean Beef Rice Bowl

Last Tuesday, my kitchen was a whirlwind of chaos. It was one of those evenings where craving something decadent and a bit out of the ordinary hit like a freight train, and all I had was a pantry challenge waiting to happen. After digging through the freezer, I found a bag of crawfish tails, and suddenly, a memory of summer seafood boils with friends came flooding back. The tantalizing mix of spices and seafood was exactly what I needed, but in a form that was quick and easy without compromising on flavor. Enter: Crawfish Cake Sliders. These little beauties pack a punch, they’re crispy on the outside yet tender inside, and they’re kind of impressive when you serve them up — like a casual, yet gourmet, hand-held delight. Perfect for a weeknight dinner or to wow your friends at a gathering.
Jump to Recipe
What You’ll Need
Let’s be honest, if you love a good seafood dish, you’ve probably got most of this on hand already. Here’s what you’ll need to whip up these sliders:
- 1 teaspoon oil
- 1 cup chopped red onion
- 1 clove garlic, minced
- 1 teaspoon Creole spice (or to taste)
- 1 pound crawfish tails, thawed if frozen
- 1 large egg
- 1/2 cup bread crumbs
- 8 slider buns
- 1/2 cup tartar sauce
How to Make Crawfish Cake Sliders
- Start by heating 1 teaspoon of oil in a sauté pan over medium heat. Toss in the chopped onion and let it sizzle away with a pop of color from some finely chopped red pepper and celery — sauté these until tender, about 2-3 minutes. The kitchen should start smelling like a savory promise.
- Once the veggies are tender, remove the pan from the heat and add the garlic, crawfish meat, and Creole spice. The residual heat will mellow out the garlic and awaken the spices.
- Transfer this aromatic mixture into a mixing bowl and let it cool just enough so that it doesn’t scramble the egg. Speaking from experience here, oops!
- Mix in the egg and just enough bread crumbs for the mixture to bind together — you’re looking for a consistency that holds but isn’t dry. Taste and adjust the seasonings with salt, pepper, and more Creole spice if you’re feeling bold.
- Form the mixture into 8 equal patties and flatten them to about 3/4-inch thick. They should feel sturdy but not densely packed.
- Heat the remaining oil in the same sauté pan over medium heat. Cook the patties on both sides until they’re brown and crispy, about 3-4 minutes per side. This is where the magic happens — the aroma alone is worth it.
- Once cooked, serve each cake nestled in a slider bun with a generous dollop of tartar sauce. It’s the final touch that brings everything together.
Cook’s Notes
As you embark on this culinary adventure, keep a few things in mind: If using frozen crawfish tails, make sure they’re fully thawed and patted dry to prevent soggy cakes. The mixture should be moist but not wet; too much moisture means your patties might fall apart during cooking. If you need to make these ahead, form the patties and store them covered in the fridge for a few hours. Cooked patties can also be reheated in a 350°F oven until warm.
Make It Your Own
Here’s where you can get creative with these sliders:
- Spice Swap: Try using Old Bay or a Cajun spice mix if Creole isn’t your thing.
- Herb Boost: Add chopped fresh parsley or cilantro to the mixture for a fresh twist.
- Different Sauce: Swap out tartar sauce for a spicy remoulade or even a dollop of garlic aioli for a different flavor profile.
- Gluten-Free Option: Use gluten-free bread crumbs and buns to make this dish suitable for your gluten-sensitive friends.
If you try this, I’d love to hear how it turns out — drop a comment or tag me! Your kitchen stories make this cooking journey so much more fun. Happy cooking!
Related update: Crawfish Cake Sliders
Related update: Ditalini with peas
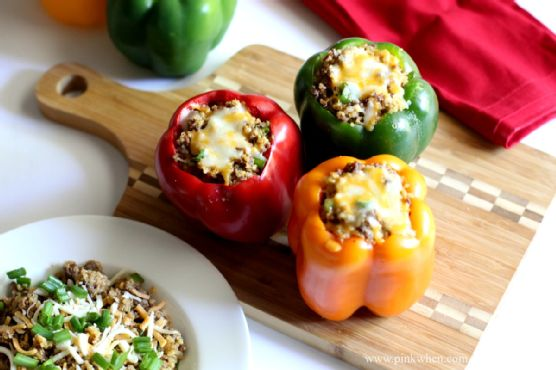
It was one of those weeknights where everything seemed to demand my attention at once. You know the kind, right? The kind where your inbox is overflowing, the laundry pile is ominously high, and all you want to do is eat something comforting that doesn’t involve a microwave pizza. So there I was, staring into my fridge, hoping for inspiration to leap out at me. That’s when I spotted the bell peppers chilling out in the crisper drawer, looking like they needed a purpose. The chorizo and ground beef were sitting in the fridge too, probably whispering that they’d be amazing together. And just like that, dinner was decided. These Chorizo and Beef Quinoa Stuffed Peppers are a satisfying blend of rich, spicy flavors and textures, and they come together quicker than you’d think. Plus, they’re perfect for those nights when you need something a bit more special without all the hassle.
Jump to Recipe
What You’ll Need
If you’re like me, you probably have most of these ingredients already lounging around your pantry and fridge. Here’s what you’ll want to gather:
- Bell peppers (any color you love)
- 1 cup quinoa
- Water (for quinoa)
- Chorizo, 250g
- Lean ground beef, 250g
- Mixed Monterey Jack and Cheddar cheese, 1 cup shredded
- 2 tablespoons green onion tops, chopped
- 1 teaspoon cumin
- 1/2 teaspoon cayenne
- 1 teaspoon chili powder
How to Make Chorizo and Beef Quinoa Stuffed Pepper
- Preheat your oven to 350°F (175°C). While you’re at it, bring a pot of water to boil for the quinoa. The goal is to get these started simultaneously to save time.
- In a skillet over medium heat, brown the chorizo and ground beef together. Stir occasionally until the mixture is golden and fragrant, around 6-8 minutes. Once cooked, drain the excess fat thoroughly and transfer the meat to a medium mixing bowl.
- Once your quinoa is fully cooked and fluffy, add it to the bowl with your meat mixture. This is where it starts to get exciting!
- Add the chopped green onion tops, cumin, cayenne, chili powder, and the shredded Monterey Jack and Cheddar cheese to the bowl. Mix everything well until it’s all happily combined.
- Prepare your bell peppers by cutting off the tops and removing any seeds. You want them to be ready to receive all that deliciousness.
- Stuff each bell pepper generously with your meat and quinoa mixture. Don’t be shy — pack it in there.
- Place your stuffed peppers in a baking dish, sprinkle a little more cheese on top for good measure, and bake in the preheated oven for about 10 minutes. You’ll know they’re done when the peppers have softened slightly and the cheese on top is melty and golden.
- Serve immediately and enjoy the awesome combination of flavors. Trust me, these are worth every bite.
Cook’s Notes
If you’re looking to make these ahead (and who doesn’t love a little meal prep?), you can absolutely prepare the filling in advance. Just store it in an airtight container in the fridge for up to two days. When you’re ready to eat, stuff the peppers and proceed with baking. As for leftovers, they keep well in the fridge for up to three days. Just reheat them gently in the oven or microwave until warmed through. A quick tip: make sure to drain the meat well after browning to avoid a greasy filling. Oh, and don’t skip the step of softening the peppers in the oven; it makes them easier to cut and eat!
Make It Your Own
Feel free to get creative with these stuffed peppers. Here are a few swap ideas to make them suit your taste:
- Swap the quinoa for cooked rice or couscous for a different texture experience.
- If you’re not into beef, try using ground turkey or chicken instead for a lighter option.
- Make it vegetarian by using crumbled tofu or tempeh in place of the meat. Just add a bit more spice to keep the flavor bold.
- Switch up the cheese with crumbled feta or a smoky gouda to add a unique twist.
If you try this, I’d love to hear how it turns out — drop a comment or tag me on your food pics! These stuffed peppers are a personal favorite, and I can’t wait to see your take on them. Happy cooking!
Related update: Chorizo and Beef Quinoa Stuffed Pepper
Related update: Crawfish Cake Sliders

It was one of those evenings when the fridge seemed to have its own agenda. You know, the kind where you open the door, and despite it being packed, you can’t find the makings of a straightforward dinner. I spotted some forlorn leeks and a half-full bottle of porter leftover from the weekend, and inspiration hit me like a bolt of lightning. Enter my Cheese and Leek Strata—a dish that’s an absolute game-changer for those nights when you don’t want to keep oscillating between the fridge and the pantry. This strata is comfort in a casserole, layered with flavors and textures that promise to turn your evening around. It’s like a savory bread pudding, but with a cheesy, leeky twist. Perfect for brunch or a cozy dinner, it’s a make-ahead marvel that gives you more time to curl up on the couch with a good book or Netflix series.
Jump to Recipe
What You’ll Need
With ingredients you likely have lurking around your kitchen, this dish won’t require a mad dash to the grocery store. Here’s the lowdown:
- 6 large eggs
- 2 cups milk
- 1/2 cup porter (or any dark beer)
- 1 garlic clove, minced
- Salt and pepper, to taste
- 1 loaf sourdough bread, cut into cubes
- 1 large leek, thinly sliced
- 1 red bell pepper, diced
- 1 cup shredded cheddar cheese
- 1 cup shredded Swiss cheese
How to Make Cheese and Leek Strata
- Preheat your oven to 350 degrees Fahrenheit. As it warms, the kitchen fills with a cozy promise of what’s to come.
- In a large mixing bowl, combine the eggs, milk, porter, minced garlic, and a generous pinch of salt and pepper. Beat this mixture well until it’s beautifully blended, creamy and slightly frothy.
- Grease a 2.5-quart round baking dish. Place half of the sourdough bread cubes at the bottom, forming the first layer of your strata.
- Sprinkle half of the sliced leeks and diced red bell pepper over the bread layer. The veggies should look like colorful confetti scattered across the bread.
- Top this veggie layer with half of the Swiss and cheddar cheeses, letting it snow over the vibrant layer beneath.
- Repeat the layering process with the remaining ingredients—bread, leeks, bell pepper, and cheeses—ending with a delightful blanket of cheddar cheese on top.
- Pour the egg mixture evenly over the entire dish, ensuring the liquid seeps through to all corners.
- Cover the dish tightly with foil or plastic wrap and weigh it down with a slightly smaller baking dish. This step helps everything meld together beautifully.
- Refrigerate for at least 2 hours or, even better, overnight. This waiting period lets the flavors mingle and intensify.
- When you’re ready to bake, remove the cover and place it in the oven for about 40 minutes. The strata is done when the center is set and the top is golden and enticingly fragrant.
- Serve warm, and let the compliments roll in!
Cook’s Notes
You’ll want to give this strata time in the fridge. Trust me, it makes all the difference in flavor and texture. If you’re strapped for time, a minimum of 2 hours will do, but overnight is optimal. If you have leftovers, they store beautifully in the fridge for up to three days. Just reheat them gently in the oven. Be sure to use a crusty sourdough—it holds up better against the liquid soaking. And if you find the center isn’t setting after 40 minutes, give it another 5-10 minutes until it’s firm.
Make It Your Own
- Swap the cheddar cheese for some sharp Gruyère if you’re feeling fancy.
- Not a fan of leeks? Try using caramelized onions for a sweeter touch.
- Give it a meaty twist by adding cooked bacon or sausage between the layers.
- For a spicy kick, toss in some jalapeños alongside the bell peppers.
If you try this, I’d love to hear how it turns out—drop a comment or tag me! Happy cooking, and may your fridge always surprise you in the best possible way.
Related update: Cheese and Leek Strata
Related update: Chorizo and Beef Quinoa Stuffed Pepper

There was this one time, smack in the middle of a hectic Wednesday, when I found myself staring into the abyss of my fridge, promising my hungry self something quick and satisfying. You know those days, right? When you want something homemade but don’t really have the bandwidth for a culinary marathon. That’s when Charlotte Potato Salad came to the rescue. It’s like that best friend who stops by unannounced but always brings wine. This dish is vibrant, with just the right amount of zing from the mustard and lemon, balanced by the comforting notes of bacon and potatoes. Perfect for elevating a mundane weeknight or impressing a surprise guest.
Jump to Recipe
What You’ll Need
Here’s the best part — this recipe involves a handful of ingredients, many of which might already be sitting in your pantry or fridge. Just a few essentials come together to deliver a flavor-packed salad that feels both sophisticated and homey.
- Charlotte potatoes
- Bacon cubes
- Dijon mustard
- Dried parsley
- Lemon juice
- Olive oil
- Black salt and pepper
- Spring onions
How to Make Charlotte Potato Salad
- Begin by boiling the Charlotte potatoes in salted water until they are just tender. You’ll know they’re ready when a fork easily pierces through. Drain them and let them cool just enough to handle, then peel off the skins.
- In a small bowl, whisk together the lemon juice, Dijon mustard, black salt, and pepper until smoothly blended. Start to beat in the olive oil slowly, creating a creamy dressing. Add the finely chopped spring onions at this point, letting the sharpness infuse the sauce.
- In a dry frying pan over low heat, dry fry the bacon cubes. Let them sizzle and release their fat, crisping up for about 5 minutes. The smell will be irresistible!
- Add these golden bacon cubes to your dressing, stirring well to ensure each piece is coated in mustardy goodness.
- Thickly slice the warm potatoes and place them in a serving bowl. Pour the bacon-infused dressing over the potatoes, tossing gently to coat each slice.
- Finish with a generous sprinkle of dried parsley for a pop of color and added flavor, then serve warm or at room temperature.
Cook’s Notes
Alright, so here’s the scoop on making this dish even more seamless. If you’re prepping in advance, boil and peel the potatoes, then store them in the fridge. Just make sure everything comes to room temperature before you toss it together. This salad is best enjoyed warm but still delightful if served cold. Avoid over-boiling the potatoes — we want them soft but not mushy. The potato slices should hold their own and not turn into mashed potatoes as you mix.
Make It Your Own
You can riff on this salad in a few fun ways:
- Swap the bacon for crispy tofu cubes to make it vegetarian — simply fry the tofu until golden and proceed with the recipe.
- Try using fresh herbs like dill or chives instead of dried parsley for a fresh twist.
- For a richer flavor, substitute half of the olive oil with melted butter in the dressing.
- Mix in some capers for a briny kick that beautifully counterbalances the richness of the bacon and potatoes.
If you try this, I’d love to hear how it turns out — drop a comment or tag me! Cooking is all about sharing those delicious moments, and this one is too good not to share. Enjoy!
Related update: Charlotte Potato Salad
Related update: Quinoa Salad with Barberries & Nuts

I was standing in my kitchen one Sunday afternoon, staring at the latest cookbook I’d impulsively bought. You know the feeling — you’ve got that itch to bake something, but the ingredients list reads like a novel. So there I was, craving something sweet, but not ready for a grocery run. A little lightbulb moment hit me when I remembered these Mexican Wedding Cookies — they’re a breeze to make and taste like pure joy wrapped in sugar. The kind of recipe that makes you feel accomplished without breaking a sweat. They’re like a warm hug, perfect for when you need a bit of comfort. Now, imagine sinking your teeth into a buttery, nutty cookie, with a snowy coating of sugar. You’re welcome.
Jump to Recipe
What You’ll Need
Honestly, you probably have most of these right in your kitchen. These cookies are all about keeping it simple yet delicious. Here’s what you need:
- Butter – The star of the show for that rich flavor.
- Powdered sugar – Twice; once for the dough, once for rolling.
- Vanilla extract – Just a splash for depth.
- All-purpose flour – The backbone of any good cookie.
- Pecans – Coarsely chopped for that lovely crunch.
- Ground cinnamon – For a little warmth in the sugar coating.
How to Make Authentic Mexican Wedding Cookies
- Start by beating the butter in a large bowl using an electric mixer. You want it to be light and fluffy, like clouds on a summer day.
- Add 1/2 cup of powdered sugar and a splash of vanilla. Keep beating until everything is well blended and smells heavenly.
- Mix in the flour bit by bit, then fold in the pecans. The dough should come together nicely — feel free to steal a taste test!
- Divide the dough in half and roll each into a ball. Wrap them in plastic and let them chill in the fridge for about 30 minutes.
- Preheat your oven to 350°F (or 180°C if you’re in my neck of the woods).
- While waiting, whisk the remaining 1 1/2 cups of powdered sugar with the cinnamon in a pie dish. This will be your magical coating.
- Take half of the chilled dough and roll it into small balls, about 2 teaspoons each. Line them up on a baking sheet, giving them a little room to breathe.
- Bake for about 18 minutes. You’re looking for golden brown bottoms and just a hint of gold on top.
- Let them cool on the sheet for 5 minutes, then gently toss in the cinnamon sugar while still warm. It’s like a sugar spa treatment.
- Transfer to a rack to cool completely, then repeat with the other half of the dough. Dust any leftover cinnamon sugar over the cookies before serving.
Cook’s Notes
Grab a good-quality vanilla extract, it makes a difference. Pecans can be swapped out for walnuts if you’re in a pinch, but pecans do have that melt-in-your-mouth quality that’s hard to beat. To store, keep them in an airtight container — if they last that long! They freeze well too, just defrost at room temperature. If you’re making ahead, you can chill the dough overnight. But be warned, you might start sneaking little bites from the fridge.
Make It Your Own
- Almond Lovers: Swap pecans for almonds, and maybe add a dash of almond extract for a nutty twist.
- Chocolate Dream: Add mini chocolate chips to the dough for a sweet surprise in every bite.
- Orange Zest: Add a teaspoon of orange zest to the dough for a citrusy zing.
- Gluten-Free: Use a cup-for-cup gluten-free flour blend — easy peasy!
If you try these, I’d love to hear how they turn out for you — drop a comment or tag me! There’s something magical about sharing a recipe and seeing it come to life in other kitchens. Enjoy, lovely bakers!
Related update: Authentic Mexican Wedding Cookies
Related update: Layered Poppy Seed Pastries

It all started on a rainy Tuesday afternoon when my snack cravings were at an all-time high. I stared at the bunch of overripe bananas on the counter, contemplating yet another loaf of banana bread, when inspiration struck. What if I could combine the comforting flavors of a peanut butter banana sandwich with the indulgence of a chocolate chip cookie? That’s how these Chocolate Chip Peanut Butter Banana Cookies came to be. They’re a delightful twist on the usual, bringing together the creamy, nutty goodness of peanut butter with the sweet, decadent charm of chocolate chips—all in a soft, banana-infused cookie package. Perfect for a quick treat or a cozy moment with a cup of tea, these cookies hit the sweet spot every time.
Jump to Recipe
What You’ll Need
You won’t need a fancy trip to the grocery store for this recipe. Chances are, you’ve got most of these goodies in your pantry and fridge already. Here’s what you’ll need:
- 2 ripe bananas
- 1/2 cup butter, softened
- 1/2 cup creamy peanut butter
- 1/2 cup brown sugar
- 1/2 cup granulated sugar
- 1 large egg
- 1 teaspoon vanilla extract
- 1 and 1/2 cups flour
- 1 teaspoon baking powder
- 1/2 teaspoon baking soda
- 1/2 teaspoon cinnamon
- 1/4 teaspoon salt
- 1 cup mini chocolate chips
- 1/4 cup sugar (for sprinkling)
- 1/2 teaspoon cinnamon (for sprinkling)
How to Make Chocolate Chip Peanut Butter Banana Cookies
- Preheat your oven to 350°F. This is non-negotiable—no cold oven surprises here!
- In a large mixing bowl, mash the ripe bananas until smooth-ish. Don’t worry about small lumps; they’re just character.
- Add the softened butter, creamy peanut butter, both sugars, egg, and vanilla to the bananas. Stir until everything’s nicely combined and smelling heavenly.
- In a separate bowl, whisk together the flour, baking powder, baking soda, cinnamon, and salt. This dry blend will give our cookies structure and a hint of spice.
- Gently fold the dry ingredients into the banana mixture. Stir just until everything comes together—overmixing makes for tough cookies, and we want these to be soft and tender.
- Toss in those mini chocolate chips and give a few more gentle stirs to distribute them evenly.
- Using a large spoon, drop dollops of dough onto a parchment-lined baking sheet. Aim for about 2 inches apart to avoid cookie collisions.
- In a small bowl, combine the sugar and cinnamon for sprinkling. Give those dough mounds a generous dusting of cinnamon sugar magic.
- Bake in the preheated oven for 10-12 minutes, or until the edges are slightly golden brown and your kitchen smells like a dream. My oven runs hot, so keep an eye out; 10 minutes could be plenty.
Cook’s Notes
These cookies are best enjoyed fresh out of the oven (aren’t they all?), but they do keep well for a couple of days in an airtight container. If you’re planning ahead, you can make the dough and chill it for up to two days before baking. Just remember, cold dough might need an extra minute or two in the oven. And if you end up with leftovers that have lost their day-one freshness, a quick zap in the microwave will revive their warm, gooey glory.
Make It Your Own
Here are a few fun tweaks to shake things up:
- Swap the mini chocolate chips for dark chocolate chunks for a richer, more intense chocolate hit.
- If you’re nuts for nuts, add a handful of chopped walnuts or pecans to the dough for an extra crunch.
- Turn up the tropical vibes by adding a half cup of shredded coconut to the mix.
- For a gluten-free version, use a 1-to-1 gluten-free flour blend. Texture might vary slightly, but the flavor will still be on point.
If you give these cookies a whirl, I’d love to hear about it! Drop a comment below or tag me in your sweet creations. Happy baking, and remember, life’s too short to skip dessert!
Related update: Chocolate Chip Peanut Butter Banana Cookies
Related update: Authentic Mexican Wedding Cookies

Picture this: it’s a busy weeknight, the kind where everything that could go wrong does—my cat decided to knock over a plant, and I swear the vacuum cleaner is giving me side-eye for not using it. That’s when I remember the bundle of asparagus I impulsively bought at the market, and suddenly, the night doesn’t seem so impossible. This Flemish Style Asparagus Side Dish is everything you need it to be—quick, comforting, and just fancy enough to make you feel like you’ve got things under control. It’s got that buttery, lemony vibe that I can’t get enough of, and it’s one of those dishes that somehow manages to elevate your mood and your meal. So, let’s dive in and get cooking!
Jump to Recipe
What You’ll Need
You’re going to love how simple and stress-free this ingredient list is. Chances are, you already have most of these goodies lounging in your kitchen:
- Green and white fresh asparagus
- Butter
- Hardboiled eggs
- Italian flat parsley
- Lemon (just the juice!)
- Salt and pepper
How to Make Flemish Style Asparagus Side Dish
- Start by peeling the asparagus at their ends, leaving their heads untouched. This helps with texture and makes them more palatable.
- Place the asparagus in a large saucepan and cover them with boiling water. Add a pinch of salt. Let them simmer until they’re tender—about 3 to 4 minutes. You’ll know they’re perfect when they turn a vibrant green and are fork-tender.
- While the asparagus is cooking, chop the flat parsley into fine bits. Trust me, this will add a fresh, herby kick that’s just perfect.
- Boil three eggs till they’re hard, then peel them. Use a fork to mash them into fine crumbs—they should resemble coarse sand.
- In a separate saucepan, melt the butter over medium heat. Add the juice of half a lemon, and whisk constantly. It should smell like heaven and have a smooth, silky texture.
- Stir in the mashed eggs into your butter-lemon mixture. The mixture should be thick and luscious. Add the chopped parsley and stir to combine.
- Plate the dish by laying a few stalks of cooked asparagus on a plate and drizzling the sauce generously over the stalk ends. Season with salt and pepper to taste. Serve warm and enjoy every bite!
Cook’s Notes
Okay, real talk: the key to nailing this dish is all about timing. Make sure your asparagus is not overcooked—aim for that sweet spot where it’s tender but still has a bit of crunch. If you’re prepping in advance, you can boil the eggs and chop the parsley earlier in the day. The sauce, however, is best fresh. Leftovers are rare because it’s just that good, but if you find yourself with any, store the asparagus and sauce separately. The asparagus can go in an airtight container, and you can reheat the sauce gently on the stove. It keeps well for up to two days.
Make It Your Own
Want to put your personal spin on this dish? Here are a few variations to consider:
- Swap the butter for ghee if you’re feeling adventurous—it adds a nutty richness.
- Try adding a pinch of smoked paprika or cayenne to the sauce for a little heat.
- If parsley isn’t your thing, fresh dill or chives would also be delightful.
- For a bit of extra texture, toss in some toasted pine nuts or almonds before serving.
If you try this, I’d love to hear how it turns out—drop a comment or tag me! Whether you’re having a chaotic day or just need a little culinary pick-me-up, this dish is your new best friend.
Related update: Flemish Style Asparagus Side Dish
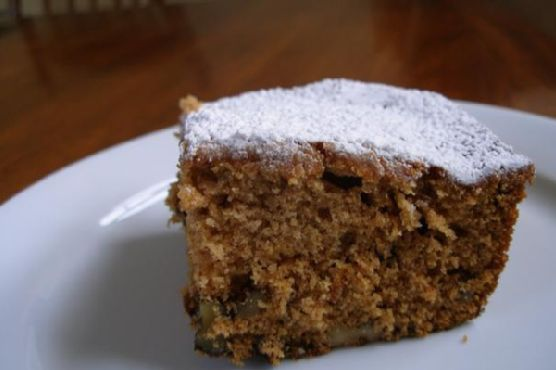
It was one of those chilly fall afternoons where the sky promised a drizzle, but I had a craving that promised warmth—something comforting to fill the kitchen with cozy scents. As I rummaged through my pantry, I found a jar of applesauce that sparked the idea of a nostalgic, spiced cake. This applesauce cake is the kind of recipe that wraps you in a hug from the first bite. It’s ridiculously easy to whip up, and before you know it, your kitchen will smell like pure autumn bliss. Trust me, this cake is the one you’ll want to cozy up with a hot cup of tea.
Jump to Recipe
What You’ll Need
This cake is built on pantry staples, so there’s a good chance you won’t need to run to the store. It’s all about the applesauce and cinnamon—they’re the stars of the show.
- 1 cup brown sugar
- 1 teaspoon cinnamon
- 1 teaspoon baking soda
- 1/2 cup raisins
- 1/2 cup red cherries (reserve some for decoration)
- 1 cup white sugar
- 1 cup butter, softened
- 2 eggs
- 2 cups applesauce
- 3 cups plain flour
- 1 cup nuts (pecans work beautifully, reserve some for decoration)
- 1 teaspoon vanilla extract
How to Make Applesauce Cake
- Preheat your oven to 325°F. Grab your trusty cake pan and give it a generous greasing, followed by a dusting of flour. This ensures no tragic sticking incidents later.
- In a mixing bowl, cream together the butter and both sugars. The mixture should be light and fluffy, almost like a sweet cloud.
- Add in the eggs, one at a time, beating well after each addition. You’re aiming for a smooth, unified batter here.
- Stir in the pure vanilla extract and the applesauce. You’ll notice the batter starts to look luscious and inviting.
- In a separate bowl, whisk together the flour, cinnamon, and baking soda. Carefully fold this dry mixture into the wet ingredients until just combined.
- Gently fold in the raisins, cherries, and nuts. The batter should look speckled with fruity and nutty goodness.
- Pour this aromatic batter into your prepared cake pan. Smooth out the top and sprinkle on those reserved cherries and nuts for a pop of color and texture.
- Bake in the preheated oven for about 1 1/2 hours. The cake is done when it’s golden and a skewer inserted into the center comes out clean.
- Let the cake cool in the pan for a few minutes before transferring it to a wire rack. The wait will be the hardest part!
Cook’s Notes
This cake keeps beautifully, making it an excellent make-ahead option. Just wrap it tightly in plastic wrap and store it in the fridge, where it can last for several days. It actually tastes even better the next day as the flavors meld together. If you find yourself with leftovers (a rarity, let me assure you), they’re perfect with a scoop of vanilla ice cream.
- Don’t skip greasing and flouring the pan; it saves you from the heartbreak of half the cake sticking.
- If your raisins are a bit dry, soak them in hot water for about 10 minutes and then drain them before adding to the batter.
- Feel free to substitute pecans with walnuts if you have those on hand.
Make It Your Own
- If you’re not into pecans, swap them out for walnuts or even hazelnuts for a different nutty note.
- For a boozy twist, soak the raisins in rum before adding them to the batter.
- Replace half the flour with whole wheat flour to add a rustic texture and flavor.
- Try adding a teaspoon of ground ginger or nutmeg for an extra spice kick.
If you try this, I’d love to hear how it turns out—drop a comment or tag me! I’m already excited to see your takes on this cozy classic. Happy baking!
Related update: Applesauce Cake
Related update: Chocolate Chip Peanut Butter Banana Cookies