
Last Tuesday, I found myself staring at the fridge at 7 a.m., coffee in hand, trying to muster some inspiration for breakfast before the day spiraled into chaos. There they were: a half-empty bag of potato tots, some bell peppers, and a few eggs that desperately needed a purpose. In that moment of breakfast indecision, Easy Weekday Breakfast Muffins were born. These muffins are the perfect balance of savory, cheesy goodness, and they’re surprisingly simple to whip up. Plus, they can be made ahead, making those rushed weekdays just a tad more bearable. Trust me, once you try these, weekday mornings will feel like a breeze.
Jump to Recipe
What You’ll Need
Most of these ingredients are probably lounging in your kitchen already, just waiting to become something delicious.
- Bell pepper, chopped
- Eggs – 6 of them, whisked
- Milk – just a splash
- Small onion, chopped
- Potato tots – because who doesn’t love them?
- Salt and pepper, to taste
- Shredded cheese – the more, the merrier
- Turkey – diced or shredded
How to Make Easy Weekday Breakfast Muffins
- Preheat your oven to 350°F (180°C). This gives you time to prep everything while it heats up.
- In a medium-sized bowl, whisk together the eggs and a splash of milk until they’re well combined and a lovely shade of pale yellow.
- Fold in the chopped bell pepper and onion. Season this mixture with a good pinch of salt and a couple of cracks of pepper.
- Stir in a generous handful of shredded cheese. This will add that irresistible gooeyness and flavor.
- Lightly grease a muffin tin or line it with muffin cups, then fill each cup halfway with the egg mixture.
- Drop a few pieces of turkey into each cup. It’s like a little protein surprise!
- Place a single potato tot in the center of each cup, pressing it lightly into the egg mixture.
- Sprinkle a bit more shredded cheese on top of each muffin for that golden, bubbly top.
- Pop the muffin tin into the oven for about 20 minutes, or until the muffins are set and the tops are gloriously golden.
- Let them cool for a few minutes before serving or storing for later.
Cook’s Notes
If you’re short on time in the morning, these muffins can be made the night before and stored in the fridge. Just reheat them in the microwave for about 20-30 seconds, and they’ll taste like you just pulled them out of the oven.
- When whisking the eggs, ensure they’re completely blended to avoid any streaks of egg whites in your muffins.
- These muffins keep well in the fridge for up to 3 days. For longer storage, freeze them and thaw overnight in the fridge before reheating.
- Be careful not to overfill the muffin cups. They’ll expand as they cook, and you don’t want egg mixture overflowing in your oven!
Make It Your Own
- Swap the turkey for crispy tofu for a vegetarian version that’s just as satisfying.
- Try adding cooked bacon bits to each muffin for an extra savory kick.
- Use different cheeses like sharp cheddar or feta for a flavor twist.
- If you’re feeling a bit adventurous, sprinkle some chopped jalapeños into the mix for a spicy morning pick-me-up.
If you try this, I’d love to hear how it turns out — drop a comment or tag me! Breakfast doesn’t have to be a hassle; let’s make it delicious and fun together.
Related update: Easy Weekday Breakfast Muffins
Related update: Chimichurri Skirt Steak with Grilled Asparagus
Related update: Healthy Southwestern Oatmeal

It was one of those evenings when the fridge seemed to have its own agenda. You know, the kind where you open the door, and despite it being packed, you can’t find the makings of a straightforward dinner. I spotted some forlorn leeks and a half-full bottle of porter leftover from the weekend, and inspiration hit me like a bolt of lightning. Enter my Cheese and Leek Strata—a dish that’s an absolute game-changer for those nights when you don’t want to keep oscillating between the fridge and the pantry. This strata is comfort in a casserole, layered with flavors and textures that promise to turn your evening around. It’s like a savory bread pudding, but with a cheesy, leeky twist. Perfect for brunch or a cozy dinner, it’s a make-ahead marvel that gives you more time to curl up on the couch with a good book or Netflix series.
Jump to Recipe
What You’ll Need
With ingredients you likely have lurking around your kitchen, this dish won’t require a mad dash to the grocery store. Here’s the lowdown:
- 6 large eggs
- 2 cups milk
- 1/2 cup porter (or any dark beer)
- 1 garlic clove, minced
- Salt and pepper, to taste
- 1 loaf sourdough bread, cut into cubes
- 1 large leek, thinly sliced
- 1 red bell pepper, diced
- 1 cup shredded cheddar cheese
- 1 cup shredded Swiss cheese
How to Make Cheese and Leek Strata
- Preheat your oven to 350 degrees Fahrenheit. As it warms, the kitchen fills with a cozy promise of what’s to come.
- In a large mixing bowl, combine the eggs, milk, porter, minced garlic, and a generous pinch of salt and pepper. Beat this mixture well until it’s beautifully blended, creamy and slightly frothy.
- Grease a 2.5-quart round baking dish. Place half of the sourdough bread cubes at the bottom, forming the first layer of your strata.
- Sprinkle half of the sliced leeks and diced red bell pepper over the bread layer. The veggies should look like colorful confetti scattered across the bread.
- Top this veggie layer with half of the Swiss and cheddar cheeses, letting it snow over the vibrant layer beneath.
- Repeat the layering process with the remaining ingredients—bread, leeks, bell pepper, and cheeses—ending with a delightful blanket of cheddar cheese on top.
- Pour the egg mixture evenly over the entire dish, ensuring the liquid seeps through to all corners.
- Cover the dish tightly with foil or plastic wrap and weigh it down with a slightly smaller baking dish. This step helps everything meld together beautifully.
- Refrigerate for at least 2 hours or, even better, overnight. This waiting period lets the flavors mingle and intensify.
- When you’re ready to bake, remove the cover and place it in the oven for about 40 minutes. The strata is done when the center is set and the top is golden and enticingly fragrant.
- Serve warm, and let the compliments roll in!
Cook’s Notes
You’ll want to give this strata time in the fridge. Trust me, it makes all the difference in flavor and texture. If you’re strapped for time, a minimum of 2 hours will do, but overnight is optimal. If you have leftovers, they store beautifully in the fridge for up to three days. Just reheat them gently in the oven. Be sure to use a crusty sourdough—it holds up better against the liquid soaking. And if you find the center isn’t setting after 40 minutes, give it another 5-10 minutes until it’s firm.
Make It Your Own
- Swap the cheddar cheese for some sharp Gruyère if you’re feeling fancy.
- Not a fan of leeks? Try using caramelized onions for a sweeter touch.
- Give it a meaty twist by adding cooked bacon or sausage between the layers.
- For a spicy kick, toss in some jalapeños alongside the bell peppers.
If you try this, I’d love to hear how it turns out—drop a comment or tag me! Happy cooking, and may your fridge always surprise you in the best possible way.
Related update: Cheese and Leek Strata
Related update: Chorizo and Beef Quinoa Stuffed Pepper

The other day, I found myself on a typical Wednesday evening with a sudden, fierce craving for something warm, cheesy, and a little herby. The kind of comfort food you can savor with a cup of tea while staring out the window on a rainy day. As my pantry was a bit sparse, I knew I needed something quick and easy, yet utterly satisfying. That’s when Savory Cheese Dill Scones came to mind. They’re those magical little bites that feel fancy enough for company but are secretively easy to pull together. The kind of bake that makes you feel like a kitchen genius with minimal effort. So, let’s get scone-ing!
Jump to Recipe
What You’ll Need
You might be surprised how many of these you already have in your kitchen! The usual suspects of baking are here, alongside the stars of the show: cheese and dill. Here’s what you’ll need:
- 2 cups unbleached flour
- 1/2 cup whole wheat flour
- 1 tablespoon baking powder
- 1/4 teaspoon baking soda
- 1/2 teaspoon black pepper
- 1 tablespoon sugar
- 1/2 cup cold butter, cut into small pieces
- 3/4 cup buttermilk
- 1/2 cup coarsely shredded cheddar cheese
- 1/2 cup cottage cheese
- 3 tablespoons chopped fresh dill
- 1 small shallot, finely chopped
How to Make Savory Cheese Dill Scones
- Preheat your oven to 375°F, placing the rack in the middle position. This gives your scones the perfect balance of heat, making them rise nicely while staying tender and light.
- In a large bowl, whisk together the unbleached flour, whole wheat flour, baking powder, baking soda, black pepper, and sugar. This dry mix is your scone foundation.
- Add the chopped butter into the flour mixture. Use your fingers or a pastry cutter to blend until the mix resembles coarse crumbs. You want to see little bits of butter peeking through.
- Stir in both the cheddar and cottage cheese, followed by the fresh dill and shallot. The aroma will start making promises your taste buds will thank you for later.
- Pour in the buttermilk and gently fold the mixture with a spatula until just combined. Avoid overmixing; a rough dough will yield tender scones.
- Turn the dough out onto a floured surface and knead gently, just enough to bring it together — about 4 or 5 times.
- Pat the dough into a circle, approximately 1 inch thick. Cut into 8 wedges and place them on a baking sheet lined with parchment paper.
- Bake in your preheated oven for 20-25 minutes, until the scones are golden and the kitchen smells like heaven. Serve warm and swoon.
Cook’s Notes
These scones are best on the day they’re made, but if you have leftovers (lucky you!), store them in an airtight container for a day or two. They make a delightful breakfast, slightly warmed with a pat of butter. You can also freeze the unbaked scones on a tray, then transfer them to a bag once they’re solid. Bake them from frozen, adding a few extra minutes to the cooking time. Common pitfalls? Overworking the dough or letting the butter soften too much. Keep it chill for the chillest scones!
Make It Your Own
Here are some delicious twists to customize your scones:
- Swap the dill for chopped chives if you’re in a more oniony mood.
- Use gruyere instead of cheddar for a rich, nutty take.
- Add a handful of crispy bacon bits for a savory delight.
- Mix in some sun-dried tomatoes for a Mediterranean vibe.
If you try this, I’d love to hear how it turns out — drop a comment or tag me! Remember, cooking is just like life: best when shared and savored. Enjoy your baking adventure!
Related update: Savory Cheese Dill Scones
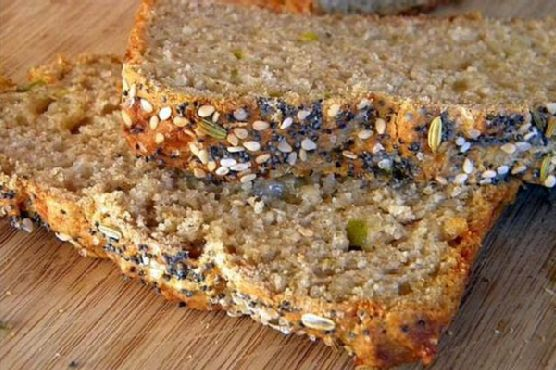
I remember last fall when I was caught in a total downpour on my way back from the farmers’ market. I dashed inside my apartment, dripping and shivering, with a bag full of local cheese and a can of green chiles I had impulsively picked up. My mind immediately went to a warm, comforting loaf of bread, something easy yet satisfying. Enter Cheddar Chile Beer Bread. This recipe is your best friend when you need something hearty but don’t want to fuss with yeast or kneading. It comes together in a flash, and that extra sharp cheddar paired with the zing from the chiles makes it feel special and cozy. Plus, it’s the kind of bread that fills your kitchen with the most *amazing* aroma, making it worth every second of waiting while it bakes.
Jump to Recipe
What You’ll Need
Chances are, most of these ingredients are lurking in your pantry right now, just waiting for their moment to shine. Here’s what you’ll need:
- 1 cup whole wheat flour
- 1 cup all-purpose flour
- 1 tablespoon baking powder
- 1 teaspoon salt
- 1/2 teaspoon dry mustard
- 1 can (12 oz) beer (use what you love to drink!)
- 1 cup white shredded extra sharp cheddar cheese
- 1 can (4 oz) canned green chiles, drained
- 1 tablespoon sesame seeds
- 1 tablespoon poppy seeds
- 1/2 teaspoon caraway seeds
- 1 teaspoon sea salt
How to Make Cheddar Chile Beer Bread
- Preheat your oven to 425 degrees. While it warms up, grease a loaf pan to make sure our bread doesn’t stick.
- In a large mixing bowl, whisk together the whole wheat flour, all-purpose flour, baking powder, salt, and dry mustard. This will be the backbone of your bread.
- Add the green chiles, shredded cheddar, and the beer to the dry mix. Stir until everything comes together. Expect a super thick batter that’s a good arm workout!
- Scrape the thick batter into your prepared loaf pan. Spread it out evenly so it bakes up nice and uniform.
- Now for the fun part: sprinkle the sesame seeds, poppy seeds, and caraway seeds over the top. Finish with a sprinkle of sea salt. Use your fingers to gently press these into the batter so they stick while baking.
- Lower your oven temperature to 400 degrees and pop the loaf in. Bake for 45-50 minutes, and let the aromas take over. It’s done when a toothpick inserted into the center comes out clean.
- Let the bread cool on a wire rack for about 15 minutes, then turn it out of the pan. Try to resist diving in right away, but I give you full permission to sample a slice while it’s still warm!
Cook’s Notes
A few little tips: using a beer you enjoy drinking will really make a difference as it flavors the bread. If the batter feels too thick, that’s totally normal. It might seem like you’ve done something wrong, but trust the process, it will work out. The seeds on top not only add flavor, but also a fun texture contrast to the soft, cheesy bread. This loaf is best the day it’s made, but if you have leftovers, toast them up the next morning with a bit of butter—it’s heavenly!
Make It Your Own
Here are a few ways to switch it up:
- Spicy Kick: Add a chopped jalapeño to the mix for some extra heat.
- Herby Twist: Toss in a tablespoon of dried herbs like rosemary or thyme with the dry ingredients.
- Cheese Swap: Use pepper jack or gouda instead of cheddar for a different cheesy flavor.
- Gluten-Free Version: Substitute the flours with a 1:1 gluten-free blend.
If you try this, I’d love to hear how it turns out—drop a comment or tag me in your photos! Sharing is caring, especially when it’s as delicious as this. Enjoy every bite, friends!
Related update: Cheddar Chile Beer Bread
Related update: Fenugreek Roti
Related update: Savory Cheese Dill Scones

It was one of those Mondays where everything seemed to go sideways. You know the kind — you spill your coffee, your phone dies halfway through the day, and by the time you get home, the last thing you want to do is cook. That’s when it hit me: the ultimate comfort food savior, Classic Macaroni and Cheese. This dish is like a warm, cheesy hug that never lets you down. It’s rich, creamy, and surprisingly easy to whip up even when your day’s gone haywire. Plus, it’s got that golden crust on top that makes everything feel just a little bit better. Trust me, once you dig in, you won’t even remember why you were stressed in the first place.
Jump to Recipe
What You’ll Need
This is one of those recipes where you’ll likely have most of the ingredients chilling in your pantry, just waiting to be transformed into something magical.
- 6 tablespoons butter
- 1/4 cup all-purpose flour
- 1/8 teaspoon cayenne pepper
- Salt and white pepper, to taste
- 3 cups hot whole milk
- 3 cups grated sharp cheddar cheese
- 1 pound cooked short macaroni
- 1/2 cup heavy cream
- 1 cup fresh bread crumbs
How to Make Classic Macaroni and Cheese
- Preheat your oven to 350°F. Get your 8″ x 11″ baking dish ready — butter it up like you’re giving it a massage.
- Melt 6 tablespoons of butter in a medium saucepan over low heat. Toss in the flour and stir constantly for about 4 minutes until you have a nice roux going. It’ll smell slightly nutty and look golden.
- Add the cayenne pepper, and sprinkle in some salt and white pepper. Slowly whisk in the hot milk, 1/2 cup at a time, cooking until your sauce thickens up and coats the back of a spoon. You’re looking for a smooth, luscious texture here.
- Reduce the heat and stir in 2 cups of cheddar. Keep stirring until the cheese melts into silky perfection, about 2 minutes.
- In a large bowl, combine the cooked macaroni and the cheese sauce. Give it a taste and season with more salt if needed. Cheese loves salt, trust me.
- Sprinkle 1/2 cup of cheese at the bottom of your prepared baking dish. Layer a third of the pasta mixture on top, followed by another 1/2 cup of cheese. Repeat the layering process, ending with a final cheese layer.
- Pour the heavy cream over the assembled dish — it’s the secret to that extra creamy finish.
- Melt the remaining butter in a skillet and toss in the bread crumbs until they’re all buttery and gorgeous. Sprinkle this over the top of your macaroni and cheese.
- Bake for about 30 minutes, or until the crust is golden and calling your name. Let it rest for 15 minutes before serving; it’ll firm up a bit as it cools.
Cook’s Notes
Here’s the lowdown: Make sure to taste your sauce before you start layering. It should be slightly more seasoned than you think, as the pasta will absorb some of the saltiness. If you’re in a rush, assemble the mac and cheese earlier in the day and store it in the fridge until you’re ready to bake. Just add an extra 10 minutes to the baking time if it’s coming straight from the fridge. For leftovers (if you have any!), they keep for up to 3 days in the fridge. Reheat in the oven at 300°F until warm and bubbly again. Avoid the microwave unless you’re really in a pinch — it just won’t do this comforting dish justice.
Make It Your Own
Want to put your own spin on this classic? Here are a few fun ideas:
- Swap the sharp cheddar with a mix of smoked gouda and mozzarella for a smoky, melty twist.
- Add cooked, crispy bacon bits between the layers for a savory boost.
- Use panko breadcrumbs instead of fresh for an extra crunchy top layer.
- For a veggie boost, stir in some sautéed spinach or roasted broccoli with the macaroni.
If you give this Classic Macaroni and Cheese a try, I’d love to hear all about your cheesy adventures — drop a comment or tag me in your gooey masterpiece!
Related update: Classic Macaroni and Cheese
Related update: Arroz Con Pollo

I recently found myself staring at a half-head of cauliflower and some broccoli florets, both on the brink of overstaying their welcome in my crisper drawer. It was one of those evenings, you know? When the day has been a bit too long, and you need comfort but don’t want to weigh yourself down with a heavy meal. Enter this Cauliflower and Broccoli Gratin with Camembert Cheese. It’s the kind of dish that feels a little fancy — thanks to the gooey, rich camembert — yet it’s simple enough to whip up on a busy weeknight. Plus, it transforms those neglected veggies into something fabulous and satisfying. Let’s not forget, it’s a great way to sneak in some greens under all that cheesy goodness.
Jump to Recipe
What You’ll Need
For this dish, the ingredients are delightfully simple, and you might already have most of them chilling in your kitchen. Here’s what’s going into our cozy gratin:
- 1 head of cauliflower
- 1 bunch of broccoli
- 2 tablespoons of butter
- 2 tablespoons of flour
- 1 cup of milk
- Salt and pepper to taste
- 200g camembert cheese, cut into cubes, plus extra to put on top
- 1 cup of breadcrumbs
How to Make Cauliflower and Broccoli Gratin With Camembert Cheese
- First, preheat your oven to 180 degrees C (or 350 degrees F). It’s always nice to have it ready and waiting.
- In a large pot of boiling water, parboil the broccoli and cauliflower. You’re looking for tender-crisp veggies here — about 10-15 minutes should do the trick.
- Once your veggies are done, drain them well and set them aside. They’ll be ready to soak up that cheesy sauce.
- In a saucepan, melt the butter over medium heat. When it’s completely melted and starts to bubble, sprinkle in the flour. Stir constantly until it forms a smooth paste, which takes about a minute.
- Slowly whisk in the milk. Keep stirring until the mixture thickens to a nice, creamy consistency.
- Now, add in the camembert cubes. Stir until the cheese is fully melted and the sauce is smooth. Season with salt and pepper to your liking.
- Combine your cheese sauce with the parboiled veggies, ensuring they’re well coated.
- Transfer everything into a baking dish. Top with extra camembert chunks and breadcrumbs for that crispy, golden finish.
- Pop it in the oven for about 20 minutes or until it’s golden and bubbling on top. Your kitchen will smell heavenly!
Cook’s Notes
Let’s talk about some little tips that will make this dish even better. If you’re short on time, you can parboil the veggies in advance and keep them in the fridge until you’re ready to assemble the gratin. For storage, this dish keeps well in the fridge for up to three days — just reheat it in the oven to keep the top crispy. One common mistake is overcooking the veggies during parboiling. You want them to maintain some bite since they’ll continue cooking in the oven.
Make It Your Own
Here are some fun variations to shake things up if you feel like experimenting:
- Swap the camembert for a sharp cheddar if you prefer a stronger cheese flavor.
- Throw in some crispy bacon bits for an extra savory kick.
- Use panko breadcrumbs instead of regular ones for an even crunchier topping.
- Add a pinch of nutmeg to the cheese sauce for a warm, aromatic twist.
If you try this, I’d love to hear how it turns out — drop a comment or tag me! It’s always so fun to see your creations and variations. Enjoy the cheesy goodness!
Related update: Cauliflower and Broccoli Gratin With Camembert Cheese

Let’s talk about the time I ambitiously decided to make enchiladas on a Wednesday night after one too many hours of doom-scrolling through Instagram. You know the ones—cheesy, gooey, and utterly comforting. I could already taste the spicy tang of green chilies, imagining it would somehow transform my week. Spoiler: it did. This Enchiladas Verdes recipe is not only a delicious weeknight hero but also a dish that’s forgiving enough for any kitchen mishaps. Didn’t roll the tortillas tight enough? No worries; it’s all going to melt together in a cheesy, saucy hug anyway. And trust me, the result is so satisfying, you’ll forget about that midweek slump. Jump to Recipe
What You’ll Need
What’s fantastic about this dish is you might already have most of the ingredients lounging around in your kitchen. If not, the list is simple and straightforward.
- Skinless boneless chicken breast or a quick swap with a store-bought rotisserie chicken.
- Green Anaheim chili peppers – these are the stars of the show.
- Canola oil
- Flour
- White diced onion
- White corn tortillas
- White shredded cheese
- Queso fresco
- Sour crema
- Salt
- Water
- Suero or buttermilk (canned buttermilk works, too)
How to Make Enchiladas Verdes (Green Enchiladas)
- Preheat your broiler and get those green chili peppers ready for roasting. Choose firm, meaty peppers—no wrinkles, please!
- Rinse the peppers and lay them on a foil-lined cookie sheet. Slide them under the broiler and keep an eye on them. Within minutes, you’ll see the skin begin to blister and turn black.
- Flip the peppers after about 5 minutes to get all sides evenly blistered. Once done, pop them into a plastic bag and cover with a towel, letting them cool. This makes peeling off the blackened skin a breeze.
- For the sauce, blend those roasted peppers, flour, and half of your suero or buttermilk until smooth and creamy. Pour this mixture into a skillet over medium-low heat.
- As it warms, gradually stir in more suero or buttermilk. Season with salt—around 2 teaspoons usually does the trick. If it’s too spicy for your taste, add crema. Too thick? Dribble in some water.
- Now, the chicken. Either boil your chicken breasts in a pot until done or just shred a rotisserie chicken. The choice is yours.
- For stacked style enchiladas, fry your tortillas in hot oil just until they’re soft, then drain. Dip each in the sauce before layering on plates with chicken, cheese, and onion. Go for three layers per serving.
- If you prefer oven-baked, preheat to 350°F. Spread sauce at the bottom of your baking dish, fry and fill the tortillas, then roll them up seam down in the dish.
- Drench with more sauce and sprinkle with crumbled queso fresco. Bake until everything’s gloriously warm, about 15 minutes.
- Serve with a dollop of sour crema and get ready to conquer the rest of your week!
Cook’s Notes
Here are a few tips I’ve picked up along the way:
- These enchiladas are flexible with make-ahead options. Prepare the sauce and chicken in advance, then just assemble when you’re ready.
- Store leftovers in an airtight container in the fridge for up to three days. Reheat in the oven for best results.
- Don’t skip the roasting of peppers, as it’s essential for that smoky flavor. If you find peeling them tricky, let them steam longer in the plastic bag.
Make It Your Own
- For a vegetarian spin, swap out chicken with crispy tofu or sautéed mushrooms.
- Mix in some black beans with the chicken for added texture and protein.
- Try using a mix of different cheeses like mozzarella for an extra gooey factor.
- Add avocado or cilantro as a fresh topping before serving.
If you try this, I’d love to hear how it turns out—drop a comment or tag me on social media! Enjoy your cozy, midweek escape with these Enchiladas Verdes.
Related update: Enchiladas Verdes (Green Enchiladas)
Related update: Baked Sirloin Steak

Last Tuesday, I found myself in one of those delightful culinary conundrums: a craving for something comforting yet uncomplicated, something that would warm the soul without demanding too much time or attention. The answer came to me as I stood in front of my pantry: Soft Croatian corn bread, or proja. This gem of a recipe is perfect for those moments when you want something special but don’t want to spend hours in the kitchen. It’s rich with the rustic flavors of corn and cheese, and the best part? You probably already have most of the ingredients on hand. Plus, it pairs wonderfully with soups and stews, making it a great choice for the changing seasons.
Jump to Recipe
What You’ll Need
In this recipe, the magic happens with just a few pantry staples and a couple of fresh items. Chances are, you already have most of this lying around:
- 1 cup all-purpose flour
- 1 teaspoon baking powder
- 1 cup corn grits
- 1 cup cornmeal
- 1 cup cottage cheese
- 3 large eggs
- 1 cup natural yogurt
- 1/4 cup olive oil
- 1 teaspoon salt
- 1 cup mineral water
How to Make Soft Croatian corn bread – proja
- Preheat your oven to 220°C (or about 430°F). Time to get that kitchen nice and toasty.
- In a large mixing bowl, crack in the eggs and sprinkle the salt. Whisk until the mixture becomes slightly frothy.
- Add the all-purpose flour, corn grits, cornmeal, and baking powder. Stir until everything is just combined.
- Pour in the olive oil and yogurt, mixing until you have a smooth batter that glistens with promise.
- Gradually add the mineral water, stirring consistently to achieve a thin, pourable batter. Don’t rush — let the batter tell you when it’s ready.
- Gently fold in the cottage cheese, ensuring it’s evenly distributed. The batter should be light and slightly lumpy.
- Lightly grease a baking pan with butter, then pour in the batter. Smooth the top with a spatula, giving it a little jiggle to settle.
- Bake in the preheated oven for about 30 minutes. You’ll know it’s done when the top is golden, and a toothpick inserted in the center comes out clean.
Cook’s Notes
Proja is forgiving, but here are a few tips to keep in mind. Make sure your batter is on the thinner side before baking; this ensures a tender crumb. If the top is browning too quickly in the oven, cover it with foil halfway through. Leftovers can be wrapped tightly and stored in the refrigerator for up to three days. To reheat, just pop a slice in the oven or toaster, and it comes back to life like magic.
Make It Your Own
Looking to add your own twist to this lovely loaf? Here are some fun variations:
- Swap the cottage cheese for feta for a tangier kick.
- Add a handful of chopped olives for a Mediterranean vibe.
- Mix in some sun-dried tomatoes for a pop of color and flavor.
- Replace the mineral water with beer for a richer, deeper flavor.
If you try this, I’d love to hear how it turns out — drop a comment or tag me! Your kitchen stories are always my favorite part. Happy baking, and remember: the best recipes are the ones that make you smile.
Related update: Soft Croatian corn bread – proja
Related update: Cavatappi pasta with salmon crab surimi

One evening, after a long day of juggling work and kids’ activities, I found myself staring at a couple of lonely zucchinis in the fridge, wondering what on Earth I could make for dinner that everyone would actually eat. There was no time for anything elaborate, and I really didn’t want to resort to cereal again. That’s when it hit me: Mini Zucchini Bites, or as I affectionately call them, Cuadritos De Calabacin. These little guys are a lifesaver — quick to throw together, they make the perfect savory snack or side, and they’ve got enough bacon and cheese to keep the pickiest eaters happy. Plus, I mean, they’re bite-sized, and who doesn’t love a good two-bite treat?
Jump to Recipe
What You’ll Need
Trust me, chances are you already have most of this in your kitchen, which makes it even better for those spontaneous dinner decisions.
- 2 slices of diced bacon
- 1/2 cup white onion, chopped
- 2 cups grated zucchini
- 1 cup grated gouda cheese
- 1/2 cup flour
- 1 teaspoon baking powder
- 1/4 cup vegetable oil
- 2 eggs
- Salt & pepper to taste
- 1 tablespoon butter, melted
- 1/4 cup plain bread crumbs
How to Make Mini Zucchini Bites (Cuadritos De Calabacin)
- Preheat your oven to 375°F, because nothing kills dinner momentum like a cold oven.
- In a sauté pan, cook the diced bacon until it’s perfectly crisp. The goal here is crispy, not soggy, so let it do its thing. Once done, set the bacon aside but don’t ditch the bacon fat.
- With about 2 tablespoons of that glorious bacon fat, sauté the white onion until it turns transparent. You’ll know it’s ready when your kitchen smells heavenly. Set aside.
- In a large mixing bowl, combine the grated zucchini, gouda cheese, flour, baking powder, vegetable oil, eggs, bacon, and onion. Season generously with salt and pepper and mix it until everything is just combined. The mixture will be slightly thick and that’s exactly what you want.
- Grab a 10 x 7-inch baking pan and brush it thoroughly with the melted butter. Then, sprinkle plain bread crumbs to coat — this will give you a nice, crispy edge.
- Pour the zucchini mixture evenly into the prepared pan, spreading it out as needed. Pop it in the oven and let it bake for 45-60 minutes. It’s done when it’s firm and the top is golden brown.
- Once baked, let it rest for about 10 minutes. This resting time is key to letting everything set before you slice them into 2-inch cubes. Serve them warm or cold, they’re delicious either way!
Cook’s Notes
For best results, make sure to squeeze out any excess moisture from your grated zucchini. You want your bites to be perfectly firm, not soggy. If you’re planning ahead, you can mix the ingredients a few hours early, cover it, and keep it in the fridge until you’re ready to bake. As for leftovers, they store well in an airtight container in the fridge for up to 3 days. Just pop them in the oven to reheat, or enjoy them cold, straight from the fridge.
Make It Your Own
- Swap the gouda for sharp cheddar if you’re after a bolder cheese flavor.
- Replace bacon with crispy tofu for a vegetarian twist that’s still hearty and delicious.
- Add a handful of chopped fresh herbs like parsley or dill for an added burst of freshness.
- For a bit of heat, toss in a finely diced jalapeño or a pinch of red pepper flakes.
If you try this, I’d love to hear how it turns out. Drop a comment or tag me in your photos — especially if you’ve made it your own with any fun variations! Enjoy!
Related update: Mini Zucchini Bites (Cuadritos De Calabacin)
Related update: Garlic & Spice Plantain Chips

Last Tuesday, I found myself staring into the fridge, the usual weeknight dilemma playing out: what to make that’s quick, refreshing, yet still feels like a treat? I’d been craving something that had all the comforting notes of fall but was light enough to not weigh me down. Enter the pear salad with walnuts and blue cheese, a concoction that seemed to tick every box. This salad is all about contrasts — the creaminess of the blue cheese against the crisp pears, the bitterness of endive softened by the sweet, nutty warmth of walnuts. It’s a symphony of flavors that feels like indulging without the next-day guilt. Ready to dive in? Trust me, it’s a keeper.
Jump to Recipe
What You’ll Need
This recipe doesn’t require a trip to a gourmet store. Odds are you already have most of these ingredients hanging out in your kitchen.
- Pears – Choose ripe, but firm ones.
- Mixed salad leaves – A blend with some curly endive adds a nice bitter touch.
- Lemon juice – For a bright, tangy kick.
- Blue cheese – Go for your fave, the funkier, the better.
- Chives – Finely chopped for a fresh oniony hint.
- Safflower oil – For a neutral base.
- Walnut oil – Adds a toasty depth.
- Walnuts – Toast these for that extra crunch.
How to Make Pear Salad With Walnuts and Blue Cheese
- Start by prepping the pears. Slice a thin piece off their bases so they can stand upright without toppling over. Trust me, this makes the plating look extra fancy.
- In individual bowls, artistically arrange the pears amidst the mixed salad leaves. Think of this as your blank canvas.
- Sprinkle the chopped chives over the leaves, letting them fall where they may — no need for precision here.
- In a small bowl, whisk together the lemon juice, safflower oil, and walnut oil. Aim for a smooth emulsion that coats the back of a spoon.
- Drizzle this dressing lovingly over your salads. You’ll want a nice, even coverage without drowning the ingredients.
- Finish by scattering a generous handful of blue cheese crumbles and toasted walnuts over each salad, letting them nestle into the greens.
Cook’s Notes
Okay, let’s talk about some things to keep in mind. Firstly, when choosing pears, Bartletts or Anjous are my go-to for their texture and sweet flavor. If they’re too ripe, they might collapse under the pressure of the salad fork, so aim for that sweet spot of just ripe.
Toasting the walnuts is a game-changer. Just a few minutes in a dry skillet until they’re golden and fragrant will make a world of difference. Store any leftovers in a sealed container in the fridge, but honestly, this salad is best enjoyed fresh.
If you’re prepping ahead, keep the dressing separate until you’re ready to serve. This keeps the greens from wilting and maintains that fresh, crisp bite.
Make It Your Own
- Don’t love blue cheese? Swap it out for crumbled feta or goat cheese for a milder taste.
- For a protein boost, add some grilled chicken or crispy tofu on top. It turns this salad into a complete meal.
- Try swapping walnuts with pecans for a sweeter, softer crunch.
- If you can’t find curly endive, arugula offers a peppery alternative that pairs wonderfully with the pears and cheese.
If you try this, I’d love to hear how it turns out — drop a comment or tag me! Whether you stick to the script or put your own twist on it, I hope it becomes a staple in your kitchen like it has in mine. Happy cooking!
Related update: Pear Salad With Walnuts and Blue Cheese
Related update: Pear Salad With Walnuts and Blue Cheese

Last Tuesday evening, I was standing in my kitchen, staring into the fridge like it was an oracle with all the answers to my dinner dilemmas. It had been a long day, and I needed to whip up something that felt like a reward for surviving it. That’s when I spotted the pack of pork chops tucked away on the bottom shelf, right beside a wedge of Gruyère cheese that had almost been forgotten. The idea of Cheese Pork Chops was born, and let me tell you, this dish is a midweek savior. It’s got that special touch of comfort with gooey cheese and rich mustard cream, yet it’s simple enough to throw together while you’re half-distracted by a podcast or the kids’ homework.
Jump to Recipe
What You’ll Need
This is one of those recipes where you might just have everything you need already. It’s all about bold flavors with just a handful of ingredients.
- 2 tablespoons olive oil
- 2 tablespoons unsalted butter
- 4 pork chops (about 1 inch thick)
- Salt and pepper, to taste
- 1/2 cup heavy cream
- 2 tablespoons dijon mustard
- 1 cup shredded Gruyère cheese
How to Make Cheese Pork Chops
- Heat a heavy-bottom skillet over medium-high heat. Add the olive oil and butter, swirling them together until the butter melts and starts to slightly foam.
- Carefully place the pork chops in the skillet. Sauté for about 3 minutes on each side, letting them develop a lovely golden crust.
- Reduce the heat to medium. Cook the pork chops for an additional 5 to 6 minutes per side, until they’re just cooked through. Sprinkle with salt and pepper to taste. Remember, the juices should run clear when you test them.
- While the chops finish cooking, preheat your broiler. In a small bowl, whisk together the heavy cream, dijon mustard, and shredded Gruyère cheese until well combined.
- Transfer the cooked pork chops to an ovenproof dish. Spread the cheese-cream mixture generously over each chop.
- Place the dish under the preheated broiler for about 5 minutes. Keep a close eye on them—the cheese should be bubbly and slightly browned.
Cook’s Notes
One of the best things about this dish is how forgiving it is. If your chops are a bit thicker or thinner, just adjust cooking time accordingly. You want them juicy, not dry.
If you’re making this ahead of time, you can prepare the cheese mixture in advance and even sear the chops the night before. Just store them separately in the fridge and bring to room temperature before broiling.
Got leftovers? Lucky you! They’re fabulous sliced thin and tossed into a salad, or reheated gently in the microwave for a next-day lunch that will make your coworkers jealous.
Make It Your Own
- Spice it up: Add a teaspoon of chili flakes to the cheese mixture for a spicy kick.
- Herbaceous twist: Mix a tablespoon of chopped fresh herbs like thyme or rosemary into the cheese mixture.
- Cheese swap: Try shredded sharp cheddar or even blue cheese for a different flavor profile.
- Dijon alternative: Experiment with whole grain mustard for a bit more texture and tang.
If you try this, I’d love to hear how it turns out — drop a comment or tag me in your cheesy creations! Happy cooking, friends!
Related update: Cheese Pork Chops

Picture this: It’s a Tuesday evening, and the week’s already wearing me down. I’m craving something cheesy, comforting, and a little indulgent. You know, the kind of meal where the smell alone makes you feel like you’ve just wrapped yourself in a warm, delicious hug. Enter the Easy Cheesy Pizza Casserole. It’s like a giant pizza in a pan but with all the cozy vibes of a casserole. Plus, it’s a crowd-pleaser, perfect for family dinners or casual get-togethers with friends. The best part? It’s as easy as it is cheesy. Grab your apron, and let’s dive in!
Jump to Recipe
What You’ll Need
Trust me, this ingredient list reads like a love letter to your pantry. Chances are, you already have most of these on hand:
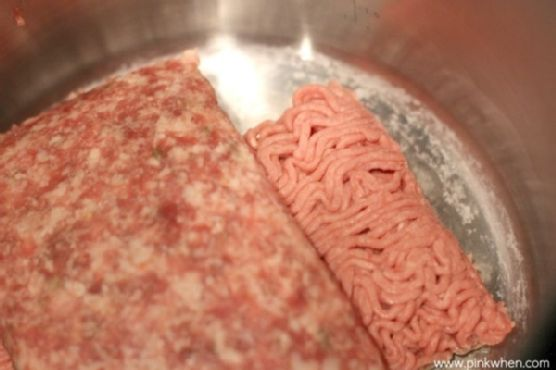
- Ground beef or bulk sausage mix
- Ricotta cheese
- Oregano
- Basil
- Parmesan cheese
- Pasta sauce or canned pizza sauce
- Crushed red pepper flakes
- Pepperoni
- Shredded mozzarella cheese
- Shredded aged provolone cheese
- Herbed parmesan drop biscuits (recipe follows)
- Baking mix
- Italian seasoning
- Milk
How to Make Easy Cheesy Pizza Casserole
- Preheat your oven to 375°F. This is a crucial step, so your biscuits start cooking right away.
- Brown the ground beef or sausage in a skillet over medium heat until it’s no longer pink. Drain the fat because nobody likes greasy casseroles.
- Stir in the pasta or pizza sauce and a pinch of crushed red pepper flakes. Let it simmer until everything is well-blended and smells heavenly.
- In a separate bowl, mix the ricotta cheese with oregano, basil, and Parmesan cheese. This will be your creamy layer of deliciousness.
- Prepare the biscuit dough by combining the baking mix with Italian seasoning and milk. Stir until just blended; lumps are okay here.
- Spray a 13 x 9-inch pan with non-stick spray. Drop the biscuit dough by teaspoons into the pan, spacing them evenly. Don’t worry about gaps; the dough will spread out beautifully in the oven.
- Layer the ground beef mixture over the biscuits, then dot with the ricotta mixture. You should start to see the makings of a masterpiece.
- Bake at 375°F for about 20 minutes or until the biscuits are puffed and just starting to turn golden. Your kitchen should smell like a dream by now.
- Increase the oven temperature to 425°F. Sprinkle mozzarella and provolone cheeses over the top and lay out pepperoni slices like you’re decorating a pizza.
- Return the casserole to the oven for about 10 minutes, until the cheese is melted and bubbling slightly. This is the moment you’ve been waiting for.
- Let it stand for 5 minutes before slicing. Patience is a virtue, and it’ll pay off when your slices come out picture-perfect.
- Optionally, sprinkle additional Parmesan cheese on top before serving. More cheese is always the right choice.
Cook’s Notes
A few quick tips to make sure your casserole is a hit:
- If you want to make this ahead, prepare the beef and ricotta mixtures and store them in the fridge. When ready to bake, just assemble everything, and you’re good to go.
- This casserole keeps well in the fridge for up to three days. Just cover and reheat in the oven to keep the biscuits from getting soggy.
- Be sure not to over-mix your biscuit dough; a gentle stir is all it takes. Over-mixing can make them tough.
Make It Your Own
Feel free to get creative and put your spin on this cozy dish:
- Swap the pepperoni for crispy tofu slices for a vegetarian twist that still packs plenty of flavors.
- Use spicy Italian sausage in place of ground beef for an extra kick.
- Try adding a layer of sautéed mushrooms and onions for an earthy depth of flavor.
- Go Hawaiian and add pineapple chunks along with ham or Canadian bacon for a sweet and savory combo.
If you give this Easy Cheesy Pizza Casserole a whirl, I’d be thrilled to hear how it turned out for you. Drop a comment or tag me on social media with your delicious creations. Happy cooking!
Related update: Easy Cheesy Pizza Casserole
Related update: My Drunken Fish Fillet

Have you ever had one of those days when the weather just flips from sunny and warm to cold and dreary, like the sky can’t make up its mind? That’s exactly what happened last Tuesday. I was planning on grilling dinner, but as the clouds rolled in, I found myself craving something warm and comforting instead. Enter my trusty Homemade Broccoli Cheddar Soup. It’s one of those recipes that feels like a big, cozy sweater for your insides. Plus, it’s surprisingly easy to whip up, which makes it perfect for those spontaneous soup days. With just a handful of ingredients, most of which are probably lurking in your pantry right now, you’ll have a bowl of creamy, cheesy goodness that hits all the right notes.
Jump to Recipe
What You’ll Need
This soup keeps things simple, but there are a few standout ingredients that make it special and oh-so-delicious. Don’t worry if your pantry is looking a little bare; chances are you already have most of this stuff on hand.
- Olive oil
- 1 shallot, chopped
- 1 red onion, chopped
- 1 jalapeno, optional for heat
- Lemon juice
- 4 cups vegetable broth
- Salt and pepper to taste
- 2 large Yukon Gold potatoes, peeled and diced
- 2 heads of raw broccoli, chopped (save a few florets for garnish!)
- Plain yogurt (like Chobani)
- Plain almond milk
- Fresh parsley, chopped
- Shredded cheddar cheese
- 1 bay leaf
How to Make Homemade Broccoli Cheddar Soup
- In your soup pot, heat 2 tablespoons of olive oil over medium-high heat. Add the shallot, red onion, and jalapeno. Sauté until the onions are translucent and everything smells heavenly.
- Add a splash of lemon juice, all the vegetable broth, the remaining olive oil, salt, and pepper. Give it a good stir, then reduce the heat to medium.
- Toss in the diced potatoes and bring the broth to a boil. Cook until you can easily pierce the potatoes with a fork.
- Stir in the chopped broccoli, but remember to reserve a few florets for later. Cover the pot and let the broccoli get nice and tender.
- Once the broccoli is cooked, turn off the heat. Carefully transfer the contents of the pot to a large mixing bowl and let it cool slightly.
- Add the parsley, yogurt, and almond milk to the bowl. Gently fold these into the soup mixture, letting the heat from the soup meld everything together.
- In batches, puree the mixture in a blender until it’s as smooth as you like it. I’m still dreaming of that Vitamix, but any blender will do!
- In the now-empty soup pot, sauté the reserved broccoli florets with a dash of veggie broth until they’re just tender.
- Return the pureed soup to the pot, add the bay leaf, and a few pinches of chopped basil if you’re feeling fancy. Simmer uncovered for at least 20 minutes, stirring frequently to banish those pesky air bubbles. Remember to fish out the bay leaf before serving!
Cook’s Notes
Let’s chat about some things that might come in handy as you make this soup. First off, if you’re not into spicy, feel free to skip the jalapeno; it’s totally optional. If you’re planning to make this soup ahead of time, it stores beautifully in the fridge for up to 3 days. Just reheat it slowly on the stove, and you’ll be good to go. As for freezing, I wouldn’t recommend it — the texture can get a little funky once thawed. Always remember to remove that bay leaf before serving; no one wants a surprise in their spoon!
Make It Your Own
This is where the fun begins! Here are a few ideas to tweak this soup to your liking:
- Swap the cheddar for Gruyere cheese if you’re feeling fancy; it adds a nutty depth to the soup.
- Want a heartier meal? Stir in some cooked quinoa or white beans for added protein.
- For a vegan twist, use nutritional yeast instead of cheddar cheese. It adds a cheesy flavor without the dairy.
- Love greens? Toss in a few handfuls of spinach or kale before blending for an extra boost of nutrients.
If you try this, I’d love to hear how it turns out — drop a comment or tag me! Whether you’re combating a surprise rainy day or just craving something warm and comforting, I hope this soup brings a bit of joy to your kitchen. Happy cooking!
Related update: Homemade Broccoli Cheddar Soup
Related update: Moroccan Carrot Soup

Picture this: It’s a Wednesday night, and I have exactly 45 minutes to whip up something that feels a little fancy but won’t leave me with a mountain of dishes. That’s when I remember my trusty cream cheese stuffed chicken breasts. It’s the kind of meal that sounds like it took hours, but really, it’s a bit of kitchen magic that you can pull together with everyday ingredients. And let’s be honest, who doesn’t love a good creamy-cheesy-bacon combo? The first time I made it, I almost skipped the tarragon — but trust me, it’s the game-changer that makes this dish sing.
Jump to Recipe
What You’ll Need
This list is pretty much pantry-basics-plus-bacon. You might even have everything you need already, minus a quick trip to the fridge:
- Skinless boneless chicken breasts
- Cream cheese
- Bacon
- Olive oil or unsalted butter
- Diced onion
- Garlic
- Salt
- Black pepper
- Fresh tarragon
How to Make Cream Cheese Stuffed Chicken Breasts
- Preheat your oven to 350°F. This is your moment to take a deep breath and envision the golden deliciousness to come.
- In a small skillet, warm the butter or olive oil over medium-low heat. Add the diced onions and let them sweat it out until they’re soft and translucent, about 5 minutes. Toss in the garlic and stir for another minute until it’s fragrant enough to make you weak in the knees.
- While that cools, grab another skillet and give the bacon a gentle sauté over low heat. You want it soft and a little bit rendered, not crispy. Paper towel it up and let it chill.
- Place the chicken breasts between two sheets of waxed paper, and give them a good, even pounding to about 1/4-inch thickness. Channel your inner zen and season them with salt and pepper.
- Combine the cooled onion-garlic mix with the cream cheese. Spread a generous dollop of this goodness in the center of each chicken breast.
- Roll or fold the chicken around the cream cheese mixture. Tuck the ends under and secure these delightful little packages with toothpicks. Don’t worry if they look a bit rustic, that’s part of the charm.
- Sprinkle fresh tarragon over the rolled chicken. Wrap each piece with bacon, giving them a cozy little blanket.
- Place your chicken rolls in an 8×11 baking dish and drizzle with melted butter. Pop them in the oven for 25 to 30 minutes. They’re done when the chicken is cooked through, the bacon is browned, and the cream cheese is irresistibly melty.
- Serve immediately and watch them disappear. Seriously, they’re magic.
Cook’s Notes
A few things to keep in mind while you’re chef-ing it up:
– Make sure the onions and garlic are cool before mixing them with the cream cheese. Otherwise, things might get a bit too melty too soon.
– If you’re making this ahead, you can assemble the chicken rolls and keep them in the fridge for a few hours. Just bake them right before you’re ready to eat.
– Leftovers? Store them in an airtight container in the fridge for up to two days. Reheat gently in the oven to keep that bacon crisp.
Make It Your Own
Here’s where you can get a little playful:
- Swap the chicken for crispy tofu for a vegetarian twist that still brings all the creamy-bacon vibes (yep, vegetarian bacon exists!).
- Add some chopped spinach to the cream cheese mixture for a pop of color and a little extra nutrition.
- Try prosciutto instead of bacon for a slightly saltier, more gourmet flavor.
- Experiment with herbs — basil or rosemary could take this dish in a deliciously different direction.
If you try this, I’d love to hear how it turns out — drop a comment or tag me! Your kitchen adventures are what make this all so fun. Happy cooking!
Related update: Cream Cheese Stuffed Chicken Breasts
Related update: Crock-Pot: Asian-Style Country Ribs with Black Bean Garlic Sauce

The first time I attempted to make tamales, it was a classic case of my eyes being bigger than my expertise. I had this craving for something hearty yet comforting, and tamales seemed like the perfect challenge. Spoiler alert: the kitchen looked like a masa massacre by the end of it. But with a little patience and practice, these Beef, Poblano & Cheese Tamales have become my go-to for impressing friends without losing my mind in the process. They’re just the right mix of savory and spicy, with a cheesy twist that keeps you coming back for more. Plus, the aroma that fills your kitchen is like a warm hug from a friend you haven’t seen in ages.
Jump to Recipe
What You’ll Need
You might already have most of these staples in your pantry. And if you don’t, trust me, it’ll be worth the grocery run.
- Dried corn husks
- Dried California chili pods
- Ground beef
- Shredded mozzarella cheese
- Diced poblano pepper
- Garlic, minced
- Olive oil
- Goya seasoning
- Salt
- Chili powder
How to Make Beef, Poblano & Cheese Tamales
- Start by soaking the corn husks in hot water in a large bowl. They need to be pliable, so give them at least 20 minutes.
- In a large saucepan, bring 4 cups of water to a boil. Remove any string-like bits from the chili pods and throw them into the boiling water with half a packet of Goya seasoning. Cover it up and let it all simmer for about 20 minutes.
- Once the chili pods have softened, blend them with 2 cups of the chili stock until you get a smooth sauce. Drain the rest of the stock from the saucepan, but keep it handy.
- Put the saucepan back on medium heat. When any leftover stock evaporates, add a splash of olive oil, then toss in the onion and beef. Break apart the beef as it cooks.
- Season the beef with a packet of Goya seasoning and chili powder, then let it cook for about 5 minutes until it gets a bit brown.
- Pour in the chili sauce, followed by the garlic and about 2 teaspoons of salt. Add the diced poblano pepper now for the best flavor. Turn the heat down to medium-low, partially cover the pan, and let it simmer for an hour. The sauce should thicken nicely.
- While the beef is simmering, make the corn masa mix. In a large bowl, combine the instant corn masa mix, water, baking powder, salt, and olive oil. Mix until it’s spongy.
- Now for assembly: spread the masa mix thinly on the right side of a corn husk, leaving about 2 inches at the left edge clear. Spoon about 2 tablespoons of the meat mixture and a sprinkle of cheese onto the masa. Roll it up starting with the right-hand side, and fold the left flap over.
- If you’ve got a double boiler, great! If not, a metal colander in a large pot will do. Arrange the tamales so they’re snug but not squashed.
- Boil 2 cups of water in the pot (or about 1 inch high), then reduce the heat and add the tamales. Place a towel between the colander and lid to keep the steam in. Let them steam for 30 minutes.
Cook’s Notes
Soaking the corn husks longer is better than less, so patience pays off here. When blending the chili pods, you might have to stop and scrape the sides of the blender to get a smooth sauce. And hey, don’t stress if your masa isn’t perfectly even when you spread it — it’s homemade charm we’re going for, not factory precision.
Leftovers? Store them in an airtight container in the fridge; they’ll last up to a week. Reheat them by steaming again or even in the microwave wrapped in a damp paper towel to keep them from drying out. You can also freeze them for up to three months, just make sure they’re cool before you pack them up.
Make It Your Own
- Swap the ground beef for shredded chicken or even pulled pork for a different protein punch.
- Try smoked gouda or Monterey Jack instead of mozzarella for a unique cheesy twist.
- If you’re a veggie lover, add in some sautéed mushrooms or zucchini with the poblano for extra texture.
- For a spicy kick, mix in some diced jalapeños or serrano peppers when you add the poblano.
And there you have it! If you try this, I’d love to hear how it turns out — drop a comment or tag me! These tamales are a labor of love, but trust me, they are totally worth it. Enjoy every bite!
Related update: Beef, Poblano & Cheese Tamales
Related update: Chimichurri Skirt Steak with Grilled Asparagus

Picture this: it’s a chilly weekday evening, the kind where the wind seems to seep through every layer of clothing, and all I can think about is wrapping my hands around a warm bowl of something comforting. That’s how I found myself in the kitchen, wrestling with the idea of making a classic French Onion Soup. You know, the kind with a deep, rich broth and a cheesy, bubbly top that smells like pure coziness. It’s the perfect dish for those nights when you want to impress yourself with something that feels a bit fancy yet totally do-able. Spoiler alert: this recipe is easier than it seems and totally worth every bit of effort. Oh, and if you’re in a hurry to dive in, I’ve got you covered.
Jump to Recipe
What You’ll Need
Guess what? You might already have most of these ingredients hanging out in your kitchen. This recipe leans on everyday staples with a few stars that bring the magic.
- 2 tablespoons of salted butter
- 4 large yellow onions, sliced thin
- 2 tablespoons of flour
- 1/2 cup of sherry
- 8 cups of beef broth
- 4 sprigs of fresh thyme
- 3 sprigs of fresh parsley
- 1 bay leaf
- Salt and pepper to taste
- 1 French crusty baguette
- 2 cups of shredded gruyere cheese
How to Make Classic French Onion Soup
- Preheat your oven to 400°F (200°C). This is crucial for that cheesy top finish.
- In a large Dutch oven, melt the butter over medium heat. Let it sizzle and foam—it’s the signal that your onions are ready to join the party.
- Add the sliced onions to the pot and sprinkle them with flour. Stir occasionally, adjusting the heat between medium and low. You’ll want to do this for about 45 minutes until they turn a tender, golden brown. If they start to brown too quickly, don’t hesitate to lower the heat.
- It’s de-glazing time! Pour in the sherry and scrape up those flavorful bits stuck to the bottom of the pot—aroma heaven.
- Add the beef broth and bring everything to a rolling boil. The anticipation builds!
- Toss in the fresh thyme, parsley, bay leaf, and season with salt and pepper. Simmer gently for 15 minutes, letting the flavors mingle and deepen.
- Meanwhile, slice the baguette and butter each piece. Arrange them on a cookie sheet and bake for 5-10 minutes until they’re dry and ready to soak up all that brothy goodness. Set aside to cool just a bit.
- Remove the herb sprigs and bay leaf from the soup. Ladle the soup into four oven-safe ramekins. Now, the fun part: top each with a slice of crusty bread and a generous sprinkle of gruyere cheese.
- Place your ramekins on a cookie sheet (for easy handling) and bake uncovered at 400°F for another 5-10 minutes until the cheese is bubbling. For an extra golden top, switch to broil for one more minute.
- Finally, serve warm and watch the smiles unfold around the table.
Cook’s Notes
Okay, here are a few nuggets of wisdom to ensure your soup is spot-on. First, let’s talk onions. Low and slow is key for that melt-in-your-mouth caramelization, so patience is your best friend here. And always taste your broth before seasoning—sometimes beef broth can be saltier than expected.
If you’re making it ahead, the soup base can be stored in the fridge for up to 3 days. Just reheat gently and add the bread and cheese topping before serving. Leftovers? They reheat beautifully in the oven; just keep the bread and cheese separate until you’re ready to enjoy round two.
Make It Your Own
Want to put a personal spin on this classic? Here are some tasty variations:
- For a vegetarian version, swap the beef broth with a robust veggie broth and add a splash of soy sauce for depth.
- If sherry isn’t your thing, try a dry white wine or even a splash of brandy for a different kind of warmth.
- Love a bit of heat? Add a pinch of red pepper flakes to the onion mix for a subtle kick.
- Switch up the cheese! Try a combo of gruyere and sharp cheddar for a more pronounced flavor.
If you give this recipe a try, I’d love to hear how it turns out—drop a comment or tag me in your delicious creations. Happy cooking, and may your kitchen be filled with warmth and joy!
Related update: Classic French Onion Soup
Related update: One Soup, Two Ways: Chunky Vegetables and Cream Of Vegetables

It was one of those nights when the fridge seemed to mock me with its emptiness, only the defiant glow of the leftover polenta catching my eye. I had no grand plans for dinner, just a craving for something that felt like a hug on a plate without the fuss. Enter Polenta Pie with Italian Toppings — a recipe that marries the comforting, hearty texture of polenta with vibrant, savory toppings. It’s the perfect dish for those evenings when you need a little culinary adventure without a complicated list of steps or ingredients. Plus, it’s a great way to transform humble pantry staples into something that feels a bit fancy.
Jump to Recipe
What You’ll Need
It’s likely that you already have most of these ingredients lingering in your kitchen, making this dish both convenient and delicious. Here’s what you need to gather:
- Water
- Milk
- Olive oil
- Salt
- Yellow corn meal
- Diced pancetta
- Shallot
- Garlic
- Gorgonzola cheese or any blue cheese you love
- Baby spinach
- Sweet bright colored bell pepper
- Pignoli (pine nuts)
How to Make Polenta Pie With Italian Toppings
- Start by making the polenta. In a saucepan, bring water, milk, 1/4 cup of olive oil, and a pinch of salt to a boil. Immediately reduce the heat and gradually pour in the cornmeal while stirring to prevent lumps.
- Keep simmering the cornmeal, stirring very frequently for about 15 minutes. You’ll know it’s ready when it’s thick and holds its shape.
- Line a baking sheet with foil or parchment paper and drizzle it with olive oil. Spread the polenta evenly across the sheet to about 1/2-inch thick, shaping it into a circle like a pizza crust. Let it cool until it’s firm.
- Preheat your oven to 425°F. Once the polenta is set, sprinkle it with freshly ground pepper and bake for 30 minutes, until the edges are beautifully browned.
- While your crust is baking, prepare the toppings. Heat 1 tablespoon of olive oil in a skillet and sauté the diced pancetta, shallots, and garlic for about 7-8 minutes until they are golden and fragrant. Don’t overdo it — you want them just right, not crunchy.
- Remove the pancetta mixture to a bowl. In the same skillet, sauté the baby spinach until it’s wilted and a deep green, about 3 minutes. Remove and set aside.
- Add a touch more oil if needed and sauté the bell pepper slices until they’re slightly wilted, about 3-4 minutes.
- Now, let’s assemble the pie! Start by spreading the gorgonzola crumbs evenly over the baked polenta crust. Then layer the pancetta mix, followed by the spinach, bell peppers, and finally a sprinkle of pine nuts.
- Drizzle a few more drops of olive oil over the top and pop it back in the oven for 4-5 minutes just to warm everything through.
- Slice your polenta pie like a pizza or into neat squares. Serve it hot and enjoy the medley of flavors!
Cook’s Notes
This dish is a great candidate for prepping ahead. You can make the polenta crust a day in advance and store it in the fridge, well-wrapped. Just bring it to room temperature before proceeding with the baking step. If you’re lucky enough to have leftovers, they hold well in the fridge for 2-3 days. Simply reheat in the oven to enjoy a second time with a nice crisp. A common pitfall is undercooking the polenta, so keep an eye on that texture — thick but not cement-like is your sweet spot.
Make It Your Own
Here are a few fun twists to try:
- Swap the pancetta for crispy tofu to make it vegetarian-friendly.
- Try a mix of mushrooms instead of the bell pepper for an earthy depth.
- Use feta if you’re not a fan of blue cheese, it brings a nice tang.
- Replace the pine nuts with toasted almonds for an unexpected crunch.
If you try this Polenta Pie with Italian Toppings, I’d love to hear how it turns out! Drop a comment below or tag me in your creation pics. Let’s share the love for this deliciously comforting dish.
Related update: Polenta Pie With Italian Toppings
Related update: Chicken Porridge

So there I was, standing in my kitchen on a chilly Wednesday evening, staring at the contents of my fridge like they might magically assemble themselves into dinner. It had been one of those days, you know? The kind where you just want something cozy and comforting, but it needs to come together fast because you’re already running low on energy. That’s when I spotted the potatoes and cheese, and it hit me—Potato Cheese Soup! But not just any soup; this one is going to be served in a bread bowl. Trust me, by the time you ladle this velvety magic into its warm carb cradle, you’ll feel like you just wrapped yourself in a fluffy blanket of culinary bliss. It’s rich, creamy, and feels like a hug in a bowl. Perfect for when life needs a pause button. And yes, it’s secretly pretty easy to make! Jump to Recipe
What You’ll Need
This ingredient list is a lifesaver because chances are, you already have most of these lurking in your pantry or fridge.
- 2 tablespoons of olive oil
- 1 sweet diced onion
- 2 cloves of garlic, minced
- 4 cups of chicken stock
- 2 cups of water
- 1 teaspoon of salt
- 5 medium red potatoes, diced
- 2 carrots, peeled and sliced
- 1 cup of whole milk
- 1/2 cup of heavy cream
- 2 tablespoons of butter
- 8 oz block of Velveeta cheese, cubed
- 2 cups of shredded sharp cheddar cheese
- Salt and pepper to taste
- Optional garnishes: bacon crumbles, chives, sour cream, shredded Parmesan cheese
How to Make Best Potato Cheese Soup in a Bread Bowl
- In a large heavy stock pot, heat 2 tablespoons of olive oil over medium heat. When the oil shimmers, toss in the chopped onions. Cook until they’re translucent and their sweetness wafts through the kitchen, about 2-3 minutes.
- Add the minced garlic and let it dance around in the pot for another minute until it’s fragrant but not brown.
- Pour in the chicken stock, water, and a teaspoon of salt. Stir to combine and then add in the diced potatoes and sliced carrots.
- Bring the pot to a boil. Let it work its magic until the potatoes are fork-tender, like a hot knife through butter.
- Turn off the burner and let things cool a bit. Scoop out about half of the potatoes into a food processor or blender. Blitz them until you have a smooth paste, then return them to the pot. This thickens the soup beautifully.
- Place the pot back on medium heat. Add the whole milk, heavy cream, butter, and Velveeta cheese. Stir gently until the butter and Velveeta have melted into a luscious pool. Make sure not to boil; adjust the heat to low as needed.
- Start adding the shredded sharp cheddar cheese, a handful at a time, stirring lovingly after each addition. Finish with a sprinkle of Parmesan cheese.
- Taste and adjust seasoning with salt and pepper. Remember, the cheeses are salty, so go slow and taste as you go.
- Spoon the soup into bread bowls, regular bowls, or even a mug if you’re feeling rebellious. Top with bacon crumbles, chives, a dollop of sour cream, and a sprinkle of extra cheese for good measure.
Cook’s Notes
This soup is your forgiving friend in the kitchen. If you find that it’s too thick, just splash in a bit more milk or chicken stock. It’ll hang out in the fridge for about 3 days, but I doubt it’ll last that long. When reheating, do so gently over low heat to avoid separating that creamy goodness.
If you’re planning ahead, make the soup without the cream and cheeses, cool it, and store in the fridge. When you’re ready to eat, reheat and then add the dairy components for freshest flavor.
Make It Your Own
- Swap the Velveeta for a more natural cheese like Gruyère or Fontina for a different creamy texture.
- Add crispy bacon directly into the soup for a smoky flavor boost that’s irresistible.
- Go vegetarian by using vegetable stock instead of chicken stock. It’s still super flavorful!
- Spice it up with a dash of cayenne pepper or a splash of hot sauce for those who like a bit of heat.
If you try this, I’d love to hear how it turns out—drop a comment or tag me! Your kitchen adventures make my day. Here’s to warm bowls and full hearts!
Related update: Best Potato Cheese Soup in a bread bowl
It was one of those nights where the fridge was whispering, “Hey, you forgot to grocery shop this week.” You know the ones? I had a craving for something cozy but didn’t want to spend hours in the kitchen. Enter: the World’s Greatest Lasagna Roll Ups. These babies are not only a twist on the classic lasagna but also perfect for when you want to impress without the stress. They’re a bit like lasagna’s cool, quirky cousin – all the comfort, but with a fun twist. Plus, they make the whole place smell like a tiny Italian bistro. Who can say no to that? Grab your apron, and let’s do this!
Jump to Recipe
What You’ll Need
This is one of those glorious recipes where you probably already have most of the stuff sitting in your pantry. A few fresh ingredients and some pantry heroes, and you’re ready to roll.
- Lean ground beef you like
- Italian sausage
- Extra virgin olive oil
- Onion
- Garlic
- Italian seasoning
- Dried basil
- Fire roasted diced canned tomatoes
- Canned tomato sauce
- Canned tomato paste
- Water
- Black ground pepper
- Lasagna noodles
- Ricotta cheese
- Fresh parsley
- Egg
- Salt
- Parmesan Reggiano
- Mozzarella cheese
How to Make the World’s Greatest Lasagna Roll Ups
- In a large saucepan over medium heat, start browning the ground beef and Italian sausage. This is where the comforting aroma begins!
- In a separate pan, heat a tablespoon of extra virgin olive oil over medium heat. Cook the onion, garlic, Italian seasoning, and dried basil for about 6-8 minutes, or until the onion is translucent and everything smells heavenly.
- Add the cooked onion and garlic mixture to the meat. Stir in the diced canned tomatoes, tomato sauce, tomato paste, water, black pepper, and 2 tablespoons of the fresh parsley. Let it simmer uncovered for an hour, filling your home with the scent of Italian goodness.
- Meanwhile, bring a large pot of water to a boil. Cook the lasagna noodles for 8-10 minutes, then drain and rinse with cold water. Set them aside.
- In a small mixing bowl, combine the remaining parsley, ricotta cheese, egg, and 1/2 teaspoon salt. Mix well until it’s creamy and spreadable.
- Preheat your oven to 375°F. Pour a bit of the meat sauce into the bottom of a 9 x 13 glass baking dish to set the stage for our roll ups.
- To assemble, lay a lasagna noodle on a flat surface. Spread a generous amount of the cheese mixture over it, sprinkle with a little Parmesan Reggiano, and roll it up snugly. Place it seam side down in the baking dish. Repeat with the remaining noodles.
- Cover each roll up with a spoonful of the meat sauce. Top with slices of mozzarella cheese for that melty goodness we all adore.
- Cover the dish with foil and bake in the oven for 20 minutes. Then, remove the foil and bake for an additional 10 minutes uncovered. This is when the cheese gets all bubbly and golden!
- Let them cool for about 10 minutes before serving. Trust me, they’re worth the wait!
Cook’s Notes
- This dish is forgiving. If you need to make it ahead, just assemble the roll ups in the baking dish, cover, and refrigerate until you’re ready to bake. Just add a few minutes to the baking time if you’re cooking them from cold.
- Leftovers? Absolutely. They reheat beautifully in the microwave or oven. If you want to freeze them, do so before baking.
- Don’t overstuff the noodles. It’s tempting, but a little restraint keeps them from bursting and ensures they stay tidy and perfect.
Make It Your Own
- Swap the ground beef for ground turkey or chicken if that’s what you have or prefer.
- For a veggie twist, replace the meat with mushrooms and zucchini, just cook them down until tender.
- If you’re feeling spicy, add some crushed red pepper flakes to the meat sauce for an extra kick.
- Use fresh spinach in the cheese mixture for a pop of color and nutrition. Just make sure to sauté it first to remove excess moisture.
If you try this, I’d love to hear how it turns out—drop a comment or tag me! Your kitchen adventures make my day. Happy rolling!
Related update: How to make the World’s Greatest Lasagna Roll Ups
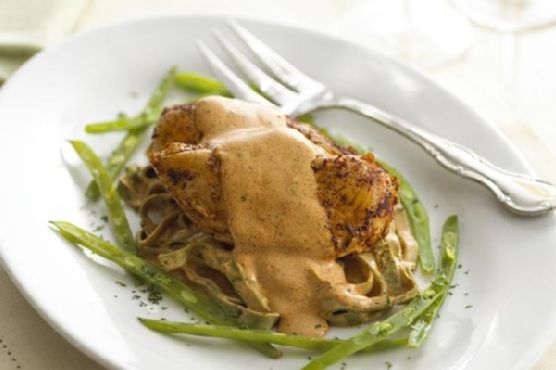
So there I was, standing in my kitchen, staring down a package of chicken breasts and wondering how on earth I was going to make an exciting dinner out of them—again. It was one of those evenings where you just want something easy yet indulgent, and frankly, I felt like a culinary magician without a wand. That’s when it hit me: Alouette Chicken Paprika. This dish has saved my weeknight dinners countless times, thanks to its creamy, savory sauce and that lovely paprika kick. It feels fancy enough to impress anyone you might have over but is straightforward enough to whip up after a long day. Trust me, once you try it, you’ll be hooked.
Jump to Recipe
What You’ll Need
The beauty of this recipe is that you probably already have most of these gems in your kitchen. It’s a pantry hero, with a few special players like Alouette Garlic & Herbs Spreadable Cheese that make it sing.
- 2 tablespoons butter
- 4 boneless chicken breast halves
- 1 teaspoon garlic powder
- 1 container Alouette Garlic & Herbs Spreadable Cheese
- 1/2 cup milk
- 6 teaspoons paprika
How to Make Alouette Chicken Paprika
- In a small bowl, blend the garlic powder with 6 teaspoons of paprika until well combined. Coat each chicken breast generously with this mixture, making sure they’re evenly covered.
- Melt the butter in a skillet over medium heat. Add the chicken and sauté for about 5 minutes on each side. You’ll know it’s ready to move on when the chicken is golden and slightly crisp at the edges.
- Cover the skillet, reduce the heat to low, and let the chicken simmer for 15 minutes. This is your chance to let the flavors mingle and intensify.
- Once done, remove the chicken from the skillet but keep that liquid gold in there—you’re going to need it!
- In another bowl, combine the milk, Alouette Garlic & Herbs Spreadable Cheese, and any remaining paprika. Mix until smooth and dreamy.
- Pour this cheese mixture into the skillet, stirring well with the reserved liquid. Let it simmer for a couple of minutes until the sauce is smooth and slightly thickened.
- To serve, generously pour this creamy, aromatic sauce over the chicken. If you’re feeling extra indulgent, use any remaining sauce over a bed of rice, pasta, or potatoes.
Cook’s Notes
When cooking the chicken, make sure not to rush the sautéing step. That golden color adds layers of flavor that are worth the wait. If the sauce seems too thick, a splash more milk can save the day. For leftovers, store the chicken and sauce separately in airtight containers in the fridge for up to 3 days. The sauce will thicken as it chills, so warming it gently on the stovetop with a bit of extra milk will bring it back to life.
Make It Your Own
- Swap the chicken for crispy tofu for a vegetarian twist—just coat and cook the same way.
- Love smoky flavors? Use smoked paprika instead of regular for an extra punch.
- Add a handful of sautéed mushrooms to the sauce for more earthiness and texture.
- Try coconut milk in place of regular milk for a dairy-free and slightly exotic option.
If you try this, I’d love to hear how it turns out—drop a comment or tag me! Your feedback is like the perfect spice blend for my recipe collection!
Related update: Alouette Chicken Paprika
Related update: Cauliflower, Brown Rice, and Vegetable Fried Rice