Arroz Con Leche | Made by Meaghan Moineau

One chilly evening, I found myself standing in the kitchen, the rain tapping softly against my window, craving something warm and creamy to chase away the lingering cold. I peeked into my pantry and spotted the perfect answer to my comfort food craving—Arroz Con Leche. This luscious rice pudding has a way of wrapping you in a cozy hug with its creamy texture and fragrant cinnamon aroma. It’s one of those deceptively simple recipes that feels fancy but comes together in a snap. Plus, it uses ingredients you’re likely to already have on hand. Trust me, if you’re in need of a little comfort in a bowl, this one’s a keeper. Jump to Recipe

What You’ll Need

If your pantry is anything like mine, you’re already halfway there with these ingredients:

  • 2 cups heavy cream
  • 2 cups milk
  • 1 cup arborio rice
  • 2 cinnamon sticks
  • 1 tablespoon lemon zest
  • Pinch of salt
  • 1 cup sugar
  • Ground cinnamon, for sprinkling

How to Make Arroz Con Leche

  1. Grab a medium-sized saucepan and toss in 2 cups of heavy cream, 2 cups of milk, the cup of arborio rice, cinnamon sticks, lemon zest, and a pinch of salt. Bring this fragrant concoction to a gentle boil over medium heat. You want those aromas to greet you like an old friend.
  2. Once it hits a boil, reduce the heat and let it simmer gently. Stir occasionally, enjoying the wafting scent of cinnamon, until the rice is tender. This should take about 30 minutes. Keep an eye on it—if the mixture gets too thick, add a splash of milk or cream to loosen it up.
  3. Remove the pan from heat and stir in the sugar until it’s fully dissolved. It should feel like velvet on your spoon.
  4. Fish out those cinnamon sticks before serving. Scoop the creamy rice pudding into bowls and give it a generous sprinkle of ground cinnamon for that extra warm-spice kick.

Cook’s Notes

Here’s the scoop: Arroz Con Leche is all about the creamy texture. Arborio rice is my go-to because it’s so good at soaking up all that dairy goodness. Keep the heat low and slow once you’ve hit that initial boil. If you’re not careful, the bottom might scorch or it might thicken too quickly, so don’t wander off too far!

Leftovers? You bet! This pudding keeps well in the fridge for up to three days. Just seal it in an airtight container. When you’re ready to reheat, you might need to add a splash of milk to bring it back to life.

Make It Your Own

  • Swap out the lemon zest for orange zest if you’re feeling citrusy.
  • Throw in a handful of raisins or dried cranberries during the last 10 minutes of cooking for a fruity twist.
  • If you’re a vanilla fan, add a splash of vanilla extract just before serving for an added layer of flavor.
  • Try using coconut milk for a tropical take—just replace half the milk and heavy cream with coconut milk.

If you try this, I’d love to hear how it turns out—drop a comment or tag me! There’s nothing like sharing a little comfort, one bowl at a time. Enjoy the warmth, my friends!

Goes Well With

If you want to round out the meal, here’s what I’d pair it with over on meaghanmoineau.com:

Related update: Arroz Con Leche

Healthy Southwestern Oatmeal | Made by Meaghan Moineau

On a chilly Tuesday morning last week, I found myself staring into my pantry, desperate for something other than my go-to toast routine. You know those mornings when you crave a little adventure but also need to keep it quick and wholesome? Enter my Healthy Southwestern Oatmeal. It’s like a warm hug with a zesty kick, perfect for waking up those taste buds and starting your day on a high note. You get the heartiness of oats, the warmth of chili powder, and the creamy goodness of cheese—all in one bowl. Plus, it’s a breeze to make. No fancy footwork in the kitchen, just straightforward comfort with a little flair.

Jump to Recipe

What You’ll Need

If your kitchen is anything like mine, you’re already halfway there with these ingredients! Simple, everyday staples with a couple of stars.

  • 1 1/2 cups water
  • 1 cup old fashioned oats
  • 2 egg whites
  • 1/4 cup reduced fat cheddar cheese
  • 1/2 teaspoon chili powder
  • 2 green white scallions, sliced
  • Salt, to taste

How to Make Healthy Southwestern Oatmeal

  1. Start by bringing 1 1/2 cups of water to a rolling boil in a medium saucepan. Feel the steam rising and imagine the coziness awaiting you.
  2. Add the old fashioned oats to the water, giving them a gentle stir. Reduce the heat to a simmer and let them cook for about 10 minutes. You’ll know they’re ready when the mixture starts to look more like oats and less like water.
  3. Toss in the sliced scallions and chili powder. Cook together until the excess liquid has evaporated and the aroma of chili fills your kitchen, hinting at the southwestern flair.
  4. Pour in the egg whites, stirring constantly. Watch as they transform from clear to opaque, weaving themselves into the oats like magic.
  5. Spoon your creation into a serving bowl, sprinkle with salt and the reduced fat cheddar cheese. The cheese will melt slightly, adding a touch of creaminess and comfort.

Cook’s Notes

This dish is all about balance, so don’t be shy to adjust the chili powder for your spice preference. I find it best to enjoy this oatmeal fresh, but if you have leftovers, store them in an airtight container in the fridge for up to two days. When reheating, add a splash of water or milk to help bring it back to life. And if you find yourself in a rush in the morning, prep your scallions the night before to save some precious minutes.

Make It Your Own

  • Swap the reduced fat cheddar for a little goat cheese for a tangy twist.
  • For a protein boost, add black beans alongside the scallions.
  • Try topping with a dollop of Greek yogurt for added creaminess and a bit of cool contrast.
  • If you’re a meat lover, some crumbled turkey sausage would make a hearty addition.

If you try this, I’d love to hear how it turns out—drop a comment or tag me! Whether you stick to the recipe or tweak it to your liking, I hope this bowl brings a little extra joy to your morning routine.

Goes Well With

If you want to round out the meal, here’s what I’d pair it with over on meaghanmoineau.com:

Related update: Healthy Southwestern Oatmeal

Related update: Cheddar Polenta with Sun-dried Tomatoes & Shrimp

Balsamic Roasted Vegetables | Made by Meaghan Moineau

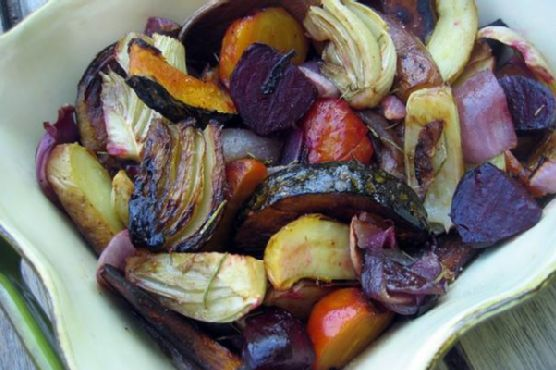
It was one of those evenings when the leaves were just starting to turn, and there was a crisp snap in the air that made you want to stay in and bake something comforting. I was eyeing the mishmash of vegetables in my pantry and fridge, and the thought struck me—why not toss them all together and see what happens? With my trusty bottle of balsamic vinegar in hand, I embarked on a culinary adventure that turned into a beautiful medley of roasted goodness. This Balsamic Roasted Vegetables dish has become my go-to for a weeknight rescue mission—it’s hearty, flavorful, and a feast for the eyes and the palate. You’ll love how the balsamic vinegar caramelizes everything into a sweet-savory delight. Plus, it’s as easy as it is delicious!

Jump to Recipe

What You’ll Need

Chances are you already have most of this in your kitchen, and if not, they’re just a quick grocery trip away. Here’s the line-up:

  • Golden beets
  • Red beets
  • Bulb fennel
  • Red onion
  • Fingerling potatoes
  • Kabocha squash
  • Olive oil
  • Balsamic vinegar

How to Make Balsamic Roasted Vegetables

  1. First, give the beets and fingerling potatoes a good rinse and trim off any tops. Drizzle just enough olive oil over them to coat lightly, and place them on a baking sheet.
  2. Roast whole in a preheated oven at 400°F. After about 30 minutes, they should feel softened when you poke them with a fork but not fully cooked.
  3. Remove from the oven with some care (they’re hot!), peel the beets gently, and then halve them. You can leave the fingerlings whole or slice them lengthwise—both versions are equally tasty.
  4. While they cool a bit, quarter the fennel and red onion lengthwise. Slice the kabocha squash into 1/2-inch wedges.
  5. In a big mixing bowl, combine all the vegetables. Drizzle a generous amount of olive oil to coat them well.
  6. Add a hearty splash of balsamic vinegar—think about 1/4 cup. Toss in a couple of hearty pinches of Kosher salt, several good turns of fresh ground black pepper, and a small sprig of rosemary.
  7. Roast the vegetable mixture on the baking sheet for another 30-40 minutes, turning every so often, so everything gets evenly roasted. You’ll know they’re ready when they look golden and smell absolutely divine.

Cook’s Notes

Here’s a little pro-tip: make sure all the vegetables are cut to roughly the same size. This helps them cook evenly and saves you from a few burnt bits. If you’re prepping ahead, you can roast the initial batch of beets and potatoes earlier in the day. Just store them in the fridge and continue with the rest of the recipe when you’re ready to serve. If by some miracle you have leftovers, these veggies keep well in the fridge for up to three days and make a great cold salad topper or sandwich filling.

Make It Your Own

  • Swap the kabocha squash for sweet potatoes if you’re craving something a little different. They add a lovely sweetness.
  • If you’re out of red onion, try shallots for a milder flavor that caramelizes beautifully.
  • Throw in some brussels sprouts in place of or in addition to the fennel for a bit of crunchy texture.
  • For a Mediterranean twist, sprinkle some crumbled feta cheese over the warm vegetables just before serving.

If you try this, I’d love to hear how it turns out—drop a comment or tag me! Whether it’s a weeknight dinner or a holiday side, these roasted veggies are sure to impress. Happy cooking!

Goes Well With

If you want to round out the meal, here’s what I’d pair it with over on meaghanmoineau.com:

Related update: Balsamic Roasted Vegetables

Butternut Squash Soup (In Half An Hour!) | Made by Meaghan Moineau

Picture this: it’s a chilly Tuesday evening, and I’ve just gotten home from a day that felt like moving through molasses in January. The kind of day where you just want something warm and comforting, ideally with as minimal effort as possible. Cue my go-to butternut squash soup, which not only warms the soul but also manages to be delightfully easy and quick. The beauty of this soup lies not just in its velvety texture but in how it brings together humble ingredients—like canned black-eyed peas and hearty collard greens—into something truly soothing. Plus, it’s ready in just about thirty minutes, which means you can have it on the table faster than it takes to decide on a Netflix show. Trust me, this one’s a keeper.

Jump to Recipe

What You’ll Need

The ingredient list for this soup is refreshingly straightforward. Chances are, you already have most of this in your pantry:

  • Butternut squash, peeled and cubed
  • 2 tablespoons of olive oil
  • 1 large yellow onion, chopped
  • Vegetable broth – about 4 cups
  • 1 small piece of kombu (about 3 inches)
  • 1 can of black-eyed peas, drained and rinsed
  • 1 cup of cooked quinoa
  • A bunch of collard greens, chopped
  • A dash of ground nutmeg
  • Salt and pepper to taste

How to Make Butternut Squash Soup (In Half An Hour!)

  1. In a large pot, heat the olive oil over medium heat. Toss in the chopped onion and sauté until soft and translucent, about 5 minutes. You’ll know it’s ready when your kitchen smells like sweet, gentle onions.
  2. Add the cubed butternut squash to the pot and give it a good stir. Let it sauté for a couple of minutes, allowing the flavors to mingle.
  3. Pour in the vegetable broth and tuck in the piece of kombu. Bring the mixture to a boil, then reduce the heat to a simmer. Let it cook until the squash is tender, about 15 minutes. The squash should be easy to pierce with a fork.
  4. Using a slotted spoon, remove the squash pieces and blend them until smooth. You can use a stand blender or an immersion blender—whichever makes you feel like a kitchen ninja.
  5. Return the pureed squash to the pot and stir in the black-eyed peas and cooked quinoa. Let it all get cozy for a few minutes.
  6. Add the collard greens and cook for another 5 minutes or until they’re soft but still vibrant green.
  7. Finally, season the soup with nutmeg, salt, and pepper to taste. Give it a final stir, and it’s ready to serve!

Cook’s Notes

This soup keeps well in the fridge for about three days, making it a great option for meal prep. Just store it in an airtight container, and you’re good to go. If you’re planning to freeze it, I suggest doing so before adding the collard greens—just toss them in when you’re reheating. One common mistake is overcooking the squash; keep an eye on it so it doesn’t turn to mush before you blend it. And yes, kombu might sound exotic, but it’s just there to add a subtle umami note. You can find it in most health food stores or Asian markets.

Make It Your Own

  • Swap the butternut squash with sweet potatoes for an equally delicious twist.
  • Try kale instead of collard greens if that’s what you have on hand.
  • For a protein boost, add in some shredded chicken or crispy tofu.
  • If you’re out of quinoa, barley or brown rice work beautifully too.

If you try this, I’d love to hear how it turns out—drop a comment or tag me! This recipe is all about warming up those chilly evenings with a bowl full of comfort. Enjoy!

Related update: Butternut Squash Soup (In Half An Hour!)

Related update: Make Olive Garden’s Delicious Pasta Fagioli At Home

Healthy Southwestern Oatmeal | Made by Meaghan Moineau

Picture this: It’s a chilly Tuesday morning, and I’m standing in my kitchen, bleary-eyed, clutching my favorite oversized mug of coffee. I need something hearty, something that’ll stick with me through the morning without sending me into a food coma by 10 a.m. Enter my go-to breakfast hero: Healthy Southwestern Oatmeal. It’s that perfect mix of comfort and sustenance — warm, savory oats with a kick of spice and cheesy goodness. Plus, it’s packed with protein from egg whites to keep me powered up. A total week-morning win, ready in no time, and bonus: you probably have most of the ingredients lurking in your pantry and fridge. Let’s dive into this simple yet satisfying breakfast wonder.

Jump to Recipe

What You’ll Need

This recipe is all about elevating simple pantry staples. Chances are you already have most of these on hand, which is great because who wants to run to the store before breakfast?

  • 1 1/2 cups water
  • 1 cup old fashioned oats
  • 2-3 egg whites
  • 1/4 cup reduced fat cheddar cheese, shredded
  • 1/4 teaspoon chili powder (adjust to taste)
  • 1-2 green white scallions, sliced
  • Salt, to taste

How to Make Healthy Southwestern Oatmeal

  1. Start by bringing 1 1/2 cups of water to a boil in a medium saucepan. This is your base, so let that water get nice and bubbly before moving on.
  2. Add in the oats and reduce the heat to a gentle simmer. Let them cook for about 10 minutes. You’ll know they’re ready when the mixture is more oats than water, and it starts to thicken up. Stir occasionally to keep them from sticking.
  3. Once the oats are thick, toss in the scallions and chili powder. Give it a good stir, and let it all cook together until any remaining liquid is gone, and the aroma of chilies fills your kitchen.
  4. Now, the fun part: adding the egg whites. Pour them in slowly while stirring constantly. You’ll want to keep stirring until the whites are opaque and fully incorporated into the oats. It should take just a couple of minutes.
  5. Transfer the oatmeal to your favorite serving bowl, sprinkle with salt to taste, and top with the cheddar cheese. Let it melt over the top, and you’ve got yourself a delicious, energizing breakfast!

Cook’s Notes

Let’s talk about some tips and tricks to make this Southwestern Oatmeal fit right into your morning routine. First off, if you’re tight on time, you can prep the dry ingredients the night before. In the morning, just boil the water and you’re halfway there. Leftovers (if there are any!) can be stored in the fridge for up to two days. Just reheat them gently on the stove or in the microwave, and maybe splash a bit of water or milk to loosen them up. Be careful not to overdo the chili powder unless you’re really into spice — a little goes a long way!

Make It Your Own

You’re the boss of your breakfast bowl! Here are a few ideas to tweak it to your taste:

  • Cheesy Upgrade: Swap the reduced-fat cheddar for a sharp aged cheddar or even some pepper jack for extra zing.
  • Go Green: Add a handful of spinach or kale in with the scallions for an extra veggie boost.
  • Protein Boost: Top with a sliced boiled egg if you’re looking for more protein power.
  • Spice It Up: Add a dash of hot sauce or some chopped jalapeños if you want to kick up the heat.

If you try this, I’d love to hear how it turns out! Drop a comment or tag me on social media with your delicious creations. Happy breakfasting! 🥄

Related update: Healthy Southwestern Oatmeal

Related update: Blackened Cajun Chicken

Related update: Oatmeal Pancake (Yummy & Heart Healthy)

Cauliflower, Leek and Cheddar Cheese Soup | Made by Meaghan Moineau

It was a chilly Tuesday evening, and my fridge was looking pretty bare. You know those nights when you just stand there, door open, hoping for inspiration to strike? That was me. But then, hiding behind some leftover lettuce, I found a head of cauliflower and half a leek. It was like a culinary “Aha!” moment. I remembered a soup I improvised once that was so comforting and cheesy, it felt like a warm hug in a bowl. Cauliflower, Leek, and Cheddar Cheese Soup to the rescue! It’s so simple, you might not even need to make a grocery run, and it’s rich and satisfying without being heavy. Plus, it’s a fabulous way to sneak in those veggies.

Jump to Recipe

What You’ll Need

Surprisingly, this soup calls for ingredients you might already have lurking in your kitchen. Simple but mighty, these ingredients come together to make a creamy delight:

  • 1 head of trimmed cauliflower
  • 1 leek, sliced
  • Olive oil
  • 1 teaspoon fresh thyme
  • 2 cloves garlic, minced
  • 1 tablespoon Worcestershire sauce
  • 4 cups vegetable broth
  • 1 cup fat-free evaporated milk
  • 2 cups shredded cheddar cheese

How to Make Cauliflower, Leek and Cheddar Cheese Soup

  1. Start by heating a splash of olive oil in a large saucepan over medium heat. Toss in the sliced leeks and let them cook for about 5 minutes. You want them softened and a little caramelized, filling your kitchen with that sweet, oniony aroma.
  2. Next, add the chopped cauliflower, minced garlic, fresh thyme, Worcestershire sauce, and pour in the vegetable broth. Give it a good stir, and bring the soup to a simmer. Let it bubble away gently over medium-low heat for 30 to 40 minutes, until the cauliflower is so tender it practically falls apart.
  3. Take the pot off the heat. Now for the fun part—puree the soup until it’s silky smooth. You can do this with an immersion blender right in the pot or in batches using a regular blender. Just be careful with hot liquids!
  4. Once your soup is blended, return it to the saucepan, and stir in the evaporated milk and 2 cups of cheddar cheese. Place it back on medium heat for just 3 to 5 minutes, stirring until the cheese melts into the soup and it’s all dreamy and creamy.
  5. Pour it into bowls and finish with a sprinkle of cheddar cheese on top for a little extra indulgence. Enjoy your cozy creation!

Cook’s Notes

This soup is super forgiving. If you find it a bit too thick after blending, just add a splash more broth until you reach your desired consistency. It keeps well in the fridge for about 3 days, making it a great make-ahead meal. Reheat gently on the stove to avoid any separation. Freezing isn’t ideal because of the cheese and milk, but it can work in a pinch—just expect a slightly different texture.

Make It Your Own

  • Spice it up by adding a pinch of cayenne or smoked paprika for a little heat and depth of flavor.
  • If you’re a meat lover, throw in some crispy bacon bits on top just before serving. It adds a delightful crunch!
  • For a vegetarian twist, substitute the Worcestershire sauce with soy sauce to keep it plant-friendly.
  • Swap the cheddar for a sharp blue cheese if you’re feeling bold and want a tangy kick.

If you try this, I’d love to hear how it turns out—drop a comment or tag me in your cozy creations! Remember, cooking is all about making it suit your taste and enjoying the process. Happy cooking!

Related update: Cauliflower, Leek and Cheddar Cheese Soup

Related update: Minted Pea & Spinach Soup

Brussels Sprouts with Bacon and Shallots | Made by Meaghan Moineau

It was one of those evenings where I’d just gotten home from a long day, opened the fridge, and sighed at its contents — or lack thereof. You know what I’m talking about, the classic weeknight scramble where you’re too tired to go out but still want something comforting and a tad bit fancy. That’s when I spotted a lonely pack of bacon and some brussels sprouts I’d forgotten about. A lightbulb moment ensued, and this dish was born out of necessity, quickly becoming a household staple. It’s one of those meals that feels a bit impressive but is ridiculously easy to throw together. Plus, the crispy bacon pairs so perfectly with the tender brussels sprouts and sweet shallots. Trust me, this dish is a game-changer for lazy evenings.

Jump to Recipe

What You’ll Need

Chances are you already have most of this hanging around your kitchen. Just a few ingredients that combine to make magic happen:

  • Bacon – the soul of this dish
  • Brussels sprouts – trimmed and ready to shine
  • Lemon juice – for that bright, zesty finish
  • Salt and pepper – essentials, of course
  • Shallot – it adds a sweet, delicate flavor

How to Make Brussels Sprouts with Bacon and Shallots

  1. In a large skillet, toss in the chopped bacon. Cook over medium heat until it’s golden brown and your kitchen smells like pure heaven.
  2. Next, add the shallots to the skillet. Let them mingle with the bacon, cooking until tender and translucent.
  3. Crank up the heat to high and introduce the brussels sprouts to the party. Sauté them until they develop that irresistible golden crust, making sure to stir occasionally so they don’t stick.
  4. Finish with a squeeze of lemon juice and season generously with salt and pepper. Give it all a good toss, letting every ingredient get cozy.
  5. Serve immediately, preferably with a grin because you just made something delicious with minimal effort.

Cook’s Notes

A couple of things I’ve learned along the way: First, do not overcrowd your skillet. This is a surefire way to end up with soggy sprouts, and nobody wants that. If you’re making a larger batch, definitely work in batches. As for storage, leftovers can be popped in an airtight container and kept in the fridge for a couple of days. Reheat them in the skillet to keep that crispiness alive. Pro tip: if you’re making this for a crowd, you can prep everything in advance and then do the actual cooking just before serving. It’s quick enough that even last-minute is doable!

Make It Your Own

Feeling like switching things up? Here are a few ideas:

  • Swap the bacon for crispy pancetta or prosciutto for an Italian twist.
  • Try adding a splash of balsamic vinegar instead of lemon juice for a deeper flavor.
  • Throw in some toasted pine nuts or almonds for an extra crunch.
  • If you’re vegetarian, swap the bacon for crispy tofu — trust me, it works!

If you try this, I’d love to hear how it turns out — drop a comment or tag me! Remember, the best recipes are the ones you make your own. Happy cooking!

Related update: Brussels Sprouts with Bacon and Shallots

Béarnaise Sauce | Made by Meaghan Moineau

Picture this: It’s a Wednesday night, and I’ve got a craving — not just any craving, but a very specific desire for something that feels lavish but doesn’t require me to spend two hours in the kitchen. That’s when I think of Béarnaise sauce. It’s rich, velvety, and makes any dish feel like it’s straight out of a fancy restaurant. Whether I’m drizzling it over grilled steak or spooning it onto roasted vegetables, it’s the magic touch that elevates a meal from “meh” to “marvelous.” Plus, the whole process feels like a fun science experiment with all the whisking and bubbling. Seriously, once you nail this, you’ll never go back to store-bought.

Jump to Recipe

What You’ll Need

Let’s talk ingredients. Chances are, you already have most of these hanging out in your kitchen. It’s all about bringing them together in a way that sings.

  • 1/2 cup melted butter
  • 1/4 cup dry white wine
  • 3 egg yolks
  • 1 tablespoon lemon juice
  • 1 tablespoon chopped parsley
  • Salt and pepper to taste
  • 2 tablespoons minced shallots
  • 1 teaspoon chopped fresh tarragon
  • 1 tablespoon tarragon vinegar

How to Make Béarnaise Sauce

  1. In the top of a double boiler, whisk together the egg yolks and lemon juice. It’ll look thick and creamy, almost like a custard that’s waiting to be transformed.
  2. Place this over simmering water, making sure the water doesn’t actually touch the bowl. We want gentle heat, not a sauna for our eggs.
  3. Slowly stream in the melted butter while whisking constantly. You’ll see the mixture start to thicken and get glossy in the process. This part feels like magic! Keep it slow, and your sauce won’t break.
  4. Season with salt and a generous grind of pepper. Add the tarragon, shallots, parsley, vinegar, and the white wine. Whisk until everything is beautifully blended and the sauce has a lush, velvety texture.
  5. Keep whisking for another minute or so, allowing the flavors to meld together. You’ll know it’s ready when the sauce clings to the back of a spoon and smells like something you’d get at a five-star joint.

Cook’s Notes

Here’s the deal: Béarnaise sauce can be a bit temperamental, but don’t let that scare you. The key is patience and whisking. If you find your sauce is getting too thick, whisk in a teaspoon of warm water to loosen it. Also, remember that this sauce doesn’t love to wait around; make it just before serving for the best texture and flavor.

  • If you’re not serving it immediately, keep it warm in a thermos or a warmed bowl. Just avoid reheating directly on the stove as it tends to separate.
  • This sauce is best fresh, but if you have leftovers, store them in the fridge and use within a day. Gently reheat it in a double boiler, whisking vigorously to bring it back together.

Make It Your Own

  • Herb Swap: Not a fan of tarragon? Swap it out for basil or dill for a different herbal note. Each will give your Béarnaise a unique twist.
  • Citrus Twist: Replace the lemon juice with orange or lime for a subtle citrus variation.
  • Spicy Kick: Add a pinch of cayenne or a dash of hot sauce for a spicy Béarnaise that pairs beautifully with grilled meats.
  • Vegan Alternative: Use vegan butter and replace egg yolks with a tablespoon of nutritional yeast and a teaspoon of cornstarch for a plant-based version.

If you try this, I’d love to hear how it turns out — drop a comment or tag me! Béarnaise sauce has this wonderful way of making any dish feel like a special occasion. So go ahead, treat yourself!

Related update: Béarnaise Sauce

Flemish Style Asparagus Side Dish | Made by Meaghan Moineau

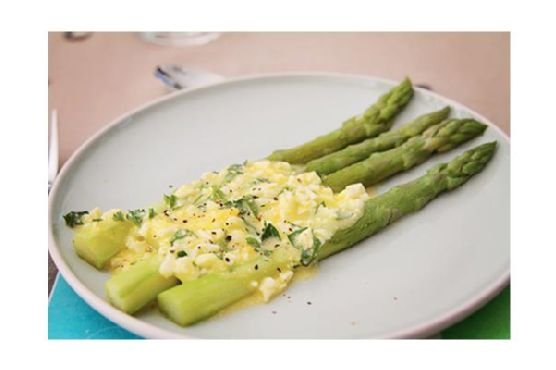
Picture this: it’s a busy weeknight, the kind where everything that could go wrong does—my cat decided to knock over a plant, and I swear the vacuum cleaner is giving me side-eye for not using it. That’s when I remember the bundle of asparagus I impulsively bought at the market, and suddenly, the night doesn’t seem so impossible. This Flemish Style Asparagus Side Dish is everything you need it to be—quick, comforting, and just fancy enough to make you feel like you’ve got things under control. It’s got that buttery, lemony vibe that I can’t get enough of, and it’s one of those dishes that somehow manages to elevate your mood and your meal. So, let’s dive in and get cooking!

Jump to Recipe

What You’ll Need

You’re going to love how simple and stress-free this ingredient list is. Chances are, you already have most of these goodies lounging in your kitchen:

  • Green and white fresh asparagus
  • Butter
  • Hardboiled eggs
  • Italian flat parsley
  • Lemon (just the juice!)
  • Salt and pepper

How to Make Flemish Style Asparagus Side Dish

  1. Start by peeling the asparagus at their ends, leaving their heads untouched. This helps with texture and makes them more palatable.
  2. Place the asparagus in a large saucepan and cover them with boiling water. Add a pinch of salt. Let them simmer until they’re tender—about 3 to 4 minutes. You’ll know they’re perfect when they turn a vibrant green and are fork-tender.
  3. While the asparagus is cooking, chop the flat parsley into fine bits. Trust me, this will add a fresh, herby kick that’s just perfect.
  4. Boil three eggs till they’re hard, then peel them. Use a fork to mash them into fine crumbs—they should resemble coarse sand.
  5. In a separate saucepan, melt the butter over medium heat. Add the juice of half a lemon, and whisk constantly. It should smell like heaven and have a smooth, silky texture.
  6. Stir in the mashed eggs into your butter-lemon mixture. The mixture should be thick and luscious. Add the chopped parsley and stir to combine.
  7. Plate the dish by laying a few stalks of cooked asparagus on a plate and drizzling the sauce generously over the stalk ends. Season with salt and pepper to taste. Serve warm and enjoy every bite!

Cook’s Notes

Okay, real talk: the key to nailing this dish is all about timing. Make sure your asparagus is not overcooked—aim for that sweet spot where it’s tender but still has a bit of crunch. If you’re prepping in advance, you can boil the eggs and chop the parsley earlier in the day. The sauce, however, is best fresh. Leftovers are rare because it’s just that good, but if you find yourself with any, store the asparagus and sauce separately. The asparagus can go in an airtight container, and you can reheat the sauce gently on the stove. It keeps well for up to two days.

Make It Your Own

Want to put your personal spin on this dish? Here are a few variations to consider:

  • Swap the butter for ghee if you’re feeling adventurous—it adds a nutty richness.
  • Try adding a pinch of smoked paprika or cayenne to the sauce for a little heat.
  • If parsley isn’t your thing, fresh dill or chives would also be delightful.
  • For a bit of extra texture, toss in some toasted pine nuts or almonds before serving.

If you try this, I’d love to hear how it turns out—drop a comment or tag me! Whether you’re having a chaotic day or just need a little culinary pick-me-up, this dish is your new best friend.

Related update: Flemish Style Asparagus Side Dish

Moroccan Carrot Soup | Made by Meaghan Moineau

It was one of those chilly Tuesday evenings when the sun decided to call it quits early, and the only way to combat the creeping cold was with something warm and comforting. As I rummaged through my pantry, I stumbled upon a bag of carrots that had been waiting patiently for their turn to shine. It struck me right then — Moroccan Carrot Soup! A bowlful of this would feel like a cozy hug, yet it’s surprisingly easy to whip up on a weeknight when you’re not in the mood for fussing over a stove. This soup is perfect for those nights when you want something hearty but can’t be bothered with a long list of ingredients or complicated steps. Stick with me here, and you’ll be ladling this aromatic beauty in no time.

Jump to Recipe

What You’ll Need

Chances are, you already have most of this. It’s all about letting just a few ingredients shine.

  • 2 tablespoons of butter
  • 1 yellow onion, chopped
  • 6 cups of carrots, peeled and chopped
  • 4 cups of low sodium chicken stock
  • 1 tablespoon of cumin seeds
  • 1 tablespoon of honey
  • 1 tablespoon of fresh lemon juice
  • 1/4 teaspoon of allspice
  • Salt and pepper to taste
  • 1/2 cup of sour plain yogurt

How to Make Moroccan Carrot Soup

  1. In a large saucepan, melt the butter over medium-high heat. Once it’s bubbly and aromatic, toss in the chopped onion. Sauté for about 2 minutes until the onion starts turning translucent and your kitchen smells heavenly.
  2. Add the carrots and pour in the chicken stock. Bring this orange-hued mixture to a boil. Then, reduce the heat to low, cover the pot, and let it simmer. In about 20 minutes, the carrots should be tender enough to yield to a fork.
  3. Meanwhile, grab a small skillet and toast the cumin seeds over medium-high heat. Keep an eye on them, stirring occasionally, until they are golden and releasing their nutty aroma — about 4 to 5 minutes.
  4. Once toasted, finely grind the cumin seeds in a spice mill or with a mortar and pestle. The fresh grind makes a world of difference, trust me!
  5. Remove the soup from the heat. Carefully, in batches, purée it in a blender until it’s silky smooth. Return the blended soup to the saucepan.
  6. Whisk in the honey, lemon juice, and allspice, stirring until everything is well combined. Give it a taste and season with salt and pepper to your liking.
  7. To serve, ladle the soup into bowls. You can either sprinkle the ground cumin on top or, for an extra creamy finish, mix the cumin with sour cream and dollop that goodness right in the center of the soup. Enjoy!

Cook’s Notes

Let’s talk storage first: This soup keeps like a champ. Store it in an airtight container in the fridge, and you’ve got a delicious lunch or dinner for up to 4 days. If you’re meal prepping or just want to savor the flavors later, it freezes beautifully for up to 3 months. Just thaw and reheat gently on the stove.

Avoid the temptation to add the honey and lemon while it’s still boiling — you don’t want to lose those delicate flavors. And when blending the hot soup, please be cautious; do not overfill the blender as the steam can cause it to splatter. Patience is key here!

Make It Your Own

  • Spice it up: Add a pinch of cayenne pepper or a swirl of harissa for a bit of heat.
  • Veggie twist: Swap half of the carrots for sweet potatoes. It gives the soup an even richer texture.
  • Herbaceous hit: Stir in some fresh chopped cilantro or mint just before serving for a fresh burst of flavor.
  • Vegan swap: Use coconut oil instead of butter and vegetable broth in place of chicken stock. Skip the yogurt or use a plant-based alternative.

If you try this, I’d love to hear how it turns out — drop a comment or tag me! Happy cooking, and may your kitchen be filled with the warmth of this delightful Moroccan Carrot Soup.

Related update: Moroccan Carrot Soup

Related update: Spicy Lemongrass Soup

Easy Cheesy Pizza Casserole | Made by Meaghan Moineau

Picture this: It’s a Tuesday evening, and the week’s already wearing me down. I’m craving something cheesy, comforting, and a little indulgent. You know, the kind of meal where the smell alone makes you feel like you’ve just wrapped yourself in a warm, delicious hug. Enter the Easy Cheesy Pizza Casserole. It’s like a giant pizza in a pan but with all the cozy vibes of a casserole. Plus, it’s a crowd-pleaser, perfect for family dinners or casual get-togethers with friends. The best part? It’s as easy as it is cheesy. Grab your apron, and let’s dive in!

Jump to Recipe

What You’ll Need

Trust me, this ingredient list reads like a love letter to your pantry. Chances are, you already have most of these on hand:

  • Ground beef or bulk sausage mix
  • Ricotta cheese
  • Oregano
  • Basil
  • Parmesan cheese
  • Pasta sauce or canned pizza sauce
  • Crushed red pepper flakes
  • Pepperoni
  • Shredded mozzarella cheese
  • Shredded aged provolone cheese
  • Herbed parmesan drop biscuits (recipe follows)
  • Baking mix
  • Italian seasoning
  • Milk

How to Make Easy Cheesy Pizza Casserole

  1. Preheat your oven to 375°F. This is a crucial step, so your biscuits start cooking right away.
  2. Brown the ground beef or sausage in a skillet over medium heat until it’s no longer pink. Drain the fat because nobody likes greasy casseroles.
  3. Stir in the pasta or pizza sauce and a pinch of crushed red pepper flakes. Let it simmer until everything is well-blended and smells heavenly.
  4. In a separate bowl, mix the ricotta cheese with oregano, basil, and Parmesan cheese. This will be your creamy layer of deliciousness.
  5. Prepare the biscuit dough by combining the baking mix with Italian seasoning and milk. Stir until just blended; lumps are okay here.
  6. Spray a 13 x 9-inch pan with non-stick spray. Drop the biscuit dough by teaspoons into the pan, spacing them evenly. Don’t worry about gaps; the dough will spread out beautifully in the oven.
  7. Layer the ground beef mixture over the biscuits, then dot with the ricotta mixture. You should start to see the makings of a masterpiece.
  8. Bake at 375°F for about 20 minutes or until the biscuits are puffed and just starting to turn golden. Your kitchen should smell like a dream by now.
  9. Increase the oven temperature to 425°F. Sprinkle mozzarella and provolone cheeses over the top and lay out pepperoni slices like you’re decorating a pizza.
  10. Return the casserole to the oven for about 10 minutes, until the cheese is melted and bubbling slightly. This is the moment you’ve been waiting for.
  11. Let it stand for 5 minutes before slicing. Patience is a virtue, and it’ll pay off when your slices come out picture-perfect.
  12. Optionally, sprinkle additional Parmesan cheese on top before serving. More cheese is always the right choice.

Cook’s Notes

A few quick tips to make sure your casserole is a hit:

  • If you want to make this ahead, prepare the beef and ricotta mixtures and store them in the fridge. When ready to bake, just assemble everything, and you’re good to go.
  • This casserole keeps well in the fridge for up to three days. Just cover and reheat in the oven to keep the biscuits from getting soggy.
  • Be sure not to over-mix your biscuit dough; a gentle stir is all it takes. Over-mixing can make them tough.

Make It Your Own

Feel free to get creative and put your spin on this cozy dish:

  • Swap the pepperoni for crispy tofu slices for a vegetarian twist that still packs plenty of flavors.
  • Use spicy Italian sausage in place of ground beef for an extra kick.
  • Try adding a layer of sautéed mushrooms and onions for an earthy depth of flavor.
  • Go Hawaiian and add pineapple chunks along with ham or Canadian bacon for a sweet and savory combo.

If you give this Easy Cheesy Pizza Casserole a whirl, I’d be thrilled to hear how it turned out for you. Drop a comment or tag me on social media with your delicious creations. Happy cooking!

Related update: Easy Cheesy Pizza Casserole

Related update: My Drunken Fish Fillet

Maple & Curry Acorn Squash | Made by Meaghan Moineau

Picture this: It’s a chilly fall evening, and my kitchen still smells like the remnants of the apple pie I baked last weekend. I’m standing in front of the pantry, craving something that’s both cozy and a little unexpected. Ever had those moments where you stare at the ingredients you have and think, “This could either be a disaster or magic”? That was me a few weeks ago, reaching for an acorn squash, some curry powder, and a bottle of maple syrup that I had been saving for pancake Sundays. What came out of that experimental whirlwind was a dish that’s not only delicious but also has become my go-to when I need to impress with minimal effort. It’s sweet, spicy, and roasted to perfection—ideal for spicing up a weeknight or wowing guests without breaking a sweat.

Jump to Recipe

What You’ll Need

This recipe is delightfully simple, and chances are you already have most of these on hand. Here’s what you’ll need:

  • Acorn squash – pick one that’s firm and heavy for its size.
  • Curry powder – this is where the magic happens, so use your favorite blend.
  • Maple syrup – pure, not the pancake kind, for that rich, caramelized finish.
  • Olive oil – for that perfect roast.
  • Salt – to taste and to enhance all those flavors.

How to Make Maple & Curry Acorn Squash

  1. Preheat your oven to 400°F (200°C) and line a baking sheet with parchment paper or a silicone mat. This makes cleanup a breeze and prevents any sticky situations.
  2. Give the acorn squash a good rinse, especially if you plan to eat the skin (which, trust me, you’ll want to after it’s all roasted and crispy).
  3. Carefully, chop the squash in half and scoop out the seeds. You can use a spoon or an ice cream scoop for this—whichever feels less like wrestling and more like a gentle sweep.
  4. Slice the squash into one-inch wedges, using the natural grooves as your guide. Not only does this make the pieces look pretty, but it also ensures even cooking.
  5. In a medium bowl, toss the squash wedges with curry powder, maple syrup, olive oil, and salt. Stir until each piece is glistening with the mixture, and you’re tempted to lick your fingers.
  6. Arrange the wedges on the prepared baking sheet, cut side down. This helps them get that beautiful golden-brown finish on the edges.
  7. Bake for 15 minutes, then flip them over with a spatula so both sides get equal love and attention. Bake for another 10 to 15 minutes until they’re tender and can be easily pierced with a fork.

Cook’s Notes

When it comes to choosing the right acorn squash, look for one that feels heavy for its size and has a deep green skin. A few orange patches are okay and can even be a sign of ripeness. If you’re prepping ahead, you can slice the squash a day in advance and keep it in the fridge. Once roasted, these wedges keep well covered in the fridge for up to three days. Just pop them in the oven to reheat and crisp them back up. Be cautious not to over-bake; the squash should be tender but not mushy, and the edges should be caramelized but not burnt.

Make It Your Own

  • Switch up the squash: Don’t have acorn squash? Butternut or delicata squash work beautifully too.
  • Spice it up: Add a pinch of cayenne pepper to the mix for a spicy kick.
  • Play with herbs: Sprinkle some fresh rosemary or thyme over the top before baking for an aromatic twist.
  • Sweeten the deal: Drizzle a bit more maple syrup on top right before serving for an extra glossy finish.

If you try this, I’d love to hear how it turns out — drop a comment or tag me! Seriously, nothing makes my day more than seeing someone else enjoy something I whipped up in my kitchen. Happy cooking, and remember, kitchen experiments are just recipes in disguise!

Related update: Maple & Curry Acorn Squash

Related update: Pizza bites with pumpkin

Homemade Broccoli Cheddar Soup | Made by Meaghan Moineau

Have you ever had one of those days when the weather just flips from sunny and warm to cold and dreary, like the sky can’t make up its mind? That’s exactly what happened last Tuesday. I was planning on grilling dinner, but as the clouds rolled in, I found myself craving something warm and comforting instead. Enter my trusty Homemade Broccoli Cheddar Soup. It’s one of those recipes that feels like a big, cozy sweater for your insides. Plus, it’s surprisingly easy to whip up, which makes it perfect for those spontaneous soup days. With just a handful of ingredients, most of which are probably lurking in your pantry right now, you’ll have a bowl of creamy, cheesy goodness that hits all the right notes.

Jump to Recipe

What You’ll Need

This soup keeps things simple, but there are a few standout ingredients that make it special and oh-so-delicious. Don’t worry if your pantry is looking a little bare; chances are you already have most of this stuff on hand.

  • Olive oil
  • 1 shallot, chopped
  • 1 red onion, chopped
  • 1 jalapeno, optional for heat
  • Lemon juice
  • 4 cups vegetable broth
  • Salt and pepper to taste
  • 2 large Yukon Gold potatoes, peeled and diced
  • 2 heads of raw broccoli, chopped (save a few florets for garnish!)
  • Plain yogurt (like Chobani)
  • Plain almond milk
  • Fresh parsley, chopped
  • Shredded cheddar cheese
  • 1 bay leaf

How to Make Homemade Broccoli Cheddar Soup

  1. In your soup pot, heat 2 tablespoons of olive oil over medium-high heat. Add the shallot, red onion, and jalapeno. Sauté until the onions are translucent and everything smells heavenly.
  2. Add a splash of lemon juice, all the vegetable broth, the remaining olive oil, salt, and pepper. Give it a good stir, then reduce the heat to medium.
  3. Toss in the diced potatoes and bring the broth to a boil. Cook until you can easily pierce the potatoes with a fork.
  4. Stir in the chopped broccoli, but remember to reserve a few florets for later. Cover the pot and let the broccoli get nice and tender.
  5. Once the broccoli is cooked, turn off the heat. Carefully transfer the contents of the pot to a large mixing bowl and let it cool slightly.
  6. Add the parsley, yogurt, and almond milk to the bowl. Gently fold these into the soup mixture, letting the heat from the soup meld everything together.
  7. In batches, puree the mixture in a blender until it’s as smooth as you like it. I’m still dreaming of that Vitamix, but any blender will do!
  8. In the now-empty soup pot, sauté the reserved broccoli florets with a dash of veggie broth until they’re just tender.
  9. Return the pureed soup to the pot, add the bay leaf, and a few pinches of chopped basil if you’re feeling fancy. Simmer uncovered for at least 20 minutes, stirring frequently to banish those pesky air bubbles. Remember to fish out the bay leaf before serving!

Cook’s Notes

Let’s chat about some things that might come in handy as you make this soup. First off, if you’re not into spicy, feel free to skip the jalapeno; it’s totally optional. If you’re planning to make this soup ahead of time, it stores beautifully in the fridge for up to 3 days. Just reheat it slowly on the stove, and you’ll be good to go. As for freezing, I wouldn’t recommend it — the texture can get a little funky once thawed. Always remember to remove that bay leaf before serving; no one wants a surprise in their spoon!

Make It Your Own

This is where the fun begins! Here are a few ideas to tweak this soup to your liking:

  • Swap the cheddar for Gruyere cheese if you’re feeling fancy; it adds a nutty depth to the soup.
  • Want a heartier meal? Stir in some cooked quinoa or white beans for added protein.
  • For a vegan twist, use nutritional yeast instead of cheddar cheese. It adds a cheesy flavor without the dairy.
  • Love greens? Toss in a few handfuls of spinach or kale before blending for an extra boost of nutrients.

If you try this, I’d love to hear how it turns out — drop a comment or tag me! Whether you’re combating a surprise rainy day or just craving something warm and comforting, I hope this soup brings a bit of joy to your kitchen. Happy cooking!

Related update: Homemade Broccoli Cheddar Soup

Related update: Moroccan Carrot Soup

Breakfast Biscuits and Gravy | Made by Meaghan Moineau

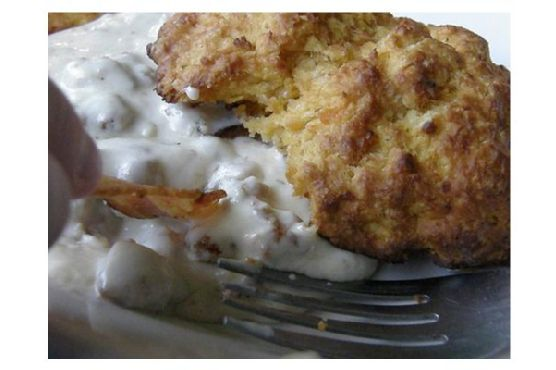
So, there I was on a lazy Sunday morning, craving something indulgent yet homey, and oh-so-satisfying. The kind of comfort food that just wraps you up in a warm hug — you know what I mean? That’s when I decided to whip up one of my go-to favorites: Breakfast Biscuits and Gravy. I mean, who can resist flaky biscuits smothered in rich, savory sausage gravy? Not me! They’re perfect for those mornings when you want to treat yourself without spending hours in the kitchen. Jump to Recipe

What You’ll Need

If you’ve got a well-stocked pantry, you’re already halfway there. This recipe relies on some everyday staples, along with a few flavor-boosting stars:

  • Flour — unbleached for the best texture
  • Baking powder
  • Salt — regular and a pinch of black salt for depth
  • Unsalted butter — because you can never have too much
  • Plain yogurt
  • Whole milk
  • Fresh sage leaves
  • Paprika
  • Ground allspice
  • Pork sausage
  • Black pepper

How to Make Breakfast Biscuits and Gravy

  1. Preheat your oven to 425°F. Trust me, getting that oven nice and hot is crucial for achieving biscuit perfection.
  2. Line a baking sheet with parchment paper — no one likes a sticky mess.
  3. In a large bowl, sift together the flour, baking powder, and salt. This is where the magic starts.
  4. Grab your pastry blender or two knives and cut in the butter. You’re aiming for a texture ranging from cornmeal to pea-sized bits. A quick blitz in the food processor works if you’re feeling fancy.
  5. Using a fork, mix in the yogurt followed by the milk. The dough should be soft and slightly sticky, so don’t sweat it if it feels a bit wet.
  6. Turn the dough onto a lightly floured surface and knead briefly — just enough to hold everything together. Roll it out about 1 1/4 inches thick and cut into rounds.
  7. While your biscuits are getting golden in the oven, let’s tackle the sausage. Combine all the sausage ingredients in a large bowl, mixing them up with your hands. Don’t be shy!
  8. Form small patties and cook them in a skillet over medium-high heat until crisp and browned on the outside, cooked through inside. About 8 minutes per side should do it.
  9. As the sausage sizzles, inhale that aromatic blend of sage and spices. It’s a thing of beauty!

Cook’s Notes

Here’s the deal: biscuits are one of those things that get better with practice, so don’t stress if your first batch isn’t perfect. Keep the butter cold for the flakiest layers, and don’t overwork the dough. You can make the sausage mixture ahead of time and keep it in the fridge for up to a day — just form and fry when ready. Leftover biscuits? Pop them in an airtight container, and they’ll last a couple of days; they’re great reheated in the oven.

Make It Your Own

Switch things up and put your own spin on this classic dish with these ideas:

  • Swap the pork sausage for turkey sausage if you’re leaning towards a lighter option.
  • Add a pinch of red pepper flakes if you crave a bit of heat in your morning.
  • For a vegetarian twist, use crispy tofu instead of sausage.
  • Throw in some cheddar cheese into the biscuit dough for an extra layer of flavor.

If you try this, I’d love to hear how it turns out — drop a comment or tag me! Cooking is all about sharing the love, and I can’t wait to see your versions and hear your stories. Enjoy every bite! 🍽️

Related update: Breakfast Biscuits and Gravy

Related update: Easy Baked Parmesan Chicken

Related update: Loaded Veggie Omelet

Philly Cheesesteak Grilled Wraps | Made by Meaghan Moineau

It was one of those early fall evenings when the chill starts to creep through the windows, and you find yourself craving something warm and comforting but don’t want to spend hours in the kitchen. The kind of night where you’re too lazy to do anything complicated but still want something that feels like a hug on a plate. That’s when I first made these Philly Cheesesteak Grilled Wraps. They’re a perfect blend of flavors with juicy steak, melty cheese, and a little kick of hot sauce, all rolled up into a crispy tortilla. They’re quick to assemble and hit all the right notes for a cozy meal. Plus, there’s something so satisfying about getting a little char on that wrap. Trust me, this recipe is going to be your new weeknight hero.

Jump to Recipe

What You’ll Need

I love how simple this ingredient list is. Chances are you already have most of this hanging out in your fridge or pantry:

  • Steaks – Choose your favorite cut; just slice it thin!
  • Vegetable oil – For those beautiful caramelized onions.
  • Onions – The backbone of flavor here!
  • Better Than Bouillon Beef Base – My little secret for that extra punch.
  • Portobello mushrooms – Meaty and delicious.
  • Bell peppers – Adds color and sweetness.
  • Mayonnaise – Trust me on this one, it’s the glue.
  • Hot sauce – For that essential kick.
  • Tortillas – The wrap that holds it all together.

How to Make Philly Cheesesteak Grilled Wraps

  1. In a frying pan over medium-low heat, add your onions and give them their time to shine. Let them caramelize slowly, stirring occasionally, until they transform into sweet, golden ribbons. This should take about 30 minutes.
  2. Once the onions are just right, stir in the Better Than Bouillon Beef Base with a tablespoon of water. This creates a faint gravy that coats everything beautifully.
  3. Next, introduce the mushrooms and bell peppers. Cook until they’ve softened and their flavors have melded, about 5 minutes. You’ll know they’re ready when the mushrooms are tender and the peppers are vibrant.
  4. Lay out a tortilla and spread a thin layer of mayonnaise over it. Add a few squirts of hot sauce for that necessary zing.
  5. Pile on the steak slices and the savory vegetable mix. Roll it up tightly, ensuring the ends are sealed so nothing escapes.
  6. Heat a griddle or large frying pan over medium heat and give it a light spray of cooking oil. Place your wraps seam side down, and press them with something heavy—think a smaller frying pan weighted down. Grill until the tortilla is toasty and golden.
  7. Flip the wraps and repeat the process on the other side. If you have a panini press or a George Foreman grill, these work wonders too.
  8. Once they’re grilled to perfection, pull them off and let them sit for a minute before slicing them in half. Enjoy watching happy faces around the table!

Cook’s Notes

Slow and steady wins the race with those onions. Rushing them will lose all that sweet, caramelized goodness. If you’re planning ahead, you can make the steak and veggie mix earlier in the day and just assemble and grill the wraps when you’re ready to eat. Leftovers? Pop them in the fridge and when you’re ready to reheat, a few minutes in a toaster oven will bring back that lovely crunch.

Make It Your Own

  • Swap the steak for crispy tofu to make it vegetarian-friendly. Just make sure to season the tofu well!
  • Try adding some provolone cheese or your favorite melty cheese for an extra layer of richness.
  • Incorporate some jalapeños if you want to amp up the heat—just slice them thinly and add them alongside the peppers.
  • Use whole wheat or spinach tortillas for a heartier, healthier twist.

If you try this, I’d love to hear how it turns out—drop a comment below or tag me on social media. Can’t wait to see your delicious creations!

Related update: Philly Cheesesteak Grilled Wraps

Easy Vegetable Fried Rice | Made by Meaghan Moineau

Ever have one of those days where you open the fridge, and it feels like a barren wasteland of half-used vegetables and random leftovers? Last Tuesday was precisely that for me. I had a craving for something comforting yet quick, and the idea of ordering takeout for the third time that week wasn’t sitting well with my wallet—or my waistline. That’s when I remembered my go-to Easy Vegetable Fried Rice. It’s one of those recipes that feels like a kitchen miracle, turning odds and ends into something spectacularly satisfying. Plus, it’s quicker than waiting for delivery and way more rewarding.

Jump to Recipe

What You’ll Need

This recipe’s magic lies in its versatility and simplicity. Chances are you already have most of these ingredients lurking in your kitchen:

  • Broccoli – The more the merrier!
  • Butter – Because everything’s better with it.
  • Carrots – Sweet and crunchy.
  • Cooked rice – Preferably a day old, but fresh works too.
  • Egg – For that authentic fried rice finish.
  • Garlic – Minced, for a punch of flavor.
  • Ginger – Freshly grated, if possible.
  • Green beans – Snappy and fresh.
  • Peas – Sweet, lovely little peas.
  • Soy sauce – This is your salt and savory magic.
  • Sesame oil – For that nutty, toasted aroma.
  • Sugar – Just a touch for balance.

How to Make Easy Vegetable Fried Rice

  1. Start by bringing a pot of water to a boil. Toss in the green beans and broccoli. Let them blanch for about two minutes, then drain them immediately to keep that vibrant color. If you’re using frozen veggies, ease off the package instructions by three minutes—no one likes mushy veggies.
  2. In a large pan or wok, heat your sesame oil over medium heat. Toss in the garlic and ginger. Stir them around for about a minute until your kitchen smells irresistibly fragrant.
  3. Add the carrots and give them a quick stir for one to two minutes—just enough to soften them a bit but still keep that crunch.
  4. Now, add the rice. The key here is using rice that’s a day old, but if you’re in a pinch, fresh rice works too. Pour in your soy sauce; adjust based on how salty you like it.
  5. While the rice warms up, beat the egg in a small bowl. Push the rice to the sides of the pan, creating a little space in the middle. Pour in the egg and scramble it right there, blending it in with the rice once it’s almost cooked.
  6. Throw in the blanched broccoli, peas, and any other veggies you fancy. Sprinkle in the sugar and stir everything together for a couple of minutes.
  7. Add the butter and let it melt through the rice mixture. This is where the magic happens—let the rice sit and sizzle just a bit to get those delightful crispy bits.
  8. Give it one last toss before serving. Dive in and enjoy your homemade fried rice!

Cook’s Notes

Fried rice is forgiving, but a few things can elevate your dish from good to great. First, cold, day-old rice is ideal since it’s less sticky and more likely to fry up nicely. If using fresh rice, spread it out on a baking sheet to cool and dry a bit. Feel free to adjust the soy sauce to your taste—every brand varies in saltiness. If you’re making this ahead of time, store it in an airtight container in the fridge for a couple of days. Reheat in a pan for the best texture, adding a splash of water if it seems dry.

Make It Your Own

  • For protein, swap the egg for crispy tofu cubes. Just pan-fry them before adding the garlic and ginger.
  • Add a kick by tossing in a teaspoon of chili paste or Sriracha along with the soy sauce.
  • Switch out the green beans for snap peas for an even sweeter crunch.
  • For a nutty twist, sprinkle toasted sesame seeds over the top before serving.

If you try this, I’d love to hear how it turns out—drop a comment or tag me on your social media adventures! Enjoy every spoonful of your kitchen creativity.

Related update: Easy Vegetable Fried Rice

Related update: Hyderabadi baghara Baingan

Peaches And Cream Oatmeal | Made by Meaghan Moineau

Okay, so picture this: It’s a chilly Tuesday morning, and I had exactly five minutes before my first Zoom call of the day. My stomach was growling louder than my cat, and I needed a breakfast solution that was quick, comforting, and wouldn’t leave me feeling like I scarfed down a bowl of sugar cubes. Enter Peaches And Cream Oatmeal! It’s that perfect hug-in-a-bowl for mornings when time seems to slip through your fingers like sand. Honestly, it’s like eating dessert for breakfast, but without the guilt trip. And the best part? In just a few minutes, with ingredients you likely have on hand, you can whip up something that tastes like you’ve been slaving over the stove. Spoiler: You haven’t.

Jump to Recipe

What You’ll Need

This is one of those recipes where you’ll likely find most of the ingredients already hanging out in your kitchen. It’s delightfully simple, and trust me, you’re gonna love what these basics can turn into.

  • Frozen peaches
  • Cooking oats
  • Non-fat milk
  • Low fat cream cheese
  • Agave
  • Cinnamon

How to Make Peaches And Cream Oatmeal

  1. Start by microwaving the frozen peaches for about 30 seconds. You want them to be just soft enough to break apart easily with a spoon but still holding their shape.
  2. Add in the cooking oats, non-fat milk, a dollop of low fat cream cheese, a drizzle of agave, and a sprinkle of cinnamon. The combination of creamy and sweet with a hint of spice will make your kitchen smell divine.
  3. Pop it all in the microwave for about a minute. Keep an eye out as the edges will start to bubble, and the cream cheese will melt into a luscious swirl.
  4. Once done, give it a good stir. You want everything to meld together into a creamy, peachy paradise. Enjoy it while it’s warm and watch your morning instantly get better.

Cook’s Notes

Here’s the deal: This oatmeal is extremely forgiving, so don’t stress if you don’t measure everything exactly. I find it’s best eaten right away while it’s warm, but if you do have leftovers, they can be stored in an airtight container in the fridge for a day or two. Just add a splash of milk before reheating to bring it back to its creamy self.

If you don’t have agave, honey or maple syrup work just as well. And if you prefer your oatmeal a bit thicker, you can reduce the milk slightly or add more oats. The cream cheese gives it that dreamy, creamy texture, so feel free to adjust according to your taste buds’ desire.

Make It Your Own

  • Berry Delight: Swap the peaches for a mix of berries. Frozen blueberries or raspberries can add a nice tart kick.
  • Nutty Crunch: Toss in some chopped almonds or walnuts for a bit of texture and extra protein.
  • Vegan Vibes: Use almond or oat milk and vegan cream cheese to keep it plant-based.
  • Spice It Up: Add a pinch of nutmeg or ginger along with the cinnamon for a warm, spiced flavor.

If you try this, I’d love to hear how it turns out — drop a comment or tag me! Your mornings deserve a little bit of peachy comfort, and I can’t wait for you to try it. Enjoy! 🍑❤️

Related update: Peaches And Cream Oatmeal

Related update: Crawfish Cake Sliders

Related update: Blueberry, Chocolate & Cocao Superfood Pancakes - Gluten-Free/Paleo/Vegan

Hard-Boiled Egg Gratin In A Bechamel Sauce | Made by Meaghan Moineau

It was one of those gloomy Tuesday evenings when the thought of another sad salad was just too much to bear. I glanced at the dozen eggs I had forgotten in my fridge and thought, “We can do better than this, guys!” Thus, the Hard-Boiled Egg Gratin In A Béchamel Sauce was born. This dish is the perfect marriage of creamy comfort and accessible elegance. It’s like giving your humble eggs a posh makeover, and believe me, it’s way easier than you’d think. Plus, it’s the kind of dish that makes you feel like you can handle anything the week throws at you.

Jump to Recipe

What You’ll Need

You might already have most of this in your kitchen, just waiting to become something delightfully decadent. Here’s what you’ll gather:

  • 6 large eggs
  • 4 tablespoons butter, divided
  • 1 small onion, finely chopped
  • 3 tablespoons flour
  • 2 cups milk
  • Nutmeg, a pinch
  • Salt and white pepper to taste
  • 1 cup grated gruyère cheese

How to Make Hard-Boiled Egg Gratin In A Béchamel Sauce

  1. Start with hard-boiling your eggs. Bring a saucepan of salted water to a boil, add the eggs gently, then reduce the heat and let them simmer for 10 minutes. Once done, transfer the eggs to a bowl of cold water to cool slightly, then peel them. Trust me, rolling them gently with your palm on a hard surface makes peeling a breeze.
  2. In a small frying pan, melt 2 tablespoons of the butter over low heat and add the chopped onion. Cook, stirring frequently, until the onion is tender but not colored — you want that sweet onion aroma wafting through your kitchen.
  3. Now for the béchamel sauce: In a medium saucepan, melt the remaining 2 tablespoons of butter over low heat. Add the flour and whisk it for about 2 minutes. Keep an eye on it; you want a smooth blend without any color change.
  4. Slowly whisk in the milk and bring the mixture to a boil. Keep whisking to avoid lumps. Season the sauce with nutmeg, salt, and white pepper to your liking. Lower the heat and let it simmer for 10 minutes, continuing to whisk and scrape the sides for a silky finish.
  5. Stir in the cooked onions and let it all meld together for another 5 minutes, stirring occasionally.
  6. Preheat your grill. While it heats, slice the eggs about 1 cm thick. Spread a thin layer of béchamel sauce on the bottom of a gratin dish, then layer in the sliced eggs. Coat the slices generously with the remaining sauce.
  7. Top it all off with a generous sprinkle of grated gruyère cheese. Pop it under the grill and watch closely — turn the dish if needed to ensure an even, golden-brown crust. Serve immediately and bask in the glory of your culinary creation.

Cook’s Notes

A few things to keep in mind: The béchamel can be made ahead and stored in the fridge for up to two days. Just reheat gently before assembling the gratin. If you find your sauce is too thick after reheating, add a splash of milk to loosen it up. Leftovers (if you have any!) can be kept in the fridge and reheated in the oven at a low temperature. Just be mindful that the eggs can toughen slightly as they are reheated.

Make It Your Own

The joy of this dish is in its flexibility. Here are some fun variations:

  • For a smoky twist, swap the gruyère for smoked gouda.
  • If you’re feeling fancy, add a layer of sautéed mushrooms between the eggs and the sauce.
  • For a fresh hit, sprinkle chopped chives or parsley over the top before serving.
  • Try adding a thin layer of spinach under the eggs for a pop of color and nutrition.

If you try this, I’d love to hear how it turns out — drop a comment or tag me! Whip it up, make it your own, and most importantly, enjoy every creamy forkful. Happy cooking, friends!

Related update: Hard-Boiled Egg Gratin In A Bechamel Sauce

Apple Cheddar Turkey Burgers With Chipotle Yogurt Sauce | Made by Meaghan Moineau

Last Tuesday, after a long day at work and an unexpected downpour that left me semi-drenched on my way home, I found myself craving something warm and hearty but also a little adventurous. That’s when I remembered my go-to Apple Cheddar Turkey Burgers with Chipotle Yogurt Sauce. They’re a delicious twist on your classic burger — a little bit cozy, a little bit spicy, and deeply satisfying. Plus, they’re quick enough to whip up on a weeknight without losing any of that “special dinner” vibe. Perfect for when you need comfort food that feels like a treat. Trust me, your taste buds will thank you. Jump to Recipe

What You’ll Need

This recipe is a gem because most of these ingredients are pantry staples, with a few stars that elevate the whole dish. It’s likely you already have everything you’ll need.

  • 1 whole diced apple
  • 1 cup bread crumbs
  • 1 pound ground turkey
  • 1 tablespoon chipotle hot sauce
  • 1 small onion, finely chopped
  • 1/2 cup plain yogurt
  • Salt and pepper, to taste
  • 1 cup shredded sharp cheddar cheese
  • Diced garnish (optional, but recommended for extra crunch!)

How to Make Apple Cheddar Turkey Burgers With Chipotle Yogurt Sauce

  1. In a large bowl, mix together the diced apple, bread crumbs, ground turkey, chipotle hot sauce, chopped onion, salt, and pepper. Get in there with your hands — it’s the best way to ensure everything is evenly combined.
  2. Once everything is well mixed, shape the mixture into 4-6 patties, depending on your preferred size. You want them to be about 1 inch thick so they cook evenly.
  3. Preheat your grill or skillet over medium heat. Add the patties and cook for about 2 minutes on each side. You’ll know they’re done when the juices run clear, and the outside is golden brown and slightly crispy.
  4. While the burgers are cooking, stir together the plain yogurt and chipotle hot sauce in a small bowl. Adjust the heat level with more sauce if you like it spicier.
  5. Once the burgers are cooked, top each with a generous sprinkle of shredded cheddar cheese. Allow it to melt slightly before removing the patties from the grill or pan.
  6. Serve the burgers topped with a dollop of chipotle yogurt sauce and a sprinkle of your favorite diced garnish. Enjoy immediately while they’re warm and melty!

Cook’s Notes

These burgers are as versatile as they are tasty. If you find yourself with leftovers, they store well in the fridge for up to three days. Just reheat them in a pan over low heat to avoid drying out the turkey. To make these ahead, you can prepare the patties and sauce the night before and keep them refrigerated until you’re ready to cook.

  • Ensure your apple is diced finely to mix well with the turkey and keep the patties from falling apart.
  • Don’t rush the cooking. Medium heat is key to achieving that perfect golden crust while keeping the inside juicy.

Make It Your Own

  • Swap the turkey for beef if you’re feeling more traditional but still want that apple-cheddar flair.
  • Try using smoked gouda in place of cheddar for a deeper, smokier flavor.
  • For a vegetarian twist, use a black bean and quinoa mix instead of turkey. It pairs surprisingly well with the apple and cheddar!
  • If you’re not into chipotle, substitute with your favorite barbecue sauce for a different kind of smoky heat.

If you try this, I’d love to hear how it turns out — drop a comment or tag me! Your feedback means the world and inspires my next kitchen adventure. Happy cooking! 🍔

Related update: Apple Cheddar Turkey Burgers With Chipotle Yogurt Sauce

Related update: Baked Eggs and Bacon Cream In Spinach Fettuccine Nests

French Onion Marsala Soup | Made by Meaghan Moineau

It was one of those dreary Tuesday evenings, the kind where the wind howls just a little too enthusiastically and the rain taps against the window like it’s trying to join the conversation. I found myself in need of something cozy, something that would wrap me up like a warm blanket with each and every spoonful. Enter my kitchen experiment turned favorite: French Onion Marsala Soup. This dish has the timeless charm of French onion soup, but with a cheeky twist thanks to the marsala wine. It’s the kind of soup that feels indulgent but is actually surprisingly simple to whip up. Perfect for those nights when you’re craving restaurant-quality comfort without leaving the house.

Jump to Recipe

What You’ll Need

Trust me, the ingredient list is straightforward, and you probably have most of these tucked away in your pantry or fridge already. Here’s what you’ll need to make this comforting bowl of goodness:

  • Butter
  • Olive oil
  • Onions — lots of them!
  • Canned beef broth
  • Marsala wine — this is the twist that makes it special
  • Dried thyme
  • Salt and pepper
  • Sugar
  • Texas toast croutons
  • Provolone cheese
  • Diced Swiss cheese
  • Parmesan cheese

How to Make French Onion Marsala Soup

  1. Melt the butter with the olive oil in a large pot over medium heat. You’ll want to use a pot that’s big enough to handle all those onions without a fuss.
  2. Add the onions and stir them gently and continually until they’re translucent. Give them the time they need to soften and release their sweet fragrance.
  3. Pour in the beef broth, marsala wine, and a sprinkle of dried thyme. Bring it to a simmer, letting the flavors meld together for about 30 minutes.
  4. Add a dash of sugar and season with salt and pepper to taste. Be careful with the salt — it’s easy to go overboard when the broth’s already savory.
  5. Ladle the soup into oven-safe bowls. Add a generous handful of croutons to each bowl — they’re the crunchy surprise waiting at the bottom.
  6. Top with a sprinkle of Swiss cheese and Parmesan. Finish with two slices of provolone, which will melt into a gooey, golden layer.
  7. Place the bowls on a cookie sheet and broil them in a preheated oven until the cheese is bubbly and beautifully browned. Keep an eye on them — no one likes burnt cheese!

Cook’s Notes

This soup is all about the onions and cheese, so don’t rush the onion cooking phase. Slow and steady wins the race here. If you’re planning to make it ahead, you can stop right before broiling and refrigerate. Just reheat and broil when you’re ready to serve. Leftovers can be stored in the fridge for up to three days. They reheat beautifully, though you might want to add fresh croutons and cheese before broiling again to keep that satisfying texture balance.

Make It Your Own

Feel free to play around with this soup! Here are some ideas to make it your own:

  • For a vegetarian version, swap the beef broth for a rich vegetable stock.
  • Try using Gruyère cheese instead of Swiss for a nuttier flavor.
  • Use homemade croutons if you have stale bread lying around — just toss them in some olive oil and bake until crispy.
  • Want a bit of heat? Add a pinch of red pepper flakes during the simmering step.

If you try this, I’d love to hear how it turns out — drop a comment or tag me! Your kitchen adventures make my day, and who knows? You might just come up with a new twist on this classic for me to try next time. Happy cooking!

Related update: French Onion Marsala Soup

Related update: Ham and Red Bean Soup