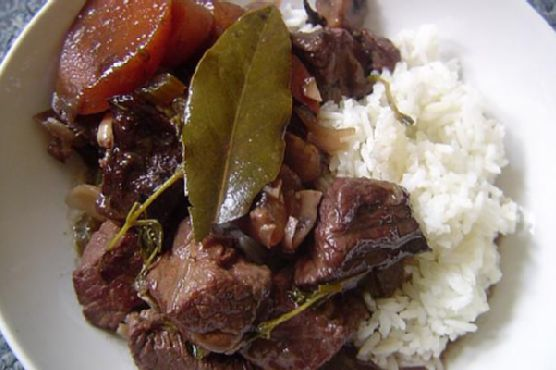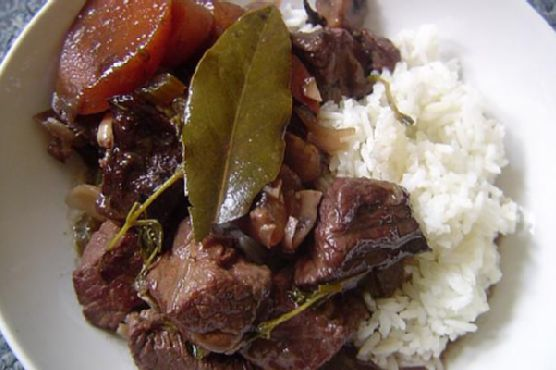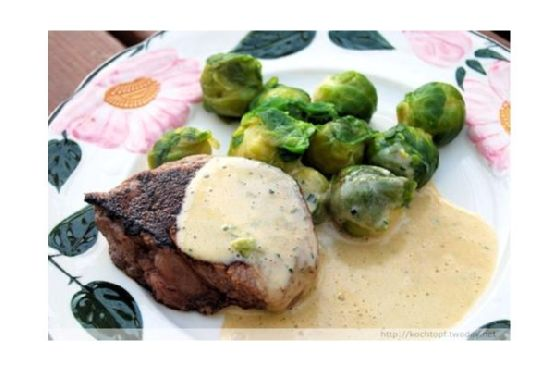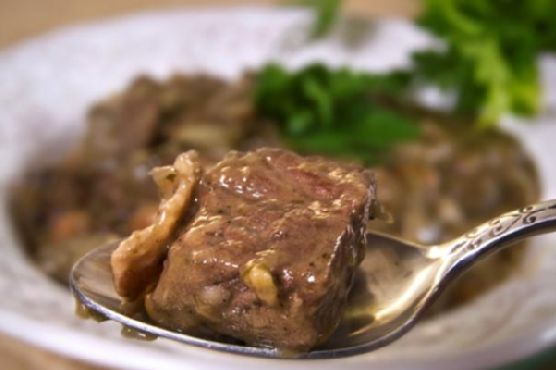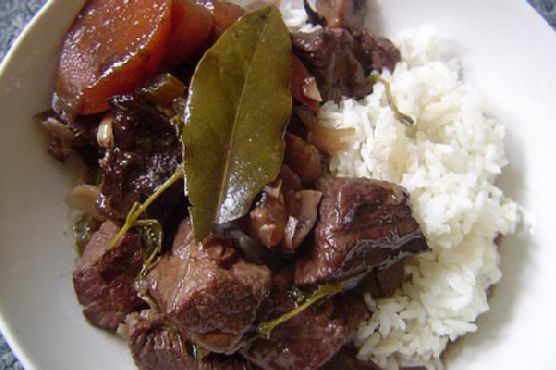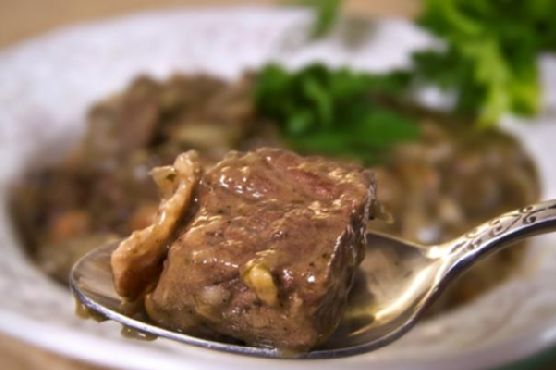
Boeuf Bourgignon | Made by Meaghan Moineau

Picture this: It’s a chilly Tuesday evening, and I’m standing in my kitchen with an insistent craving for something rich, hearty, and French. You know the type of night where you want to curl up with a bowl of something warm that takes you far, far away? Enter Boeuf Bourgignon. Trust me, it’s not just for fancy dinner parties or trying to impress your in-laws. The beauty of this dish lies in its depth of flavor, which tastes like hours of work but is mostly just a long, slow simmer. This isn’t a quick weeknight meal, but it’s perfect for a lazy weekend when you just want the house to smell amazing. And hey, it’s an excuse to open some cognac. Cheers to that! Jump to Recipe

What You’ll Need

Chances are you already have most of what you’ll need to create this masterpiece. The list is straightforward, but a few ingredients really make this dish sing.

  • Button mushrooms
  • Butter
  • Uns-moked bacon
  • Vegetable oil
  • Boneless well-trimmed beef chuck
  • Yellow onion
  • Shallots
  • Carrots
  • Black salt and pepper
  • Flour
  • Cognac
  • Beef stock
  • Unsweetened cocoa powder
  • Garlic cloves
  • Fresh thyme
  • Fresh flat-leaf parsley leaves
  • Tomato paste
  • Bay leaf

How to Make Boeuf Bourgignon

  1. Preheat your oven to 160°C (325°F). Get excited—you’re about to make magic happen.
  2. In a skillet, sauté the mushrooms in butter until they’re brown and soft. This is where the richness begins. Set these beauties aside.
  3. In a deep-bottomed pot or casserole, sauté the bacon in 1 tablespoon of oil over moderate heat. Give it 2 to 3 minutes to get a light browning. Remove with a slotted spoon and keep aside.
  4. Crank up the heat until the remaining fat is almost smoking, then it’s time to brown the beef. Do this in batches so each piece gets a nice sear without crowding. All sides should be browned—not sweated.
  5. Add the browned beef to your reserved bacon. Let them mingle together like old friends.
  6. Reduce the heat to medium, and in the same fat, toss in onions, shallots, and carrots. Cook until the carrots start softening and the onions begin to caramelize lightly.
  7. Add the softened veggies to your beef and bacon mix. Pour out the excess sautéing fat from the pot.
  8. Return the beef mixture to the casserole. Sprinkle flour on top and toss to ensure every piece of beef has a light coating of flour. Stir until the flour cooks through and none of it is visible.
  9. Add the reserved bacon and veggie mix back in, seasoning with black salt and pepper to taste. Stir in the cognac and enough beef stock to just barely cover the meat.
  10. Add garlic, thyme, parsley, tomato paste, and bay leaf. Bring this sumptuous mix to a gentle simmer on your stovetop.
  11. Cover the casserole and place it in the oven. Cook for about 2 1/2 to 3 hours, giving you plenty of time for a glass of wine and a good book.
  12. About an hour into cooking, retrieve your casserole from the oven. Mix in the reserved mushrooms and stir in the unsweetened cocoa powder. This secret ingredient adds an extra layer of depth, trust me.
  13. Return the dish to the oven. The stew is ready when the beef is fork-soft and your kitchen smells like a dreamy French bistro.

Cook’s Notes

This dish is forgiving, but here are a few tips to keep in mind. Don’t rush the browning of the beef; it builds the flavor base for the entire stew. If you’re making this ahead, it tastes even better the next day as the flavors meld together beautifully. Store any leftovers in an airtight container in the fridge for up to three days. Reheat gently on the stove or in the microwave. And in case of spills or splatters, just embrace it as part of the cooking adventure!

Make It Your Own

  • Go vegetarian: Swap the beef for crispy tofu or a mix of hearty root vegetables like parsnips and potatoes.
  • No cognac? Use a dry red wine instead for a slightly different but equally delicious flavor profile.
  • Spice it up: Add a pinch of cayenne or smoked paprika for an unexpected kick.
  • Herb it up: Experiment with rosemary or tarragon if you don’t have thyme on hand.

If you try this, I’d love to hear how it turns out—drop a comment or tag me! Cooking is all about sharing and connecting, so don’t be shy. Bon appétit!

Related update: Boeuf Bourgignon

Béarnaise Sauce | Made by Meaghan Moineau

Picture this: It’s a Wednesday night, and I’ve got a craving — not just any craving, but a very specific desire for something that feels lavish but doesn’t require me to spend two hours in the kitchen. That’s when I think of Béarnaise sauce. It’s rich, velvety, and makes any dish feel like it’s straight out of a fancy restaurant. Whether I’m drizzling it over grilled steak or spooning it onto roasted vegetables, it’s the magic touch that elevates a meal from “meh” to “marvelous.” Plus, the whole process feels like a fun science experiment with all the whisking and bubbling. Seriously, once you nail this, you’ll never go back to store-bought.

Jump to Recipe

What You’ll Need

Let’s talk ingredients. Chances are, you already have most of these hanging out in your kitchen. It’s all about bringing them together in a way that sings.

  • 1/2 cup melted butter
  • 1/4 cup dry white wine
  • 3 egg yolks
  • 1 tablespoon lemon juice
  • 1 tablespoon chopped parsley
  • Salt and pepper to taste
  • 2 tablespoons minced shallots
  • 1 teaspoon chopped fresh tarragon
  • 1 tablespoon tarragon vinegar

How to Make Béarnaise Sauce

  1. In the top of a double boiler, whisk together the egg yolks and lemon juice. It’ll look thick and creamy, almost like a custard that’s waiting to be transformed.
  2. Place this over simmering water, making sure the water doesn’t actually touch the bowl. We want gentle heat, not a sauna for our eggs.
  3. Slowly stream in the melted butter while whisking constantly. You’ll see the mixture start to thicken and get glossy in the process. This part feels like magic! Keep it slow, and your sauce won’t break.
  4. Season with salt and a generous grind of pepper. Add the tarragon, shallots, parsley, vinegar, and the white wine. Whisk until everything is beautifully blended and the sauce has a lush, velvety texture.
  5. Keep whisking for another minute or so, allowing the flavors to meld together. You’ll know it’s ready when the sauce clings to the back of a spoon and smells like something you’d get at a five-star joint.

Cook’s Notes

Here’s the deal: Béarnaise sauce can be a bit temperamental, but don’t let that scare you. The key is patience and whisking. If you find your sauce is getting too thick, whisk in a teaspoon of warm water to loosen it. Also, remember that this sauce doesn’t love to wait around; make it just before serving for the best texture and flavor.

  • If you’re not serving it immediately, keep it warm in a thermos or a warmed bowl. Just avoid reheating directly on the stove as it tends to separate.
  • This sauce is best fresh, but if you have leftovers, store them in the fridge and use within a day. Gently reheat it in a double boiler, whisking vigorously to bring it back together.

Make It Your Own

  • Herb Swap: Not a fan of tarragon? Swap it out for basil or dill for a different herbal note. Each will give your Béarnaise a unique twist.
  • Citrus Twist: Replace the lemon juice with orange or lime for a subtle citrus variation.
  • Spicy Kick: Add a pinch of cayenne or a dash of hot sauce for a spicy Béarnaise that pairs beautifully with grilled meats.
  • Vegan Alternative: Use vegan butter and replace egg yolks with a tablespoon of nutritional yeast and a teaspoon of cornstarch for a plant-based version.

If you try this, I’d love to hear how it turns out — drop a comment or tag me! Béarnaise sauce has this wonderful way of making any dish feel like a special occasion. So go ahead, treat yourself!

Related update: Béarnaise Sauce

Classic Boeuf Bourguignon | Made by Meaghan Moineau

Picture this: It’s a chilly Tuesday evening, and I’ve just managed to duck out of the rain and into my cozy kitchen. My cat, Oliver, is curled up on the windowsill, and the whole place is alive with the soft patter of raindrops. It’s the kind of night that calls for something deeply comforting, something that can fill not just the belly but also the soul. Enter Classic Boeuf Bourguignon — my go-to when I crave something hearty and a tad bit indulgent but without spending hours in the kitchen. Honestly, the magic of this dish lies in its ability to transform simple ingredients into something truly extraordinary. The smell of beef simmering with red wine and herbs is, quite literally, poetry in a pot. Plus, it’s the kind of recipe where you can pop it all into a Dutch oven, let it work its magic, and you’ll still have time to catch up on that new series everyone’s been talking about.

Jump to Recipe

What You’ll Need

Just a heads-up: You might already have most of these tucked away in your pantry, and the rest? Well, they’re worth the trip to the store. Trust me.

  • Bacon – Adds a smoky depth to the dish.
  • Olive oil
  • Beef stew meat – The star of the show.
  • Garlic
  • Diced onion
  • Fresh thyme
  • Bay leaves
  • Parsley
  • Pearl onions
  • Button mushrooms
  • Carrot
  • Red wine – Go for something you’d drink.
  • Beef broth
  • All-purpose flour
  • Salt and pepper

How to Make Classic Boeuf Bourguignon

  1. Preheat your oven to 400°F (200°C). Get that Dutch oven ready – it’s about to work its magic.
  2. Heat olive oil over medium heat and toss in the bacon. Let it sizzle for about 2-3 minutes until it’s just perfectly cooked. Transfer the bacon out with a slotted spoon and let it hang out on the side.
  3. Pat the beef dry with paper towels for a better browning. Crank up the heat to medium-high, throw the beef into the bacon fat, and let it sear for 4-5 minutes until every piece is gloriously browned. Spoon them out and set aside.
  4. Lower the heat back to medium. Toss in the carrots, garlic, onions, parsley, thyme, and bay leaves. Give them a good stir for about 2-3 minutes. Out they go with the slotted spoon, into a separate dish.
  5. Add pearl onions and mushrooms to the Dutch oven. Sauté them until the onions start to brown and the mushrooms become tender. Move them to the dish with the bacon.
  6. Return the beef to the pot and sprinkle one tablespoon of flour over it. Give it a good toss to coat. Season generously with salt and pepper. Pop it in the oven for about 4-5 minutes to develop a gorgeous crust.
  7. Remove the pot from the oven and set it on the stovetop. Pour in the red wine and deglaze, scraping up all those tasty bits. Add the beef broth, bring it to a gentle simmer.
  8. Introduce the carrot, onion, and spice mixture back into the pot. Lower the heat, cover, and let it simmer away for an hour, filling your kitchen with the most intoxicating aroma.
  9. After an hour, add the pearl onions, mushrooms, and bacon. Continue to simmer, allowing the beef to tenderize further, about another 30 minutes.
  10. Use a slotted spoon to fish out the solids and set them aside. Crank up the heat; let the sauce come to a rapid boil.
  11. In a small bowl, mix the remaining tablespoon of flour with two tablespoons of sauce. Stir until smooth and lump-free. Add to the pot, stirring constantly until the sauce thickens.
  12. Remove the bay leaves and thyme sprigs. Discard them. Return the solids to the pot, stirring to coat evenly with the enriched sauce. Serve warm, perhaps over a bed of egg noodles or rice if you’re feeling it.

Cook’s Notes

Let’s talk practicalities. This dish is one of those gems that get even better the next day — so if you can resist not devouring it all, it’s perfect for leftovers. Store it in an airtight container in the fridge, and when you reheat, just do it gently over low heat to keep that beef tender and juicy. If you’re prepping ahead, you can cook everything up to the point just before adding the flour in step 10. Refrigerate and proceed with the sauce thickening when you’re ready to serve. Also, don’t skimp on the wine. A good wine makes all the difference. Taste as you go, and adjust the seasoning if needed.

Make It Your Own

Feel free to get creative and put your own spin on this classic:

  • Vegetarian Twist: Swap out the beef for hearty mushrooms like portobello or cremini, and use vegetable broth instead of beef.
  • Poultry Option: Switch the beef out for chicken thighs. They’re just as comforting and cook a bit quicker.
  • Root Veggie Addition: Try adding some parsnips or turnips along with the carrots for a little extra earthy sweetness.
  • Herbaceous Flair: Add rosemary or sage for an aromatic twist that complements the wine beautifully.

If you try this, I’d love to hear how it turns out — drop a comment or tag me! Sharing your kitchen adventures makes my day. Plus, who knows, your twist might just inspire someone else!

Related update: Classic Boeuf Bourguignon

Apricot Clafouti With Lavender & Pecans | Made by Meaghan Moineau

Picture this: It’s a lazy Sunday afternoon, and I’m rummaging through my pantry, longing for something sweet but not overly indulgent. It’s one of those days where you want a little baking therapy but refuse to spend hours in the kitchen. Enter the Apricot Clafouti With Lavender & Pecans. This is the kind of recipe that surprises you with how easy it is, yet it brings such elegance to your table. Imagine delicate apricots mingling with the floral notes of lavender while pecans add that irresistible crunch. It’s like a summer melody in dessert form. Trust me, this is the kind of dish that makes you feel like you’ve been transported to a quaint French cafe.

Jump to Recipe

What You’ll Need

The beauty of this ingredient list is that it’s simple yet feels extravagant, and odds are, you’ve already got most of these on hand.

  • All-natural apricot nectar
  • Apricot preserves
  • Dried California apricots
  • Fresh apricots
  • Cardamom
  • Eggs
  • Honey
  • Dried culinary lavender buds
  • Lemon juice
  • Lemon zest
  • Low fat sour cream
  • Nonfat milk
  • Pecans
  • Salt
  • Unbleached flour
  • Vanilla extract

How to Make Apricot Clafouti With Lavender & Pecans

  1. First thing’s first: preheat your oven to 375°F. We want it nice and hot so that our clafouti bakes to perfection.
  2. In a large mixing bowl, beat the eggs until they’re frothy. This is your base, so put some love into it.
  3. Add in the sour cream, milk, apricot nectar, lemon juice, lemon zest, apricot preserves, honey, and vanilla extract. Mix until everything is beautifully combined and smooth.
  4. Slowly whisk in the flour, a pinch of salt, cardamom, and those aromatic lavender buds. You’ll start to smell the floral notes as you mix—heavenly!
  5. Fold in the diced, dried apricots and pecans. Make sure they’re evenly distributed; you want each slice to have its share of goodies.
  6. Pour the mixture into a glass pie plate. Gently press the fresh apricot halves into the mix, forming a decorative pattern on top. This step is where you can get artsy!
  7. Let it set for 10 minutes. This little rest allows the flavors to mingle and the mixture to thicken slightly.
  8. Pop it into the oven and let it bake for 30-45 minutes. You’ll know it’s done when the edges are golden and the center is set but slightly wobbly—like a good custard.

Cook’s Notes

Alright, so here’s the deal: the clafouti is best served warm, right out of the oven, with maybe a scoop of vanilla ice cream if you’re feeling decadent. But if you have leftovers, they’re still delightful the next day, cold or gently warmed in the oven. Store any extras in an airtight container in the fridge for up to three days. A little note of caution—don’t overdo the lavender; a little goes a long way, and too much can taste soapy. When folding the nuts and apricots, be gentle to avoid deflating your batter.

Make It Your Own

Here’s where the fun begins—customizing your clafouti to suit your mood or what’s in your pantry.

  • Swap the apricots for juicy peaches or nectarines when they’re in season. They work beautifully with lavender as well.
  • If pecans aren’t your thing, use almonds or hazelnuts for a different type of crunch.
  • Add a handful of fresh raspberries before baking for a tart contrast to the sweet apricots.
  • For a more herbal twist, sprinkle in some fresh rosemary to complement the lavender.

If you try this, I’d love to hear how it turns out—drop a comment or tag me! Whether you stick to the script or venture into your own variations, this clafouti is sure to bring a touch of culinary bliss to your table. Bon appétit!

Related update: Apricot Clafouti With Lavender & Pecans

Related update: Banana in brown sugar ice cream

Chouquettes | Made by Meaghan Moineau

It was one of those Tuesdays where everything felt just a little bit off. You know the kind — you spill coffee on your favorite shirt, you’re already late and the cat decides now is the perfect time to puke on the rug. By the time dinner rolled around, I was craving something sweet, delightful, and impossibly easy — something to save the day. Luckily, I remembered the pack of Swedish pearl sugar in the cupboard and thought, “It’s a chouquette night.” I mean, who can resist those airy little puffs topped with crunchy sugar? They make you feel like you’re at a fancy café in Paris, but they’re totally doable at home. Plus, there’s something deeply satisfying about the way they puff up in the oven, like little clouds of happiness. So let’s dive into this, and as they say in France, “C’est parti!”

Jump to Recipe

What You’ll Need

You might find that you already have most of these ingredients lounging in your pantry, waiting for their moment to shine. The only thing you might need to hunt down is that lovely, crunchy Swedish pearl sugar — it’s the secret to these beauties.

  • Butter
  • Sugar
  • Salt
  • Lemon rind
  • Water
  • Flour
  • Vanilla
  • Rum
  • Eggs
  • Swedish pearl sugar

How to Make Chouquettes

  1. First things first, preheat your oven to 400°F and let it get nice and hot for at least 20 minutes — this is key to getting that beautiful rise.
  2. In a medium saucepan, bring the butter, sugar, salt, lemon rind, and water to a boil. The aroma will start lifting your spirits instantly!
  3. Once it’s bubbling away, remove it from the heat and dump all the flour in at once. Stir gently at first, then with some serious vigor, until it all comes together. It’ll be a bit of a workout but hang in there!
  4. Return the pan to medium-high heat and cook for about 3-4 minutes. Stir continuously until the batter clings to the spoon and looks glossy, like it’s showing off a new shiny coat.
  5. Take it off the heat, add the vanilla and rum, then let it cool in the pan. This is a good time to dance around the kitchen.
  6. Beat in the eggs one at a time with a wooden spoon. Don’t worry when it looks like a lumpy, broken mess after each egg — keep stirring and it’ll come back together beautifully, a sticky masterpiece.
  7. Line a baking sheet with parchment paper. Drop quarter-sized balls onto the sheet and go wild with that pearl sugar. Sprinkle generously because more is more here.
  8. Pop them into the oven and bake for 5-20 minutes. Keep an eye out — they need to be completely brown before you rescue them from the heat to ensure they don’t collapse on you.

Cook’s Notes

Chouquettes are best enjoyed fresh from the oven, when they’re crisp and airy. However, if you have leftovers (a big if!), store them in an airtight container at room temperature. They’ll soften a little but are still delicious for about a day. Just give them a quick reheat in a 350°F oven to crisp them back up.

A common pitfall is underbaking. If they look pale, they’re not done. Trust me, patience is a virtue here. Wait for them to reach a deep golden brown.

If you’re planning ahead, the dough can be prepared and piped onto baking sheets, then frozen. When you’re ready to impress, bake them straight from the freezer — just add a few extra minutes to the bake time.

Make It Your Own

  • Chocolate Chouquettes: Add a tablespoon of cocoa powder to the flour for a chocolatey twist. They’re irresistible with a dusting of powdered sugar instead of pearl sugar.
  • Nutty Delights: Sprinkle chopped almonds or hazelnuts along with the pearl sugar for an added crunch and nutty flavor.
  • Spiced Up: Add a pinch of cinnamon or cardamom to the dough to bring a warm, spicy note that pairs beautifully with a hot cup of tea.
  • Citrus Burst: Double up on the lemon by adding a touch of lemon extract along with the rind for an extra zesty kick.

If you try this, I’d love to hear how it turns out — drop a comment or tag me! Chouquettes are one of those sweet treats that can make any day feel special. Happy baking!

Related update: Chouquettes

Related update: Apricot Clafouti With Lavender & Pecans

Classic French Onion Soup | Made by Meaghan Moineau

Picture this: it’s a chilly weekday evening, the kind where the wind seems to seep through every layer of clothing, and all I can think about is wrapping my hands around a warm bowl of something comforting. That’s how I found myself in the kitchen, wrestling with the idea of making a classic French Onion Soup. You know, the kind with a deep, rich broth and a cheesy, bubbly top that smells like pure coziness. It’s the perfect dish for those nights when you want to impress yourself with something that feels a bit fancy yet totally do-able. Spoiler alert: this recipe is easier than it seems and totally worth every bit of effort. Oh, and if you’re in a hurry to dive in, I’ve got you covered.

Jump to Recipe

What You’ll Need

Guess what? You might already have most of these ingredients hanging out in your kitchen. This recipe leans on everyday staples with a few stars that bring the magic.

  • 2 tablespoons of salted butter
  • 4 large yellow onions, sliced thin
  • 2 tablespoons of flour
  • 1/2 cup of sherry
  • 8 cups of beef broth
  • 4 sprigs of fresh thyme
  • 3 sprigs of fresh parsley
  • 1 bay leaf
  • Salt and pepper to taste
  • 1 French crusty baguette
  • 2 cups of shredded gruyere cheese

How to Make Classic French Onion Soup

  1. Preheat your oven to 400°F (200°C). This is crucial for that cheesy top finish.
  2. In a large Dutch oven, melt the butter over medium heat. Let it sizzle and foam—it’s the signal that your onions are ready to join the party.
  3. Add the sliced onions to the pot and sprinkle them with flour. Stir occasionally, adjusting the heat between medium and low. You’ll want to do this for about 45 minutes until they turn a tender, golden brown. If they start to brown too quickly, don’t hesitate to lower the heat.
  4. It’s de-glazing time! Pour in the sherry and scrape up those flavorful bits stuck to the bottom of the pot—aroma heaven.
  5. Add the beef broth and bring everything to a rolling boil. The anticipation builds!
  6. Toss in the fresh thyme, parsley, bay leaf, and season with salt and pepper. Simmer gently for 15 minutes, letting the flavors mingle and deepen.
  7. Meanwhile, slice the baguette and butter each piece. Arrange them on a cookie sheet and bake for 5-10 minutes until they’re dry and ready to soak up all that brothy goodness. Set aside to cool just a bit.
  8. Remove the herb sprigs and bay leaf from the soup. Ladle the soup into four oven-safe ramekins. Now, the fun part: top each with a slice of crusty bread and a generous sprinkle of gruyere cheese.
  9. Place your ramekins on a cookie sheet (for easy handling) and bake uncovered at 400°F for another 5-10 minutes until the cheese is bubbling. For an extra golden top, switch to broil for one more minute.
  10. Finally, serve warm and watch the smiles unfold around the table.

Cook’s Notes

Okay, here are a few nuggets of wisdom to ensure your soup is spot-on. First, let’s talk onions. Low and slow is key for that melt-in-your-mouth caramelization, so patience is your best friend here. And always taste your broth before seasoning—sometimes beef broth can be saltier than expected.

If you’re making it ahead, the soup base can be stored in the fridge for up to 3 days. Just reheat gently and add the bread and cheese topping before serving. Leftovers? They reheat beautifully in the oven; just keep the bread and cheese separate until you’re ready to enjoy round two.

Make It Your Own

Want to put a personal spin on this classic? Here are some tasty variations:

  • For a vegetarian version, swap the beef broth with a robust veggie broth and add a splash of soy sauce for depth.
  • If sherry isn’t your thing, try a dry white wine or even a splash of brandy for a different kind of warmth.
  • Love a bit of heat? Add a pinch of red pepper flakes to the onion mix for a subtle kick.
  • Switch up the cheese! Try a combo of gruyere and sharp cheddar for a more pronounced flavor.

If you give this recipe a try, I’d love to hear how it turns out—drop a comment or tag me in your delicious creations. Happy cooking, and may your kitchen be filled with warmth and joy!

Related update: Classic French Onion Soup

Related update: One Soup, Two Ways: Chunky Vegetables and Cream Of Vegetables

Hard-Boiled Egg Gratin In A Bechamel Sauce | Made by Meaghan Moineau

It was one of those gloomy Tuesday evenings when the thought of another sad salad was just too much to bear. I glanced at the dozen eggs I had forgotten in my fridge and thought, “We can do better than this, guys!” Thus, the Hard-Boiled Egg Gratin In A Béchamel Sauce was born. This dish is the perfect marriage of creamy comfort and accessible elegance. It’s like giving your humble eggs a posh makeover, and believe me, it’s way easier than you’d think. Plus, it’s the kind of dish that makes you feel like you can handle anything the week throws at you.

Jump to Recipe

What You’ll Need

You might already have most of this in your kitchen, just waiting to become something delightfully decadent. Here’s what you’ll gather:

  • 6 large eggs
  • 4 tablespoons butter, divided
  • 1 small onion, finely chopped
  • 3 tablespoons flour
  • 2 cups milk
  • Nutmeg, a pinch
  • Salt and white pepper to taste
  • 1 cup grated gruyère cheese

How to Make Hard-Boiled Egg Gratin In A Béchamel Sauce

  1. Start with hard-boiling your eggs. Bring a saucepan of salted water to a boil, add the eggs gently, then reduce the heat and let them simmer for 10 minutes. Once done, transfer the eggs to a bowl of cold water to cool slightly, then peel them. Trust me, rolling them gently with your palm on a hard surface makes peeling a breeze.
  2. In a small frying pan, melt 2 tablespoons of the butter over low heat and add the chopped onion. Cook, stirring frequently, until the onion is tender but not colored — you want that sweet onion aroma wafting through your kitchen.
  3. Now for the béchamel sauce: In a medium saucepan, melt the remaining 2 tablespoons of butter over low heat. Add the flour and whisk it for about 2 minutes. Keep an eye on it; you want a smooth blend without any color change.
  4. Slowly whisk in the milk and bring the mixture to a boil. Keep whisking to avoid lumps. Season the sauce with nutmeg, salt, and white pepper to your liking. Lower the heat and let it simmer for 10 minutes, continuing to whisk and scrape the sides for a silky finish.
  5. Stir in the cooked onions and let it all meld together for another 5 minutes, stirring occasionally.
  6. Preheat your grill. While it heats, slice the eggs about 1 cm thick. Spread a thin layer of béchamel sauce on the bottom of a gratin dish, then layer in the sliced eggs. Coat the slices generously with the remaining sauce.
  7. Top it all off with a generous sprinkle of grated gruyère cheese. Pop it under the grill and watch closely — turn the dish if needed to ensure an even, golden-brown crust. Serve immediately and bask in the glory of your culinary creation.

Cook’s Notes

A few things to keep in mind: The béchamel can be made ahead and stored in the fridge for up to two days. Just reheat gently before assembling the gratin. If you find your sauce is too thick after reheating, add a splash of milk to loosen it up. Leftovers (if you have any!) can be kept in the fridge and reheated in the oven at a low temperature. Just be mindful that the eggs can toughen slightly as they are reheated.

Make It Your Own

The joy of this dish is in its flexibility. Here are some fun variations:

  • For a smoky twist, swap the gruyère for smoked gouda.
  • If you’re feeling fancy, add a layer of sautéed mushrooms between the eggs and the sauce.
  • For a fresh hit, sprinkle chopped chives or parsley over the top before serving.
  • Try adding a thin layer of spinach under the eggs for a pop of color and nutrition.

If you try this, I’d love to hear how it turns out — drop a comment or tag me! Whip it up, make it your own, and most importantly, enjoy every creamy forkful. Happy cooking, friends!

Related update: Hard-Boiled Egg Gratin In A Bechamel Sauce

French Onion Marsala Soup | Made by Meaghan Moineau

It was one of those dreary Tuesday evenings, the kind where the wind howls just a little too enthusiastically and the rain taps against the window like it’s trying to join the conversation. I found myself in need of something cozy, something that would wrap me up like a warm blanket with each and every spoonful. Enter my kitchen experiment turned favorite: French Onion Marsala Soup. This dish has the timeless charm of French onion soup, but with a cheeky twist thanks to the marsala wine. It’s the kind of soup that feels indulgent but is actually surprisingly simple to whip up. Perfect for those nights when you’re craving restaurant-quality comfort without leaving the house.

Jump to Recipe

What You’ll Need

Trust me, the ingredient list is straightforward, and you probably have most of these tucked away in your pantry or fridge already. Here’s what you’ll need to make this comforting bowl of goodness:

  • Butter
  • Olive oil
  • Onions — lots of them!
  • Canned beef broth
  • Marsala wine — this is the twist that makes it special
  • Dried thyme
  • Salt and pepper
  • Sugar
  • Texas toast croutons
  • Provolone cheese
  • Diced Swiss cheese
  • Parmesan cheese

How to Make French Onion Marsala Soup

  1. Melt the butter with the olive oil in a large pot over medium heat. You’ll want to use a pot that’s big enough to handle all those onions without a fuss.
  2. Add the onions and stir them gently and continually until they’re translucent. Give them the time they need to soften and release their sweet fragrance.
  3. Pour in the beef broth, marsala wine, and a sprinkle of dried thyme. Bring it to a simmer, letting the flavors meld together for about 30 minutes.
  4. Add a dash of sugar and season with salt and pepper to taste. Be careful with the salt — it’s easy to go overboard when the broth’s already savory.
  5. Ladle the soup into oven-safe bowls. Add a generous handful of croutons to each bowl — they’re the crunchy surprise waiting at the bottom.
  6. Top with a sprinkle of Swiss cheese and Parmesan. Finish with two slices of provolone, which will melt into a gooey, golden layer.
  7. Place the bowls on a cookie sheet and broil them in a preheated oven until the cheese is bubbly and beautifully browned. Keep an eye on them — no one likes burnt cheese!

Cook’s Notes

This soup is all about the onions and cheese, so don’t rush the onion cooking phase. Slow and steady wins the race here. If you’re planning to make it ahead, you can stop right before broiling and refrigerate. Just reheat and broil when you’re ready to serve. Leftovers can be stored in the fridge for up to three days. They reheat beautifully, though you might want to add fresh croutons and cheese before broiling again to keep that satisfying texture balance.

Make It Your Own

Feel free to play around with this soup! Here are some ideas to make it your own:

  • For a vegetarian version, swap the beef broth for a rich vegetable stock.
  • Try using Gruyère cheese instead of Swiss for a nuttier flavor.
  • Use homemade croutons if you have stale bread lying around — just toss them in some olive oil and bake until crispy.
  • Want a bit of heat? Add a pinch of red pepper flakes during the simmering step.

If you try this, I’d love to hear how it turns out — drop a comment or tag me! Your kitchen adventures make my day, and who knows? You might just come up with a new twist on this classic for me to try next time. Happy cooking!

Related update: French Onion Marsala Soup

Related update: Ham and Red Bean Soup

Hard-Boiled Egg Gratin In A Bechamel Sauce | Made by Meaghan Moineau

It was one of those rainy Tuesday evenings when the thought of another takeout meal just didn’t appeal. You know those nights, right? When you crave something warm and comforting that feels like a hug on a plate? That’s when this Hard-Boiled Egg Gratin in a Béchamel Sauce came to life in my kitchen. It’s the kind of dish that’s deceptively simple yet incredibly satisfying, with a creamy sauce and a crispy, cheesy top. It’s perfect for when you want something a bit special but don’t want to spend hours in the kitchen. Plus, chances are, you already have most of the ingredients lurking in your pantry or fridge.

Jump to Recipe

What You’ll Need

Imagine pulling together a dish without a last-minute grocery run. That’s the beauty of this recipe. Here’s what you’ll need:

  • Eggs – the stars of the show, of course!
  • Butter – for that rich, comforting flavor.
  • Flour – to thicken up our luscious sauce.
  • Gruyère cheese – because what’s a gratin without a cheesy top?
  • Milk – to create the creamy béchamel.
  • Nutmeg – just a dash for warmth.
  • Onion – adds a subtle sweetness.
  • White salt and pepper – to season everything just right.

How to Make Hard-Boiled Egg Gratin In A Bechamel Sauce

Ready to dive in? Here’s how to bring this cozy dish to life:

  1. Start by hard-boiling the eggs. Bring a saucepan of salted water to a rolling boil, then gently add the eggs. Lower the heat and let them simmer for 10 minutes.
  2. Once the eggs are done, place them into cold water until they’re just cool enough to handle. Here’s a little trick: roll them with your palm on a hard surface to crack the shell, then peel under a slow stream of running water. It works like a charm!
  3. In a small frying pan, melt some butter over low heat. Add the onion and cook, stirring frequently, until they’re tender but not browned. Set aside.
  4. Next, let’s make the béchamel sauce. In a medium heavy-bottomed saucepan, melt more butter over low heat. Stir in the flour and whisk for around 2 minutes without letting it color.
  5. Whisk in the milk, bringing it to a boil while whisking constantly to avoid lumps. Season with nutmeg, salt, and pepper, then reduce the heat and let it simmer for 10 minutes. Keep whisking and scraping the pan to ensure nothing sticks.
  6. Stir the cooked onions into the béchamel and let it all cook together for an additional 5 minutes.
  7. Preheat your grill. Slice the eggs into 1 cm (0.4 inch) slices and start assembling. Spread a thin layer of the béchamel sauce at the bottom of your gratin dish.
  8. Layer the egg slices over this sauce, covering them with the remaining béchamel. Sprinkle generously with grated Gruyère cheese.
  9. Place the dish under the grill. Keep an eye on it and turn the dish if necessary to ensure an evenly golden, bubbly top. Serve immediately and enjoy the deliciousness!

Cook’s Notes

Let’s talk practical tips. First, don’t rush the béchamel sauce; whisk it patiently to avoid lumps. If you find the bechamel is too thick, a splash more milk can help loosen it up. This dish is best served right away when the cheese is melty and gooey, but if you do have leftovers, they can be stored in an airtight container in the fridge for up to two days. Reheat gently in the oven or microwave until warmed through.

Make It Your Own

This recipe is delicious as is, but here are a few ways to make it your own:

  • Swap the Gruyère cheese for sharp cheddar for a more pronounced flavor.
  • Add a layer of sautéed spinach between the eggs and the sauce for some greens.
  • Substitute half of the milk with cream for an even richer béchamel.
  • Sprinkle some crispy bacon bits on top before grilling for a smoky kick.

If you try this, I’d love to hear how it turns out — drop a comment or tag me! Whether it’s your first time making a gratin or you’re an old pro, I hope this becomes a comforting staple in your kitchen. Happy cooking!

Related update: Hard-Boiled Egg Gratin In A Bechamel Sauce

Related update: Caramelised Onion and Mushroom Quiche

Boeuf Bourgignon | Made by Meaghan Moineau

Picture this: It’s a chilly weekday evening, and I find myself staring into the abyss of my pantry, longing for something hearty, something that feels like a warm hug after a long day. My eyes land on a bottle of cognac, nestled between spices and canned goods, and a light bulb goes off. Boeuf Bourgignon. It’s one of those dishes that sounds fancy but is deceptively simple — perfect for a night when I want to impress myself (or my family) without breaking a sweat. This recipe is rich in flavor, comforting, and surprisingly doable. Trust me, once you’ve got a pot of this simmering on the stove, the cozy aroma alone will make you feel like a culinary genius.

Jump to Recipe

What You’ll Need

It’s amazing how such a luxurious meal can come together with things you probably already have. You might need a quick trip for beef stock or fresh herbs, but that’s about it.

  • Button mushrooms
  • Butter
  • Un-smoked bacon
  • Vegetable oil
  • Boneless well-trimmed beef chuck
  • Yellow onion
  • Shallots
  • Carrots
  • Black salt and pepper
  • Flour
  • Cognac
  • Beef stock
  • Unsweetened cocoa powder
  • Garlic cloves
  • Fresh thyme
  • Fresh flat-leaf parsley leaves
  • Tomato paste
  • Bay leaf

How to Make Boeuf Bourgignon

  1. Preheat your oven to 160°C (325°F). This is crucial for getting that low and slow cook that makes the beef melt-in-your-mouth tender.
  2. In a pan, sauté the button mushrooms in butter until they’re brown and soft. Set them aside. You’re going to love their nutty aroma.
  3. In a large, deep-bottomed pot, sauté the bacon in 1 tablespoon of oil over moderate heat for 2 to 3 minutes. You’re looking for a light brown color that brings out the bacon’s savory goodness.
  4. Remove the bacon with a slotted spoon and set it aside. Don’t clean the pan — that bacon fat is flavor gold.
  5. Reheat the pan until the fat is almost smoking, then sauté the beef in batches. Give the pieces space to brown properly on all sides, and resist the urge to stir too soon.
  6. Add your browned beef to the reserved bacon. Lower the heat to medium.
  7. In the same flavorful fat, add the onions, shallots, and carrots. Cook them until the carrots soften and the onions are translucent.
  8. Combine the cooked veggies with the beef and bacon. Pour out the excess fat, but don’t wipe the pot — every bit of flavor is needed.
  9. Return the beef mixture to the pot. Sprinkle on the flour and toss everything to coat. Stir until the flour has cooked and you see no white traces.
  10. Season with salt and pepper, then stir in the cognac and just enough beef stock to barely cover the meat.
  11. Add the garlic, thyme, parsley, tomato paste, and bay leaf. Bring everything to a simmer on the stove.
  12. Cover the pot and set it in the oven. Cook for 2 ½ to 3 hours, checking about an hour in to add the mushrooms and stir in the cocoa powder, which gives a subtle depth of flavor.
  13. The stew is ready when the meat is fork-soft and your kitchen smells like heaven.

Cook’s Notes

Don’t be shy with the cognac. It adds such a lovely depth, but if it’s not your thing, red wine works in a pinch. Be sure to use a heavy-bottomed pot or casserole dish that can transition from stovetop to oven seamlessly. If you make this ahead, it only gets better the next day — those flavors really come together after a night in the fridge. Reheat gently on the stove, adding a splash of water or stock to loosen things up if needed.

Make It Your Own

  • Swap the beef chuck for lamb shoulder for a different take on this classic stew.
  • If mushrooms aren’t your thing, try adding pearl onions instead — they’ll add a lovely sweetness.
  • Replace the bacon with pancetta for a slightly different, yet delicious, flavor profile.
  • Make it vegetarian by using hearty vegetables like potatoes and turnips. Replace beef stock with a veggie version, and skip the bacon.

If you try this, I’d love to hear how it turns out — drop a comment or tag me! Enjoy the cozy vibes and maybe a glass of wine while you’re at it. Cheers to the perfect night in!

Related update: Boeuf Bourgignon

Related update: San Francisco Cioppino

Classic Boeuf Bourguignon | Made by Meaghan Moineau

So there I was, staring at my pantry with the kind of determination only a rainy Wednesday could bring. The day called for something hearty, something that would fill the kitchen with warmth and the kind of smell that makes you sigh with happiness. Enter: Classic Boeuf Bourguignon. I know, it sounds like something you’d only order at a fancy French restaurant, but trust me, it’s totally doable at home. Plus, this dish is the culinary equivalent of a hug — rich, savory, and oh-so-comforting. The best part? You probably have most of the ingredients already lounging in your kitchen. It’s the perfect answer to a mid-week dinner dilemma that deserves a little extra love.

Jump to Recipe

What You’ll Need

Just a handful of ingredients stand between you and this French classic. Heads up: you’ll want to grab a good bottle of red wine. Cooking with wine is all about using what you’d actually want to drink!

  • Bacon
  • Olive oil
  • Beef stew meat
  • Garlic
  • Diced onion
  • Fresh thyme
  • Bay leaves
  • Parsley
  • Pearl onions
  • Button mushrooms
  • Carrot
  • Red wine
  • Beef broth
  • All-purpose flour
  • Salt and pepper

How to Make Classic Boeuf Bourguignon

  1. Preheat your oven to 400°F (200°C). This is when the kitchen starts to get cozy.
  2. In a large Dutch oven, heat a splash of olive oil over medium heat. Add the bacon and sauté for 2-3 minutes until cooked and fragrant. Use a slotted spoon to keep the bacon separate for now.
  3. Pat the beef dry with paper towels (not a glamorous job, but it helps the meat brown, so don’t skip it). Increase heat to medium-high, add the beef to the bacon fat, and cook for 4-5 minutes until browned. Set the beef aside in a separate dish.
  4. Return the heat to medium and toss in carrots, garlic, onions, parsley, thyme, and bay leaves. Sauté for 2-3 minutes, just until you can smell the magic happening. Transfer this to its own dish.
  5. Add pearl onions and mushrooms to the Dutch oven. Sauté until the onions begin to brown and the mushrooms are tender. Scoop them up and let them hang out with the bacon.
  6. Return the beef to the pot and dust it with a tablespoon of flour. Toss it around — you want it fully coated. Sprinkle with salt and pepper, then pop the pot in the preheated oven for 4-5 minutes to let the flour set.
  7. Back to the stovetop! Pour in the red wine to deglaze the pan, scraping up those delicious brown bits. Add the beef broth and bring to a simmer over medium heat.
  8. Add the carrot, onion, and herb mix back into the pot. Reduce the heat, cover, and let it simmer for an hour. This is when you can catch up on your favorite show or get some chores done (or not!).
  9. After an hour, add the pearl onions, mushrooms, and bacon. Let everything simmer together for another 30 minutes, until the beef is tender and practically melts in your mouth.
  10. Use a slotted spoon to remove the solids — trust me, they’re not going far. Increase the heat and bring the sauce to a boil.
  11. Mix one tablespoon of flour with two tablespoons of sauce in a small bowl until smooth. Stir this back into the pot, working quickly to avoid lumps. Let the sauce thicken while stirring constantly.
  12. Remove the bay leaves and thyme sprigs — they’ve done their job. Add the solids back into the pot and stir to coat everything evenly in that luscious sauce. Serve warm over a bed of egg noodles or rice. Bon appétit!

Cook’s Notes

Here are some little nuggets of wisdom to make this dish a breeze:

  • If you’re planning to make this ahead, stop after simmering the beef for the first hour. You can refrigerate it overnight, and then continue the next day with the rest of the steps.
  • Leftovers? Lucky you! This dish actually tastes even better the next day as the flavors meld together. Keep it in an airtight container in the fridge for up to three days.
  • Don’t have a Dutch oven? Any heavy-bottomed pot that can go from stovetop to oven will work.

Make It Your Own

One of the best things about cooking is making a dish fit your life. Here are some ways to tweak this classic:

  • Swap the beef stew meat for lamb for a slightly different twist on flavor. It’s delicious.
  • Vegetarian? No problem! Use crispy tofu instead of beef and vegetable broth instead of beef broth.
  • If you don’t have red wine, try using an equal amount of robust beef broth and a splash of balsamic vinegar to mimic the depth of flavor.
  • For a more rustic feel, add some hearty root vegetables like parsnips or potatoes with the carrots.

So there you have it — the Classic Boeuf Bourguignon that’s just as perfect for a special dinner as it is for a cozy weeknight in. If you try this, I’d love to hear how it turns out — drop a comment or tag me! Happy cooking!

Related update: Classic Boeuf Bourguignon