
Last Tuesday, after a long day at work and an unexpected downpour that left me semi-drenched on my way home, I found myself craving something warm and hearty but also a little adventurous. That’s when I remembered my go-to Apple Cheddar Turkey Burgers with Chipotle Yogurt Sauce. They’re a delicious twist on your classic burger — a little bit cozy, a little bit spicy, and deeply satisfying. Plus, they’re quick enough to whip up on a weeknight without losing any of that “special dinner” vibe. Perfect for when you need comfort food that feels like a treat. Trust me, your taste buds will thank you. Jump to Recipe
What You’ll Need
This recipe is a gem because most of these ingredients are pantry staples, with a few stars that elevate the whole dish. It’s likely you already have everything you’ll need.
- 1 whole diced apple
- 1 cup bread crumbs
- 1 pound ground turkey
- 1 tablespoon chipotle hot sauce
- 1 small onion, finely chopped
- 1/2 cup plain yogurt
- Salt and pepper, to taste
- 1 cup shredded sharp cheddar cheese
- Diced garnish (optional, but recommended for extra crunch!)
How to Make Apple Cheddar Turkey Burgers With Chipotle Yogurt Sauce
- In a large bowl, mix together the diced apple, bread crumbs, ground turkey, chipotle hot sauce, chopped onion, salt, and pepper. Get in there with your hands — it’s the best way to ensure everything is evenly combined.
- Once everything is well mixed, shape the mixture into 4-6 patties, depending on your preferred size. You want them to be about 1 inch thick so they cook evenly.
- Preheat your grill or skillet over medium heat. Add the patties and cook for about 2 minutes on each side. You’ll know they’re done when the juices run clear, and the outside is golden brown and slightly crispy.
- While the burgers are cooking, stir together the plain yogurt and chipotle hot sauce in a small bowl. Adjust the heat level with more sauce if you like it spicier.
- Once the burgers are cooked, top each with a generous sprinkle of shredded cheddar cheese. Allow it to melt slightly before removing the patties from the grill or pan.
- Serve the burgers topped with a dollop of chipotle yogurt sauce and a sprinkle of your favorite diced garnish. Enjoy immediately while they’re warm and melty!
Cook’s Notes
These burgers are as versatile as they are tasty. If you find yourself with leftovers, they store well in the fridge for up to three days. Just reheat them in a pan over low heat to avoid drying out the turkey. To make these ahead, you can prepare the patties and sauce the night before and keep them refrigerated until you’re ready to cook.
- Ensure your apple is diced finely to mix well with the turkey and keep the patties from falling apart.
- Don’t rush the cooking. Medium heat is key to achieving that perfect golden crust while keeping the inside juicy.
Make It Your Own
- Swap the turkey for beef if you’re feeling more traditional but still want that apple-cheddar flair.
- Try using smoked gouda in place of cheddar for a deeper, smokier flavor.
- For a vegetarian twist, use a black bean and quinoa mix instead of turkey. It pairs surprisingly well with the apple and cheddar!
- If you’re not into chipotle, substitute with your favorite barbecue sauce for a different kind of smoky heat.
If you try this, I’d love to hear how it turns out — drop a comment or tag me! Your feedback means the world and inspires my next kitchen adventure. Happy cooking! 🍔
Related update: Apple Cheddar Turkey Burgers With Chipotle Yogurt Sauce
Related update: Baked Eggs and Bacon Cream In Spinach Fettuccine Nests

It was one of those dreary Tuesday evenings, the kind where the wind howls just a little too enthusiastically and the rain taps against the window like it’s trying to join the conversation. I found myself in need of something cozy, something that would wrap me up like a warm blanket with each and every spoonful. Enter my kitchen experiment turned favorite: French Onion Marsala Soup. This dish has the timeless charm of French onion soup, but with a cheeky twist thanks to the marsala wine. It’s the kind of soup that feels indulgent but is actually surprisingly simple to whip up. Perfect for those nights when you’re craving restaurant-quality comfort without leaving the house.
Jump to Recipe
What You’ll Need
Trust me, the ingredient list is straightforward, and you probably have most of these tucked away in your pantry or fridge already. Here’s what you’ll need to make this comforting bowl of goodness:
- Butter
- Olive oil
- Onions — lots of them!
- Canned beef broth
- Marsala wine — this is the twist that makes it special
- Dried thyme
- Salt and pepper
- Sugar
- Texas toast croutons
- Provolone cheese
- Diced Swiss cheese
- Parmesan cheese
How to Make French Onion Marsala Soup
- Melt the butter with the olive oil in a large pot over medium heat. You’ll want to use a pot that’s big enough to handle all those onions without a fuss.
- Add the onions and stir them gently and continually until they’re translucent. Give them the time they need to soften and release their sweet fragrance.
- Pour in the beef broth, marsala wine, and a sprinkle of dried thyme. Bring it to a simmer, letting the flavors meld together for about 30 minutes.
- Add a dash of sugar and season with salt and pepper to taste. Be careful with the salt — it’s easy to go overboard when the broth’s already savory.
- Ladle the soup into oven-safe bowls. Add a generous handful of croutons to each bowl — they’re the crunchy surprise waiting at the bottom.
- Top with a sprinkle of Swiss cheese and Parmesan. Finish with two slices of provolone, which will melt into a gooey, golden layer.
- Place the bowls on a cookie sheet and broil them in a preheated oven until the cheese is bubbly and beautifully browned. Keep an eye on them — no one likes burnt cheese!
Cook’s Notes
This soup is all about the onions and cheese, so don’t rush the onion cooking phase. Slow and steady wins the race here. If you’re planning to make it ahead, you can stop right before broiling and refrigerate. Just reheat and broil when you’re ready to serve. Leftovers can be stored in the fridge for up to three days. They reheat beautifully, though you might want to add fresh croutons and cheese before broiling again to keep that satisfying texture balance.
Make It Your Own
Feel free to play around with this soup! Here are some ideas to make it your own:
- For a vegetarian version, swap the beef broth for a rich vegetable stock.
- Try using Gruyère cheese instead of Swiss for a nuttier flavor.
- Use homemade croutons if you have stale bread lying around — just toss them in some olive oil and bake until crispy.
- Want a bit of heat? Add a pinch of red pepper flakes during the simmering step.
If you try this, I’d love to hear how it turns out — drop a comment or tag me! Your kitchen adventures make my day, and who knows? You might just come up with a new twist on this classic for me to try next time. Happy cooking!
Related update: French Onion Marsala Soup
Related update: Ham and Red Bean Soup

It was one of those weeks where everything felt like a bit too much—work stress, social commitments, and a never-ending to-do list. I wanted to treat myself and my family to something indulgent but didn’t have the energy for an elaborate dessert. That’s when I remembered my Oreo Cake recipe, the ultimate no-bake comfort food that feels like a hug on a plate. It’s like having a sundae in cake form, with layers of creamy vanilla ice cream and that iconic Oreo crunch. Plus, it’s a crowd-pleaser with minimal effort. Win-win, right?
Jump to Recipe
What You’ll Need
This ingredient list is a dream come true for those last-minute dessert cravings. Chances are you already have most of this delightful ensemble in your pantry or freezer.
- 1/2 cup butter
- 1 can chocolate syrup
- 1 container Cool Whip
- 1 package Oreo cookies
- 1 gallon vanilla bean ice cream
How to Make Oreo Cake
- Crumble the entire package of Oreo cookies. Keep about 1/3 of the crumbs aside for the topping.
- In a mixing bowl, combine the melted butter with the remaining 2/3 of the cookie crumbs. Stir until the mixture resembles wet sand.
- Press this buttery Oreo mixture firmly into the bottom of a long cake pan. This will be your deliciously crunchy crust.
- Scoop out half a gallon of vanilla bean ice cream and spread it evenly over the crust. Let it sit for a minute or two to soften a bit if needed.
- Pour half the can of chocolate syrup over the ice cream layer, spreading it gently with the back of a spoon.
- Layer on the Cool Whip, smoothing it out into an even layer that reaches all the corners.
- Sprinkle the reserved Oreo crumbs over the top, followed by a drizzle of the remaining chocolate syrup.
- Cover the cake pan with foil or plastic wrap and freeze it overnight, or for at least 12 hours, to ensure it sets beautifully.
Cook’s Notes
Here’s a little tip: this cake is best served with a bit of time out of the freezer, about 10-15 minutes, so it softens just enough to cut easily. If you’re planning to make this in advance, it can be frozen for up to a week—just make sure it’s well-covered to prevent freezer burn. As for leftovers (if there are any!), they keep nicely in the freezer for about another week.
- Ensure the ice cream is slightly softened before spreading it, or you might end up with an uneven layer.
- If you want stronger chocolate flavor, feel free to add more syrup according to your taste.
Make It Your Own
- Swap the vanilla bean ice cream for chocolate or mint chocolate chip for an interesting twist.
- Use peanut butter sandwich cookies instead of Oreos for a nutty flavor that’s simply irresistible.
- Add a layer of sliced bananas between the ice cream and Cool Whip for a fruity surprise.
- If you’re a coffee lover, drizzle some cooled espresso along with the chocolate syrup for a mocha kick.
If you try this Oreo Cake, I’d love to hear how it turns out! Drop a comment below or tag me in your pictures—sharing your sweet creations makes my day!
Related update: Oreo Cake
Related update: Valentine Hearts

I found myself in the kitchen on one of those unexpectedly chilly evenings, the kind that sneaks up on you after a week of golden autumn days. As I rummaged through the pantry, I came across a can of cannellini beans tucked away behind the lentils – a forgotten gem in my usual dinner rotation. The scene was set: I had a craving for something warm and comforting, yet light enough not to tip into winter stews. A quick glance in the fridge revealed a bulb of fennel and a red onion that had been waiting patiently for their moment to shine. In no time, I whipped up this Cannellini Bean Side Dish with Fennel, Red Onion, and Saffron. It’s a dish that’s as fragrant as it is colorful, and blissfully easy to pull together. It’s perfect for a weeknight, yet elegant enough to grace a dinner party table.
Jump to Recipe
What You’ll Need
The magic of this dish is that it leans heavily on pantry staples, with just a few fresh ingredients to elevate the flavors. Chances are you already have most of this on hand!
- Cannellini beans – cooked and ready to go
- Extra virgin olive oil – for a rich, flavorful base
- Fennel – adds a lovely anise flavor
- Flat parsley – for a fresh, herby finish
- Red onion – brings sweetness and color
- Saffron threads – a pinch of luxury
- Black salt and pepper – to season
- Vegetable broth – to adjust consistency
- Water – for soaking the saffron
How to Make Cannellini Bean Side Dish With Fennel, Red Onion, and Saffron
- Start by combining the saffron threads with a few tablespoons of boiling water in a small, heat-proof bowl or measuring cup. Let this steep for about 5 minutes. You’ll notice the water turning a lovely golden hue.
- In a large nonstick skillet, heat the extra virgin olive oil over medium heat. Toss in the fennel and red onion, and cook them, stirring occasionally, until they’re tender and the kitchen smells like heaven – about 5 minutes.
- Add the cannellini beans and the saffron water to the skillet. Stir everything together until the beans are coated with that gorgeous saffron color.
- Season to taste with black salt and freshly cracked pepper. If the mixture starts to look a bit dry, splash in some vegetable broth or the liquid from the beans until you achieve the consistency you like.
- Finish by sprinkling freshly chopped flat parsley or fennel fronds over the top. Serve immediately while it’s still gloriously warm.
Cook’s Notes
This dish is forgiving and flexible, which is part of its charm. If you don’t have saffron, don’t panic – just add a pinch of turmeric for a hint of color. Store any leftovers in an airtight container in the fridge for up to three days. To reheat, simply add a splash of broth or water to loosen everything back up. This dish is also perfect for making ahead; the flavors deepen as they sit, so it tastes even better the next day.
Make It Your Own
Here are a few ways to switch things up and make this dish your own:
- Swap the cannellini beans for chickpeas or butter beans for a different texture.
- Replace the fennel with celery if you prefer a milder flavor.
- For a protein boost, add crispy tofu cubes or cooked shredded chicken towards the end of cooking.
- Sprinkle some crumbled feta or goat cheese on top for a creamy finish.
If you try this, I’d love to hear how it turns out — drop a comment or tag me! There’s nothing better than seeing a little corner of my kitchen magic make its way into another home. Enjoy!
Related update: Cannellini Bean Side Dish With Fennel, Red Onion, and Saffron

I remember that evening vividly. It was a Wednesday, and the kind of humid that makes your hair curl up at the edges. I was standing in my kitchen, staring at the half-empty fridge, and wondering what on earth I could throw together without making a trip to the grocery store. That’s when I spotted the zucchini and eggplant I’d been meaning to use. The idea clicked like a lightbulb switching on—vegetarian ratatouille! It’s the kind of dish that feels like a warm hug at the end of a long day: rustic, hearty, and packed with seasonal veggies. Plus, it’s surprisingly simple, with most ingredients already hanging out in the pantry or crisper drawer. Let’s dive in!
Jump to Recipe
What You’ll Need
This recipe is blessedly straightforward. Chances are, you already have most of these in your kitchen. Here’s what you’ll gather:
- 1 eggplant, diced
- 2 zucchinis, sliced
- 1 yellow squash, sliced
- 3 large tomatoes, chopped
- 1 red bell pepper, diced
- 1 orange bell pepper, diced
- 1 onion, finely chopped
- 3 cloves of garlic, minced
- A handful of fresh basil leaves, torn
- 1 tsp thyme
- 1 tsp dried oregano
- 2 tbsp extra virgin olive oil
- Sea salt, to taste
How to Make Vegetarian Ratatouille
- Heat the extra virgin olive oil in a large saucepan over medium-low heat. Toss in the chopped onion and minced garlic. Sauté until the onions turn translucent and the garlic is fragrant, about 5 minutes.
- Add the chopped tomatoes to the pan and give it a good stir, letting them meld with the onion and garlic for about 2 minutes.
- Add the diced eggplant, zucchini, yellow squash, and both bell peppers to the pan. Stir everything together and lower the heat to low.
- Sprinkle in the thyme, dried oregano, and sea salt. Stir to coat all the veggies in the herby goodness.
- Cover the saucepan and let it all simmer for about 30 minutes, stirring occasionally. You’ll know it’s ready when the eggplant is tender and the flavors have melded beautifully.
- Finish it off with those fresh torn basil leaves right before serving, for a burst of fresh flavor.
Cook’s Notes
Here’s the thing about ratatouille — it’s a forgiving dish. You can let it simmer a bit longer if you prefer your veggies softer, just keep an eye on the moisture level. If it starts to dry out, add a splash of water or stock. Store any leftovers in an airtight container in the fridge, and they’ll be even more flavorful the next day. Just reheat on the stove over low heat or enjoy it cold as a salad topping — it’s surprisingly versatile. If you’re planning ahead, you can chop the veggies the night before and store them in the fridge, so you just have to toss them in the pan when you’re ready.
Make It Your Own
Feeling adventurous or just need a change? Here are a few ways to mix things up:
- Add some heat: Throw in a pinch of red pepper flakes when adding the spices for a little kick.
- Protein punch: Toss in a can of drained chickpeas with the tomatoes for extra protein and heartiness.
- Herb swap: If you’re out of fresh basil, a touch of fresh parsley or even cilantro can give it a unique twist.
- Cheesy finish: Sprinkle some crumbled feta or grated Parmesan on top when serving for a tangy finish.
If you try this, I’d love to hear how it turns out — drop a comment or tag me! Whether you stick to the basics or put your own spin on it, I hope this ratatouille brings a little warmth and simplicity to your table. Enjoy!
Related update: Vegetarian Ratatouille
Related update: Fall Fruit Compote

I remember the evening perfectly. It was one of those chilly Tuesday nights when you feel like you’ve barely survived the day and the only thing that could possibly make it better is a big bowl of something soul-warming. I opened my fridge and, like a miracle, the ingredients for this Kale and Chickpea Soup with Lemon seemed to jump out at me. The magic of this soup is in its simplicity. It’s the kind of dish that feels like a hug in a bowl, yet it’s deceptively easy to throw together. A few fresh ingredients, a touch of blending, and you’ve got yourself a soup that’s both nourishing and comforting. Plus, it’s the perfect excuse to use that crusty bread you’ve been meaning to finish.
Jump to Recipe
What You’ll Need
I bet you’ve got most of these lying around already. This list is all about those everyday heroes that transform humble into heartwarming.
- 2 banana shallots
- 1 bay leaf
- 2 cans chickpeas, drained and rinsed
- 2 stalks of celery
- 1/2 teaspoon of chilli flakes
- 1 loaf of crusty bread
- 1 garlic clove
- Lemon (juice of half, plus slices for garnish)
- 1 bunch of kale, stems removed, roughly chopped
- 2 tablespoons of olive oil
- Parmesan cheese, for topping
- 1 sprig of rosemary
- Salt, to taste
- 1.5 liters of stock (vegetable or chicken)
How to Make Kale and Chickpea Soup with Lemon
- Set a Dutch oven or large saucepan over medium heat and pour in the olive oil. Let it warm slightly until it shimmers.
- Finely dice the banana shallots and toss them in, stirring to coat them in the oil. Let them sizzle and become translucent.
- Slice the celery stalks horizontally into long strips, then chop them into small pieces. Add these to the shallots, stirring occasionally.
- Finely chop the rosemary leaves and add them to the pan, along with the bay leaf and chilli flakes. Wait for the fragrance to hit you – it’s a good sign.
- Smash the garlic clove using the flat of your knife and your palm, then toss it in whole. No need to fuss over chopping here.
- Rinse and drain the chickpeas and add them to the pan along with the kale. Stir everything together until it’s all coated nicely.
- Pour in the hot stock and bring it all to a gentle boil, then reduce the heat and let it simmer for about 20 minutes, until the kale is beautifully tender.
- Squeeze in the juice of half a lemon, stirring to blend. Taste and adjust the seasoning with more lemon or salt, depending on your stock.
- Using either a stick blender in the pan or in batches in a regular blender, blitz the soup to your desired texture. I like to set aside a ladleful or two before blending so there are still some chickpeas and kale for texture.
- Serve hot, with a couple of lemon slices floating on top of each bowl, and pass around the parmesan cheese for everyone to sprinkle to their heart’s content. Pair with toasted crusty bread for dipping.
Cook’s Notes
Okay, here’s the lowdown. If you’re planning ahead, this soup is a fantastic make-ahead option. It actually tastes even better the next day once the flavors have had time to marry. Just store it in an airtight container in the fridge for up to three days. Reheat gently on the stove, adding a splash of water if it’s thickened up too much. You can also freeze this soup for up to three months, though I’d recommend freezing before adding the lemon juice to prevent bitterness. Defrost it overnight in the fridge and add the lemon after reheating.
Watch your salt! If your stock is already salted, you might want to wait until the end of cooking to adjust the seasoning. It’s always easier to add than to take away.
Make It Your Own
The beauty of this soup is its flexibility. Here are a few of my favorite variations:
- Swap the chickpeas for white beans: Cannellini or Great Northern beans work beautifully here, offering a creamier texture.
- Add protein with chicken: Shredded rotisserie chicken stirred in at the end makes this a heartier meal.
- Spice it up with chorizo: Cook some diced chorizo in the pan before the shallots and let the spicy oil enrich the soup.
- Go green with spinach or Swiss chard: If kale isn’t your thing, these leafy greens make a great substitute.
If you try this, I’d love to hear how it turns out — drop a comment or tag me! Your feedback is the best part of sharing recipes. Happy cooking!
Related update: Kale and Chickpea Soup with Lemon
Related update: One Soup, Two Ways: Chunky Vegetables and Cream Of Vegetables

It was one of those biting-cold Wisconsin evenings when the wind cut through my coat like a knife, and all my fingers could think about was curling around something warm. I stumbled into the kitchen, cheeks pink from the chill, and had that lightbulb moment: Wisconsin Beer Cheese Soup. It’s one of those recipes that feels like a cozy flannel blanket – indulgent, comforting, and just what you need when the weather’s not cooperating. It’s like a big, cheesy hug in a bowl, and the best part is that it comes together quickly with ingredients you probably already have lurking in your pantry or fridge. Plus, melting cheese into anything just seems to magically fix a bad day, don’t you think?
Jump to Recipe
What You’ll Need
Just a heads-up, this isn’t one of those shopping list monsters. You might already have a lot of these basics on hand, except for maybe the hero of the dish: a good Wisconsin beer.
- 2 tablespoons butter
- 1 medium onion, diced
- 2 carrots, peeled and diced
- 2 celery sticks, chopped
- 2 cloves garlic, minced
- 1/4 cup flour
- 1 cup Wisconsin beer
- 2 cups broth (chicken or vegetable)
- 1 cup half & half
- 2 cups shredded Wisconsin cheddar
- 1 tablespoon mustard
- 1 teaspoon worcestershire sauce
- 1/2 teaspoon black pepper
- 1/4 teaspoon red pepper flakes
- Salt to taste
How to Make Wisconsin Beer Cheese Soup
- Start by melting the butter over medium heat. Once it’s all sizzly and lovely, toss in the onion, carrots, celery, and garlic. Cook everything for about 3-4 minutes until the veggies are soft and the kitchen smells like you’re winning at dinner.
- Sprinkle the flour over your veggie mix and stir until it disappears into the buttery goodness, absorbing all those delicious flavors.
- Pour in the beer and broth, scrapping up any bits sticking to the bottom of the pot, and bring it to a gentle boil. You’ll see some bubbles start to form at the edges – that’s your cue!
- Lower the heat to a simmer and stir in the half & half and the shredded cheddar. Let the cheese melt completely, stirring occasionally. This is where the magic happens, so don’t rush it.
- Add in the mustard, worcestershire sauce, black pepper, and red pepper flakes. Give it a good stir.
- Time to grab your immersion blender and blend the soup until it’s smooth and creamy. No immersion blender? No worries! Carefully blend in batches using a regular blender, but only fill it a third full each time to prevent a hot liquid disaster.
- Taste and add salt as needed. Pour yourself a big bowl, sit back, and enjoy the creamy, cheesy glory.
Cook’s Notes
When it comes to soup, patience is key. Letting the cheese melt slowly into the broth ensures a velvety texture. If you rush this part, you might end up with a grainy soup, and nobody wants that. As for storage, this soup keeps well in the fridge for about 3 days. Just give it a good stir when you reheat it since the cheese and liquid might separate a bit. Unfortunately, this one’s not a great candidate for freezing; the texture changes too much after thawing. If you’re planning ahead, you can chop the veggies a day early and store them in the fridge to make your cooking super speedy.
Make It Your Own
- Swap the beer: If you’re not a beer person, a hard cider can add an interesting twist with a sweet undertone.
- Make it meatier: Stir in some cooked, crumbled bacon for added smokiness and texture.
- Vegetarian version: Use vegetable broth instead of chicken broth and skip the worcestershire sauce or use a veggie-friendly alternative.
- Spice it up: Add a finely chopped jalapeño with the veggies for an extra kick.
If you try this, I’d love to hear how it turns out — drop a comment or tag me! Cooking is all about sharing, after all. Can’t wait to see your delicious creations!
Related update: Wisconsin Beer Cheese Soup
Related update: Tomato and lentil soup

It was a typical Tuesday evening, and I found myself staring into the depths of my fridge, hoping for inspiration to magically appear. You know those days when you just want something cozy and satisfying without embarking on a full-blown culinary adventure? That’s when I stumbled across a lonely head of cauliflower. With a little bit of cheese and some pantry staples, I knew I could transform it into something special. My Cheesy Cauliflower recipe is the perfect blend of comfort and simplicity. It’s one of those dishes that feels indulgent but won’t have you spending hours in the kitchen. Curious yet? Trust me, one bite of this creamy, cheesy goodness and you’ll be hooked.
Jump to Recipe
What You’ll Need
This recipe is super forgiving, and chances are, you already have most of these ingredients hanging out in your kitchen:
- Cauliflower – a medium head, about 2 pounds
- 2 tablespoons unsalted butter
- 2 tablespoons all-purpose flour
- 1 teaspoon mustard powder
- A pinch of cayenne pepper
- 2 cups whole milk
- Cheese – 1 ½ cups shredded, plus 2 tablespoons for topping (cheddar works great!)
- Salt and black pepper to taste
How to Make Cheesy Cauliflower
- Preheat your oven to 400°F (200°C). This gives you the perfect time to prep everything else.
- Trim the cauliflower florets from the stalk and discard the stalk. Aim to cut the florets into 1-2 inch pieces so they cook evenly.
- Steam the cauliflower for about 10 minutes. You want them firm but tender — think al dente if cauliflower could be pasta.
- Spread the steamed florets out onto a paper towel. This ensures they’re not waterlogged when the cheese sauce coats them.
- In a medium saucepan, melt the butter over medium-high heat. Add the flour and whisk to combine, cooking for 1-2 minutes to get rid of that raw flour taste.
- Stir in the mustard powder, a pinch of cayenne (or more if you like a kick), and black pepper. Feel that aroma dancing around?
- Gradually drizzle in the milk, whisking continuously to keep things smooth and creamy. Bring this mixture to a simmer while stirring; it should thicken beautifully.
- Once thickened, add the cheese one handful at a time. Let each addition melt fully before the next. Taste and adjust with salt and pepper if needed.
- Spread the cauliflower into a 2-quart baking dish or an iron skillet, then spoon the rich cheese sauce over the top. Oh, yes!
- Sprinkle the reserve 2 tablespoons of cheese over everything, then bake for about 30 minutes or until it’s browned and bubbly.
- Garnish with fresh herbs if you fancy, and enjoy every cheesy, comforting bite!
Cook’s Notes
Don’t rush the sauce; taking your time to whisk it ensures a creamy consistency without lumps. If you’re making this ahead of time, you can assemble everything and then pop it in the fridge. Just extend the baking time slightly if you’re starting from cold. Leftovers (if there are any!) keep well in the fridge for up to three days. Reheat them gently in the oven to keep the texture lovely.
Make It Your Own
- Swap out the cauliflower for broccoli or do a mix of both for a bit of variety.
- If you’re in the mood for something heartier, add cooked chicken pieces before pouring over the cheese sauce.
- Want more kick? Replace the cayenne with smoked paprika for a smoky twist.
- Try sprinkling in some crisped bacon bits before baking for a savory boost.
If you try this, I’d love to hear how it turns out — drop a comment or tag me! This Cheesy Cauliflower is a little slice of happiness, and I hope it brings some warmth to your table. Enjoy!
Related update: Cheesy Cauliflower

Last Tuesday, I found myself staring into the depths of my pantry, desperately seeking inspiration for dinner. It was one of those weeks where time slipped through my fingers, and suddenly, it was 6 PM, and my stomach was growling loud enough to scare the cat. That’s when I stumbled upon my trusty bag of brown rice and a can of mushrooms. With a bit of onion, a splash of oil, and a pinch of this and that, I transformed these humble staples into a warm, fragrant Brown Rice Mushroom Pilaf. It’s the kind of dish that feels cozy and effortless, yet tastes like you put in way more effort than you actually did. Perfect for those busy nights when you need something quick but also crave-worthy.
Jump to Recipe
What You’ll Need
This dish relies on a few simple ingredients, and chances are you already have most of them lurking in your kitchen.
- 1 tablespoon unrefined sunflower oil
- 1 medium onion, chopped
- 1 can (about 12 oz) of fresh mushrooms, drained and sliced
- 1 cup brown rice
- 2 cups water
- Sea salt to taste
- Ground pepper to taste
How to Make Brown Rice Mushroom Pilaf
- Start by heating the sunflower oil in a large saucepan over medium heat. You want the oil to be shimmering but not smoking.
- Add the chopped onion and sliced mushrooms. Sauté for about 5 minutes, stirring occasionally, until the onion is translucent and the mushrooms are golden and fragrant.
- Stir in the brown rice, ensuring every grain is coated with the oil and mingling with the onions and mushrooms.
- Pour in the water, then sprinkle with sea salt and ground pepper. Give it a gentle stir to combine.
- Bring the mixture to a boil. Once it’s bubbling, reduce the heat to low, cover the pan, and let it simmer for 30 minutes.
- After 30 minutes, remove the pan from the heat but keep it covered. Let it rest for about 10 minutes, allowing the rice to absorb any remaining liquid.
- Fluff the pilaf with a fork before serving. Taste and adjust the seasoning if needed.
Cook’s Notes
If you find that the rice hasn’t absorbed all the water after resting, simply return it to the heat for a few more minutes. This dish can be made ahead of time and stored in the fridge for up to four days. Just reheat it gently on the stove or in the microwave, adding a splash of water to prevent it from drying out. Avoid using high heat when reheating, as it might make the rice too tough.
Make It Your Own
- Swap the canned mushrooms for fresh ones, like cremini or shiitake, for a richer flavor.
- Stir in a handful of frozen peas during the last few minutes of cooking for a pop of color and sweetness.
- For a protein boost, add cooked shredded chicken or crispy tofu just before serving.
- Mix in some chopped fresh herbs like parsley or thyme to brighten the dish.
If you try this, I’d love to hear how it turns out — drop a comment or tag me! Cooking is all about experimenting and making a dish your own, so don’t be shy to tweak it to your taste. Enjoy every bite!
Related update: Brown Rice Mushroom Pilaf

Last Tuesday, as the autumn breeze swept through my kitchen window, I found myself craving something warm and cozy. I had just returned from a brisk walk, the kind that leaves your cheeks rosy and fingers tingling. That’s when the idea of spiced apple cider popped into my head. It’s the perfect drink to transition into the cooler months – comforting, aromatic, and surprisingly easy to whip up. There’s something magical about the way the spices blend with the apple juice, evoking a sense of nostalgia and warmth. Plus, it fills your home with the most inviting aroma. Trust me, this spiced apple cider is exactly what you need on a chilly day, especially if you’re looking for a quick pick-me-up or a delightful way to impress your guests without spending hours in the kitchen.
Jump to Recipe
What You’ll Need
Most of these ingredients are already sitting in your pantry, waiting to be transformed into a cozy beverage.
- Allspice
- Freshly apple juice
- Cinnamon sticks
- Ginger
- Maple syrup
- Nutmeg
- Orange
- Water
How to Make Spiced Apple Cider
- In a large non-reactive pot, combine all the ingredients. Give them a gentle stir to ensure everything is well-mixed.
- Bring the mixture to a boil over medium-high heat. You’ll notice the aroma of spices filling your kitchen — that’s when you know you’re on the right track.
- Let it boil for about 5 minutes, just enough for the flavors to start mingling and becoming friends.
- Cover the pot, reduce the heat, and let it simmer gently for 30-40 minutes. This is when the magic happens, and the flavors deepen into a warm hug in a mug.
- Next, line a colander with cheesecloth and strain the cider. This will give you a smooth, clear drink free of any spice bits.
- Serve it warm in your favorite mug. And if it’s been one of those days, feel free to spike it with a little dark rum for an extra kick.
Cook’s Notes
When making this cider, patience is your best friend. Allowing it to simmer means the spices have the chance to really infuse the apple juice, creating that perfect balance of flavor. If you’re planning ahead, you can make the cider in the morning and reheat it gently before serving. The flavors will actually become more pronounced over time.
- Store any leftovers in the fridge for up to 4 days. Reheat gently on the stove or in the microwave.
- Be cautious when boiling; too high heat can evaporate your cider down more than you’d like.
Make It Your Own
- Swap the maple syrup with honey for a different layer of sweetness.
- Add a splash of lemon juice for a hint of citrusy brightness.
- Replace water with apple brandy for a stronger apple flavor and a boozy twist.
- Introduce star anise for an extra depth of flavor, giving your cider a slightly licorice note.
If you try this, I’d love to hear how it turns out — drop a comment or tag me! Your kitchen adventures are what make sharing these recipes so rewarding.
Related update: Spiced Apple Cider

It was one of those rainy Tuesday evenings when the thought of another takeout meal just didn’t appeal. You know those nights, right? When you crave something warm and comforting that feels like a hug on a plate? That’s when this Hard-Boiled Egg Gratin in a Béchamel Sauce came to life in my kitchen. It’s the kind of dish that’s deceptively simple yet incredibly satisfying, with a creamy sauce and a crispy, cheesy top. It’s perfect for when you want something a bit special but don’t want to spend hours in the kitchen. Plus, chances are, you already have most of the ingredients lurking in your pantry or fridge.
Jump to Recipe
What You’ll Need
Imagine pulling together a dish without a last-minute grocery run. That’s the beauty of this recipe. Here’s what you’ll need:
- Eggs – the stars of the show, of course!
- Butter – for that rich, comforting flavor.
- Flour – to thicken up our luscious sauce.
- Gruyère cheese – because what’s a gratin without a cheesy top?
- Milk – to create the creamy béchamel.
- Nutmeg – just a dash for warmth.
- Onion – adds a subtle sweetness.
- White salt and pepper – to season everything just right.
How to Make Hard-Boiled Egg Gratin In A Bechamel Sauce
Ready to dive in? Here’s how to bring this cozy dish to life:
- Start by hard-boiling the eggs. Bring a saucepan of salted water to a rolling boil, then gently add the eggs. Lower the heat and let them simmer for 10 minutes.
- Once the eggs are done, place them into cold water until they’re just cool enough to handle. Here’s a little trick: roll them with your palm on a hard surface to crack the shell, then peel under a slow stream of running water. It works like a charm!
- In a small frying pan, melt some butter over low heat. Add the onion and cook, stirring frequently, until they’re tender but not browned. Set aside.
- Next, let’s make the béchamel sauce. In a medium heavy-bottomed saucepan, melt more butter over low heat. Stir in the flour and whisk for around 2 minutes without letting it color.
- Whisk in the milk, bringing it to a boil while whisking constantly to avoid lumps. Season with nutmeg, salt, and pepper, then reduce the heat and let it simmer for 10 minutes. Keep whisking and scraping the pan to ensure nothing sticks.
- Stir the cooked onions into the béchamel and let it all cook together for an additional 5 minutes.
- Preheat your grill. Slice the eggs into 1 cm (0.4 inch) slices and start assembling. Spread a thin layer of the béchamel sauce at the bottom of your gratin dish.
- Layer the egg slices over this sauce, covering them with the remaining béchamel. Sprinkle generously with grated Gruyère cheese.
- Place the dish under the grill. Keep an eye on it and turn the dish if necessary to ensure an evenly golden, bubbly top. Serve immediately and enjoy the deliciousness!
Cook’s Notes
Let’s talk practical tips. First, don’t rush the béchamel sauce; whisk it patiently to avoid lumps. If you find the bechamel is too thick, a splash more milk can help loosen it up. This dish is best served right away when the cheese is melty and gooey, but if you do have leftovers, they can be stored in an airtight container in the fridge for up to two days. Reheat gently in the oven or microwave until warmed through.
Make It Your Own
This recipe is delicious as is, but here are a few ways to make it your own:
- Swap the Gruyère cheese for sharp cheddar for a more pronounced flavor.
- Add a layer of sautéed spinach between the eggs and the sauce for some greens.
- Substitute half of the milk with cream for an even richer béchamel.
- Sprinkle some crispy bacon bits on top before grilling for a smoky kick.
If you try this, I’d love to hear how it turns out — drop a comment or tag me! Whether it’s your first time making a gratin or you’re an old pro, I hope this becomes a comforting staple in your kitchen. Happy cooking!
Related update: Hard-Boiled Egg Gratin In A Bechamel Sauce
Related update: Caramelised Onion and Mushroom Quiche
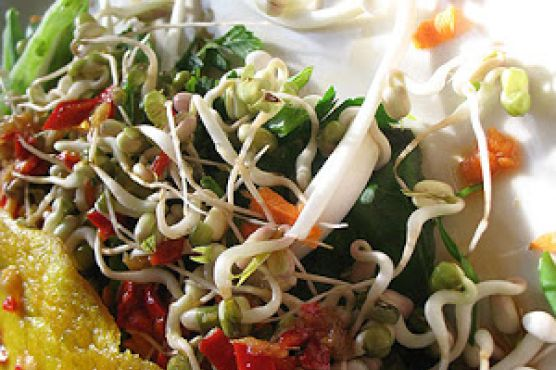
One Thursday evening, I found myself staring at my pantry, hoping for culinary inspiration to jump out at me. You know how it goes — those nights when you’re craving something more exciting than a sandwich but don’t want to spend hours in the kitchen. That’s when my memory flashed back to a street food adventure in Vietnam. I remembered devouring these crispy, savory pancakes called Bánh Xèo, filled with fresh veggies and a fragrant dipping sauce that tingled the senses. It was the perfect balance of crispy, soft, and tangy. So, I decided to recreate that magic. This recipe is both comforting and impressive without demanding too much of your time. Perfect for when you want to feel like you’ve traveled the world from your kitchen!
Jump to Recipe
What You’ll Need
Ever had one of those moments when you think you have nothing to cook, but then realize you actually have the makings of a feast? This is one of those recipes. Chances are you already have most of this in your kitchen, and the rest are worth adding to your pantry!
- Brown rice flour – the backbone for a gluten-free batter.
- Coconut milk – for that creamy texture and subtle sweetness.
- Tamari sauce – adds depth to the dipping sauce.
- Egg – helps bind the batter.
- Sea salt
- Turmeric – for color and a hint of earthiness.
- Cayenne – just a pinch for a touch of heat.
- Green fresh chili – adds freshness and zing.
- Carrot, daikon radish, and snow peas – for the filling, adding crunch and nutrition.
- Mung bean sprouts – because they make everything better.
- Fresh basil, mint, and parsley leaves – an aromatic, herbal trio.
- Trimmed enoki mushrooms – delicate and perfect for texture.
- Garlic and fresh ginger – because no good dish is complete without them.
- Red fresh chilies – for a spicy kick in the sauce.
- Lime juice – lifts everything with its citrusy zest.
- Rice vinegar – for a tang in the sauce.
- Sesame oil – for richness in the sauce.
How to Make Vietnamese Pancakes with Vegetables, Herbs and a Fragrant Dipping Sauce (Bánh Xèo)
- Start by making the pancake batter: In a mixing bowl, whisk together the rice flour, egg, sea salt, turmeric, cayenne, and green chili. Gradually add the coconut milk, whisking as you go. Aim for a smooth, pourable consistency. If it’s too thick, a splash of water does wonders. Cover the bowl and set it aside to rest.
- Now, onto the sauce: Combine the tamari sauce, lime juice, rice vinegar, minced garlic, grated ginger, chopped red chilies, and a drizzle of sesame oil. Whisk until all the flavors meld together and set aside. This fragrant sauce will take your pancakes to another level.
- For the filling, mix the julienned carrot, daikon radish, thinly sliced green onions, chopped green chilies, and sliced snow peas in a bowl. In another bowl, gather the chopped fresh herbs and have the mung bean sprouts and enoki mushrooms ready to go.
- Time to cook the pancakes! Heat a teaspoon of sesame oil in a non-stick skillet over medium heat. Once hot, pour in about 1/2 cup of batter. Use the bottom of the ladle to spread it into a 6 to 8-inch circle. Cook for 6 to 8 minutes, waiting for small bubbles to pop and the edges to turn crispy and golden brown. Flip and cook the other side for another couple of minutes. Repeat with the remaining batter, keeping the cooked pancakes warm in a 150°F oven.
- To serve, layer a portion of the vegetable mixture and herbs on one half of the pancake. Drizzle with some sauce, fold the pancake over, and give it another light drizzle of sauce. Voilà, your culinary journey to Vietnam is served!
Cook’s Notes
Don’t rush the pancake batter; a little rest allows the flour to hydrate fully, giving you that perfect texture. When cooking the pancakes, medium heat is your best friend. Too high, and you’ll burn them before they’re cooked through. If making ahead, the batter can rest in the fridge for a few hours, just give it a gentle stir before using. Leftover pancakes are a treat; reheat them in a hot pan to regain the crispiness. The sauce and filling can be prepped in advance, making your cooking process even smoother.
Make It Your Own
- Swap the enoki mushrooms for shiitake if you like a meatier texture.
- Use crispy tofu instead of, or alongside, the veggies for a protein-packed version.
- For a spicier kick, add an extra green chili or some Sriracha to the batter.
- Play with the herbs: cilantro lovers, feel free to add it into the mix!
If you try this, I’d love to hear how it turns out — drop a comment or tag me! Making Bánh Xèo is like taking a mini vacation right from your kitchen. Enjoy every crispy, savory bite.
Related update: Vietnamese Pancakes with Vegetables, Herbs and a Fragrant Dipping Sauce (Bánh Xèo)
Related update: Grilled Chicken Hunter Style

Picture this: It’s a blustery Tuesday evening, and I’ve just come home from work, craving something warm and savory to take the chill off. The kind of dish that fills the house with tantalizing aromas and makes you feel like you’re getting a hug from the inside. Enter my baked Indian samosas — golden, flaky, and just spicy enough to keep things interesting. These little parcels of joy are surprisingly easy to whip up, even on a weeknight, thanks to the magic of puff pastry. And trust me, your taste buds won’t know what hit them. Plus, they’re baked, not fried, so we can feel a little virtuous, right? These samosas have become my go-to comfort food, especially when I want to impress without too much hassle. Jump to Recipe
What You’ll Need
The ingredient list is refreshingly straightforward, and chances are you already have most of this in your pantry.
- Puff pastry
- 1 egg
- Water
- 1 russet potato, peeled and diced
- Salt
- 2 bay leaves
- 1 teaspoon coriander seeds, divided
- 1 teaspoon black peppercorns
- 1 teaspoon red chili flakes
- 1 skinless boneless chicken breast
- 1/2 cup diced mango
- 1/4 cup peas
- Juice of 1 lime
- 2 tablespoons chipotle sauce
- 1 teaspoon cumin seeds
- 1/4 cup chopped cilantro leaves
- Black salt and pepper, to taste
How to Make Baked Indian Samosas
- Preheat your oven to 425 degrees F. This is your golden ticket to perfectly baked samosas.
- In a small saucepan, combine the diced potato and enough cold water to cover. Add a generous pinch of salt. Bring it to a boil over medium heat, then reduce to a simmer until the potato is tender, about 12 to 15 minutes.
- In another pot, bring 4 cups of water to a simmer. Toss in a pinch of salt, the bay leaves, 1 teaspoon of coriander seeds, peppercorns, chili flakes, and the chicken breast. Let it simmer until the chicken is cooked through, about 8 to 10 minutes.
- Drain the cooked potato and mash it until smooth. Shred the chicken finely. Combine both in a large mixing bowl.
- Add the peas, diced mango, lime juice, chipotle sauce, remaining coriander seeds, cumin, cilantro, and salt and pepper to the bowl. Mix everything together until well incorporated, using a spoon or your hands. Taste and adjust the seasoning as needed.
- Roll out the puff pastry slightly to flatten the seams. Use a paring knife to cut the dough into 8 (7-inch wide) rounds. Cut each round into 2 semicircles.
- Place a tablespoon of filling in the center of each semicircle. Keep a small bowl of water nearby. Dip your finger in the water and run it along the edges of the dough.
- Fold the left corner over the filling in a triangular motion, landing the corner on the bottom right. Repeat with the other corner, then squeeze the bottom shut. Seal with water and press with a fork for good measure.
- Arrange the samosas on a lightly greased baking sheet. In a small bowl, whisk together the egg with 1 teaspoon of water. Brush the tops of the samosas with this egg wash.
- Bake for 15 minutes at 425 degrees F, then lower the heat to 375 degrees F and bake for another 10 minutes. If you’re feeling adventurous, flip them just before turning the heat down.
- Serve warm with your favorite chutney and bask in the deliciousness.
Cook’s Notes
The magic of these samosas is in their versatility. You can make the filling a day in advance, which makes assembly a breeze on a busy day. Just keep it chilled in an airtight container. As for leftovers, if there are any, you can store them in the fridge for up to three days. Reheat them in the oven to restore their crispness — microwaving makes them soggy, and nobody wants that. One common mistake is overfilling the samosas, which can lead to leaks. Less is more here, trust me.
Make It Your Own
- Swap the chicken breast for crispy tofu for a vegetarian version that’s equally satisfying.
- Replace the mango with diced apples for a subtly sweet twist.
- Add a handful of chopped spinach to sneak in some greens.
- For a spicier kick, mix in some diced jalapeños with the filling.
If you try this, I’d love to hear how it turns out — drop a comment or tag me! Nothing makes my day like seeing your kitchen adventures. Enjoy your samosa-making journey!
Related update: Baked Indian Samosas

Picture this: it’s a drizzly Tuesday evening, and you’ve just returned from a long day that felt like a relentless blur of meetings and errands. You’re craving something comforting and hearty, yet adventurous enough to pull you out of the weekday monotony. Enter Khachapuri — the pillowy, cheese-filled bread boat that hails from Georgia (the country, not the state). I’ve always found Khachapuri to be the perfect marriage of comfort and culinary curiosity, with its gooey center and golden, flaky crust. Making it is like giving yourself a cozy hug in bread form, and it’s surprisingly doable even when you’re running on fumes. Let’s dive into creating this cheesy delight that’s sure to warm your soul.
Jump to Recipe
What You’ll Need
What’s fantastic about this recipe is that you might already have most of these ingredients lounging in your pantry or fridge. Let’s get you prepped:
- Dry yeast
- Sugar
- Water
- Milk
- Butter
- Salt
- White Swiss cheese – 8 ounces
- Cheddar
- 2 eggs
- Muenster cheese
- Parsley
- White pepper
How to Make Khachapuri
- Dissolve the yeast and 1 teaspoon of sugar in 1/4 cup of warm water. Let it stand for 5-10 minutes until it becomes foamy and alive with little yeast bubbles.
- In a mixing bowl, combine the proofed yeast with milk, 2 tablespoons of sugar, butter, and salt. Gradually mix in enough flour to form a soft, slightly tacky dough.
- Transfer the dough to a greased bowl, turning it so it’s coated on all sides. Cover with a damp cloth and let it rise in a warm spot until it doubles in size — about an hour.
- While your dough is having its beauty rest, shred the cheeses and mix them with the eggs, parsley, and a pinch of white pepper. Pop this filling in the fridge to chill and mingle.
- Grease a 9-inch springform pan generously. Punch down the risen dough, shape it into a ball, and roll it out to a 20-inch circle.
- Gently fold the dough circle in half to lift it, then unfold it into the pan, allowing the edges to drape over. Pile the cheese filling into the dough-lined pan.
- Bring the draped edges of the dough up and over the filling, creating 8-12 evenly spaced pleats around the perimeter. Twist and pinch the ends together in the center to form a rustic knob.
- Cover the loaf with a buttered square of waxed paper and let it rise again until doubled in bulk.
- Preheat your oven to 375°F. Brush the top with a glaze made of 1 egg white mixed with 1 tablespoon of water, or simply use margarine.
- Bake for 40-50 minutes until the Khachapuri is deeply golden brown. Remove from the pan and place directly on the oven rack for an additional 5 minutes to crisp the bottom crust.
- Let it cool on a rack for about 45 minutes before slicing into wedges and basking in all the cheesy goodness.
Cook’s Notes
Here’s where the magic and little nuances come into play:
- Proofing patience: If your yeast doesn’t foam, give it another try with fresh yeast and slightly warmer water. It’s worth the wait to get that dough rising right!
- Cheese choices: Feel free to tailor the cheese mix to your liking. I find the combination of Swiss, Cheddar, and Muenster to be a dreamy balance between sharp and creamy.
- Leftovers: Khachapuri does great as leftovers. Wrap it tightly in foil and reheat it in the oven at 350°F for about 10-15 minutes to refresh that crispy crust.
- Make-ahead: You can prepare the dough and filling up to a day in advance — just keep them chilled and separate until you’re ready to assemble and bake.
Make It Your Own
- Herb It Up: Add fresh dill or cilantro to the filling for an herbal twist.
- Meaty Marvel: Toss in crispy bacon bits or diced ham for a protein-packed version.
- Spice Things Up: Mix in a pinch of red pepper flakes into the cheese for a touch of heat.
- Go Green: Layer in some sautéed spinach or kale for a veggie boost.
If you try this Khachapuri recipe, I’d love to hear all about your cheesy adventures! Drop me a comment or tag me on social media with your delicious creations. Let’s connect over this cozy, cheesy masterpiece!
Related update: Khachapuri