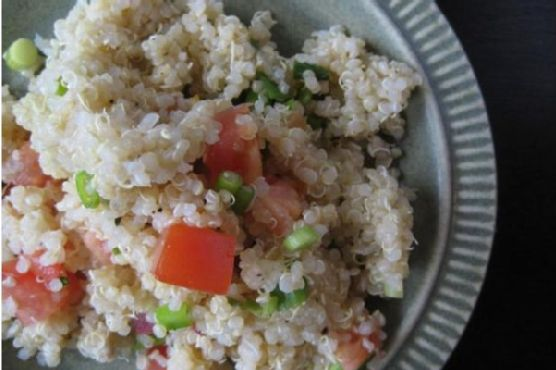
Picture this: It’s a Wednesday night, and I’m staring into the abyss of my fridge, hunting for something quick yet satisfying to whip up. I’m not in the mood for anything heavy, and the thought of a greasy takeout container is just not doing it for me. Then, I spot it: a bag of quinoa hidden behind some questionable leftovers. Suddenly, I’m inspired to throw together something fresh and vibrant. Enter the Quinoa, Tomato, Green Onion Side Salad. It’s one of those effortless dishes that surprises you with how delicious it is. Light, tangy, and with just the right amount of bite from the green onions, it’s the perfect sidekick to almost any meal. Plus, chances are, you already have most of these ingredients hanging out in your pantry or fridge.
Jump to Recipe
What You’ll Need
It’s amazing how such a simple ingredient list can come together into something so flavorful. Chances are you already have most of this.
- Quinoa – the nutty base that gives this salad heft and texture.
- Water – to cook the quinoa perfectly fluffy.
- Tomatoes – juicy and sweet, they bring freshness and color.
- Green Onions – for that bit of sharpness and crunch.
- Lemon – juice for tanginess that brightens up everything.
- Olive Oil – adds a smooth richness that ties the salad together.
- Salt and Pepper – to taste, because seasoning is everything!
How to Make Quinoa, Tomato, Green Onion Side Salad
- Start by rinsing your quinoa in a fine mesh strainer. This step is crucial to remove any bitterness from the grains.
- Combine the quinoa and water in a medium-sized pan. Heat over medium until it starts to bubble and simmer, then cover the pan and lower the heat to low. Let it cook for about 15 minutes, or until all the water is absorbed and the quinoa is fluffy.
- While your quinoa is cooking, wash the green onions and tomatoes well. Give them a rough chop—you want them in bite-sized pieces. The tomatoes should be juicy, and the onions pungent.
- Cut a lemon in half and squeeze the juice from one half into a bowl, taking care to fish out any seeds that escape.
- Once the quinoa is done, let it cool a bit. It can still be a little warm, but not piping hot—you don’t want to wilt the fresh ingredients.
- Incorporate the olive oil and lemon juice into the quinoa, then mix in the chopped tomatoes and green onions. Stir everything together gently.
- Season with salt and pepper to taste. You’ll know it’s right when the flavors pop but still feel balanced.
- Chill the salad in the refrigerator for a bit before serving, or serve it slightly warm if you’re in a hurry. It’s delicious either way!
Cook’s Notes
Once you’ve made this salad, you’ll see how forgiving and flexible it is. You can make the quinoa a day ahead and store it in the fridge, saving some time. Just bring it to room temperature before you mix everything together. If anything, the flavors meld even more deliciously after they’ve had time to chill. Leftovers can be stored in an airtight container in the fridge for up to three days, but trust me, it won’t last that long. Do keep an eye on the tomatoes, though—they can get a bit mushy past the second day.
Make It Your Own
This salad is like a blank canvas, and there are so many delicious ways to switch it up:
- Swap the quinoa for couscous or even farro for a different texture and flavor profile.
- Add some crumbled feta cheese for a tangy, creamy element.
- Mix in some chickpeas or black beans to boost the protein and make it a more filling main dish.
- Toss in a handful of fresh herbs like parsley or basil for an extra burst of freshness.
If you try this, I’d love to hear how it turns out—drop a comment or tag me on social media! Your kitchen adventures make my day. Happy cooking!
Goes Well With
If you want to round out the meal, here’s what I’d pair it with over on meaghanmoineau.com:
Related update: Quinoa, Tomato, Green Onion Side Salad

Picture this: I’m standing in the kitchen, eyeing a bunch of fresh beets and wondering what on earth I’m going to make for dinner. It’s one of those days where time is tight, but my craving for something fresh and vibrant is even tighter. Enter my Citrus Beet Salad. It’s the kind of dish that feels fancy but is deceptively simple to whip up. We’re talking earthy beets paired with juicy grapefruit, creamy goat cheese, and a sprinkle of crunchy pumpkin seeds. It’s a harmony of flavors and textures that makes it the perfect side or light main course. And trust me, once you taste it, it’ll quickly become a staple in your kitchen lineup. Jump to Recipe
What You’ll Need
I love this recipe because the ingredient list is short and sweet, and you might already have a few of these in your kitchen. Here’s what you’ll need to make this vibrant salad come to life:
- Beets – Fresh is best, but pre-cooked can work in a pinch.
- Olive oil – A good quality one really makes a difference here.
- Balsamic vinegar – Adds a tangy depth to the sweet beets.
- Grapefruit – Juicy and adds a bright pop of flavor.
- Sprouts – I like alfalfa or radish sprouts for their peppery taste.
- Pumpkin seeds – Toasted for extra crunch.
- Goat cheese – Creamy and tangy, it ties everything together.
How to Make Citrus Beet Salad
Ready to get cooking? Let’s dive into the steps:
- Start by washing your beets and patting them dry. You don’t want any excess moisture when they hit the oven.
- Place the beets on a sheet of aluminum foil and give them a generous drizzle of olive oil. Seal them up in the foil to create a snug little pouch.
- Pop the pouch onto a cookie sheet and slide it into the oven. Bake until the beets are tender. This can take anywhere from 30 minutes to an hour, depending on their size. Start checking at the 30-minute mark.
- Once tender, let them cool enough to handle. Use your hands to slip off their skins — they should peel away easily.
- Slice the beets into bite-sized wedges and give them a good drizzle of balsamic vinegar. This is where the magic starts.
- Line the bottom of a large bowl with a bed of sprouts. Add your beets and grapefruit slices on top.
- Finish with a scatter of pumpkin seeds and a crumble of goat cheese. Serve immediately and enjoy the freshness!
Cook’s Notes
Okay, a few things to keep in mind! When roasting your beets, size matters. If they’re particularly large, give them a little extra time in the oven. You want that fork to slide in without much resistance. And about that grapefruit — try to segment it so you avoid the bitter pith. If you’re making the salad ahead, keep everything separate until just before serving to avoid soggy sprouts. Leftovers are best consumed within a day or two, but if you really want to stretch it, pack the beets and sprouts separately to keep them fresh.
Make It Your Own
Here’s how you can put your own spin on this classic:
- Swap the goat cheese for crumbled feta or blue cheese for an extra punch.
- Use blood oranges instead of grapefruit for a sweeter twist.
- Substitute sunflower seeds if pumpkin seeds aren’t your thing, or if you want to mix it up.
- Add a handful of arugula or baby spinach for extra greens and volume.
If you try this, I’d love to hear how it turns out — drop a comment or tag me in your food pics! This salad is one of my favorites to play around with, and I’m curious to see how you’ll make it your own. Happy cooking!
Goes Well With
If you want to round out the meal, here’s what I’d pair it with over on meaghanmoineau.com:
Related update: Citrus Beet Salad
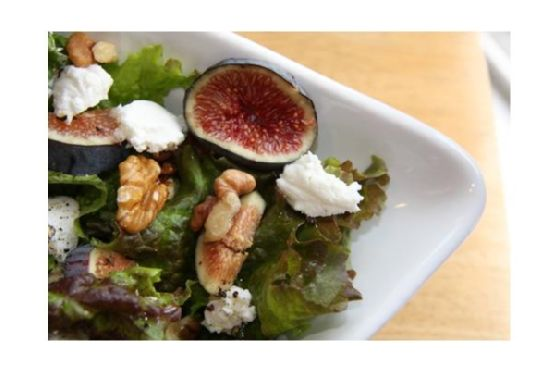
Last Tuesday, the afternoon sun cast a golden glow across my kitchen, and all I craved was something fresh and vibrant. You know those days when life gets a bit too overwhelming, and you just need a food hug? That was me. I opened the fridge and there they were—beautifully ripe figs, a half-eaten log of goat cheese, and a bag of mixed greens waiting to be transformed. And just like that, a Fig, Goat Cheese, and Walnut Salad came to life. This dish is like a cozy sweater—it’s comforting yet bright, with just the right amount of flair to make you feel fancy without the fuss. Trust me, this salad is a total game-changer, especially when you need something quick yet utterly delicious.
Jump to Recipe
What You’ll Need
This salad is all about simple ingredients that pack a punch. Chances are you already have most of this stuff lying around:
- Fresh figs – the star of the show
- Goat cheese – creamy goodness in every bite
- Lemon juice – for that zesty kick
- Mixed greens – a fresh and leafy base
- Olive oil – smooth and silky
- Salt and pepper – gotta season!
- Walnuts – for a crunchy contrast
How to Make Fig, Goat Cheese and Walnut Salad
- Start by rinsing your mixed greens. Spin them dry if you have a salad spinner or spread them out on a clean towel to air-dry. You want them crisp, not soggy.
- Tear the greens into bite-size pieces if they’re not already prepped. No one wants to wrestle with a giant leaf on their plate.
- Slice the figs delicately, savoring the sweet fragrance that fills the room. They should be tender yet firm enough to hold their shape.
- Roughly chop the walnuts. You’re aiming for a mix of larger chunks and smaller bits to keep things interesting.
- Gently scatter small spoonfuls of goat cheese over the salad. This is where the magic happens—creamy pockets of flavor await every bite.
- In a small bowl, mix olive oil and lemon juice to taste, or if you’re like me and love to freestyle, drizzle them directly over the salad.
- Season with salt and pepper to your liking. Toss everything together gently to keep all those beautiful components intact.
- Serve immediately and enjoy the delightful combination of flavors and textures.
Cook’s Notes
Here’s the deal: use the freshest figs you can find. Overripe ones can make the salad mushy, and underripe figs won’t give you that sweet juiciness. You can prepare the salad base and keep it in the fridge for a couple of hours, but only add the dressing and goat cheese right before serving to keep the greens vibrant and the cheese from getting lost in the mix. If you need to store leftovers, keep the dressing separate and consume within a day for best quality.
Make It Your Own
- Swap the goat cheese for feta if you’re feeling a bit more Mediterranean.
- Replace the walnuts with toasted almonds for an added crunch and a slightly different flavor profile.
- Add some crispy bacon bits if you want a smoky, savory note.
- Try arugula instead of mixed greens for a peppery punch.
If you try this, I’d love to hear how it turns out—drop a comment or tag me! There’s nothing like sharing the joy of a simple, delicious meal with friends. Bon appétit! 🍽️
Goes Well With
If you want to round out the meal, here’s what I’d pair it with over on meaghanmoineau.com:
Related update: Fig, Goat Cheese and Walnut Salad
Related update: Citrus Beet Salad
Related update: Vegetable Tart With Goat Cheese
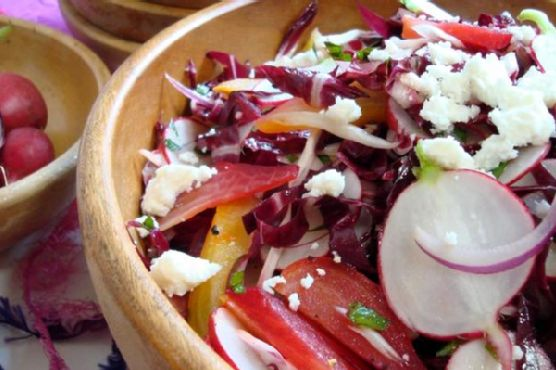
It was one of those evenings where the sun lazily dips behind the trees, casting a golden hue over everything, and the weather’s still warm enough to eat on the porch. I was staring into my fridge, thinking that I could either order takeout or transform the lonely bunch of beets staring back at me into something fabulous. The idea of a roasted beet and radicchio salad popped into my head, and suddenly I could taste it — earthy, a bit bitter, and wonderfully fresh. This dish isn’t just a salad; it’s a celebration of textures and flavors. The kind that makes you feel like you’ve pulled off a culinary magic trick with minimal effort.
Jump to Recipe
What You’ll Need
Chances are you already have most of this, but a quick trip to the store might be necessary for a few fresh flavors.
- Beets
- Olive oil
- Radicchio
- Red onion
- Radishes
- Fresh mint leaves
- Queso fresco
- Red wine vinegar
- Honey
- Garlic clove
- Salt
- Pepper
How to Make Roasted Beet and Radicchio Salad
- Preheat your oven to 400°F. This is the perfect time to catch up on that podcast you’ve been meaning to listen to.
- Trim the beets, placing them snugly in a baking dish. Drizzle with 1 tablespoon of olive oil, making sure each beet gets a glossy coat. Cover and roast for about 30-35 minutes, until they surrender easily to a fork’s pressure.
- While the beets are doing their thing, cut the radicchio into quarters and remove the core. Slice it into thin strips and let it chill in a bowl of ice water for 20-30 minutes. This little spa treatment mellows out its bitterness.
- Channel your inner chef as you slice the red onion and radishes paper-thin. This is where a sharp knife becomes your best friend.
- In a small bowl, whisk together 3 tablespoons of olive oil, red wine vinegar, honey, a minced garlic clove, a pinch of salt, and a few cracks of pepper. It should taste lively and balanced, with a little zing.
- By now, the beets should be cool enough to handle. Slip their skins off as if peeling a particularly stubborn sticker, then slice into elegant wedges.
- Toss the radicchio, beets, onions, radishes, and fresh mint leaves with the vinaigrette. It should look like a riot of colors and smell like a garden party.
- Top with crumbled queso fresco and serve to a chorus of “oohs” and “aahs.” You just made something beautiful.
Cook’s Notes
So, a few things I’ve learned while dancing through this recipe:
- Make sure to keep an eye on those beets. They can go from perfectly roasted to “oops, charcoal” pretty quickly.
- The ice bath for the radicchio really is a game-changer. Trust me, you don’t want to skip it.
- If you’re planning for leftovers, keep the dressing separate. The salad stays crisp and fresh for the next day.
Make It Your Own
Here are a few variations to keep things interesting:
- Swap the queso fresco for crumbled feta or goat cheese for a tangy twist.
- For more crunch, toss in a handful of toasted walnuts or slivered almonds.
- Not a fan of radicchio? Arugula or spinach would be great here too.
- Add some diced avocado for a creamy contrast.
If you try this, I’d love to hear how it turns out — drop a comment or tag me! Let’s see those gorgeous, colorful creations. Happy cooking!
Goes Well With
If you want to round out the meal, here’s what I’d pair it with over on meaghanmoineau.com:
Related update: Roasted Beet and Radicchio Salad
Related update: Fig, Goat Cheese and Walnut Salad
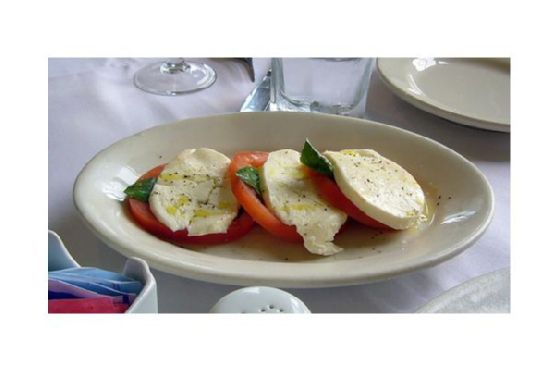
Last Tuesday, I found myself rummaging through the fridge at 6:00 p.m., desperately in need of something that screamed “dinner” but without the patience for a culinary marathon. There they were: a couple of vine-ripened tomatoes and a ball of mozzarella glaring back at me, almost as if they knew they were meant to be together. That’s when it hit me—Italian Tomato and Mozzarella Caprese! It’s that perfect blend of simplicity and flavor, a dish that makes you feel like you’re dining al fresco in the Italian countryside. This recipe comes together in minutes, and it’s so fresh and vibrant that you’ll forget how easy it was to make. Trust me, this is the kind of dish that turns a chaotic weeknight into a serene evening.
Jump to Recipe
What You’ll Need
This is one of those recipes where you probably have most of the ingredients lying around, making it a super convenient option for those spontaneous cravings.
- Vine-ripened tomatoes
- Fresh whole-milk mozzarella
- Fresh basil leaves
- Fluid balsamic vinegar
- Olive oil
- Kosher salt
- Black pepper
- Dry sprinkle of oregano leaves
How to Make Italian Tomato and Mozzarella Caprese
- Start by grabbing a large platter and slice your vine-ripened tomatoes. Lay them out, leaving just enough space between them so they can bask in their own glory.
- Drizzle the tomatoes with fluid balsamic vinegar. You’re looking for a glistening sheen that tempts you to dive in immediately.
- Place one fresh basil leaf atop each slice of tomato. The aroma will already start to transport you to a sun-drenched piazza.
- Slice the mozzarella into rounds that match the size of your tomatoes, and place each slice on top of the basil leaves. Trust me, this is where the magic happens.
- Sprinkle with oregano, salt, and black pepper. Be generous but not heavy-handed; you want to enhance, not overpower.
- Finish it off with a drizzle of olive oil. The edges of the cheese will start to glisten, and the whole platter will look like it belongs in a magazine.
Cook’s Notes
This recipe is straightforward, but a few pointers can elevate it. First, always opt for the freshest ingredients you can find. The quality of the tomatoes and mozzarella really shines through, so this is the time to splurge a little if possible. You can make this dish a couple of hours ahead of time; just be sure to add the basil and olive oil right before serving to keep everything fresh and vibrant. Leftovers? If there are any, they’re fantastic on a slice of toasted sourdough the next day.
Make It Your Own
- Replace the mozzarella with crispy tofu for a vegan twist that still brings the creamy texture.
- Swap the balsamic vinegar for a splash of red wine vinegar for a sharper tang.
- Add a handful of arugula underneath the tomatoes for an extra peppery bite.
- Incorporate roasted red peppers for a sweet, smoky layer to the dish.
So there it is, my go-to for a quick, satisfying meal that feels like a little escape to Italy. If you try this, I’d love to hear how it turns out — drop a comment or tag me on social media. Buon appetito!
Related update: Italian Tomato and Mozzarella Caprese
Related update: Mashed Sweet Potatoes
Related update: Crab Cakes Rockefeller
Related update: Roasted Beet and Radicchio Salad
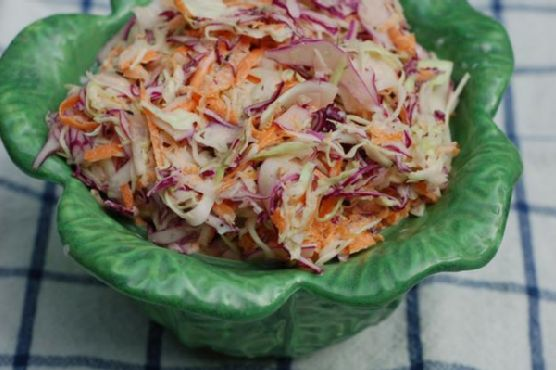
So there I was, standing in my kitchen on a Tuesday evening, staring at the lovely head of purple cabbage I had impulsively bought over the weekend. It was one of those days when you feel like the fridge is a puzzle, and you’re just not sure how all the pieces fit together. The pantry was looking sparse, and there was a definite need for a dinner side that wasn’t just steamed broccoli…again. Enter: Classic Creamy Coleslaw. This recipe is a lifesaver because it’s one of those dishes that hits the mark every time — creamy, tangy, and just the right amount of crunch to elevate any meal. Plus, it’s quick to whip up and, let’s be honest, who doesn’t love a dish that lets the veggies do all the colorful talking?
Jump to Recipe
What You’ll Need
The beauty of this coleslaw is its simplicity. Chances are you already have most of these hanging out in your kitchen — if not, they’re easy grabs during your next grocery run.
- Red cabbage
- Green cabbage
- Carrot
- Onion
- Apple cider vinegar
- Mayonnaise
- Dijon mustard
- Caraway seeds
- Sugar
- Sea salt
- Several grinds of black pepper
How to Make Classic Creamy Coleslaw
- Start by grabbing your trusty mandoline or a really sharp knife. You’re going to slice up the red and green cabbage, carrot, and onion paper-thin. Think of it as a meditation exercise — there’s something satisfying about seeing those vibrant veggies pile up in a bowl.
- In a separate small bowl, combine the apple cider vinegar, mayonnaise, Dijon mustard, caraway seeds, sugar, sea salt, and black pepper. Stir everything together until smooth; the sugar and salt should be fully dissolved so the dressing is creamy without any gritty bits.
- Toss your sliced veggies with the dressing in a medium-sized bowl. Make sure every slice gets a good coating. It’s like wrapping each piece in a creamy hug. Once everything is well-mixed, you can serve it right away or let it chill for a bit in the fridge to let those flavors meld together even more.
Cook’s Notes
This coleslaw is as forgiving as it is delicious. If you find the cabbage a bit stiff, letting the coleslaw sit in the fridge for an hour will soften it up just right. It’s perfect for making ahead — you can prepare the veggies and dressing separately and toss them together when you’re ready to serve. Leftovers hold up well for a couple of days in the fridge, but you might notice it gets a bit watery. Just give it a quick toss, and it’s as good as new. Be careful with the amount of salt; remember, you can always add more, but once it’s in, there’s no going back!
Make It Your Own
- Herb it Up: Add a handful of chopped fresh parsley or dill for a herbal twist.
- Go Nutty: Toss in some toasted sunflower seeds or slivered almonds for added crunch and nuttiness.
- Tropical Vibes: Swap the carrot with shredded pineapple for a sweet, tropical flavor.
- Spicy Kick: Add a teaspoon of sriracha or a pinch of cayenne to the dressing for some heat.
If you give this classic creamy coleslaw a try, I’d love to hear how it turns out for you — drop a comment or tag me on social! Your kitchen wins and tweaks are what make cooking such a fun adventure. Enjoy the crunch!
Related update: Classic Creamy Coleslaw

Picture this: it’s Easter Sunday morning, and I was in the kitchen trying to assemble a last-minute dessert that was festive enough to impress my friends but easy enough to make in my barely-awake state. I found myself eyeing the abundance of fresh fruit and a surplus of vegan-friendly pantry staples. That’s when the idea for Easter Bunny’s Vegan Ambrosia Salad popped into my head. This salad is a delightful mix of sweet and tangy, with a cloud-like creaminess that makes it feel like a treat straight from a springtime dream. It’s perfect for those times when you want something impressive but don’t have hours to fuss over it. Plus, who can resist its nostalgic charm?
Jump to Recipe
What You’ll Need
Most of these ingredients might already be lounging around in your kitchen, especially if you’re a fan of tropical flavors and vegan treats.
- Plain vegan heavy cream
- Sugar
- Sour vegan cream
- Vegan marshmallows
- Clementine orange segments
- Fresh pineapple
- Coconut
- Pecans
- Maraschino cherries
How to Make Easter Bunny’s Vegan Ambrosia Salad
- Grab your stand mixer and toss in the plain vegan heavy cream and sugar. Whip them together until you see those glorious stiff peaks forming. It’s like magic happening right before your eyes.
- Add in the sour vegan cream and whisk again until everything is smoothly combined. You’ll know it’s ready when it looks like a fluffy cloud of deliciousness.
- Now, in goes the fun: gently stir in the vegan marshmallows, clementine orange segments, fresh pineapple, coconut, and pecans. Mix until everything is evenly coated and well-distributed. It should look colorful and festive!
- Transfer your creation into a beautiful glass serving bowl. Cover it with a lid or some cling wrap, and let it chill in the refrigerator for about two hours. This helps all the flavors meld together beautifully.
- Finally, just before serving, top it off with those bright maraschino cherries. They add a pop of color and a sweet finishing touch!
Cook’s Notes
This ambrosia salad is pretty forgiving, but here are some tips to make sure you nail it every time:
- It’s best to use fresh pineapple rather than canned—it offers a better texture and flavor punch.
- If you’re making this ahead, it can be prepared up to a day in advance. Just remember to give it a quick stir before serving, as some ingredients might settle at the bottom.
- If you don’t have a stand mixer, a hand mixer will do just fine. Just make sure to whip the cream until those stiff peaks stand proud.
Make It Your Own
Want to put your own spin on this classic? Here are some ideas:
- Swap the pecans for walnuts or almonds for a different nuttiness.
- Add a handful of diced mango for an extra tropical twist.
- If you’re a fan of berries, throw in some fresh raspberries or blueberries for added color and tang.
- For a chocolate version, mix in a handful of vegan chocolate chips. Chocolate and oranges are a match made in heaven!
If you try this, I’d love to hear how it turns out — drop a comment or tag me! Your creativity in the kitchen is what makes cooking fun and memorable. Enjoy your Easter treat!
Related update: Easter Bunny’s Vegan Ambrosia Salad
Related update: Butterscotch Pie
Related update: Classic Creamy Coleslaw
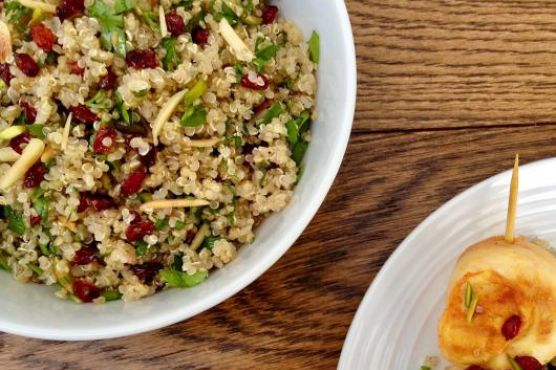
Picture this: It’s a Tuesday evening, and I’ve just emerged from a whirlwind day of meetings and errands. My energy is zapped, but my taste buds are clamoring for something a bit more exciting than my standard, last-minute pasta. I glance at my pantry, and there it is—a trusty bag of quinoa. This little grain (or seed, to be precise) is my go-to for nights like these when I want something nourishing yet packed with flavor. That’s where my Quinoa Salad with Barberries & Nuts comes into play. It’s a delightful dance of textures and tastes—fluffy quinoa, tangy barberries, and crunchy nuts, all mingling with fresh herbs. Bonus: It’s ready in a flash and makes me feel like a kitchen wizard every single time.
Jump to Recipe
What You’ll Need
Trust me, most of these ingredients are likely chilling in your pantry or fridge already. It’s the *bold* ones that make this dish pop, so don’t skip those!
- Quinoa – the base of our salad
- Water
- Salt
- Olive oil
- Barberries – these little gems add a tart kick
- Slivered almonds
- Slivered pistachios
- Coriander
- Mint
How to Make Quinoa Salad with Barberries & Nuts
- Start by rinsing the quinoa thoroughly in a sieve under cold running water. This step is crucial to remove that pesky bitterness. Drain well.
- Next, pour boiling water over the drained quinoa in a medium saucepan. Add a good pinch of salt, give it a stir, and cook over medium-low heat. You’re looking for the quinoa to be tender but with a slight bite. Drain it again using the sieve.
- While your quinoa is doing its thing, pick over the barberries, rinse them gently in a sieve, and dry them on some kitchen paper. Easy peasy.
- Now, let’s get those nuts toasted. Heat a tablespoon of olive oil in a saucepan over medium heat. Toss in the almond slivers first until they’re a light golden hue—then add the pistachios.
- With the nuts nicely toasted, add the rest of your olive oil and throw in the rinsed barberries. Cook them just until they’re shiny and looking a bit puffed up, which is when they release their tangy aroma.
- Reserve a tablespoon of the barberry and nut mixture, along with a tablespoon of the chopped coriander and mint, for our final flourish.
- Mix the remaining nut and barberry blend with the quinoa and herbs. Pop it all back into the pot and place over low heat. Cover it up and let it cook for about ten minutes until it’s steaming and thoroughly heated.
- Finally, turn your quinoa creation into a serving dish. Fluff it up with a fork, add a drizzle of olive oil, and a twist of black pepper if you’re feeling it. Sprinkle with the reserved barberry-nut mix and herbs. Serve it up either as a main or a side—your choice!
Cook’s Notes
Here’s the thing about this salad: it’s super forgiving and versatile. If you’ve never worked with barberries before, you might find them at a specialty grocery store or online. They’re worth the hunt, trust me. When it comes to leftovers, this salad holds up well for up to three days in the fridge. Just be sure to store it in an airtight container. If you’re planning to make it ahead, keep the garnish separate and mix it in just before serving to maintain that fresh, crunchy vibe.
Make It Your Own
Customizing this salad is a breeze. Here are a few ideas to get you started:
- Swap the barberries for dried cranberries or cherries if you prefer something sweeter.
- Try adding crispy tofu to make it a more filling main dish.
- Substitute the almonds and pistachios with hazelnuts and walnuts for a different nutty profile.
- If you’re into greens, throw in a handful of arugula or baby spinach for extra color and nutrients.
If you try this, I’d love to hear how it turns out—drop a comment or tag me! Let’s get cooking and make the everyday extraordinary.
Related update: Quinoa Salad with Barberries & Nuts
Related update: Brussels Sprouts with Bacon and Shallots
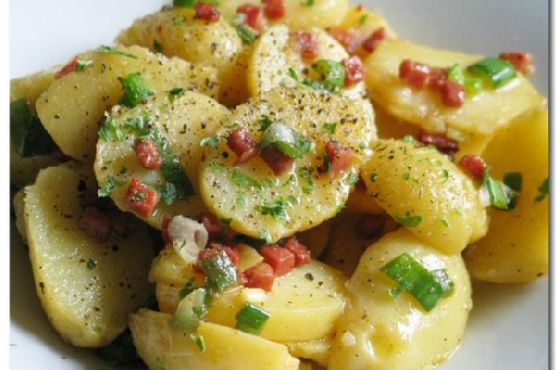
There was this one time, smack in the middle of a hectic Wednesday, when I found myself staring into the abyss of my fridge, promising my hungry self something quick and satisfying. You know those days, right? When you want something homemade but don’t really have the bandwidth for a culinary marathon. That’s when Charlotte Potato Salad came to the rescue. It’s like that best friend who stops by unannounced but always brings wine. This dish is vibrant, with just the right amount of zing from the mustard and lemon, balanced by the comforting notes of bacon and potatoes. Perfect for elevating a mundane weeknight or impressing a surprise guest.
Jump to Recipe
What You’ll Need
Here’s the best part — this recipe involves a handful of ingredients, many of which might already be sitting in your pantry or fridge. Just a few essentials come together to deliver a flavor-packed salad that feels both sophisticated and homey.
- Charlotte potatoes
- Bacon cubes
- Dijon mustard
- Dried parsley
- Lemon juice
- Olive oil
- Black salt and pepper
- Spring onions
How to Make Charlotte Potato Salad
- Begin by boiling the Charlotte potatoes in salted water until they are just tender. You’ll know they’re ready when a fork easily pierces through. Drain them and let them cool just enough to handle, then peel off the skins.
- In a small bowl, whisk together the lemon juice, Dijon mustard, black salt, and pepper until smoothly blended. Start to beat in the olive oil slowly, creating a creamy dressing. Add the finely chopped spring onions at this point, letting the sharpness infuse the sauce.
- In a dry frying pan over low heat, dry fry the bacon cubes. Let them sizzle and release their fat, crisping up for about 5 minutes. The smell will be irresistible!
- Add these golden bacon cubes to your dressing, stirring well to ensure each piece is coated in mustardy goodness.
- Thickly slice the warm potatoes and place them in a serving bowl. Pour the bacon-infused dressing over the potatoes, tossing gently to coat each slice.
- Finish with a generous sprinkle of dried parsley for a pop of color and added flavor, then serve warm or at room temperature.
Cook’s Notes
Alright, so here’s the scoop on making this dish even more seamless. If you’re prepping in advance, boil and peel the potatoes, then store them in the fridge. Just make sure everything comes to room temperature before you toss it together. This salad is best enjoyed warm but still delightful if served cold. Avoid over-boiling the potatoes — we want them soft but not mushy. The potato slices should hold their own and not turn into mashed potatoes as you mix.
Make It Your Own
You can riff on this salad in a few fun ways:
- Swap the bacon for crispy tofu cubes to make it vegetarian — simply fry the tofu until golden and proceed with the recipe.
- Try using fresh herbs like dill or chives instead of dried parsley for a fresh twist.
- For a richer flavor, substitute half of the olive oil with melted butter in the dressing.
- Mix in some capers for a briny kick that beautifully counterbalances the richness of the bacon and potatoes.
If you try this, I’d love to hear how it turns out — drop a comment or tag me! Cooking is all about sharing those delicious moments, and this one is too good not to share. Enjoy!
Related update: Charlotte Potato Salad
Related update: Quinoa Salad with Barberries & Nuts
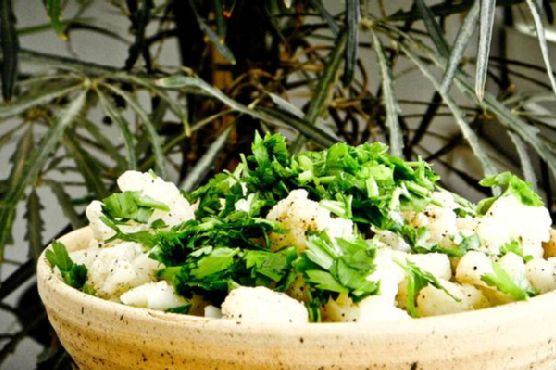
Last Tuesday, I found myself staring at a head of cauliflower in the fridge, feeling a bit uninspired and yet in desperate need of something fresh and zesty to perk up my weeknight dinner. It was one of those Tuesdays when you’re caught between the comfort of routine and the allure of a little culinary adventure. Enter the Egyptian Cauliflower Side Salad—a dish that’s beautifully simple yet impressively flavorful, perfect for those moments when you want something that’ll surprise your taste buds without complicating your evening. It’s quick, tangy, and lets the humble cauliflower shine with a bit of Middle Eastern flair. Trust me, this is one you’ll want as a regular in your recipe arsenal.
Jump to Recipe
What You’ll Need
This recipe is all about using fresh and vibrant ingredients that you might already have lounging around in your pantry or fridge. Think of it as a happy meeting between global flavors and everyday simplicity.
- Cauliflower – the star of the show, bring your best one!
- Cumin – to add that warm, earthy depth.
- Fresh parsley – for a burst of color and freshness.
- Lemon juice – for that zippy tang.
- Olive oil – your salad dressing superhero.
- Bell pepper – adds sweetness and crunch.
- Salt – to elevate all other flavors.
How to Make Egyptian Cauliflower Side Salad
- First, separate your cauliflower into medium-sized florets. Aim for bite-sized pieces that are easy to manage for both cooking and eating.
- Steam the cauliflower in a steamer until just tender. If you don’t have a steamer, no worries! You can boil the whole cauliflower in water until fork-tender and then cut it into pieces. Go for a texture that’s soft but still holds its shape.
- Once the cauliflower is cooked, place it in a large mixing bowl. The warmth will help it soak up all those delicious flavors we’re about to add.
- In a small bowl, whisk together the olive oil, cumin, lemon juice, and a generous pinch of salt. You want a good balance of zesty and savory here, so taste and adjust if needed.
- Pour the dressing over the warm cauliflower and toss gently to coat every piece. The aroma of cumin will start to fill your kitchen—it’s heavenly!
- Dice the bell pepper finely and add it to the bowl, tossing everything together once more for good measure.
- Finally, garnish with a handful of freshly chopped parsley. This not only adds a vibrant color but also a lovely fresh note to the salad.
Cook’s Notes
This salad is best enjoyed fresh, while the cauliflower is still warm, allowing it to soak up all those lovely flavors. However, it’s also quite forgiving if made in advance. Simply store it in the fridge for up to two days, and let it come to room temperature before serving to revive the flavors a bit. If you find the dressing has thickened upon chilling, a splash of warm water can loosen it right up. Be careful not to overcook the cauliflower—you’re aiming for tender, not mushy. It should have a slight bite to it, creating the perfect texture contrast with the creamy dressing and crunchy bell pepper.
Make It Your Own
- Swap the parsley for fresh cilantro if you’re a fan of its pungent flavor.
- For a spicy kick, add a pinch of red chili flakes to the dressing.
- Mix in some toasted almonds or pine nuts for extra crunch and nuttiness.
- Use lime juice instead of lemon for a slightly different citrusy edge.
If you try this, I’d love to hear how it turns out—drop a comment or tag me! Your kitchen adventures are always a delight to hear about. Enjoy your culinary trip to Egypt with just a few simple steps and ingredients!
Related update: Egyptain Cauliflower Side Salad
Related update: Charlotte Potato Salad
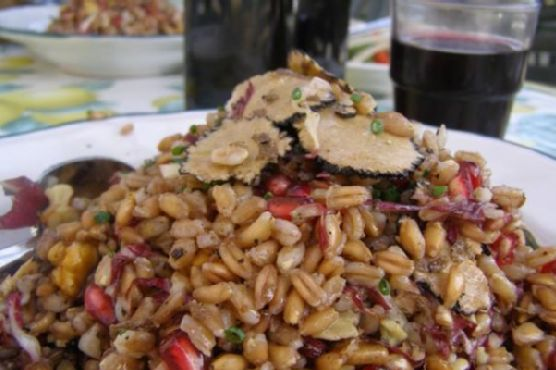
It was one of those evenings when the crisp air makes you crave something grounded yet bright—think cozy sweater vibes but on a plate. I had just returned from the farmers market, pomegranates in hand, and a desire for something different but not overly complicated. That’s how this Fall Farro Salad with Pomegranate, Walnut & Truffles was born. It’s the kind of dish that combines hearty farro with the tangy pop of pomegranate seeds, and the rich aroma of truffles—a little bit of everything deliciously fall. It’s a perfect weeknight meal that’s just as impressive for a weekend get-together, and the best part is how ridiculously easy it is to put together. I mean, we’re talking about strong flavors that do all the heavy lifting for you. Jump to Recipe
What You’ll Need
This salad’s ingredient list is refreshingly straightforward, yet it packs a punch with gourmet vibes. Chances are you already have most of these at home, except maybe the truffle mushroom, but trust me, it’s worth the small trip.
- Extra virgin olive oil
- Farro
- Parmesan (shaved into ribbons)
- Pomegranate (seeds)
- Radicchio (thinly sliced)
- Salt and pepper
- Truffle mushroom
- Vinegar
- Walnuts
How to Make Fall Farro Salad with Pomegranate, Walnut & Truffles
- Begin by rinsing the farro under cold water. In a large pot, bring plenty of cold water to a boil. Add a good pinch of salt along with the farro. If you have any vegetable scraps handy, toss them in for extra flavor. Cook until al dente, about 20-35 minutes. Taste a grain—it should be tender with a slight chew.
- While the farro cooks, prep the other ingredients. Shave the parmesan into delicate ribbons, thinly slice the radicchio, and remove the pomegranate seeds. You know you’re doing it right when your cutting board looks like a painter’s palette.
- In a small skillet, toast the walnuts over medium-low heat until they’re golden and fragrant. Keep an eye on them—they can go from toasty to burnt in a blink.
- Once the farro is ready, drain and let it cool slightly. Toss it into a big bowl with the radicchio, pomegranate seeds, walnuts, and parmesan ribbons.
- Drizzle with extra virgin olive oil, a splash of good vinegar, and season with salt and pepper. Mix gently, ensuring everything is well coated but not bruised.
- Finally, thinly slice the truffle mushroom and gently fold it into the salad. The aroma should start to bloom, lacing through the entire dish.
Cook’s Notes
Farro can be cooked ahead of time, making this salad a great option for meal prep. Just cool it completely before storing it in an airtight container in the fridge. When ready to assemble, allow it to return to room temperature for the best texture.
Watch out for overcooking the farro—it should retain some chewiness to balance the other textures of the salad. And remember, a little truffle goes a long way. You want it to complement, not overpower.
If you have leftovers, store the salad and dressing separately for up to two days to keep everything fresh and crunchy.
Make It Your Own
- Swap the truffle mushroom for a sprinkle of truffle oil if you’re in a pinch—it gives a similar aroma boost.
- Use feta cheese instead of parmesan for a tangier bite.
- Not a fan of radicchio? Substitute with baby kale or arugula.
- For a heartier version, add roasted butternut squash or sweet potato cubes.
If you give this recipe a whirl, I’d love to hear how it turned out—or any fun twists you added! Drop a comment or tag me on your food adventures. Happy cooking!
Related update: Fall Farro Salad with Pomegranate, Walnut & Truffles
Related update: Cauliflower and Broccoli Gratin With Camembert Cheese
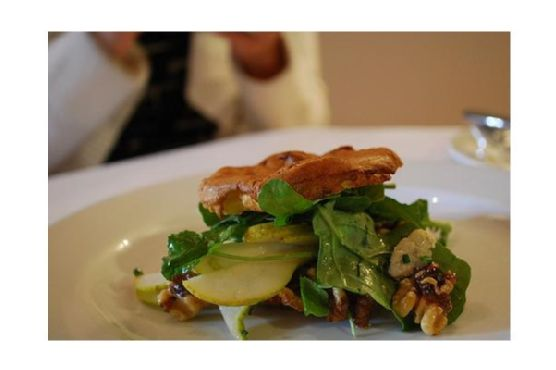
It was one of those fall evenings where the air turned crisp just a little too early for my liking. I found myself staring at a lonely pair of pears on my countertop, wondering how they’d somehow escaped the lunchbox routine all week. Inspired by the chill, a craving for something both comforting and refreshing struck me. This pear salad with walnuts and blue cheese was the answer — a perfect transitional dish that’s light yet satisfying. It’s what happens when you want to feel like you’re eating something fancy, minus the hassle. It’s filling enough for a lunch, or could be a lovely start to a cozy dinner.
Jump to Recipe
What You’ll Need
This salad is the definition of simple elegance, and chances are you already have most of these ingredients at home.
- Pears – ripe but firm enough to hold their shape
- Mixed salad leaves – I’m partial to using a mix that includes curly endive for that extra crunch
- Walnuts – toasted lightly to bring out their nuttiness
- Blue cheese – creamy and tangy, the star of the show
- Lemon juice – for a zesty dressing that cuts through the richness
- Safflower oil – mild and light, perfect for dressings
- Walnut oil – adds a subtle nutty depth
- Chives – delicate oniony flavor
How to Make Pear Salad With Walnuts and Blue Cheese
- Start by prepping your pears. Trim the base of each pear so they can stand upright like little soldiers on your cutting board. This will make slicing them easier and more stable.
- In individual salad bowls, arrange a generous handful of mixed salad leaves. Place one of your sliced pears on top of the greens in each bowl, making sure to fan them out for a bit of flair.
- Now, sprinkle a small handful of celery pieces into each bowl. The celery adds a delightful crunch and freshness to the salad.
- In a small bowl, combine the safflower oil, walnut oil, lemon juice, and a sprinkle of freshly chopped chives. Whisk together until the dressing is emulsified — you’ll know it’s ready when it’s slightly thick and all combined.
- Drizzle the dressing over each salad evenly. You want just enough to coat everything lightly without drowning it.
- Finish by scattering a healthy amount of crumbled blue cheese and toasted walnuts over each salad. These are your flavor bombs, so be generous!
Cook’s Notes
When it comes to choosing your pears, I recommend a variety like Bosc or Anjou for their firmness and sweetness. If your pears are too ripe, they’ll turn mushy in the salad. As for the blue cheese, any creamy variety works, but I find that a strong Roquefort can elevate the dish beautifully. To toast walnuts, simply spread them on a baking sheet and pop them in a 350°F (175°C) oven for about 5-7 minutes, or until they are golden and fragrant. Watch them closely because they can go from perfectly toasted to burnt in seconds! The salad is best served fresh, but you can store leftovers in an airtight container in the fridge for up to a day — just keep the dressing separate to avoid soggy greens.
Make It Your Own
- Swap out the blue cheese for goat cheese if you’re not a fan of strong flavors. It adds a milder creaminess that is just as delightful.
- Use pecans instead of walnuts for a slightly sweeter nutty touch.
- If you’re looking for a bit more protein, add some grilled chicken or crispy tofu to make it a complete meal.
- Drizzle a little balsamic glaze over the top for an added tangy sweetness that complements the pears beautifully.
If you try this, I’d love to hear how it turns out — drop a comment or tag me on Instagram! Your kitchen adventures make my day. Happy cooking!
Related update: Pear Salad With Walnuts and Blue Cheese
Related update: Fall Farro Salad with Pomegranate, Walnut & Truffles
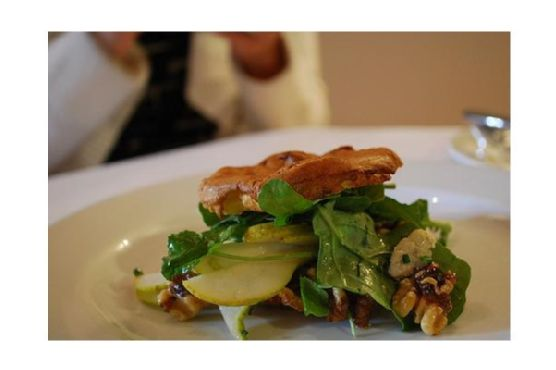
Last Tuesday, I found myself staring into the fridge, the usual weeknight dilemma playing out: what to make that’s quick, refreshing, yet still feels like a treat? I’d been craving something that had all the comforting notes of fall but was light enough to not weigh me down. Enter the pear salad with walnuts and blue cheese, a concoction that seemed to tick every box. This salad is all about contrasts — the creaminess of the blue cheese against the crisp pears, the bitterness of endive softened by the sweet, nutty warmth of walnuts. It’s a symphony of flavors that feels like indulging without the next-day guilt. Ready to dive in? Trust me, it’s a keeper.
Jump to Recipe
What You’ll Need
This recipe doesn’t require a trip to a gourmet store. Odds are you already have most of these ingredients hanging out in your kitchen.
- Pears – Choose ripe, but firm ones.
- Mixed salad leaves – A blend with some curly endive adds a nice bitter touch.
- Lemon juice – For a bright, tangy kick.
- Blue cheese – Go for your fave, the funkier, the better.
- Chives – Finely chopped for a fresh oniony hint.
- Safflower oil – For a neutral base.
- Walnut oil – Adds a toasty depth.
- Walnuts – Toast these for that extra crunch.
How to Make Pear Salad With Walnuts and Blue Cheese
- Start by prepping the pears. Slice a thin piece off their bases so they can stand upright without toppling over. Trust me, this makes the plating look extra fancy.
- In individual bowls, artistically arrange the pears amidst the mixed salad leaves. Think of this as your blank canvas.
- Sprinkle the chopped chives over the leaves, letting them fall where they may — no need for precision here.
- In a small bowl, whisk together the lemon juice, safflower oil, and walnut oil. Aim for a smooth emulsion that coats the back of a spoon.
- Drizzle this dressing lovingly over your salads. You’ll want a nice, even coverage without drowning the ingredients.
- Finish by scattering a generous handful of blue cheese crumbles and toasted walnuts over each salad, letting them nestle into the greens.
Cook’s Notes
Okay, let’s talk about some things to keep in mind. Firstly, when choosing pears, Bartletts or Anjous are my go-to for their texture and sweet flavor. If they’re too ripe, they might collapse under the pressure of the salad fork, so aim for that sweet spot of just ripe.
Toasting the walnuts is a game-changer. Just a few minutes in a dry skillet until they’re golden and fragrant will make a world of difference. Store any leftovers in a sealed container in the fridge, but honestly, this salad is best enjoyed fresh.
If you’re prepping ahead, keep the dressing separate until you’re ready to serve. This keeps the greens from wilting and maintains that fresh, crisp bite.
Make It Your Own
- Don’t love blue cheese? Swap it out for crumbled feta or goat cheese for a milder taste.
- For a protein boost, add some grilled chicken or crispy tofu on top. It turns this salad into a complete meal.
- Try swapping walnuts with pecans for a sweeter, softer crunch.
- If you can’t find curly endive, arugula offers a peppery alternative that pairs wonderfully with the pears and cheese.
If you try this, I’d love to hear how it turns out — drop a comment or tag me! Whether you stick to the script or put your own twist on it, I hope it becomes a staple in your kitchen like it has in mine. Happy cooking!
Related update: Pear Salad With Walnuts and Blue Cheese
Related update: Pear Salad With Walnuts and Blue Cheese
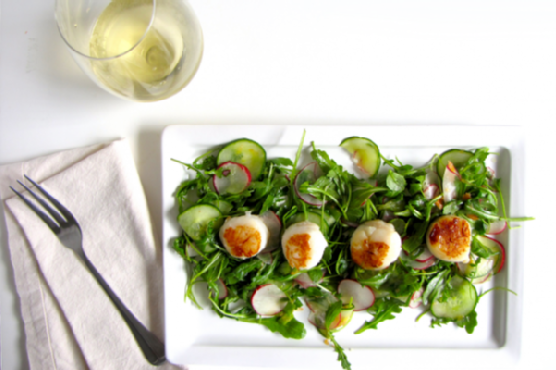
Picture this: It’s a Tuesday evening. You’ve just kicked off your shoes after a whirlwind day, and all you want is something fresh, zesty, and sophisticated on your plate without spending more time in the kitchen than you did in traffic. That’s where my Citrus Arugula Salad with Seared Scallops swoops in to save the day. It’s got that crisp, peppery bite from the arugula that I absolutely crave, the juicy pop of a Cara Cara orange, and the tender, buttery goodness of perfectly seared scallops. It sounds fancy, but trust me, it’s a cinch to throw together—and it’s bound to impress whoever’s lucky enough to join you at the table.
Jump to Recipe
What You’ll Need
Chances are you already have most of this in your kitchen, aside from maybe the scallops. But it’s the simple ingredients that really let those scallops shine.
- Arugula
- Cara Cara orange
- Radish
- English or Persian cucumber
- Green onion
- Salt
- Scallops
How to Make Citrus Arugula Salad with Seared Scallops
- First, thinly slice the radishes and cucumber. You want them delicate enough to complement the scallops, not overshadow them. Dice up the green onion, too.
- In a bowl, squeeze the juice and pulp from half of the Cara Cara orange. Add a pinch of salt and whisk it all together until it’s beautifully blended.
- Add in your radish and cucumber slices, along with a healthy handful of arugula. Toss it all together until every leaf and slice glistens with that citrusy goodness.
- Now, for the scallops: Heat a splash of oil in a pan over high heat. The pan needs to be hot, hot, hot—like sizzling enough that you can almost hear it pleading for the scallops.
- Gently place the scallops flat-side down in the pan. Space is key here, so if you have a lot of scallops, do them in batches. Crowding the pan is the enemy of that golden sear we’re aiming for.
- Let them sear undisturbed. The temptation to peek and prod is real, but resist! After a couple of minutes, check for that caramel-colored crust. Once you see it, flip them over.
- Plate your salad and place about four scallops on top. They should be served immediately to avoid any rubbery disappointments.
Cook’s Notes
Seared scallops are one of those things where less is more. Don’t overdo the seasoning; let their natural sweetness shine. Also, scallops are quick to cook and quick to turn rubbery if left too long. Watch them like a hawk, and you’ll be fine. If you want to make this ahead, prepare the salad components in advance and just sear the scallops right before serving. As for leftovers, the salad keeps well for a day, but the scallops are best enjoyed fresh out of the pan.
Make It Your Own
- Swap the arugula for spinach if you prefer a milder green.
- Replace the Cara Cara orange with blood orange for a deeper color and flavor.
- Try grilling the scallops for a smoky twist.
- For a vegetarian version, swap the scallops for crispy tofu slices.
If you try this, I’d love to hear how it turns out—drop a comment or tag me! Whether it’s a quick weeknight dinner or a date night delight, I hope you find this as much of a joy to make as it is to eat. Enjoy!
Related update: Citrus Arugula Salad with Seared Scallops
Related update: Vegetarian Ratatouille
Related update: Pear Salad With Walnuts and Blue Cheese
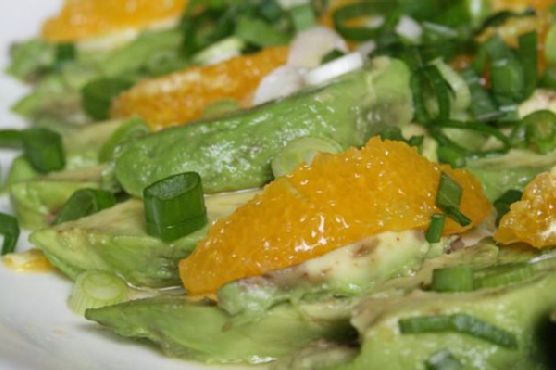
It was one of those days where I stood in front of the open fridge, hoping dinner would magically appear. You know the type, right? The sun had made a surprise appearance after a string of dreary days, and suddenly all I wanted was something fresh, vibrant, and maybe a little unexpected. That’s when the neglected oranges rolled into view, nestled next to a couple of perfectly ripe avocados. Bingo! Avocado and Orange Salad with Orange-Ginger Dressing was on the menu. It’s a salad that feels like sunshine on a plate — quick to prepare, yet impressive enough that you’ll feel like you’ve done something special. It’s got that killer combo of creamy and tangy, with the zing of ginger giving it an extra twist. Seriously, this salad is a game-changer for those nights when you want something different but can’t be bothered with too much fuss.
Jump to Recipe
What You’ll Need
This salad is all about the ingredients speaking for themselves. Chances are you already have most of this hanging around your kitchen.
- Avocados – ripe but still firm
- Oranges – sweet and juicy
- Green onions
- Orange juice – fresh is best
- Lemon juice
- Fresh ginger paste
- Agave syrup
- Olive oil
- Salt and pepper
How to Make Avocado and Orange Salad With Orange-Ginger Dressing
- Start by peeling your oranges. Cut them into segments, saving any extra juice for the dressing. Arrange the orange segments and avocado slices so they’re overlapping slightly on a platter. It should look effortlessly gorgeous.
- Take the leftover orange carcass and give it a good squeeze all over the salad, letting that sweet juice mingle with the creamy avocado. This is what dreams are made of.
- Next, slice up some green onions and sprinkle them over the salad. A pinch of salt here too to bring everything together.
- Cover the platter with cling film and pop it in the fridge. Let it chill out until you’re ready to serve.
- For the dressing, blend together orange juice, lemon juice, fresh ginger paste, agave syrup, and olive oil. Make sure to taste it — you want it balanced, so add salt and pepper as needed.
- Right before serving, pour the dressing generously over the salad. Watch as it glistens and coats everything beautifully, inviting you to dig in.
Cook’s Notes
If you’re prepping this ahead of time, keep the salad and dressing separate until you’re ready to serve. The citrus will keep the avocados from browning, but it’s always best fresh. Leftovers can be stored in the fridge for a day, but the avocados might get a bit soft. I recommend making just enough for the meal to keep everything at its peak. One more tip: make sure the ginger paste is as fresh as possible — it’s key to that lovely zing!
Make It Your Own
- Swap out the green onions for thinly sliced red onions if you prefer a bit more bite and color.
- Add some toasted almonds or walnuts for crunch. They pair beautifully with the creamy avocado.
- If you’re feeling adventurous, try adding thin slices of fennel for a mild anise flavor and an extra bit of crunch.
- For a bit of spice, sprinkle some chili flakes over the salad before drizzling with the dressing.
If you try this, I’d love to hear how it turns out — drop a comment or tag me! There’s something about this salad that just feels like a little bit of sunshine in a bowl, and I hope it brings some brightness to your table too. Enjoy, friends!
Related update: Avocado and Orange Salad With Orange-Ginger Dressing
Related update: Citrus Arugula Salad with Seared Scallops
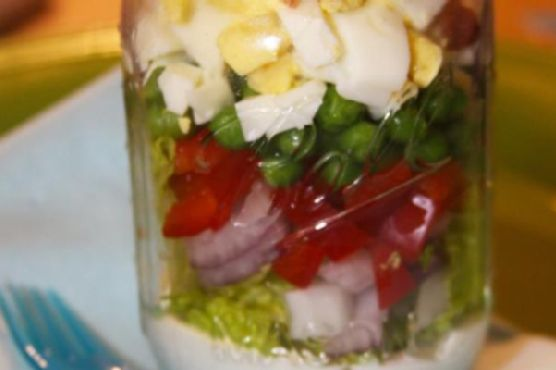
One chilly Tuesday evening last fall, I found myself digging through the fridge, craving something crisp and refreshing amidst all the usual comfort foods. The dilemma? It was one of those weeks where time seemed to vanish, and I needed something quick yet satisfying. That’s when it dawned on me: my favorite Southern 7 Layer Salad — but with a twist! Instead of the classic trifle dish, I opted for a mason jar presentation. Not only does it make for an easy, transportable lunch, but there’s something so charming about seeing those vibrant layers through glass. Plus, let’s be real, salads in mason jars just make you feel like you’ve got your life together. Ready to dive in?
Jump to Recipe
What You’ll Need
Here’s the beauty of this recipe: most of these ingredients are pantry regulars. If you don’t have them all, don’t worry — substitutions are a breeze!
- Bacon – because everything’s better with bacon, right?
- Black pepper
- Eggs – hard-boiled and chopped
- Lettuce – crisp and refreshing
- Mayo
- Frozen peas – they make the salad pop!
- Red diced bell pepper
- Sour cream
- Sugar
- Yellow or red diced onion
How to Make Southern 7 Layer Salad in a Mason Jar
- Prepare the dressing by mixing the mayo, sour cream, sugar, and a dash of black pepper in a small bowl. Give it a good whisk until smooth. Pop it in the fridge to chill while you prep everything else.
- Cook the bacon in a skillet over medium heat until it’s wonderfully crisp and the kitchen smells like breakfast heaven. Let it cool on a paper towel-lined plate, then chop it into bite-sized pieces.
- Hard-boil your eggs if you haven’t already, then dice them into little chunks. I love using an egg slicer for this — it’s oddly satisfying.
- Grab your large mason jars (21oz works beautifully). Start with a couple of spoonfuls of the chilled dressing at the bottom of each jar. This way, when you tip it out to eat, everything ends up nicely coated.
- Layer in this order: chopped lettuce, a sprinkle of diced onions, a cheerful scatter of red bell peppers, those poppy little peas, the diced eggs, and finally, the crispy bacon.
- Screw the lid on tightly, give it a little shake if you’re feeling adventurous, and either dig in straight from the jar or pour it into a bowl. Enjoy the crunchy, creamy goodness!
Cook’s Notes
Let’s talk practicalities:
– This salad is a fantastic prep-ahead option. You can make all the components the night before. Just wait to add the dressing until you’re ready to dig in to avoid anything getting soggy.
– Storing the salad in the fridge will keep it fresh for up to two days, but honestly, it’s so tasty it’ll probably disappear way before then.
– One potential trip-up: overcooking the bacon or eggs. Keep a close eye on both to ensure they’re just right.
Make It Your Own
Want to mix things up? Here are a few ideas:
- Swap the bacon for crispy tofu for a vegetarian twist.
- Use Greek yogurt instead of sour cream for a tangier, lighter dressing.
- Add shredded cheddar cheese for an extra savory kick.
- Include sliced avocado for a creamy texture and added health benefits.
So there you have it — my trusty Southern 7 Layer Salad in a Mason Jar! If you try this, I’d love to hear how it turns out. Drop a comment below or tag me on social media with your layered creations. Happy crunching!
Related update: Southern 7 Layer Salad in a Mason Jar
Related update: Avocado and Orange Salad With Orange-Ginger Dressing
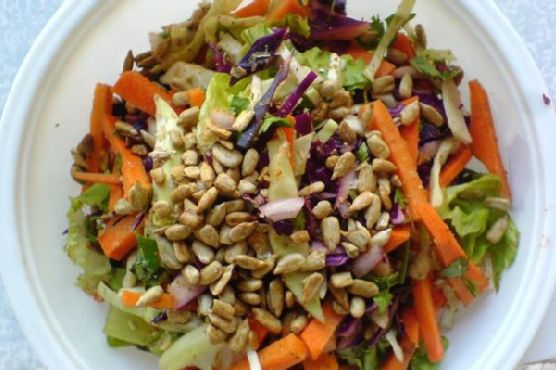
So there I was, standing in the kitchen, mid-week with a craving for something fresh yet satisfying. I’d just finished a long day of work, and the idea of a heavy meal felt like too much. My fridge had the usual suspects: a couple of carrots and half a cabbage from my last attempt at being super healthy. That’s when I remembered this Carrot and Cabbage Salad With Coriander+cumin Dry Rub. It’s one of those recipes that’s surprisingly easy and hits that magical spot between simplicity and flavor explosion. The combination of earthy spices and crunchy vegetables makes it refreshing and comforting at the same time. And the best part? It’s perfect for when you need to throw something together quickly but still feel like a kitchen wizard.
Jump to Recipe
What You’ll Need
You’re in luck because this ingredient list is all about basics that pack a punch. Chances are you already have most of this hanging out in your pantry and fridge.
- Carrots
- Green cabbage
- Red cabbage
- Cumin seed powder
- Ground coriander
- Fresh coriander
- Lime juice
- Olive oil
- Sunflower seeds
How to Make Carrot and Cabbage Salad With Coriander+cumin Dry Rub
- Start by chopping up the carrots and both the green and red cabbage into thin slivers. Aim for uniformity here so every bite is a perfect mix.
- In a large bowl, add the chopped veggies, then sprinkle in the ground coriander and cumin seed powder.
- Pour in the lime juice and olive oil. Now, roll up your sleeves and massage the spices into the veggies. You’ll know you’re done when everything’s lightly coated and you can smell the spices waking up.
- Finish by tossing in the fresh coriander and sunflower seeds. Give it a final stir to distribute these goodies evenly.
- Let the salad sit for a couple of hours. This waiting game is crucial for the spices to seep into the veggies, enriching the flavors.
Cook’s Notes
Don’t skip the resting period. This gives the spices a chance to penetrate the veggies, making them more flavorful. If you’re planning ahead, you can even prepare this salad the day before and let it sit in the fridge overnight. Just give it a quick toss before serving. Leftovers hold up surprisingly well too, so pack some for lunch the next day!
- Be sure to chop the vegetables evenly to ensure each bite is well-balanced.
- Feel free to adjust the lime juice to taste. More lime will give it a zestier kick!
Make It Your Own
- Switch out the sunflower seeds for pumpkin seeds for a different crunch.
- Add thinly sliced red onion or scallions for an extra layer of flavor.
- Replace the olive oil with avocado oil for a different, slightly nuttier taste.
- If you prefer a bit of heat, toss in some thinly sliced chili or a pinch of chili flakes.
If you try this, I’d love to hear how it turns out — drop a comment or tag me! Your variations and tweaks are always inspiring, and who knows, you might come up with the next favorite twist on this dish! 🌿🥕
Related update: Carrot and Cabbage Salad With Coriander+cumin Dry Rub
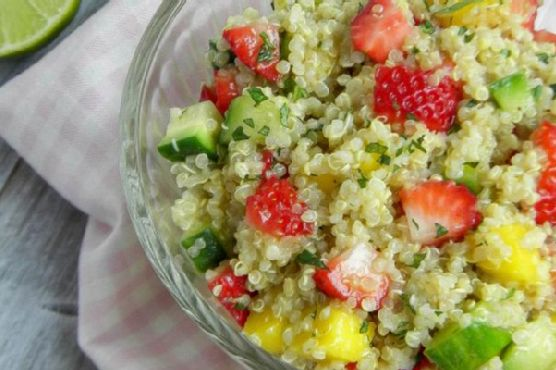
The first time I made this Strawberry-Mango Quinoa Salad, it was one of those chaotic weeknights where I just wanted something fresh and easy. You know the kind—work had run late, the fridge was a bit empty, and the idea of ordering takeout was so tempting. But then I remembered the sweet mangoes I had picked up on a whim, and the lonely strawberries sitting in the fridge. That’s when the idea hit me—what if I threw together a salad that was not only refreshing but also filled with vibrant, zesty flavors? This salad is the kind of dish that makes you feel like you’ve got it all together, even when life is a little messy. Plus, it’s super quick to whip up.
Jump to Recipe
What You’ll Need
This salad’s beauty lies in its simplicity and the burst of flavors from super fresh ingredients. Chances are you already have most of these in your kitchen:
- Quinoa – Nutty and satisfying, the base of our salad.
- Water
- Salt
- Fresh strawberries – Sweet, juicy, and perfect for adding a pop of color.
- Ripe mango – For that tropical twist.
- Cucumber – Crunchy and refreshing.
- Fresh mint – Bright and aromatic.
- Lime juice and zest – To give that zesty zing.
- Honey – For a touch of sweetness.
- Canned sour plain cream – Adds a creamy tang.
- Olive oil – Smooth and rich, tying it all together.
- Bell pepper – For some extra crunch and color.
How to Make Strawberry-Mango Quinoa Salad
- In a medium saucepan, combine the quinoa, water, and a pinch of salt. Bring it to a boil over medium-high heat. Once it starts bubbling, lower the heat and let it simmer. Cover the pan and let it cook for about 15 minutes, until the liquid is just absorbed. You’ll know it’s done when you see those little quinoa tails unfurling.
- Spread the cooked quinoa out on a baking sheet. Let it cool for about 20 minutes. It should be warm to the touch but not steaming hot—perfect for absorbing all the dressing goodness later.
- While the quinoa is cooling, grab a large bowl. Whisk together the lime juice, lime zest, honey, sour cream, and olive oil. The mixture should be smooth and slightly thick, with a lovely citrusy aroma.
- Add the cooled quinoa to the bowl. Then toss in the strawberries, mango, cucumber, and mint. Toss everything well to make sure each bite is balanced.
- Season with a pinch of salt and a grind of pepper to taste. Give it one last gentle toss, and you’re ready to serve immediately.
Cook’s Notes
This salad is as forgiving as they come. If your quinoa isn’t quite cool when you mix it with the dressing, don’t sweat it—just let it sit a little longer before adding the other ingredients. Also, always taste as you go; if your mangoes are particularly sweet, you might want to dial back a bit on the honey. Leftovers can be stored in an airtight container in the fridge for up to two days. But let’s be real, it rarely lasts that long!
Make It Your Own
Here’s where you can get playful with it:
- Swap the mango for juicy pineapple if that’s what’s on hand or in season.
- For a bit of nuttiness, toss in a handful of toasted almonds or cashews.
- Add a spicy kick by mixing in some finely chopped jalapeños or a dash of chili flakes.
- If you’re a cheese lover, crumble some feta or goat cheese on top before serving.
If you try this, I’d love to hear how it turns out—drop a comment or tag me! Whether you stick to the original or put your own twist on it, this salad is sure to bring a bit of sunshine to your table. Enjoy!
Related update: Strawberry-Mango Quinoa Salad
Related update: Carrot and Cabbage Salad With Coriander+cumin Dry Rub
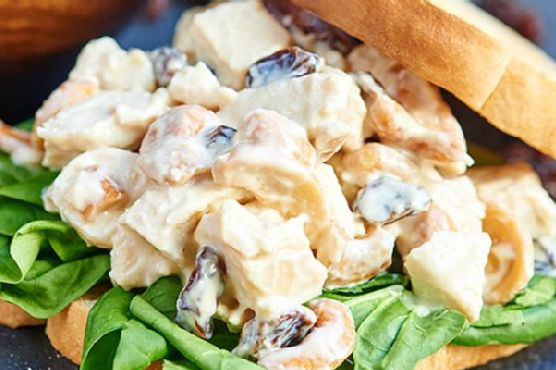
It was one of those whirlwind Wednesday evenings where everything seemed to be happening at once. My kitchen was a mess of grocery bags, half-empty coffee cups, and a laptop precariously perched on the edge of the counter streaming my latest binge-worthy show. Between juggling work calls and taming the chaos that had taken over my living space, I needed dinner to be quick, satisfying, and ideally nutritious enough to make me feel like I was winning at adulthood. Enter the Greek Yogurt Chicken Salad. It’s a reliable hero for those nights when you need something comforting yet refreshing, and it doesn’t hurt that the cleanup is a breeze! The creamy, tangy dressing paired with the tender chicken and the occasional sweet zing from the craisins is just what you need to hit reset.
Jump to Recipe
What You’ll Need
Just a heads up, this is the kind of recipe where you might already have most of the ingredients lounging around in your kitchen. It’s simple yet flavorful.
- 2-3 whole chicken breasts
- 4 cups chicken broth or water
- 1 cup plain Greek yogurt
- 1 tablespoon Dijon mustard
- 1 teaspoon garlic powder
- 1/2 cup craisins (or raisins)
- 1/2 cup roasted cashews
- Salt, to taste
- Pepper, to taste
How to Make Greek Yogurt Chicken Salad
- Start by bringing your chicken broth or water to a boil in a medium pot. Once it’s bubbling, add in your whole chicken breasts. Let them cook until there’s no pink left in the middle; this usually takes about 15-20 minutes depending on their size.
- While your chicken is having its spa treatment, whisk together the Greek yogurt, Dijon mustard, and garlic powder in a bowl. You’re aiming for a smooth, well-mixed sauce here. Add a dash of salt and pepper, adjusting to your taste.
- Stir in the craisins and cashews. If you love a bit more crunch, hold off on the cashews until just before serving. This way, they maintain their delightful crunch!
- Once the chicken is done, let it rest for about 5 minutes. Trust me, this little pause keeps all those flavorful juices locked in.
- Dice the chicken into bite-sized chunks and toss it into your prepared sauce. Give everything a good mix so each piece of chicken is generously coated.
- Serve your chicken salad chilled or at room temperature. It’s perfect in a sandwich, on a bed of greens, or just straight from the bowl.
Cook’s Notes
– Boiling the chicken in broth instead of water really takes the flavor up a notch, but if you’re in a pinch, water works just fine.
– This chicken salad keeps well in the fridge for about 3 days, making it a great make-ahead lunch option. Just store it in an airtight container to keep it fresh.
– If you’re planning to eat it over a few days, consider adding the cashews just before serving each time to maintain that satisfying crunch.
– Be mindful not to overcook the chicken, as it can become a bit rubbery. You want it tender and juicy!
Make It Your Own
- Swap the chicken for crispy tofu if you’re going for a vegetarian vibe. Just cube it and toss it in!
- Love a bit of heat? Add a pinch of cayenne pepper or some chopped jalapeños to the sauce.
- For an extra tangy twist, try tossing in some diced green apples. They add a delightful crunch and zing.
- Switch the craisins for chopped dried apricots for a different kind of sweetness if you’re feeling adventurous.
If you give this Greek Yogurt Chicken Salad a whirl, I’d love to hear how it turns out for you! Drop a comment below or tag me in your kitchen creations. Let’s keep those weeknight dinners delicious and stress-free!
Related update: Greek Yogurt Chicken Salad
Related update: Strawberry-Mango Quinoa Salad
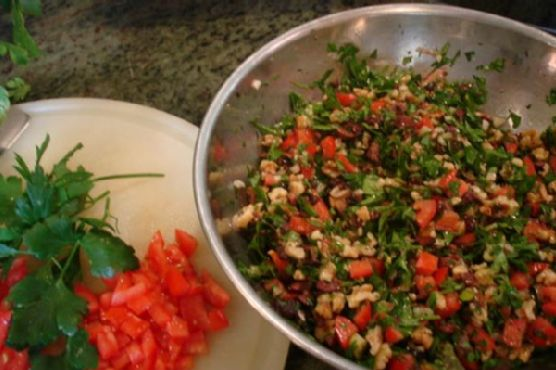
Oh, let me tell you about last Thursday. I was knee-deep in emails, the dog barking at god-knows-what, and all I could think about was how much I didn’t want to spend hours in the kitchen. You know those days, right? So, I opened the fridge and saw a half-empty bunch of parsley and some lonely tomatoes — the lightbulb went off. Middle Eastern Chopped Salad. Crisp, refreshing, and quick to throw together, it’s the perfect escape from the chaos. With the zesty lemon and a hint of cumin, this salad is a breath of fresh air on a hectic day. Ideal for those nights when you want something nourishing but can’t be bothered with a long recipe.
Jump to Recipe
What You’ll Need
The beauty of this salad is how simple and versatile it is. You might have most of these in your kitchen already:
- Walnuts – for a lovely crunch.
- Italian parsley – the star of the show, make sure it’s fresh!
- Niçoise olives – bring a briny depth.
- Scallion – adds a mild onion flavor.
- Tomato – adds juiciness and color.
- Extra virgin olive oil – for that luscious texture.
- Fresh squeezed lemon juice – a must for that zesty punch.
- Cumin powder – just a touch for warmth.
- Red chili flake – for a subtle kick.
- Black kosher salt and coarsely ground pepper – to taste.
How to Make Middle Eastern Chopped Salad
- Preheat your oven to 325°F and place the walnuts on a baking sheet. Toast them for about 10 minutes until you catch that delicious nutty aroma wafting through your kitchen. Let them cool completely before chopping.
- While the nuts are cooling, prep your parsley. Remove the stems and finely mince the leaves. If you’re using a food processor, pulse gently — we want fluffy, not mushy.
- Chop the niçoise olives, cooled walnuts, and scallions into a rough dice. This isn’t about perfection, it’s rustic and charming with its rough edges.
- Dice your tomatoes and give them a quick drain to avoid a watery salad. No soggy salads here!
- In a large wooden bowl (or any roomy bowl you’ve got), combine all your chopped ingredients. The colors should already be making you smile.
- Drizzle in olive oil and fresh lemon juice, then sprinkle with cumin and red chili flakes. Give it a gentle toss until everything’s coated and shiny.
- Finally, season to your liking with kosher salt and black pepper. Taste and adjust — don’t be shy!
Cook’s Notes
Okay, a few things I’ve learned making this salad a million times. First, don’t skip toasting the walnuts. It deepens their flavor and adds that wow factor. The parsley is the foundation, so fresh and finely minced is key. And, if you find your salad is a bit too lemony, balance it with a tad more olive oil. Leftovers? They hold up well for a day but are best fresh. If making ahead, keep the dressing and chopped ingredients separate until just before serving to keep it crisp.
Make It Your Own
Here’s where the fun begins. This salad is a canvas waiting for your personal touch:
- Swap the walnuts for almonds or pistachios for a different nutty vibe.
- If you’re not into olives, try diced cucumbers for a fresh crunch.
- Replace red chili flakes with smoked paprika for a smoky warmth.
- Add a sprinkle of feta cheese for a creamy, tangy finish.
So there you have it, a delightful salad that’s both a sidekick and a star on its own. If you try this, I’d love to hear how it turns out — drop a comment or tag me! Enjoy the little escape this salad offers, even if life’s a bit chaotic.
Related update: Middle Eastern Chopped Salad