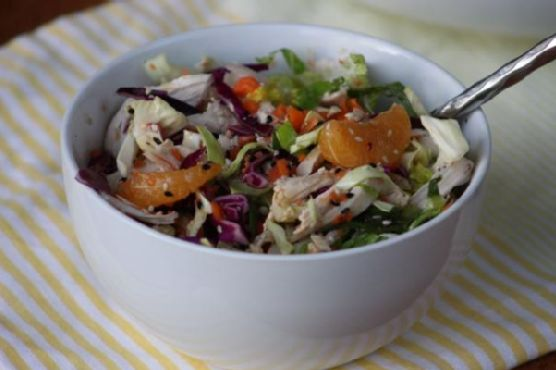
Picture this: it’s a chilly Tuesday evening, and I’m rummaging through my pantry, hoping to conjure up something light yet filling for dinner. The usual suspects—pasta, rice, potatoes—just weren’t cutting it. I craved something crunchy, vibrant, and tangy, but with one big catch: it had to fit in with my gluten-free, dairy-free, and sugar-free lifestyle. That’s when the idea struck! A Chinese Chicken Salad, but not just any salad—one packed with flavors, textures, and a zing that makes your taste buds do a happy dance. This salad is a savior for those nights when you need something quick to whip up yet impressive enough to make you feel like a gourmet chef. Plus, all you need is a handful of ingredients you probably already have lurking in your fridge and pantry. Trust me, this is not your average salad—it’s a celebration in a bowl!
Jump to Recipe
What You’ll Need
Chances are you already have most of this. Here’s what you’ll need to gather:
- Green cabbage
- Red cabbage
- Romaine lettuce hearts
- Scallions
- Carrots
- Fresh satsuma mandarins
- 1 mandarin (cut crosswise then tablespoon into jar over a strainer) (juice)
- Bone-in shredded chicken breasts, roasted
- Sesame oil
- Extra virgin olive oil
- Apple cider vinegar
- White sesame seeds
- Black sesame seeds
- Kosher salt
- Black pepper
- Xylitol
How to Make Gluten Free Dairy Free Sugar Free Chinese Chicken Salad
- Start by prepping the veggies. Finely slice the red and green cabbage and the romaine lettuce hearts. You want them to be thin and delicate, so they soak up all the dressing goodness.
- Trim the ends off the scallions, then finely slice both the white and green parts. This will add a lovely sharpness to the salad.
- Peel and grate the carrots. If you’ve got a mini food processor, throw them in there for a quick chop.
- Peel the satsuma mandarins, then carefully remove the pith from the slices. This step is key to ensure that you don’t get any bitter bites in your salad.
- In a large bowl, combine all your prepped veggies and the shredded chicken. Toss them together to mix it up nicely.
- For the dressing, whisk together the mandarin juice, sesame oil, apple cider vinegar, extra virgin olive oil, and a touch of xylitol for sweetness. Add a pinch of kosher salt and a crack of black pepper for seasoning.
- Drizzle the dressing over your salad and give it a thorough toss, ensuring every piece is coated beautifully.
- Sprinkle the white and black sesame seeds over the top for that perfect finishing touch.
Cook’s Notes
One thing I’ve learned with this salad is that the fresher your ingredients, the better it will taste. If you’re making it ahead of time, keep the dressing and the salad separate until you’re ready to serve; this will keep everything crunchy and fresh. Leftovers can be stored in an airtight container in the fridge for up to two days, but trust me, it’s so delicious it might not last that long! Common mistakes include over-dressing or not balancing the flavors, so taste as you go. If you’re not a fan of xylitol, feel free to adjust the sweetness with another sugar substitute of your choice.
Make It Your Own
- Swap the chicken for crispy tofu to make it vegetarian and just as satisfying.
- Use napa cabbage instead of romaine for a different take on texture.
- Add a sprinkle of roasted almonds for a nutty crunch.
- For a spicier kick, toss in some thinly sliced jalapeños.
If you try this, I’d love to hear how it turns out—drop a comment or tag me! This salad is a little bowl of joy that can brighten any day, and I can’t wait for you to experience it. Enjoy!
Related update: Gluten Free Dairy Free Sugar Free Chinese Chicken Salad
Related update: Middle Eastern Chopped Salad
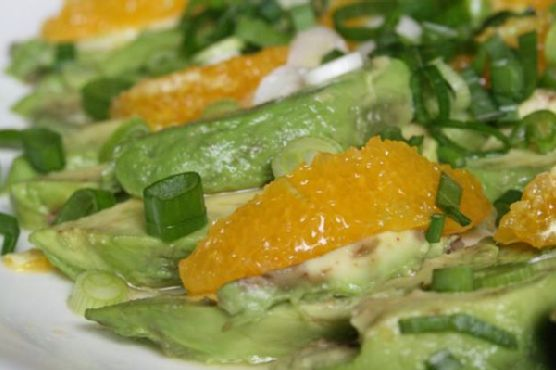
Imagine this: it’s midweek, and your brain is fried from a day full of emails and Zoom calls. You open the fridge, and there it is, an avocado teetering on the edge of overripeness and a couple of oranges sitting pretty but untouched. Suddenly, inspiration strikes—why not combine these beauties into a refreshing salad that screams “spring” without actually requiring a season change? This Avocado and Orange Salad, dressed with a zingy Orange-Ginger Dressing, is like a mini-vacation for your taste buds. It’s quick, colorful, and destined to make you fall in love with simple ingredients all over again. Jump to Recipe
What You’ll Need
The beauty of this ingredient list is how effortlessly it combines pantry staples with fresh produce to create something magical.
- Avocados – Perfectly ripe.
- Oranges – Sweet and juicy.
- Green onions – For a hint of sharpness.
- Orange juice – Freshly squeezed, for that extra punch.
- Lemon (juice) – To add a bit of zing.
- Fresh ginger paste – Trust me, it’s worth it.
- Agave syrup – For a touch of sweetness.
- Olive oil – Smooth and lush.
- Salt and pepper – To taste.
How to Make Avocado and Orange Salad With Orange-Ginger Dressing
- Begin by slicing your avocados and oranges. Let them overlap on a platter as if they’re chatting at a party.
- Don’t waste that orange carcass! Squeeze its juice over your arranged slices, letting it mingle and soften the edges of the avocado.
- Sprinkle green onions artfully over the top, like confetti, and add a pinch of salt to awaken those flavors.
- Cover the platter with cling film, tucking it into the fridge, so the salad chills out while you prepare the dressing.
- In a blender, combine orange juice, lemon juice, fresh ginger paste, agave syrup, and olive oil. Blend until the mixture is smooth and the ginger’s aroma wafts up deliciously.
- Season the dressing with salt and pepper, tasting it to find your perfect balance of sweet, spicy, and tangy.
- Just before serving, unveil your masterpiece from the fridge and drizzle the dressing generously over the salad.
Cook’s Notes
Here’s the lowdown on making this salad work like a charm:
- Make sure your avocados are ripe but firm enough to hold their shape when sliced.
- If you’re making this ahead, keep the dressing separate until just before serving to prevent the avocados from getting too mushy.
- Leftovers? Unlikely. But if you do have some, store them in an airtight container and consume within a day for best results.
- Be cautious with the salt. Remember, you can always add more, but you can’t take it out!
Make It Your Own
This salad is versatile enough to play with, so go ahead and shake things up:
- Swap the oranges for grapefruit slices if you’re after a slightly more tart flavor.
- Add some toasted almonds or walnuts for a crunchy contrast.
- For a spicy kick, sprinkle in some red pepper flakes to the dressing.
- Try a honey drizzle in place of agave if that’s more your style.
If you try this, I’d love to hear how it turns out—drop a comment or tag me! There’s nothing better than seeing your creations light up someone else’s table. Happy cooking!
Related update: Gluten Free Dairy Free Sugar Free Chinese Chicken Salad
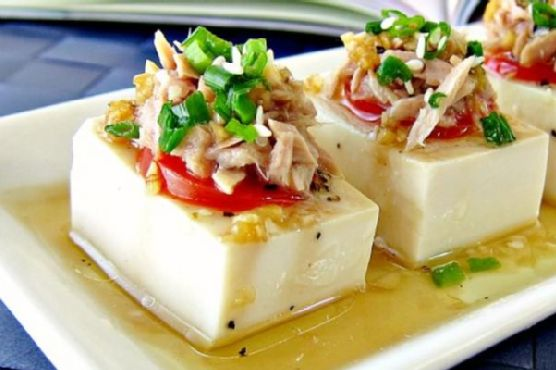
So there I was, staring into my fridge on a Wednesday night, contemplating the sad assortment of leftovers and a few random ingredients when inspiration struck. It was one of those evenings where cooking seemed more like a Herculean task than a simple pleasure, and I just needed something refreshing yet satisfying. Enter my Tuna and Tofu Cold Dish. This dish is like a cool breeze on a hot day—simple, refreshing, and oh-so-satisfying. It’s the perfect quick fix when you’re juggling work, life, and everything in between. Plus, it’s surprisingly elegant for how little effort it takes. Trust me, this one’s a keeper for those nights when you want to pretend you’re at a fancy restaurant without changing out of your pajamas.
Jump to Recipe
What You’ll Need
This is a no-fuss, ingredient-light dish. Chances are you already have most of this in your kitchen, just waiting to be transformed into something delicious.
- A block of silken tofu
- A can of tuna in water, drained
- White diced cherry tomatoes
- A dash of white pepper
- A pinch of salt
- A splash of extra virgin olive oil
- A few drops of vinegar
- Light Kikkoman soy sauce
- A clove of garlic, minced
- Freshly cracked black pepper
How to Make Tuna and Tofu Cold Dish
- Start by cutting your block of silken tofu into small, bite-sized blocks. Be gentle here—silken tofu is as fragile as my willpower at a dessert buffet!
- Open the can of tuna and drain it well. Once drained, place the tuna in a bowl and gently squash it with a fork. Mix in a dash of white pepper and a pinch of salt to bring out its flavor.
- Take your cherry tomatoes and slice them thinly. The goal is to get them to release their sweet and tangy juices.
- On a serving plate, carefully place the tofu blocks. Top them with your sliced cherry tomatoes and then the seasoned tuna.
- For the sauce, mix together a good splash of extra virgin olive oil, a few drops of vinegar, and a dash of light Kikkoman soy sauce. Add the minced garlic and freshly cracked black pepper.
- Drizzle this fragrant sauce over your tofu, tuna, and tomatoes.
- Finish by sprinkling with toasted sesame seeds and diced spring onion for that extra pop of flavor and crunch. Serve immediately and enjoy the calm in a chaotic weeknight!
Cook’s Notes
This dish is a lifesaver on busy nights. It’s all about the balance of textures and flavors—the creamy tofu, the robust tuna, and the crunchy veggies. Once assembled, it’s best eaten right away to enjoy the freshness of the ingredients. If you want to prep ahead, mix the sauce earlier in the day and keep it in the fridge. Just wait to dress the dish until you’re ready to serve, or the tofu might get over-marinated and lose its delicate texture.
Make It Your Own
- Swap the tuna for crispy tofu if you’re going plant-based. Just pan-fry tofu cubes until golden for a delightful contrast.
- Try adding sliced avocado for a creamy twist. It pairs beautifully with the tofu and tuna.
- For a spicy kick, mix a bit of Sriracha into the sauce. It’ll add warmth and complexity without overpowering the dish.
- Switch up the herbs by adding fresh cilantro or basil instead of spring onion for a different flavor profile.
If you try this, I’d love to hear how it turns out—drop a comment or tag me! Your feedback makes this kitchen adventure all the more fun. Bon appétit, my fellow food explorers!
Related update: Tuna and Tofu Cold Dish
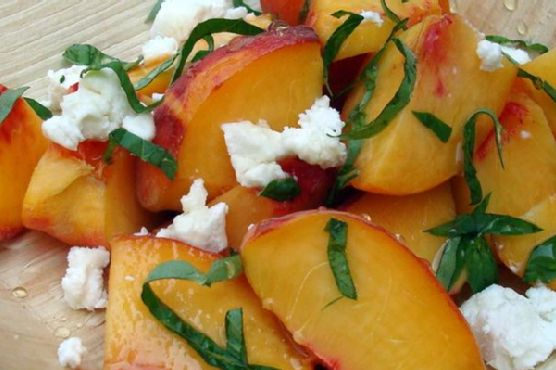
It was one of those sticky summer afternoons, the kind where even the shade feels warm and inviting. I had a couple of peaches lounging on the counter, looking like they might start a protest if not eaten soon. That’s when inspiration struck! I wanted something refreshing but also satisfying, and that’s how this Fresh Peach With Goat Cheese Side Salad came to life. It’s such a delightful surprise: juicy peaches balanced by creamy goat cheese, accented with fragrant basil and a hint of honey sweetness. Plus, it only takes a few minutes to whip up, making it perfect for a spontaneous lunch or a quick dinner side.
Jump to Recipe
What You’ll Need
I bet you have most of these hanging around your kitchen. Here’s what you need for this bite of sunshine:
- 4 ripe peaches – the juicier, the better
- 1 tablespoon of honey – for that sweet, sticky goodness
- Pinch of salt – to make all the flavors sing
- 1/2 cup of crumbled goat cheese – creamy and tangy
- A handful of fresh basil leaves – torn for maximum aroma
How to Make Fresh Peach With Goat Cheese Side Salad
- Halve and pit the peaches, then slice them into wedges. Place these sun-drenched beauties into a large mixing bowl.
- Drizzle the honey over the peach slices. Use your hands to gently toss them until they’re evenly coated. Feel free to sneak a taste here; it’s irresistible!
- Sprinkle a pinch of salt over the honeyed peaches. This simple move really brightens up the flavors, trust me.
- Now for the aromatic part: gently fold in the torn basil leaves. The smell is going to be like a mini vacation.
- Finally, crumble the goat cheese over the top and give it one last gentle toss. The cheese should cling lovingly to the peaches.
Cook’s Notes
Here’s a little secret: no need to be too precise with this salad. It’s all about the balance of sweet and tangy meeting fresh and creamy. If you don’t have ripe peaches, you might need a bit more honey to bring out their sweetness. This salad doesn’t keep well, so aim to enjoy it right away. But if you have leftovers, they’ll still be tasty for a day if stored in the fridge — just expect the basil to do a little wilting dance.
Make It Your Own
Looking to customize this salad? Here are some fun tweaks:
- Swap the peaches for nectarines or even grilled apricots for a smoky twist.
- Try using a soft blue cheese instead of goat cheese if you’re feeling adventurous.
- For a nutty crunch, add a handful of toasted pistachios or sliced almonds.
- If basil isn’t your thing, mint leaves could bring a refreshing coolness instead.
If you try this, I’d love to hear how it turns out — drop a comment or tag me! I hope this salad brings a burst of sunshine to your table as it did mine. Enjoy every juicy, creamy bite!
Related update: Fresh Peach With Goat Cheese Side Salad
Related update: Roasted Brussels Sprouts With Red Onions and Pancetta
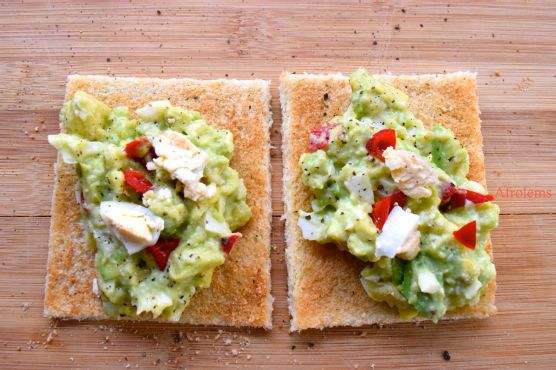
There’s something about a Saturday morning when I’m craving something simple yet satisfying, and this avocado egg salad hits just the right spot. Last week, I found myself staring into the fridge, half-awake and in dire need of coffee, when I realized I had everything I needed for a quick, hearty brunch. This recipe is a lifesaver for lazy mornings or when you just need something nourishing but don’t want to spend an hour in the kitchen. With creamy avocado and the perfect hint of spice from the scotch bonnet pepper, it’s a fresh take on a classic. Plus, you can have it ready in under 30 minutes. Trust me, you’ll want to keep coming back to this one.
Jump to Recipe
What You’ll Need
Chances are you already have most of this in your pantry or fridge, making it a breeze to whip up without a grocery run.
- 4 large eggs
- 1 ripe avocado pear
- 1 lemon
- 1/2 teaspoon black pepper
- 1 small seasoning cube
- 1 small scotch bonnet pepper
- 4 slices of whole wheat bread
How to Make Avocado Egg Salad
- Boil your eggs in a pot of water for about 10 minutes until they’re hard-boiled. Once cooked, immerse them in cold water to cool. This makes peeling a breeze.
- While the eggs cool, peel your avocado and mash it in a large bowl until smooth but with a few chunks for texture.
- Cut your lemon in half and squirt the juice over the mashed avocado. This keeps it from browning and adds a nice tangy kick.
- Once the eggs are cool, peel and chop them into bite-sized pieces, then add them to the avocado mixture.
- In a small bowl, mix the black pepper, crumbled seasoning cube, and finely chopped scotch bonnet pepper. Adjust pepper to taste if you’re not into too much heat.
- Add the spice mixture to your avocado and egg and gently combine until everything is well mixed.
- Toast your whole wheat bread until crisp and golden. The aroma alone will make your mouth water.
- Roll over the toasted bread with a rolling pin, cut the edges off for a neat presentation, and serve with a generous helping of the avocado egg salad on top.
Cook’s Notes
Here are a few nuggets of wisdom to keep in mind while making this dish:
- If your avocados are slightly underripe, you can microwave them for 30 seconds to soften.
- Scotch bonnet peppers pack a punch, so handle them carefully if you’re not a heat enthusiast. You can always start with half and add more to taste.
- This salad can be made a few hours ahead of time. Just cover it tightly with plastic wrap to keep the avocado from browning.
- Leftovers can be stored in an airtight container in the fridge for a day, although it’s best enjoyed fresh.
Make It Your Own
- Swap the whole wheat bread for a crusty baguette or sourdough for a different texture.
- Replace the scotch bonnet with jalapeños if you prefer a milder heat.
- Add a handful of cherry tomatoes, halved, for a burst of freshness.
- Mix in a spoonful of Greek yogurt for a creamier texture and a hint of tang.
If you try this, I’d love to hear how it turns out — drop a comment or tag me! Enjoy your meal, and remember, the best recipes are those you make your own.
Related update: Avocado Egg Salad
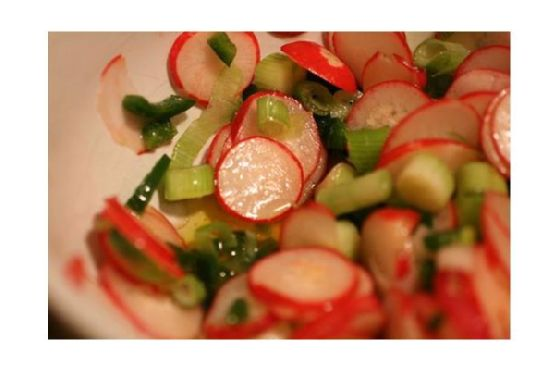
Picture this: it’s midweek, and I’ve just wrapped up a marathon day of work calls and last-minute errands. The fridge is looking a bit sparse, and my energy levels are even lower. I need something quick and bright to lift my spirits and keep me from calling for takeout. Enter my Radish and Watercress Salad. This dish is like a little burst of sunshine — crisp, peppery, and so darn easy to throw together that it almost feels like cheating. It’s the kind of salad that makes you feel like you’ve got your life together, even when you really don’t. It’s refreshing and light, yet robust in flavor, making it the perfect pick-me-up any day of the week.
Jump to Recipe
What You’ll Need
This recipe is all about fresh, vibrant flavors, and chances are, you’ve got most of these ingredients hanging around already. Here’s what you’ll need:
- Salt
- Garlic powder
- Dijon mustard — the kickstarter of flavor here
- Red wine vinegar — for that tangy bite
- Olive oil
- Lemon juice
- Watercress — peppery and fresh, the star of the salad
- Red radishes — crisp and colorful
How to Make Radish and Watercress Salad
- In a screw-top jar, combine a pinch of salt and a sprinkle of garlic powder. Add in the Dijon mustard, red wine vinegar, olive oil, and a dash of lemon juice. Secure the lid and give it a vigorous shake until everything is well blended and the dressing looks smooth and slightly thickened.
- Rinse the watercress thoroughly under cool, running water. Pat it dry with a clean kitchen towel or paper towels — no one likes a soggy salad, right?
- Thinly slice the red radishes. You want them to be thin enough to be translucent but still have a good crunch.
- In a large salad bowl, toss the watercress and sliced radishes together. Pour your freshly shaken dressing over the top, and toss again gently until everything is evenly coated.
Cook’s Notes
This salad is as straightforward as it gets, but a few tips can make it even better. When shaking the dressing, make sure the jar is sealed tight, or you’ll end up with a vinegar-scented kitchen. If you’re making this ahead, keep the dressing and salad separate until just before serving to prevent the greens from wilting. Leftovers can be stored in the fridge for a day, but honestly, this salad is best enjoyed fresh. The peppery bite of the watercress and the crunch of the radishes are what make it sing.
Make It Your Own
- Swap the watercress for arugula if you want a slightly milder peppery flavor.
- Add sliced almonds or walnuts for some extra crunch and protein.
- Throw in some crumbled feta or goat cheese for a creamy contrast.
- Mix in some thinly sliced cucumbers or avocados for additional freshness and creaminess.
If you try this, I’d love to hear how it turns out — drop a comment or tag me! Your midweek dinner game is about to get a whole lot brighter and a little bit fancier. Happy cooking!
Related update: Radish and Watercress Salad
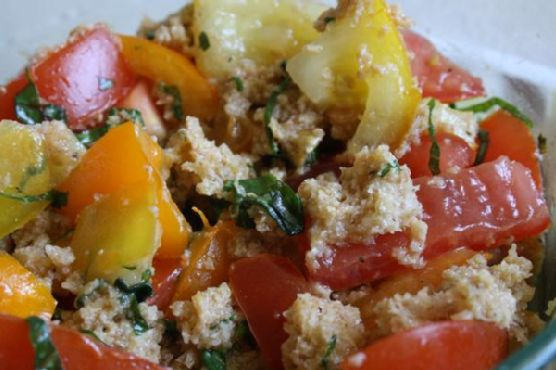
Picture this: It’s the kind of sweltering summer day where the thought of turning on the oven makes you break into a sweat. My garden was overgrown with tomatoes begging to be picked, and the loaf of Tuscan bread on the counter was a day away from becoming an even more petrified artifact of the kitchen. That’s when I remembered the glory of Panzanella. This Tuscan bread salad is not only a perfect way to beat the heat, but it’s also a deliciously resourceful way to use up what you might already have at home. The magic of it lies in its simplicity: juicy tomatoes, aromatic basil, and chewy-crunchy bread brought to life with a glug of olive oil and a tangy splash of vinegar. It’s a dish that’s as comforting as it is impressive, and trust me, the flavors are anything but humble.
Jump to Recipe
What You’ll Need
The beauty of Panzanella is its simplicity. Chances are you already have most of these ingredients cozying up in your kitchen:
- Six slices of day-old Tuscan bread
- Extra virgin olive oil
- Fresh basil leaves
- Red onion
- Red wine vinegar
- Salt and pepper
- Tomatoes (as ripe as you can find, trust me!)
How to Make Traditional Panzanella
- First up, grab a large bowl and submerge your day-old bread in water. Let it lounge in its little pool for about 20 minutes. You’re aiming for soft, but not soggy.
- Once soaked, drain the bread and give it a good squeeze to get rid of all that water. Crumble the bread into a serving bowl; think large, rustic chunks rather than breadcrumbs.
- Now, scatter your chopped tomatoes, thinly sliced red onion, and fragrant basil leaves over the bread. The colors should already be making you smile.
- Dress the salad with a generous drizzle of extra virgin olive oil and a splash of red wine vinegar. Salt and pepper to taste, then toss everything together like you’re giving it a gentle hug.
- Give it a taste and adjust with more oil, salt, or vinegar as your taste buds demand. Let the Panzanella sit for 15 minutes to let the flavors mingle and serve it up at room temperature.
Cook’s Notes
So here’s the deal: Panzanella is all about that bread absorbing the tomato juices and dressing. Use the sturdiest day-old bread you can find for the best texture—soggy bread is a no-go. If you can, make this a bit ahead of time; the flavors only get better as they sit together. Store any leftovers in the fridge, but honestly, Panzanella is best on the day it’s made. If you need to refresh it the next day, add a bit more olive oil and vinegar to bring it back to life.
Make It Your Own
Here are a few ideas to switch things up while still keeping that classic Panzanella vibe:
- Swap the red onion for thinly sliced shallots for a milder flavor.
- Add cucumbers for extra crunch and freshness.
- Throw in some capers for a briny kick that plays nicely with the tomatoes.
- For a bit of protein, toss in some creamy mozzarella balls or crispy tofu.
If you try this, I’d love to hear how it turns out — drop a comment or tag me! Your kitchen stories make my day. Here’s to celebrating simple ingredients and the joy of letting them shine.
Related update: Traditional Panzanella
Related update: Radish and Watercress Salad
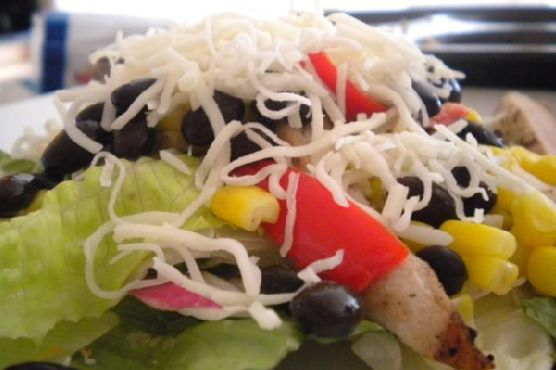
Picture this: It’s midweek, and you’re staring into the abyss of your fridge, seeking inspiration for dinner. We’ve all been there, and that’s precisely how this Garlic Lime Grilled Chicken Salad came to life in my kitchen. It’s that perfect holistic mix of tangy, zesty, and fresh that turns a mundane weeknight into a mini feast. The best part? It’s simple yet impressive enough to make you feel like a culinary genius without breaking a sweat. It’s brightened by the citrusy marinade and packed with vibrant, savory flavors that are sure to elevate your salad game. Plus, it’s a great excuse to fire up the grill! So, if you’re looking for a vibrant, flavor-packed dinner that’s also healthy, this one’s for you. Jump to Recipe
What You’ll Need
Chances are you already have most of these in your pantry or fridge, making this dish delightfully low-fuss. Here’s the lineup:
- Chicken breast
- Limes
- Garlic
- Olive oil
- Cooked refrigerated black beans
- Black pepper
- Cilantro
- Cumin
- Frozen corn
- Kosher salt
- Shredded Mexican cheese
- Onions
- Orange
- Oregano
- Red peppers
- Romaine lettuce
- Vinegar
How to Make Garlic Lime Grilled Chicken Salad
- In a small bowl, mix 1/4 cup of fresh orange juice and 1/4 cup of fresh lime juice with olive oil, a sprinkle of cumin, a dash of oregano, a generous pinch of kosher salt, and minced garlic. Trust me, the aroma is divine!
- Pour half of this citrusy concoction over the chicken breasts, ensuring they get a good soak. Save the rest of the marinade for later. Let those flavors mingle for at least an hour—two if you have the time.
- Prepare your grill and heat it up to a sizzling 425°F. Once hot, sear the marinated chicken on both sides, about 12 minutes, or until you see those lovely grill marks.
- Lower the heat to 350°F and let the chicken cook through for another 7-10 minutes. You’re aiming for juicy, not dry!
- Slice up the red peppers into thin strips and give them a quick grill for about 2-3 minutes, so they’re tender but still have a bit of crunch.
- Warm up the frozen corn—nothing fancy here, just make sure it’s warm to the touch.
- Transform the leftover marinade into a vinaigrette by whisking in 1-2 tablespoons of vinegar. This will be your salad’s secret weapon.
- Start your salad assembly: Start with a bed of fresh romaine lettuce, layer on the grilled chicken, sprinkle with black beans, grilled red peppers, cheese, and a drizzle of your vinaigrette. Voilà!
Cook’s Notes
Here’s the scoop: Marinating is key. The longer you let the chicken hang out in that zingy bath, the better. If you’re in a hurry, even 30 minutes can work. Don’t rush the grill time; those grill marks are where the magic happens, giving that smoky, irresistible taste.
Store any extras in separate containers, if possible, to avoid soggy lettuce—nobody likes a wilted salad! This dish holds up beautifully in the fridge for up to three days, so it’s perfect for meal prep, too.
Make It Your Own
- Swap the chicken for crispy tofu to make it vegetarian-friendly. Just press and marinate the tofu the same way you would the chicken.
- Add some diced avocado for creamy goodness that pairs perfectly with the citrusy zing.
- Not a fan of romaine? Spinach or arugula would be fantastic substitutes, bringing their unique flavors to the table.
- Craving extra crunch? Toss in a handful of tortilla strips or crushed tortilla chips right before serving.
If you try this, I’d love to hear how it turns out—drop a comment or tag me! Whether it’s a weeknight or a weekend grill-out, this salad is a surefire way to brighten up your dinner table. Enjoy!
Related update: Garlic Lime Grilled Chicken Salad
Related update: Swiss Chard Wraps
Related update: Traditional Panzanella
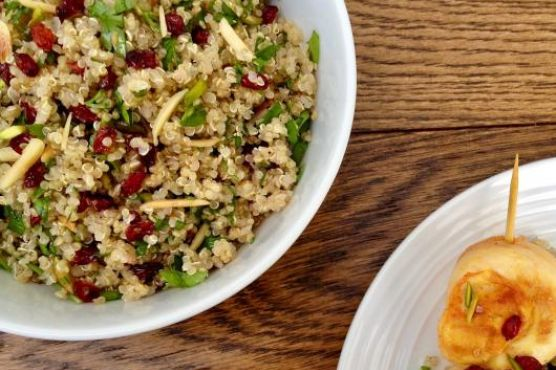
On a chilly Tuesday evening, I found myself rummaging through my pantry, desperate for something that felt like a hug in a bowl but wouldn’t keep me hostage in the kitchen. I wanted something earthy yet vibrant, complex but not fussy. That’s when a bag of quinoa caught my eye, nestled behind a family of lentils. With a little inspiration from the tangy barberries I’d recently discovered at the market and a stash of nuts that begged to be toasted to life, this Quinoa Salad with Barberries & Nuts was born. It’s the kind of dish that fills the kitchen with warm, toasty aromas and feels fancy enough to impress, but is simple enough to whip up on a weeknight.
Jump to Recipe
What You’ll Need
There’s a good chance you already have most of these ingredients hanging around, just waiting for a chance to shine. Here’s what you’ll gather:
- Quinoa – the blank canvas for all the flavor.
- Water – to cook the quinoa to fluffy perfection.
- Salt – always the unsung hero.
- Olive oil – for toasting and dressing.
- Barberries – those tangy pops of flavor.
- Slivered almonds – for that nutty crunch.
- Slivered pistachios – because why not double down on nuts?
- Coriander – a fresh, herby kick.
- Mint – because everything deserves a little minty brightness.
How to Make Quinoa Salad with Barberries & Nuts
- Start by rinsing the quinoa under cool running water using a sieve. This little bath removes any bitterness. Once rinsed, drain thoroughly.
- In a medium saucepan, pour boiling water over the quinoa. Add a generous pinch of salt, stir, and cook over medium-low heat. You’re looking for the quinoa to be tender yet retain a slight bite. Drain again in a sieve if needed.
- While the quinoa is doing its thing, turn your attention to the barberries. Pick them over, rinse them clean in a sieve, and let them dry a bit on some kitchen paper.
- In another saucepan, heat 1 tablespoon of olive oil over medium heat. Toss in the slivered almonds and toast them lightly. When they’re golden and fragrant, add the pistachios. Keep an eye on them; nuts can burn quickly!
- Add the rest of the olive oil and the rinsed barberries to the pan with the nuts. Cook briefly until the barberries are shiny and slightly puffed. Remove from heat.
- Save a tablespoon of the nut and barberry mixture for garnish later. Combine the remaining nut-barberry mixture with the cooked quinoa along with the chopped coriander and mint.
- Return the quinoa mixture to the pot. Cover with a lid and let it sit over low heat for about ten minutes until everything is well heated and steam is rising. The aroma will make it hard to wait!
- Fluff the quinoa with a fork, drizzle a little extra olive oil, give it a twist of black pepper if you’re feeling it, and then sprinkle over the reserved nut-barberry mix and herbs.
- Serve this beauty as a star on its own or let it play the perfect sidekick to any main dish.
Cook’s Notes
I won’t lie, this dish is forgiving. Quinoa can be prepped a day ahead and kept in the fridge, making this a great make-ahead option. If you end up with leftovers (lucky you!), it holds up well in the fridge for up to 3 days. Just give it a gentle reheat on the stove or enjoy it cold—it’s pretty versatile. Be mindful when toasting the nuts; they love to go from golden to charred in a heartbeat.
Make It Your Own
- Swap the barberries for dried cranberries if they’re more readily available. The sweetness will complement the nuts beautifully.
- Not a fan of pistachios? Use toasted hazelnuts instead for an equally delicious crunch.
- For a protein boost, toss in some shredded cooked chicken or crispy tofu cubes.
- If coriander and mint aren’t your jam, try parsley and basil for a different herby note.
If you try this, I’d love to hear how it turns out—drop a comment or tag me on social media! It’s always a joy to see your creations and hear your twists on the recipe. Enjoy the journey from pantry to plate!
Related update: Quinoa Salad with Barberries & Nuts
Related update: Garlic Lime Grilled Chicken Salad
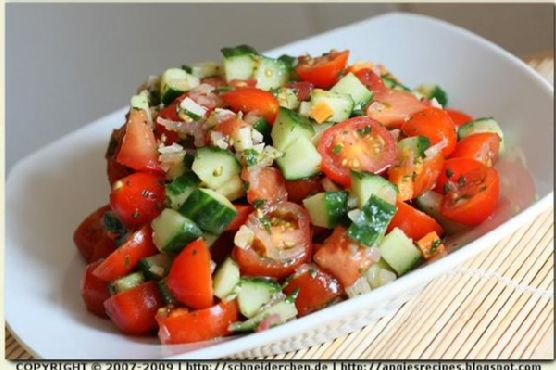
It was one of those hectic Tuesday evenings, you know the kind where the laundry is beckoning, emails are piling up, and yet your stomach still somehow wants to be fed. There I was, standing in front of my refrigerator, hoping for some culinary inspiration to jump out and save me from splurging on takeout for the third night in a row. My eyes landed on that lonely basket of cherry tomatoes and a half-used cucumber. Suddenly, a memory of a zesty Tomato Cucumber Salad from a sunlit café popped into my head. The beauty of this dish is its simplicity and the fact that it’s much more than the sum of its parts: refreshing yet satisfying, quick yet elegantly reminiscent of summer picnics. It’s the kind of dish that comes together with a handful of pantry staples, a little bit of chopping, and a splash of creativity. Easy enough to whip up in under 30 minutes, and impressive enough to make you feel like a culinary genius.
Jump to Recipe
What You’ll Need
This Tomato Cucumber Salad is all about letting simple ingredients shine. Chances are you already have most of this hanging around in your kitchen.
- Cherry tomatoes – the sweeter, the better!
- Diced cucumber – refreshing crunch is a must.
- Sliced garlic
- Lemon juice
- Olive oil – go for the good stuff if you can.
- Black salt and pepper
- Shallot – for a hint of sweet oniony goodness.
- Fresh parsley
How to Make Tomato Cucumber Salad
- Start by heating a splash of olive oil in a skillet over medium heat. When the oil shimmers, toss in the chopped shallot and sliced garlic. Stir-fry gently, keeping an eye out for a lightly golden hue. The kitchen should start smelling divine right about now.
- Remove the skillet from the heat and introduce a bright splash of lemon juice to the mix. The sizzle will tell you the dressing is coming together beautifully. Season with a sprinkle of black salt and a few cracks of pepper to taste.
- As the dressing takes a moment to cool, cut your cherry tomatoes into halves and dice the cucumber into cheerful 1cm cubes. Toss them both into a salad bowl, ready to soak up all the goodness.
- Pour the warm dressing over the tomato and cucumber combo, and toss gently. The fresh parsley should be added last, offering a vibrant pop of color and flavor.
- Cover the bowl and let the salad chill in the fridge for about an hour. This helps the flavors to meld into a harmonious chorus of tangy, sweet, and savory.
Cook’s Notes
This salad is as forgiving as it is delicious. If you’re running short on time, you can skip the chilling, but letting it sit in the fridge does wonders for flavor mingling. If you’ve got leftovers, they’ll keep in an airtight container in the fridge for a day or two, though the tomatoes may soften slightly. Avoid over-stirring after refrigeration if you prefer your salad to stay crisp.
Make It Your Own
- Swap the cucumber for crisp, thinly sliced fennel for an aromatic twist.
- Add a handful of crumbled feta for a creamy contrast.
- Throw in some roasted chickpeas for extra protein and crunch.
- Use fresh basil leaves instead of parsley for a fragrant, pesto-esque vibe.
If you try this, I’d love to hear how it turns out — drop a comment or tag me! This salad is a little taste of sunshine on your plate, and I hope it brings a bright spot to your day, just like it did for mine. Enjoy!
Related update: Tomato Cucumber Salad
Related update: Quinoa Salad with Barberries & Nuts
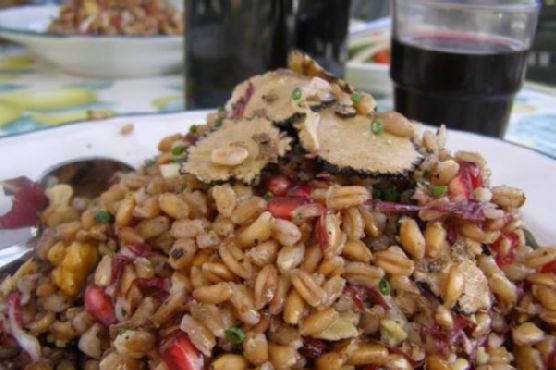
Picture this: It’s a chilly autumn afternoon, and the sun is giving off that perfect golden hue that makes everything look like a scene from a cozy movie. I’m in my kitchen, wearing my favorite oversized sweater, and I’ve got a craving for something that’s nourishing but still feels like a treat. Enter my Fall Farro Salad with Pomegranate, Walnut & Truffles. This dish is like a warm hug in a bowl, combining nutty farro with the sweet burst of pomegranate seeds, the earthy depth of truffles, and the crunch of walnuts. It’s quick to put together yet tastes like you’ve been working on it for hours. Trust me, this is the kind of recipe that’ll make you feel like a culinary genius with minimal effort, perfect for a weeknight dinner or impressing friends over a weekend brunch.
Jump to Recipe
What You’ll Need
Most of these ingredients are pantry staples, so you might already find them hanging out in your kitchen. Here’s what you need:
- 1 cup farro
- 2 tablespoons extra virgin olive oil
- 1/2 cup pomegranate seeds
- 1/2 cup walnuts, roughly chopped
- 1/2 head radicchio, thinly sliced
- 1/4 cup parmesan, shaved into ribbons
- 2 teaspoons truffle oil
- 1 tablespoon balsamic vinegar
- Salt and pepper, to taste
How to Make Fall Farro Salad with Pomegranate, Walnut & Truffles
- Start by cooking the farro. Bring a pot of cold water to a boil, and don’t forget a pinch of salt. Toss in the farro and let it cook until it’s al dente—about 20-35 minutes. You can throw in some vegetable scraps like a carrot or celery if you have them, for added flavor.
- While the farro is cooking, toast the walnuts in a dry pan over medium heat. Keep an eye on them and stir occasionally, until they are golden and fragrant. This should take about 5-7 minutes.
- In a large bowl, whisk together the extra virgin olive oil, balsamic vinegar, truffle oil, salt, and pepper. This dressing will bring everything together with a luxurious, earthy flavor.
- Once the farro is cooked, drain it and let it cool slightly. You want it warm but not piping hot.
- Add the farro to the bowl with the dressing, and toss until the grains are well coated.
- Gently fold in the radicchio, pomegranate seeds, and toasted walnuts. The radicchio should soften slightly but remain crisp.
- Finish by shaving parmesan over the top. A vegetable peeler works wonders here for creating beautiful, thin ribbons.
- Give it a final toss, taste, and tweak any seasoning if needed. Serve immediately and enjoy the medley of textures and flavors!
Cook’s Notes
Let’s chat about farro for a second. It’s an ancient grain, so it’s a bit chewy and wonderfully nutty, perfect for absorbing all the dressing goodness. Don’t skimp on toasting your walnuts; it makes a world of difference in flavor. Also, this salad is best enjoyed fresh, but if you do have leftovers, they’ll keep in the fridge for a day or two. Just know that the radicchio might lose some of its crispness.
Make It Your Own
Feel free to remix this salad with these variations:
- Swap the farro for quinoa if you’re looking for a gluten-free option.
- Substitute walnuts with pecans or almonds for a different nutty dimension.
- Try adding grilled chicken or crispy tofu for extra protein.
- Love cheese? Crumbled goat cheese can replace parmesan for a tangier kick.
If you try this, I’d love to hear how it turns out — drop a comment or tag me! Cooking is all about experimenting and finding what makes your taste buds sing, so have fun with it.
Related update: Fall Farro Salad with Pomegranate, Walnut & Truffles
Related update: Tomato Cucumber Salad