On a chilly Tuesday evening last fall, I found myself craving something that would warm both my kitchen and my soul. The weather outside was doing that indecisive dance between autumn and winter, and I needed more than just a hot cup of tea to satisfy my hunger. Enter: Paella. This Spanish mixed seafood stew is my go-to for those nights when I want to feel like I’m treating myself to something special without the fuss of a complicated recipe. The beauty of this dish lies in its simplicity—using a single pan to create layers of flavor that taste like you’ve been cooking all day, even though it’s ready in about an hour. Paella takes what could be an ordinary weeknight and turns it into a culinary adventure. Trust me, you’re going to want to keep this one in your recipe rotation.
Jump to Recipe
What You’ll Need
Chances are you already have most of these ingredients lounging in your pantry or fridge. But it’s the combination of a few key players that really make this dish sing.
- Smoky paprika
- Dried oregano
- Kosher salt
- Black pepper
- Chicken wings
- Littleneck clams
- Solid chorizo sausage
- Shrimp
- Extra virgin olive oil
- White diced onion
- Diced garlic
- Italian parsley leaves
- Whole .5 oz tomatoes
- Canned Spanish short grain rice
- Water
- Saffron
- Salt and pepper
- Green peas
- Lemon wedges
How to Make Paella for Four; A Wonderful Spanish Mixed Seafood Stew
- First, let’s make our spice mix. Combine smoky paprika, dried oregano, kosher salt, and black pepper in a small bowl. Rub this all over the chicken wings, then pop them in the fridge for an hour to let those flavors sink in.
- As your chicken’s marinating, let’s prep the other ingredients. Slice your chorizo sausage into rounds and get your seafood ready. Let the chicken sit out for 30 minutes before you start cooking to take the chill off.
- Grab a 12-inch All-Clad stainless steel pan (or whatever large pan you have) and heat half of the olive oil over medium-high heat. Brown the chorizo rounds until they’re golden and fragrant, then take them out and set them aside.
- In the same pan, add the remaining oil. Toss in the chicken wings and brown them on all sides. Remove the chicken from the pan and keep it aside with the sausage.
- Now, reduce the heat to medium and add diced onions, garlic, and parsley to the pan. Stir it around for 2 to 3 minutes until the aroma fills your kitchen. Add crushed and drained tomatoes, cooking for about 3 minutes to let the flavors meld. This is your sofrito!
- Pour in the canned Spanish short-grain rice and stir, coating every grain with the delicious sofrito. This should take about 2 minutes.
- Return the browned chorizo and chicken to the pan. Pour in hot water, bring everything to a gentle simmer, and let it all cook for about 5 minutes, stirring occasionally to make sure everything is evenly distributed.
- Place the littleneck clams strategically wherever you’d like them to shine in the finished dish. No more stirring from this point on!
- After 5 minutes, nestle the shrimp in the pan, tails up, because presentation matters. Let it all cook for about 10 minutes or until the clams have opened, the shrimp have turned a lovely pink, and the rice is fluffy and just moist enough.
- For the pièce de résistance, check for the socarrat. With a fork, feel the bottom of your dish. If it hasn’t formed yet, turn the heat up for 30 to 45 seconds until you get that perfect crispy layer. Serve immediately and enjoy your masterpiece!
Cook’s Notes
Cooking paella is more art than science, so don’t worry if it doesn’t look perfect. The key to a good paella is not to stir it once you’ve added the clams to allow that beautiful socarrat crust to form. If you’re new to saffron, go easy on it—too much can overpower the dish. Leftovers? Store them in an airtight container and they’ll last up to two days in the fridge. When reheating, do it gently on the stove with a splash of water to bring it back to life.
Make It Your Own
- Swap the chicken wings for crispy skin-on chicken thighs for a richer flavor.
- If clams aren’t your thing, mussels make an excellent alternative.
- Vegetarian? Skip the seafood and add in some grilled bell peppers and artichokes for a hearty twist.
- For a spicier kick, add a pinch of red chili flakes when you brown the chorizo.
If you try this, I’d love to hear how it turns out—drop a comment or tag me! Whether it becomes a weeknight staple or a weekend treat, I hope this paella brings a bit of Spanish sunshine into your home. Enjoy!
Goes Well With
If you want to round out the meal, here’s what I’d pair it with over on meaghanmoineau.com:
Related update: Paella for Four; A Wonderful Spanish Mixed Seafood Stew
Related update: No Fuss Sunday Slow-Cooker Balsamic Pot Roast

So, there I was, staring at a slightly wilted eggplant in my fridge, contemplating how it had survived my week-long quest of ordering takeout. The poor thing had been neglected, and I felt that familiar culinary guilt creeping up. But then, inspiration struck — a crispy-on-the-outside, creamy-on-the-inside snack could be the redemption both I and the eggplant needed. Enter: Eggplant Fries with Tzatziki Sauce. This recipe is perfect for those gotta-have-a-snack moments and gives you major chef vibes while being secretly simple. Trust me, these fries are addictive, and the tangy tzatziki? A match made in snacking heaven.
Jump to Recipe
What You’ll Need
The beauty of this recipe? The ingredient list is a delightful mix of pantry staples and a few fresh bits. Chances are, you already have most of these lounging in your kitchen.
- 2 medium eggplants
- 1 cup bread crumbs
- 1 tablespoon Italian seasoning mix
- 1/2 teaspoon salt
- 1/2 teaspoon garlic powder
- 1/2 teaspoon paprika
- 1 cup low-fat plain yogurt
- 1 egg
How to Make Eggplant Fries with Tzatziki Sauce
- Preheat your oven to 450°F. As it warms up, your kitchen will turn into a cozy haven, with the anticipation of crispy delights in the air.
- Grab a bowl and combine the salt, garlic powder, Italian seasoning, and paprika. This is the flavor powerhouse that’ll make your eggplant irresistible.
- In a separate bowl, whisk together the yogurt and egg until smooth. This mixture is the secret to getting that perfect golden crust.
- Slice the eggplants into fry-like strips. Aim for consistency in size so they cook evenly. Think about the perfect fry you’d happily dip into ketchup!
- Dip each eggplant strip into the yogurt mixture, letting any excess drip off, then roll it in the bread crumb mixture. Ensure it’s coated evenly, like giving it a snug little bread crumb blanket.
- Place the coated strips on a baking pan lined with parchment paper or lightly greased. Don’t crowd them; they need their personal space to crisp up nicely.
- Bake for 10-15 minutes, rotating once to ensure even browning. You’re looking for slightly brown edges and a crispy exterior.
- While the fries bake, whip up a quick tzatziki sauce if you’re feeling fancy: Mix more yogurt with chopped cucumber, a squeeze of lemon, and a dash of salt.
Cook’s Notes
- When choosing your eggplants, go for ones that feel heavy for their size and have a smooth, glossy skin. These are signs of freshness.
- If your bread crumbs are on the coarse side, giving them a quick blitz in the food processor can help them adhere better to the eggplant.
- Store leftovers in an airtight container in the fridge. They’ll lose a bit of their crispness, but a quick reheat in the oven will revive them nicely.
- These fries are best enjoyed fresh, but if you must make them ahead, consider prepping the eggplant strips and coating them just before baking.
Make It Your Own
- Spice Swap: If you’re in the mood for a kick, swap the Italian seasoning for a Cajun mix.
- Cheesy Twist: Add a handful of grated parmesan to the bread crumb mix for an extra layer of flavor.
- Herb Lover’s Dream: Mix chopped fresh herbs like parsley or dill into the yogurt dip for a refreshing twist.
- Gluten-Free Option: Use gluten-free bread crumbs to make this snack suitable for everyone at the table.
If you give this recipe a whirl, I’d love to see how it turns out! Drop a comment to share your eggplant fry adventures or tag me in your crispy creations. Happy snacking! 🍆🍟
Goes Well With
If you want to round out the meal, here’s what I’d pair it with over on meaghanmoineau.com:
Related update: Eggplant Fries with Tzatziki Sauce
Related update: Southwest Egg Rolls with Cilantro Lime Pesto
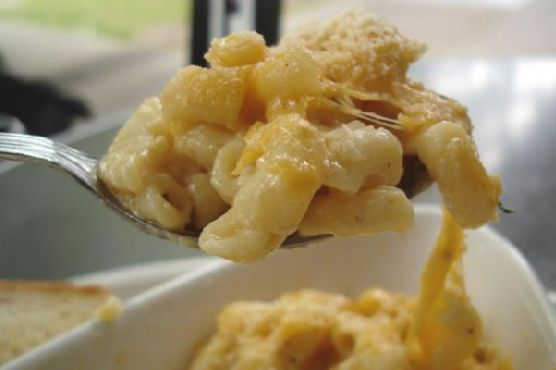
It was one of those chilly Tuesday evenings when all I wanted was something warm and comforting, but the thought of spending hours in the kitchen felt like a big nope. You know those nights, right? That’s when the idea of a classic macaroni and cheese pops into your head like a warm hug. This dish is the ultimate comfort food that manages to be both creamy and crispy, gooey yet structured—seriously, what’s not to love? Plus, it’s like a blank canvas for whatever you want to throw in. You probably have most of these ingredients already, so there’s no need to brave the grocery store aisles either. Ready to dive in? Let’s do this!
Jump to Recipe
What You’ll Need
Here’s the magic of this recipe: it combines pantry staples with just a few fresh elements to create something truly satisfying.
- Fresh bread crumbs
- Butter
- Cayenne pepper
- Flour
- Heavy cream
- Cooked short macaroni
- White salt and pepper
- Sharp cheddar
- Whole milk
How to Make Classic Macaroni and Cheese
- Preheat your oven to 350°F. This gives you time to prep everything else while it comes up to temperature.
- Melt 6 tablespoons of butter in a medium saucepan over low heat. Add flour and cook, stirring constantly, for about 4 minutes. The mixture should smell nutty and have a golden hue.
- Stir in cayenne and add salt and pepper to taste. This is where the flavor kicks in!
- Whisk in hot milk, 1/2 cup at a time, and cook while stirring until the sauce thickens to a creamy consistency.
- Reduce the heat to low and stir in 2 cups of cheese. Keep stirring until the cheese melts into a luscious sauce, about 2 minutes.
- Combine the cooked macaroni and cheese sauce in a large bowl, ensuring each piece of pasta is well-coated. Season with additional salt if needed.
- Butter an 8″x11″ baking dish and sprinkle 1/2 cup of cheese over the bottom.
- Place one-third of the pasta in the baking dish, top with 1/2 cup of cheese, and repeat the layers until you end with a layer of cheese on top. You’re making three layers in total.
- Pour the heavy cream over the assembled macaroni and cheese. This is your golden ticket to creaminess!
- Melt the remaining butter in a skillet, add bread crumbs, and coat them well with the butter. Sprinkle this over the macaroni and cheese.
- Bake until the crust is golden and irresistible, about 30 minutes. Let it rest for 15 minutes before serving—that’s the hardest part, I promise.
Cook’s Notes
Here’s the thing, patience is key when making your roux (that’s your butter and flour mixture). Stir it constantly so it doesn’t burn, and let it get to that perfect nutty aroma. If you’re in a hurry, you might be tempted to crank up the heat on the cheese sauce but resist the urge; slow and steady wins the race here.
As for leftovers, they’re like a gift that keeps on giving. Store them in an airtight container in the fridge for up to three days. When reheating, add a splash of milk to bring back that creamy consistency and bake it covered in foil to prevent drying out.
Make It Your Own
- For a smoky twist, swap out the sharp cheddar for smoked gouda. It adds a new depth of flavor without any extra effort.
- If you’re feeling veggie-friendly, toss in some sautéed mushrooms or spinach between the layers of pasta and cheese.
- Craving protein? Add slices of cooked chicken breast or crispy bacon in between your cheesy layers.
- For a spicy kick, replace the cayenne with smoked paprika or toss in some diced jalapeños.
If you try this, I’d love to hear how it turns out—drop a comment or tag me! Whether you stick to the classic or jazz it up, this mac and cheese is sure to become a staple in your home. Enjoy every cheesy bite!
Goes Well With
If you want to round out the meal, here’s what I’d pair it with over on meaghanmoineau.com:
Related update: Classic Macaroni and Cheese
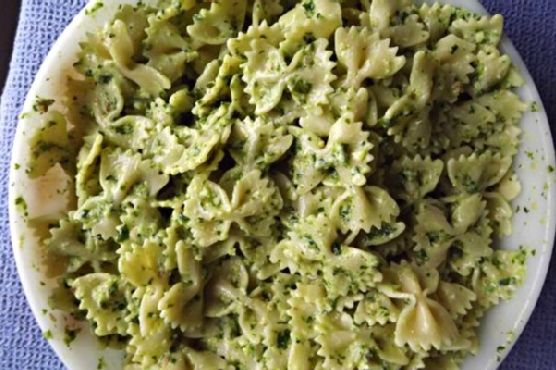
It was one of those evenings when I was standing in front of my open refrigerator, overwhelmed by the task of creating something delicious yet foolproof. You know, that state of mind where you can’t decide between ordering takeout or using up that random bunch of parsley and only-half-full container of yogurt. That’s when this Pesto & Yogurt Pasta was born. It’s a delightful mishmash of classic and unexpected, with the richness of pesto beautifully mellowed by the tang of yogurt. Trust me, it’s the kind of dish that hits the perfect balance between indulgent and refreshing. Plus, it comes together in the time it takes to scroll through Instagram a couple of times.
Jump to Recipe
What You’ll Need
Let’s be honest, there’s nothing worse than having to run to the store for an obscure ingredient. Luckily, this recipe leans heavily on pantry staples, so you might just find everything you need already in your kitchen.
- 8 oz of farfalle pasta
- 1 bunch of flat leaf parsley
- 3 cloves of garlic
- 1/2 cup of mixed nuts (walnuts, almonds, or whatever you’ve got on hand)
- 1/2 cup low fat plain yogurt
- 1/4 cup olive oil
- 1/2 cup parmesan cheese, grated
- Salt & pepper, to taste
How to Make Pesto & Yogurt Pasta
- Start by bringing a large pot of salted water to a boil. Toss in the farfalle and cook it until it’s al dente. This should be about 10-12 minutes, but keep an eye on it. You want it just slightly firm to the bite.
- While the pasta is cooking, grab your trusty food processor. In it, combine the parsley, garlic cloves, and mixed nuts. Pulse a few times until everything is coarsely chopped.
- With the processor running, slowly drizzle in the olive oil. You’re aiming for a smooth, pesto-like consistency. Pause to scrape down the sides if the stuff clings to the edges. Your kitchen should smell wonderfully garlicky and fresh at this point!
- Stir the yogurt into your pesto blend. It should look creamy and inviting. Then, mix in the parmesan cheese. Give it a taste and season with salt and pepper to your liking.
- By now, your pasta should be ready. Drain it, but don’t worry about being too thorough—a bit of pasta water is your friend here. Toss the warm pasta and pesto yogurt sauce together in a large bowl until each piece is well-coated in the creamy green goodness.
Cook’s Notes
Let’s keep it real: pesto can be a bit stiff if it sits too long, so if you’re not diving into this dish right away, save a splash of that pasta water to loosen it up before serving. The sauce will thicken as it cools, and a little warm water will bring it back to life. And hey, leftovers are your friend! Refrigerate them in an airtight container, and they’ll be just as tasty for up to three days. Just remember, a quick reheat is all it needs—not a full-blown nuke session—since the yogurt can separate if overheated.
Make It Your Own
- Go Nut-Free: Swap the mixed nuts for sunflower seeds or pumpkin seeds for a nut-free alternative that still gives you that satisfying crunch.
- Herb Swap: Not a fan of parsley? Basil or a mix of spinach and mint can step into the spotlight for a fresh twist.
- Cheese Choices: Love a stronger flavor? Try pecorino or even a sprinkle of feta for a tangy surprise.
- Protein Boost: Add some grilled chicken or shrimp to make it a more filling meal. Even crispy tofu would be a great addition for a vegetarian option.
If you try this, I’d love to hear how it turns out—drop a comment or tag me! This recipe’s been a weeknight hero for me, and I’m excited to see how it fits into your rotation. Enjoy the pasta magic!
Goes Well With
If you want to round out the meal, here’s what I’d pair it with over on meaghanmoineau.com:
Related update: Pesto & Yogurt Pasta
Related update: Boozy Bbq Chicken
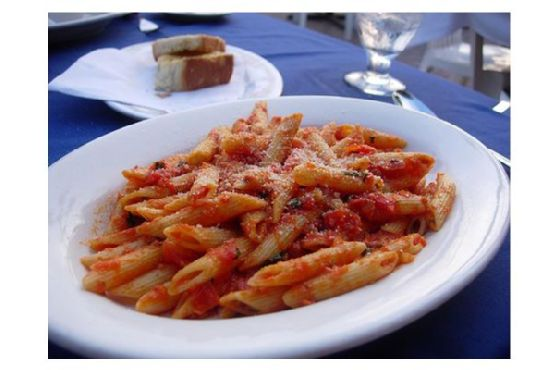
The other night, as I found myself rummaging through my pantry, I hit jackpot with a can of tomatoes and a packet of penne. It was one of those evenings where I needed something quick, comforting, and just a little spicy to shake off the chill of the day. Enter Penne Arrabiata – my go-to for when I want something fiery, yet satisfying, without the fuss. Who knew a simple dish with such few ingredients could pack so much punch? Plus, if you’re like me and almost always have pasta, canned tomatoes, and garlic stashed away, you’re already halfway there. The magic really is in the simplicity.
Jump to Recipe
What You’ll Need
You might be surprised at how few ingredients are needed for this explosive dish. Chances are you already have most of these tucked away in your kitchen.
- Canned whole tomatoes (I adore those Pomi tomatoes that come in a box!)
- A packet of penne
- Fresh garlic (about 5 cloves, minced)
- Olive oil (3 tablespoons to be exact)
- About 1 teaspoon of dried red peppers
- Fresh Italian parsley, minced (2 tablespoons plus extra for garnish)
- Fresh basil, coarsely chopped, for that final flourish
How to Make Penne Arrabiata
- First, set a large pot of water on the stove and bring it to a rolling boil. You’ll want enough water so the penne has space to dance around.
- While waiting on the water, heat 3 tablespoons of olive oil in a pan over medium heat. Toss in about 1 teaspoon of dried red peppers. Let them mingle with the oil until they’re fragrant but not burning.
- Add the minced garlic and 2 tablespoons of fresh Italian parsley to the oil and peppers. Stir and watch carefully – you want the garlic golden, not brown.
- Next, introduce the star of the show: your canned tomatoes. Give them a good chop before adding them to the pan. Stir, cover, and let the sauce simmer until it’s heated through and inviting.
- By now, your water should be boiling. Toss in the penne and cook until it’s al dente. You know it’s ready when it has a slight bite but isn’t mushy.
- Once the pasta is perfect, drain it and add it directly to the sauce. Mix thoroughly, ensuring each piece of penne is luxuriously coated in that fiery sauce.
- Right before serving, sprinkle in some coarsely chopped fresh basil and a little more parsley for that fresh, earthy touch.
- Serve immediately, preferably with a side of crusty bread to mop up any leftover sauce.
Cook’s Notes
Let me give you a few insider tips to make sure your Penne Arrabiata is the talk of the dinner table. First, don’t overcook the garlic – it can turn bitter quickly. Always keep an eye on it while it’s in the pan. If you’re in the mood for a deeper flavor, let the sauce simmer longer on low heat. You can make the sauce ahead of time; just reheat gently before adding the pasta. And leftovers? They keep well in the fridge for a couple of days. Just make sure to cover them properly and add a splash of olive oil when reheating to keep things glossy.
Make It Your Own
Here’s where you can let your creativity or pantry dictate the dish:
- Swap the penne for rigatoni or another pasta you have on hand – just adjust the cooking time as needed.
- For a smoky twist, add a pinch of smoked paprika along with the dried red peppers.
- Incorporate some protein by tossing in cooked crispy tofu or grilled chicken right before serving.
- If you’re feeling indulgent, sprinkle some shaved Parmesan on top. It’s not traditional, but who can resist cheese?
If you try this, I’d love to hear how it turns out — drop a comment or tag me! There’s nothing better than a little fiery pasta to spice up your day. Enjoy every bite, my friends!
Goes Well With
If you want to round out the meal, here’s what I’d pair it with over on meaghanmoineau.com:
Related update: Penne Arrabiata

Okay, so picture this: It’s a lazy Sunday morning, and I’m still in my pajama pants, hair doing its own thing, craving something that’s going to make me feel like I have my life together. But I definitely do not have my life together right now. I glance over at my kitchen counter, and there’s a basket of mulberries just sitting there, giving me the “use me or lose me” eyes. Rhubarb stalks are peeking out from the fridge door like they’re trying to escape to find their life purpose. And that’s when it hit me: Dutch Babies with Mulberry-Rhubarb Compote. This recipe is one of those magical ones where you get to feel fancy without actually doing anything fancy. It’s not just about the taste—though, trust me, it’s a hug on a plate—but it’s also about how it looks like you put in way more effort than you actually did. Plus, it gets me extra points with anyone who’s lucky enough to be around when it comes out of the oven.
Jump to Recipe
What You’ll Need
This recipe is all about using what you probably already have in your kitchen, with a couple of stars that make it shine.
- Butter
- Cornstarch
- Eggs
- Flour
- Milk
- Mint leaves
- Mulberries
- Orange juice
- Rhubarb
- Salt
- Sugar
- Vanilla sugar
How to Make Dutch Babies With Mulberry-Rhubarb Compote
- First, let’s tackle the compote. Pulse the rhubarb in a food processor about 5-6 times until it’s diced but not mushy. Then give the mulberries a quick 3-4 pulses until they’re nicely chopped.
- In a saucepan, combine the diced rhubarb, chopped mulberries, orange juice, sugar, salt, and cornstarch. Let this mixture simmer over medium heat for about 10-15 minutes, stirring occasionally. You’ll know it’s done when it smells like a fruity dream and is slightly thickened.
- Once off the heat, stir in the fresh mint leaves. This is where the magic happens, trust me. Set it aside—it’ll thicken a bit more as it cools.
- Now, preheat your oven to 375°F. This is the perfect time to grab a coffee and do a little dance because it’s all happening!
- In a blender, throw in the flour, sugar, salt, milk, and eggs. Blend for a solid 10 seconds to get everything nice and smooth. Then, add 2 tablespoons of melted butter and give it another quick blitz.
- Brush the remaining 4 tablespoons of melted butter into a 24-cup muffin tin, ensuring every nook and cranny is coated. This is what gives the Dutch babies their golden crispiness.
- Pour the batter slowly into each muffin cup, filling about halfway. Pop them into the oven and bake for 12-14 minutes until the edges are golden brown and the centers are all puffed up and proud.
- Remove those Dutch babies immediately from the muffin tins to avoid any sticking issues, and top generously with your mulberry-rhubarb compote. Serve them up while they’re still warm and watch them disappear!
Cook’s Notes
These Dutch babies are best eaten fresh out of the oven, but if you have leftovers (ha, as if!), they can be stored in an airtight container in the fridge for up to two days. Just reheat them in the oven for a few minutes to regain some of that crispiness.
When making the compote, keep an eye on the heat. You want a gentle simmer, not a vigorous boil, to avoid turning everything into a fruit soup.
- If you’re short on mulberries, you can easily swap in another berry. Blackberries or blueberries work wonders here.
- For a richer flavor, try browning the butter before you add it to the muffin tins—trust me, it’s a game-changer.
- If you’re feeling adventurous, add a dash of cinnamon or nutmeg to the batter for a warm spice twist.
Make It Your Own
- Swap the mulberries for blackberries if you’re feeling a bit wild, or raspberries for a nice tart kick.
- Want a savory version? Skip the compote and serve with a dollop of crème fraîche and smoked salmon.
- No rhubarb? No problem! Substitute with an equal amount of strawberries for a sweeter compote.
- For a nutty twist, add a tablespoon of almond extract to the batter and top with slivered almonds before baking.
If you try this, I’d love to hear how it turns out—drop a comment or tag me on social media! I’m always excited to see your creations and hear your tweaks. Happy baking!
Goes Well With
If you want to round out the meal, here’s what I’d pair it with over on meaghanmoineau.com:
Related update: Greek Inspired Spring Omelet
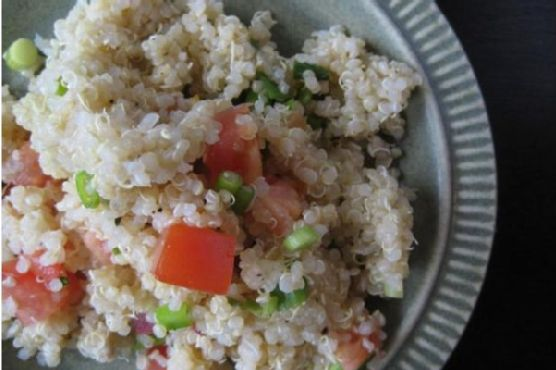
Picture this: It’s a Wednesday night, and I’m staring into the abyss of my fridge, hunting for something quick yet satisfying to whip up. I’m not in the mood for anything heavy, and the thought of a greasy takeout container is just not doing it for me. Then, I spot it: a bag of quinoa hidden behind some questionable leftovers. Suddenly, I’m inspired to throw together something fresh and vibrant. Enter the Quinoa, Tomato, Green Onion Side Salad. It’s one of those effortless dishes that surprises you with how delicious it is. Light, tangy, and with just the right amount of bite from the green onions, it’s the perfect sidekick to almost any meal. Plus, chances are, you already have most of these ingredients hanging out in your pantry or fridge.
Jump to Recipe
What You’ll Need
It’s amazing how such a simple ingredient list can come together into something so flavorful. Chances are you already have most of this.
- Quinoa – the nutty base that gives this salad heft and texture.
- Water – to cook the quinoa perfectly fluffy.
- Tomatoes – juicy and sweet, they bring freshness and color.
- Green Onions – for that bit of sharpness and crunch.
- Lemon – juice for tanginess that brightens up everything.
- Olive Oil – adds a smooth richness that ties the salad together.
- Salt and Pepper – to taste, because seasoning is everything!
How to Make Quinoa, Tomato, Green Onion Side Salad
- Start by rinsing your quinoa in a fine mesh strainer. This step is crucial to remove any bitterness from the grains.
- Combine the quinoa and water in a medium-sized pan. Heat over medium until it starts to bubble and simmer, then cover the pan and lower the heat to low. Let it cook for about 15 minutes, or until all the water is absorbed and the quinoa is fluffy.
- While your quinoa is cooking, wash the green onions and tomatoes well. Give them a rough chop—you want them in bite-sized pieces. The tomatoes should be juicy, and the onions pungent.
- Cut a lemon in half and squeeze the juice from one half into a bowl, taking care to fish out any seeds that escape.
- Once the quinoa is done, let it cool a bit. It can still be a little warm, but not piping hot—you don’t want to wilt the fresh ingredients.
- Incorporate the olive oil and lemon juice into the quinoa, then mix in the chopped tomatoes and green onions. Stir everything together gently.
- Season with salt and pepper to taste. You’ll know it’s right when the flavors pop but still feel balanced.
- Chill the salad in the refrigerator for a bit before serving, or serve it slightly warm if you’re in a hurry. It’s delicious either way!
Cook’s Notes
Once you’ve made this salad, you’ll see how forgiving and flexible it is. You can make the quinoa a day ahead and store it in the fridge, saving some time. Just bring it to room temperature before you mix everything together. If anything, the flavors meld even more deliciously after they’ve had time to chill. Leftovers can be stored in an airtight container in the fridge for up to three days, but trust me, it won’t last that long. Do keep an eye on the tomatoes, though—they can get a bit mushy past the second day.
Make It Your Own
This salad is like a blank canvas, and there are so many delicious ways to switch it up:
- Swap the quinoa for couscous or even farro for a different texture and flavor profile.
- Add some crumbled feta cheese for a tangy, creamy element.
- Mix in some chickpeas or black beans to boost the protein and make it a more filling main dish.
- Toss in a handful of fresh herbs like parsley or basil for an extra burst of freshness.
If you try this, I’d love to hear how it turns out—drop a comment or tag me on social media! Your kitchen adventures make my day. Happy cooking!
Goes Well With
If you want to round out the meal, here’s what I’d pair it with over on meaghanmoineau.com:
Related update: Quinoa, Tomato, Green Onion Side Salad

It was one of those mid-week evenings where everything was a bit of a scramble. You know the type — when you open your fridge and your brain’s a blank canvas, and all you’ve got is a carton of milk, some half-wilted greens, and a bunch of rhubarb staring back at you. My sweet tooth was relentless though, demanding something a little more exciting than a bowl of cereal. That’s when the idea of making Crispy Rhubarb Pockets hit me like a lightbulb moment. They’re quick, just the right mix of tangy and sweet, and have this magical way of making your kitchen smell like a bakery. Jump to Recipe
What You’ll Need
Chances are, you already have most of these tucked away in your kitchen. Let’s make some magic with these simple, but powerful ingredients:
- 1 cup of diced rhubarb
- 1/2 cup of granulated sugar
- 1 tablespoon cornstarch
- Pinch of salt
- 1/2 teaspoon vanilla extract
- 4 phyllo sheets
- Melted butter for brushing
How to Make Crispy Rhubarb Pockets
- Start by tossing your diced rhubarb, sugar, cornstarch, and salt into a medium saucepan. Place over medium-low heat and stir occasionally. You’ll want to keep an eye on it, as the rhubarb releases its liquid and breaks down into a thick, chunky sauce — about 10 minutes.
- Once it’s looking all lovely and jam-like, remove the pan from the heat. Stir in the vanilla extract for that extra fragrant kick, and let it cool to room temperature. Patience, my friend, it’s worth it.
- While the filling cools, layer your phyllo sheets. Brush each sheet with melted butter like you’re painting a masterpiece. Then, preheat your oven to a cozy 350°F.
- With a sharp knife, cut four 4-inch squares from the phyllo stack. It’s okay if they aren’t perfect — rustic is in.
- Place about 2 teaspoons of the rhubarb filling in the center of each square. Brush a little water from the edge of the filling to each point of the square. Now, gather the points and pinch together just above the filling to create a cute pouch.
- Brush each pouch with more butter (because why not?) and place them on an ungreased baking sheet, making sure they’re at least an inch apart.
- Bake in your preheated oven for 12 to 15 minutes. You’re looking for a golden brown color and a house smelling deliciously sweet.
- Once golden, remove the pouches and let them cool on a wire rack for about 5 minutes. They’re ready to serve warm or at room temperature, whichever tempts you more.
Cook’s Notes
Don’t rush the cooling process for the filling; hot phyllo and hot filling don’t mix well. If the filling is too hot, it might burst open your lovely creations. If you want to prep ahead, you can make the rhubarb filling a day in advance and store it in the fridge. Just bring it to room temperature before using.
Make It Your Own
- Berry Bliss: Swap out half of the rhubarb for your favorite berries. Strawberries or raspberries would add a nice twist.
- Creamy Dream: Add a dollop of cream cheese to the filling for a richer texture.
- Nuts About It: Sprinkle some chopped almonds or walnuts over the filling before sealing the pouch for a crunchy surprise.
- Spice It Up: Add a pinch of cinnamon or nutmeg to the filling for an extra layer of warmth.
If you try this, I’d love to hear how it turns out — drop a comment or tag me! Let’s keep the sweet adventures rolling in our kitchens.
Goes Well With
If you want to round out the meal, here’s what I’d pair it with over on meaghanmoineau.com:
Related update: Quinoa, Tomato, Green Onion Side Salad
Related update: Brioche Bread Pudding
Picture this: It’s a Tuesday, and the week’s already feeling like a never-ending to-do list. After a day full of meetings that could’ve been emails, I found myself craving something cozy but a tad bit fancy for dinner. Enter Bruschetta Stuffed Potatoes. I stumbled upon this idea when I had a bunch of potatoes and a fresh batch of basil that needed to be used before I found them looking sad in the back of the fridge. These potatoes are your best weeknight friend—they’re comforting, satisfyingly crispy, and the kind of dish that makes you feel like a kitchen wizard without breaking a sweat. Plus, who doesn’t love a good bruschetta twist?
Jump to Recipe
What You’ll Need
It’s likely you’ve already got most of this in your pantry, and if not, the list is short enough for a quick grocery run.
- 4 large dried baking potatoes
- Olive oil
- 1 small red onion, finely chopped
- 2 cups diced tomato
- 3 cloves garlic, minced
- Fresh basil, chopped
- 1 cup shredded mozzarella cheese
- 1/2 cup cultured dairy (sour cream or Greek yogurt work great)
- Butter
- Sea salt & freshly ground pepper
How to Make Bruschetta Stuffed Potatoes
- Preheat your oven to 350°F (175°C). While you wait, give your potatoes a good scrub. Generously coat their skins with olive oil to ensure they get that irresistible crispy finish.
- Place the potatoes directly on the oven rack and bake for 1 to 1 1/2 hours, or until they’re tender when poked with a fork. This is your chance to catch up on that series you’ve been meaning to binge!
- While the potatoes are doing their thing, toss together the red onion, diced tomatoes, garlic, fresh basil, and mozzarella cheese in a small bowl. The mixture should smell like a summer garden—just divine. Set it aside.
- Once your potatoes are tender, carefully cut a small slice off the top of each one. Scoop out the soft, fluffy flesh and transfer it into a large bowl. Be gentle so you don’t tear the skins—those are going back in the oven.
- Place the empty potato shells back on a baking sheet and turn the oven down to 150°F (65°C) to keep them warm.
- In the bowl with the potato flesh, add the cultured dairy, a pat of butter, and a splash more olive oil. Mash it all together until smooth and creamy. The mixture should be velvety with a slight sheen from the butter.
- Fold the bruschetta mixture into your mashed potatoes. The cheese will start to melt a little, binding everything together. Season with sea salt and freshly ground pepper to taste.
- Spoon the mixture back into the potato shells, mounding it high. Pop them in the oven just to warm through—if you don’t reheat them too much, the enzymes in the dairy will keep it tasting fresh and tangy.
Cook’s Notes
You’ll want to use baking potatoes like russets as they have the perfect consistency for this recipe. Don’t skimp on the olive oil when coating your potato skins—it’s the secret to getting that perfect crisp. Leftovers (if any!) can be stored in the fridge for up to two days. Just reheat them in the oven to maintain texture. If you’re making these ahead, you can prepare the bruschetta and potato filling separately and stuff the potatoes just before serving.
Make It Your Own
- Caprese Style: Swap the mozzarella for fresh buffalo mozzarella and add a drizzle of balsamic glaze just before serving.
- Spicy Kick: Add a diced jalapeño to the bruschetta mixture for some heat. You can also sprinkle some red pepper flakes on top.
- Mediterranean Twist: Incorporate some chopped olives and a sprinkle of feta cheese into your bruschetta mix for a Greek-inspired flavor.
- Vegan Version: Use vegan cheese and a plant-based yogurt instead of dairy. A touch of nutritional yeast can mimic the buttery flavor.
If you try this, I’d love to hear how it turns out—drop a comment or tag me! These Bruschetta Stuffed Potatoes have become a staple in my kitchen, and I hope they find a spot in yours too. Enjoy every delicious bite!
Goes Well With
If you want to round out the meal, here’s what I’d pair it with over on meaghanmoineau.com:
Related update: Bruschetta Stuffed Potatoes

Picture this: I’m standing in the kitchen, eyeing a bunch of fresh beets and wondering what on earth I’m going to make for dinner. It’s one of those days where time is tight, but my craving for something fresh and vibrant is even tighter. Enter my Citrus Beet Salad. It’s the kind of dish that feels fancy but is deceptively simple to whip up. We’re talking earthy beets paired with juicy grapefruit, creamy goat cheese, and a sprinkle of crunchy pumpkin seeds. It’s a harmony of flavors and textures that makes it the perfect side or light main course. And trust me, once you taste it, it’ll quickly become a staple in your kitchen lineup. Jump to Recipe
What You’ll Need
I love this recipe because the ingredient list is short and sweet, and you might already have a few of these in your kitchen. Here’s what you’ll need to make this vibrant salad come to life:
- Beets – Fresh is best, but pre-cooked can work in a pinch.
- Olive oil – A good quality one really makes a difference here.
- Balsamic vinegar – Adds a tangy depth to the sweet beets.
- Grapefruit – Juicy and adds a bright pop of flavor.
- Sprouts – I like alfalfa or radish sprouts for their peppery taste.
- Pumpkin seeds – Toasted for extra crunch.
- Goat cheese – Creamy and tangy, it ties everything together.
How to Make Citrus Beet Salad
Ready to get cooking? Let’s dive into the steps:
- Start by washing your beets and patting them dry. You don’t want any excess moisture when they hit the oven.
- Place the beets on a sheet of aluminum foil and give them a generous drizzle of olive oil. Seal them up in the foil to create a snug little pouch.
- Pop the pouch onto a cookie sheet and slide it into the oven. Bake until the beets are tender. This can take anywhere from 30 minutes to an hour, depending on their size. Start checking at the 30-minute mark.
- Once tender, let them cool enough to handle. Use your hands to slip off their skins — they should peel away easily.
- Slice the beets into bite-sized wedges and give them a good drizzle of balsamic vinegar. This is where the magic starts.
- Line the bottom of a large bowl with a bed of sprouts. Add your beets and grapefruit slices on top.
- Finish with a scatter of pumpkin seeds and a crumble of goat cheese. Serve immediately and enjoy the freshness!
Cook’s Notes
Okay, a few things to keep in mind! When roasting your beets, size matters. If they’re particularly large, give them a little extra time in the oven. You want that fork to slide in without much resistance. And about that grapefruit — try to segment it so you avoid the bitter pith. If you’re making the salad ahead, keep everything separate until just before serving to avoid soggy sprouts. Leftovers are best consumed within a day or two, but if you really want to stretch it, pack the beets and sprouts separately to keep them fresh.
Make It Your Own
Here’s how you can put your own spin on this classic:
- Swap the goat cheese for crumbled feta or blue cheese for an extra punch.
- Use blood oranges instead of grapefruit for a sweeter twist.
- Substitute sunflower seeds if pumpkin seeds aren’t your thing, or if you want to mix it up.
- Add a handful of arugula or baby spinach for extra greens and volume.
If you try this, I’d love to hear how it turns out — drop a comment or tag me in your food pics! This salad is one of my favorites to play around with, and I’m curious to see how you’ll make it your own. Happy cooking!
Goes Well With
If you want to round out the meal, here’s what I’d pair it with over on meaghanmoineau.com:
Related update: Citrus Beet Salad
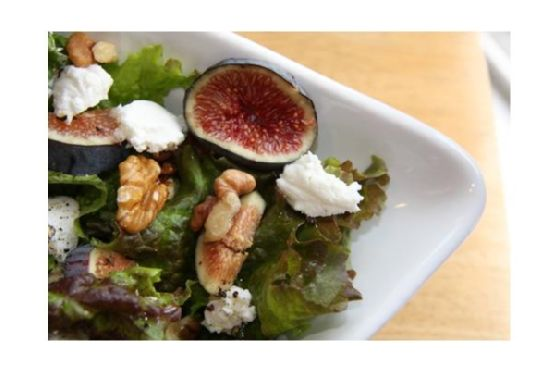
Last Tuesday, the afternoon sun cast a golden glow across my kitchen, and all I craved was something fresh and vibrant. You know those days when life gets a bit too overwhelming, and you just need a food hug? That was me. I opened the fridge and there they were—beautifully ripe figs, a half-eaten log of goat cheese, and a bag of mixed greens waiting to be transformed. And just like that, a Fig, Goat Cheese, and Walnut Salad came to life. This dish is like a cozy sweater—it’s comforting yet bright, with just the right amount of flair to make you feel fancy without the fuss. Trust me, this salad is a total game-changer, especially when you need something quick yet utterly delicious.
Jump to Recipe
What You’ll Need
This salad is all about simple ingredients that pack a punch. Chances are you already have most of this stuff lying around:
- Fresh figs – the star of the show
- Goat cheese – creamy goodness in every bite
- Lemon juice – for that zesty kick
- Mixed greens – a fresh and leafy base
- Olive oil – smooth and silky
- Salt and pepper – gotta season!
- Walnuts – for a crunchy contrast
How to Make Fig, Goat Cheese and Walnut Salad
- Start by rinsing your mixed greens. Spin them dry if you have a salad spinner or spread them out on a clean towel to air-dry. You want them crisp, not soggy.
- Tear the greens into bite-size pieces if they’re not already prepped. No one wants to wrestle with a giant leaf on their plate.
- Slice the figs delicately, savoring the sweet fragrance that fills the room. They should be tender yet firm enough to hold their shape.
- Roughly chop the walnuts. You’re aiming for a mix of larger chunks and smaller bits to keep things interesting.
- Gently scatter small spoonfuls of goat cheese over the salad. This is where the magic happens—creamy pockets of flavor await every bite.
- In a small bowl, mix olive oil and lemon juice to taste, or if you’re like me and love to freestyle, drizzle them directly over the salad.
- Season with salt and pepper to your liking. Toss everything together gently to keep all those beautiful components intact.
- Serve immediately and enjoy the delightful combination of flavors and textures.
Cook’s Notes
Here’s the deal: use the freshest figs you can find. Overripe ones can make the salad mushy, and underripe figs won’t give you that sweet juiciness. You can prepare the salad base and keep it in the fridge for a couple of hours, but only add the dressing and goat cheese right before serving to keep the greens vibrant and the cheese from getting lost in the mix. If you need to store leftovers, keep the dressing separate and consume within a day for best quality.
Make It Your Own
- Swap the goat cheese for feta if you’re feeling a bit more Mediterranean.
- Replace the walnuts with toasted almonds for an added crunch and a slightly different flavor profile.
- Add some crispy bacon bits if you want a smoky, savory note.
- Try arugula instead of mixed greens for a peppery punch.
If you try this, I’d love to hear how it turns out—drop a comment or tag me! There’s nothing like sharing the joy of a simple, delicious meal with friends. Bon appétit! 🍽️
Goes Well With
If you want to round out the meal, here’s what I’d pair it with over on meaghanmoineau.com:
Related update: Fig, Goat Cheese and Walnut Salad
Related update: Citrus Beet Salad
Related update: Vegetable Tart With Goat Cheese
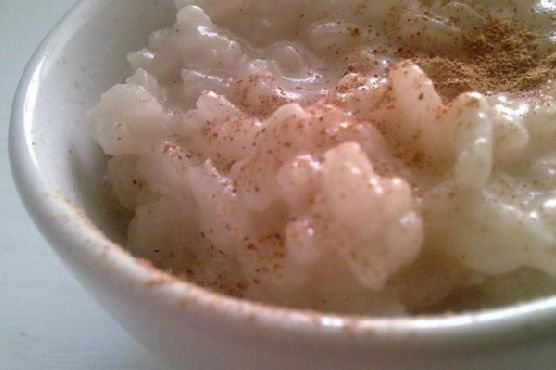
One chilly evening, I found myself standing in the kitchen, the rain tapping softly against my window, craving something warm and creamy to chase away the lingering cold. I peeked into my pantry and spotted the perfect answer to my comfort food craving—Arroz Con Leche. This luscious rice pudding has a way of wrapping you in a cozy hug with its creamy texture and fragrant cinnamon aroma. It’s one of those deceptively simple recipes that feels fancy but comes together in a snap. Plus, it uses ingredients you’re likely to already have on hand. Trust me, if you’re in need of a little comfort in a bowl, this one’s a keeper. Jump to Recipe
What You’ll Need
If your pantry is anything like mine, you’re already halfway there with these ingredients:
- 2 cups heavy cream
- 2 cups milk
- 1 cup arborio rice
- 2 cinnamon sticks
- 1 tablespoon lemon zest
- Pinch of salt
- 1 cup sugar
- Ground cinnamon, for sprinkling
How to Make Arroz Con Leche
- Grab a medium-sized saucepan and toss in 2 cups of heavy cream, 2 cups of milk, the cup of arborio rice, cinnamon sticks, lemon zest, and a pinch of salt. Bring this fragrant concoction to a gentle boil over medium heat. You want those aromas to greet you like an old friend.
- Once it hits a boil, reduce the heat and let it simmer gently. Stir occasionally, enjoying the wafting scent of cinnamon, until the rice is tender. This should take about 30 minutes. Keep an eye on it—if the mixture gets too thick, add a splash of milk or cream to loosen it up.
- Remove the pan from heat and stir in the sugar until it’s fully dissolved. It should feel like velvet on your spoon.
- Fish out those cinnamon sticks before serving. Scoop the creamy rice pudding into bowls and give it a generous sprinkle of ground cinnamon for that extra warm-spice kick.
Cook’s Notes
Here’s the scoop: Arroz Con Leche is all about the creamy texture. Arborio rice is my go-to because it’s so good at soaking up all that dairy goodness. Keep the heat low and slow once you’ve hit that initial boil. If you’re not careful, the bottom might scorch or it might thicken too quickly, so don’t wander off too far!
Leftovers? You bet! This pudding keeps well in the fridge for up to three days. Just seal it in an airtight container. When you’re ready to reheat, you might need to add a splash of milk to bring it back to life.
Make It Your Own
- Swap out the lemon zest for orange zest if you’re feeling citrusy.
- Throw in a handful of raisins or dried cranberries during the last 10 minutes of cooking for a fruity twist.
- If you’re a vanilla fan, add a splash of vanilla extract just before serving for an added layer of flavor.
- Try using coconut milk for a tropical take—just replace half the milk and heavy cream with coconut milk.
If you try this, I’d love to hear how it turns out—drop a comment or tag me! There’s nothing like sharing a little comfort, one bowl at a time. Enjoy the warmth, my friends!
Goes Well With
If you want to round out the meal, here’s what I’d pair it with over on meaghanmoineau.com:
Related update: Arroz Con Leche
Related update: Fresh Fig, Walnut, Rosemary Upside Down Cake And A Crisp Citrusy Chardonnay

Picture this: it’s a Wednesday evening, the kind where you just want to curl up with something that feels like a bear hug — warm, comforting, and a little bit spicy. This One Bowl Jalapeno Cheddar Cornbread is the answer to that midweek craving. It’s one of those recipes that’s as satisfying to make as it is to eat, with just enough kick from the jalapenos to keep things interesting. Plus, did I mention you only need one bowl to whip this up? Less dishes, more deliciousness. Trust me, you’ll want to bookmark this for those cozy nights.
Jump to Recipe
What You’ll Need
The beauty of this recipe is that it uses pantry staples with a couple of standout stars. Chances are you already have most of this lying around:
- 1 stick unsalted butter
- 1 cup white sugar
- 2 eggs
- 1 cup buttermilk
- ½ teaspoon baking soda
- 1 cup cornmeal
- 1 cup flour
- ½ teaspoon salt
- 1 cup shredded cheddar cheese
- 1 can diced jalapenos
- 1 fresh jalapeno, thinly sliced
How to Make One Bowl Jalapeno Cheddar Cornbread
- Start by melting a stick of butter in a microwave-safe bowl. Use 30-second intervals to melt it completely without making a buttery mess.
- Whisk in the white sugar until it’s well integrated with the melted butter. The mixture should look smooth and glossy.
- Add in the eggs. You’ll want to whisk until the mixture turns a pale yellow and all the ingredients are happily married.
- In a small bowl, mix together the buttermilk and baking soda, then pour this into your buttery egg mixture. Stir until well combined.
- Now, add the cornmeal, flour, salt, shredded cheddar cheese, and diced jalapenos to the bowl. Mix gently until the batter is just combined. The mantra is ‘less is more’ here — overmixing is the enemy of tender cornbread.
- Preheat your oven to 375°F. While it’s warming up, prepare your pan with cooking spray. I usually opt for a mini loaf pan, but an 8×8 inch pan is a solid choice too.
- Spoon the batter into the prepared pan and artfully arrange the fresh jalapeno slices on top. They add a little flair and a preview of the heat inside.
- Bake for 25 to 35 minutes. Keep an eye out for edges turning golden and a skewer coming out clean. Remember, cooking time varies with pan size, so adjust as needed!
- Once baked, let the cornbread cool in the pan for a few minutes before transferring to a cooling rack. This step requires patience, but it’s worth it.
Cook’s Notes
Here are some notes to keep your cornbread game strong:
- For those who plan ahead, this cornbread can be made a day in advance and stored in an airtight container. Just reheat it gently in the oven or microwave before serving.
- If you accidentally overmix the batter, don’t panic! Just proceed and make a mental note for next time. It’ll still taste great, just a bit denser.
- Leftovers can be wrapped and stored in the fridge for about a week. They’re fantastic reheated with a little butter or honey.
Make It Your Own
Feeling adventurous? Try these variations:
- Spicy Honey Drizzle: Mix honey with a dash of cayenne pepper, and drizzle over warm cornbread for a sweet-spicy twist.
- Herb Infusion: Add a tablespoon of chopped fresh cilantro or chives to the batter for a burst of freshness.
- Cheese Swap: Try swapping cheddar for pepper jack if you want an extra kick.
- Vegetarian Twist: Add in a half cup of cooked corn kernels for a subtle textural change.
If you try this, I’d love to hear how it turns out — drop a comment or tag me! Happy baking and spicing things up in your kitchen!
Goes Well With
If you want to round out the meal, here’s what I’d pair it with over on meaghanmoineau.com:
Related update: One Bowl Jalapeno Cheddar Cornbread
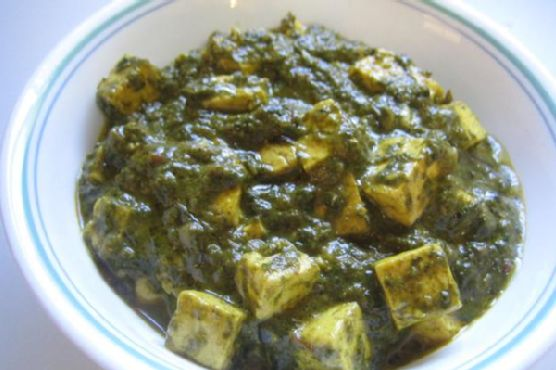
It was one of those chaotic Tuesday evenings, you know the kind, where the clock somehow ticks faster and the fridge looks like a barren desert. I was craving something comforting but also needed it to be quick and not require a last-minute grocery run. That’s when I stumbled upon my trusty block of tofu and a vibrant bunch of spinach sitting in the crisper looking like they might stage a protest if not used soon. Voila, it hit me—Palak-Tofu (or bean curd if you’re feeling fancy)! It’s the kind of dish that feels like a hug in a bowl, creamy yet packed with a punch of spices, and best of all, it comes together in a snap. It’s the perfect blend of Indian flavors that makes you feel like you’ve put in way more effort than you actually did. Ready to dive in?
Jump to Recipe
What You’ll Need
The beauty of this recipe is that you probably already have most of these staples lurking in your pantry or fridge. Here’s the lineup:
- 1 tbsp oil
- 2 onions, finely chopped
- 1 tbsp ginger-garlic paste
- 2-3 green chillies, chopped (adjust depending on how spicy you’re feeling)
- 1 tomato, chopped
- 3 cups palak (spinach), washed
- 1 block tofu, cut into cubes
- Salt to taste
- 1/2 tsp turmeric
- 1 tsp coriander powder
- 1/2 tsp cumin seeds
- 1 tsp kasuri methi (dried fenugreek leaves)
- 1/4 cup cream or milk
- 1 tbsp butter
- 1/2 tsp garam masala
How to Make Palak-tofu (bean curd)
- In a pan, heat 1 tablespoon of oil over medium heat. Add the chopped onions and sauté them until they’re golden brown. The aroma is the first hint you’re on the right track.
- Add the ginger-garlic paste to the onions and stir for about a minute until the raw smell disappears. Toss in the green chillies and chopped tomato, sautéing until the tomatoes soften and meld into the mix.
- Add the washed spinach leaves in their full glory. Sauté them for about 5 minutes until they wilt down, looking like a fraction of their former selves. Let this mixture cool.
- Once cooled, blend the spinach mixture to a coarse paste and set it aside.
- In the same pan, add another tablespoon of oil and sauté the tofu cubes. Sprinkle a pinch of salt and turmeric over them, stirring for about 2 minutes to give them a nice golden tan. Remove and set aside.
- Return the spinach paste to the pan, seasoning with salt and coriander powder. Let it cook slowly for about 10 minutes, allowing the flavors to deepen.
- Add the sautéed tofu cubes to the pan, mixing well. Crumble the kasuri methi between your palms to release its aroma before adding it to the pan.
- Pour in the cream or milk, stirring to combine. Cover the pan and let it simmer on a low flame for 5 minutes. The mixture should look creamy and inviting.
- Finish with a dollop of butter for richness and a sprinkle of garam masala for that final flavor burst. Serve hot with roti or paratha.
Cook’s Notes
Here’s the thing: you can make parts of this dish ahead if batch cooking is your jam. The spinach paste can be made a day ahead and stored in the fridge. Just warm it up and follow the rest of the recipe when you’re ready to serve.
- Don’t rush the sautéing of onions; it sets the flavor base.
- Make sure to cool the spinach mix before blending. Hot ingredients in a blender can be hazardous (hot splashes are no fun).
- Leftovers keep well in the fridge for up to 3 days. Just reheat gently, adding a splash of milk if it’s too thick.
Make It Your Own
- Swap the tofu for crispy paneer cubes for a decadent twist.
- Add a handful of green peas for a pop of color and sweetness.
- Use ghee instead of oil for a richer, buttery flavor.
- For a vegan version, swap the cream with coconut milk and omit the butter.
If you try this, I’d love to hear how it turns out — drop a comment or tag me in your kitchen adventures! Let’s make weeknight dinners exciting, one dish at a time!
Goes Well With
If you want to round out the meal, here’s what I’d pair it with over on meaghanmoineau.com:
Related update: Palak-tofu (bean curd)
Related update: Delicious Sausage & Peppers
Related update: One Bowl Jalapeno Cheddar Cornbread
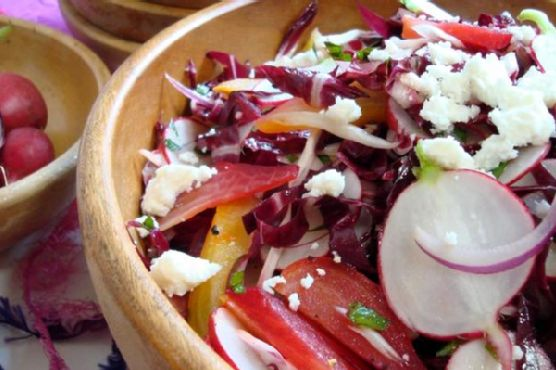
It was one of those evenings where the sun lazily dips behind the trees, casting a golden hue over everything, and the weather’s still warm enough to eat on the porch. I was staring into my fridge, thinking that I could either order takeout or transform the lonely bunch of beets staring back at me into something fabulous. The idea of a roasted beet and radicchio salad popped into my head, and suddenly I could taste it — earthy, a bit bitter, and wonderfully fresh. This dish isn’t just a salad; it’s a celebration of textures and flavors. The kind that makes you feel like you’ve pulled off a culinary magic trick with minimal effort.
Jump to Recipe
What You’ll Need
Chances are you already have most of this, but a quick trip to the store might be necessary for a few fresh flavors.
- Beets
- Olive oil
- Radicchio
- Red onion
- Radishes
- Fresh mint leaves
- Queso fresco
- Red wine vinegar
- Honey
- Garlic clove
- Salt
- Pepper
How to Make Roasted Beet and Radicchio Salad
- Preheat your oven to 400°F. This is the perfect time to catch up on that podcast you’ve been meaning to listen to.
- Trim the beets, placing them snugly in a baking dish. Drizzle with 1 tablespoon of olive oil, making sure each beet gets a glossy coat. Cover and roast for about 30-35 minutes, until they surrender easily to a fork’s pressure.
- While the beets are doing their thing, cut the radicchio into quarters and remove the core. Slice it into thin strips and let it chill in a bowl of ice water for 20-30 minutes. This little spa treatment mellows out its bitterness.
- Channel your inner chef as you slice the red onion and radishes paper-thin. This is where a sharp knife becomes your best friend.
- In a small bowl, whisk together 3 tablespoons of olive oil, red wine vinegar, honey, a minced garlic clove, a pinch of salt, and a few cracks of pepper. It should taste lively and balanced, with a little zing.
- By now, the beets should be cool enough to handle. Slip their skins off as if peeling a particularly stubborn sticker, then slice into elegant wedges.
- Toss the radicchio, beets, onions, radishes, and fresh mint leaves with the vinaigrette. It should look like a riot of colors and smell like a garden party.
- Top with crumbled queso fresco and serve to a chorus of “oohs” and “aahs.” You just made something beautiful.
Cook’s Notes
So, a few things I’ve learned while dancing through this recipe:
- Make sure to keep an eye on those beets. They can go from perfectly roasted to “oops, charcoal” pretty quickly.
- The ice bath for the radicchio really is a game-changer. Trust me, you don’t want to skip it.
- If you’re planning for leftovers, keep the dressing separate. The salad stays crisp and fresh for the next day.
Make It Your Own
Here are a few variations to keep things interesting:
- Swap the queso fresco for crumbled feta or goat cheese for a tangy twist.
- For more crunch, toss in a handful of toasted walnuts or slivered almonds.
- Not a fan of radicchio? Arugula or spinach would be great here too.
- Add some diced avocado for a creamy contrast.
If you try this, I’d love to hear how it turns out — drop a comment or tag me! Let’s see those gorgeous, colorful creations. Happy cooking!
Goes Well With
If you want to round out the meal, here’s what I’d pair it with over on meaghanmoineau.com:
Related update: Roasted Beet and Radicchio Salad
Related update: Fig, Goat Cheese and Walnut Salad

It was one of those frantic Tuesday evenings, you know the kind—where you’re trying to juggle work emails, a pile of laundry, and a kid who’s determined to turn the living room into an art studio. I was staring into the abyss of my pantry, desperately seeking weeknight dinner inspiration, when it hit me: Chicken Noodle Casserole! This dish is like a cozy, warm hug in the form of food. It’s one of those recipes that’s both comforting and deceptively easy, perfect for when you need something satisfying but don’t have hours to spend in the kitchen. Plus, it’s a great way to use up some of those leftover veggies hiding in your freezer. Let’s dive in, shall we?
Jump to Recipe
What You’ll Need
You’ll love this ingredient list because, chances are, you already have most of these staples lurking in your kitchen:
- Italian bread crumbs
- Butter
- Frozen carrots
- Chicken broth
- Cooked egg noodles
- Flour
- Frozen corn
- Garlic powder
- Italian seasoning
- Milk
- Shredded parmesan cheese
- Frozen peas
- Salt and pepper
- Cooked shredded chicken
- Shredded mozzarella
- Sour cream
- Sweet diced onion
How to Make Chicken Noodle Casserole Dish
- Start by preheating your oven to 350°F. This way, it’s ready to go once you’ve assembled everything.
- In a large skillet, sauté the sweet diced onion in 2 tablespoons of olive oil over medium heat. Cook until the onion is soft and translucent, filling your kitchen with that irresistible aroma.
- Pour in the chicken broth and add the frozen carrots, corn, and peas. Bring everything to a boil, then reduce the heat and let it simmer for about 2 minutes. You want the veggies to just start softening.
- Slowly whisk in the flour, ensuring there are no lumps, then gradually add the milk, stirring constantly to create a smooth sauce.
- Stir in the sour cream, shredded parmesan, and mozzarella until everything is nicely melted and combined. Toss in the cooked shredded chicken and season with garlic powder, Italian seasoning, salt, and pepper.
- Mix in the cooked egg noodles, making sure they’re evenly coated with the creamy mixture.
- Pour the entire mixture into a 13×9-inch casserole dish that you’ve generously buttered to prevent sticking.
- In a separate bowl, combine the remaining parmesan, Italian bread crumbs, and a bit more butter. Sprinkle this mixture evenly over the top of the casserole. It’ll give you that crave-worthy crunchy topping.
- Bake in the preheated oven for about 25 minutes, until the top is golden and the edges start to bubble. Your kitchen will smell amazing!
- Serve hot and enjoy every comforting bite!
Cook’s Notes
This casserole is pretty forgiving, which is one of the many reasons I love it. You can store leftovers in an airtight container in the fridge for up to three days. Just reheat in the oven or microwave until heated through. If you’re planning ahead, you can make and assemble the casserole a day in advance; just cover it tightly and store it in the fridge until you’re ready to bake it. Avoid adding too much flour too quickly to prevent lumps. A gentle stream and continuous whisking are your best friends here.
Make It Your Own
Here are some fun swaps to make this dish fit your taste buds or pantry supplies:
- Switch out the chicken for crispy tofu for a vegetarian twist.
- Use cheddar or gouda in place of mozzarella for a different cheese experience.
- Try adding a dash of sriracha or red pepper flakes if you like it spicy.
- For a gluten-free version, swap in gluten-free noodles and breadcrumbs.
If you try this, I’d love to hear how it turns out—drop a comment or tag me! There’s nothing better than sharing a dish that brings a little comfort to the chaos. Happy cooking!
Goes Well With
If you want to round out the meal, here’s what I’d pair it with over on meaghanmoineau.com:
Related update: Chicken Noodle Casserole Dish
Related update: Asian Salmon Burgers With Tangy Ginger Lime Sauce
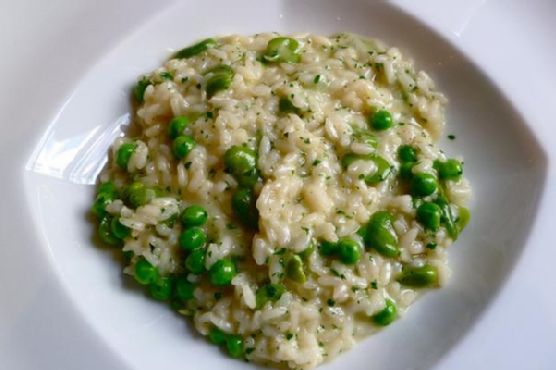
It was one of those unpredictable Tuesdays when everything at work ran late, and by the time I got home, I was craving something comforting yet sophisticated. My pantry didn’t have much, but the bare essentials were there—arborio rice, a bag of frozen peas, and some chicken stock. You know that feeling when you’re just too tired for anything elaborate, yet you want something that feels like a warm hug on your plate? That’s when I knew a creamy risotto with fresh peas would be perfect. This dish has that magical ability to elevate your everyday ingredients into something kinda fancy, without the three-hour prep time. Let’s dive in, shall we?
Jump to Recipe
What You’ll Need
I love how risotto makes you feel like a chef without needing a ton of exotic ingredients. Chances are you already have most of this—except for maybe the arborio rice if you’re not a risotto regular.
- 4 cups of HOT chicken stock
- 2 tablespoons of butter
- 2 tablespoons of extra virgin olive oil
- 1 chopped onion
- 2 minced garlic cloves
- 1 cup of arborio rice
- 1/2 cup of dry white wine
- 1 cup of peas (fresh or thawed frozen)
- 1/2 cup of grated parmesan
- 1 bay leaf
- Salt and pepper to taste
How to Make Risotto With Fresh Peas
- Melt the butter in a heavy large saucepan over medium heat. Add the olive oil, bay leaf, and onions. Season with salt and pepper. Cook until the onions are translucent, filling your kitchen with that irresistible oniony aroma, around 5 minutes.
- Stir in the minced garlic, letting it sauté until tender, roughly 3 more minutes. You’ll know it’s perfect when the garlic starts to mellow and sweeten.
- Add the arborio rice to the pan, stirring it through the buttery onions and garlic. Toast the rice until the grains are glistening, about 2 minutes. It helps develop that nutty flavor we all love.
- Pour in the dry white wine and let it sizzle and cook until the liquid is completely absorbed, stirring often, about 2 minutes. This adds a subtle depth and aroma that’s just dreamy.
- Now, slowly add the hot chicken broth, one cup at a time. Make sure the liquid is absorbed before adding more, stirring often. It’s a bit like babysitting, but it’s worth it. This whole process takes about 28 minutes over medium-low heat. Each addition should take roughly 3 minutes.
- When the rice is tender and the texture is creamy, stir in the peas and parmesan. Watch as the cheese melts into the risotto, making it oozy and silky. Season with more salt and pepper to your liking.
- Cook until the mixture has absorbed all the liquid and has doubled in size. Let it sit for a minute before diving in; I promise it’s worth the wait!
Cook’s Notes
This risotto is pretty forgiving, but here are a few tips to make it foolproof. Always have your chicken stock hot; this helps the rice cook evenly and prevents it from becoming mushy. Got leftover risotto? Lucky you! It can be transformed into risotto cakes the next day. Just form the cold risotto into patties, dust them with flour, and fry them in a little olive oil until crispy and golden. Also, avoid using regular rice; it won’t give you that creamy texture that arborio is famous for.
Make It Your Own
Everyone’s taste is a bit different, and that’s what makes cooking so fun! Here are some ways to play around with this risotto recipe:
- Swap the peas for crispy prosciutto for a salty, meaty twist.
- Replace the parmesan with a tangy goat cheese for something wonderfully creamy and unexpected.
- Add a handful of sautéed mushrooms for an earthy depth that complements the risotto’s creaminess.
- Use vegetable stock instead to make it vegetarian-friendly without losing flavor.
If you try this, I’d love to hear how it turns out — drop a comment or tag me! There’s a special joy in seeing others enjoy a dish that’s become a staple in my kitchen. Happy cooking!
Goes Well With
If you want to round out the meal, here’s what I’d pair it with over on meaghanmoineau.com:
Related update: Risotto With Fresh Peas
Related update: BBQ Beef Brisket
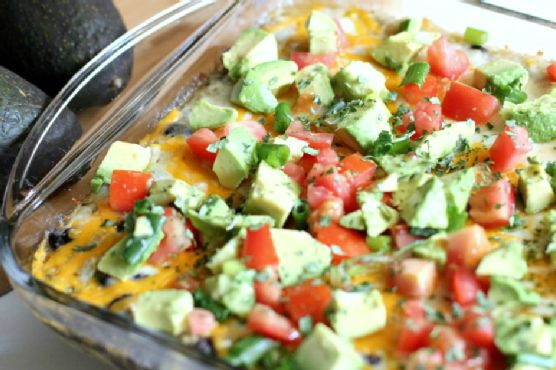
Picture this: It’s a random Tuesday night, and I’m standing in my kitchen, staring blankly at the fridge, wondering how to turn a motley assortment of leftovers and pantry staples into something that doesn’t scream “desperation dinner.” That’s when inspiration struck, as I spied a lonely can of verde enchilada sauce next to last night’s cooked quinoa. What followed was a happy accident of flavors and textures, culminating in my new favorite go-to comfort dish: Cheesy Chicken Enchilada Quinoa Casserole. It’s creamy, cheesy, and bursting with zesty flavors — perfect for those nights when you need something easy but crave-worthy. You’ll be shocked at how quickly it comes together and how it leaves the whole family asking for seconds. Or thirds.
Jump to Recipe
What You’ll Need
This recipe is a pantry hero! If you’ve got a well-stocked spice rack and some leftover chicken, you’re halfway there.
- Cooked quinoa – the fluffy base of this casserole
- Cooked skinless boneless shredded chicken breast – feel free to use rotisserie chicken for a shortcut
- Canned verde enchilada sauce – the tangy key player
- Shredded cheese – use your favorite melting cheese
- Canned tomatoes with chilis
- Canned black beans
- Canned sweet corn
- Salt
- Black pepper
- White pepper
- Chili powder
- Cumin
- Fresh cilantro
- Green onion tops
- Roma tomato
- Avocado
How to Make Cheesy Chicken Enchilada Quinoa Casserole
- Preheat your oven to 350°F and grab an 8×8 inch baking dish. Make sure it’s ready for action.
- Cook the quinoa according to the package instructions. If you haven’t shredded your chicken yet, now’s the time to boil and shred it too.
- In a medium-sized mixing bowl, combine 2 tablespoons of chopped cilantro, 1 cup of shredded cheese, cooked quinoa, canned tomatoes with chilis, black beans, half a can of sweet corn, verde enchilada sauce, cumin, chili powder, white pepper, black pepper, and salt to taste. Stir everything together until well mixed and harmonious.
- Pour your well-mixed concoction into the prepared baking dish, spreading it out evenly. Top with the remaining cup of shredded cheese, covering the surface generously.
- Bake in the preheated oven for about 15 minutes, or until the cheese is delightfully melty and bubbling at the edges. The smell will be irresistible at this point!
- Remove from the oven and let it cool slightly for about 5 minutes. This helps everything set a bit so you can serve neat slices.
- Top your casserole with freshly chopped Roma tomato, avocado chunks, green onion tops, and the remaining 2 teaspoons of cilantro. Serve immediately and bask in the glory of your culinary creation!
Cook’s Notes
This dish is pretty forgiving, but here are a few tips to ensure success. If your quinoa is a bit on the wet side, let it sit in a sieve for a few minutes to drain excess moisture — nobody likes a soggy casserole! When adding salt, remember that the canned ingredients and cheese already bring their own saltiness, so taste as you go. Store any leftovers in an airtight container in the fridge for up to 3 days. It reheats beautifully in the microwave or oven. If you’re planning to make this ahead, assemble everything but wait to add the cheese topping until you’re ready to bake.
Make It Your Own
- Swap the chicken for crispy tofu to make it vegetarian. Just cube the tofu, toss it in a bit of cornstarch, and sauté until golden.
- Add some heat by including a diced jalapeño or a sprinkle of crushed red pepper flakes into the mix.
- If you’re not a fan of cilantro, try using fresh parsley or chives for a milder pop of green.
- More veggies? Toss in some sautéed bell peppers or zucchini to make it even more wholesome.
If you try this, I’d love to hear how it turns out — drop a comment or tag me! This casserole was a happy accident in my kitchen, and I’m excited to see it work its magic in yours. Enjoy every cheesy, tangy bite! 🥑🌿🍅
Goes Well With
If you want to round out the meal, here’s what I’d pair it with over on meaghanmoineau.com:
Related update: Cheesy Chicken Enchilada Quinoa Casserole
Related update: Risotto With Fresh Peas

It was one of those Thursday afternoons when I found myself staring at the fridge, desperate for something sweet and a little different to snack on. You know the kind of day — a little bit drizzly, and the idea of a fragrant loaf filling the house with warmth seemed like the perfect antidote. I remembered some strawberries and a lonely lemon hanging out in the crisper drawer, and an idea sparked. This Lemon and Strawberry Loaf is a twist on your usual bake — think sweet strawberries mingling with zesty lemon and a hint of coconut. It’s a little slice of sunshine even when the weather outside is anything but. Plus, the recipe is straightforward enough to whip up on a whim.
Jump to Recipe
What You’ll Need
What’s great about this ingredient list is that you might already have most of these at home. It’s the kind of recipe that doesn’t require a last-minute supermarket dash.
- Butter
- Sugar
- Eggs
- Self-raising flour
- Dessicated coconut
- Natural yoghurt
- Lemon (juice and rind)
- Fresh strawberries
How to Make Lemon and Strawberry Loaf
- Preheat your oven to 180°C. While it heats up, line a 23cm x 12cm loaf tin with baking paper. Trust me, it’ll make your life easier when you’re trying to get that loaf out later.
- In a large bowl, beat the butter and sugar together until they’re pale and creamy. You want a texture that feels fluffy and light.
- Add the eggs, one by one, beating well after each addition. This will give you a smooth and well-incorporated mixture.
- Grate the lemon rind into the mixture and squeeze in the juice. That zesty aroma should hit you right in the face — it’s heavenly!
- Fold in the self-raising flour, dessicated coconut, and natural yoghurt with a rubber spatula. Be gentle; you’re aiming for a lovely, airy batter.
- Finally, fold in the fresh strawberries. Try to distribute them evenly so you don’t end up with a surprise berry-less slice.
- Pour the mixture into your prepared loaf tin, smoothing the top with the spatula to ensure it bakes evenly.
- Bake for 50-60 minutes. The loaf is done when a skewer inserted in the center comes out clean, and the top is beautifully golden.
- Let it cool in the tin for about 10 minutes, then turn it out onto a wire rack to cool completely. Waiting is the hardest part, but it’s worth it!
Cook’s Notes
This loaf is a keeper for a couple of days, tightly wrapped at room temperature. If you’re planning to make it ahead, it freezes well too. Just wrap it up snugly in plastic wrap and pop it in a ziplock bag. A tip if you’re in a rush: you can microwave slices directly from frozen — it’s like bringing back freshly baked magic!
- Be careful not to overmix the batter once you’ve added the flour. Overmixing can make the loaf dense instead of light and fluffy.
- For the strawberries, smaller pieces work best. They distribute better through the loaf, giving you a little strawberry burst in each bite.
Make It Your Own
- Swap the strawberries for raspberries if you prefer a different berry twist.
- For a tropical vibe, add a handful of chopped pineapple instead of strawberries, and you’ll feel like you’re on a mini-vacation.
- If you’re out of self-raising flour, use plain flour with an extra teaspoon of baking powder.
- Try adding a teaspoon of vanilla extract to the batter for an extra layer of flavor.
If you try this, I’d love to hear how it turns out — drop a comment or tag me! It’s always a joy to see your creations come to life. Happy baking, and may your kitchen be filled with the delicious aroma of lemon and strawberries!
Goes Well With
If you want to round out the meal, here’s what I’d pair it with over on meaghanmoineau.com:
Related update: Lemon and Strawberry Loaf
Related update: Mascarpone & Ricotta Cheese Cake
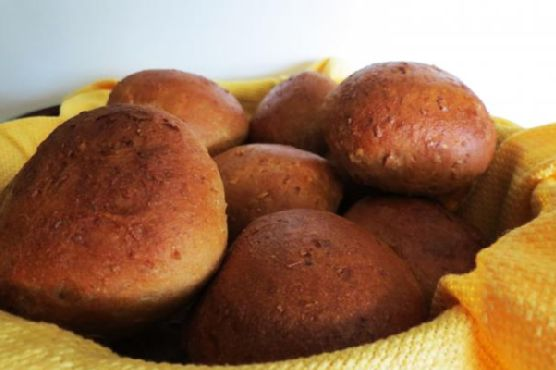
It was one of those Tuesday evenings when I realized I had promised fresh bread for dinner. The sun was setting, casting a warm, golden hue across my kitchen, and I could feel the cool breeze of autumn sneaking through the barely open window. That’s when it hit me — I needed something cozy yet impressive, but also forgiving enough to handle a bit of my mid-week chaos. Enter: these Whole Wheat Dinner Rolls. They’re not just any rolls; they’re the kind that make your kitchen smell like a bakery and your heart feel utterly content. I love how something so wholesome can come from ingredients I usually have stashed away in my pantry. Plus, they’re surprisingly easy to make, with a bit of patience and love.
Jump to Recipe
What You’ll Need
You’ll likely find most of these ingredients are staples in your kitchen, with a few stars that make these rolls stand out. Here’s what you’ll need:
- 1 cup water
- Cracked wheat (or Coaches Oats) – gives that lovely texture
- 1/3 cup warm water
- Dry active yeast – for that perfect rise
- Granulated sugar – just a touch for the yeast
- Butter – because everything is better with butter
- 1 teaspoon table salt
- Molasses – adds depth and color
- Honey – a natural sweetness
- 2 tablespoons wheat germ
- 1 cup milk
- 2 1/4 cups whole wheat flour
- 2 cups all-purpose flour
- Whole egg white – for that glossy finish
How to Make Whole Wheat Dinner Rolls
- In a small saucepan, bring 1 cup of water and the cracked wheat to a boil, then reduce the heat to medium-low and let it simmer for around 6 minutes. The kitchen will fill with a nutty aroma, and you’ll know it’s ready when the mixture has softened. Remove from the heat and allow it to cool to lukewarm.
- In a medium bowl, dissolve the yeast with the 1/3 cup of warm water and a tablespoon of sugar. Give it a quick stir and let it sit for about 10 minutes until it’s foamy and fragrant. It’ll be your sign that the yeast is happy and ready to work its magic.
- Add the cooled cracked wheat mixture to the yeast along with the butter, salt, molasses, honey, wheat germ, and milk in the bowl of an electric mixer. Use the paddle attachment to mix everything until just combined.
- Add 1 cup of the whole wheat flour and 2 cups of the all-purpose flour. Mix until the dough comes together. Switch to the dough hook attachment and gradually add the remaining whole wheat flour, about a quarter cup at a time, until the dough sticks less to the sides of the bowl.
- Let the mixer knead the dough on medium-low for about 8-10 minutes. The dough should be smooth and slightly tacky to the touch.
- Lightly oil a large bowl, place the dough inside, and cover it with a clean towel. Let it rise in a warm spot until it doubles in size — this could take anywhere from 1 to 2 hours, so be patient!
- Punch down the dough to release the air and divide it into 19 equally-sized pieces, about 2.5 ounces each. Shape them into balls and place them on a baking sheet lined with parchment paper. Cover with a towel and let them rise for another 45 minutes.
- While the rolls are rising, preheat your oven to 375°F. Place a dutch oven or oven-safe pot filled with water on the lowest shelf for added steam.
- Brush the risen rolls with an egg wash made by whisking the egg white with a bit of water. This will give them that irresistible sheen.
- Bake for 17-23 minutes until golden brown. The molasses will naturally darken the rolls, so don’t worry if they seem a little darker than expected. Once baked, let them cool on a wire rack.
Cook’s Notes
The key to these rolls is patience. Letting the dough rise properly will reward you with a tender crumb. If your kitchen is chilly, try placing the dough near a warm oven or in an off oven with the light on. For storage, keep them in an airtight container at room temperature for up to three days — if they last that long! To reheat, a quick zap in the microwave or a few minutes in a warm oven will bring them back to life. Freezing is an option too; just make sure they’re completely cooled before popping them in a freezer bag.
Make It Your Own
- Cheesy Rolls: Add a cup of your favorite shredded cheese to the dough for a gooey surprise in every bite.
- Herb-Infused: Mix in a tablespoon of dried rosemary or thyme into the dough for a fragrant herb twist.
- Seeded Top: Sprinkle sesame or poppy seeds on top of the rolls before baking for an added crunch.
- Sweet Cinnamon Swirl: Add a swirl of cinnamon sugar to the dough before shaping for a sweet counterpart to the savory meal.
If you try this recipe, I’d love to hear how it turns out for you — drop a comment or tag me in your photos! Whether they’re part of a holiday spread or a weeknight dinner, these rolls are sure to be a hit. Happy baking!
Goes Well With
If you want to round out the meal, here’s what I’d pair it with over on meaghanmoineau.com:
Related update: Whole Wheat Dinner Rolls
Related update: Cheddar Chile Beer Bread