
Last Tuesday, my kitchen was a whirlwind of chaos. It was one of those evenings where craving something decadent and a bit out of the ordinary hit like a freight train, and all I had was a pantry challenge waiting to happen. After digging through the freezer, I found a bag of crawfish tails, and suddenly, a memory of summer seafood boils with friends came flooding back. The tantalizing mix of spices and seafood was exactly what I needed, but in a form that was quick and easy without compromising on flavor. Enter: Crawfish Cake Sliders. These little beauties pack a punch, they’re crispy on the outside yet tender inside, and they’re kind of impressive when you serve them up — like a casual, yet gourmet, hand-held delight. Perfect for a weeknight dinner or to wow your friends at a gathering.
Jump to Recipe
What You’ll Need
Let’s be honest, if you love a good seafood dish, you’ve probably got most of this on hand already. Here’s what you’ll need to whip up these sliders:
- 1 teaspoon oil
- 1 cup chopped red onion
- 1 clove garlic, minced
- 1 teaspoon Creole spice (or to taste)
- 1 pound crawfish tails, thawed if frozen
- 1 large egg
- 1/2 cup bread crumbs
- 8 slider buns
- 1/2 cup tartar sauce
How to Make Crawfish Cake Sliders
- Start by heating 1 teaspoon of oil in a sauté pan over medium heat. Toss in the chopped onion and let it sizzle away with a pop of color from some finely chopped red pepper and celery — sauté these until tender, about 2-3 minutes. The kitchen should start smelling like a savory promise.
- Once the veggies are tender, remove the pan from the heat and add the garlic, crawfish meat, and Creole spice. The residual heat will mellow out the garlic and awaken the spices.
- Transfer this aromatic mixture into a mixing bowl and let it cool just enough so that it doesn’t scramble the egg. Speaking from experience here, oops!
- Mix in the egg and just enough bread crumbs for the mixture to bind together — you’re looking for a consistency that holds but isn’t dry. Taste and adjust the seasonings with salt, pepper, and more Creole spice if you’re feeling bold.
- Form the mixture into 8 equal patties and flatten them to about 3/4-inch thick. They should feel sturdy but not densely packed.
- Heat the remaining oil in the same sauté pan over medium heat. Cook the patties on both sides until they’re brown and crispy, about 3-4 minutes per side. This is where the magic happens — the aroma alone is worth it.
- Once cooked, serve each cake nestled in a slider bun with a generous dollop of tartar sauce. It’s the final touch that brings everything together.
Cook’s Notes
As you embark on this culinary adventure, keep a few things in mind: If using frozen crawfish tails, make sure they’re fully thawed and patted dry to prevent soggy cakes. The mixture should be moist but not wet; too much moisture means your patties might fall apart during cooking. If you need to make these ahead, form the patties and store them covered in the fridge for a few hours. Cooked patties can also be reheated in a 350°F oven until warm.
Make It Your Own
Here’s where you can get creative with these sliders:
- Spice Swap: Try using Old Bay or a Cajun spice mix if Creole isn’t your thing.
- Herb Boost: Add chopped fresh parsley or cilantro to the mixture for a fresh twist.
- Different Sauce: Swap out tartar sauce for a spicy remoulade or even a dollop of garlic aioli for a different flavor profile.
- Gluten-Free Option: Use gluten-free bread crumbs and buns to make this dish suitable for your gluten-sensitive friends.
If you try this, I’d love to hear how it turns out — drop a comment or tag me! Your kitchen stories make this cooking journey so much more fun. Happy cooking!
Related update: Crawfish Cake Sliders
Related update: Ditalini with peas
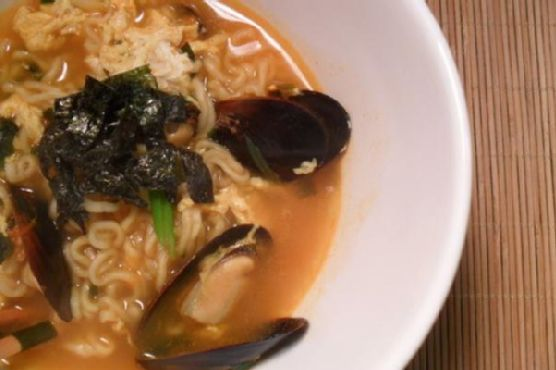
It was one of those chilly evenings when nothing but a steaming bowl of comfort would do. My kitchen counter was a mess of ingredients that promised warmth and nostalgia: ramen packets, a handful of mussels I had ambitively picked up at the market, and that last lonely scallion in the crisper. This, I decided, was the night for Neoguri (Spicy Seafood Ramen). Quick enough for a weeknight yet impressive with its depth of flavor, this dish is all about minimal effort with maximum impact. And honestly, who doesn’t love a meal that comes together in under 15 minutes but feels like a hug in a bowl?
Jump to Recipe
What You’ll Need
You probably have most of these already lurking in your kitchen. Just a quick note, make sure to use fresh mussels for the best experience.
- Neoguri ramen (spicy seafood flavor)
- 1 egg
- Mussels (fresh, ideally)
- 1 green scallion
- Seaweed (gim sheets are perfect)
How to Make Neoguri (Spicy Seafood Ramen)
- Start by bringing a pot of water to a rolling boil. This is the moment for a deep breath because things are about to get exciting.
- Add the mussels and the sauce packets from the Neoguri ramen. Let them party in the pot for about 5 minutes. If you’re using fresh mussels, watch them closely: they should open up. Any stubborn, closed mussels deserve to be tossed.
- Time to add the ramen noodles. Give them 2 to 3 minutes to soften and soak up all that spicy goodness.
- For the egg, you have options: beat it and drizzle while swirling the noodles for those lovely egg ribbons or slide it in gently to poach. Both ways are dreamy.
- While everything mingles and cooks, grab your scallion and seaweed. Slice the scallion thinly and tear or cut up your seaweed into munchable pieces.
- Transfer your ramen to a serving bowl, putting the mussels on display like the treasures they are, and sprinkle generously with scallion and seaweed.
Cook’s Notes
The wonderful thing about this ramen is how forgiving it is. If you’re using dried seaweed snacks instead of gim, it works just as well. For those planning ahead, fresh mussels can be stored in the fridge for a day or two if they’re kept cool and moist. Once cooked, the ramen doesn’t fare well as leftovers (it tends to become a soggy sea of sadness), so plan to savor it in one sitting. If you find yourself with extra scallions or seaweed, these make great additions to salads or other soups you’ll whip up during the week.
Make It Your Own
- Swap out the mussels for shrimp or clams if that’s what you have on hand.
- Use crispy tofu instead of mussels for a delightful vegetarian spin that’s still packed with protein.
- If you’re not a fan of spicy, try mixing in a little coconut milk or cream to mellow out the heat.
- Want more greens? Toss in some spinach or bok choy just before the noodles finish cooking for extra nutrients.
If you try this, I’d love to hear how it turns out — drop a comment or tag me on social media! Whether you’re a ramen novice or a seasoned pro, this dish is bound to hit the spot. Enjoy your bowl of cozy goodness!
Related update: Neoguri (Spicy Seafood Ramen)
Related update: Braised Pork: Filipino Humba
Related update: Cauliflower, Leek and Cheddar Cheese Soup
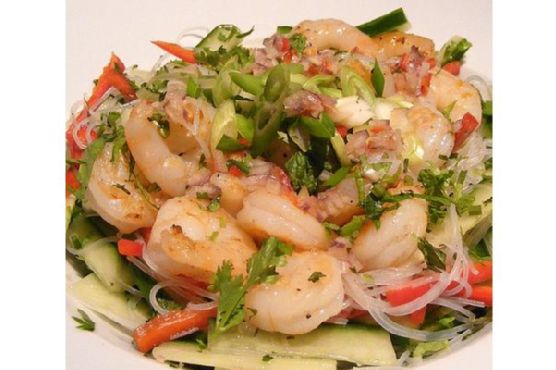
It was one of those evenings where the day seemed to stretch on forever, and all I could think about was something light yet satisfying to cap it off. The sun was setting, casting a warm glow across my kitchen, and I had a sudden craving for something that felt like a mini tropical escape. That’s when the idea of making Grilled Lemongrass Shrimp hit me. It’s the kind of dish that’s deceptively impressive but doesn’t demand hours of your time—perfect for a weeknight treat. The lemongrass adds a citrusy zing, while the chili paste gives it just the right kick. With a short marinating time, it’s as close to instant gratification as you can get with a grill. Plus, there’s something about skewering shrimp that feels like a fun party trick, even if it’s just you and your family.
Jump to Recipe
What You’ll Need
Chances are you already have most of this tucked away in your pantry, aside from maybe the lemongrass. But trust me, it’s worth hunting down for that signature aromatic flavor.
- Bamboo skewers soaked in water
- Lemongrass – the star of the show!
- Garlic
- Soy sauce
- Fish sauce
- Ground chili paste
- Pinch of salt
- Sugar
- Vegetable oil
- Water
- Raw shrimp – peeled and deveined
How to Make Grilled Lemongrass Shrimp
- Gather all your ingredients and a mixing bowl. Combine the chopped lemongrass, minced garlic, soy sauce, fish sauce, chili paste, salt, sugar, and a drizzle of vegetable oil in the bowl. Stir until it all comes together into a fragrant marinade.
- Add the shrimp into the bowl, making sure each one gets coated in the aromatic marinade. Let them marinate for 15 minutes—just enough time to sip on a cool drink and prep your grill.
- Thread the shrimp onto the soaked bamboo skewers. It’s all about that balance, so make sure the shrimp are spaced out evenly.
- Fire up your grill to moderate heat. If you’re using charcoal, wait until the coals are hot but no longer flaming. For a gas grill, a medium setting will do the trick.
- Place the skewers on the grill. The shrimp will cook quickly, so stay close. Turn them after about a minute or so, keeping an eye out for that beautiful pink hue and slightly charred edges. They’re done when they’re opaque and firm, about 2-3 minutes in total.
Cook’s Notes
If you’re like me and tend to get distracted, set a timer for the marinating and grilling time. You don’t want to overdo the shrimp—there’s nothing worse than rubbery seafood. If you don’t have a grill, a griddle pan on the stovetop works surprisingly well. Just make sure it’s hot enough to give you that lovely char. Leftovers, if you have any, are great cold in a salad or tossed into a noodle dish the next day.
Make It Your Own
- Swap the shrimp for chicken or tofu if you’re looking for a different protein. Adjust cooking times accordingly—chicken will take a bit longer.
- For a sweeter twist, add a splash of coconut milk to the marinade. It brings a creamy texture that pairs beautifully with the lemongrass.
- Throw in some chopped cilantro or mint into the marinade for a fresh, herbal kick.
- If you’re feeling brave, up the chili paste for more heat. Just have a cool drink at the ready!
If you try this, I’d love to hear how it turns out—drop a comment or tag me! It’s always fun to see how different kitchens bring their own flair to a dish. Enjoy your little slice of tropical heaven!
Related update: Grilled Lemongrass Shrimp
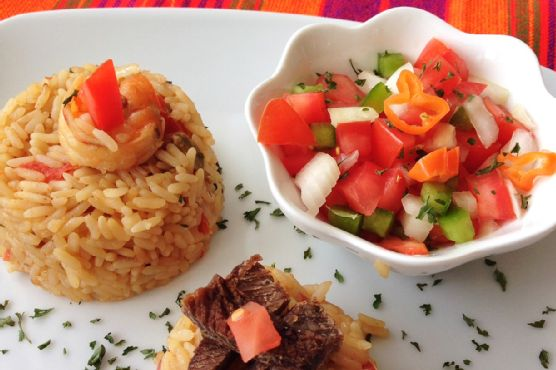
Imagine this: It’s a chilly, rainy Tuesday evening. I find myself staring into the pantry, looking for something that’ll warm me up, body and soul. I have a little bit of goat meat, some shrimp, and the usual pantry spices that seem to multiply on their own. It’s the kind of evening where you crave something comforting yet exotic, and that’s when I remember — Kenyan Pilau. It’s one of those dishes that sounds impressive but is surprisingly easy to whip up. The aroma of spices mingling in the kitchen is enough to make anyone feel like a culinary genius. It’s perfect for those weeknight dinners when you want to travel the world without leaving your kitchen.
Jump to Recipe
What You’ll Need
Trust me, you might already have most of these ingredients lounging around in your kitchen. And the hero of this dish? It’s definitely the spice mix that elevates a simple rice dish into something extraordinary.
- Black whole peppercorns
- Cardamom pods
- Cinnamon sticks
- Cumin seed powder
- Garlic
- Ginger
- Goat meat
- Onion
- Canned rice
- Salt
- Dressed shrimp
- Tomatoes
- Cooking spoon of vegetable oil
How to Make Kenyan Pilau
- First things first, season the goat meat well and set it to boil. You want it tender, like it’s ready to fall apart at a fork’s touch.
- Chop all your lovely spices — the peppercorns, cardamom, and cinnamon — and give them a good crush. This is where the magic begins.
- Heat up a cooking spoon of vegetable oil in a large pot. Once shimmering, add sliced onions and sauté until they’re golden brown, releasing a sweet aroma.
- Add the boiled goat meat to the pot and allow it to brown just a little more. This is where you start to feel like a pro chef.
- Stir in your crushed spices, letting their fragrance envelop the kitchen. Then, add the canned rice and chopped tomatoes, giving it all a good mix.
- Add the dressed shrimp, followed by 2 cups of water. Reduce the heat, cover the pot, and let it steam. Check occasionally to ensure the water is absorbed and the rice is soft.
- Once the rice is perfect, increase the heat briefly and stir to ensure all those fantastic spices soak into every grain. Serve it alongside some Kachumbari or your favorite salad.
Cook’s Notes
A little tip from my kitchen to yours: make sure you don’t rush the browning process for the onions and meat. This step deepens the flavor of the Pilau significantly. Feel free to make this dish ahead of time; it keeps well in the fridge for a couple of days and the flavors only get better. Just reheat gently to avoid drying out the rice. If you find yourself with leftovers, good news — they can be transformed into a delightful next-day lunch. Just add a splash of water before reheating to fluff it up again.
Make It Your Own
This Kenyan Pilau is versatile, and you can easily tweak it to fit your taste or pantry stock. Here are some ideas:
- Swap the goat meat with chicken thighs for a lighter version.
- Substitute the shrimp with crispy tofu for a vegetarian twist.
- Try using basmati rice instead of canned rice for a fragrant touch.
- Add a handful of peas or diced carrots for a pop of color and sweetness.
If you try this, I’d love to hear how it turns out—drop a comment or tag me! Whether you stick to the script or make it your own, this Kenyan Pilau is set to be a crowd-pleaser at your table. Happy cooking!
Related update: Kenyan Pilau
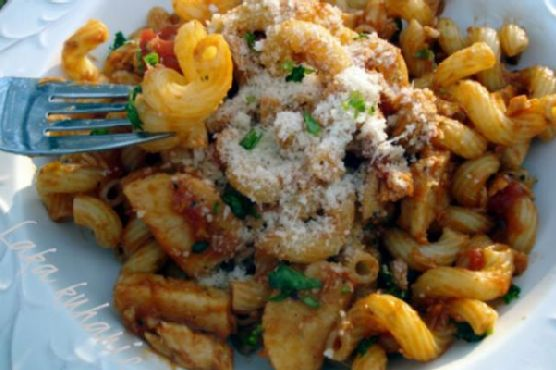
Picture this: It’s a blustery Tuesday evening, and you’ve just gotten home from a day that was long enough to make watching paint dry sound thrilling. You’re craving something that’s easy enough to not require a kitchen degree, but still feels like a cozy hug in a bowl. Enter my Cavatappi pasta with salmon crab surimi. This dish is a delightful tangle of flavors that hits the sweet spot between comfort food and seafood sophistication. The pasta’s curly tubes are perfect for catching all the saucy goodness, and the combination of salmon and surimi gives you that savory, oceanic touch without the need for a second mortgage. It’s a recipe that comes together in a flash, so you can have your taste of the Mediterranean with just a little bit of kitchen magic and minimal fuss. Curious yet?
Jump to Recipe
What You’ll Need
The best part about this ingredient list is that it’s likely you’ve already got most of these at your disposal. A few pantry staples, a couple of fresh herbs, and you’re in business.
- 8 oz Cavatappi pasta
- 2 tablespoons olive oil
- 2 cloves garlic, minced
- 1 can (6 oz) salmon fillets, drained
- 4 oz surimi crab sticks, sliced
- 2 plum tomatoes, chopped
- 2 tablespoons tomato puree
- 1 tablespoon red wine
- 1 teaspoon dried basil
- 2 tablespoons fresh basil, chopped
- 2 tablespoons fresh parsley, chopped
- 1 teaspoon sugar
- Salt and pepper to taste
- Grated Parmesan cheese for serving
How to Make Cavatappi pasta with salmon crab surimi
- First, get that pasta going. Cook the Cavatappi according to the package instructions until it’s al dente. Drain it, but don’t be too hasty — reserve a bit of that starchy cooking water like the little secret weapon it is.
- In a large skillet, heat up the olive oil over medium heat. Add the minced garlic and sauté it for about a minute. Keep an eye out – you want it just fragrant, not the golden brown of regret.
- Add the canned salmon and surimi crab sticks to the pan. Stir them gently, and let them simmer together for just a couple of minutes, like a friendly neighborhood chat.
- Time for the juicy bits: toss in the chopped tomatoes, tomato puree, dried basil, and red wine. Mix everything so it all gets to know each other, and let it simmer gently. You should start seeing those edges bubble in about 2-3 minutes.
- Sprinkle in the sugar, and season with salt and pepper. Stir it all together, letting the flavors meld into a harmonious sauce.
- Now, bring the pasta back into the fold. Add the Cavatappi to your sauce, turning it through until everything is well coated. If things look a bit too thick, a spoonful of that reserved pasta water will smooth it out beautifully.
- Serve immediately, with a generous sprinkle of Parmesan cheese and a touch of fresh, chopped basil for that finishing flair.
Cook’s Notes
Don’t be tempted to rush the garlic; it can go from golden to bitter in the blink of an eye. When simmering the sauce, keep it gentle—you’re coaxing out flavors, not boiling them away. This pasta dish is best enjoyed fresh, but if you happen to have leftovers, they’ll keep well in the fridge for up to two days. Just reheat gently, adding a splash of water if needed to get the sauce back to its luscious texture.
Make It Your Own
- Want to mix up the protein? Try swapping the salmon for some succulent shrimp or even crispy tofu for a vegetarian twist.
- If you’re a spice lover, a pinch of red pepper flakes tossed in with the garlic can add a nice kick.
- No wine on hand? A splash of chicken or vegetable broth works in a pinch and still adds depth.
- For a creamier version, stir in a splash of cream or a dollop of mascarpone cheese just before serving.
So there you have it! This Cavatappi pasta with salmon crab surimi is a surefire way to elevate any evening with minimal effort. If you try this, I’d love to hear how it turns out — drop a comment or tag me! Happy cooking! 🍝
Related update: Cavatappi pasta with salmon crab surimi
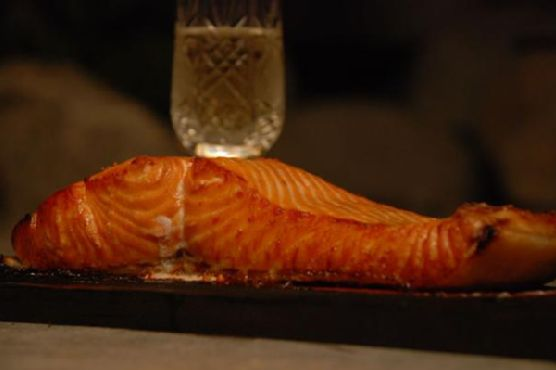
Last Thursday, I found myself staring into the fridge, hoping for inspiration to strike before my toddler demanded dinner. It was one of those days where you need something kinda fancy to feel like an adult—but it also had to be easy enough to not cause a breakdown. Enter: Wildwood Ovens Bourbon Apple Glazed Cedar Plank Salmon. This dish is the answer to those chaotic moments when you want to impress yourself and anyone lucky enough to be at the table. It’s a little sweet, a little smoky, and totally doable on a weeknight. The cedar plank makes it taste like it came from a restaurant, but really you just soaked a piece of wood and turned on the grill. Magic, right?
Jump to Recipe
What You’ll Need
The beauty here is that the ingredient list is straightforward, and there’s a good chance you’ve got most of this hiding in your pantry. A quick run to the store, and you’ll be ready to rock this impressive dish.
- Apple juice
- Brown sugar
- Cedar plank (make sure it’s food-safe!)
- 3-4 garlic cloves, minced
- 1 tsp kosher salt
- Freshly cracked black pepper
- Salmon filet (about 1.5-2 lbs is perfect)
- Bourbon whiskey
How to Make Wildwood Ovens Bourbon Apple Glazed Cedar Plank Salmon
- Start by soaking your cedar plank in water for at least 2 hours. This step is crucial to prevent any unplanned flare-ups and to infuse that lovely woody flavor into your salmon.
- Rinse the salmon under cold water and gently pat it dry with paper towels. This is essential as it helps the seasoning stick better and gives you a nice crisp finish.
- Grab a medium saucepan and set it over medium-high heat. Carefully pour in the bourbon—remember, no free-pouring from the bottle, unless you enjoy spontaneous kitchen pyrotechnics.
- Once the alcohol is reduced and you’ve got just a little left at the bottom of the pan, add in the apple juice, brown sugar, and minced garlic. Keep it on the heat until it’s reduced to about a third of its original volume. You’re looking for something just thinner than syrup.
- Season the salmon generously with salt and freshly cracked black pepper on both sides. Brush the skin side with a bit of olive oil.
- Place the seasoned salmon, skin side down, on the soaked cedar plank. Then, transfer the plank to a medium-high grill or a wood-fired oven preheated to 500°F, positioning it close to the fire for that authentic flavor.
- Using a probe thermometer, start checking the internal temperature of the salmon after about 10 minutes, and then every 5 minutes thereafter. Once it hits at least 100°F, brush on the apple glaze—every few minutes. This layering helps build up that gorgeous, sticky finish.
- Continue cooking until the salmon reaches your desired doneness; I aim for around 135°F for that perfect, juicy flakiness.
Cook’s Notes
Here are some extra tips for nailing this dish every time:
- Make sure your cedar plank is fully submerged while soaking, maybe putting a can or something on top to keep it under water.
- Don’t skimp on the glaze. The more layers you add, the richer the flavor.
- Leftovers (if you have any) can be kept in an airtight container in the fridge for a couple of days. Flake it over a salad for a quick next-day meal!
Make It Your Own
- Swap the bourbon for brandy if you prefer a slightly sweeter glaze.
- For a spicier kick, add a pinch of chili flakes to the glaze.
- No salmon? Try this glaze on chicken breasts or even tofu—just adjust the cooking time accordingly.
- Top with fresh herbs like dill or parsley for a pop of color and flavor right before serving.
If you try this, I’d love to hear how it turns out—drop a comment or tag me on social media! It’s always a win when we can turn a potential kitchen meltdown into a tasty triumph.
Related update: Wildwood Ovens Bourbon Apple Glazed Cedar Plank Salmon
Related update: Meat rolls with prosciutto and sage

Picture this: it’s a Wednesday evening, and you just got home, eyes baggy from the day, craving something that feels like a mini-vacation but without the suitcase hassle. Enter Crunchy Prawn Skewers With Lemony Avocado Dip. These little beauties are my go-to when I need something fresh, quick, and so delightful it erases the mundane right off your plate. I love that they’re impressive enough to make my husband think I’ve been slaving away when really, it’s just a fun little dish that comes together quicker than you can say “takeout.” Plus, that avocado dip? Oh, it’s the zingy, creamy goodness that dreams are made of.
Jump to Recipe
What You’ll Need
I bet you already have most of these staples hanging around your kitchen. You might just need to grab some prawns on your way home.
- Prawns – The star of the show, fresh or thawed from frozen.
- Flesh of Avocado – Creamy and ripe, please.
- Crème Fraiche – For that lush, smooth texture in the dip.
- Lemon (juice) – Bright, zesty, and necessary.
- Bread crumbs – I like the panko kind for extra crunch.
- Olive oil – Just a splash to coat those prawns.
- Bamboo skewers – Don’t let them set your kitchen on fire.
How to Make Crunchy Prawn Skewers With Lemony Avocado Dip
- Start by making the dip: throw the avocado flesh, crème fraiche, and lemon juice into a food processor. Blend until silky smooth. Taste, season, and set it aside.
- In a separate bowl, mix your breadcrumbs with a touch of lemon zest, and season generously. It should smell like a fresh, zesty day.
- Now, coat your prawns in a little olive oil. Give them a gentle massage, then toss them into the breadcrumb mixture, ensuring they’re well-coated.
- Thread three prawns onto each skewer. Trust me, this is easier than threading a needle.
- Time to grill! Place the skewers on a preheated grill for about 2 minutes on each side, until they’re golden and crisp. The smell should be irresistible by now.
- Serve immediately with that luscious avocado dip and watch them disappear quickly.
Cook’s Notes
I can’t stress enough the importance of soaking those bamboo skewers beforehand. Give them at least an hour in cold water, and you’ll avoid any unwelcome flare-ups. If you’re planning to make this dish ahead, prep the dip and breadcrumb mixture in advance, but hold off on breading the prawns until you’re ready to cook. Leftovers? Pop them in an airtight container in the fridge — the dip stays good for a couple of days, but the prawns are best enjoyed fresh while they’re crispy.
Make It Your Own
- Instead of prawns, try using tofu cubes for a vegetarian twist. Just press them well to remove excess moisture before coating.
- Add a pinch of smoked paprika to the breadcrumb mix for a smoky kick.
- Swap the crème fraiche with Greek yogurt if you prefer a tangier dip.
- For a little heat, toss a few chili flakes into the breadcrumb mixture.
If you try this, I’d love to hear how it turns out — drop a comment or tag me! Enjoy making these skewers and watch them become a weeknight favorite in no time!
Related update: Crunchy Prawn Skewers With Lemony Avocado Dip
Related update: Mini Zucchini Bites (Cuadritos De Calabacin)
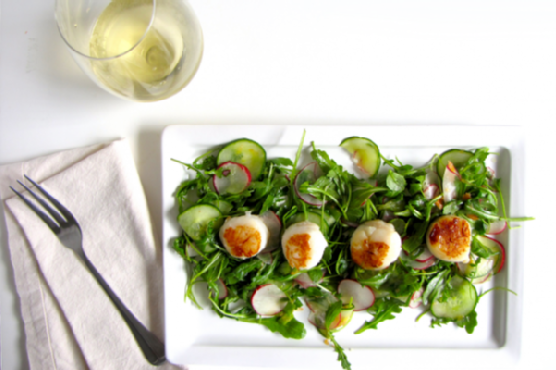
Picture this: It’s a Tuesday evening. You’ve just kicked off your shoes after a whirlwind day, and all you want is something fresh, zesty, and sophisticated on your plate without spending more time in the kitchen than you did in traffic. That’s where my Citrus Arugula Salad with Seared Scallops swoops in to save the day. It’s got that crisp, peppery bite from the arugula that I absolutely crave, the juicy pop of a Cara Cara orange, and the tender, buttery goodness of perfectly seared scallops. It sounds fancy, but trust me, it’s a cinch to throw together—and it’s bound to impress whoever’s lucky enough to join you at the table.
Jump to Recipe
What You’ll Need
Chances are you already have most of this in your kitchen, aside from maybe the scallops. But it’s the simple ingredients that really let those scallops shine.
- Arugula
- Cara Cara orange
- Radish
- English or Persian cucumber
- Green onion
- Salt
- Scallops
How to Make Citrus Arugula Salad with Seared Scallops
- First, thinly slice the radishes and cucumber. You want them delicate enough to complement the scallops, not overshadow them. Dice up the green onion, too.
- In a bowl, squeeze the juice and pulp from half of the Cara Cara orange. Add a pinch of salt and whisk it all together until it’s beautifully blended.
- Add in your radish and cucumber slices, along with a healthy handful of arugula. Toss it all together until every leaf and slice glistens with that citrusy goodness.
- Now, for the scallops: Heat a splash of oil in a pan over high heat. The pan needs to be hot, hot, hot—like sizzling enough that you can almost hear it pleading for the scallops.
- Gently place the scallops flat-side down in the pan. Space is key here, so if you have a lot of scallops, do them in batches. Crowding the pan is the enemy of that golden sear we’re aiming for.
- Let them sear undisturbed. The temptation to peek and prod is real, but resist! After a couple of minutes, check for that caramel-colored crust. Once you see it, flip them over.
- Plate your salad and place about four scallops on top. They should be served immediately to avoid any rubbery disappointments.
Cook’s Notes
Seared scallops are one of those things where less is more. Don’t overdo the seasoning; let their natural sweetness shine. Also, scallops are quick to cook and quick to turn rubbery if left too long. Watch them like a hawk, and you’ll be fine. If you want to make this ahead, prepare the salad components in advance and just sear the scallops right before serving. As for leftovers, the salad keeps well for a day, but the scallops are best enjoyed fresh out of the pan.
Make It Your Own
- Swap the arugula for spinach if you prefer a milder green.
- Replace the Cara Cara orange with blood orange for a deeper color and flavor.
- Try grilling the scallops for a smoky twist.
- For a vegetarian version, swap the scallops for crispy tofu slices.
If you try this, I’d love to hear how it turns out—drop a comment or tag me! Whether it’s a quick weeknight dinner or a date night delight, I hope you find this as much of a joy to make as it is to eat. Enjoy!
Related update: Citrus Arugula Salad with Seared Scallops
Related update: Vegetarian Ratatouille
Related update: Pear Salad With Walnuts and Blue Cheese
Last Tuesday was one of those days where everything felt a little off-kilter. You know, the kind where your morning coffee just doesn’t hit right, and your afternoon is a blur of tasks that never seem to end? By the time dinner rolled around, I was craving something that would transport me far from the daily grind—something warm, comforting, and just a tad exotic. Enter: paella. Not only is it a dish that sounds fancy enough to impress, but it’s surprisingly simple to whip up. It’s got this amazing way of bringing a little Spanish sunshine to your table, even on the dreariest of evenings. Plus, it’s a one-pan wonder, so less time spent cleaning up means more time for Netflix or a good book. Trust me, once you’ve tasted this, you’ll see what all the fuss is about. Jump to Recipe
What You’ll Need
If your pantry’s got some basics and your local grocery store has a seafood section, you’re pretty much set. I love that this recipe starts with stuff you likely already have on hand!
- Smoky paprika
- Dried oregano
- Kosher salt
- Black pepper
- Chicken wings
- Littleneck clams
- Solid chorizo sausage
- Shrimp
- Extra virgin olive oil
- White diced onion
- Diced garlic
- Italian parsley leaves
- Whole .5 oz tomatoes
- Canned Spanish short grain rice
- Water
- Saffron
- Salt and pepper
- Green peas
- Lemon wedges
How to Make Paella for Four; A Wonderful Spanish Mixed Seafood Stew
- Start by mixing the smoky paprika, dried oregano, kosher salt, and black pepper. Rub this spice mix all over the chicken wings and let them chill in the fridge for an hour. This is where the magic begins—infusing the chicken with all those bold, earthy flavors.
- Take the chicken out of the fridge about 30 minutes before you’re ready to cook. They should be close to room temp, which helps them cook evenly.
- Heat half of the olive oil in your trusty 12-inch All-Clad stainless steel pan over medium-high heat. Toss in the chorizo rounds and let them sizzle away until they’re browned and fragrant. Remove them from the pan and set aside.
- Add the rest of the oil to the pan, then brown the chicken on all sides, savoring that sizzling sound. Once they’re golden brown, take them out and keep them with the chorizo.
- Turn the heat down to medium and add the onions, garlic, and parsley. This is your sofrito—a flavor-packed base that’s the heart of the dish. Cook until the onions are translucent and everything smells irresistible, about 2-3 minutes.
- Next, add the crushed and drained tomatoes. Give everything a good stir and let it cook for about 3 minutes until the flavors meld together.
- Stir in the rice, making sure it’s all cozy with the sofrito, for about 2 minutes. You want each grain to be coated with that delicious base.
- Return the sausage and chicken to the pan. Pour in the hot water and bring the mixture to a gentle simmer, cooking for about 5 minutes. Give it a stir now and then to keep everything mingling nicely.
- Now, place the clams artfully atop the rice. Resist the urge to stir! You want them just so.
- Let the paella cook for another 5 minutes, then position the shrimp, tails up, so they can steal the show. Continue to cook for about 10 minutes, until the clams have popped open, the shrimp are a lovely pink, and the rice is fluffy yet moist.
- Finally, check for socarrat. With a fork, gently feel the bottom of the pan. If you detect that legendary crispy crust, you’re golden. If not, crank up the heat for 30-45 seconds to get that perfect crackling finish, then serve immediately.
Cook’s Notes
Here are a few little nuggets of wisdom to ensure your paella is perfecto:
- If you’re short on time, you can season the chicken and let it sit while you prep the rest of the ingredients. It won’t be exactly the same, but life necessitates shortcuts sometimes!
- Leftovers? Pop them in an airtight container and they’ll keep in the fridge for up to two days. Paella is one of those dishes that tastes even better the next day, I promise.
- Be patient with the socarrat. It’s the best bit, but it requires a little trust in the process. If you don’t hear a slight crackle when you turn up the heat, give it a bit more time.
Make It Your Own
Feeling creative? Here are some twists to make this paella uniquely yours:
- Swap out the chicken wings for crispy tofu to make a pescatarian version.
- Substitute the clams with mussels if that’s what you’ve got on hand or prefer.
- Feeling spicy? Use a hot chorizo for an extra kick.
- Not a fan of saffron? Add a pinch of turmeric for a golden hue without the floral notes.
If you try this, I’d love to hear how it turns out—drop a comment or tag me! Your feedback keeps this kitchen creativity going. Enjoy the taste of Spain at your own table!
Related update: Paella for Four; A Wonderful Spanish Mixed Seafood Stew
Related update: Cheese Pork Chops

Picture this: it’s a rainy Wednesday evening, and I’m staring at my fridge like it’s going to magically suggest what I should make for dinner. Ever have those moments when nothing feels right, but takeout seems too tragic? That’s when I stumbled upon the perfect antidote — My Drunken Fish Fillet. It’s this crispy, golden, comforting dish that feels like a hug on a plate, without the takeout guilt. The beer in the batter makes everything delightfully light and airy, and honestly, it’s low-key impressive when you pull it off. Plus, who doesn’t love cooking with wine and beer? The kitchen smells divine, and it’s as much fun to make as it is to devour.
Jump to Recipe
What You’ll Need
Okay, so let’s talk about the magic ingredient list. The cool part? You probably have a bunch of this stuff hanging out in your pantry already. Here’s the breakdown:
- Fish – whatever fillet you’ve got; think tilapia or cod.
- Salt – to season the fish and the batter.
- White ground pepper – trust me, it adds just the right kick.
- Rice wine – this is where the magic (and the name) starts.
- Beer – pick something light, like a lager.
- White eggs – you’ll need both the yolk and the whites, separately.
- All-purpose flour – plus a little more for dusting if you’re feeling fancy.
- Oil – for frying, of course.
How to Make My Drunken Fish Fillet
Let’s break this down step-by-step so you can nail it every time:
- Start by combining your beer, egg yolk, flour, and half a teaspoon of salt. Whisk it well until you’ve got a thick, smooth batter. Pop this into the fridge for a good hour. This rest is crucial for texture!
- Meanwhile, sprinkle your fish fillets with salt and white ground pepper. Give them a pat so they’re nicely coated. Then, splash on the rice wine and let them marinate for about 15 to 20 minutes. The fragrance alone will brighten your day!
- When you’re ready to fry, beat the egg whites until they’re soft and foamy. Gently fold these into your chilled batter. This is where the light, airy magic happens.
- Heat up your oil until it’s shimmering. Dip your marinated fish fillets into the batter, ensuring they’re fully enveloped in that luscious mix. Fry them three pieces at a time, so they’re not overcrowded. Cook until they’re a beautiful golden brown and oh-so-crispy.
- For a quick dip, mix Yamasa soy sauce with a bit of wasabi from the tube and a squeeze of lemon juice. Simple but absolute perfection.
Cook’s Notes
Here’s the tea on making this dish truly sing. First off, make sure your oil is hot enough before you start frying. You want that sizzle! If it’s too cool, the batter soaks up oil and gets greasy. You can make the batter ahead (up to a day), just keep it covered in the fridge because that chill time is key. Leftover fillets (if you have any!) can be reheated in an oven to crisp them back up — avoid the microwave unless you love soggy regrets.
Make It Your Own
Want to switch things up? Here are some variations that keep things exciting:
- Swap the fish for crispy tofu. Just be sure to press the tofu well before marinating.
- Go gluten-free by using a gluten-free flour blend in place of all-purpose flour.
- Add a spicy twist by mixing a pinch of cayenne into the batter for a bit of heat.
- Try an Asian twist with panko breadcrumbs mixed into the batter for extra crunch.
If you try this, I’d love to hear how it turns out — drop a comment or tag me! I’m always here for your kitchen triumphs and even the occasional mishap. Happy frying!
Related update: My Drunken Fish Fillet
Related update: Paella for Four; A Wonderful Spanish Mixed Seafood Stew
Related update: Crunchy Prawn Skewers With Lemony Avocado Dip
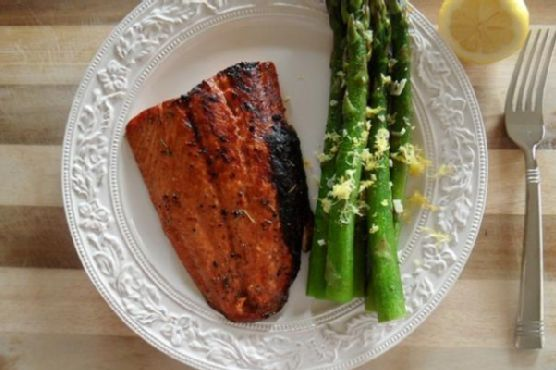
Picture this: It’s Tuesday evening, and you just got home from a day that felt longer than it had any right to be. You’re staring into the fridge, willing it to offer up some inspiration. Then, like a beacon of hope, you spot a lonely salmon fillet tucked behind last night’s leftovers. A lightbulb moment strikes: Balsamic & Honey Glazed Salmon with Lemony Asparagus. Deliciously sweet and tangy salmon, paired with asparagus that’s just the right amount of zesty. It’s the perfect blend of “fancy enough for company” and “easy enough for a weeknight.” This dish is a favorite because it’s quick yet feels special, and it hits all the right notes from tangy to savory. Trust me, your taste buds will thank you.
Jump to Recipe
What You’ll Need
You probably have most of these at home already, with maybe just a quick spice cabinet dive for a few aromatics. Here’s the lineup for this easy-peasy dinner:
- Salmon fillet
- Balsamic vinegar
- Apple cider vinegar
- Honey
- Dried dill
- Herbs de Provence
- Salt and pepper
- Grapeseed oil
- Lemon (juice and zest)
- Asparagus
- Garlic
- Vegetable stock
How to Make Balsamic & Honey Glazed Salmon with Lemony Asparagus
- In a small mixing bowl or blender, throw together all the balsamic marinade ingredients except the lemon juice: balsamic vinegar, apple cider vinegar, 1 tablespoon grapeseed oil, honey, dried dill, herbs de Provence, salt, and pepper. Whisk or blend until the mixture loses its vinegar-and-oil identity crisis.
- Lay the salmon fillet in a cozy little baking dish — I usually opt for a small casserole dish. Pour your freshly mingled marinade over the salmon, letting it settle in for at least 15 minutes. If patience is your virtue, up to 24 hours in the fridge is even better.
- Crank your oven to high broil. Just before the salmon gets its turn in the oven spotlight, drizzle the lemon juice over the top for that extra zing.
- Slide the salmon onto the top rack and broil for 10 to 12 minutes. You’re looking for glazed, browned, and a sizzle that says, “Dinner is almost ready!”
- While the salmon works its magic, prep your asparagus. Wash and trim off the tough ends — about an inch and a half will do. Lay them in a large skillet, as if sunbathing.
- Drizzle grapeseed oil over the asparagus, and use your hands to ensure every stalk gets some love. Sprinkle with salt and pepper, then sauté over medium heat for about 5 minutes.
- Add 2 tablespoons of vegetable stock, cover, and let them steam for 4 minutes. Lift the lid, introduce the minced garlic, and cover again. Let cook for another 3 to 5 minutes, just until tender but with a little bite.
- Finish with a flourish of freshly grated lemon zest over the asparagus, adding a citrusy brightness that ties the whole dish together.
Cook’s Notes
Let’s talk salmon: It should flake easily with a fork when it’s done. If you’re new to broiling, remember that it’s super quick and can go from perfect to overdone in a flash. As for leftovers (if there are any!), this dish reheats beautifully. Store the salmon and asparagus separately in airtight containers for up to two days. Reheat gently, so you don’t dry out that beautiful fish. If you’re meal prepping, the marinade is a fantastic make-ahead step. Whip it up and keep it in the fridge for when inspiration (or hunger) strikes.
Make It Your Own
Here are a few ways to switch things up:
- Swap salmon for crispy tofu if you’re going plant-based. Marinate and bake it the same way for a protein-packed treat.
- Try maple syrup instead of honey for a deeper, earthier sweetness.
- Substitute broccoli for asparagus if that’s more your jam — just adjust the cooking time to keep it crisp-tender.
- Add a sprinkle of red pepper flakes to the marinade for a little heat if you like things spicy.
Hey, if you try this, I’d love to hear how it turns out for you! Drop a comment below or tag me in your delicious photos. Happy cooking!
Related update: Balsamic & Honey Glazed Salmon with Lemony Asparagus
Related update: Yogurt Marinated Lamb Skewers

It was one of those evenings when you open the fridge and just sigh, you know what I mean? It had been a long day, and I wanted something delicious but low-key. There it was, a can of shrimp I had almost forgotten about. That’s when inspiration hit—breaded shrimp with a spicy mayo dip! It’s the kind of dish that feels like a cheat: super quick to make, but everyone will think you’re some kind of kitchen wizard. Perfect for when friends drop by unannounced or when you’re just craving something crispy and spicy. Trust me, this Breaded Shrimp and Spicy Mayo Appetizer is about to become your new go-to.
Jump to Recipe
What You’ll Need
You probably have most of these ingredients hanging out in your pantry already, and if not, they’re easy enough to grab at any grocery store. Here’s what you’ll need:
- All-purpose flour
- Bread crumbs
- Chili powder
- Egg
- Garlic powder
- Mayonnaise
- Onion powder
- Suya pepper
- Salt
- Canned shrimps
- Sriracha sauce
How to Make Breaded Shrimp and Spicy Mayo Appetizer
- Start by peeling and deveining your shrimp. You can leave the tails on for a bit of extra crunch and a nicer presentation if you like.
- Season the shrimp with suya pepper and set them aside to let the flavors sink in.
- Whisk the egg in a small bowl and set it aside as your dipping station.
- In another bowl, combine your all-purpose flour with onion powder, garlic powder, salt, and chili powder.
- Take each seasoned shrimp and dredge it in the seasoned flour, making sure it’s well-coated. The spices should cling to every curve.
- Dunk the floured shrimp into the egg mixture, ensuring they’re nice and gooey.
- Coat them in the bread crumbs; press gently so the crumbs stick fully.
- Heat up a pan with oil for frying until it’s hot but not smoking. Fry the shrimp until golden brown on both sides, about 2-3 minutes per side.
- For the spicy mayo, mix 2 tablespoons of mayonnaise with 1 tablespoon of sriracha sauce until well combined. It should be a lovely salmon pink color.
- Serve your crispy shrimp with the spicy mayo on the side for dipping. Enjoy the crunchy, spicy goodness!
Cook’s Notes
You want to make sure your oil is hot enough before you start frying; otherwise, your shrimp will absorb too much oil and become soggy. If you’re making this for a crowd, you can fry the shrimp earlier and keep them warm in a low oven. Leftovers can be stored in an airtight container in the fridge and reheated in the oven to keep them crispy. I wouldn’t recommend microwaving them—no one likes limp shrimp!
Make It Your Own
- Swap the shrimp for crispy tofu if you’re catering to vegetarians. Just make sure to press the tofu well before seasoning.
- If you love extra heat, add more sriracha or even a dash of hot sauce to the spicy mayo.
- Try using panko instead of regular bread crumbs for an extra-crunchy texture.
- If you’re out of suya pepper, a mix of cayenne and paprika can add that smoky heat.
If you try this, I’d love to hear how it turns out—drop a comment or tag me! I’m always excited to see how you guys make these recipes your own. Happy cooking!
Related update: Breaded Shrimp and Spicy Mayo Appetizer
Related update: Hush Puppies
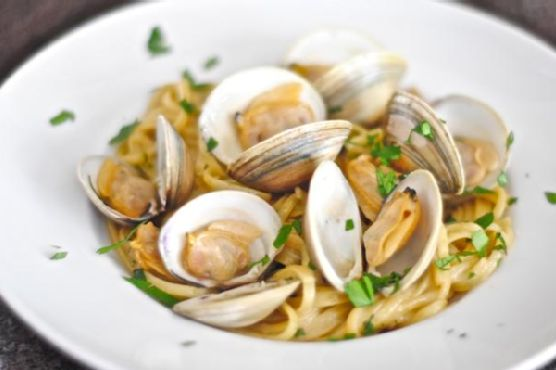
It was one of those weeknights when I opened the fridge and stared blankly, hoping dinner would magically appear. With only a few clams left from last weekend and some trusty linguine, I decided it was time to whip up my favorite Linguine with Clams in Garlic White Wine Sauce. It’s one of those dishes that sounds fancy—and tastes even fancier—but it’s surprisingly forgiving and quick to prepare, perfect for a midweek pick-me-up. By the time the pasta was perfectly al dente, my kitchen smelled like a cozy little Italian trattoria. My secret weapon? Loads of garlic and a splash of wine that turns simple ingredients into something special.
Jump to Recipe
What You’ll Need
I bet you have most of these ingredients hanging around already, and if not, they’re worth stocking up on for moments like this.
- 5 cloves of garlic
- 3 1/2 dozen little neck clams
- 1 cup dry white wine
- Pinch of red pepper flakes
- 1 pound linguine
- 4 tablespoons unsalted butter
- 1/4 cup fresh Italian parsley
- 1/4 cup fresh oregano leaves
- Parmigiano-Reggiano (optional)
- Kosher salt
How to Make Linguine and Clams In Garlic White Wine Sauce
- Coat a large sauté pan with olive oil and toss in 5 garlic cloves with a pinch of red pepper flakes. Crank the heat to medium-high until the garlic is golden brown and fragrant; this is when your kitchen begins to smell divine. If you’re like me and adore garlic, flip the cloves for extra flavor. Once golden, remove and discard them.
- Add the clams to the pan, pour in the white wine, and cover. Allow it to come to a boil over medium heat. Let it simmer until the clams open up, around 10 minutes. Use a slotted spoon to fish out the clams, reserving the cooking liquid.
- Boil a large pot of water for your linguine. Normally, I’d salt the water generously, but this time I skipped it because the clam juice added enough salty goodness.
- Mince the remaining garlic cloves. In the same sauté pan, drizzle more olive oil, add the minced garlic and another pinch of red pepper flakes. Cook until the garlic is just releasing its aroma, careful not to brown it.
- Add the raw clams and reserved clam juice back to the pan, checking the liquid for any sand or grit. A paper towel-lined sieve could help here to avoid any unwanted crunchiness in your dish.
- Cover and let the clams cook while you drop your linguine into the boiling water, aiming for very al dente—about a minute less than the box suggests.
- Once the clams have opened, set aside those in their shells to keep warm. Add butter and the clams removed from their shells back to the pan. Bring the liquid to a boil, then toss in the cooked pasta and fresh herbs.
- Cook everything together until the sauce coats the linguine. Kill the heat, then stir in grated Parmigiano-Reggiano if you’re using. Serve up the pasta, topping each dish with the clams in their shells and a sprinkle of fresh herbs.
Cook’s Notes
A few pearls of wisdom from my kitchen to yours: make sure to buy shellfish sold in mesh bags to avoid dead shellfish—plastic suffocates them. If you’re planning in advance, all the components can be prepped a few hours ahead, but cook them right before serving for optimal freshness. Leftovers, if you have any, can be refrigerated for up to two days. Just know that reheating clams can make them chewy, so enjoy it fresh if possible.
Make It Your Own
Switch it up with a few fun variations:
- Substitute the clams for crispy tofu for a plant-based twist.
- Use whole wheat or gluten-free pasta to suit dietary needs.
- Swap the white wine for vegetable broth if you’re steering clear of alcohol.
- Add a handful of cherry tomatoes for a pop of color and sweetness.
If you try this, I’d love to hear how it turns out—drop a comment or tag me! Cooking is all about sharing, so let’s keep this delicious conversation going.
Related update: Beans With Smoked Pork Hock
Related update: Greek Yogurt Chicken Salad
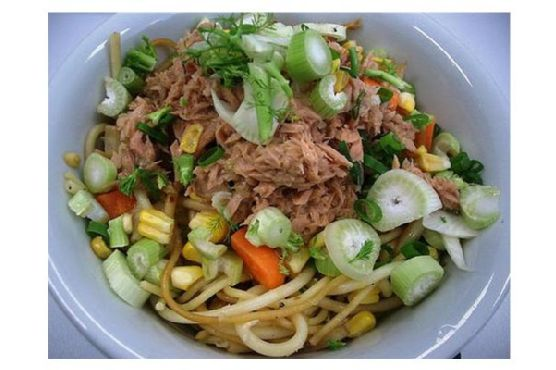
I was standing in my kitchen one Tuesday night, craving something hearty yet low-key — you know, that sweet spot between weeknight ease and weekend indulgence. I scoured my pantry for inspiration and stumbled upon a can of tuna. That’s when it hit me: Pasta With Tuna. This dish is like a warm hug on a plate, combining the creamy comfort of a sauce with the lightness of seafood. It’s quick, it’s satisfying, and yes, it’s got a little kick, thanks to that dash of hot pepper sauce. Perfect when you need to whip up something scrumptious without a ton of fuss.
Jump to Recipe
What You’ll Need
The beauty of this dish is in its simplicity. Chances are you already have most of these lying around in your kitchen:
- Olive oil
- 1 onion, chopped
- Flour
- Non-fat milk
- 1 can water-packed tuna, drained and shredded into chunks
- 1 cup frozen peas
- A bunch of fresh parsley, chopped
- 2-3 green onions, sliced
- 1 cup parmesan cheese, grated
- A dash of pepper sauce
- 1 pound of tubular pasta of your choice
How to Make Pasta With Tuna
- Start by cooking your pasta in a large pot of boiling water until it’s perfectly al dente. You want it to have a nice bite — not too soft.
- Once done, drain the pasta and return it to the warm pot. This keeps it cozy while you work on the sauce.
- Grab a saucepan and heat up a drizzle of olive oil over medium heat. Toss in the chopped onion and sauté until it’s transparent, releasing its sweet aroma.
- Sprinkle in the flour and give it a good stir. Cook for just a few seconds to take off that raw edge.
- Whisk in the non-fat milk, stirring constantly. You’ll see it start to thicken into a creamy base — that’s the magic happening!
- Add in the frozen peas, and let them mingle with the sauce for a couple of minutes until they’re vibrant and heated through.
- Introduce the tuna, breaking it into chunks as you go, followed by the parsley, green onions, and a generous amount of parmesan. Don’t forget that dash of pepper sauce for some zing!
- Pour this delightful sauce over the pasta and stir gently to mix everything together. You want each piece of pasta to be lovingly coated.
- Serve it up immediately, preferably with extra parmesan on top — because why not?
Cook’s Notes
Let’s get real — this dish is pretty forgiving. Don’t sweat the small stuff. If your onions are more golden than transparent, it’s all good. The key is stirring the sauce constantly; it keeps it smooth and prevents lumps. Make it ahead by prepping the sauce and storing it separately from the pasta. When you’re ready to eat, simply reheat them together on the stove. Leftovers? They keep well for up to two days in the fridge. Just note that the pasta will continue to absorb the sauce, so it may be less saucy but still deliciously flavorful.
Make It Your Own
Feeling adventurous? Here are some fab twists to try:
- Swap the tuna for crispy tofu chunks for a vegetarian spin.
- Add a squeeze of lemon juice for a citrusy pop that brightens the flavor.
- Replace the parmesan with feta cheese for a tangy twist.
- Throw in a handful of cherry tomatoes for a burst of sweetness and color.
If you give this pasta dish a try, I’d love to know how it turns out for you! Drop a comment below or tag me on social media with your culinary creations. Bon appétit!
Related update: Pasta With Tuna
Related update: Creamy Mushrooms Over Soba Noodles (Vegan)

It was one of those freakishly warm spring afternoons when I first craved something light but satisfying. You know, when the sun teases you into thinking it’s okay to pack away your sweaters, only for the evening chill to remind you it’s not quite summer yet. I was rummaging through my fridge, hoping for inspiration, when I stumbled upon some swai fillets tucked behind the carton of eggs. Cue lightbulb moment: ceviche. Fresh, tangy, and with a bit of a kick, this swai ceviche is the kind of dish that feels fancy but comes together with minimal effort. Perfect for those nights when you want to impress without breaking a sweat. Jump to Recipe
What You’ll Need
Most of these ingredients are things you might already have lounging around in your kitchen. The magic is in the freshness and the little kick of spice.
- 1 pound of diced swai fillets
- Lime juice from about 4-5 limes
- 1 red diced shallot
- 1 cup of diced avocado
- 1 tomato, diced
- 1 tablespoon of chile-garlic paste
- 2 tablespoons of olive oil
- 1/4 cup of cilantro, chopped
- Salt and pepper to taste
How to Make Fresh and Simple Swai Ceviche
- Place the diced swai fillets in a bowl and cover them with half of the lime juice. Make sure each piece is submerged, then cover and pop it in the fridge for at least 3 hours. This allows the fish to “cook” in the acidity of the lime juice. You’re looking for it to turn opaque and tender.
- Once the fish is ready, strain it to remove excess lime juice. Don’t rush this step; too much moisture will make the ceviche soupy.
- In another bowl, combine the diced tomato, red shallot, and avocado with the remaining lime juice. Toss gently, so the avocado stays in lovely chunks.
- Stir in the swai and chopped cilantro. Give it all a good, gentle mix.
- Drizzle with olive oil and add the chile-garlic paste. The sauce gives it that spicy, garlicky punch that makes you go back for more.
- Season with salt and pepper to taste. Remember, a little goes a long way, so keep tasting as you go.
- Serve immediately with tortilla chips or over a fresh salad. Enjoy the vibrant flavors in every bite!
Cook’s Notes
Don’t skimp on the lime juice – it’s both the cooking agent and flavor base. If you’re not a fan of too much heat, start with half the amount of chile-garlic paste and adjust. This ceviche is best enjoyed fresh, but if you have leftovers, store them in an airtight container for up to a day. The avocado might brown slightly, but the taste will still be lovely.
Make It Your Own
- Swap the swai for shrimp or scallops if you’re feeling fancy.
- Add some diced cucumber for extra crunch and freshness.
- If cilantro isn’t your thing, try using fresh mint or basil for a different herbal note.
- For a sweeter twist, toss in some diced mango or pineapple.
If you try this, I’d love to hear how it turns out — drop a comment or tag me in your creations! Happy ceviche making!
Related update: Fresh and Simple Swai Ceviche
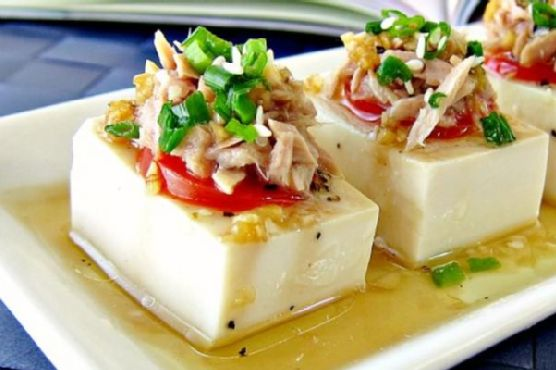
So there I was, staring into my fridge on a Wednesday night, contemplating the sad assortment of leftovers and a few random ingredients when inspiration struck. It was one of those evenings where cooking seemed more like a Herculean task than a simple pleasure, and I just needed something refreshing yet satisfying. Enter my Tuna and Tofu Cold Dish. This dish is like a cool breeze on a hot day—simple, refreshing, and oh-so-satisfying. It’s the perfect quick fix when you’re juggling work, life, and everything in between. Plus, it’s surprisingly elegant for how little effort it takes. Trust me, this one’s a keeper for those nights when you want to pretend you’re at a fancy restaurant without changing out of your pajamas.
Jump to Recipe
What You’ll Need
This is a no-fuss, ingredient-light dish. Chances are you already have most of this in your kitchen, just waiting to be transformed into something delicious.
- A block of silken tofu
- A can of tuna in water, drained
- White diced cherry tomatoes
- A dash of white pepper
- A pinch of salt
- A splash of extra virgin olive oil
- A few drops of vinegar
- Light Kikkoman soy sauce
- A clove of garlic, minced
- Freshly cracked black pepper
How to Make Tuna and Tofu Cold Dish
- Start by cutting your block of silken tofu into small, bite-sized blocks. Be gentle here—silken tofu is as fragile as my willpower at a dessert buffet!
- Open the can of tuna and drain it well. Once drained, place the tuna in a bowl and gently squash it with a fork. Mix in a dash of white pepper and a pinch of salt to bring out its flavor.
- Take your cherry tomatoes and slice them thinly. The goal is to get them to release their sweet and tangy juices.
- On a serving plate, carefully place the tofu blocks. Top them with your sliced cherry tomatoes and then the seasoned tuna.
- For the sauce, mix together a good splash of extra virgin olive oil, a few drops of vinegar, and a dash of light Kikkoman soy sauce. Add the minced garlic and freshly cracked black pepper.
- Drizzle this fragrant sauce over your tofu, tuna, and tomatoes.
- Finish by sprinkling with toasted sesame seeds and diced spring onion for that extra pop of flavor and crunch. Serve immediately and enjoy the calm in a chaotic weeknight!
Cook’s Notes
This dish is a lifesaver on busy nights. It’s all about the balance of textures and flavors—the creamy tofu, the robust tuna, and the crunchy veggies. Once assembled, it’s best eaten right away to enjoy the freshness of the ingredients. If you want to prep ahead, mix the sauce earlier in the day and keep it in the fridge. Just wait to dress the dish until you’re ready to serve, or the tofu might get over-marinated and lose its delicate texture.
Make It Your Own
- Swap the tuna for crispy tofu if you’re going plant-based. Just pan-fry tofu cubes until golden for a delightful contrast.
- Try adding sliced avocado for a creamy twist. It pairs beautifully with the tofu and tuna.
- For a spicy kick, mix a bit of Sriracha into the sauce. It’ll add warmth and complexity without overpowering the dish.
- Switch up the herbs by adding fresh cilantro or basil instead of spring onion for a different flavor profile.
If you try this, I’d love to hear how it turns out—drop a comment or tag me! Your feedback makes this kitchen adventure all the more fun. Bon appétit, my fellow food explorers!
Related update: Tuna and Tofu Cold Dish

It was one of those weeks where everything felt just a bit off. You know the kind — when you drop your phone in the sink, forget your keys, and somehow leave a trail of bread crumbs throughout the entire house. I needed some comfort food, but not the kind that takes hours to prepare. Enter: Crawfish Cake Sliders. These little gems are a weeknight savior — quick to whip up, yet bold and satisfying. Perfect for when you need a little culinary escape without the fuss. Plus, they pack that southern charm that makes you feel like you’re right at home, sitting by a bayou.
Jump to Recipe
What You’ll Need
Here’s the best part: you likely have most of these ingredients hanging out in your pantry. Just a few fresh items and you’re golden.
- 1 teaspoon oil (plus more for frying)
- 1 pound crawfish tails, chopped
- 1 small red onion, finely chopped
- 1 clove garlic, minced
- 1 teaspoon Creole spice (or more to taste)
- 1 large egg
- 1/2 cup bread crumbs
- 8 slider buns
- Tartar sauce for serving
How to Make Crawfish Cake Sliders
- In a sauté pan, heat 1 teaspoon of oil over medium heat. Add the chopped red onion and cook until tender, about 2-3 minutes. The kitchen will start to smell amazing, like the beginning of a great meal.
- Once the onion is tender, remove the pan from the heat and add the minced garlic, chopped crawfish tails, and 1 teaspoon of Creole spice. Give it a quick toss to awaken those flavors.
- Transfer the mixture to a mixing bowl and let it cool for a bit. This is the perfect time to take a breather and maybe sip some iced tea.
- Once cooled, mix in the egg and just enough bread crumbs to bind everything together. You want the mixture to hold its shape, so feel free to adjust with more crumbs if needed. Season with salt, pepper, and more Creole spice if you’re feeling bold.
- Form the mixture into 8 equal patties and flatten them to about 3/4-inch thick. They should feel firm but not too dense.
- Heat more oil in the sauté pan over medium heat. Fry the patties on each side until they’re brown and crispy — about 3-4 minutes per side. You’ll know they’re ready when they smell irresistible.
- Serve these beauties on slider buns with a generous dollop of tartar sauce, and watch them disappear as quickly as you made them.
Cook’s Notes
A few things to keep in mind:
- If your mixture feels too wet, sprinkle in more bread crumbs until it binds correctly.
- Worried about the patties falling apart? Let them chill in the fridge for 15 minutes before frying. It makes them easier to handle.
- These sliders can be made ahead of time. Just prepare the patties and store them in the fridge. Cook them when you’re ready to serve.
- Leftovers can be stored in an airtight container in the fridge for up to two days. Reheat them in a skillet to bring back that lovely crispiness.
Make It Your Own
Want to put your spin on these sliders? Here are a few ideas:
- Add some heat: Chop up a jalapeño and add it to the mix for a spicy kick.
- Go green: Mix in some chopped fresh parsley or cilantro for a burst of freshness.
- Cheesy delight: Add a slice of your favorite cheese on top of each patty just before they’re done frying.
- Gluten-free option: Swap the bread crumbs for gluten-free crumbs and use gluten-free buns.
If you try this, I’d love to hear how it turns out — drop a comment or tag me in your delicious creations! Let’s make sure those off weeks are few and far between, my fellow food adventurers. Happy cooking!
Related update: Crawfish Cake Sliders
Related update: Easy Vegetable Fried Rice
Related update: Homemade Apple Almond Granola Bars
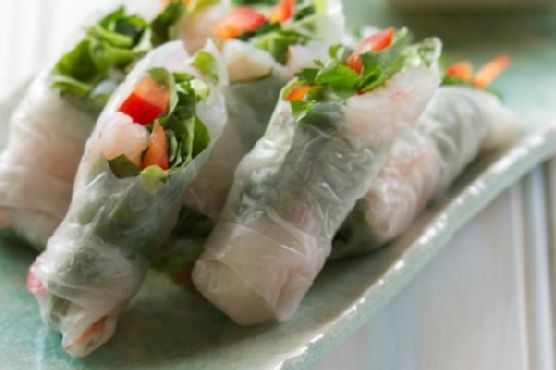
On one of those bustling weekday evenings when time seems to slip away faster than you can say “dinner,” I found myself staring into the fridge, hoping for a miracle. What I really wanted was something fresh and light but also satisfying. That’s when I remembered these Easy To Make Spring Rolls. They’re perfect for those nights when you want something delicious and impressive-looking without the fuss. Plus, they have this uncanny ability to make you feel like you’ve got your life together. Not bad for a dish that’s ready in under 30 minutes!
Jump to Recipe
What You’ll Need
This recipe is the epitome of a grab-and-go grocery list. Most of these ingredients are probably already lounging in your kitchen. Here’s what you’ll need to whip up these fresh bites of joy:
- Rice paper wrappers
- Cooked shrimp, halved
- Boston lettuce leaves
- Fresh basil, mint, and coriander leaves
- Red bell pepper, sliced into thin strips
- Chili pepper, thinly sliced (optional for a kick)
- Garlic, minced
- Fresh lime juice
- Nuoc cham for dipping
- Fish sauce
- Rice vinegar
- Sugar
- Water
How to Make Easy To Make Spring Rolls
- First, get all your ingredients prepped and within arm’s reach. Trust me, this will save you a lot of scrambling later.
- Fill a large bowl with warm water. Dip a rice paper wrapper in the water just until it softens—this means a couple of swishes should do it. It might feel slightly stiff as you take it out, but don’t worry.
- Lay the softened wrapper flat on a clean surface. In the center, line up two shrimp halves. It’s like creating a little shrimp runway!
- Top the shrimp with a few leaves of basil, mint, and cilantro. Add a layer of Boston lettuce, and maybe some red bell pepper strips and a slice of chili if you’re feeling spicy.
- Fold the sides of the wrapper inward over the filling. Start rolling from the end with the lettuce, tucking in the filling as you go for a snug little spring roll.
- Repeat with the remaining wrappers and ingredients. Once you’ve got your little spring roll soldiers lined up, cut them in half for easy handling.
- Serve them at room temperature with some nuoc cham for dipping. Don’t skip the dipping sauce—it’s the secret weapon!
Cook’s Notes
Dealing with rice paper wrappers can be a bit like handling a delicate flower. Too much time in the water and they’ll become a soggy mess. Not enough and they’ll tear when you try to roll. My trick? A quick dip and a confident hand. They’ll soften up perfectly by the time you start rolling. These rolls are best enjoyed fresh, but you can prepare all the components ahead of time and roll them just before serving. If you have leftovers, wrap them tightly in plastic wrap to keep them from drying out.
Make It Your Own
Feel free to get creative with these spring rolls. Here are some variations to consider:
- Swap the shrimp for crispy tofu to make it vegetarian-friendly.
- Add in slivers of cooked pork or chicken for a meatier bite.
- Include julienned carrots for an extra crunch and pop of color.
- Spice things up by adding a dash of Sriracha to the dipping sauce.
If you try this, I’d love to hear how it turns out—drop a comment or tag me on social media! Whether you’re a spring roll pro or a first-timer, I hope these become a fun and tasty part of your meal rotation. Enjoy every bite!
Related update: Easy To Make Spring Rolls

It was a Wednesday evening, and I’d just returned home after a long day that seemed to have no end in sight. You know the one — where you’re too exhausted to even scroll through your takeout apps. I peered into the fridge, hoping for a miracle, and voilà, the ingredients for Farfalle with Shrimps, Tomatoes Basil Sauce all but jumped out at me. It was like they were whispering, “We got you.” There’s something magical about pulling together a meal that feels indulgent and comforting but comes together in the blink of an eye. This dish is that kind of magic. Perfect for those nights when you want something special without the hassle.
Jump to Recipe
What You’ll Need
You might already have most of these ingredients lounging in your pantry or fridge, just waiting to become something delicious. Farfalle pasta is the star of the show, and everything else is there to make it shine even brighter.
- 1 tablespoon of butter
- 8 ounces of farfalle pasta
- 1 cup of fresh tomatoes, chopped
- 1/2 pound of fresh shrimp, peeled and deveined
- 1/2 cup of fresh basil leaves
- Salt and freshly ground black pepper, to taste
How to Make Farfalle with Shrimps, Tomatoes Basil Sauce
- Bring a large pot of salted water to a boil. Add the farfalle and cook until al dente, which should take about 10-12 minutes. You’ll know it’s ready when it’s firm to the bite yet tender.
- While the pasta cooks, melt the butter in a large frying pan over medium-high heat. Once the butter starts to bubble and gives off a nutty aroma, toss in the tomatoes.
- Sauté the tomatoes for about a minute, just until they start to soften and their juices mingle with the butter, creating a simple, vibrant sauce.
- Add the shrimp to the pan. Cook them until they turn a beautiful light pink and are cooked through, about 3-4 minutes. Sprinkle with salt and freshly ground black pepper to taste.
- Toss in the fresh basil leaves and give everything a gentle stir, letting the basil release its fragrant oils.
- Once your pasta is perfectly cooked, drain it and add it directly to the skillet with the shrimp and tomatoes. Toss everything together so the pasta is well-coated in the buttery tomato sauce.
- Serve immediately while it’s still hot, and watch as the room fills with the comforting aroma of basil and buttery goodness.
Cook’s Notes
This dish is forgiving, which is a blessing if you’re prone to distractions like I am. Keep an eye on the shrimp; they cook fast and go from perfect to rubbery in a blink. If you find your sauce getting too thick, a splash of the pasta cooking water will loosen it right up.
Leftovers can be stored in an airtight container in the refrigerator for up to two days. Reheat gently in a skillet over low heat, adding a little water to bring back the sauce’s creaminess.
Make It Your Own
- Swap out the shrimp for crispy tofu if you’re in the mood for a vegetarian twist.
- Add a handful of baby spinach along with the basil for a boost of greens.
- If you love a bit of heat, a pinch of red pepper flakes will do wonders.
- For a citrusy finish, add a squeeze of lemon juice just before serving.
If you try this, I’d love to hear how it turns out — drop a comment or tag me! Cooking is such a shared joy, and I can’t wait to hear your tales from the kitchen.
Related update: Farfalle with Shrimps, Tomatoes Basil Sauce
Related update: Cannellini Bean Side Dish With Fennel, Red Onion, and Saffron
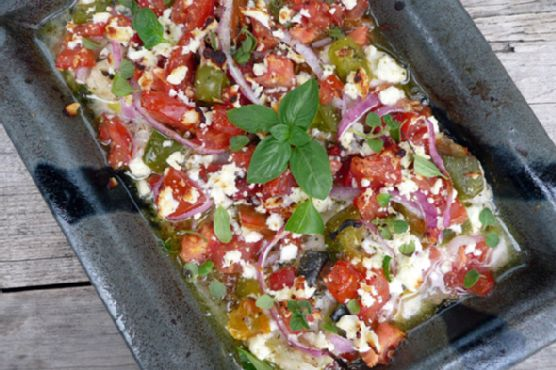
Picture this: It’s midweek, I’ve worked the whole day, and the fridge is looking thin. I peek inside to find some fish fillets, a lonely bell pepper, and a crumbling block of feta cheese. The usual dinner panic begins to set in, but then I remember this Greek-Style Baked Fish recipe. It’s my go-to for those days when I want something fresh and flavorful without the fuss. The beauty of this dish is that it’s both light and deeply satisfying, perfect for when you want a bit of sunshine on your plate, no matter the season. Plus, it comes together faster than you can say “Saganaki!”.
Jump to Recipe
What You’ll Need
This recipe shines with its simplicity and the ingredients you probably already have on hand. Here’s what you’ll need:
- Fish fillets – Choose your favorite white fish.
- Red onion – Adds a sweet crunch.
- Bell pepper – The more colorful, the better.
- Feta cheese – Crumbly and tangy goodness.
- Tomato – Juicy and adds a touch of acidity.
- White wine – For that hint of sophistication.
- Olive oil – The Greek staple.
- Dried basil and oregano
- Salt & pepper
- Cooked rice – To serve alongside.
How to Make Greek-Style Baked Fish: Fresh, Simple, and Delicious
- Preheat your oven to 450 degrees F. You want it hot so the fish cooks quickly and stays tender.
- Grab an oven-proof baking dish that will snugly fit your fish fillets without them overlapping. Give it a light spray with cooking spray to prevent sticking.
- Lay the fish fillets in the dish in a single layer. Season them generously with salt and pepper, because who likes bland fish?
- Top the fish with slices of red onion and bell pepper. The colors should already start to cheer you up.
- Sprinkle dried basil and oregano over the top, followed by diced tomato and crumbled feta cheese. The feta will melt slightly and get creamy in the oven.
- Drizzle the white wine and olive oil over everything. This is the magic moment that brings it all together.
- Finish with a grind of fresh pepper, just before putting it in the oven.
- Bake uncovered for about 12 – 15 minutes. You’ll know it’s done when the fish flakes easily with a fork and the kitchen smells heavenly.
- Once out of the oven, squeeze some lemon wedges over the fish, and if you have fresh basil or oregano, now’s the time to sprinkle them on. Serve immediately with hot cooked rice.
Cook’s Notes
A few things to keep in mind: First, if your fish fillets are particularly thick, you might need a minute or two more in the oven. But keep a watchful eye, overcooked fish is a tragedy! As for leftovers, they’re rare, but if you do have any, this dish microwaves well. Just be gentle, so the fish doesn’t dry out.
If you’re planning ahead, you can chop the vegetables and crumble the feta in advance. Just keep them in the fridge until you’re ready to assemble. This makes an already quick recipe even speedier.
Make It Your Own
This dish is wonderfully versatile. Here are a few ideas to make it your own:
- Switch the fish fillets for chicken breast. Just adjust the cooking time until the chicken is cooked through.
- Try tofu instead of fish for a vegetarian twist. Use firm tofu and bake until it’s golden.
- Throw in some kalamata olives for an extra punch of Mediterranean flavor.
- Use quinoa instead of rice to up your protein and fiber game.
If you try this, I’d love to hear how it turns out — drop a comment or tag me in your photos. Here’s to less dinner panic and more delicious moments!
Related update: Greek-Style Baked Fish: Fresh, Simple, and Delicious
Related update: Stir Fried Cabbage and Tomatoes