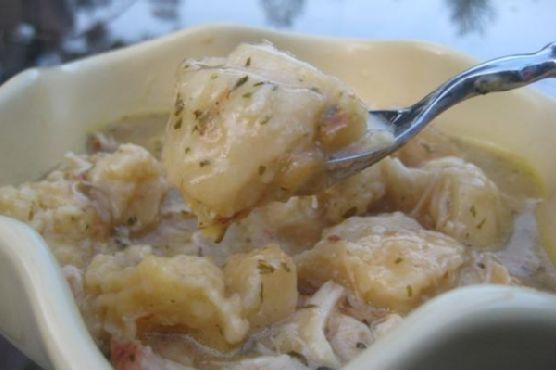
Crockpot Chicken and Dumplings
Intro
Welcome to our kitchen! Today, I’m sharing a recipe that’s close to my heart – Crockpot Chicken and Dumplings. This dish takes me back to lazy Sunday afternoons at my grandmother’s house. As a child, I’d watch her skillfully blend simple ingredients into a pot of pure comfort. Now, I get to share this tradition with you, using the convenience of a crockpot to make it even easier!
Why You’ll Love It
This recipe is a keeper for many reasons. First, it’s incredibly easy to make – perfect for busy weekdays or leisurely weekends. The crockpot does all the heavy lifting, filling your home with an aroma that promises warmth and comfort. The chicken turns out tender and juicy, while the biscuits transform into fluffy, savory dumplings. It’s a dish that hugs you from the inside out.
Ingredients
- 4 skinless boneless chicken breasts
- 2 tablespoons butter
- 2 cans cream of chicken soup
- 2 cups canned chicken broth
- 1 diced onion
- 1 tablespoon dried parsley
- 1 can grands flaky refrigerator biscuits
Instructions
- Place the chicken breasts in the crockpot.
- Add the butter, cream of chicken soup, chicken broth, diced onion, and dried parsley.
- Cook on high for 4-6 hours or on low for 8 hours, until the chicken is tender and fully cooked.
- About 30 minutes before the chicken is done, cut each biscuit into 9 pieces and add them to the crockpot.
- Gently stir to coat the biscuit pieces in the cooking liquid.
- Continue to cook for another 30 minutes, allowing the biscuits to become soft and fluffy dumplings.
- Serve hot and enjoy the comforting flavors!
Tips
For best results, make sure to cut the biscuits into evenly sized pieces. This ensures they cook uniformly and absorb the flavors of the broth. If you prefer a thicker consistency, remove the lid during the last 10 minutes of cooking to allow some moisture to evaporate.
Variations & Substitutions
Feel free to get creative with this recipe! You can substitute the chicken breasts for thighs if you prefer dark meat, which adds a richer flavor. For a touch of color and added nutrition, toss in some diced carrots or peas. If you’re a fan of herbs, a sprig of fresh thyme or rosemary can elevate the taste even further.
Storage
Leftover chicken and dumplings can be stored in an airtight container in the refrigerator for up to 3 days. Reheat gently in the microwave or on the stovetop, adding a splash of chicken broth if necessary to restore the creamy consistency.
FAQ
Can I use homemade biscuit dough instead of canned?
Absolutely! Homemade biscuit dough can be a delightful addition. Just ensure the pieces are small enough to cook through in the crockpot.
Is it possible to make this recipe gluten-free?
Yes, you can make this gluten-free by using gluten-free canned soup and biscuits. Ensure all ingredients, including the broth, are labeled gluten-free.
Can I add vegetables to this dish?
Yes, adding vegetables like peas, carrots, or celery can enhance the flavor and nutritional value of the dish. Simply add them in with the other ingredients at the beginning of the cooking process.
Nutrition
This hearty dish is not only delicious but also provides a good balance of protein and carbohydrates. Each serving offers approximately:
- Calories: 350
- Protein: 30g
- Carbohydrates: 40g
- Fat: 12g
- Fiber: 2g
Conclusion
Crockpot Chicken and Dumplings is more than just a meal; it’s a warm embrace on a chilly day, a reminder of home, and a testament to the magic of simple ingredients. Whether you’re a seasoned cook or a kitchen novice, this recipe is sure to become a cherished favorite in your household. Happy cooking!
Related update: Crockpot Chicken and Dumplings
Related update: Eggplant Parmesan