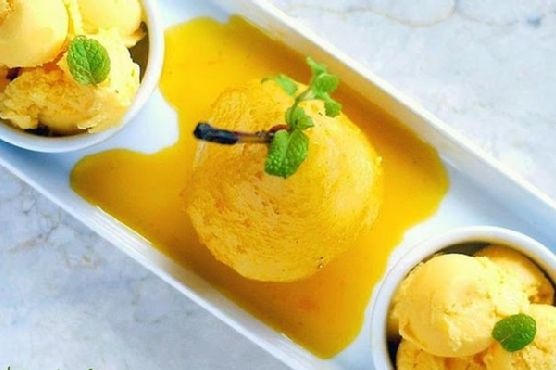
Ginger Snap and Pumpkin Ice Cream Sandwiches
Intro
As the leaves begin to turn and the air gets crisp, my kitchen becomes a haven for all things warm and spicy. Growing up, autumn weekends were synonymous with baking days with my grandmother. I can still vividly recall the comforting aroma of ginger and cinnamon wafting through the house, mingling with the distant sound of leaves crunching underfoot outside. This recipe for Ginger Snap and Pumpkin Ice Cream Sandwiches combines those cherished memories with a modern twist, creating a delightful treat that brings together the best flavors of fall.
Why You’ll Love It
This dessert is a celebration of autumn in every bite. The soft, creamy pumpkin ice cream is perfectly complemented by the warm, spicy snap of the ginger cookies. Whether you’re looking to impress guests at a fall gathering or simply indulge in a cozy treat at home, these sandwiches are sure to be a hit. They’re also a wonderful make-ahead dessert, allowing you to enjoy the flavors of the season without the last-minute rush.
Ingredients
- Whole milk
- Heavy cream
- Granulated sugar
- Cinnamon
- Nutmeg
- Ground ginger
- Whole cinnamon stick
- Kosher salt
- Egg yolks
- Canned pumpkin puree
- Vanilla
- All purpose flour
- Baking soda
- Ground cinnamon
- Ground ginger
- Ground nutmeg
- Ground pepper
- Unsalted butter
- Granulated sugar
- Vanilla extract
- Molasses
- Egg
Instructions
- In a medium saucepan over medium heat, combine the milk, cream, granulated sugar, ginger, ground cinnamon, cinnamon stick, nutmeg, and salt. Heat the mixture until steaming and it begins to foam. Remove from the heat.
- In a small bowl, whisk the egg yolks until pale yellow. Gradually whisk in one cup of the warm cream mixture, whisking constantly.
- Pour the yolks and cream mixture back into the saucepan and cook over low heat, stirring constantly and being sure to scrape the bottom and sides of the pan. Continue cooking until the mixture thickens and coats the back of a spoon.
- Place some ice and water into a large bowl and place a smaller bowl inside. Pour the cream mixture through a mesh strainer into the bowl.
- Stir in the pumpkin and vanilla, add the cinnamon stick back to the mixture. Chill thoroughly, preferably overnight.
- Pour the mixture into the freezer can of an electric ice cream maker and freeze according to the manufacturer’s instructions.
- In a small bowl, whisk together the dry ingredients.
- In the bowl of an electric mixer, beat the butter until soft. Add the sugar and continue beating until smooth and creamy. Stop the mixer occasionally to scrape down the sides of the bowl.
- Stir in the vanilla, molasses, and egg, combine thoroughly.
- Mix in the dry ingredients gradually until the dough is smooth. Turn the dough out onto a lightly floured surface and divide in half.
- Roll each half into a log about 2 inches in diameter. Wrap each log in plastic wrap and then roll them lightly to smooth them out. Refrigerate or freeze until firm.
- Preheat the oven to 350 degrees and line two baking sheets with parchment paper.
- Slice the dough into 1/4 inch rounds with a serrated knife, being careful to keep their shape. Place the rounds on the baking sheet and sprinkle with granulated or coarse sugar.
- Bake for 10-13 minutes, rotating the pans halfway through the baking time. Let the cookies cool in the pan for about 2 minutes and then transfer to a wire cooling rack.
Tips
For the best flavor, make sure to chill the ice cream base thoroughly before churning. This helps the ice cream to set properly and enhances the rich, creamy texture. When slicing the cookie dough, use a sharp serrated knife to maintain the shape of the cookies. Freezing the dough logs slightly before slicing makes this task much easier.
Variations & Substitutions
If you’re looking to change things up, try adding a hint of clove or allspice to the ice cream base for an extra layer of warmth. You can also substitute the pumpkin puree with sweet potato puree for a slightly different flavor profile. For a gluten-free version, use a 1:1 gluten-free baking flour in place of the all-purpose flour.
Storage
The cookie dough can be refrigerated for up to five days or frozen for up to three months, making it easy to prepare in advance. Once baked, the ginger snaps can be stored in an airtight container for approximately a week. The assembled ice cream sandwiches can be wrapped individually and stored in the freezer for up to two weeks, ready to enjoy whenever the craving strikes.
FAQ
Can I make the ice cream without an ice cream maker?
Yes, you can make the ice cream without a machine by pouring the chilled mixture into a shallow dish and freezing it. Stir the mixture every 30 minutes until it’s frozen to ensure a smooth texture.
What else can I use the ginger snaps for?
These ginger snaps are delicious on their own, but they also pair beautifully with a cup of tea or coffee. You can crumble them over yogurt or use them as a crust for pies and cheesecakes.
Nutrition
While this dessert is definitely a treat, it’s made with wholesome ingredients that provide a bit of comfort and warmth. The pumpkin adds fiber and vitamin A, while the spices offer antioxidants and flavor without the need for excessive sugar.
Conclusion
Ginger Snap and Pumpkin Ice Cream Sandwiches encapsulate the essence of fall, combining familiar flavors with a touch of nostalgia. Whether you’re recreating memories of baking with family or simply savoring the changing seasons, this recipe offers a delightful way to celebrate the cozy warmth of autumn. So, grab a blanket, your favorite book, and enjoy this sweet indulgence.
Related update: Ginger Snap and Pumpkin Ice Cream Sandwiches
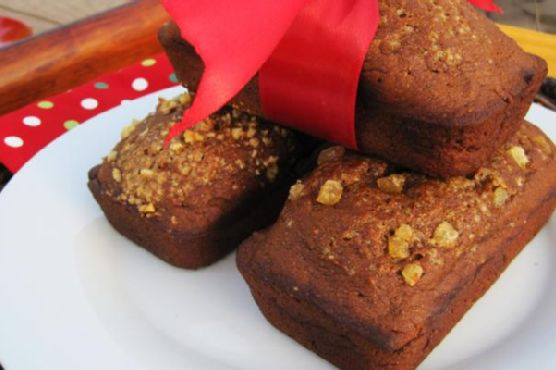
Related update: Buttermilk Pound Cake