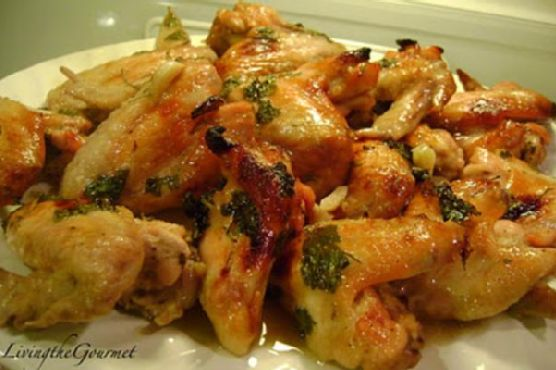
Baked Lemon~Lime Chicken Wings
Intro
Ah, chicken wings! A dish that never fails to evoke a sense of nostalgia. I remember the summer barbecues at my grandparents’ house, where the aroma of sizzling chicken wings filled the air. Those gatherings were always filled with laughter, stories, and the irresistible taste of my grandmother’s secret lemon-lime marinade. Today, I am excited to share a modern twist on this family favorite, Baked Lemon~Lime Chicken Wings, that is sure to become a staple in your home.
Why You’ll Love It
These Baked Lemon~Lime Chicken Wings are a delightful combination of zesty citrus and savory goodness. The lemon and lime juices bring a refreshing tang, while the honey and sugar add a touch of sweetness that balances the flavors beautifully. The addition of garlic and herbs gives the wings an aromatic depth that will have everyone reaching for seconds. Plus, the recipe is simple, requiring minimal ingredients and effort, yet delivering maximum flavor.
Ingredients
- 2 lbs chicken wings
- Juice of 1 lemon
- Juice of 1 lime
- 3 cloves garlic, minced
- 2 tablespoons honey
- 1 tablespoon sugar
- 2 tablespoons red wine
- 1/4 cup chicken broth
- 2 tablespoons vegetable oil
- 1 tablespoon chopped Italian fresh parsley
- 1 tablespoon chopped fresh cilantro
- Salt, to taste
- Freshly ground black pepper, to taste
Instructions
- In a large mixing bowl, combine the lemon juice, lime juice, minced garlic, honey, sugar, red wine, chicken broth, and vegetable oil to create the marinade.
- Season the marinade with salt and freshly ground black pepper according to your taste.
- Add the chicken wings to the marinade, ensuring they are well coated.
- Cover the bowl with plastic wrap and refrigerate for at least 1 hour, or up to a few hours for a more intense flavor.
- Preheat your oven to 400°F (200°C).
- Line a baking sheet with parchment paper or foil, and place a wire rack on top.
- Arrange the marinated chicken wings on the wire rack, ensuring they are spaced evenly.
- Bake in the preheated oven for 35 to 40 minutes, turning halfway through, until the wings are golden brown and cooked through.
- Remove from the oven and sprinkle with chopped Italian parsley and cilantro before serving.
Tips
For the best results, allow the chicken wings to marinate for as long as possible. This will ensure the flavors penetrate deeply, making the wings even more flavorful. If you have the time, let them sit in the marinade overnight. Additionally, for extra crispy skin, consider patting the wings dry with a paper towel before baking.
Variations & Substitutions
If you want to add a spicy kick to your wings, consider adding a pinch of cayenne pepper or a dash of hot sauce to the marinade. For a different flavor profile, you can substitute the red wine with apple cider vinegar or balsamic vinegar for a tangy twist. If fresh herbs are not available, dried herbs can be used, but reduce the quantity by half as dried herbs are more concentrated.
Storage
Leftover chicken wings can be stored in an airtight container in the refrigerator for up to 3 days. To reheat, place them in a preheated oven at 350°F (175°C) for about 10 minutes or until heated through. Avoid microwaving, as it can make the skin soggy.
FAQ
Can I use chicken drumettes instead of whole wings?
Absolutely! Chicken drumettes work just as well. Just keep in mind that the cooking time might need slight adjustment depending on their size.
Is it possible to grill the wings instead of baking them?
Yes, grilling is a fantastic option. Preheat your grill to medium heat and cook the wings for about 20-25 minutes, turning occasionally, until they are browned and cooked through.
Can I freeze the marinated wings before baking?
Yes, you can freeze the marinated wings. Place them in a freezer-safe bag, remove as much air as possible, and store for up to 2 months. Thaw in the refrigerator overnight before baking.
Nutrition
While these Baked Lemon~Lime Chicken Wings are a treat for the taste buds, they’re also a reasonable choice nutritionally. Packed with protein from the chicken and with a moderate calorie count, they fit well into a balanced diet. Keep portion sizes in mind, and enjoy these wings as part of a varied meal plan.
Conclusion
These Baked Lemon~Lime Chicken Wings are not only a trip down memory lane for me but also an invitation for you to create lasting memories with your loved ones. Whether you’re hosting a game day party or a casual dinner, these wings are sure to be a hit. They’re easy to prepare, packed with flavor, and the perfect marriage of zesty and savory. So, gather your ingredients, and let’s make this delightful dish together. I hope you enjoy these wings as much as my family and I do!
Related update: Baked Lemon~Lime Chicken Wings