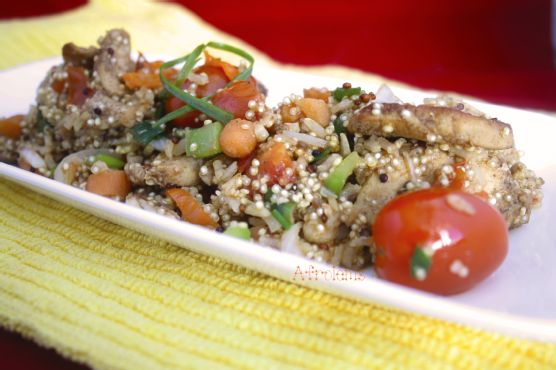
Stir Fried Quinoa, Brown Rice, and Chicken Breast
Intro
There’s something about the smell of sizzling chicken and vegetables that transports me back to my childhood kitchen. I remember standing on tiptoe to peek over the counter as my mom expertly tossed ingredients into her trusty pan, her laughter mingling with the sound of the spatula scraping the bottom of the pan. This Stir Fried Quinoa, Brown Rice, and Chicken Breast recipe is a tribute to those cherished memories, bringing together wholesome ingredients and vibrant flavors for a dish that’s both nourishing and delicious.
Why You’ll Love It
This recipe is a winner for so many reasons. First, it’s a one-pan wonder, meaning less cleanup and more time to relax. It’s also incredibly versatile; whether you’re an experienced cook or a kitchen newbie, you’ll find this dish straightforward and rewarding to make. The combination of quinoa and brown rice offers a hearty, nutritious base, while the chicken breast provides a lean source of protein. The dish is further elevated by the aromatic suya spice and a medley of fresh vegetables, creating a symphony of flavors and textures.
Ingredients
- Suya spice
- Quinoa and brown rice mix
- Butter
- Carrots
- Whole cherry tomatoes
- Chicken breast
- Garlic
- Seasoning cubes
- Green bell pepper
- Roma tomato
- Scotch bonnet pepper
- Spring onion
- Vegetable oil
- Water
Instructions
- In a bowl, season the chicken breast with the seasoning cubes and suya spice and allow to marinate for 2 hours, or if you are really hungry, you can use it immediately.
- In a pot of boiling water (1 cup), pour in your quinoa mix and the teaspoon of oil and allow to boil till soft, which should take about 5-7 minutes. Pour into a bowl and set aside.
- In a pan, heat up the melted butter and pan fry on medium heat the chicken breast, constantly flipping it over so it browns on both sides. Reduce the heat, cover the pan, and allow the chicken to cook properly. If the pan becomes too dry, add 2 tablespoons of water.
- Stir in the chopped vegetables into the pan of frying chicken and finally add the quinoa/brown rice mix. Serve hot!
Tips
For the best results, use fresh, high-quality ingredients. Make sure to marinate the chicken for at least two hours if time allows, to let the flavors seep in thoroughly. If you prefer a bit of a crunch, lightly sauté the vegetables instead of cooking them through completely. This will add texture and keep the veggies vibrant.
Variations & Substitutions
If you want to switch things up, try using shrimp or tofu instead of chicken for a different protein option. For a vegetarian version, simply omit the chicken and double up on the vegetables. You can also play around with the spice levels by adjusting the amount of suya spice or adding extra scotch bonnet pepper if you’re a fan of heat.
Storage
This dish keeps well in the refrigerator for up to 3 days. Store in an airtight container and reheat in a pan over medium heat, stirring occasionally to ensure even heating. Add a splash of water if needed to prevent it from drying out.
FAQ
Can I use only quinoa or only brown rice instead of a mix?
Absolutely! You can use only quinoa or only brown rice if you prefer. Just ensure to adjust the cooking time accordingly, as brown rice typically takes longer to cook than quinoa.
Is there a way to make this dish spicier?
Yes, if you love spicy food, consider adding more scotch bonnet pepper or a dash of cayenne pepper. You can also increase the suya spice for an added kick.
Nutrition
This dish is rich in protein from the chicken and packed with fiber and essential amino acids from the quinoa and brown rice. The vegetables add vitamins and minerals, making it a well-rounded meal that supports a balanced diet.
Conclusion
Stir Fried Quinoa, Brown Rice, and Chicken Breast is more than just a meal; it’s an experience that brings together the warmth of home cooking and the excitement of bold flavors. Whether you’re cooking for family or friends, or just treating yourself, this dish is sure to become a favorite. Enjoy every bite, and don’t forget to share the love!
Related update: Stir Fried Quinoa, Brown Rice and Chicken Breast
Related update: Easy Garlic Roast Leg Of Lamb With Rosemary and Parsley
Related update: We recently published an article that expands on this topic: read the latest post.
Related update: We recently published an article that expands on this topic: read the latest post.