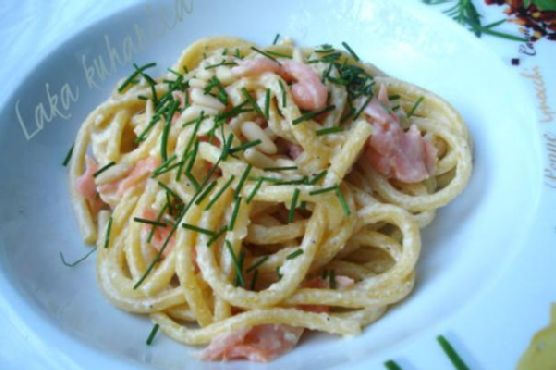
Baked Scallops With Parma Ham | Made by Meaghan Moineau

Baked Scallops With Parma Ham

Intro

There’s something incredibly nostalgic about the aroma of seafood baking in the oven. It instantly transports me back to my childhood summers spent by the coast, where every meal was a celebration of the ocean’s bounty. One dish that particularly stands out in my memory is Baked Scallops With Parma Ham. The combination of tender scallops and the savory, slightly salty Parma ham is nothing short of divine. This dish has become a cherished staple in my family, especially during festive gatherings when we want to serve something special yet uncomplicated.

Why You’ll Love It

This recipe is perfect for both novice cooks and seasoned culinary enthusiasts. Here’s why:

  • Simple Ingredients: You don’t need a long list of exotic ingredients. Most items are pantry staples or easily available at your local market.
  • Quick to Prepare: With just a few simple steps, this dish can be ready in under 30 minutes, making it ideal for last-minute entertaining.
  • Elegant Presentation: The combination of golden-baked breadcrumbs and the rosy hue of Parma ham makes for a beautiful presentation that will impress your guests.
  • Flavorful and Satisfying: The savory notes of Parma ham complement the delicate sweetness of scallops, while the breadcrumbs add a delightful crunch.

Ingredients

  • Fresh big scallops
  • Parma ham
  • 1 garlic clove
  • Dried breadcrumbs
  • Parsley
  • Olive oil
  • 1 bell pepper

Instructions

  1. Preheat your oven to 410°F (210°C / T 7).
  2. In a food processor, combine the breadcrumbs, Parma ham, garlic clove, parsley, and 1 teaspoon of olive oil. Pulse until the mixture is finely chopped and well combined.
  3. Fold a piece of kitchen paper, pour 1 teaspoon of olive oil on it, and use it to grease an oven rack thoroughly.
  4. Place the fresh scallops on the greased rack, ensuring they are evenly spaced.
  5. Top each scallop with a generous spoonful of the Parma ham mixture.
  6. Drizzle a dash of olive oil over the top of the mixture to help it crisp up in the oven.
  7. Bake the scallops in the preheated oven for 8 minutes or until the topping is golden brown and the scallops are cooked through.
  8. Serve immediately, garnished with a few leaves of lamb’s lettuce or rocket if desired.

Tips

For the best results, use fresh, high-quality scallops. Ensure they are dry before topping with the Parma ham mixture to prevent them from becoming soggy. If you do not have a food processor, finely chop the ingredients by hand for a more rustic texture. Remember, the key to this dish’s success lies in its simplicity and the quality of its ingredients.

Variations & Substitutions

If Parma ham is not available, you can substitute it with prosciutto or another type of thinly sliced, cured ham. For an extra kick, add a pinch of red pepper flakes to the breadcrumb mixture. You can also experiment with herbs; basil or thyme can be excellent substitutes for parsley, offering a different yet delightful flavor profile.

Storage

While this dish is best enjoyed fresh, you can store any leftovers in an airtight container in the refrigerator for up to two days. To reheat, place the scallops in a preheated oven at 350°F (175°C) until warmed through. Avoid using a microwave, as it may cause the scallops to become rubbery.

FAQ

Can I use frozen scallops for this recipe?

Yes, you can use frozen scallops, but ensure they are completely thawed and patted dry before preparation to avoid excess moisture, which can affect the texture and cooking time.

What can I serve with baked scallops?

This dish pairs wonderfully with a light salad of mixed greens or a simple vegetable side such as sautéed asparagus or roasted bell peppers. The fresh, crisp textures complement the richness of the scallops perfectly.

Can I prepare the topping in advance?

Absolutely! You can prepare the breadcrumb mixture up to a day in advance and store it in the refrigerator. This makes it even more convenient if you’re planning to serve this dish at a dinner party.

Nutrition

This dish is a great source of lean protein, making it a healthy choice for a starter. Scallops are low in fat and calories, while the addition of olive oil provides heart-healthy fats. However, be mindful of portion sizes if you are watching your sodium intake, as cured meats like Parma ham can be high in salt.

Conclusion

Baked Scallops With Parma Ham is a dish that seamlessly blends elegance with simplicity. It’s a testament to the idea that sometimes less is more, allowing the natural flavors of the ingredients to shine. Whether you’re preparing for a quiet dinner at home or hosting a festive gathering, this recipe is sure to be a hit. I invite you to try it and perhaps create your own cherished memories around the dining table.

Related update: Baked Scallops With Parma Ham

Related update: Crab Wontons

Mixed Paella | Made by Meaghan Moineau

Mixed Paella: A Hearty Feast for the Soul

Intro

Paella is more than just a dish; it’s a vibrant celebration of flavors and textures that brings people together. This Mixed Paella recipe has been a cherished staple in my family for generations, often making an appearance during our Sunday gatherings. I vividly recall the tantalizing aroma that filled my grandmother’s kitchen as she skillfully prepared the dish, her laughter mingling with the sizzle of chorizo in the pan. It’s a dish that carries with it the warmth and love of home, a culinary tradition I am thrilled to share with you today.

Why You’ll Love It

This Mixed Paella is a delightful medley of seafood, meat, and aromatic spices, making it a complete meal that is sure to satisfy. The harmonious blend of flavors from the saffron-infused rice, savory chorizo, and tender fish and shrimp creates a symphony on your palate. It’s a dish that’s both comforting and impressive, perfect for both casual family meals and special occasions. Plus, it’s a one-pan wonder that simplifies cleanup, allowing you more time to enjoy with your loved ones.

Ingredients

  • 1 bay leaf
  • 4 cups chicken broth
  • 1 chorizo sausage
  • 2 teaspoons extra virgin olive oil
  • 1 white fish fillet
  • 2 cloves garlic, minced
  • 1 lemon, cut into wedges
  • 1 teaspoon lemon zest
  • 1 pound mussels, cleaned
  • 1 Spanish onion, diced
  • 1/4 cup fresh parsley, chopped
  • 1/2 cup peas
  • 1 red bell pepper, diced
  • 1/2 teaspoon crushed red pepper flakes
  • 2 cups dry rice
  • 1/4 teaspoon saffron threads
  • 1/2 pound shrimp, peeled and deveined
  • 1 teaspoon thyme

Instructions

  1. In a very large non-stick skillet or paella pan preheated over medium-high heat, add 2 teaspoons of your oil (you will need more oil if you’re not using non-stick), garlic, red pepper flakes, and rice. Sauté for about 3 minutes.
  2. Add saffron, thyme, bay leaf, and chicken broth, then bring to a boil. Cover and reduce heat to a simmer. Leave covered, do not stir.
  3. In another non-stick skillet, heat to medium-high. Add chorizo and crumble as you sauté. When the sausage is cooked through, add red pepper and onion. Salt and pepper to taste if needed. Sauté until the onion is tender, then remove from heat and set aside.
  4. When the rice is nearly done (about 15 minutes), add fish and shrimp and press into rice. Add mussels, peas, and sprinkle with lemon zest. Cover and continue to simmer until the rice is done and the mussels have opened. Discard any mussels that do not open.
  5. Top with the chorizo mixture and parsley. Serve with lemon wedges and a crusty bread.

Tips

To ensure the perfect paella, resist the urge to stir the rice once the broth is added. This allows the rice to develop a crispy bottom layer known as “socarrat,” which is highly prized in traditional paella. Also, make sure to clean the mussels thoroughly and discard any that are cracked or do not close when tapped.

Variations & Substitutions

Feel free to customize your paella by swapping out ingredients based on your preferences or availability. You can use different types of seafood like clams or scallops, or substitute the chorizo with another type of sausage for a unique twist. For a vegetarian version, omit the meat and seafood entirely and add more vegetables like artichokes and green beans.

Storage

Leftover paella can be stored in an airtight container in the refrigerator for up to 3 days. To reheat, place it in a skillet over medium heat and add a splash of water or broth to retain moisture. Avoid using a microwave, as it may cause the seafood to become rubbery.

FAQ

Can I use brown rice instead of white rice?

Yes, you can use brown rice, but keep in mind that it has a longer cooking time compared to white rice. You’ll need to adjust the cooking time and possibly add more broth to ensure the rice is fully cooked.

Is it necessary to use saffron?

Saffron is a key ingredient in traditional paella, providing a unique flavor and vibrant color. However, if saffron is unavailable, you can substitute with turmeric, although the flavor will be different.

Can I freeze paella?

While it is possible to freeze paella, it’s not recommended as the texture of the seafood and rice may change upon thawing. It’s best enjoyed fresh or stored in the refrigerator for short-term use.

Nutrition

Mixed Paella is a balanced dish that combines proteins, carbohydrates, and healthy fats. With seafood providing omega-3 fatty acids and the addition of vegetables, it’s a nutritious option for a hearty meal. Adjust the portion size based on dietary needs and personal preferences.

Conclusion

This Mixed Paella recipe is a testament to the richness of Spanish cuisine, offering a delightful blend of flavors in every bite. Whether you’re sharing it with family or friends, it’s sure to be a crowd-pleaser. I hope this recipe becomes a treasured addition to your own culinary traditions, just as it has been in mine. Enjoy the process of cooking and savor the joyful moments it brings!

Related update: Mixed Paella

Related update: The Perfect Butter Beans Stew

Linguine with Prawns, Fresh Tomatoes and Spinach | Made by Meaghan Moineau

Linguine with Prawns, Fresh Tomatoes, and Spinach

Intro

Every time I prepare this delightful dish of Linguine with Prawns, Fresh Tomatoes, and Spinach, I’m transported back to the heartwarming summer evenings spent at my grandmother’s seaside cottage. The aroma of fresh tomatoes simmering with garlic and herbs would waft through the air, mingling with the salty sea breeze. My grandmother, with her apron dusted with flour, would beckon us to the table with a warm smile, serving up plates of her lovingly prepared pasta. This recipe is a tribute to those cherished memories, and I’m thrilled to share it with you.

Why You’ll Love It

This dish is a celebration of fresh, vibrant flavors and simple ingredients that come together to create a symphony of taste and texture. The juicy prawns add a delightful sweetness, complemented by the rich, buttery sauce that clings to every strand of linguine. The fresh tomatoes provide a burst of acidity, while the spinach gives it a nutritious punch. It’s a versatile recipe that’s easy enough for a weeknight meal but elegant enough to impress guests at a dinner party.

Ingredients

  • 300g fresh baby spinach, stems removed
  • 400g linguine (or fettuccine)
  • 2 garlic cloves, minced
  • 3 tablespoons olive oil
  • 2 tablespoons freshly chopped parsley
  • 400g fresh prawns, peeled and deveined
  • Salt and pepper to taste
  • 4 fresh tomatoes, chopped
  • 2 tablespoons unsalted butter
  • 1/3 cup white wine

Instructions

  1. Cook the linguine according to package directions until al dente. Drain and set aside.
  2. In a large skillet over medium heat, melt the butter with the olive oil.
  3. Add the chopped tomatoes, parsley, and garlic to the skillet. Sauté until the tomatoes are slightly tender, about 3-4 minutes.
  4. Add the spinach and white wine to the skillet, and cook until the spinach is wilted.
  5. Add the prawns to the skillet and sauté until they turn pink, about 3-5 minutes.
  6. Season with salt and pepper to taste.
  7. Add the cooked linguine to the skillet, tossing to coat the pasta in the sauce.
  8. Serve hot, garnished with additional parsley if desired.

Tips

For the best results, use the freshest ingredients you can find. Fresh prawns and ripe tomatoes will make a significant difference in flavor. Also, remember to not overcook the prawns as they can become tough and chewy. If you prefer a spicier kick, consider adding a pinch of red pepper flakes when sautéing the garlic and tomatoes. This dish is best served immediately, as the pasta can absorb the sauce and become dry if left for too long.

Variations & Substitutions

If you’re looking to switch things up, consider these variations:

  • Vegetarian Option: Omit the prawns and add more vegetables like zucchini or bell peppers for a vegetarian version.
  • Whole Wheat Pasta: Substitute regular linguine with whole wheat pasta for a healthier option.
  • Cheese Lover’s Delight: Sprinkle some grated Parmesan cheese over the dish just before serving for an added layer of flavor.

Storage

While this dish is best enjoyed fresh, you can store leftovers in an airtight container in the refrigerator for up to 2 days. To reheat, add a splash of water or white wine to the pasta and warm it gently in a skillet over low heat. This will help to prevent the pasta from drying out.

FAQ

Can I use frozen prawns?

Yes, you can use frozen prawns if fresh ones are not available. Just make sure to thaw them completely and pat them dry with paper towels before cooking to remove excess moisture.

What type of white wine should I use?

A dry white wine, such as Sauvignon Blanc or Pinot Grigio, pairs beautifully with this dish. Avoid sweet wines as they can alter the flavor profile of the sauce.

Nutrition

This dish is a good source of protein and vitamins, thanks to the prawns and spinach. It provides a balanced meal with carbohydrates from the pasta and healthy fats from the olive oil. However, if you’re watching your calorie intake, consider reducing the amount of butter used.

Conclusion

Incorporating the essence of seaside dining, this Linguine with Prawns, Fresh Tomatoes, and Spinach is a dish that brings the comforting flavors of a coastal Italian meal to your kitchen. It’s not just a recipe, but a journey back to cherished memories, and an opportunity to create new ones with your loved ones. Whether you’re serving it for a special occasion or simply indulging in a delicious homemade meal, this dish is sure to become a favorite in your culinary repertoire. Enjoy the delightful blend of flavors and happy cooking!

Related update: Linguine with Prawns, Fresh Tomatoes and Spinach

Related update: Lamb & Sweet Potato Pot Pie

Kk’s Fish Tacos | Made by Meaghan Moineau

Kk’s Fish Tacos: A Crispy, Flavorful Delight

Intro

There’s something magical about fish tacos that transport me back to sun-soaked afternoons on the coast, where the gentle sea breeze mingles with the aroma of freshly caught seafood. My love affair with fish tacos began during a family vacation to Baja California, where every bite was a revelation of flavors. Over the years, I’ve refined my own version, which I now share with you as Kk’s Fish Tacos. This recipe is more than just a meal; it’s a culinary journey back to those cherished memories by the ocean.

Why You’ll Love It

This recipe for Kk’s Fish Tacos is a crowd-pleaser for many reasons. The crispy, golden-brown tilapia offers a satisfying crunch, perfectly complemented by the soft, warm tortillas. The combination of fresh cilantro, zesty lime, and vibrant veggies create a refreshing contrast to the savory fish. Whether it’s a casual family dinner or a lively gathering with friends, these tacos are sure to impress.

Ingredients

  • Fresh tilapia fillets
  • Flour tortillas
  • Fresh cilantro, chopped
  • Limes, cut into wedges
  • Iceberg lettuce, shredded
  • Diced tomatoes
  • Diced onion
  • Italian bread crumbs
  • Creole seasoning
  • Lard for frying
  • Salt (optional)
  • Queso fresco (optional)
  • Salsa and/or guacamole (optional)

Instructions

  1. In a pie pan or deep dish, add your Italian bread crumbs.
  2. In a large pan, add about 1 cup of lard and bring it up to a sizzling temperature. Note: You may need to add more oil after frying about half the fish.
  3. If using frozen tilapia, thaw it in lukewarm water and drain well.
  4. Once the oil is ready, take one of the fillets and thoroughly coat both sides with the bread crumbs.
  5. Place the fillet in the oil and cook until each side is golden brown, approximately 2-3 minutes per side.
  6. Transfer the cooked fillets to sheets of paper towels to drain excess oil.
  7. Lightly season the top side of the fish with salt or creole seasoning.
  8. While frying the rest of the fillets, chop up all of your accouterments.
  9. When everything is ready, microwave your tortillas for about 30 seconds on high, completely covered in a paper towel or clean dishtowel.
  10. Set up a taco-building buffet: add your fish, a little queso, your veggies, a pinch of cilantro, and then salsa and/or guacamole.
  11. Use the lime wedges to give your taco a little extra kick of citrus!

Tips

Here are some tips to ensure your fish tacos turn out perfectly:

  • Oil Temperature: Make sure your oil is hot enough before adding the fish. If it’s not sizzling, your fish might become soggy instead of crispy.
  • Draining Excess Oil: Use paper towels to drain the fish thoroughly after frying to keep them crispy.
  • Fresh Ingredients: Use the freshest ingredients possible, especially the fish and vegetables, for the best flavor.

Variations & Substitutions

Feel free to get creative with this recipe. Here are some variations and substitutions to consider:

  • Fish Options: While tilapia is a great choice, you can also use cod or haddock for a different flavor and texture.
  • Tortillas: Swap flour tortillas for corn tortillas if you prefer a different taste or are looking for a gluten-free option.
  • Spice Level: Adjust the creole seasoning to your preferred spice level, or add a dash of hot sauce for extra heat.

Storage

If you have leftovers, store the fish and toppings separately from the tortillas to maintain their texture. Keep the fish in an airtight container in the refrigerator for up to 2 days. Reheat the fish in a skillet to retain its crispiness before assembling your tacos.

FAQ

Can I bake the fish instead of frying it?

Yes, you can! Preheat your oven to 425°F (220°C). Place the breaded fish on a baking sheet lined with parchment paper and bake for 12-15 minutes, or until golden and cooked through.

What toppings work well with fish tacos?

Aside from the classic toppings listed in the recipe, you can also add sliced avocado, pickled red onions, or spicy slaw for added flavor and texture.

Can I make these tacos ahead of time?

While it’s best to serve these tacos fresh, you can prepare the components ahead of time. Store the fried fish and chopped vegetables in separate containers in the fridge, and assemble the tacos just before serving.

Nutrition

The nutritional content of these fish tacos will vary based on the specific ingredients and quantities used. Generally, they offer a balanced mix of protein, healthy fats, and carbohydrates, with additional vitamins and minerals from the fresh vegetables. Adjust portion sizes and toppings to fit your dietary needs.

Conclusion

Kk’s Fish Tacos are more than just a meal—they’re a celebration of flavors and memories. Whether you’re reminiscing about sunlit adventures or creating new culinary traditions, these tacos are sure to delight your taste buds. Gather your loved ones, share a meal, and enjoy the simple pleasures of life wrapped in a warm tortilla. Bon appétit!

Related update: Kk’s Fish Tacos

Related update: Siamese Fried Noodle (Mee Siam)

Grilled Garlicky-Herbed Shrimp | Made by Meaghan Moineau

Grilled Garlicky-Herbed Shrimp

Intro

There’s something truly magical about grilling seafood, especially when it involves a cherished family recipe that has been passed down through generations. I still vividly remember those summer evenings at my grandmother’s house by the sea. As kids, we’d watch her prepare her famous grilled shrimp, the air filled with the rich aroma of garlic and herbs, while we eagerly awaited the feast. This Grilled Garlicky-Herbed Shrimp recipe is a beautiful tribute to those warm, breezy nights and the love shared through food. Whether you’re hosting a backyard BBQ or having a quiet dinner at home, this recipe is sure to bring a touch of nostalgia and delight to your table.

Why You’ll Love It

This Grilled Garlicky-Herbed Shrimp recipe is not just about savoring deliciously marinated shrimp; it’s about enjoying a dish that’s both simple to prepare and packed with flavor. You’ll love how the robust garlic and fresh herbs combine with the subtle heat of chili pepper flakes, creating a perfect marinade that elevates the delicate taste of shrimp. Whether you’re a seafood aficionado or someone trying shrimp for the first time, this recipe promises to be a hit!

Ingredients

  • Chili pepper flakes
  • Extra virgin olive oil
  • Coriander leaves
  • Garlic
  • Shrimp
  • Lemon zest
  • Parsley

Instructions

  1. Combine all ingredients except shrimp in a large bowl.
  2. Add shrimp and toss to combine, making sure all parts of the shrimp are coated in the marinade.
  3. Refrigerate for 4 hours or overnight to let the flavors meld.
  4. Preheat grill on medium heat.
  5. Place shrimp on the grill and cook, turning once, until pink, about 5 minutes.
  6. For a Mediterranean feel, serve the shrimp with a roasted red pepper salad. Enjoy!

Tips

For the best flavor, use fresh shrimp and marinate them overnight if possible. Be cautious not to overcook the shrimp as they can become tough and rubbery. Keep an eye on the grill and turn the shrimp as soon as they turn pink.

Variations & Substitutions

If you prefer a spicier kick, feel free to increase the amount of chili pepper flakes or add a pinch of cayenne. For a milder version, reduce the chili flakes or omit them altogether. You can also substitute cilantro for parsley if you prefer, or add a splash of white wine to the marinade for extra depth of flavor.

Storage

Leftover grilled shrimp can be stored in an airtight container in the refrigerator for up to 2 days. To reheat, gently warm them in a skillet over low heat, or enjoy them cold in a salad or wrap.

FAQ

Can I use frozen shrimp for this recipe?

Yes, you can use frozen shrimp, but make sure to thaw them completely before marinating to ensure they absorb the flavors well.

What kind of grill should I use?

You can use either a gas or charcoal grill. If you don’t have a grill, a grill pan on the stovetop works well too.

How can I tell when the shrimp are done?

Shrimp are done when they turn pink and opaque. Be careful not to overcook them as they can become rubbery.

Nutrition

This dish is low in calories and high in protein, making it a healthy choice. It’s also full of healthy fats from the olive oil and packed with flavor, ensuring that you don’t sacrifice taste for nutrition.

Conclusion

Grilled Garlicky-Herbed Shrimp is more than just a recipe – it’s a culinary experience that brings together the joy of grilling, the delight of fresh ingredients, and the warmth of shared memories. Whether you’re reminiscing about family gatherings or creating new traditions, this shrimp dish is sure to become a favorite. Gather your loved ones, fire up the grill, and enjoy a meal that’s as heartwarming as it is delicious.

Related update: Grilled Garlicky-Herbed Shrimp

Indias Growth Surge: Factories Fuel Boom | Analysis by Brian Moineau

India’s GDP Surprise: Factories, Festivals and a Fed of Optimism

Prime Minister Narendra Modi called the GDP number “very encouraging.” And who wouldn’t be? When official data showed India’s economy growing faster than most forecasters dared to predict, the reaction was equal parts relief and recalibration — for businesses, policymakers and investors trying to read what comes next.

Why this quarter felt different

  • India’s GDP surged 8.2% year‑on‑year in the July–September 2025 quarter, well above Bloomberg and consensus forecasts and the strongest pace in six quarters. (fortune.com)
  • The upswing was broad-based: private consumption jumped ahead of the festival season, manufacturing posted a sharp gain, and services remained resilient. Policy moves — tax cuts in September and a series of earlier rate reductions — helped juice demand. (fortune.com)
  • All of this happened while a strained trade backdrop loomed: a 50% U.S. tariff on many Indian imports complicates export prospects and adds uncertainty to the near term. Yet firms appear to have front‑loaded shipments and inventory activity, muting the immediate bite of tariffs. (fortune.com)

What the numbers really tell us

  • Short-term momentum: The combination of festive-season spending, tax cuts and prior interest‑rate easing produced a powerful near‑term boost. Manufacturing growth (9.1%) and a near‑8% jump in private consumption are the headline engines of the quarter. (fortune.com)
  • Not necessarily durable: Several economists warn the gains may fade once the one‑off effects — stockpiling before tariffs, festival demand, and statistical quirks like a lower GDP deflator — wash out. Forecasts for next fiscal year were nudged up, but multilateral institutions and rating agencies still flag downside risks if trade frictions persist. (fortune.com)
  • Policy implications: Strong growth reduces the urgency for an immediate rate cut by the Reserve Bank of India, though low inflation keeps room for easing open. Markets reacted by pricing a lower probability of an imminent cut. (fortune.com)

A closer look at the Trump tariffs effect

  • Timing matters: Many exporters shipped ahead of August’s tariff implementation, which created a temporary volume bump. That front‑loading shows up in the data, helping manufacturing and export‑related activity this quarter. (fortune.com)
  • Structural risk remains: If high U.S. tariffs endure, exporters will face sustained price and market‑access penalties. Multilateral forecasts (IMF WEO and Article IV assessments) reduced long‑run growth projections slightly under a scenario of prolonged tariffs. India’s domestic demand cushion can blunt but not fully negate export pain. (imf.org)
  • Winners and losers: Sectors with strong domestic market exposure (consumer goods, some services, domestic manufacturing) benefit most from the current setup. Labor‑intensive export sectors — textiles, gems and jewelry, seafood — are more exposed to tariff damage. (forbes.com)

When numbers and politics collide

  • Messaging matters: Modi’s “very encouraging” post on X is more than cheerleading. Strong quarterly prints bolster the government’s reform story (tax cuts, Make in India push) and strengthen negotiating leverage in trade talks. But politics also raises the bar for sustaining results; the state wants growth to look both robust and inclusive. (fortune.com)
  • External perceptions: International agencies still see India as one of the few bright spots in a slower world economy, even if they temper longer-term forecasts because of protectionist shocks. That positioning attracts capital and attention — until and unless trade barriers start redirecting supply chains away from India. (imf.org)

Practical implications for readers

  • For consumers: Strong demand helped by tax cuts means fresher buying power now, especially in urban centers during festival cycles. But keep an eye on inflation and employment signals over the next two quarters.
  • For business leaders: Don’t over‑interpret one robust quarter. Use the breathing room to invest in productivity, diversify export markets, and avoid over‑reliance on short‑term stockpiling gains.
  • For investors: Macro momentum and lower inflation create a constructive backdrop, but tariff‑driven export risk and potential capital flow swings mean selective exposure and active risk management make sense.

A few smart caveats

  • Some part of the headline jump may reflect statistical effects (lower GDP deflator and other discrepancy adjustments), so analysts are rightly cautious about extrapolating this pace forward. (fortune.com)
  • Forecasts vary: While the IMF projects India to remain a top growth performer in 2025–26 under its baseline, it also warns that sustained high tariffs shave projected growth thereafter. (imf.org)

My take

This quarter feels like a tactical win for India: policy levers and private consumption combined to outpace expectations, and manufacturing showed welcome life. But the strategic contest is just beginning. If India wants manufacturing-led, export‑driven growth to be durable, it needs two things: (1) trade diplomacy and adaptation to reclaim lost market access, and (2) faster local value‑chain deepening so that front‑loaded shipments don’t become the main growth story. Short of that, domestic resilience will keep India growing, but the trajectory will be bumpier than a single headline number suggests.

The bottom line

An 8.2% print is newsworthy and politically powerful. It buys space for reforms and investment. But read it as a strong quarter, not a guarantee of uninterrupted acceleration. The next few quarters — how tariffs play out, whether festival demand normalizes, and whether investment follows consumption — will tell us whether this was a steppingstone or a spike.

Sources


Related update: We recently published an article that expands on this topic: read the latest post.


Related update: We recently published an article that expands on this topic: read the latest post.


Related update: We recently published an article that expands on this topic: read the latest post.

Shrimp & Crab Egg Rolls | Made by Meaghan Moineau

Shrimp & Crab Egg Rolls

Intro

When I was a child, my grandmother would invite the entire family over on Sunday afternoons for a feast. The kitchen was always bustling with energy, filled with the rich aroma of spices and the laughter of family members sharing stories. Amongst the many dishes, her Shrimp & Crab Egg Rolls were the highlight of our gatherings. She would always let me help with rolling the egg rolls, a task I took on with great pride. Today, I share this cherished recipe with you, hoping it brings the same warmth and joy to your home as it did to ours.

Why You’ll Love It

These Shrimp & Crab Egg Rolls are a delightful combination of succulent seafood and crisp vegetables, all wrapped up in a perfectly crispy exterior. They make for a fantastic appetizer or snack, and they’re sure to impress at any gathering. The balance of flavors is both comforting and exotic, making it a dish that everyone will adore.

Ingredients

  • 8 oz. dry bean sprouts, washed and patted dry
  • 1 cup shredded carrots
  • 1/2 lb imitation crab (or real crab if preferred)
  • 1/2 lb medium-sized shrimp, shelled and deveined
  • 2 garlic cloves, finely minced (or 1 tbsp garlic powder)
  • 1 tsp brown sugar
  • 3 green onions, finely chopped (green part only)
  • 10-12 (6 or 8-inch) egg roll wrappers
  • 1 beaten egg, for egg wash
  • Vegetable oil, for frying
  • 1 tsp salt and ground pepper
  • 1 cup sweet chili sauce, for serving

Instructions

  1. In a large bowl, combine the bean sprouts, shredded carrots, imitation crab, shrimp, minced garlic, brown sugar, and green onions. Season with salt and pepper to taste.
  2. Place an egg roll wrapper on a clean surface with one corner pointing towards you. Spoon about 2 tablespoons of the filling onto the center of the wrapper.
  3. Fold the bottom corner over the filling, then fold in the sides. Roll the wrapper tightly towards the top corner. Brush the top corner with a bit of the beaten egg to seal the roll. Repeat with the remaining wrappers and filling.
  4. Heat vegetable oil in a deep pan or fryer to 350°F (175°C). Carefully place the egg rolls in the hot oil, a few at a time, and fry until golden brown and crispy, about 3-5 minutes.
  5. Remove the egg rolls from the oil and drain on a paper towel-lined plate.
  6. Serve warm with sweet chili sauce for dipping.

Tips

For best results, ensure that the filling is well-drained before wrapping to prevent soggy egg rolls. Additionally, do not overcrowd the pan when frying, as this can lower the oil temperature and result in less crispy egg rolls.

Variations & Substitutions

Feel free to experiment with different fillings. You could add finely sliced cabbage or bell peppers for extra crunch. If you prefer a spicier kick, consider adding a dash of Sriracha or chopped chili peppers to the filling. For a vegetarian version, simply omit the seafood and add more vegetables or tofu.

Storage

Leftover egg rolls can be stored in an airtight container in the refrigerator for up to 3 days. To reheat, place them in the oven at 350°F (175°C) until warmed through and crispy. Avoid microwaving, as this can make the egg rolls soggy.

FAQ

Can I bake these egg rolls instead of frying?

Yes, you can bake them for a healthier alternative. Preheat your oven to 400°F (200°C), place the egg rolls on a baking sheet lined with parchment paper, and brush them lightly with oil. Bake for 15-20 minutes or until golden brown, flipping halfway through.

What dipping sauces pair well with these egg rolls?

Besides sweet chili sauce, these egg rolls pair well with soy sauce, hoisin sauce, or a spicy peanut sauce. Feel free to get creative and try different flavors to complement the egg rolls.

Can I prepare these in advance?

Absolutely! You can prepare the filling and wrap the egg rolls a day ahead. Store them in the refrigerator, covered with a damp cloth, to prevent the wrappers from drying out. Fry them just before serving for the best texture.

Nutrition

These Shrimp & Crab Egg Rolls are a source of protein and vitamins from the seafood and vegetables. While frying adds calories, you can opt for baking to reduce the fat content. As with any indulgent dish, moderation is key.

Conclusion

These Shrimp & Crab Egg Rolls are more than just a meal; they are a testament to family traditions and the joy of cooking together. Whether you’re making them for a special occasion or just a cozy night in, they are sure to become a favorite in your household. Enjoy the crispiness, the rich flavors, and the happiness they bring to your table. From my family to yours, happy cooking!

Related update: Shrimp & Crab Egg Rolls

Related update: Tomato Cutlets

Baked Scallops With Parma Ham | Made by Meaghan Moineau

Baked Scallops With Parma Ham

Intro

There’s a certain kind of magic that happens when you combine the delicate sweetness of scallops with the rich, savory notes of Parma ham. This recipe for Baked Scallops with Parma Ham transports me back to my childhood, when my family would gather around the table for Sunday dinners. My grandmother, an enthusiastic cook with a love for simple yet elegant dishes, would often prepare this delightful starter. The aroma of garlic and parsley mingling with the salty scent of the sea would fill the kitchen, creating an atmosphere of warmth and togetherness. Today, I’m excited to share that same sense of comfort and joy with you through this recipe.

Why You’ll Love It

This dish is a celebration of flavors and textures that complement each other beautifully. The tender, juicy scallops provide a perfect canvas for the crispy, savory topping made from Parma ham and breadcrumbs. With just a handful of ingredients, this recipe is not only delicious but also incredibly easy to prepare. Whether you’re hosting a dinner party or simply want to treat yourself, these baked scallops are sure to impress. Plus, they’re ready in under 30 minutes, making them an excellent choice for both special occasions and weeknight dinners.

Ingredients

  • Fresh big scallops
  • Parma ham
  • 1 garlic clove
  • Dried breadcrumbs
  • Parsley
  • Olive oil
  • Bell pepper

Instructions

  1. Preheat your oven to 410°F (210°C / T 7).
  2. In a food processor, mix together the breadcrumbs, Parma ham, garlic, parsley, and 1 teaspoon of olive oil until you have a coarse, crumbly mixture.
  3. Fold a piece of kitchen paper, pour 1 teaspoon of olive oil on it, and use it to grease an oven rack.
  4. Place the scallops on the greased rack and top each one with a generous spoonful of the Parma ham mixture.
  5. Drizzle a dash of olive oil on top of each scallop.
  6. Bake in the preheated oven for about 8 minutes, or until the topping is crispy and golden brown.
  7. Serve immediately as a starter, accompanied by a few leaves of lamb’s lettuce or rocket if desired.

Tips

For the best results, use fresh scallops rather than frozen ones. Fresh scallops have a sweeter, more delicate flavor that pairs perfectly with the robust Parma ham. If you’re using frozen scallops, be sure to thaw them completely and pat them dry before cooking to prevent excess moisture from affecting the dish.

To achieve an even crispier topping, consider lightly toasting the breadcrumbs in a dry pan before adding them to the food processor. This step is optional but can add a lovely depth of flavor.

Variations & Substitutions

If you’re looking to mix things up, there are plenty of variations you can try with this recipe. Consider adding a pinch of red pepper flakes to the breadcrumb mixture for a hint of heat. Alternatively, swap the parsley for fresh basil or chives for a different herbal note.

For those who prefer a non-pork option, substitute the Parma ham with turkey bacon or prosciutto. Each will offer a slightly different flavor profile while maintaining the dish’s savory richness.

Storage

While these scallops are best enjoyed fresh, you can store any leftovers in an airtight container in the refrigerator for up to two days. To reheat, place them in a preheated oven at 350°F (175°C) for about 5 minutes, or until warmed through. Avoid using the microwave, as it can make the scallops rubbery.

FAQ

Can I use frozen scallops for this recipe?

Yes, you can use frozen scallops, but be sure to thaw them completely and pat them dry before cooking. This step ensures that the scallops don’t release too much moisture during baking, which can affect the texture.

What can I serve with baked scallops?

Baked scallops make an excellent starter served with a simple salad of lamb’s lettuce or rocket. For a more substantial meal, consider pairing them with a side of creamy risotto or garlic butter pasta.

How do I know when the scallops are cooked?

The scallops are done when they’re opaque and slightly firm to the touch. Be careful not to overcook them, as they can become tough and chewy. The baking time in this recipe is just right for achieving perfectly cooked scallops.

Nutrition

While I don’t have the exact nutritional breakdown, this dish is generally low in carbohydrates and high in protein, making it a great option for those following a low-carb or keto-friendly diet. The combination of olive oil and seafood provides healthy fats, while the parsley adds a touch of freshness and vitamins.

Conclusion

Baked Scallops with Parma Ham is a dish that’s as delightful to the palate as it is to the soul. With its roots in family tradition and its simplicity in preparation, it’s a recipe that invites you to savor every moment, from the aromatic anticipation in the kitchen to the first delicious bite. Whether you’re creating new memories or reliving cherished ones, I hope this recipe brings a touch of warmth and elegance to your table. Happy cooking!

Related update: Baked Scallops With Parma Ham

Related update: Savory Slow Roasted Tomatoes with Filet of Anchovy

Asian Salmon Burgers With Tangy Ginger Lime Sauce | Made by Meaghan Moineau

Asian Salmon Burgers With Tangy Ginger Lime Sauce

Intro

There’s something undeniably comforting about sinking your teeth into a well-crafted burger. For me, it brings back fond memories of summer evenings spent with my family in our backyard. My father, the grill master, would whip up his signature dishes, and one day, he introduced us to these delightful Asian Salmon Burgers. The combination of fresh salmon with a tangy ginger lime sauce became an instant favorite. Today, I’m excited to share this family recipe with you all, hoping it brings the same joy and deliciousness to your home as it did to ours.

Why You’ll Love It

These Asian Salmon Burgers are not just another burger recipe. They are a delightful fusion of flavors and textures that will tantalize your taste buds. The fresh salmon, rich with omega-3 fatty acids, brings a tender and juicy bite, while the ginger lime sauce adds a perfect zing that complements the savory burger. Whether you’re looking for a healthy alternative to traditional beef burgers or simply want to try something new, these salmon burgers are a must-try!

Ingredients

  • 4 burger buns
  • 1/4 cup fresh basil, chopped
  • 2 cloves garlic, minced
  • 2 green onions, finely sliced
  • 1 lime, juiced
  • 1/2 cup mayonnaise
  • 2 tablespoons oyster sauce
  • 1 teaspoon powdered ginger
  • 1 pound salmon, skin removed
  • 2 tablespoons sesame oil
  • 1/4 cup sour cream
  • 2 tablespoons soy sauce

Instructions

  1. Cut the salmon into large hunks and run it through a food processor until no large pieces remain.
  2. Add to the salmon the soy sauce, garlic, ginger, oyster sauce, green onion, and basil.
  3. Combine ingredients well and form 4 large patties from the mixture.
  4. Heat up the sesame oil in a large frying pan on medium-high heat and add in the patties.
  5. Cook for about 10 minutes, flipping once halfway through.
  6. To make the sauce, mix the mayonnaise, sour cream, lime juice, and a pinch of ginger until smooth.
  7. Pour a spoonful of sauce over the top of the finished salmon burger and serve inside a toasted bun.

Tips

For the best results, use fresh salmon. It enhances the flavor and texture of the burger. If you don’t have a food processor, you can finely chop the salmon with a sharp knife. Be sure to toast your buns for extra flavor and crunch. Lastly, don’t overcook the salmon patties; they should be juicy and slightly pink in the center.

Variations & Substitutions

If you want to switch things up, consider using shrimp instead of salmon for a different seafood twist. You can also add some heat by including a teaspoon of sriracha or chili flakes to the sauce. For a gluten-free option, serve the patties on lettuce wraps instead of buns. If you prefer a different herb, cilantro works wonderfully in place of basil.

Storage

These salmon burgers are best enjoyed fresh, but if you have leftovers, store the patties in an airtight container in the refrigerator for up to 2 days. The sauce can be refrigerated separately in a small container. To reheat, gently warm the patties in a skillet over low heat until heated through.

FAQ

Can I freeze the salmon patties?

Yes, you can freeze the uncooked salmon patties. Place them on a baking sheet lined with parchment paper and freeze until solid. Once frozen, transfer the patties to a freezer-safe bag or container. They can be stored for up to 3 months. Thaw in the refrigerator before cooking.

What can I serve with these salmon burgers?

These burgers pair wonderfully with a light and fresh salad, sweet potato fries, or a simple coleslaw. You can also serve them with grilled vegetables for a wholesome meal.

Nutrition

This recipe provides a nutritious meal option rich in protein and omega-3 fatty acids, which are beneficial for heart health. Salmon is also a great source of vitamin D and B vitamins. Remember to adjust portion sizes to fit your dietary needs.

Conclusion

These Asian Salmon Burgers with Tangy Ginger Lime Sauce are a delicious way to enjoy a healthy and satisfying meal. With their vibrant flavors and simple preparation, they make an excellent choice for family dinners or entertaining guests. I hope you enjoy making and savoring these burgers as much as my family has over the years. Bon appétit!

Related update: Asian Salmon Burgers With Tangy Ginger Lime Sauce

Related update: Avocado Nests

Crab Cake Stuffed Shrimp | Made by Meaghan Moineau

Crab Cake Stuffed Shrimp

Intro

There’s something truly magical about the combination of crab cakes and shrimp. It takes me back to summer evenings spent by the coastline, where the air was tinged with the saltiness of the sea and the gentle hum of waves provided the perfect backdrop to our family gatherings. My grandmother, ever the culinary wizard, would whip up this dish that was both an indulgence and a comfort. Her Crab Cake Stuffed Shrimp was the star of many a festive table, and today, I am thrilled to share her recipe with you. This delightful appetizer is sure to impress your guests, bringing a touch of the ocean’s bounty to your dining table.

Why You’ll Love It

This Crab Cake Stuffed Shrimp recipe is the perfect blend of elegance and comfort, making it ideal for both special occasions and casual gatherings. Here’s why you’ll fall in love with it:

  • Flavor-Packed: Each bite is a burst of rich, savory flavors with a hint of spice.
  • Textural Delight: The tender shrimp combined with the crispy crab cake offers a satisfying texture contrast.
  • Impressive Presentation: This dish looks as good as it tastes, making it a show-stopper on any table.
  • Make Ahead: The crab mixture can be prepared in advance, allowing you more time to enjoy with guests.
  • Customizable: Easily adjust the spice level or add your personal touch with various substitutions.

Ingredients

  • 10 tablespoons unsalted butter, divided
  • 1 onion, finely chopped
  • 1 green bell pepper, finely chopped
  • 1 red bell pepper, finely chopped
  • 1/4 cup dry white wine
  • 2 cloves garlic, minced
  • 1 pound crab meat
  • 1/2 cup round buttery crackers, crushed
  • 1/2 cup panko bread crumbs
  • 1/2 teaspoon red ground pepper
  • 1 teaspoon Old Bay seasoning
  • Salt and black ground pepper to taste
  • 16 large shrimp, peeled and deveined
  • Optional: Lemon wedges for serving

Instructions

  1. Line a baking sheet with parchment paper.
  2. In a skillet, melt 5 tablespoons of butter over medium heat. Add the onion and sauté until translucent.
  3. Add the green and red bell peppers, remaining 5 tablespoons of butter, white wine, and garlic. Cook until the vegetables are tender, about 4 minutes.
  4. In a large bowl, combine the crab meat, onion mixture, crushed crackers, panko bread crumbs, red pepper, Old Bay seasoning, salt, and black pepper. Stir to combine.
  5. Cover the crab mixture and refrigerate for at least 1 hour, or up to 24 hours for enhanced flavor.
  6. Preheat your oven to 350 degrees Fahrenheit.
  7. Using a sharp knife, butterfly each shrimp starting at the tail end, and place them on the prepared baking sheet, pressing gently to flatten.
  8. Form about 3 tablespoons of the crab mixture into a ball and place it on top of each shrimp, pressing the shrimp tail over the crab.
  9. Repeat with the remaining shrimp and crab mixture.
  10. Bake in the preheated oven for 10 to 15 minutes until the shrimp are cooked through and the tops are lightly golden.
  11. Optional: Squeeze fresh lemon juice over the cooked appetizers for a zesty finish.
  12. Serve immediately to enjoy the best taste and texture.

Tips

  • Choose Fresh Ingredients: Use the freshest crab meat and shrimp for the best flavor.
  • Chill the Mixture: Refrigerating the crab mixture helps it hold together better when forming the balls.
  • Don’t Overstuff: Be gentle when wrapping the shrimp around the crab mixture to prevent tearing.

Variations & Substitutions

Feel free to make this recipe your own by experimenting with these variations and substitutions:

  • Spicy Twist: Add more red pepper or a dash of cayenne for extra heat.
  • Herbal Infusion: Mix in some fresh herbs like parsley or chives for an aromatic touch.
  • Cheesy Delight: Fold in some grated Parmesan cheese into the crab mixture for a rich flavor.
  • Alternative Meats: Swap crab meat for chopped lobster or scallops for a different take.

Storage

If you have leftovers (which is rare because they’re so delicious!), store them in an airtight container in the refrigerator for up to 2 days. Reheat in a preheated oven at 350 degrees Fahrenheit until warmed through for best results. Avoid microwaving as it may make the shrimp rubbery.

FAQ

Can I use frozen shrimp?

Yes, you can use frozen shrimp, but make sure to thaw them completely and pat them dry before using to prevent excess moisture from affecting the texture of the dish.

What can I serve with Crab Cake Stuffed Shrimp?

This dish pairs beautifully with a fresh green salad, roasted vegetables, or a light pasta dish. You can also serve it as an appetizer with a dipping sauce like aioli or cocktail sauce.

How do I know when the shrimp are cooked?

The shrimp are done when they turn opaque and pink, and the crab mixture on top is lightly golden. Be careful not to overcook them to maintain a juicy texture.

Nutrition

This dish is a delightful indulgence, rich in protein from the crab and shrimp. While exact nutritional information will vary based on specific ingredients used, it is a good source of omega-3 fatty acids, vitamins, and minerals. For those watching their sodium intake, consider adjusting the amount of Old Bay seasoning and salt.

Conclusion

Crab Cake Stuffed Shrimp is more than just a recipe; it’s a celebration of flavors that brings happiness to the table. Whether you’re recreating cherished family memories or starting new traditions, this dish is bound to be a hit. Share it with loved ones, and let the taste of the sea make your culinary experience unforgettable. Happy cooking!

Related update: Crab Cake Stuffed Shrimp

Related update: Tuna Mexi Melts

Smoked Salmon and Mascarpone Calzone | Made by Meaghan Moineau

Smoked Salmon and Mascarpone Calzone

Intro

There’s something truly magical about the aroma of freshly baked calzones wafting through the kitchen. It instantly transports me back to my childhood, where Sunday afternoons were reserved for family cooking sessions. My grandmother, with her deft hands and infectious laughter, would guide us through the art of making the perfect calzone, each one stuffed with her secret ingredient—love. Today, I’m sharing a modern twist on this nostalgic favorite: the Smoked Salmon and Mascarpone Calzone. It’s a delightful fusion of creamy mascarpone, savory smoked salmon, and the delicate flavor of fresh chives and leeks, all encased in a perfectly golden crust.

Why You’ll Love It

This Smoked Salmon and Mascarpone Calzone is not just a dish; it’s an experience. Whether you’re a fan of traditional Italian cuisine or looking to try something new, this recipe offers a unique blend of flavors and textures that will captivate your taste buds. The richness of the mascarpone complements the smokiness of the salmon perfectly, while the leeks add a subtle sweetness that ties everything together. Plus, making calzones is a fun activity for the whole family, reminiscent of those cherished childhood memories.

Ingredients

  • Black pepper
  • Egg white
  • Extra virgin olive oil
  • Fresh chives
  • Kosher salt
  • Leek
  • Mascarpone
  • Pizza dough
  • Smoked salmon

Instructions

  1. Preheat your oven to 450°F and place the top rack in the lower third of your oven. Line a baking sheet with parchment paper for easier cleanup.
  2. Wash and pat dry the leek. Slice the leek lengthwise, then cut each half into long, very thin strips. Cut the strips into short pieces, about 2 inches long. Set aside.
  3. Divide the dough into two equal parts, and roll out each into a 10-inch circle. Gently spread a thin layer of mascarpone on the surface of the dough, leaving at least a 1-inch crust.
  4. In a small bowl, break up the smoked salmon using your fingers until it is fluffy. You want the filling of the calzone to be pretty even, or it will fall apart as you eat it.
  5. Divide the salmon between the two crusts, arranging it only on one side of the crust (in a half-moon shape), again leaving at least a 1-inch crust. Sprinkle the chives and leeks over the salmon, then lightly salt and pepper. Finally, drizzle with about 1 tsp of olive oil.
  6. Fold each calzone in half, making sure that the crusts line up. Using the tines of a fork, gently press down the edge all the way around the rounded side of the calzone to seal it. Make sure you get a tight seal; this will help the calzone puff up during baking.
  7. Brush the tops of each calzone with egg white. Bake at 450°F for about 15 minutes, or until golden brown and delicious.

Tips

Here are a few tips to ensure your calzones turn out perfectly:

  • Make sure your oven is fully preheated before baking to achieve the best crust.
  • If you’re short on time, store-bought pizza dough works just as well as homemade.
  • Ensure the seal is tight to prevent any filling from leaking out during baking.

Variations & Substitutions

This recipe is wonderfully versatile. Here are some variations and substitutions you can try:

  • Swap the smoked salmon for smoked trout or cooked shrimp for a different seafood twist.
  • Replace mascarpone with cream cheese for a tangier flavor.
  • Add capers or dill for an extra burst of flavor.

Storage

To store your calzones, allow them to cool completely, then wrap them tightly in foil or place them in an airtight container. They can be refrigerated for up to 3 days. To reheat, simply place them in an oven preheated to 350°F for 10-12 minutes or until warmed through.

FAQ

Can I make the calzone dough ahead of time?

Yes, you can make the dough ahead of time. Simply prepare the dough according to your recipe, then wrap it tightly in plastic wrap and store it in the refrigerator for up to 24 hours. Allow it to come to room temperature before rolling it out.

What can I serve with these calzones?

These calzones pair beautifully with a fresh green salad or a side of roasted vegetables. You can also serve them with a simple tomato sauce or a lemon-dill sauce for dipping.

Nutrition

While the exact nutritional content may vary depending on the specific brands and quantities used, each calzone is a good source of protein and healthy fats, thanks to the smoked salmon and mascarpone. For those watching their sodium intake, you may wish to use less kosher salt.

Conclusion

The Smoked Salmon and Mascarpone Calzone is more than just a meal; it’s a touchstone to cherished memories and a versatile recipe that can be adapted to suit any palate. Whether you’re making it for a special occasion or a casual family dinner, this calzone promises to deliver warmth, comfort, and plenty of flavor. Gather your loved ones, roll up your sleeves, and enjoy the delightful experience of making and sharing this delicious dish.

Related update: Smoked Salmon and Mascarpone Calzone

Crunchy Prawn Skewers With Lemony Avocado Dip | Made by Meaghan Moineau

Crunchy Prawn Skewers With Lemony Avocado Dip

Intro

There’s something undeniably special about grilling prawns on a warm summer evening. It takes me back to the seaside holidays of my childhood, where the salty ocean breeze mingled with the enticing aroma of seafood cooking on the grill. Those were the days when my family would gather around, sharing stories and laughter as we eagerly awaited the delicious feast. This recipe for Crunchy Prawn Skewers with Lemony Avocado Dip encapsulates that nostalgic experience, combining the crispy texture of breadcrumbs with the refreshing zest of lemon-infused avocado. It’s a dish that not only satisfies the palate but also warms the heart, making it perfect for any gathering, big or small.

Why You’ll Love It

These Crunchy Prawn Skewers are a delightful fusion of textures and flavors. The succulent prawns are coated in crispy breadcrumbs, delivering a satisfying crunch with every bite. The Lemony Avocado Dip adds a creamy, tangy contrast that elevates the dish to a whole new level. Whether you’re hosting a backyard barbecue or a simple dinner with friends, these skewers are a crowd-pleaser, offering a gourmet touch that’s surprisingly easy to achieve. Plus, they’re a fantastic way to enjoy seafood that’s both healthy and delicious.

Ingredients

  • Flesh of 1 ripe avocado
  • 2 tablespoons crème fraiche
  • Juice of 1 lemon
  • 1 cup breadcrumbs
  • Zest of 1 lemon
  • 12 large prawns, peeled and deveined
  • 2 tablespoons olive oil
  • 4 bamboo skewers

Instructions

  1. In a food processor, combine the flesh of the avocado, crème fraiche, and lemon juice. Blend until smooth. Season to taste with salt and pepper, and set aside.
  2. In a bowl, combine the breadcrumbs and lemon zest. Season well with salt and pepper.
  3. Coat the prawns evenly with olive oil, then toss them in the breadcrumb mixture until fully covered.
  4. Thread three prawns onto each bamboo skewer.
  5. Preheat the grill to medium-high heat. Grill the skewers for about 2 minutes on each side, or until the prawns are crisp and golden.
  6. Serve immediately with the Lemony Avocado Dip on the side.

Tips

To prevent the bamboo skewers from burning, soak them in cold water for at least an hour before using. This simple step ensures that your skewers remain intact and your prawns cook evenly.

Variations & Substitutions

Feel free to get creative with this recipe! If prawns aren’t available, you can substitute them with chicken or tofu for a different take on the skewers. For an extra kick, add a pinch of cayenne pepper or smoked paprika to the breadcrumb mixture. You can also swap out the crème fraiche for Greek yogurt if you prefer a tangier dip.

Storage

If you have leftovers, store the skewered prawns in an airtight container in the refrigerator for up to two days. The Lemony Avocado Dip is best consumed fresh but can be stored separately in an airtight container for up to one day. To enjoy again, reheat the skewers in the oven or on a skillet until warmed through.

FAQ

Can I prepare the skewers in advance?

Yes, you can prepare the skewers up to a day in advance. Simply coat the prawns in the breadcrumb mixture and store them in the refrigerator until ready to grill. This makes them a convenient option for entertaining, allowing you to focus on your guests.

Can I use frozen prawns?

Absolutely! If using frozen prawns, make sure to thaw them completely and pat them dry before proceeding with the recipe. This ensures that the breadcrumbs adhere properly and the prawns cook evenly.

Nutrition

This dish is not only delicious but also nutritious. Prawns are a great source of lean protein, while the avocado provides healthy fats and essential nutrients. Each skewer contains approximately 180 calories, 10 grams of protein, and 12 grams of healthy fats, making it a balanced option for any meal.

Conclusion

Crunchy Prawn Skewers with Lemony Avocado Dip is a recipe that brings people together, just as it did during my childhood seaside gatherings. The crispy, golden prawns paired with a refreshing dip create a symphony of flavors that will transport you to a sunny beach with each bite. Whether you’re hosting a party or simply enjoying a quiet dinner, this dish promises to deliver satisfaction and smiles all around. So fire up the grill and embrace the joy of cooking and sharing this delectable treat with your loved ones.

Related update: Crunchy Prawn Skewers With Lemony Avocado Dip

Related update: Crisp Winter Salad with Maple Gorgonzola Dressing

Mardi Gras Shrimp Étouffée | Made by Meaghan Moineau

Mardi Gras Shrimp Étouffée

Intro

The vibrant celebration of Mardi Gras has always held a special place in my heart. Growing up in Louisiana, the anticipation of the parades, the music, and the lively colors filled the air with excitement. Yet, what truly made the experience unforgettable was gathering around the table with my family to enjoy a warm, hearty bowl of Shrimp Étouffée. The aroma of the simmering roux, mingling with the fresh seafood and spices, was enough to bring everyone into the kitchen, eagerly awaiting their first bite. Today, I’m thrilled to share this cherished recipe with you, hoping it brings the same joy and warmth to your home as it has to mine.

Why You’ll Love It

This Shrimp Étouffée is a celebration in a bowl. It combines the rich flavors of the Gulf Coast with a touch of spice, creating a dish that is both comforting and exciting. Whether you’re looking to bring a taste of Mardi Gras into your kitchen or simply want a cozy meal to share with loved ones, this recipe is sure to become a favorite. The silky roux, the succulent shrimp, and the aromatic vegetables come together harmoniously, offering a culinary experience that is both satisfying and delightful.

Ingredients

  • 1/2 cup butter
  • 1/2 cup flour
  • 2 green bell peppers, diced
  • 3 celery stalks, diced
  • 1 large yellow onion, diced
  • 3 garlic cloves, minced
  • 1 teaspoon dried thyme
  • 2 tablespoons tomato paste
  • 1 tablespoon Worcestershire sauce
  • 1 tablespoon creole seasoning
  • 4 cups chicken broth
  • 1 pound shrimp, peeled and deveined
  • 1 tablespoon butter
  • 2 scallions, sliced
  • 1 fresh tomato, diced
  • Cooked rice, for serving

Instructions

  1. Heat up a heavy pot over low heat. Add in the butter and cook for about 10-12 minutes until it turns a light golden brown. Stir occasionally to prevent burning.
  2. Whisk in the flour until smooth and continue cooking over low heat for about 8 minutes. The mixture should resemble a slightly loose peanut butter when ready.
  3. Add in the diced bell peppers, celery, and onion. Stir to coat the veggies with the roux and cook for another 10-15 minutes until the vegetables are softened.
  4. Stir in the minced garlic and dried thyme, cooking for about a minute until the garlic is fragrant.
  5. Add the tomato paste, Worcestershire sauce, creole seasoning, and chicken broth. Simmer on low for 30-40 minutes, stirring occasionally, until the sauce is slightly thickened.
  6. Stir in the shrimp, turn off the heat, and cover the pot with a lid. Allow the shrimp to cook in the residual heat for about 5-8 minutes, or until cooked through.
  7. Stir in a tablespoon of butter just before serving.
  8. Serve the Shrimp Étouffée over cooked rice and garnish with sliced scallions and fresh diced tomato.

Tips

Creating the perfect roux is key to this dish, so be patient and keep the heat low to avoid burning. Stir consistently and take your time. If you’re new to making roux, consider practicing with smaller batches to build confidence. Additionally, fresh ingredients make a difference, so opt for fresh shrimp and vegetables when possible.

Variations & Substitutions

If you’re looking to mix things up, consider using crab or crawfish instead of shrimp for a different take on this classic dish. For a spicier kick, add some cayenne pepper or hot sauce to taste. If you’re unable to find creole seasoning, you can make your own by combining paprika, garlic powder, onion powder, black pepper, white pepper, cayenne pepper, dried oregano, and dried thyme.

Storage

Store any leftovers in an airtight container in the refrigerator for up to 3 days. To reheat, warm gently on the stove over low heat, adding a splash of chicken broth if needed to loosen the sauce. Unfortunately, this dish doesn’t freeze well due to the delicate texture of the shrimp, so it’s best enjoyed fresh.

FAQ

Can I make this dish ahead of time?

Yes, you can prepare the sauce ahead of time and store it in the refrigerator. When ready to serve, simply reheat the sauce and add the shrimp just before serving to ensure they’re perfectly cooked.

Is this recipe gluten-free?

As written, this recipe is not gluten-free due to the flour used in the roux. However, you can substitute the flour with a gluten-free alternative such as rice flour or a gluten-free all-purpose blend to make it suitable for a gluten-free diet.

Nutrition

This Shrimp Étouffée is a hearty dish that’s rich in flavor and nutrients. While exact nutritional values can vary depending on the specific ingredients used, it is a good source of protein from the shrimp and vitamins from the vegetables. For those watching their calorie intake, consider reducing the amount of butter or serving it over cauliflower rice for a lighter option.

Conclusion

There’s something truly magical about gathering around the table to enjoy a dish that’s as rich in history and culture as it is in flavor. This Mardi Gras Shrimp Étouffée is more than just a meal; it’s an experience, a piece of New Orleans brought to life in your kitchen. Whether you’re celebrating Mardi Gras or simply craving a taste of the South, I hope this recipe brings joy and warmth to your home, just as it has to mine for many years. Bon appétit!

Related update: Mardi Gras Shrimp Étouffée

Related update: Soy Ginger Glazed Sea Scallops With Stir Fry Vegetables

Neoguri (Spicy Seafood Ramen) | Made by Meaghan Moineau

Neoguri (Spicy Seafood Ramen) Recipe

Intro

When I was a child, my family would often gather around the kitchen table on chilly evenings, excitedly waiting for a steaming bowl of my grandmother’s homemade ramen. The rich, savory aroma would fill the room, making our mouths water in anticipation. My grandmother, originally from a small coastal town in Korea, had a knack for turning simple ingredients into a feast for the senses. Among her creations, her spicy seafood ramen was legendary—the perfect blend of heat, umami, and comfort. Even now, the taste of spicy seafood ramen takes me back to those cherished family memories, and I’m thrilled to share a version of this recipe with you today. Let’s dive into creating a delicious bowl of Neoguri (Spicy Seafood Ramen) that warms the heart and soul.

Why You’ll Love It

This Neoguri (Spicy Seafood Ramen) recipe is more than just a quick meal; it’s a culinary experience. Here’s why you’ll adore it:

  • Quick and Easy: With just a few ingredients and simple steps, you can whip up a satisfying meal in under 20 minutes.
  • Rich in Flavor: The combination of spicy broth, seafood, and umami-packed seaweed creates a depth of flavor that’s hard to beat.
  • Customizable: This recipe is versatile and can be adjusted to suit your taste preferences or dietary needs.
  • Comforting: Perfect for a cozy night in, this ramen is sure to warm you up from the inside out.

Ingredients

  • 1 egg
  • 1 cup mussels (fresh or frozen)
  • 1 pack Neoguri ramen
  • 1 green scallion
  • 1 sheet seaweed (gim)

Instructions

  1. Bring a pot of water to a boil. Add mussels and sauce packets from the Neoguri ramen package into the boiling water. Allow it to boil for about 5 minutes to cook the mussels and deepen the broth. If using fresh mussels, wait until they open and discard any that remain closed.
  2. Include the noodles in the boiling pot and cook for 2 to 3 minutes, or until they reach your desired texture.
  3. In a small bowl, beat the egg. Gradually add the beaten egg into the pot while stirring the noodles in a circular motion for even, flaky egg drops. For a poached egg, carefully add the egg off to the side of the pot.
  4. While the noodles are cooking, thinly slice the green scallion and gim (seaweed) sheet.
  5. Transfer the cooked ramen to a serving bowl and garnish with the sliced scallions and seaweed. Serve hot and enjoy!

Tips

  • For extra heat, add a dash of chili flakes or Sriracha to the broth.
  • If you prefer a milder flavor, use only half of the Neoguri ramen sauce packet.
  • Ensure mussels are thoroughly cleaned and de-bearded before cooking to avoid any grit in your broth.
  • Use a high-quality seaweed sheet for the best flavor and texture.

Variations & Substitutions

This recipe is wonderfully adaptable. Here are some ideas to make it your own:

  • Vegetarian Option: Skip the mussels and add tofu or mushrooms for a protein boost while keeping it vegetarian.
  • Extra Veggies: Add sliced carrots, bok choy, or bean sprouts for added nutrients and texture.
  • Seafood Mix: Use a mix of seafood like shrimp, clams, and squid along with the mussels for a more diverse taste.
  • Noodle Swap: If you can’t find Neoguri ramen, any instant ramen with a spicy flavor profile will work in a pinch.

Storage

For the best taste and texture, it’s best to enjoy Neoguri (Spicy Seafood Ramen) fresh. However, if you have leftovers, store them in an airtight container in the refrigerator for up to two days. When reheating, add a splash of water or broth to loosen the noodles and ensure even warming. Be cautious, as the seafood flavor may intensify over time.

FAQ

Can I use frozen mussels instead of fresh?

Yes, frozen mussels are a convenient option and work well in this recipe. Just make sure to thaw them before adding them to the boiling water.

Is it possible to make this ramen less spicy?

Absolutely! You can control the spice level by using only half of the sauce packet or adding more water to dilute the broth. Adjust the spice to your preference.

Nutrition

This Neoguri (Spicy Seafood Ramen) offers a balanced meal with protein from mussels and egg, carbohydrates from noodles, and nutrients from scallions and seaweed. Mussels are a great source of omega-3 fatty acids, while seaweed provides iodine, an essential mineral. Adjust portion sizes to fit your dietary needs.

Conclusion

There’s something incredibly comforting about a bowl of steaming Neoguri (Spicy Seafood Ramen). It’s more than just a meal; it’s a connection to cherished memories and a celebration of flavors. This recipe brings warmth and satisfaction to any table, from its spicy seafood broth to the tender noodles and vibrant garnishes. I hope this dish becomes a beloved staple in your kitchen, just as it has been in mine. Enjoy the delightful complexity of flavors with each spoonful and share the joy with others around you. Happy cooking!

Related update: Neoguri (Spicy Seafood Ramen)

Related update: Turkey BLT with Creamy Dijon Mustard

Crab Cakes Eggs Benedict | Made by Meaghan Moineau

Crab Cakes Eggs Benedict: A Coastal Breakfast Delight

Intro

There’s something magical about waking up to the sound of waves crashing against the shore. As a child, summer mornings at our beach house were always accompanied by the irresistible aroma of my grandmother’s famous Crab Cakes Eggs Benedict. The combination of savory crab cakes and creamy hollandaise sauce, all atop a perfectly toasted English muffin, was a breakfast tradition that I eagerly anticipated each year. Today, I’m thrilled to share this beloved recipe with you, so you too can enjoy a taste of coastal charm in your own home.

Why You’ll Love It

This Crab Cakes Eggs Benedict is perfect for an indulgent weekend brunch or as a show-stopping dish for a special occasion. The richness of the crab meat, the tangy hollandaise sauce, and the comforting texture of the poached eggs create a harmonious blend of flavors and textures. Plus, the recipe is surprisingly easy to make, yet looks and tastes like a gourmet masterpiece.

Ingredients

  • 2 tablespoons celery, finely chopped
  • 1/4 cup dry bread crumbs
  • 8 large eggs
  • 3 English muffins, split and toasted
  • 1 package Knorr Hollandaise Sauce Mix
  • A few dashes of hot sauce
  • 1 pound lump crab meat
  • 1/4 cup mayonnaise
  • 1/4 cup onion, finely chopped
  • 1 tablespoon fresh parsley, chopped
  • 1 teaspoon seafood seasoning
  • 6 tablespoons unsalted butter, divided
  • 1 teaspoon Worcestershire sauce

Instructions

  1. Prepare the Crab Cakes: Cook the onion and celery in 4 tablespoons of butter over moderately low heat until tender. Transfer to a large bowl. Stir in the crab and bread crumbs.
  2. In a small bowl, whisk together the mayonnaise, seafood seasoning, Worcestershire sauce, hot sauce, parsley, and salt and pepper to taste. Stir this mixture into the crab mixture until well combined.
  3. Line a baking sheet with wax paper. Form the crab mixture into 6 flattened rounds. Chill the crab cakes, covered with plastic wrap, in the refrigerator for at least 1 hour.
  4. Heat 1 tablespoon of butter over moderate heat until the foam subsides. Cook half of the crab cakes until golden brown, about 2 to 3 minutes on each side. Repeat with the remaining crab cakes using the remaining tablespoon of butter.
  5. Prepare the Hollandaise Sauce: Follow the package instructions to make the Knorr Hollandaise Sauce.
  6. Poach the Eggs: Fill a medium-sized saucepan halfway with water. Add 1/2 teaspoon of white vinegar (optional, but it helps hold the egg together). Bring to a gentle boil and carefully add the eggs (1-2 at a time works best). Poach the eggs for 2-3 minutes or until the yolk has set to your preference.
  7. Assemble the Dish: Place a crab cake on each half of the toasted English muffins. Top with a poached egg and generously drizzle with hollandaise sauce. Serve immediately with a sprinkle of fresh parsley if desired.

Tips

For perfectly poached eggs, use the freshest eggs you can find. The fresher the egg, the better it will hold its shape in the water. If you’re new to poaching, don’t worry about achieving perfection on your first try—practice makes perfect!

Variations & Substitutions

If you prefer a spicier kick, consider adding extra hot sauce or a pinch of cayenne pepper to the crab cake mixture. For a gluten-free version, substitute gluten-free bread crumbs and English muffins. You can also experiment with different herbs, such as dill or chives, to add a personal twist to the dish.

Storage

If you have leftovers, store the crab cakes and poached eggs separately in airtight containers in the refrigerator for up to 2 days. Reheat the crab cakes in a skillet over medium heat and poach fresh eggs when ready to serve. The hollandaise sauce is best prepared fresh, but if you need to store it, keep it in the refrigerator for up to 1 day and reheat gently over low heat.

FAQ

Can I use canned crab meat instead of fresh?

Yes, you can use canned crab meat if fresh is not available. Just ensure you drain it well and gently squeeze out any excess moisture to prevent the crab cakes from becoming too soggy.

What can I serve with Crab Cakes Eggs Benedict?

This dish pairs beautifully with a simple green salad or roasted asparagus. You could also serve it with a side of fresh fruits for a refreshing contrast.

How do I keep the hollandaise sauce from breaking?

To prevent your hollandaise sauce from breaking, make sure to whisk constantly while gradually adding the melted butter. If the sauce starts to separate, whisk in a little bit of hot water to bring it back together.

Nutrition

This Crab Cakes Eggs Benedict recipe is a rich and indulgent dish, perfect for a special occasion. It’s a good source of protein from the eggs and crab, but remember to enjoy it in moderation due to its higher fat content from the hollandaise sauce and butter.

Conclusion

Crab Cakes Eggs Benedict is more than just a meal—it’s a tradition steeped in nostalgia and flavor. Whether you’re hosting a brunch or simply indulging in a weekend treat, this recipe is sure to impress and delight. I hope it brings as much joy to your table as it has to mine over the years. Happy cooking!

Related update: Crab Cakes Eggs Benedict

Related update: Sweet-N-Smoky Salmon With Ginger Mahogany Rice

Grilled Fish With Sun Dried Tomato Relish | Made by Meaghan Moineau

Grilled Fish With Sun Dried Tomato Relish | Made by Meaghan Moineau

Title: "A Taste of Memories: Grilled Fish with Sun-Dried Tomato Relish"
Description: Dive into the delightful flavors of Grilled Fish with Sun-Dried Tomato Relish, a dish that beautifully combines the freshness of white fish with a tangy, aromatic relish. This recipe is not just a feast for your taste buds but a journey back to cherished family memories. Perfect as a main dish, this culinary delight scores a 5 out of 10 on the difficulty scale and is sure to become a favorite in your household.

---


A Taste of Memories: Grilled Fish with Sun-Dried Tomato Relish


There's something inherently comforting about a dish that transports you to another time, evoking memories of laughter-filled family gatherings and cherished moments around the dining table. For me, Grilled Fish with Sun-Dried Tomato Relish is one such dish—a delightful blend of flavors that always reminds me of summers spent at my grandmother's house by the sea.


Ingredients:


- 1 white fish fillet
- 2 tablespoons olive oil
- Salt and pepper to taste
- Masterfoods Garlic Pepper (optional)
- 150g cucumber
- 5 leaves of mint or basil
- Sun-dried tomatoes soaked in oil
- 1/2 teaspoon sugar
- 1 teaspoon extra virgin olive oil
- 1/2 teaspoon balsamic vinegar
- 1 teaspoon toasted sesame seeds

Instructions:


1. Preheat and Prepare: Preheat your oven to 200°C (392°F). Line a baking tray with a sheet of baking paper and lightly grease it with olive oil. Lay the fish fillet on the baking sheet and generously rub with the remaining olive oil. Season with salt, pepper, or Masterfoods Garlic Pepper for an extra kick.
2. Cook the Fish: Place the fish in the preheated oven for 15-20 minutes until perfectly cooked. Be cautious not to overcook it as you desire a tender, flaky texture.
3. Prepare the Relish: While the fish is baking, peel the cucumber, leaving some skin for a visual appeal. Slice it into strips, removing the seeds, and dice the crunchy parts. In a bowl, combine the diced cucumber with sun-dried tomatoes (drained and cut into small pieces).
4. Herb Medley: Stack and roll up the mint or basil leaves, then finely slice them using kitchen scissors. Add the herbs to the cucumber-tomato mix.
5. Finishing Touches: Season the relish with salt, pepper, sugar, extra virgin olive oil, balsamic vinegar, and toasted sesame seeds. Stir well to combine all the flavors.
6. Serve: Once the fish is cooked, cut it into serving portions and top each with a generous amount of the sun-dried tomato relish. Garnish with a sprig of mint or basil for an elegant touch.

A Nostalgic Journey:


This dish always takes me back to my grandmother's quaint seaside cottage. Her kitchen was a haven of aromatic wonders, where the scent of fresh herbs mingled with the salty breeze from the ocean. Every summer, she would prepare this dish, using the freshest catch from local fishermen and herbs from her garden. We would gather around her rustic dining table, the sound of waves crashing in the background, and savor the simple yet exquisite flavors that she crafted with love.


Grilled Fish with Sun-Dried Tomato Relish is more than a meal—it's a reminder of those sun-drenched days, the warmth of family, and the joy of sharing good food. Whether you're creating new memories or reliving old ones, this dish is sure to bring a smile to your face and a warmth to your heart.


Difficulty Rating: 5/10
Classification: Main Dish

So, gather your loved ones, embrace the nostalgic flavors, and let this dish become a part of your family's culinary story. Enjoy!

Read more about Appetizers

Read more about Main Dishes

Read more about Desserts

Swordfish with Orange Caramel Sauce | Made by Meaghan Moineau

Swordfish with Orange Caramel Sauce | Made by Meaghan Moineau

Title: Savoring Tradition: Swordfish with Orange Caramel Sauce
Description: Dive into the rich flavors of Swordfish with Orange Caramel Sauce, a dish that promises to tantalize your taste buds while evoking cherished family memories. This main dish, rated 7 out of 10 on the difficulty scale, combines the savory richness of parmesan-crusted swordfish with the tangy sweetness of an orange caramel sauce. Join us as we explore the steps to perfecting this recipe and share a nostalgic tale that makes this dish a beloved family classic.

---


A Culinary Journey: Swordfish with Orange Caramel Sauce


Cooking is often described as a labor of love, a sentiment that rings especially true when preparing a dish that has been passed down through generations. Swordfish with Orange Caramel Sauce is one such recipe in our family, offering a taste of nostalgia with every bite. This dish, with its unique blend of flavors and textures, is a testament to the art of balancing contrasts: the crispy parmesan crust of the swordfish pairs flawlessly with the sweet, tangy orange caramel sauce.


Ingredients for Culinary Success


To recreate this delightful dish, gather the following ingredients:

- Swordfish, cut into equal sizes


- Milk or cream


- Panko bread crumbs


- Parmesan cheese


- Salt and pepper


- Dry sage and marjoram


- Orange


- Unsalted butter


- Sugar


A Step-by-Step Guide to Perfection


1. Prepare the Swordfish: Begin by patting the swordfish dry. This step is crucial for achieving that coveted golden crust.
2. Create the Coating: On a plate, mix together panko, bread crumbs, parmesan cheese, dry sage, marjoram, salt, and pepper. Ensure everything is well combined to form an even coating mixture.
3. Dip and Coat: Pour milk or cream onto a separate plate. Dip the swordfish into the milk, allowing any excess to drip away. Roll the fish in the panko-parmesan mixture, pressing it gently to adhere the coating.
4. Cook to Perfection: In a large skillet, melt 2 tablespoons of butter. Once melted, add the coated swordfish and cook until each side is beautifully golden and the fish is firm but springy to the touch. Remove the swordfish from the skillet and let it rest.
5. Craft the Orange Caramel Sauce: Discard the cooking butter from the skillet and place it over medium-high heat. Add freshly squeezed orange juice, reducing it by half. Stir in the remaining butter and sugar, allowing it to reduce until a thick sauce forms. If the sauce becomes too thick or tangy, add more sugar and swirl in another tablespoon of butter.
6. Serve with Love: Drizzle the orange caramel sauce over the swordfish or serve it alongside for dipping. This dish is best enjoyed fresh, as the flavors meld beautifully when hot.

A Taste of Family Tradition


For me, Swordfish with Orange Caramel Sauce is more than just a meal—it's a warm reminder of family gatherings at my grandmother's house. I recall the aroma of sizzling butter and the vibrant zest of oranges wafting through her kitchen. As children, we would eagerly gather around the dining table, our eyes wide with anticipation. My grandmother would regale us with stories of her own childhood, sharing how this dish became a staple in our family's culinary repertoire.


As I recreate this recipe today, I'm transported back to those cherished moments, surrounded by laughter and stories that have shaped my love for cooking. It's a joy to pass down this tradition to the next generation, ensuring that the flavors of our family's history continue to be savored and celebrated.


---


Final Thoughts

Swordfish with Orange Caramel Sauce is a dish that marries complexity with simplicity, making it a rewarding challenge for any home cook. As a main dish, it's perfect for special occasions or whenever you wish to impress your loved ones with a meal that's rich in flavor and sentiment. Embrace the tradition, savor the taste, and perhaps create new memories of your own with this timeless recipe.

Read more about Appetizers

Read more about Main Dishes

Read more about Desserts

Neoguri (Spicy Seafood Ramen) | Made by Meaghan Moineau

Neoguri (Spicy Seafood Ramen) | Made by Meaghan Moineau

A Nostalgic Bowl of Comfort: Neoguri Spicy Seafood Ramen Recipe


Introduction


In our fast-paced world, sometimes the simplest meals can bring the most comfort. Neoguri Spicy Seafood Ramen is one of those dishes, offering a perfect blend of spice, umami, and warmth. This delicious combination of flavors not only satisfies the taste buds but also evokes fond memories of family gatherings and shared laughter. Rated a 4 out of 10 in difficulty, this main dish is both an easy and delightful way to bring a little spice into your life.


Ingredients


To create this flavorful bowl of Neoguri Spicy Seafood Ramen, you will need the following ingredients:

- 1 egg


- 1 pack of Neoguri ramen


- 200 grams of mussels (fresh or frozen)


- 1 green scallion


- 1 sheet of gim (seaweed)


Instructions


1. Prepare the Broth: Begin by boiling water in a pot. Once boiling, add the mussels and the sauce packets from the Neoguri ramen pack. Allow this to boil for about 5 minutes. If you are using fresh mussels, boil until they open and discard any that remain closed.
2. Cook the Noodles: Add the ramen noodles to the pot and cook for 2 to 3 minutes until they reach your desired level of tenderness.
3. Add the Egg: For a flaky texture, beat the egg and stir it into the noodles in a circular motion. If you prefer a poached egg, gently add it to the side of the pot.
4. Garnish: Thinly slice the green scallion and cut the gim (seaweed) into small pieces. Transfer the ramen to a serving bowl and top with the scallion and seaweed for an added touch of flavor and crunch.

A Nostalgic Memory


Every time I make Neoguri Spicy Seafood Ramen, I am transported back to my grandmother's kitchen. As a child, I would watch her effortlessly prepare this dish, her deft hands creating magic in the pot. The aroma of the rich broth would fill the house, signaling the start of our family dinner. We would gather around the table, bowls in hand, savoring each spicy mouthful while sharing stories of our day.


One particular evening stands out in my memory. It was a rainy day, and we had just returned from a long walk through the local market. My grandmother, unfazed by the weather, decided to make her special ramen. As we sat down to eat, the rain pitter-pattered against the windows, and the warmth of the dish enveloped us, making the world outside fade away. It was in these moments that I learned the true power of food to bring comfort and connection.


Conclusion


Neoguri Spicy Seafood Ramen is more than just a meal; it is a vessel for cherished memories and a testament to the simple joys of life. Whether you're looking to recreate a beloved family dish or simply seeking a quick and satisfying meal, this recipe is sure to become a staple in your kitchen. So, gather your ingredients, embrace the heat, and let this flavorful dish transport you to a place of warmth and nostalgia.

Read more about Appetizers

Read more about Main Dishes

Read more about Desserts

Avocado-Mango Salad With Grilled Shrimp | Made by Meaghan Moineau

Avocado-Mango Salad With Grilled Shrimp | Made by Meaghan Moineau

Title: A Taste of Summer: Avocado-Mango Salad with Grilled Shrimp
Description: Dive into the vibrant flavors of summer with our Avocado-Mango Salad with Grilled Shrimp. This delightful dish combines the creamy richness of Hass avocados with the sweet juiciness of mango and the savory succulence of grilled shrimp. A perfect blend of freshness and zest, this salad is ideal for a light lunch or a stunning appetizer at your next gathering. Follow along as we explore this recipe that's not only a treat for the taste buds but also a cherished family tradition.

---


A Journey Through Flavors: Avocado-Mango Salad with Grilled Shrimp

The sun was setting on a warm summer evening, the sky painted with hues of orange and pink, as my family gathered around the patio table. This scene repeats itself in my memory every time I prepare our beloved Avocado-Mango Salad with Grilled Shrimp. It was a dish my grandmother introduced to us during one of those lazy summer days when the air was thick with the scent of blooming jasmine, and laughter echoed through the backyard.


Ingredients:

- 1 lb shrimp, peeled and deveined


- 2 ripe Hass avocados, diced


- 1 cup diced mango


- Lime wedges for serving


- 2 tbsp red wine vinegar


- 2 tbsp fresh lime juice


- 1 tsp freshly grated ginger


- 1 tsp sugar


- 1 tsp Dijon mustard


- 1/4 cup canola oil


- 1/4 cup chopped cilantro


- 1 tsp lime zest


- 1 small diced habanero chile (optional for heat)


- 1/2 cup thinly sliced red onion


- Black salt and pepper to taste


Instructions:
1. Prepare the Grill: Preheat your gas grill to high. The robust flavors of grilled shrimp are the star of this dish, and a hot grill ensures they cook to perfection.
2. Marinate the Shrimp: In a bowl, combine red wine vinegar, fresh lime juice, ginger, sugar, and Dijon mustard. Slowly whisk in canola oil until emulsified. Add shrimp, ensuring they're well coated. Let them marinate for about 10 minutes.
3. Grill the Shrimp: Place the shrimp on the grill, cooking each side for about 2-3 minutes until they turn opaque and have a slight char. Remove and set aside.
4. Assemble the Salad: In a large bowl, combine diced avocados, mango, red onion, cilantro, lime zest, and diced habanero chile. Toss gently to keep the avocado from becoming mushy.
5. Dress and Serve: Drizzle some of the reserved marinade over the salad, season with black salt and pepper, and toss lightly. Top with the grilled shrimp and serve with lime wedges for an extra burst of citrus.
A Family Tradition:

This dish became a family staple not just for its flavor but for the memories it created. My grandmother would hum a little tune as she prepared the ingredients, her hands moving expertly through the tasks. We would gather around, eager to taste the first bite, which was always a symphony of flavors—sweet, tangy, spicy, and savory. Even now, as I prepare this dish for my own family, I am reminded of those precious moments of togetherness and love.


Difficulty Rating: 4/10
Classification: Appetizer

---


Embrace the tastes of summer and the warmth of family memories with this Avocado-Mango Salad with Grilled Shrimp. It's more than just a dish; it's a celebration of flavors and cherished moments shared with loved ones. Whether you're new to cooking or a seasoned chef, this recipe is sure to bring joy to your table. Enjoy!

Read more about Appetizers

Read more about Main Dishes

Read more about Desserts

Farfalle with Shrimps, Tomatoes Basil Sauce | Made by Meaghan Moineau

Farfalle with Shrimps, Tomatoes Basil Sauce | Made by Meaghan Moineau

Title: Farfalle with Shrimps and Tomatoes Basil Sauce: A Taste of Family Tradition
Description: Dive into the comforting flavors of a cherished family recipe: Farfalle with Shrimps and Tomatoes Basil Sauce. This delightful main dish combines fresh ingredients and a touch of nostalgia, perfect for any occasion.

---


Farfalle with Shrimps and Tomatoes Basil Sauce: A Culinary Journey Through Time

Food has an incredible way of bringing people together, evoking memories and creating stories that are passed down through generations. In my family, one such dish that has always held a special place in our hearts is Farfalle with Shrimps and Tomatoes Basil Sauce. This simple yet elegant pasta dish has been a centerpiece at countless family gatherings, its flavors weaving a tapestry of love and nostalgia that never fails to bring us together.


Ingredients:

- 1 pack Farfalle pasta by Barilla


- 2 tablespoons butter


- 1 pound fresh shrimps, cleaned


- 4 ripe tomatoes, diced


- A handful of fresh basil leaves, chopped


- Salt and freshly ground black pepper, to taste


Instructions:
1. Prepare the Pasta: Begin by bringing a large pot of salted water to a boil. Cook the Farfalle pasta to al dente, following the instructions on the package. The term 'al dente' refers to pasta that is cooked to be firm to the bite, providing the perfect texture for this dish.
2. Sauté the Tomatoes and Shrimps: In a large frying pan, melt the butter over medium-high heat. Add the diced tomatoes and sauté for about 1 minute, just until they start to break down and release their juices. Introduce the fresh shrimps to the pan, cooking until they turn a light pink color, ensuring they are tender and succulent. Season with salt and freshly ground black pepper to taste.
3. Infuse with Basil: Add the freshly chopped basil to the pan, stirring lightly to release its aromatic oils and enhance the dish with its fragrant touch.
4. Combine and Serve: Once the pasta is ready, drain it and add it to the skillet with the tomatoes and shrimps. Add another tablespoon of butter for a rich, glossy finish. Mix everything well to ensure each piece of Farfalle is coated in the luscious sauce. Serve immediately, piping hot, to enjoy the dish at its peak flavor.
A Family Memory:

Growing up, Sunday dinners at my grandmother's house were a cherished tradition. The smell of fresh basil and sautéed tomatoes would fill the air, a scent that would instantly transport us to a place of warmth and comfort. My grandmother would share stories of her own childhood, how her mother taught her to cook this very dish in their small kitchen in Italy. She would laugh as she recalled the way her siblings would sneak tastes of the sauce when they thought no one was looking.


As we gathered around the table, the Farfalle with Shrimps and Tomatoes Basil Sauce would always be the star of the show. We would savor each bite, the flavors dancing on our tongues, while we shared stories and laughter. It was more than just a meal; it was a celebration of family, of heritage, and of love.


Difficulty Rating: 4/10
This dish is classified as a Main Dish and is relatively easy to prepare, making it an ideal choice for both novice and experienced cooks looking to create a meal that is both delicious and meaningful.

In a world that is ever-changing, it is comforting to know that some things remain constant. For my family, Farfalle with Shrimps and Tomatoes Basil Sauce will always be a reminder of where we come from, and a testament to the enduring power of family traditions. Whether you're making this dish for the first time or the hundredth, may it bring you the same joy and warmth it has brought to us for generations.

Read more about Appetizers

Read more about Main Dishes

Read more about Desserts