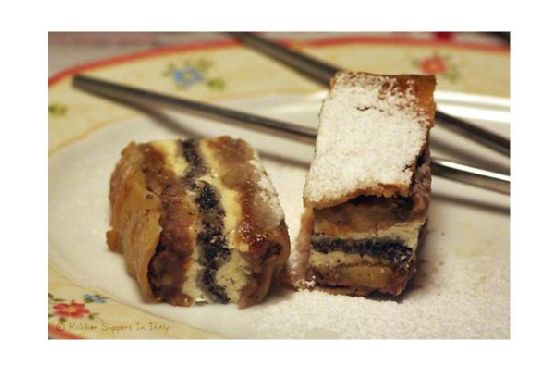
On a particularly rainy Tuesday afternoon, as the water danced against my kitchen window, I found myself craving something both cozy and indulgent. I rummaged through the pantry, hoping for inspiration, and there it was: a can of poppy seed filling. That was all it took to set me on the path toward creating these Layered Poppy Seed Pastries. They’re the perfect blend of buttery layers and rich filling, a treat that feels special but isn’t overly complex to prepare. If you’re like me and love bringing a bit of warmth and comfort on a dreary day, this recipe is a must-try. These pastries are like edible hugs — perfect for impressing friends or just treating yourself.
Jump to Recipe
What You’ll Need
You’d be surprised how many of these ingredients are likely sitting right in your pantry. This recipe doesn’t require anything too exotic, but a few key ingredients really make it shine. Here’s what you’ll need:
- Warm milk – for activating the yeast
- Dry packet yeast – to give our pastries that lovely rise
- Flour – the backbone of our pastry
- Baking powder – adds an extra lift
- Salt and a dash of sugar
- Lemon zest – for a hint of brightness
- Butter – because what’s a pastry without it?
- Whole egg plus an extra yolk for richness
- Vanilla extract – just a splash!
- Canned poppy seed filling – the star of the show
- Ground walnuts – for that nutty crunch
- Water – just a splash to bring it all together
How to Make Layered Poppy Seed Pastries
- Start by mixing the warm milk, dash of sugar, and yeast in a small bowl until the yeast dissolves. Let it sit while you prep the rest.
- In a large mixing bowl, blend the flour, baking powder, salt, and lemon zest. Add the butter and mix until you see a crumbly texture forming.
- In a separate bowl, beat the whole egg and extra yolk with vanilla. Alternate adding this mixture and the yeast mixture to the flour blend, mixing until you have a cohesive dough.
- Transfer your dough to a floured board. Divide it into four parts and knead each into a flat disc. Wrap these in plastic wrap and pop them into the fridge for an hour.
- While the dough chills, spoon your poppy seed filling into a pastry bag. Mix the sugar and ground walnuts in another bowl and set aside.
- Roll each disc into a thin sheet to fit a 13×9-inch baking dish. If you have any trimmings, save them for another pastry adventure.
- Start layering: Place one layer of dough in the baking dish, spread half the poppy seed filling, cover with another dough layer, and sprinkle with the walnut mixture. Repeat once more and top with the final dough layer.
- Let the assembled pastry sit covered with a kitchen towel for 30 minutes, allowing it to rest and rise slightly.
- Brush the top with the egg yolk mixture for a lovely golden finish. Bake at 350°F for around 45 minutes, or until the top is golden brown and the aroma fills your kitchen.
- Once baked, while still hot, cut the pastry into 24 squares. Let them cool in the pan, basking in the glory of your creation.
Cook’s Notes
Always make sure your milk is warm but not hot to the touch, as too much heat can kill the yeast. These pastries freeze beautifully; just wrap them in plastic and then foil, and pop them into a resealable plastic bag. They defrost well and maintain their crispness, tricking everyone into thinking they’re freshly baked. And here’s a tip: when serving, consider making a few extra for your neighbors or friends. Sharing these could easily brighten someone’s day!
Make It Your Own
- Swap out the poppy seed filling with a thick apricot jam for a fruity twist.
- Replace the walnuts with pecans for a sweeter, buttery nut flavor.
- For a citrusy kick, add orange zest instead of lemon zest.
- Want a hint of spice? Add a teaspoon of cinnamon to the walnut mixture.
If you try this, I’d love to hear how it turns out — drop a comment or tag me! These pastries are a rainy day favorite, and I hope they’ll become a part of your kitchen adventures too. Enjoy every flaky, delicious bite!
Related update: Layered Poppy Seed Pastries
Related update: Brandy-Apple Mini Pies With Cornmeal Crust
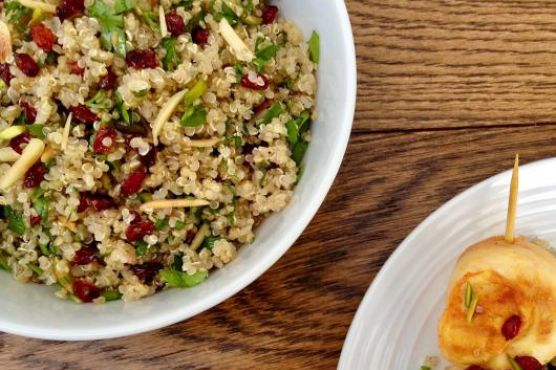
Picture this: It’s a Tuesday evening, and I’ve just emerged from a whirlwind day of meetings and errands. My energy is zapped, but my taste buds are clamoring for something a bit more exciting than my standard, last-minute pasta. I glance at my pantry, and there it is—a trusty bag of quinoa. This little grain (or seed, to be precise) is my go-to for nights like these when I want something nourishing yet packed with flavor. That’s where my Quinoa Salad with Barberries & Nuts comes into play. It’s a delightful dance of textures and tastes—fluffy quinoa, tangy barberries, and crunchy nuts, all mingling with fresh herbs. Bonus: It’s ready in a flash and makes me feel like a kitchen wizard every single time.
Jump to Recipe
What You’ll Need
Trust me, most of these ingredients are likely chilling in your pantry or fridge already. It’s the *bold* ones that make this dish pop, so don’t skip those!
- Quinoa – the base of our salad
- Water
- Salt
- Olive oil
- Barberries – these little gems add a tart kick
- Slivered almonds
- Slivered pistachios
- Coriander
- Mint
How to Make Quinoa Salad with Barberries & Nuts
- Start by rinsing the quinoa thoroughly in a sieve under cold running water. This step is crucial to remove that pesky bitterness. Drain well.
- Next, pour boiling water over the drained quinoa in a medium saucepan. Add a good pinch of salt, give it a stir, and cook over medium-low heat. You’re looking for the quinoa to be tender but with a slight bite. Drain it again using the sieve.
- While your quinoa is doing its thing, pick over the barberries, rinse them gently in a sieve, and dry them on some kitchen paper. Easy peasy.
- Now, let’s get those nuts toasted. Heat a tablespoon of olive oil in a saucepan over medium heat. Toss in the almond slivers first until they’re a light golden hue—then add the pistachios.
- With the nuts nicely toasted, add the rest of your olive oil and throw in the rinsed barberries. Cook them just until they’re shiny and looking a bit puffed up, which is when they release their tangy aroma.
- Reserve a tablespoon of the barberry and nut mixture, along with a tablespoon of the chopped coriander and mint, for our final flourish.
- Mix the remaining nut and barberry blend with the quinoa and herbs. Pop it all back into the pot and place over low heat. Cover it up and let it cook for about ten minutes until it’s steaming and thoroughly heated.
- Finally, turn your quinoa creation into a serving dish. Fluff it up with a fork, add a drizzle of olive oil, and a twist of black pepper if you’re feeling it. Sprinkle with the reserved barberry-nut mix and herbs. Serve it up either as a main or a side—your choice!
Cook’s Notes
Here’s the thing about this salad: it’s super forgiving and versatile. If you’ve never worked with barberries before, you might find them at a specialty grocery store or online. They’re worth the hunt, trust me. When it comes to leftovers, this salad holds up well for up to three days in the fridge. Just be sure to store it in an airtight container. If you’re planning to make it ahead, keep the garnish separate and mix it in just before serving to maintain that fresh, crunchy vibe.
Make It Your Own
Customizing this salad is a breeze. Here are a few ideas to get you started:
- Swap the barberries for dried cranberries or cherries if you prefer something sweeter.
- Try adding crispy tofu to make it a more filling main dish.
- Substitute the almonds and pistachios with hazelnuts and walnuts for a different nutty profile.
- If you’re into greens, throw in a handful of arugula or baby spinach for extra color and nutrients.
If you try this, I’d love to hear how it turns out—drop a comment or tag me! Let’s get cooking and make the everyday extraordinary.
Related update: Quinoa Salad with Barberries & Nuts
Related update: Brussels Sprouts with Bacon and Shallots
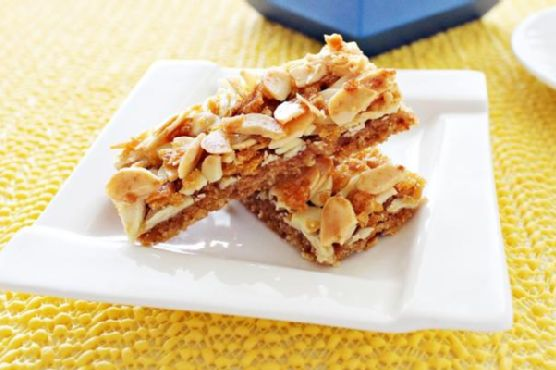
I remember one of those whirlwind Wednesday evenings, you know the type — when you get home, realize you need something sweet to take to the office the next day, and have approximately no time to do it. Enter these Almond Cookie Bars. They’re like the lovely offspring of a tempting cookie and a sophisticated tart, but they’re actually super simple to make. Just the right amount of nutty crunch meets a hint of sweet apricot. Plus, they look kind of fancy for something that doesn’t require any complicated steps. Seriously, if I can pull these off during a midweek scramble, you can too!
Jump to Recipe
What You’ll Need
Chances are you already have most of this at home, except maybe the almond flakes. The rest? Probably hanging out in your pantry or fridge.
- 100g butter, softened
- 50g brown sugar
- 70g plain flour
- 70g wholemeal flour
- 2 tbsp fresh milk
- 100g oatmeal cornflakes
- 50g almond flakes
- 100g apricot gel/jam
- 400g cookie base
How to Make Almond Cookie Bar
- Start by beating the butter and brown sugar together until the mixture is light and fluffy. This should take about 2 minutes with an electric mixer — it’s all about that creamy texture.
- In a separate bowl, combine the plain flour and wholemeal flour. Then, gently fold this dry mixture into the butter-sugar mixture using a rubber spatula. Knead it gently until you have a soft dough.
- Turn the dough out onto a floured surface or sandwich it between two plastic sheets (trust me, it’s less messy!). Roll it into a square shape and chill it for at least an hour. This helps the dough firm up for easier handling.
- Once chilled, place the dough on non-stick paper and roll it out to about 3mm thick. Prick all over with a fork—this keeps it from puffing up in weird places.
- Bake in a preheated oven at 180°C for about 15-18 minutes, or until the edges are just turning brown and the kitchen smells like buttery heaven. Set aside to cool.
- Once the biscuit base is cool, spread the apricot gel/jam over the top, ensuring an even layer.
- Mix the oatmeal cornflakes and almond flakes. Spread this topping evenly over the apricot layer using a palette knife, pressing down gently.
- Return the whole thing to the oven and bake for another 15 minutes until the topping is golden and fragrant. Let it cool completely before cutting into bars — patience is key here for neat slices!
Cook’s Notes
These bars are pretty forgiving, but here’s what I’ve learned along the way:
- Make sure your butter is truly softened, not melted. This affects the dough texture and baking consistency.
- Chilling the dough isn’t optional — it helps prevent spreading and keeps your bars nice and thick.
- You can store these in an airtight container for up to a week, but let’s be real, they probably won’t last that long. They also freeze well for longer storage.
- For a quick fix, you can even make the dough a day ahead and leave it in the fridge overnight.
Make It Your Own
Want to switch things up? Here are a few variations to keep things interesting:
- Berry Swap: Substitute the apricot gel with raspberry or blackberry jam for a different fruity twist.
- Nutty Overload: Add a handful of chopped pecans or walnuts to the almond-oat topping for extra crunch.
- Spice It Up: Stir a teaspoon of cinnamon or cardamom into the flour mixture for a warm spice note.
- Chocolate Drizzle: Once cooled, drizzle with melted dark chocolate for a fancy finish.
If you try this, I’d love to hear how it turns out — drop a comment or tag me! These bars have become a staple in my sweet treat rotation, and I hope they bring a little almond-y joy to your day too.
Related update: Almond Cookie Bar
Related update: Christmas Fruit Cake
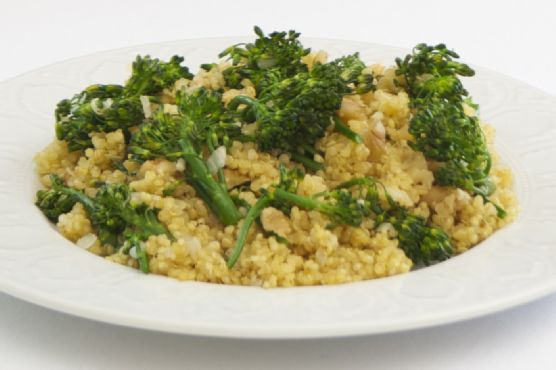
It was one of those evenings when the clouds rolled in, and the rain tapped softly against the windows, turning my kitchen into a cozy haven. I was craving something warm and hearty, something that didn’t require a grocery run in the drizzle. Enter Broccolini Quinoa Pilaf—a dish that’s both comforting and surprisingly simple. What I love about this dish is how effortlessly it balances health and flavor. The nutty quinoa paired with tender broccolini and crunchy walnuts is just the kind of meal that warms both your heart and your belly. Plus, it’s almost a one-pan wonder, which means fewer dishes—always a win in my book.
Jump to Recipe
What You’ll Need
This ingredient list is delightfully short, and chances are you already have most of this in your pantry.
- Broccolini, trimmed
- 1 garlic clove, minced
- 2 tablespoons olive oil
- 1 small onion, diced
- 1 cup quinoa, rinsed
- 2 cups vegetable broth
- 1/4 cup walnuts, chopped
- Salt and pepper to taste
How to Make Broccolini Quinoa Pilaf
- In a large pan with a lid, heat the olive oil over medium-high heat. Once shimmering, add the diced onions and cook for about a minute. You’ll notice the onions start to sizzle and soften.
- Add the minced garlic and continue to cook, stirring occasionally, until the onions become translucent and the garlic is wonderfully fragrant—this should take about 2-3 minutes.
- Pour in the quinoa and stir to coat it with the oil, garlic, and onion mixture. Let it toast for a minute to bring out its nutty flavor.
- Slowly add the vegetable broth, stirring as you pour. Increase the heat to bring it all to a boil.
- Once boiling, cover the pan and reduce the heat to low. Let the quinoa simmer for about 15 minutes.
- In the last 2-3 minutes of cooking, gently lay the broccolini on top of the quinoa. Don’t stir! Just cover it back up and let the steam work its magic.
- After 15 minutes, uncover the pan and toss the broccolini and quinoa together. The broccolini should be bright green and tender-crisp.
- Season with salt and pepper to your liking. Finish by sprinkling the chopped walnuts over the top for a delightful crunch.
- Serve hot and enjoy the medley of flavors and textures.
Cook’s Notes
A few tips to help you along: Make sure to rinse your quinoa under cold water before cooking to remove any bitterness. This dish is pretty forgiving, so feel free to let the onions cook a bit longer for a richer flavor. If you’re making this ahead, keep the broccolini separate until you’re about to serve, then warm everything up and integrate it at the end to keep the veggies vibrant. Leftovers? Store them in an airtight container in the fridge for up to 3 days, though I doubt they’ll last that long!
Make It Your Own
Here are some tweaks to keep things exciting:
- Swap the broccolini for asparagus tips if you’re in a pinch. They cook similarly and add a nice touch.
- For a protein boost, stir in some chickpeas when you add the vegetable broth. They’ll soak up the flavors beautifully.
- If you’re a cheese lover, a sprinkle of feta or parmesan over the top before serving can add a deliciously creamy element.
- For a nut-free version, use toasted pumpkin seeds for an equally satisfying crunch.
If you give this Broccolini Quinoa Pilaf a try, I’d love to hear how it turns out! Drop a comment below or tag me in your photos. Happy cooking, friends!
Related update: Broccolini Quinoa Pilaf
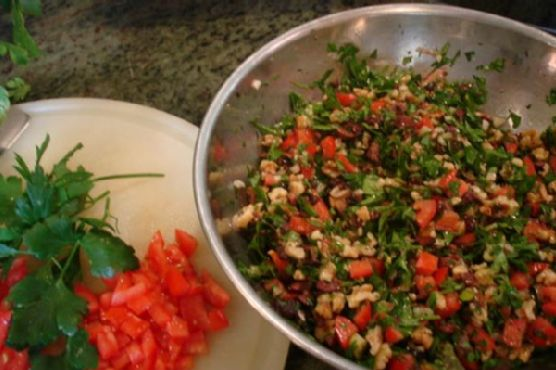
Oh, let me tell you about last Thursday. I was knee-deep in emails, the dog barking at god-knows-what, and all I could think about was how much I didn’t want to spend hours in the kitchen. You know those days, right? So, I opened the fridge and saw a half-empty bunch of parsley and some lonely tomatoes — the lightbulb went off. Middle Eastern Chopped Salad. Crisp, refreshing, and quick to throw together, it’s the perfect escape from the chaos. With the zesty lemon and a hint of cumin, this salad is a breath of fresh air on a hectic day. Ideal for those nights when you want something nourishing but can’t be bothered with a long recipe.
Jump to Recipe
What You’ll Need
The beauty of this salad is how simple and versatile it is. You might have most of these in your kitchen already:
- Walnuts – for a lovely crunch.
- Italian parsley – the star of the show, make sure it’s fresh!
- Niçoise olives – bring a briny depth.
- Scallion – adds a mild onion flavor.
- Tomato – adds juiciness and color.
- Extra virgin olive oil – for that luscious texture.
- Fresh squeezed lemon juice – a must for that zesty punch.
- Cumin powder – just a touch for warmth.
- Red chili flake – for a subtle kick.
- Black kosher salt and coarsely ground pepper – to taste.
How to Make Middle Eastern Chopped Salad
- Preheat your oven to 325°F and place the walnuts on a baking sheet. Toast them for about 10 minutes until you catch that delicious nutty aroma wafting through your kitchen. Let them cool completely before chopping.
- While the nuts are cooling, prep your parsley. Remove the stems and finely mince the leaves. If you’re using a food processor, pulse gently — we want fluffy, not mushy.
- Chop the niçoise olives, cooled walnuts, and scallions into a rough dice. This isn’t about perfection, it’s rustic and charming with its rough edges.
- Dice your tomatoes and give them a quick drain to avoid a watery salad. No soggy salads here!
- In a large wooden bowl (or any roomy bowl you’ve got), combine all your chopped ingredients. The colors should already be making you smile.
- Drizzle in olive oil and fresh lemon juice, then sprinkle with cumin and red chili flakes. Give it a gentle toss until everything’s coated and shiny.
- Finally, season to your liking with kosher salt and black pepper. Taste and adjust — don’t be shy!
Cook’s Notes
Okay, a few things I’ve learned making this salad a million times. First, don’t skip toasting the walnuts. It deepens their flavor and adds that wow factor. The parsley is the foundation, so fresh and finely minced is key. And, if you find your salad is a bit too lemony, balance it with a tad more olive oil. Leftovers? They hold up well for a day but are best fresh. If making ahead, keep the dressing and chopped ingredients separate until just before serving to keep it crisp.
Make It Your Own
Here’s where the fun begins. This salad is a canvas waiting for your personal touch:
- Swap the walnuts for almonds or pistachios for a different nutty vibe.
- If you’re not into olives, try diced cucumbers for a fresh crunch.
- Replace red chili flakes with smoked paprika for a smoky warmth.
- Add a sprinkle of feta cheese for a creamy, tangy finish.
So there you have it, a delightful salad that’s both a sidekick and a star on its own. If you try this, I’d love to hear how it turns out — drop a comment or tag me! Enjoy the little escape this salad offers, even if life’s a bit chaotic.
Related update: Middle Eastern Chopped Salad
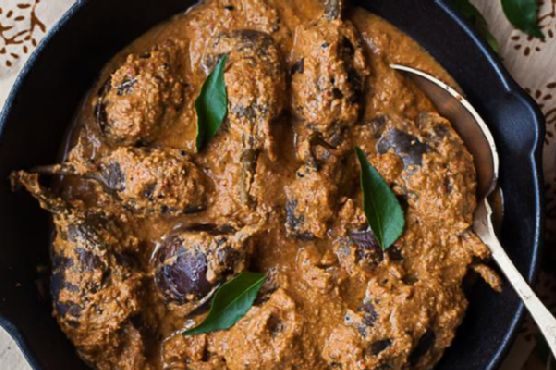
Picture this: it’s a bustling Tuesday evening and I’m standing in my kitchen, rifling through the pantry for dinner inspiration when I stumble upon a bunch of cute, little eggplants. A light bulb moment hits—Hyderabadi baghara Baingan! This dish is like a warm hug, perfect for when you’re craving something rich and tangy yet surprisingly easy to whip up. The eggplants soak up the spiced, nutty goodness, leaving you with a delicious meal that feels like it took hours, but really didn’t. Trust me, even on the busiest days, this is a dish that delivers on flavor with every bite.
Jump to Recipe
What You’ll Need
This isn’t one of those crazy ingredient lists that sends you to five different stores. Chances are you already have most of these at home.
- 10-12 baby eggplants
- 3-4 red Kashmiri chilies
- Coconut
- Coriander seeds
- Cumin seeds
- 8-10 curry leaves
- Garlic
- 1 piece of ginger
- Tamarind, about a lime-sized ball
- Oil
- Onion
- Salt
- Nigella seeds
- Sesame seeds
- Turmeric
- Jaggery
- Peanuts
- Cashews
How to Make Hyderabadi baghara Baingan
- First things first—wash those baby eggplants and pat them dry. You’re going to slit them lengthwise into fours, but keep the stems intact. This way, they hold together nicely in the dish.
- In a separate pan, heat a teaspoon of oil. Toss in the cumin seeds, peanuts, and cashews and fry them for a few seconds until fragrant.
- Add in the ginger, garlic, and chopped onion. Cook this down for about a minute until everything turns soft and golden.
- Sprinkle in the turmeric, coriander seeds, coconut, and Kashmiri red chilies. Keep frying till the mixture turns a lovely brown. Let this cool completely and then blend it into a fine paste with a little water.
- Now, in a thick-bottomed pan, heat some oil and fry the eggplants until they’re brown and tender. This is where they get all soft and lovely. Remove them and set aside.
- In the same oil, add the nigella seeds and let them crackle before stirring in those aromatic curry leaves. Fry for a few seconds to release their flavors.
- Add the ground paste you prepared, along with the tamarind pulp, salt, and jaggery. Mix it all up until it becomes a fragrant, bubbling sauce.
- Gently add the sautéed eggplants and about half a cup of water. Cover the pan and let everything simmer over low heat until the eggplants are cooked through and super soft.
- Serve this hot with rice or rotis, and savor each mouthful of that rich, tangy curry.
Cook’s Notes
Cooking Hyderabadi baghara Baingan is a breeze if you keep a few things in mind. First, ensure the eggplants are fresh and firm for the best taste. If you don’t have Kashmiri red chilies, substitute with any mild red chili for that vibrant color, but be mindful of the spice level. This dish is great the next day too as the flavors deepen overnight, so don’t hesitate to make it ahead of time. Store leftovers in an airtight container in the fridge for up to 3 days. Reheat gently, adding a splash of water if needed to loosen the sauce.
Make It Your Own
Looking to shake things up a bit? Here are a few ways to switch up this recipe:
- Swap the eggplants for zucchini or baby bell peppers for a different twist.
- For a nut-free version, omit the peanuts and cashews and add a tablespoon of almond butter to the paste for richness.
- Dial up the heat by adding a green chili or two to the paste if you’re in the mood for something spicier.
- For a heartier meal, toss in some boiled potatoes along with the eggplants.
If you try this, I’d love to hear how it turns out—drop a comment or tag me! Your feedback makes my day and helps fellow food lovers. Enjoy the cooking adventure!
Related update: Hyderabadi baghara Baingan
Related update: Lamb & Sweet Potato Pot Pie