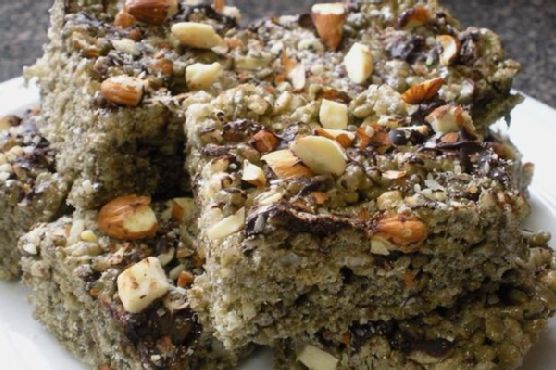
Rocky Road Rice Krispie Treats | Made by Meaghan Moineau
**Title: Rocky Road Rice Krispie Treats: A Nostalgic Twist on a Classic Dessert**
**Description: Dive into the sweet and crunchy world of Rocky Road Rice Krispie Treats. This delightful dessert combines the rich flavors of bittersweet chocolate, almonds, and marshmallows with the crispy texture of rice cereal. Perfect for family gatherings or a nostalgic treat, this recipe is sure to become a cherished favorite.**
---
### Rocky Road Rice Krispie Treats: A Sweet Trip Down Memory Lane
Ah, the sweet nostalgia of childhood desserts. There's something about the combination of chocolate, marshmallows, and almonds that never fails to transport me back to those carefree days. Growing up, my family had a tradition of gathering in the kitchen on Sunday afternoons to whip up sweet treats. The laughter, the scent of melting chocolate, and the joy of creating something delicious together are memories I cherish dearly. One particular favorite was our own twist on the classic rice krispie treats: the Rocky Road Rice Krispie Treats.
#### Ingredients:
- **Butter**: Essential for that rich, creamy base.
- **Chocolate Vanilla Swirl Marshmallows**: The star of our show, adding a delightful twist.
- **Almond Extract & Vanilla Extract**: These extracts enhance the flavor, providing a depth that complements the chocolate beautifully.
- **Rice Krispies**: The foundation of this treat, offering that iconic crunch.
- **Almonds**: One cup mixed in and an additional 1/3 cup for topping, these add a delightful crunch and nutty flavor.
- **Bittersweet Chocolate**: Melted and drizzled on top, it adds a layer of decadence.
- **Kosher Salt**: Just a sprinkle to heighten all the flavors.
#### Instructions:
1. **Melt and Combine**: In a large soup pot, melt the butter and chocolate vanilla swirl marshmallows over a low flame, stirring constantly to create a smooth, creamy mixture.
2. **Flavor Infusion**: Stir in the almond extract and vanilla extract, allowing their rich scents to fill the kitchen and blend into the marshmallow mixture.
3. **Mix It Up**: Add the rice krispies and 1 cup of almonds into the pot. Stir well, ensuring each piece of cereal is coated with the marshmallow blend.
4. **Shape and Set**: Spread the mixture into a 9x13 dish prepped with baking spray. Press down with a spatula until the surface is smooth and even.
5. **Decadent Toppings**: Drizzle the melted bittersweet chocolate over the top and sprinkle with the remaining 1/3 cup of almonds. Finish with a light sprinkle of kosher salt (about 1/2 teaspoon) to enhance the flavors.
6. **Cool and Cut**: Allow the treats to cool completely. For ease of cutting, place them in the fridge for about an hour once they reach room temperature.
#### A Sweet Memory
I recall one particular Sunday when I was around ten years old. It was a rainy afternoon, the kind where you could hear the gentle patter of raindrops against the kitchen window. My mom, my siblings, and I were gathered around the kitchen island, each of us assigned a task. I was in charge of stirring the marshmallows and butter—a task I took very seriously. As we worked, my mom would regale us with stories of her own childhood, sharing how her mother taught her to bake. It was in those moments, surrounded by family and the comforting aroma of chocolate and almonds, that I learned the true meaning of love and tradition.
#### Difficulty: 3/10
**Classification: Dessert**
This Rocky Road Rice Krispie Treats recipe is not only simple to make but also a delightful journey down memory lane. It's perfect for bringing a touch of nostalgia to any gathering, reminding us of the warmth and joy found in family traditions. Whether you're enjoying them on a rainy afternoon or sharing them at a festive gathering, these treats promise to bring smiles and sweet memories to all who indulge.