2 Minute Chocolate Yum | Made by Meaghan Moineau
Title: "2-Minute Chocolate Yum: A Quick Dessert with a Nostalgic Twist"Description: Discover the magic of crafting a delightful dessert in just two minutes with this easy-to-follow recipe. Perfect for satisfying your chocolate cravings, this 2-Minute Chocolate Yum is a simple yet decadent treat that will whisk you away to sweet family memories. With minimal ingredients and a microwave, indulge in a dessert that feels both nostalgic and indulgent, all while being incredibly quick and easy to prepare.
---
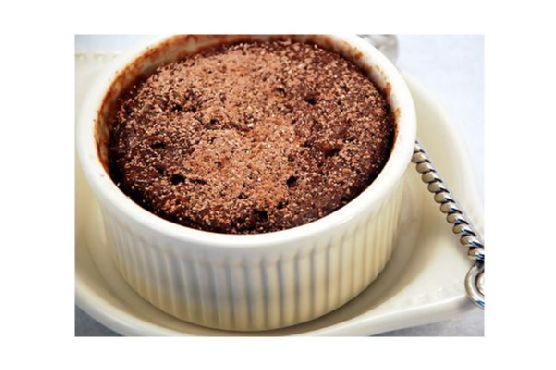
2-Minute Chocolate Yum: A Quick Dessert with a Nostalgic Twist
If there's one thing that can instantly warm the heart and soul, it's the aroma of chocolate wafting through the air. Growing up, chocolate desserts were a staple in our household, especially during those impromptu gatherings when friends and family would drop by unannounced. My mother had a knack for whipping up something quick and delightful, and the 2-Minute Chocolate Yum was her secret weapon.
Ingredients:
- 2 tablespoons cocoa powder
- 1 large egg
- 2 tablespoons flour
- 2 tablespoons milk
- 1 tablespoon oil
- A pinch of salt
- 2 tablespoons sugar
- ½ teaspoon vanilla extract
Instructions:
1. In a small mixing bowl, combine all the ingredients. Whip together until the mixture is smooth.
2. Pour the batter into two smaller 6-8 oz. ramekins, filling them a little over halfway.
3. Cook each ramekin one at a time in the microwave for 2 minutes, or until the cake is puffed up.
4. Serve immediately. Top with a scoop of ice cream or a dollop of whipped topping, or simply dust with a powdered sugar and cocoa powder mixture.
For a delightful twist, transform these into mini black forest cakes. Simply pour half of the batter into the ramekin, add a small spoonful of cherry pie filling, and top with the remaining batter before microwaving.
A Nostalgic Family Memory:
I remember one rainy afternoon when the house was filled with the chatter of cousins and the sound of raindrops tapping against the windows. My mother, ever the gracious host, decided to treat us all to her famous 2-Minute Chocolate Yum. As the aroma of chocolate filled the room, it transported me back to simpler times, where joy was found in the little things—like sharing a warm, gooey dessert with loved ones.
We gathered around the dining table, each of us with our own ramekin, topped with a generous scoop of vanilla ice cream. Laughter and stories flowed as freely as the rain outside, each bite of the warm, chocolatey goodness adding to the magic of the moment. It was in these moments that I realized the power of food to create cherished memories and bring people together.
Difficulty Rating: 2/10
Classification: Dessert
This 2-Minute Chocolate Yum is not only a quick and easy dessert to prepare, but it's also a delightful way to create lasting memories with family and friends. Whether you're a seasoned baker or a beginner in the kitchen, this recipe is sure to become a beloved go-to for any occasion. So go ahead, indulge in a little nostalgia, and share the love with this scrumptious chocolate treat.