Siew Mai | Made by Meaghan Moineau

Siew Mai: A Delightful Dim Sum Classic

Intro

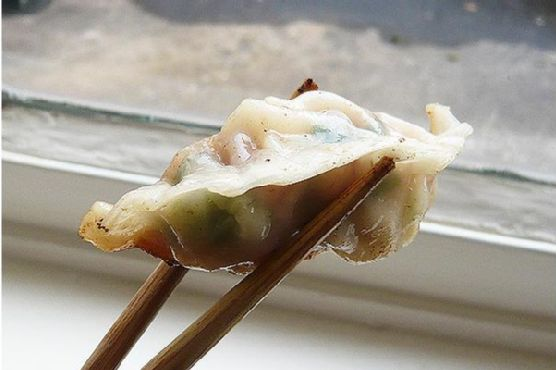
Growing up, dim sum Sundays were a cherished tradition in my family. We would gather around a bustling table, eagerly anticipating the arrival of steaming bamboo baskets filled with an assortment of dumplings. Among my favorites was siew mai, a delectable pork and shrimp dumpling that quickly won my heart with its savory filling and delightful textures. Today, I’m excited to share my family’s recipe for siew mai, a dish that brings back fond memories and continues to be a beloved part of our dining experience.

Why You’ll Love It

Siew mai is a timeless dish that has captivated taste buds for generations. Here’s why you’ll love making and eating these delicious dumplings:

  • Flavorful Filling: The combination of pork, shrimp, and Chinese sausages creates a savory and satisfying flavor profile.
  • Texture Delight: The tender pork is complemented by the crunch of water chestnuts and the chewy texture of glutinous rice.
  • Customizable: Easily adapt the recipe to suit your taste preferences with variations and substitutions.
  • Perfect for Sharing: These bite-sized delights are perfect for gatherings and will surely impress your guests.

Ingredients

  • Wonton wrappers
  • 700g fatty pork
  • 2 tablespoons corn starch
  • 1 teaspoon salt
  • 1 teaspoon white ground pepper
  • 1/2 teaspoon sugar
  • 1 teaspoon Worcestershire sauce or Maggie Seasoning Sauce
  • 2 tablespoons Shaoxing Huatiao wine
  • 2 tablespoons sesame oil
  • 80g canned water chestnuts
  • 4 large Chinese mushrooms
  • Cooked whole shrimp
  • Carrot
  • 2 lap cheongs (Chinese sausages)
  • Raw glutinous rice
  • Shallots
  • Ginger
  • Cooking oil
  • Dried shrimps
  • Cooked dried scallops
  • Light soy sauce
  • Oyster sauce

Instructions

  1. To prepare the pork filling, mince 700g of pork and place it in a large mixing bowl.
  2. Add 2 tablespoons of corn starch, 1 teaspoon of salt, 1 teaspoon of ground white pepper, 1/2 teaspoon of sugar, 1 teaspoon of Worcestershire sauce, 2 tablespoons of Shaoxing Huatiao wine, and 2 tablespoons of sesame oil. Mix well.
  3. Roughly chop 80g of canned water chestnuts and 4 large Chinese mushrooms into fine pieces. Add to the pork mixture and combine thoroughly.
  4. Finely dice a small carrot to garnish the siew mai later. Set aside.
  5. For the glutinous rice filling, soak 2 lap cheongs in boiling water until the skin separates. Remove the skin and dice the sausages.
  6. In a large saucepan over medium-high heat, pan fry the diced lap cheong until they are golden. Follow the instructions for glutinous rice preparation and stir-fry until fragrant. Add the fried lap cheong pieces and set aside to cool.
  7. Prepare the wonton wrappers by placing a sheet on a flat surface. Place a teaspoon of filling in the center of each wrapper.
  8. Dampen your finger with water and wet the edges of the wonton wrapper. Gather the wrapper around the filling and squeeze gently to seal.
  9. Top each pork siew mai with a shrimp and garnish with chopped carrot.
  10. Place the dumplings in a steamer lined with perforated baking paper. Steam over boiling water for 14-15 minutes or until cooked through.
  11. Serve hot, or freeze uncooked dumplings for later use.

Tips

To ensure the best results when making siew mai, keep these tips in mind:

  • Keep it Tight: Make sure the dumplings are tightly wrapped to prevent them from falling apart while steaming.
  • Use Fresh Ingredients: Fresh shrimp and quality pork make a significant difference in taste.
  • Steam Properly: Ensure steam can circulate by cutting holes in the baking paper lining the steamer.

Variations & Substitutions

Feel free to experiment with these variations to suit your preferences:

  • Vegetarian Siew Mai: Replace meat with chopped vegetables such as mushrooms, carrots, and bamboo shoots.
  • Spicy Twist: Add a dash of chili oil or finely chopped fresh chili for a spicy kick.
  • Flavor Enhancers: Add a touch of grated ginger or garlic for additional depth of flavor.

Storage

Siew mai is best enjoyed fresh, but if you have leftovers, store them in an airtight container in the refrigerator for up to 2 days. To freeze uncooked siew mai, place them on a baking sheet lined with parchment paper, freeze until solid, and then transfer to a freezer-safe container. They can be steamed directly from frozen.

FAQ

Can I make siew mai without shrimp?

Yes, you can omit the shrimp if desired. The pork filling is flavorful enough on its own, or you could increase the amount of pork or add other ingredients like mushrooms for added texture and taste.

What can I use instead of wonton wrappers?

If you don’t have wonton wrappers, you can use dumpling wrappers or even make your own from scratch using flour and water. The texture may vary slightly, but they’ll still be delicious.

Nutrition

While exact nutritional values can vary, siew mai is a protein-rich dish thanks to the pork and shrimp. The inclusion of vegetables like mushrooms and water chestnuts adds fiber and vitamins. Opt for leaner pork cuts to reduce fat content if desired.

Conclusion

Siew mai is more than just a dish; it’s a culinary tradition that brings people together. Whether you’re enjoying it as part of a dim sum spread or making it the star of your meal, siew mai is sure to delight with its savory flavors and satisfying textures. I hope this recipe brings joy to your kitchen and adds a touch of nostalgia to your dining table. Happy cooking!

Related update: Siew Mai

Related update: Red, White, and Blue Fruit Salsa

Related update: Lamb Tagine Stew

Curry Leaves Potato Chips | Made by Meaghan Moineau

Curry Leaves Potato Chips

Intro

There’s something magical about the aroma of freshly fried snacks wafting through the house, a nostalgic scent that takes me back to my grandmother’s kitchen. I recall afternoons spent by her side, watching her deft hands transform humble ingredients into delightful treats. Among her many specialties, one stood out – her irresistible Curry Leaves Potato Chips. This recipe, a cherished family heirloom, combines the earthy goodness of potatoes with the aromatic punch of curry leaves, creating a snack that’s both comforting and exciting. Today, I’m excited to share this beloved recipe with you, hoping it brings the same warmth and joy to your home as it does to mine.

Why You’ll Love It

These Curry Leaves Potato Chips are a perfect blend of simplicity and flavor. They come together with minimal ingredients and effort, yet deliver a taste that’s anything but ordinary. The crispy, golden potatoes are seasoned to perfection with a hint of heat from the chili powder, while the fried curry leaves add an aromatic twist that elevates this snack to gourmet status. Whether you’re looking for a quick bite during movie night or a unique appetizer for a gathering, these chips are sure to impress both you and your guests.

Ingredients

  • Potatoes, peeled
  • Plain chili powder
  • Curry leaves
  • Salt
  • Oil for frying

Instructions

  1. Start by wiping or patting the peeled potatoes dry with a clean kitchen towel. This is crucial to ensure that the chips turn out crispy.
  2. Slice the potatoes thinly and evenly for consistent cooking. A mandoline slicer can be particularly useful here.
  3. In a large mixing bowl, toss the potato slices with a dash of chili powder and salt, making sure each slice is well-coated.
  4. Heat oil in a deep pan or fryer over medium heat. To check if the oil is ready, drop a small piece of potato into it; it should sizzle immediately.
  5. Fry the potato slices in batches, ensuring they are not overcrowded, which helps them cook evenly and become crunchy.
  6. Once the chips are golden and crispy, remove them with a slotted spoon and place them on a paper towel-lined plate to drain excess oil.
  7. In the same oil, carefully fry the curry leaves until they are crispy. This should only take a few seconds.
  8. Scoop out the fried curry leaves and generously sprinkle them over the potato chips.
  9. Gently crush the curry leaves over the chips and toss everything together to distribute the flavors evenly.

Tips

For the best results, ensure that the potato slices are as dry as possible before frying. This prevents the oil from splattering and helps achieve that coveted crunch. Adjust the amount of chili powder to suit your heat preference, and feel free to experiment with additional spices like garlic powder or paprika for a personalized touch.

Variations & Substitutions

If you’re looking to switch things up, consider using sweet potatoes instead of regular potatoes for a naturally sweeter chip that pairs beautifully with the savory curry leaves. Alternatively, you can substitute the curry leaves with rosemary or thyme for a different herbaceous note. For those avoiding fried foods, try baking the potato slices in the oven at 400°F (200°C) until crispy, though the texture will differ slightly from the fried version.

Storage

Store any leftover chips in an airtight container at room temperature. They should remain crispy for up to three days. If they begin to lose their crunch, a quick reheat in the oven at 350°F (175°C) can help restore their original texture.

FAQ

Can I use a different type of potato for this recipe?

Yes, you can. While russet potatoes are ideal for their starch content, which contributes to crispiness, you can experiment with other varieties like Yukon gold or red potatoes. Keep in mind that the texture and flavor may vary slightly.

How can I make this recipe healthier?

To make a healthier version, consider air-frying or baking the potato slices instead of deep-frying. You can also reduce the amount of salt and chili powder used, or substitute them with low-sodium and less spicy alternatives.

Nutrition

The nutritional value of these chips will depend on the amount of oil absorbed during frying, but generally, they are a source of carbohydrates from the potatoes, with added vitamins and minerals from the curry leaves. If you’re mindful of your oil intake, consider opting for a heart-healthy oil like olive or avocado oil.

Conclusion

Curry Leaves Potato Chips are more than just a snack; they’re a culinary journey that brings together flavors and memories from the past. As you savor each crispy bite, I hope you feel the same sense of nostalgia and joy that this recipe has brought to my family for generations. So, gather your loved ones, share the chips, and create new memories around this delightful and aromatic treat. Happy cooking!

Related update: Curry Leaves Potato Chips

Related update: Mashed Sweet Potatoes

Japanese Gyoza Pot Stickers | Made by Meaghan Moineau

Japanese Gyoza Pot Stickers

Intro

There’s something truly magical about gathering around the kitchen table with loved ones, folding gyoza wrappers, and sharing stories. I remember as a child, watching my grandmother skillfully pleat the edges of these delightful Japanese pot stickers, her hands moving with a rhythm that spoke of years of practice. The savory aroma of sizzling gyoza would fill the room, creating an atmosphere of warmth and anticipation. Today, I share with you a recipe that brings back those cherished memories and allows you to create your own.

Why You’ll Love It

This Japanese Gyoza Pot Stickers recipe is a perfect blend of savory and umami flavors wrapped in a tender yet crispy shell. Not only are they incredibly delicious, but they’re also versatile and can be served as appetizers, snacks, or even a main course. The combination of seasoned ground beef with aromatic vegetables and the unique touch of chili sesame oil makes each bite an explosion of flavor. Plus, making them from scratch is a fun and rewarding experience that allows you to create a connection with this beloved Japanese tradition.

Ingredients

  • Black pepper, to taste
  • 1 cup cabbage, finely chopped
  • 1 teaspoon chili sesame oil
  • 1/4 cup dried mushrooms, soaked in warm water and chopped
  • 2 teaspoons grated ginger root
  • 3 to 4 green onions, finely chopped
  • 1 pound ground beef
  • 2 tablespoons salad oil
  • 1 teaspoon sesame oil
  • 2 tablespoons Kikkoman soy sauce
  • 1 tablespoon cooking wine
  • Gyoza wrappers

Instructions

  1. Chop the cabbage finely and place it in a colander. Pour boiling water over the cabbage, then let it cool until it’s comfortable to touch. Squeeze the cabbage well to remove excess water.
  2. In a large bowl, combine the cabbage, chopped green onions, chopped mushrooms, and grated ginger.
  3. In a separate bowl, mix the ground beef with cooking wine, soy sauce, sesame oil, and black pepper. Add the vegetable mixture to the beef and mix well.
  4. Place about 1 teaspoon of filling in the center of a gyoza wrapper. Fold the wrapper in half and pleat the edges to seal. If the edges do not stick, dampen the inside edge with a little water before pleating.
  5. Heat 2 tablespoons of salad oil in a pan over medium heat. Place the gyoza in the pan, flat side down.
  6. At the edge of the pan, carefully pour in a little water, up to 1/4 of the depth of the pot stickers. Cover the pan, reduce the heat to low, and let the gyoza simmer until all the water has evaporated.

Tips

For the best results, make sure not to overfill the gyoza wrappers as this can make sealing difficult and lead to bursting during cooking. When pleating the edges, use a firm but gentle touch to ensure they are securely sealed. Additionally, using a non-stick pan can help prevent sticking during the cooking process.

Variations & Substitutions

If you prefer a vegetarian version, simply replace the ground beef with finely chopped tofu or a plant-based meat substitute. You can also experiment with different vegetables such as carrots or bell peppers to add a unique twist. For a spicier kick, increase the amount of chili sesame oil or add a dash of hot sauce to the filling mixture.

Storage

To store leftover gyoza, let them cool to room temperature before placing them in an airtight container. They can be refrigerated for up to 3 days. For longer storage, consider freezing them in a single layer on a baking sheet before transferring to a freezer bag. Frozen gyoza can be cooked directly from the freezer, just increase the cooking time slightly.

FAQ

Can I make the gyoza filling in advance?

Absolutely! You can prepare the filling up to a day in advance and store it in the refrigerator. This can actually help the flavors meld together, resulting in a more flavorful filling.

What if I can’t find gyoza wrappers?

If gyoza wrappers are unavailable, you can use wonton wrappers as a substitute. They may be slightly thinner, so handle them with care when pleating and sealing.

How do I prevent the gyoza from sticking to the pan?

Ensure your pan is well-oiled and preheated before adding the gyoza. A non-stick pan can also help. If they do stick, allow them to cool briefly before gently loosening with a spatula.

Nutrition

This gyoza recipe offers a balanced combination of protein, vegetables, and healthy fats. Each serving (4-5 pot stickers) contains approximately 250 calories, 14g of protein, 20g of carbohydrates, and 12g of fat. Adjust the portion size based on your dietary needs and preferences.

Conclusion

Making Japanese Gyoza Pot Stickers at home is a delightful experience that brings the authentic flavors of Japan into your kitchen. Whether you’re recreating cherished family memories or starting new traditions, these pot stickers are sure to become a favorite. Enjoy the process of crafting each gyoza, savor the rich and complex flavors, and share them with those you love. Happy cooking!

Related update: Japanese Gyoza Pot Stickers

Related update: Spicy Black-Eyed Pea Curry with Swiss Chard and Roasted Eggplant

Related update: Curry Leaves Potato Chips

Pear Salad With Walnuts and Blue Cheese | Made by Meaghan Moineau

Pear Salad With Walnuts and Blue Cheese

Intro

There’s something inherently magical about the crispness of autumn, the way the air turns cooler, and the leaves transform into a symphony of warm hues. As a child, this season always meant family gatherings where we would indulge in hearty meals that celebrated the bounty of the harvest. One dish that has always stood out in my memory is my grandmother’s pear salad. It was a delightful mix of sweet and savory, with juicy pears, crunchy walnuts, and the bold flavor of blue cheese. This salad was more than just food; it was a celebration of the season’s best offerings, a dish that brought everyone together, and left you feeling warm and content. Today, I’m thrilled to share this beloved recipe with you, hoping it brings the same warmth to your table as it has to ours.

Why You’ll Love It

This pear salad with walnuts and blue cheese is a perfect blend of flavors and textures. Here’s why you’ll fall in love with it:

  • Balance of Flavors: The sweetness of pears complements the tangy blue cheese, while the walnuts add a savory crunch.
  • Healthy and Nourishing: Packed with vitamins, antioxidants, and healthy fats, this salad is as nutritious as it is delicious.
  • Quick and Easy: With minimal prep time, this salad is perfect for a quick meal or a stunning appetizer.
  • Visually Stunning: The vibrant colors of the salad leaves, pears, and cheese make this dish as beautiful as it is tasty.

Ingredients

  • 4 ripe pears
  • 1 cup crumbled blue cheese
  • 1/4 cup finely chopped chives
  • 6 cups mixed salad leaves (such as curly endive)
  • 2 tablespoons lemon juice
  • 3 tablespoons safflower oil
  • 1 tablespoon walnut oil
  • 1 cup walnuts, toasted and roughly chopped

Instructions

  1. Prepare the pears by cutting the base so they stand straight. This not only makes for an appealing presentation but also ensures the pear remains stable in the bowl.
  2. Arrange one pear and a generous handful of mixed salad leaves in individual serving bowls.
  3. Add a scattering of chopped celery to each bowl for added crunch.
  4. In a separate bowl, whisk together the lemon juice, safflower oil, and walnut oil to create the dressing. Drizzle the dressing over each salad.
  5. Finish by sprinkling the crumbled blue cheese and toasted walnuts evenly over each salad.
  6. Serve immediately and enjoy the delightful flavors of autumn.

Tips

For the best experience, ensure your pears are ripe but still firm to the touch. This will give you the perfect balance of sweetness and crunch. Toasting the walnuts enhances their flavor, so don’t skip this step! If you prefer a milder cheese, consider using gorgonzola instead of blue cheese.

Variations & Substitutions

  • Cheese: Swap blue cheese for feta or goat cheese for a different flavor profile.
  • Nuts: Pecans or almonds can be used as alternatives to walnuts for some variety.
  • Extra Add-ins: Add dried cranberries or pomegranate seeds for a touch of sweetness and color.
  • Dressing: A honey-mustard vinaigrette can be a delightful alternative to the walnut oil dressing.

Storage

This salad is best enjoyed fresh. However, if you need to prepare it in advance, keep the dressing separate and add it just before serving to prevent the salad leaves from wilting. Store any leftovers in an airtight container in the refrigerator for up to a day.

FAQ

Can I use canned pears instead of fresh ones?

While fresh pears offer the best texture and flavor, you can use canned pears in a pinch. Just ensure they are well-drained and not overly sweetened.

What can I use if I’m allergic to nuts?

If you have a nut allergy, try substituting the walnuts with sunflower seeds or pumpkin seeds for an added crunch without the risk.

How can I make this salad vegan?

To make this salad vegan, simply omit the cheese or use a vegan cheese alternative. Ensure the dressing is also free from animal products, perhaps using a balsamic vinaigrette instead.

Nutrition

Each serving of this pear salad is approximately 250 calories, with 18 grams of healthy fats, 5 grams of protein, and 20 grams of carbohydrates. It is a good source of fiber, vitamin C, and antioxidants, making it a nutritious choice for any meal.

Conclusion

This pear salad with walnuts and blue cheese is a tribute to the flavors of fall, a dish that is as nourishing as it is delectable. Whether you’re serving it as a starter at a dinner party or enjoying it as a light lunch, it’s sure to impress with its complex flavors and beautiful presentation. I hope this recipe becomes a staple in your home, just as it has in mine, creating new memories and bringing joy to your dining table.

Related update: Pear Salad With Walnuts and Blue Cheese

Related update: Japanese Gyoza Pot Stickers

Related update: Thai Cucumber Salad (By Roz)

Cajun Potato Wedges | Made by Meaghan Moineau

Cajun Potato Wedges

Intro

There’s something truly magical about the aroma of spices mingling with the earthy scent of potatoes roasting in the oven. It takes me back to my childhood, where Sunday afternoons meant the whole family gathered in the kitchen, eagerly awaiting my grandma’s famous Cajun Potato Wedges. Her kitchen was a haven of warmth and laughter, with the spicy aroma of these wedges filling the air. Each bite was a burst of flavor, a perfect balance of heat and comfort. Today, I’m excited to share this beloved recipe with you, inviting you to create your own cherished memories with these delicious Cajun Potato Wedges.

Why You’ll Love It

These Cajun Potato Wedges are not just another side dish; they are a flavorful adventure for your taste buds. With their crispy exterior and fluffy interior, they bring a delightful texture that pairs perfectly with the bold, spicy seasoning. Whether you’re serving them as a snack, a side dish, or even a party appetizer, these wedges are sure to be a hit. Plus, they’re easy to make and don’t require any fancy ingredients—just good old-fashioned pantry staples with a Cajun twist.

Ingredients

  • 3-4 russet potatoes
  • 2 tablespoons olive oil
  • 1 teaspoon salt
  • 1 teaspoon cayenne pepper
  • 1 teaspoon garlic powder
  • 1 teaspoon onion powder
  • 1 teaspoon paprika
  • 1 teaspoon Italian seasoning
  • 1/2 teaspoon black pepper

Instructions

  1. Preheat your oven to 425 degrees Fahrenheit (220 degrees Celsius).
  2. Wash and scrub the russet potatoes thoroughly. Slice each potato into ½ inch thick wedges, about half the length of the potato.
  3. In a small bowl, combine the cayenne pepper, garlic powder, onion powder, paprika, Italian seasoning, salt, and black pepper. Mix well to create the spice mixture.
  4. Spray a cookie sheet with olive oil cooking spray to prevent sticking.
  5. Place the potato wedges on the cookie sheet. Drizzle with olive oil and toss to coat evenly.
  6. Sprinkle the spice mixture over the potatoes, ensuring each wedge is well-seasoned. Toss again if necessary to distribute the spices evenly.
  7. Bake in the preheated oven for 25 minutes. Remove from the oven, flip the wedges over, and return to the oven for an additional 5 minutes, or until the wedges are golden brown and crispy.
  8. Once done, remove from the oven and let them cool slightly. Serve warm with your favorite dipping sauce.

Tips

For the crispiest wedges, make sure not to overcrowd the pan. This allows for better air circulation and even cooking. Also, keep the potato skins on for added texture and nutrition. If you want an extra kick, feel free to adjust the amount of cayenne pepper to your taste. Remember, the key to perfect wedges is a hot oven and a good toss of oil and spices.

Variations & Substitutions

Feel free to get creative with this recipe! You can substitute sweet potatoes for a different flavor profile or add Parmesan cheese for a cheesy twist. If you prefer a milder version, reduce the cayenne pepper or omit it altogether. You can also experiment with different herbs and spices, such as rosemary or thyme, to suit your personal taste.

Storage

These Cajun Potato Wedges are best enjoyed fresh from the oven. However, if you have leftovers, store them in an airtight container in the refrigerator for up to 3 days. To reheat, simply place them on a baking sheet and warm in the oven at 350 degrees Fahrenheit (175 degrees Celsius) until heated through. This will help retain their crispiness.

FAQ

Can I make these potato wedges in an air fryer?

Yes, you can! Prepare the wedges as instructed and preheat your air fryer to 400 degrees Fahrenheit (200 degrees Celsius). Arrange the wedges in a single layer in the air fryer basket and cook for 15-20 minutes, shaking the basket halfway through, until they are crispy and golden.

What dipping sauces go well with Cajun Potato Wedges?

These wedges are versatile and pair well with a variety of dipping sauces. Consider serving them with ranch dressing, spicy aioli, or a tangy barbecue sauce. For a healthier option, try a Greek yogurt dip with herbs.

Nutrition

While I don’t have exact nutritional information, these Cajun Potato Wedges are a great source of carbohydrates and provide some fiber, especially if you leave the skins on. The olive oil adds healthy fats, and the spices contribute antioxidants. Just remember to enjoy them in moderation as part of a balanced diet.

Conclusion

These Cajun Potato Wedges are more than just a recipe; they’re a gateway to cherished memories and new traditions. Whether you’re looking to spice up your dinner routine or impress guests at your next gathering, these wedges are sure to deliver. Easy to prepare and bursting with flavor, they embody the essence of comfort food with a kick. So gather your ingredients, preheat your oven, and let the aroma of Cajun spices fill your home. Enjoy every crispy, savory bite!

Related update: Cajun Potato Wedges

Chicken Suya | Made by Meaghan Moineau

Deliciously Spiced Chicken Suya: A Taste of West Africa

Intro

Chicken Suya is a delightful and spicy grilled chicken recipe originating from West Africa, particularly Nigeria. This dish holds a special place in my heart, as it reminds me of warm summer evenings in Lagos, where the aroma of sizzling suya from roadside vendors filled the air. As a child, my family and I would often take strolls through the bustling city streets, stopping to indulge in this delectable treat. The succulent, spicy flavor of Chicken Suya has been a cherished part of my culinary journey, and I’m thrilled to share this recipe with you.

Why You’ll Love It

There are countless reasons to fall in love with Chicken Suya. Here are just a few:

  • Bold Flavors: The suya spice blend is a powerhouse of taste, combining ground peanuts, ginger, garlic, and chili powder to create a savory and slightly spicy profile that is utterly irresistible.
  • Simple Ingredients: Despite its complex flavor, Chicken Suya requires only a handful of ingredients that you likely already have in your pantry.
  • Versatile Dish: This dish can serve as a main course, appetizer, or even a snack. It’s perfect for gatherings, barbecues, or a cozy night in.
  • Healthy and Satisfying: Grilling the chicken keeps it lean, while the spices provide a burst of nutrition and taste.

Ingredients

  • 2-3 tablespoons suya spice
  • 1 whole chicken, cut into parts
  • 1 teaspoon chili powder
  • 2 tablespoons groundnut oil (or any cooking oil)
  • 2 seasoning cubes
  • 1 onion, sliced
  • 2 tomatoes, sliced
  • Salt to taste

Instructions

  1. Preheat your oven to 500°F (260°C).
  2. Wash the chicken pieces thoroughly and pat them dry with a paper towel.
  3. In a large bowl, combine the suya spice, chili powder, seasoning cubes, and salt. Mix well.
  4. Add the chicken to the bowl, ensuring that each piece is generously coated with the spice mixture.
  5. Drizzle the groundnut oil over the seasoned chicken and give it a good mix to ensure even distribution.
  6. Arrange the chicken pieces on a baking sheet lined with aluminum foil.
  7. Place the baking sheet in the preheated oven and grill for 40 minutes. Be sure to check the chicken occasionally, flipping it to ensure it cooks evenly on both sides.
  8. Once the chicken is cooked through and has a beautiful char, remove it from the oven.
  9. Serve hot, garnished with sliced onions, tomatoes, and an extra sprinkle of suya spice for added flavor.

Tips

  • For an authentic taste, try using a grill instead of an oven. The smoky flavor from the charcoal enhances the suya’s taste.
  • If you prefer a milder heat, adjust the amount of chili powder to suit your taste.
  • Rest the chicken for a few minutes after grilling to allow the juices to redistribute, ensuring a moist and flavorful bite.

Variations & Substitutions

If you’re looking to shake things up, consider these variations:

  • Protein Swap: While chicken is traditional, you can use beef, goat meat, or even tofu for a vegetarian option.
  • Nut-Free: If you have a peanut allergy, substitute the suya spice with a nut-free spice blend.
  • Additional Veggies: Add bell peppers or mushrooms to the grill for an extra layer of flavor and texture.

Storage

Leftover Chicken Suya can be stored in an airtight container in the refrigerator for up to 3 days. To reheat, place the chicken in a preheated oven at 350°F (175°C) for about 10 minutes or until warmed through. You can also freeze the cooked chicken for up to 2 months. Thaw overnight in the refrigerator before reheating.

FAQ

Can I prepare the suya spice blend at home?

Absolutely! To make your own suya spice blend, you can combine roasted peanuts, ground ginger, garlic powder, onion powder, paprika, and chili powder. Blend them together until you reach a fine consistency. Store in an airtight jar for future use.

How can I make my Chicken Suya extra crispy?

For an extra crispy texture, finish the grilled chicken under the broiler for a few minutes. Keep a close eye on it to prevent burning, and you’ll achieve a delightful crunch.

Nutrition

Chicken Suya is a nutritious option rich in protein and flavor. While exact nutritional values depend on portion sizes, a typical serving provides:

  • Calories: Approximately 250-300 per serving
  • Protein: 25-30g
  • Fat: 15-20g
  • Carbohydrates: 5-10g

It’s a great choice for those looking to maintain a balanced diet without sacrificing taste.

Conclusion

Chicken Suya is more than just a meal; it’s a culinary experience that transports you to the vibrant streets of West Africa. With its bold flavors and tantalizing aroma, it’s sure to become a favorite in your household. Whether you’re hosting a gathering or enjoying a quiet dinner at home, this dish promises to deliver satisfaction with every bite. I hope you enjoy making and eating this Chicken Suya as much as I do. Bon appétit!

Related update: Chicken Suya

Related update: Rotisserie Chicken and Bean Tostadas

Guacamole | Made by Meaghan Moineau

The Best Homemade Guacamole

Intro

There’s nothing quite like the taste of fresh guacamole. I remember the first time I tried it at a family gathering when I was a child. The creamy texture combined with a hint of spice and citrusy notes was unlike anything I’d tasted before. My uncle, who had just returned from a trip to Mexico, made a batch for us, and since then, guacamole has been a staple at all our family gatherings. Today, I’ll share with you my take on this classic recipe, inspired by that nostalgic experience.

Why You’ll Love It

This guacamole recipe is perfect for any occasion. Whether you’re hosting a party, enjoying a quiet night in, or looking for a healthy snack, this guacamole will be your go-to. The creamy texture of the avocados paired with the freshness of herbs like cilantro, basil, and oregano creates a perfect balance of flavors. Plus, it’s quick and easy to make!

Ingredients

  • 3 ripe Haas avocados
  • 1/4 cup finely chopped onion
  • 1 jalapeño pepper, seeded and minced
  • 2 tablespoons fresh cilantro, chopped
  • 1/2 teaspoon salt
  • 1/4 teaspoon black pepper
  • 2 tablespoons fresh lime juice
  • 1 tablespoon fresh basil, chopped
  • 1 tablespoon fresh oregano, chopped

Instructions

  1. Cut the avocados in half lengthwise. Remove the pit by driving a chef’s knife into it and twisting gently to loosen.
  2. Scoop the avocado flesh out of the skin and into a mixing bowl.
  3. Using a fork, mash the avocado to your desired consistency.
  4. Add the chopped onion, jalapeño, cilantro, basil, and oregano to the mashed avocado.
  5. Mix until all the ingredients are well incorporated.
  6. Season the guacamole with salt, black pepper, and lime juice to taste.
  7. Serve immediately or chill for a more pronounced flavor.
  8. If not serving immediately, store in the refrigerator with plastic film wrap pressed onto the surface of the guacamole to prevent browning.

Tips

When choosing avocados, look for ones that are slightly soft to the touch but not mushy. A ripe avocado will yield gently to pressure. To prevent the guacamole from turning brown, ensure the plastic wrap is touching the entire surface of the guacamole. This minimizes air contact, which causes oxidation.

Variations & Substitutions

Feel free to customize your guacamole. For a spicier kick, leave the seeds in the jalapeño or add a dash of cayenne pepper. If you’re not a fan of cilantro, you can omit it or replace it with parsley. For a twist, try adding diced tomatoes or roasted corn for extra texture and flavor.

Storage

Store leftover guacamole in an airtight container in the refrigerator. Press a piece of plastic wrap directly onto the surface before sealing to keep it fresh for up to two days. Remember, the sooner you enjoy it, the better it tastes!

FAQ

Can I make guacamole in advance?

Yes, you can prepare guacamole a few hours in advance. Just make sure to store it with plastic wrap pressed against the surface to prevent browning. The lime juice also helps preserve its vibrant color.

What can I serve with guacamole?

Guacamole is incredibly versatile. Serve it with tortilla chips, as a topping for tacos, or alongside grilled chicken or fish. It’s also a great addition to sandwiches and burgers for an extra burst of flavor.

Nutrition

Avocados are packed with healthy fats, fiber, and essential nutrients. This guacamole recipe is not only delicious but also offers a good source of vitamins C, E, K, and B-6, as well as potassium and folate. Enjoy it as a healthy snack or as part of a balanced meal.

Conclusion

Whether you’re a long-time fan of guacamole or trying it for the first time, this recipe is sure to become a favorite. Its simplicity and freshness make it a standout dish that’s perfect for any occasion. So gather your ingredients and enjoy a taste of this classic, nostalgic treat. Remember, the best dishes are those shared with family and friends. Happy guacamole making!

Related update: Guacamole

Square Deviled Eggs | Made by Meaghan Moineau

Square Deviled Eggs: A Fun Twist on a Classic Appetizer

Intro

There is something truly delightful about deviled eggs. They are a timeless appetizer, cherished at family gatherings, holiday dinners, and picnics alike. As a child, I remember standing on a stool in my grandmother’s kitchen, watching her expertly prepare deviled eggs. The aroma of boiled eggs mingled with the tangy scent of mustard filled the air, and I was entranced by the magic of this simple dish. Today, I’m excited to share a unique twist on this classic recipe: Square Deviled Eggs. Perfect for surprising your guests or adding a touch of whimsy to your dining table, these square-shaped delights are not only fun to make but also utterly delicious!

Why You’ll Love It

Square Deviled Eggs are not just a visual treat; they also offer a delightful culinary experience. Here’s why you’ll love them:

  • Fun and Unique: The square shape adds a playful twist to the traditional deviled egg, making it a conversation starter at any gathering.
  • Kid-Friendly: The creamy filling is soft and mild, making it a hit with children and adults alike.
  • Versatile: Perfect for parties, picnics, or as a unique addition to your holiday spread.

Ingredients

  • Medium-sized cooked eggs
  • Cream cheese
  • Ham

Instructions

  1. Begin by preparing your hard-boiled eggs. Place the eggs in a saucepan and cover them with cold water.
  2. Bring the water to a boil over medium heat. Once boiling, let the eggs cook for 5 minutes.
  3. Remove the saucepan from heat and let the eggs stand covered in hot water for 10 minutes.
  4. Once cooled, peel the eggs.
  5. To create the square shape, use an Egg cuber or Square Egg Press (see note below for purchase options). Slide each peeled egg into the press and screw the top down gently, pushing the egg into the corners.
  6. Allow the eggs to cool completely before removing them from the mold. For the best results, use medium-sized eggs.
  7. For the filling, mash the egg yolks with cream cheese and finely chopped ham until smooth and creamy.
  8. Carefully fill the square-shaped egg whites with the creamy yolk mixture. Serve chilled.

Tips

Here are some tips to ensure your Square Deviled Eggs turn out perfectly every time:

  • Plan Ahead: If you plan to serve these at a party, consider investing in multiple egg cubers to save time.
  • Egg Size: Medium-sized eggs work best to fit into the egg press molds.
  • Cooling Time: Make sure the eggs are completely cooled before removing them from the mold for a perfect square shape.

Variations & Substitutions

If you’re looking to mix things up, consider these variations and substitutions:

  • Spicy Twist: Add a dash of hot sauce or sprinkle of cayenne pepper to the filling for a spicy kick.
  • Vegetarian Option: Omit the ham and add finely chopped herbs like dill or chives for a refreshing flavor.
  • Cheese Lovers: Substitute cream cheese with a sharp cheddar for an extra cheesy flavor.

Storage

Store any leftover Square Deviled Eggs in an airtight container in the refrigerator for up to two days. For best quality, consume them as soon as possible. The texture and flavor are at their peak when fresh.

FAQ

Where can I purchase an Egg cuber or Square Egg Press?

Egg cubers or square egg presses are available online through major retailers such as Amazon or specialty kitchen stores. They are an affordable and fun addition to your kitchen tools.

Can I make Square Deviled Eggs in advance?

Yes, you can prepare the eggs and filling in advance. Simply store them separately in the refrigerator and assemble just before serving.

Nutrition

Square Deviled Eggs are a nutritious appetizer option. The eggs provide a good source of protein, while cream cheese and ham add a touch of richness. For a lighter version, consider using low-fat cream cheese.

Conclusion

Square Deviled Eggs are sure to bring joy and surprise to your dining table. Whether you’re hosting a party, enjoying a picnic, or simply looking for a fun way to enjoy a classic dish, these eggs are a delightful choice. With a touch of nostalgia and a modern twist, they are perfect for all occasions. So grab your Egg cuber, invite your loved ones, and enjoy this whimsical take on an old favorite!

Related update: Square Deviled Eggs

Related update: Guacamole

Related update: Easy Thanksgiving Entertaining

Tomato Cutlets | Made by Meaghan Moineau

Tomato Cutlets: A Savory Delight

Intro

Growing up, summers were synonymous with the sweet aroma of fresh tomatoes ripening on the vine in my grandmother’s garden. I vividly recall the warmth of the sun on my face as I plucked those vibrant, juicy beefsteak tomatoes, their fragrance wafting through the air, promising a delectable treat. One of my cherished memories is watching my grandmother transform these garden-fresh tomatoes into golden, crispy cutlets. Today, I am excited to share this cherished family recipe with you, bringing a taste of those sun-drenched summer days into your kitchen.

Why You’ll Love It

This Tomato Cutlets recipe is a delightful fusion of crispy textures and savory flavors, perfect for a light lunch or an elegant appetizer. Whether you’re a seasoned cook or a kitchen novice, you’ll appreciate the simplicity and versatility of this dish. The combination of fresh ingredients and easy preparation makes it a go-to recipe for any occasion. Plus, it’s a great way to enjoy the seasonal bounty of tomatoes and eggplants.

Ingredients

  • 2 baby eggplants, halved
  • 2 large beefsteak tomatoes, sliced
  • 1 cup Italian bread crumbs
  • 2 eggs, beaten
  • Juice of 1 lemon
  • 2 tablespoons olive oil
  • 2 tablespoons Italian fresh parsley, chopped
  • Salt and pepper to taste
  • 1/4 cup fresh Romano cheese, grated

Instructions

  1. Prepare your ingredients by slicing the beefsteak tomatoes and beating the eggs in a shallow bowl. Place the Italian bread crumbs in another shallow dish.
  2. Dip each tomato slice into the egg wash and then coat it with the bread crumbs. Repeat this process if you have extra egg wash and bread crumbs for a thicker crust.
  3. Heat a large frying pan over medium heat and add the olive oil. Once the oil is hot, carefully place the prepared tomato slices in the pan.
  4. Cook the tomato slices for about 3-4 minutes on each side, or until they achieve a nice golden color. Gently flip them halfway through cooking.
  5. After removing the tomato slices from the pan, add the halved baby eggplants. Sprinkle them with salt and pepper to taste.
  6. Sauté the eggplants on one side until they are golden, about 3-4 minutes, then turn and sauté the other side.
  7. Plate the tomato cutlets and eggplants, and finish with a garnish of chopped parsley, a squeeze of lemon juice, and a generous sprinkle of grated Romano cheese.

Tips

For the best results, use ripe, firm beefsteak tomatoes. The firmer the fruit, the better it will hold up during cooking. Additionally, ensure the oil is hot before frying to achieve that perfect golden crust. If you find the cutlets are browning too quickly, adjust the heat to medium-low to ensure even cooking.

Variations & Substitutions

If you prefer a gluten-free version, substitute the Italian bread crumbs with gluten-free bread crumbs. For a vegan twist, replace the eggs with a plant-based egg substitute or a mixture of water and flour to help the bread crumbs adhere to the tomatoes. You can also experiment with spices in the bread crumbs, such as garlic powder or paprika, for an extra kick of flavor.

Storage

These Tomato Cutlets are best enjoyed fresh to maintain their crispy texture. However, if you have leftovers, store them in an airtight container in the refrigerator for up to 2 days. Reheat them in a preheated oven at 350°F (175°C) for about 10 minutes to regain some of their crispiness.

FAQ

Can I use other types of tomatoes for this recipe?

Yes, you can use other types of tomatoes, such as Roma or heirloom. However, beefsteak tomatoes are preferred for their size and firm texture, which hold up well during frying.

What can I serve with Tomato Cutlets?

Tomato Cutlets pair beautifully with a fresh green salad or a side of pasta. They also make a great topping for a sandwich or a burger for a unique twist.

Can I prepare the cutlets in advance?

You can prepare the tomatoes and eggplants ahead of time and store them separately in the refrigerator. When you’re ready to serve, simply fry them up fresh for the best texture and flavor.

Nutrition

While specific nutritional values will vary based on portion sizes and exact brands used, these Tomato Cutlets are generally a good source of Vitamin C from the tomatoes and healthy fats from the olive oil. Using fresh ingredients ensures a wholesome and delicious dish without unnecessary additives.

Conclusion

There’s something magical about turning simple, fresh ingredients into a dish that delights the senses. These Tomato Cutlets not only bring a taste of summer to your table but also provide a comforting, nostalgic culinary experience. Whether you’re preparing them for family, friends, or simply treating yourself, this recipe is sure to become a beloved staple in your kitchen. Enjoy the warm, crispy goodness and the nostalgic flavors of this timeless dish.

Related update: Tomato Cutlets

Related update: Square Deviled Eggs

Shrimp & Crab Egg Rolls | Made by Meaghan Moineau

Shrimp & Crab Egg Rolls

Intro

When I was a child, my grandmother would invite the entire family over on Sunday afternoons for a feast. The kitchen was always bustling with energy, filled with the rich aroma of spices and the laughter of family members sharing stories. Amongst the many dishes, her Shrimp & Crab Egg Rolls were the highlight of our gatherings. She would always let me help with rolling the egg rolls, a task I took on with great pride. Today, I share this cherished recipe with you, hoping it brings the same warmth and joy to your home as it did to ours.

Why You’ll Love It

These Shrimp & Crab Egg Rolls are a delightful combination of succulent seafood and crisp vegetables, all wrapped up in a perfectly crispy exterior. They make for a fantastic appetizer or snack, and they’re sure to impress at any gathering. The balance of flavors is both comforting and exotic, making it a dish that everyone will adore.

Ingredients

  • 8 oz. dry bean sprouts, washed and patted dry
  • 1 cup shredded carrots
  • 1/2 lb imitation crab (or real crab if preferred)
  • 1/2 lb medium-sized shrimp, shelled and deveined
  • 2 garlic cloves, finely minced (or 1 tbsp garlic powder)
  • 1 tsp brown sugar
  • 3 green onions, finely chopped (green part only)
  • 10-12 (6 or 8-inch) egg roll wrappers
  • 1 beaten egg, for egg wash
  • Vegetable oil, for frying
  • 1 tsp salt and ground pepper
  • 1 cup sweet chili sauce, for serving

Instructions

  1. In a large bowl, combine the bean sprouts, shredded carrots, imitation crab, shrimp, minced garlic, brown sugar, and green onions. Season with salt and pepper to taste.
  2. Place an egg roll wrapper on a clean surface with one corner pointing towards you. Spoon about 2 tablespoons of the filling onto the center of the wrapper.
  3. Fold the bottom corner over the filling, then fold in the sides. Roll the wrapper tightly towards the top corner. Brush the top corner with a bit of the beaten egg to seal the roll. Repeat with the remaining wrappers and filling.
  4. Heat vegetable oil in a deep pan or fryer to 350°F (175°C). Carefully place the egg rolls in the hot oil, a few at a time, and fry until golden brown and crispy, about 3-5 minutes.
  5. Remove the egg rolls from the oil and drain on a paper towel-lined plate.
  6. Serve warm with sweet chili sauce for dipping.

Tips

For best results, ensure that the filling is well-drained before wrapping to prevent soggy egg rolls. Additionally, do not overcrowd the pan when frying, as this can lower the oil temperature and result in less crispy egg rolls.

Variations & Substitutions

Feel free to experiment with different fillings. You could add finely sliced cabbage or bell peppers for extra crunch. If you prefer a spicier kick, consider adding a dash of Sriracha or chopped chili peppers to the filling. For a vegetarian version, simply omit the seafood and add more vegetables or tofu.

Storage

Leftover egg rolls can be stored in an airtight container in the refrigerator for up to 3 days. To reheat, place them in the oven at 350°F (175°C) until warmed through and crispy. Avoid microwaving, as this can make the egg rolls soggy.

FAQ

Can I bake these egg rolls instead of frying?

Yes, you can bake them for a healthier alternative. Preheat your oven to 400°F (200°C), place the egg rolls on a baking sheet lined with parchment paper, and brush them lightly with oil. Bake for 15-20 minutes or until golden brown, flipping halfway through.

What dipping sauces pair well with these egg rolls?

Besides sweet chili sauce, these egg rolls pair well with soy sauce, hoisin sauce, or a spicy peanut sauce. Feel free to get creative and try different flavors to complement the egg rolls.

Can I prepare these in advance?

Absolutely! You can prepare the filling and wrap the egg rolls a day ahead. Store them in the refrigerator, covered with a damp cloth, to prevent the wrappers from drying out. Fry them just before serving for the best texture.

Nutrition

These Shrimp & Crab Egg Rolls are a source of protein and vitamins from the seafood and vegetables. While frying adds calories, you can opt for baking to reduce the fat content. As with any indulgent dish, moderation is key.

Conclusion

These Shrimp & Crab Egg Rolls are more than just a meal; they are a testament to family traditions and the joy of cooking together. Whether you’re making them for a special occasion or just a cozy night in, they are sure to become a favorite in your household. Enjoy the crispiness, the rich flavors, and the happiness they bring to your table. From my family to yours, happy cooking!

Related update: Shrimp & Crab Egg Rolls

Related update: Tomato Cutlets

Savory Slow Roasted Tomatoes with Filet of Anchovy | Made by Meaghan Moineau

Savory Slow Roasted Tomatoes with Filet of Anchovy

Intro

There’s something magical about the aroma of slow-roasted tomatoes wafting through the kitchen. It takes me back to my grandmother’s house on lazy summer afternoons. She would spend hours preparing the most exquisite dishes, her hands moving with practiced ease. One of my favorites was her slow-roasted tomatoes topped with anchovy filets—a recipe that I’ve lovingly recreated many times over the years. There’s a warmth and nostalgia in every bite, a reminder of those sun-dappled days spent in her garden. Today, I’m thrilled to share this cherished recipe with you, hoping it brings a touch of that same magic to your home.

Why You’ll Love It

This recipe is a celebration of simplicity and flavor. The slow roasting process intensifies the natural sweetness of the tomatoes, while the anchovy filets add a savory, umami-rich layer that is simply irresistible. It’s a dish that requires minimal effort but delivers maximum flavor. Whether you’re serving it as a delightful appetizer or a side dish, these savory slow-roasted tomatoes are sure to impress your guests and become a staple in your culinary repertoire.

Ingredients

  • Round tomatoes
  • Canned fresh any herbs you like
  • Salt & pepper
  • Extra virgin olive oil
  • Anchovy filets

Instructions

  1. Preheat your oven to 150°C (280°F).
  2. Cut the top third off the tomatoes and discard the top.
  3. Place the tomatoes on a baking tray lined with parchment paper.
  4. Sprinkle generously with salt, pepper, and herbs of your choice.
  5. Drizzle a generous amount of olive oil over the tomatoes.
  6. Place the tray in the oven, allowing the tomatoes to roast for 4-6 hours, depending on their size.
  7. Occasionally baste the tomatoes in their juices and olive oil as you pass through the kitchen.
  8. Once the tomatoes shrivel slightly and take on a sun-dried appearance, they are ready. They should retain their shape and not become mushy.
  9. Remove from the oven and top each tomato with a whole anchovy filet.
  10. Serve warm or at room temperature, drizzled with the olive oil from the baking pan.

Tips

For best results, choose firm, ripe tomatoes that are uniform in size to ensure even cooking. Don’t rush the cooking time; the slow roasting is what brings out the rich, concentrated flavors. Feel free to experiment with different herbs to find your perfect flavor combination.

Variations & Substitutions

If anchovies aren’t to your liking, consider substituting them with capers or olives for a similar salty bite. For a vegan version, omit the anchovies entirely or use a plant-based alternative. You can also try different types of tomatoes, such as cherry or heirloom, adjusting the roasting time accordingly.

Storage

If you have leftovers, store the tomatoes in an airtight container in the refrigerator for up to three days. They make a delicious addition to salads, pasta dishes, or even as a topping for crusty bread. Reheat them gently in the oven to enjoy their full flavor.

FAQ

Can I use dried herbs instead of fresh?

Absolutely! Dried herbs can be a great substitute for fresh ones. Just keep in mind that dried herbs are more concentrated, so you’ll need less. Start with half the amount and adjust to taste.

What can I pair with these roasted tomatoes?

These roasted tomatoes pair beautifully with a variety of dishes. Serve them alongside grilled chicken or fish for a complete meal. They also make a wonderful topping for bruschetta or a flavorful addition to a cheese platter.

Can I make this recipe in advance?

Yes, you can prepare the roasted tomatoes a day in advance. Simply store them in the fridge and warm them up slightly before serving. They’re also delicious served cold, making them a versatile option for meal prep.

Nutrition

This dish is not only delicious but also nutritious. Tomatoes are rich in vitamins C and K, potassium, and folate, while anchovies provide a good source of omega-3 fatty acids and protein. It’s a healthy, flavorful option that you can feel good about enjoying.

Conclusion

There you have it—Savory Slow Roasted Tomatoes with Filet of Anchovy, a dish that embodies simplicity and flavor. Whether you’re reminiscing about cherished memories or creating new ones, this recipe is sure to delight your senses and warm your heart. I hope it becomes a beloved tradition in your home, just as it has in mine. Enjoy every bite!

Related update: Savory Slow Roasted Tomatoes with Filet of Anchovy

Related update: Brussels Sprouts with Bacon and Shallots

Related update: Shrimp & Crab Egg Rolls

Baked Scallops With Parma Ham | Made by Meaghan Moineau

Baked Scallops With Parma Ham

Intro

There’s a certain kind of magic that happens when you combine the delicate sweetness of scallops with the rich, savory notes of Parma ham. This recipe for Baked Scallops with Parma Ham transports me back to my childhood, when my family would gather around the table for Sunday dinners. My grandmother, an enthusiastic cook with a love for simple yet elegant dishes, would often prepare this delightful starter. The aroma of garlic and parsley mingling with the salty scent of the sea would fill the kitchen, creating an atmosphere of warmth and togetherness. Today, I’m excited to share that same sense of comfort and joy with you through this recipe.

Why You’ll Love It

This dish is a celebration of flavors and textures that complement each other beautifully. The tender, juicy scallops provide a perfect canvas for the crispy, savory topping made from Parma ham and breadcrumbs. With just a handful of ingredients, this recipe is not only delicious but also incredibly easy to prepare. Whether you’re hosting a dinner party or simply want to treat yourself, these baked scallops are sure to impress. Plus, they’re ready in under 30 minutes, making them an excellent choice for both special occasions and weeknight dinners.

Ingredients

  • Fresh big scallops
  • Parma ham
  • 1 garlic clove
  • Dried breadcrumbs
  • Parsley
  • Olive oil
  • Bell pepper

Instructions

  1. Preheat your oven to 410°F (210°C / T 7).
  2. In a food processor, mix together the breadcrumbs, Parma ham, garlic, parsley, and 1 teaspoon of olive oil until you have a coarse, crumbly mixture.
  3. Fold a piece of kitchen paper, pour 1 teaspoon of olive oil on it, and use it to grease an oven rack.
  4. Place the scallops on the greased rack and top each one with a generous spoonful of the Parma ham mixture.
  5. Drizzle a dash of olive oil on top of each scallop.
  6. Bake in the preheated oven for about 8 minutes, or until the topping is crispy and golden brown.
  7. Serve immediately as a starter, accompanied by a few leaves of lamb’s lettuce or rocket if desired.

Tips

For the best results, use fresh scallops rather than frozen ones. Fresh scallops have a sweeter, more delicate flavor that pairs perfectly with the robust Parma ham. If you’re using frozen scallops, be sure to thaw them completely and pat them dry before cooking to prevent excess moisture from affecting the dish.

To achieve an even crispier topping, consider lightly toasting the breadcrumbs in a dry pan before adding them to the food processor. This step is optional but can add a lovely depth of flavor.

Variations & Substitutions

If you’re looking to mix things up, there are plenty of variations you can try with this recipe. Consider adding a pinch of red pepper flakes to the breadcrumb mixture for a hint of heat. Alternatively, swap the parsley for fresh basil or chives for a different herbal note.

For those who prefer a non-pork option, substitute the Parma ham with turkey bacon or prosciutto. Each will offer a slightly different flavor profile while maintaining the dish’s savory richness.

Storage

While these scallops are best enjoyed fresh, you can store any leftovers in an airtight container in the refrigerator for up to two days. To reheat, place them in a preheated oven at 350°F (175°C) for about 5 minutes, or until warmed through. Avoid using the microwave, as it can make the scallops rubbery.

FAQ

Can I use frozen scallops for this recipe?

Yes, you can use frozen scallops, but be sure to thaw them completely and pat them dry before cooking. This step ensures that the scallops don’t release too much moisture during baking, which can affect the texture.

What can I serve with baked scallops?

Baked scallops make an excellent starter served with a simple salad of lamb’s lettuce or rocket. For a more substantial meal, consider pairing them with a side of creamy risotto or garlic butter pasta.

How do I know when the scallops are cooked?

The scallops are done when they’re opaque and slightly firm to the touch. Be careful not to overcook them, as they can become tough and chewy. The baking time in this recipe is just right for achieving perfectly cooked scallops.

Nutrition

While I don’t have the exact nutritional breakdown, this dish is generally low in carbohydrates and high in protein, making it a great option for those following a low-carb or keto-friendly diet. The combination of olive oil and seafood provides healthy fats, while the parsley adds a touch of freshness and vitamins.

Conclusion

Baked Scallops with Parma Ham is a dish that’s as delightful to the palate as it is to the soul. With its roots in family tradition and its simplicity in preparation, it’s a recipe that invites you to savor every moment, from the aromatic anticipation in the kitchen to the first delicious bite. Whether you’re creating new memories or reliving cherished ones, I hope this recipe brings a touch of warmth and elegance to your table. Happy cooking!

Related update: Baked Scallops With Parma Ham

Related update: Savory Slow Roasted Tomatoes with Filet of Anchovy

Easy Chicken Wings | Made by Meaghan Moineau

Easy Chicken Wings

Intro

There’s something undeniably comforting about enjoying a plate of homemade chicken wings. When I was a child, my family had a tradition of gathering around the kitchen on Sunday afternoons to cook together. My grandmother would always be in charge of the chicken wings, skillfully mixing her secret sauce that had everyone licking their fingers with delight. These moments were filled with laughter, stories, and the irresistible aroma of cooking chicken wings. Today, I’m excited to share with you a recipe for Easy Chicken Wings that captures those cherished family memories and delivers the same deliciousness with a simple yet flavorful twist.

Why You’ll Love It

This Easy Chicken Wings recipe is a crowd-pleaser for numerous reasons. It’s quick to prepare, making it perfect for those spontaneous cravings or last-minute gatherings. The combination of sweet, smoky, and spicy flavors ensures every bite is a taste sensation. Plus, it’s versatile enough to accommodate various dietary preferences with simple substitutions. Whether you’re hosting a party, watching the big game, or simply want a comforting meal, these chicken wings are sure to become a favorite in your household.

Ingredients

  • Chicken wings & drumettes
  • Ketchup
  • Smoky BBQ sauce
  • Honey
  • Sesame oil
  • Capsico sauce
  • Oil for frying

Instructions

  1. Clean and wash the chicken wings and drumettes under running water, then pat them dry with paper towels.
  2. Heat oil in a pan over medium heat. Once the oil is hot, add the chicken wings and fry for 3-4 minutes or until they are golden brown. Remove from the oil and set aside.
  3. In another pan, combine ketchup, smoky BBQ sauce, honey, sesame oil, and Capsico sauce. Stir the mixture over medium flame for a few minutes until it becomes sticky and thickens.
  4. Add the fried wings into the sauce and toss them together until they are thoroughly coated with the sauce.
  5. Serve hot with your favorite dips and enjoy!

Tips

For the best results, ensure your oil is hot before adding the chicken wings to prevent them from becoming greasy. You can test this by dropping a small piece of bread into the oil; if it sizzles and browns quickly, the oil is ready. Additionally, patting the chicken wings dry before frying helps in achieving a crispy texture.

Variations & Substitutions

If you prefer a less spicy version, you can reduce or omit the Capsico sauce. For those who enjoy extra heat, consider adding a pinch of cayenne pepper to the sauce. To make this dish gluten-free, ensure that your BBQ sauce and ketchup are gluten-free certified. You might also try substituting maple syrup for honey to create a slightly different sweetness profile.

Storage

These chicken wings are best enjoyed fresh, but if you have leftovers, store them in an airtight container in the refrigerator for up to 3 days. To reheat, place them in an oven preheated to 350°F (175°C) for about 10 minutes, or until heated through. This will help maintain their crispiness.

FAQ

Can I bake these chicken wings instead of frying them?

Absolutely! To bake, preheat your oven to 400°F (200°C) and place the wings on a baking sheet lined with parchment paper. Bake for 25-30 minutes, flipping halfway through, until they are golden and cooked through. Then follow the remaining steps to coat them in the sauce.

What can I serve with these chicken wings?

These wings pair wonderfully with a variety of sides. Consider serving them with celery and carrot sticks, a classic coleslaw, or even a fresh garden salad. For dipping, ranch or blue cheese dressing adds a creamy complement to the spicy wings.

Nutrition

While I don’t have exact nutritional information for this recipe, chicken wings are a good source of protein. Keep in mind that frying adds additional calories, so if you’re watching your intake, baking might be a better option. Adjust the sauce quantities to suit your dietary needs, especially if reducing sugar or sodium is a priority.

Conclusion

These Easy Chicken Wings are more than just a dish; they’re a gateway to fond memories and joyous gatherings. With their delightful flavor and simple preparation, they are sure to become a staple in your kitchen. Whether you’re reliving old traditions or creating new ones, this recipe is a testament to the joy of sharing good food with loved ones. I hope you find as much pleasure in making and enjoying these wings as I have. Happy cooking!

Related update: Easy Chicken Wings

Hush Puppies | Made by Meaghan Moineau

Deliciously Crispy Hush Puppies

Intro

Ah, hush puppies! Just the mention of these golden, crispy delights brings back fond memories of summer barbecues at my grandparents’ house in the deep South. I can vividly remember sitting on the porch, the warm evening breeze on my face, while my grandmother expertly fried up a batch of hush puppies in her old cast-iron skillet. The aroma was irresistible, and the taste, simply unforgettable. These small, round cornmeal-based fritters have a unique charm, drawing people together with their simple yet satisfying flavor. Today, I’m excited to share this cherished family recipe with you, so you too can create wonderful memories over a plate of freshly made hush puppies.

Why You’ll Love It

Hush puppies are the perfect side dish for any occasion. Whether you’re hosting a fish fry, a barbecue, or just looking for a quick snack, these delicious morsels are sure to be a hit. Here’s why you’ll love them:

  • Quick and Easy: With a prep time of just 15 minutes, you can have a batch ready in no time.
  • Simple Ingredients: Made with pantry staples, you probably already have everything you need.
  • Crispy Exterior, Soft Interior: The perfect combination of textures makes every bite satisfying.
  • Versatile: Hush puppies pair well with a variety of meals and can be customized to your liking.

Ingredients

  • 1 cup cornmeal
  • 1 cup all-purpose flour
  • 1 tablespoon baking powder
  • 1 teaspoon salt
  • 1 egg
  • 1/2 cup milk
  • 1 small onion, finely chopped
  • Oil, for frying

Instructions

  1. Place the cornmeal, flour, baking powder, and salt into a large mixing bowl and stir until well combined.
  2. In a medium mixing bowl, crack the egg and beat it with a fork until it is well mixed. Add the chopped onion and milk to the egg and mix well.
  3. Pour the egg, milk, and onion mixture into the cornmeal and flour mixture. Stir until the batter is smooth and well combined.
  4. In a deep-fat fryer or a heavy skillet, pour in enough oil to fill 2-3 inches. Heat the oil over medium-high heat.
  5. Once the oil is hot, carefully drop heaping teaspoons of batter into the pan. You may fry 5-6 hush puppies at a time.
  6. The hush puppies will sink at first, then rise to the surface. Fry until they are golden brown, about 1-2 minutes.
  7. Use a slotted spoon to remove the hush puppies from the oil and let them drain on paper towels.
  8. Serve warm and enjoy!

Tips

For the best results, make sure your oil is hot before adding the batter. This ensures a crispy exterior without absorbing too much oil. If your hush puppies are browning too quickly, reduce the heat slightly.

Variations & Substitutions

Feel free to get creative with your hush puppies! Here are a few ideas:

  • Spicy Kick: Add a diced jalapeño or a pinch of cayenne pepper to the batter for a spicy version.
  • Cheesy Delight: Mix in a handful of shredded cheddar cheese for a cheesy twist.
  • Herb Infusion: Add chopped fresh herbs like parsley or chives for an herby flavor.
  • Gluten-Free: Replace the all-purpose flour with a gluten-free flour blend to make them gluten-free.

Storage

If you have leftovers (which is rare!), store them in an airtight container in the refrigerator for up to 3 days. To reheat, place them in a preheated oven at 350°F (175°C) for about 10 minutes until warmed through and crisp.

FAQ

Can I make hush puppies in advance?

While hush puppies are best enjoyed fresh, you can prepare the batter in advance and store it in the refrigerator for up to 24 hours. Just give it a good stir before frying.

Can I freeze hush puppies?

Yes, you can freeze cooked hush puppies. Allow them to cool completely, then place them in a single layer on a baking sheet and freeze until solid. Transfer to a freezer bag and store for up to 3 months. Reheat in the oven at 350°F (175°C) until heated through.

What can I serve with hush puppies?

Hush puppies are a versatile dish that pairs well with many meals. They are a classic accompaniment to fried fish, but also go well with barbecue, soups, or salads.

Nutrition

While hush puppies are a delicious treat, they are fried and should be enjoyed in moderation. Here’s a rough estimate of the nutritional value per serving (3 hush puppies):

  • Calories: 150
  • Fat: 7g
  • Carbohydrates: 18g
  • Protein: 3g

Conclusion

There’s something incredibly comforting about homemade hush puppies. Their crispy exterior and fluffy interior make them an irresistible treat that brings back cherished memories of family gatherings and Southern hospitality. Whether you’re serving them at a barbecue, a seafood feast, or just as a snack, they are sure to be a crowd-pleaser. I hope this recipe brings as much joy to your kitchen as it has to mine. Enjoy every crispy bite!

Related update: Hush Puppies

Related update: Easy Chicken Wings

Roasted Red Pepper & Tomato Salsa | Made by Meaghan Moineau

Roasted Red Pepper & Tomato Salsa

Intro

There’s something truly special about making salsa from scratch, especially when it’s a vibrant, flavor-packed Roasted Red Pepper & Tomato Salsa. This recipe takes me back to sunny afternoons at my grandmother’s house, where she would whip up her legendary salsa for our family gatherings. I remember the smell of roasting peppers wafting through the kitchen and the laughter of my cousins as we devoured bowls of the salsa with crispy corn chips. Today, I’m excited to share this cherished recipe with you, bringing a taste of my family’s tradition into your home.

Why You’ll Love It

This Roasted Red Pepper & Tomato Salsa is a game-changer for your appetizer spread. It’s not just about the bold flavors of roasted peppers and tomatoes, but also the delightful hint of smokiness and the fresh kick from cilantro and lime juice. This salsa is perfect for any occasion, whether you’re hosting a summer barbecue, enjoying a cozy night in, or just want to elevate your snack game. Plus, it’s naturally vegan and gluten-free, making it a crowd-pleaser for all your guests.

Ingredients

  • Fresh cilantro
  • Cumin
  • Garlic
  • Jalapeno pepper
  • Lime (juice)
  • Olive oil
  • Onion
  • Red bell pepper
  • Smoked salt (I used sea salt)
  • Tomatoes

Instructions

  1. Preheat your oven to broil.
  2. Cut the tomatoes in half and the onions in quarters. Arrange them on a tin-foil lined baking sheet.
  3. Add the red bell pepper, whole garlic cloves (with skin), and jalapeno pepper to the baking sheet.
  4. Drizzle the vegetables with a bit of olive oil and sprinkle with salt.
  5. Broil for 10 minutes, or until the skin on the tomatoes and peppers begins to char.
  6. Allow the vegetables to cool for 5 minutes.
  7. Remove the skins from the tomatoes, pepper, and garlic.
  8. Place all the vegetables (except for the cilantro and lime) into a food processor.
  9. Pulse 2-4 times, ensuring the salsa remains a bit chunky.
  10. Transfer the mixture to a bowl and toss with fresh cilantro and lime juice.
  11. Add cumin and salt to taste.
  12. Serve with corn chips or toasted pita chips.

Tips

To make the most of this salsa, choose ripe tomatoes and a vibrant red bell pepper. The quality of your produce will significantly impact the flavor. If you prefer a milder salsa, remove the seeds from the jalapeno pepper before roasting. When broiling, keep an eye on your vegetables to avoid burning; a slight char is all you need for that smoky flavor.

Variations & Substitutions

This recipe is incredibly versatile. If you want to add a bit more heat, consider adding a serrano pepper or two. For a sweeter twist, try incorporating roasted corn kernels or diced mango. If cilantro isn’t to your taste, fresh parsley can be a great substitute, bringing a different but equally fresh flavor to the salsa.

Storage

Store any leftover salsa in an airtight container in the refrigerator for up to 5 days. The flavors will meld and deepen over time, making it even more delicious the next day. Just give it a good stir before serving.

FAQ

Can I freeze this salsa?

Yes, you can freeze this salsa! Place the salsa in a freezer-safe container, leaving some room for expansion, and freeze for up to 3 months. Thaw overnight in the refrigerator before serving. Keep in mind that the texture may change slightly after freezing, but the flavor will remain delightful.

Can I make this salsa ahead of time?

Absolutely! This salsa can be made a day or two in advance. Store it in the refrigerator, and the flavors will continue to develop, making it even more flavorful when you’re ready to serve.

What can I serve with this salsa besides chips?

This salsa is incredibly versatile and pairs well with many dishes. Try it as a topping for grilled chicken or fish, mix it into a taco filling, or use it as a flavorful addition to scrambled eggs or an omelet. The possibilities are endless!

Nutrition

This salsa is not only delicious but also a healthy option. Packed with vitamins from the fresh vegetables, it’s low in calories and fat. The olive oil adds a touch of healthy fats, and the spices provide additional health benefits, making this salsa a guilt-free indulgence.

Conclusion

Roasted Red Pepper & Tomato Salsa is a delightful addition to any meal or gathering, bringing a burst of flavor and a touch of nostalgia to your table. Whether you’re a salsa aficionado or trying your hand at making salsa from scratch for the first time, this recipe is sure to please. Gather your ingredients, fire up your broiler, and enjoy the process of creating this vibrant, flavorful salsa that will have everyone coming back for more. Enjoy!

Related update: Roasted Red Pepper & Tomato Salsa

Rustic Brie Toasts with Wild Mushroom, Cranberry and Shallot | Made by Meaghan Moineau

Rustic Brie Toasts with Wild Mushroom, Cranberry, and Shallot

Intro

There’s something remarkably comforting about the scent of earthy mushrooms mingling with the crisp sweetness of cranberries and the savory richness of melted brie. This recipe for Rustic Brie Toasts with Wild Mushroom, Cranberry, and Shallot captures the essence of autumn in every bite. I remember my grandmother preparing something similar during our family gatherings in the fall. She’d gather us around her long wooden table, the fireplace crackling in the background, and serve these toasty delights as a warm-up to our festive meals. The aroma alone would draw us in, and the first bite was always a revelation of flavors. These toasts are a nod to those cherished moments and are perfect for sharing new memories with loved ones.

Why You’ll Love It

This recipe is a perfect blend of savory and sweet, offering a gourmet twist on the classic toast. The combination of creamy brie with the nuttiness of wild mushrooms and the tartness of cranberries creates a complex flavor profile that’s sure to impress. Not only are these toasts a breeze to make, but they also serve as an elegant appetizer for any occasion. Whether you’re hosting a dinner party or enjoying a quiet night by the fireplace, these toasts will elevate your dining experience.

Ingredients

  • Diced wild mushrooms
  • Diced shallot
  • 1/4 cup dried cranberries (juice sweetened if possible)
  • Fresh thyme
  • Rustic baguette
  • Olive oil
  • Wedge of beautiful brie cheese
  • Salt and pepper

Instructions

  1. Start by preheating your oven to 350 degrees Fahrenheit.
  2. While the oven is preheating, heat the olive oil in a sauté pan over medium heat.
  3. Add the diced shallot, wild mushrooms, cranberries, and a few sprigs of fresh thyme to the pan.
  4. Sauté the mixture for a few minutes until the shallot begins to wilt and the mushrooms are tender.
  5. Season with salt and pepper to taste and set aside to cool.
  6. Slice a rustic baguette into 12 pieces.
  7. Place a slice of brie on each piece of bread.
  8. Top each toast with a spoonful of the cranberry, mushroom, and shallot mixture.
  9. Arrange the toasts on an oiled cookie sheet.
  10. Bake the toasts for 15 minutes or until the brie just begins to melt.
  11. Remove from oven and serve warm. Enjoy!

Tips

  • For a more intense flavor, allow the mushroom mixture to marinate for an hour before assembling the toasts.
  • Use a sharp knife or serrated bread knife to ensure clean slices of baguette.
  • Consider using a mix of wild mushrooms for a more complex flavor profile.

Variations & Substitutions

If you prefer a different cheese, camembert can be a lovely substitute for brie, offering a similar creamy texture. For those who enjoy a bit of heat, consider adding a pinch of red pepper flakes to the mushroom mixture. If you’re avoiding gluten, opt for gluten-free bread or crackers.

Storage

While these toasts are best enjoyed fresh, any leftovers can be stored in an airtight container in the refrigerator for up to two days. To reheat, place them back in the oven at a low temperature until warmed through. Avoid microwaving, as this can make the bread soggy.

FAQ

Can I prepare the mushroom mixture in advance?

Yes, you can prepare the mushroom mixture a day in advance. Store it in an airtight container in the refrigerator and assemble the toasts just before baking.

What type of cranberries should I use?

For this recipe, juice-sweetened dried cranberries add just the right amount of sweetness. However, you can use regular dried cranberries if you prefer.

Is there a way to make this recipe vegan?

Absolutely! Replace the brie with a vegan cheese alternative and use olive oil or vegan butter for sautéing.

Nutrition

This appetizer is a delightful treat but remember that it is rich and indulgent. Each toast provides a balance of carbohydrates from the baguette, healthy fats from the olive oil and cheese, and a touch of sweetness from the cranberries. Consume in moderation as part of a balanced diet.

Conclusion

Rustic Brie Toasts with Wild Mushroom, Cranberry, and Shallot are a wonderful way to celebrate the flavors of the season. They’re simple to prepare, yet sophisticated enough to make any occasion feel special. Whether you’re rekindling old traditions or starting new ones, these toasts are sure to bring warmth and joy to your table. Enjoy them with a glass of your favorite wine or a mug of hot cider for a truly cozy experience. Bon appétit!

Related update: Rustic Brie Toasts with Wild Mushroom, Cranberry and Shallot

Related update: Roasted Red Pepper & Tomato Salsa

Pear and Pesto Crostini | Made by Meaghan Moineau

Pear and Pesto Crostini

Intro

There’s something magical about the combination of pear and pesto that instantly transports me back to my grandmother’s kitchen. I remember sitting at her rustic wooden table, eagerly watching as she prepared a variety of appetizers for our family gatherings. The distinct aroma of fresh basil and the nutty scent of roasted pine nuts would fill the air, creating an inviting atmosphere that welcomed everyone. Among all her creations, the Pear and Pesto Crostini stood out, a perfect blend of savory and sweet, crispy and creamy. Today, I’m excited to share this cherished family recipe with you.

Why You’ll Love It

This Pear and Pesto Crostini is not just a delightful appetizer; it’s a conversation starter. The crispiness of the French bread, the fragrant and nutty pesto, paired with the tender sweetness of the bosc pear, make for a symphony of flavors and textures in every bite. It’s elegant enough for a holiday party, yet simple enough to whip up for a casual weekend snack. Plus, it’s a great way to impress your guests with minimal effort!

Ingredients

  • French bread
  • Fresh basil leaves
  • 1 garlic clove
  • Pine nuts
  • Pecorino Romano cheese
  • Your best olive oil
  • Salt and pepper to taste
  • 1 Bosc pear

Instructions

  1. Preheat your oven to 400 degrees Fahrenheit.
  2. Slice the French loaf into 1/2-inch-thick slices.
  3. Brush or spray the slices with olive oil and place them on a baking sheet.
  4. Toast the bread in the oven for 10-15 minutes, or until the edges are a deep golden brown. Remove from the oven and set aside.
  5. While the bread is toasting, make your pesto. In a food processor, combine basil leaves, garlic clove, pine nuts, and Pecorino Romano cheese. Pulse until the mixture is coarse in texture, resembling coarse sand.
  6. Add in the olive oil and process until fully incorporated. Taste and adjust with salt and pepper if needed.
  7. Scrape the pesto into a serving bowl or dish and set aside. You should have about 3/4 cup of pesto.
  8. Slice the Bosc pear thinly, and when ready to serve, top each toasted bread slice with a generous spread of pesto and a slice of pear.

Tips

  • For the best results, use high-quality olive oil, as it significantly enhances the flavor of the pesto.
  • To prevent your pears from browning, you can toss them with a little lemon juice before placing them on the crostini.
  • If you’re making these for a party, you can prepare the components ahead of time and assemble just before serving.

Variations & Substitutions

If you’re in the mood for a twist, consider swapping the Pecorino Romano for Parmesan cheese, which offers a slightly milder taste. You can also experiment with different nuts — walnuts or almonds can be a delightful substitute for pine nuts. For a touch of sweetness, drizzle a bit of honey over the top right before serving. Lastly, if pears are out of season, feel free to use apples or figs as an alternative fruit topping.

Storage

If you have leftovers (though they tend to disappear quickly!), store the components separately. Keep the toasted bread in an airtight container at room temperature for up to two days. The pesto can be stored in the refrigerator for up to a week. Just give it a stir before using it again. Unfortunately, sliced pears do not store well, so it’s best to slice them fresh as needed.

FAQ

Can I make the pesto in advance?

Yes, absolutely! The pesto can be made up to a week in advance and stored in an airtight container in the refrigerator. Just give it a good stir before using it, as the oil may separate over time.

What type of bread works best for crostini?

French bread is a classic choice due to its crusty exterior and soft interior, which toasts up perfectly. However, a baguette or ciabatta can also be used if you prefer a slightly different texture.

Is there a nut-free version of this recipe?

Definitely! You can omit the pine nuts entirely from the pesto, or substitute them with sunflower seeds for a nut-free version. The pesto will still be deliciously flavorful!

Nutrition

While I don’t have the exact nutritional breakdown, this appetizer is fairly light, especially if you’re mindful of the amount of olive oil used. The pears add a natural sweetness and a dose of fiber, while the pesto offers healthy fats from the olive oil and pine nuts. It’s a wonderful choice for those looking to indulge without guilt.

Conclusion

Whether you’re hosting a dinner party or looking for a delicious way to enjoy a quiet evening at home, this Pear and Pesto Crostini will not disappoint. It’s a testament to the power of simple, high-quality ingredients coming together to create something truly special. I hope this recipe brings as much joy to your table as it has to mine over the years. Enjoy every bite!

Related update: Pear and Pesto Crostini

Related update: Rustic Brie Toasts with Wild Mushroom, Cranberry and Shallot

Asparagus and Pea Soup: Real Convenience Food | Made by Meaghan Moineau

Asparagus and Pea Soup: Real Convenience Food

Intro

Growing up, one of my fondest memories was gathering around the kitchen table with my family for a bowl of my grandmother’s homemade soup. The aroma of fresh vegetables simmering on the stove was a comforting promise of warmth and nourishment. Fast forward to today, I find myself reaching for those same comforts, but with the ease and simplicity that modern life demands. This Asparagus and Pea Soup is the perfect blend of nostalgia and convenience. It’s a recipe that brings back those cherished memories while fitting seamlessly into a busy lifestyle.

Why You’ll Love It

This Asparagus and Pea Soup is not just a treat for your taste buds but also a boon for your schedule. It’s quick to prepare, requiring minimal ingredients and time, yet it’s packed with flavor and nutrition. Whether you’re looking for a light lunch, a starter for a dinner party, or a comforting evening meal, this soup fits the bill. The vibrant color and fresh taste make it a dish you’ll return to time and again.

Ingredients

  • 1 bag of frozen asparagus
  • 2 tablespoons extra virgin olive oil (EVOO)
  • 2 cloves of garlic, chopped
  • 1 onion, chopped
  • 1 cup frozen peas
  • 4 cups low sodium vegetable broth
  • Salt and pepper to taste
  • Pinch of red pepper flakes (optional)
  • Chives, for garnish
  • Creme fraiche, sour cream, or Greek yogurt, for serving

Instructions

  1. Chop the garlic and onions.
  2. In a large pot, heat the EVOO over medium heat. Add the chopped onions and sauté for a few minutes until they start to become translucent.
  3. Add the garlic to the pot and continue to cook for another couple of minutes.
  4. Add the whole bag of frozen asparagus to the pot and pour in the vegetable broth until everything is covered.
  5. Season with salt, pepper, and a pinch of red pepper flakes if you’re using them.
  6. Simmer the mixture until the asparagus is bright green and tender. If the asparagus is thawed, this will only take a couple of minutes.
  7. Turn off the heat and use an immersion blender to puree the soup until smooth.
  8. Add the frozen peas to the soup. The residual heat will thaw them quickly. Puree again until the soup reaches your desired thickness.
  9. Serve hot, topped with chives and a dollop of creme fraiche, sour cream, or Greek yogurt.

Tips

To ensure the best flavor, be sure not to overcook the asparagus. As soon as it turns bright green and tender, it’s ready to be blended. If you don’t have an immersion blender, you can carefully transfer the soup to a regular blender in batches. Just be sure to let it cool slightly before blending to avoid any accidents.

Variations & Substitutions

Feel free to experiment with this recipe by adding other green vegetables such as spinach or kale. If you prefer a richer taste, substitute a portion of the vegetable broth with coconut milk or cream. For a more robust flavor, try roasting the asparagus before adding it to the soup. You can also add a handful of fresh herbs like basil or mint for an extra burst of flavor.

Storage

This soup stores beautifully, making it ideal for meal prep. Store any leftovers in an airtight container in the refrigerator for up to three days. For longer storage, freeze the soup in individual portions for up to three months. When ready to eat, thaw in the refrigerator overnight and reheat on the stove.

FAQ

Can I use fresh asparagus instead of frozen?

Absolutely! Fresh asparagus will work wonderfully in this recipe. Just be sure to trim the ends and cut them into smaller pieces before adding them to the pot. The cooking time may be slightly reduced, so keep an eye on the color and tenderness of the asparagus.

Is there a way to make this soup vegan?

Yes, this soup is naturally vegan as long as you choose to garnish it with a plant-based option like coconut yogurt or a drizzle of olive oil instead of creme fraiche or sour cream.

What can I serve with this soup?

This soup pairs well with crusty bread or a simple side salad. If you’re looking for something more substantial, try serving it with a grilled cheese sandwich or a quinoa salad.

Nutrition

This Asparagus and Pea Soup is a nutritious choice, providing a good source of fiber, vitamins A and C from the asparagus, and protein from the peas. The vegetable broth keeps it light and low in calories, while the optional toppings add a touch of indulgence without going overboard.

Conclusion

With its vibrant color and refreshing taste, Asparagus and Pea Soup is a delightful way to enjoy the flavors of spring year-round. Whether you’re reminiscing about comforting family meals or creating new traditions of your own, this recipe is sure to find a place in your culinary repertoire. So grab that bag of frozen asparagus and get ready to savor simplicity at its finest. Enjoy!

Related update: Asparagus and Pea Soup: Real Convenience Food

Related update: Pear and Pesto Crostini

Related update: Carrot and Coriander Soup

Traditional Panzanella | Made by Meaghan Moineau

Traditional Panzanella: A Taste of Tuscan Summer

Intro

Ah, Panzanella! This delightful Tuscan salad offers a bite of sun-drenched summer days and leisurely family gatherings. My first encounter with this classic dish was at my grandmother’s kitchen table in Italy, where every meal was an event, and every dish told a story. As a child, I eagerly watched her transform day-old bread and the ripest tomatoes from her garden into a flavorful masterpiece. The aroma of fresh basil mingling with olive oil and vinegar still transports me back to those cherished summer afternoons. Now, I invite you to experience the simple joys and deep flavors of this traditional Panzanella recipe, a dish that captures the essence of Tuscany in every bite.

Why You’ll Love It

Why will you love this Traditional Panzanella? Let me count the ways:

  • Simple Ingredients: This recipe calls for just a handful of ingredients, most of which you may already have in your pantry.
  • Quick and Easy: With minimal preparation and no cooking required, it’s a perfect dish for busy days.
  • Refreshing and Flavorful: The combination of juicy tomatoes, fragrant basil, and tangy vinegar is refreshing and full of flavor.
  • Sustainable: It’s a great way to use up day-old bread, preventing waste and creating something delicious.
  • Versatile: Easily adaptable to suit your taste preferences or dietary needs.

Ingredients

  • 6 slices of day-old Tuscan bread
  • 1/4 cup extra virgin olive oil
  • 1 cup fresh basil leaves, chopped
  • 1 red onion, thinly sliced
  • 2 tablespoons red wine vinegar
  • Salt and pepper, to taste
  • 4 ripe tomatoes, diced

Instructions

  1. In a large bowl, combine the bread with enough water to cover and let it stand for at least 20 minutes or until it’s soft.
  2. Drain the bread and squeeze out as much water as you can. Crumble the bread into a serving bowl.
  3. Scatter the diced tomatoes, sliced onions, and chopped basil over the crumbled bread.
  4. Dress the Panzanella with extra virgin olive oil and red wine vinegar. Season with salt and pepper and toss well to combine.
  5. Taste and adjust the seasoning with more olive oil, salt, or vinegar as needed.
  6. Leave the Panzanella to stand for about 15 minutes to allow the flavors to meld. Serve at room temperature.

Tips

For the best Panzanella, use high-quality ingredients. Opt for the freshest tomatoes you can find, and don’t skimp on the olive oil—it’s integral to the salad’s flavor. If your bread is very hard, allow it to soak a bit longer until it’s sufficiently softened. Lastly, Panzanella is best when served at room temperature, allowing the flavors to fully develop.

Variations & Substitutions

Panzanella is a wonderfully adaptable dish. Here are a few ideas to make it your own:

  • Add Protein: For a heartier salad, add some fresh mozzarella, grilled chicken, or canned tuna.
  • Vegetable Variations: Include cucumbers, bell peppers, or even olives for added crunch and flavor.
  • Herb Alternatives: If basil isn’t your favorite, try parsley or mint for a different herbal note.
  • Different Breads: While traditional Panzanella uses Tuscan bread, any crusty bread like ciabatta or a baguette will work.

Storage

Panzanella is best enjoyed fresh, but if you have leftovers, store them in an airtight container in the refrigerator for up to one day. Keep in mind that the bread will continue to absorb moisture and flavors, so you may need to refresh the salad with a bit more olive oil or vinegar before serving.

FAQ

Can I use fresh bread instead of day-old bread?

While you can use fresh bread, day-old or slightly stale bread is preferred as it holds up better to the dressing and maintains a pleasant texture. If using fresh bread, you might consider toasting it lightly first.

Can I make Panzanella ahead of time?

Panzanella is best made shortly before serving, as this allows the bread to soak up the flavors without becoming too soggy. However, you can prepare the vegetables and dressing a few hours in advance and combine them with the bread just before serving.

What kind of vinegar should I use?

Red wine vinegar is traditional for Panzanella, lending a tangy depth to the dish. However, feel free to experiment with other vinegars like balsamic or apple cider for a unique twist.

Nutrition

This traditional Panzanella is a nutritious addition to any meal. Rich in vitamins A and C from the tomatoes and basil, and healthy fats from the olive oil, it’s a wholesome and satisfying choice. The dish is naturally vegan and can be gluten-free if made with gluten-free bread.

Conclusion

Traditional Panzanella is more than just a salad; it’s a celebration of summer flavors and culinary heritage. With its simple preparation and fresh, vibrant ingredients, it’s no wonder this dish has been cherished across generations. Whether you’re hosting a garden party or enjoying a quiet family dinner, Panzanella brings a touch of Tuscany to your table. I hope this recipe finds a special place in your home, creating new memories as it has for me. Buon appetito!

Related update: Traditional Panzanella

Related update: Avocado Chicken Salad

Tuna Mexi Melts | Made by Meaghan Moineau

Tuna Mexi Melts

Intro

Welcome to a delightful fusion of flavors with our Tuna Mexi Melts! This recipe is a warm homage to my childhood, where every family gathering would invariably feature a platter of deliciously cheesy, spicy snacks. My grandmother, the undisputed queen of kitchen creativity, would whip up her signature tuna melts with a twist that made them memorable. Now, I’m thrilled to share this cherished recipe with you, hoping it brings as much joy to your table as it has to ours for generations.

Why You’ll Love It

These Tuna Mexi Melts are more than just a snack; they’re a celebration of bold, vibrant flavors. The creamy, spicy tuna mixture topped with melted pepper jack cheese on crispy French bread is a treat for your taste buds. Whether you’re looking for a quick lunch, a party appetizer, or a cozy dinner option, these melts are versatile and easy to make, ensuring you’ll have more time to enjoy with your loved ones.

Ingredients

  • 1 loaf of French bread
  • 2 tablespoons butter, melted
  • 1 teaspoon chile powder
  • 1 teaspoon cumin
  • 1 teaspoon garlic powder
  • 1/2 cup sour cream
  • 2 cans of tuna, drained
  • 1/2 cup green onions, chopped
  • 1 jalapeno, diced
  • 1 tablespoon lime juice
  • 1/4 cup cilantro, chopped
  • 2 roma tomatoes, diced
  • 1/2 teaspoon paprika
  • Salt, to taste
  • 1 cup shredded cheddar cheese
  • 8 slices pepper jack cheese
  • Your favorite picante sauce

Instructions

  1. Preheat your oven to 350 degrees Fahrenheit.
  2. Start by preparing the picante sauce. Combine all sauce ingredients in a food processor and blend until smooth. Season with salt to taste.
  3. Slice the French bread into 1-inch slices. Brush each slice with melted butter.
  4. Sprinkle the slices with cumin, chile powder, and garlic powder for added flavor.
  5. In a mixing bowl, combine sour cream, tuna, green onions, jalapeno, lime juice, cilantro, roma tomatoes, paprika, and shredded cheddar cheese. Mix until well combined.
  6. Spoon a generous amount of the tuna mixture onto each bread slice.
  7. Top each with a slice of pepper jack cheese.
  8. Place the prepared slices on a baking sheet and bake for 10-15 minutes, or until the cheese is melted and bubbling.
  9. Serve warm with a side of picante sauce for dipping.

Tips

For the best results, use fresh, crusty French bread. If you prefer a spicier kick, consider adding extra jalapeno or a pinch of cayenne pepper. Make sure to drain the tuna well to avoid a soggy mixture. Always taste the mixture before placing it on the bread to adjust seasoning to your preference.

Variations & Substitutions

If you want to switch things up, try using different types of cheese. Monterey Jack or even a sharp cheddar can add a unique flavor profile. For those who prefer a lighter version, Greek yogurt can be a substitute for sour cream. Vegetarians can replace tuna with mashed chickpeas for a similar texture.

Storage

Tuna Mexi Melts are best enjoyed fresh out of the oven. However, if you have leftovers, store them in an airtight container in the refrigerator for up to two days. To reheat, place them in the oven at 350 degrees Fahrenheit until warmed through.

FAQ

Can I make the tuna mixture in advance?

Absolutely! You can prepare the tuna mixture a day ahead and store it in the refrigerator. This can enhance the flavors, making your melts even tastier.

What can I serve with Tuna Mexi Melts?

These melts pair wonderfully with a fresh salad or a bowl of tomato soup. They also make a great addition to a party platter with other finger foods.

Can I use canned tuna in oil?

Yes, you can use canned tuna in oil, but make sure to drain it thoroughly to prevent the mixture from becoming too oily.

Nutrition

While these tasty treats are indulgent, they do provide a good source of protein from the tuna and calcium from the cheese. To make them a bit healthier, consider using whole grain bread and reducing the amount of cheese.

Conclusion

Tuna Mexi Melts are a delightful, easy-to-make treat that will become a household favorite. With their bold flavors and cheesy goodness, they are perfect for any occasion. Whether you’re reminiscing about family gatherings or creating new memories, these melts bring comfort and joy to every bite. Enjoy the warmth and satisfaction of making a dish that is not only delicious but also a piece of my family’s culinary history. Happy cooking!

Related update: Tuna Mexi Melts

Related update: OREO Cookie Balls – Snowman