Pear and Pesto Crostini | Made by Meaghan Moineau

Pear and Pesto Crostini | Made by Meaghan Moineau

Title: A Taste of Nostalgia: Savory Pear and Pesto Crostini
Description: Dive into the mouthwatering world of Pear and Pesto Crostini, a delectable appetizer that brings together the rich flavors of fresh basil pesto and the sweet juiciness of Bosc pears. Perfect for nostalgic family gatherings or a sophisticated soirée, this recipe is sure to become a cherished favorite.

---


There's something timeless about the smell of fresh basil and garlic wafting through the kitchen. It takes me back to Sunday afternoons spent in my grandmother's sunlit kitchen, where the family gathered around the rustic wooden table, eagerly awaiting a spread of delightful appetizers. Among her many culinary treasures, the Pear and Pesto Crostini held a special place in our hearts.


The magic begins with a simple loaf of French bread. Preheat your oven to 400 degrees and slice the loaf into elegant 1/2-inch-thick rounds. A gentle brush of your best olive oil transforms these humble slices into golden vessels of flavor. As they toast to a deep golden brown in the oven, the anticipation builds.


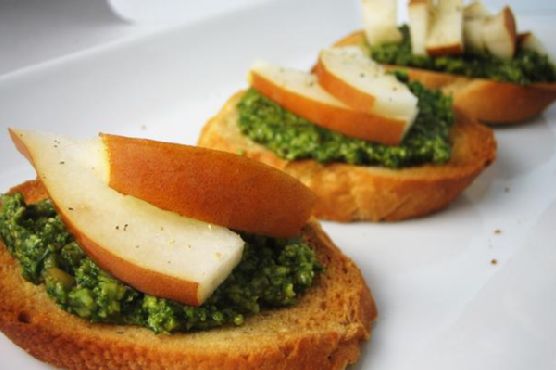
Meanwhile, the heart of this dish—the vibrant pesto—is crafted. In a dance of flavors, fresh basil leaves, a clove of garlic, pine nuts, and tangy Pecorino Romano cheese come together in a food processor. The transformation is magical, as the ingredients are pulsed into a coarse texture, reminiscent of coarse sand. A drizzle of olive oil brings it all together, creating a pesto that is as fragrant as it is flavorful. Taste, and season with salt and pepper until it sings in harmony.


As the bread cools, I remember the laughter and stories shared in my grandmother's kitchen. We would gather around, eager to top each crostini with a dollop of the green gold pesto, and a slice of sweet Bosc pear. The combination of savory and sweet, crunchy and creamy, was a revelation that delighted our taste buds and hearts alike.


This appetizer, with a difficulty rating of 3 out of 10, is not only simple to prepare but also a stunning addition to any gathering. Whether you're hosting a casual brunch or an elegant dinner party, Pear and Pesto Crostini is sure to impress. It's a dish that invites conversation, evokes memories, and creates new ones with each bite.


So, gather your loved ones, and let the aroma of fresh pesto fill your home. Create a new tradition with this exquisite appetizer, and savor the flavors of nostalgia with each delightful bite.
Read more about Appetizers

Read more about Main Dishes

Read more about Desserts

Orange-Fig Teacake with Caramel Glaze | Made by Meaghan Moineau

Orange-Fig Teacake with Caramel Glaze | Made by Meaghan Moineau

Title: "Savoring Sweet Memories: The Delightful Dance of Orange-Fig Teacake with Caramel Glaze"
Description:

Indulge in the harmonious blend of citrusy and fruity notes with our Orange-Fig Teacake, crowned with a luscious caramel glaze. This blog post will guide you through crafting this exquisite dessert while sharing a heartfelt family memory that adds a sprinkle of nostalgia to the mix. Discover the joy of baking and the magic of cherished moments wrapped in a delectable teacake.


---


The Orange-Fig Teacake with Caramel Glaze: A Slice of Nostalgia

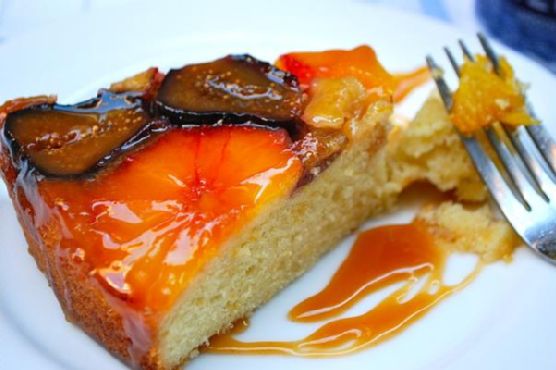
There's something undeniably comforting about the aroma of a freshly baked cake wafting through the house. Every year, as the summer sun began to mellow into the gentle warmth of autumn, my grandmother would prepare her legendary Orange-Fig Teacake. The enticing fusion of zesty oranges and sweet figs, complemented by a rich caramel glaze, made it a dessert to remember. It was more than just a cake; it was a tradition, a marker of seasons changing, and a canvas for family memories.


Ingredients:

- 2 cups all-purpose flour


- 1 1/2 teaspoons baking powder


- 1 teaspoon ground cardamom


- 1/2 teaspoon salt


- 1 cup unsalted butter, softened


- 1 cup sugar


- 3 large eggs


- 1/2 cup heavy cream, plus more for caramel


- 1 teaspoon vanilla extract


- 2 navel oranges


- 6-8 fresh figs


- 1 cup sugar (for caramel sauce)


- 1/4 cup water


- 2 tablespoons butter


Instructions:

1. Preheat your oven to 350°F (175°C). Prepare a 9" springform pan by spraying it with baking spray or buttering and sprinkling it with 2 tablespoons of sugar.


2. Zest one orange and add the zest to your mixing bowl. Peel both oranges, removing all pith, and slice into 1/4" rounds. Halve the figs.


3. In a large bowl, combine the softened butter, orange zest, and sugar. Beat until light and fluffy.


4. Add the eggs, heavy cream, and vanilla extract to the mixture. Beat well until smooth.


5. Sift together the flour, baking powder, cardamom, and salt. Gently incorporate the dry ingredients into the batter.


6. Arrange the fig halves and orange slices in the prepared pan. Spoon the batter over the fruit, spreading it evenly and tapping the pan to release air bubbles.


7. Bake for approximately 45 minutes, or until a tester comes out clean. Allow the cake to cool slightly before inverting it onto a rack to cool completely.


8. For the caramel glaze, combine sugar and water in a saucepan over medium-high heat. Once the sugar turns a golden amber, turn off the heat and slowly add the warmed heavy cream, stirring constantly.


9. Add the butter, stirring until smooth. Let the glaze cool for a few minutes before brushing it over the cake while still warm.


A Slice of Memory:

I vividly recall the annual family gatherings where my grandmother would serve this delightful creation. As children, my siblings and I would gather around the kitchen table, eagerly watching her expertly layer the figs and oranges before gently spreading the batter. The kitchen would fill with the sweet and spicy aroma of baking cardamom and citrus. The anticipation of that first bite, the sweet burst of orange and fig mingling with the creamy caramel, was pure bliss. Each slice of the teacake was a reminder of the love and warmth that bound our family together.


With every bite of this Orange-Fig Teacake, I am transported back to those cherished moments, surrounded by laughter and the comforting embrace of family. I hope this recipe brings the same joy and warmth to your home as it has to mine.


Difficulty Rating: 6/10
Classification: Dessert

Whether you're a seasoned baker or a novice in the kitchen, this teacake offers a delightful challenge that promises to reward you with a taste experience steeped in history and heart. Enjoy the journey of baking, and may each bite bring you as much joy as it has brought my family over the years.

Read more about Appetizers

Read more about Main Dishes

Read more about Desserts

Baked Alaska | Made by Meaghan Moineau

Baked Alaska | Made by Meaghan Moineau

**Title: Nostalgic Elegance: Crafting the Perfect Baked Alaska**


**Description:** Discover the timeless allure of Baked Alaska, a classic dessert that combines the richness of cake, the chill of ice cream, and the ethereal beauty of meringue. This blog post offers a step-by-step guide to creating this show-stopping dessert while sharing a heartfelt family memory that adds a touch of nostalgia to every bite. Perfect for those looking to impress at their next dinner party or simply indulge in a sweet trip down memory lane.


---


### The Art of Baked Alaska: A Dessert with a Story


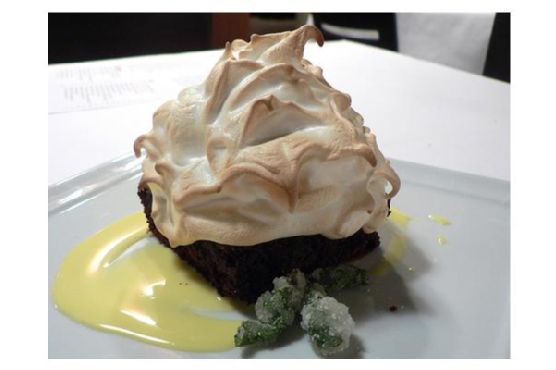
Baked Alaska is more than just a dessert; it's an experience—a theatrical finale to any meal that leaves your guests in awe. This classic dessert combines the simplicity of a round cake, the delight of creamy ice cream, and the elegance of golden meringue peaks. With its captivating contrast of hot and cold, Baked Alaska is a sweet symphony that dances on your taste buds.


#### Ingredients You'll Need:


- Round cake


- 1/2 gallon ice cream


- 4 egg whites


- 1/4 teaspoon cream of tartar


- 1 cup powdered sugar


#### Step-by-Step Instructions:


1. **Prepare the Ice Cream Layer**:


Grease a 7-inch bowl with flavorless oil or unsalted butter. Allow the ice cream to soften until it's workable. Pack it tightly into the bowl, smoothing the top. Freeze until it hardens completely.


2. **Make the Meringue**:


Beat the egg whites until foamy. Add the cream of tartar and continue whipping until stiff peaks form. Gradually fold in the powdered sugar, ensuring the meringue is smooth and glossy.


3. **Assemble the Baked Alaska**:


Place the frozen cake on a plate slightly larger than the cake. Unmold the ice cream onto the center of the cake. If the ice cream is stubborn, dip the bowl briefly in warm water to release it.


4. **Decorate with Meringue**:


"Frost" the cake and ice cream with the meringue, covering it completely. Use a spoon or spatula to create decorative peaks.


5. **Bake to Perfection**:


Preheat your oven to 450°F. Bake the assembled Baked Alaska for 6-7 minutes until the meringue peaks are golden brown. Store in the freezer until you're ready to serve.


#### A Family Memory: The Sweetness of Tradition


Every year, my family gathers for a cherished tradition—Grandma's birthday. Amongst the laughter and shared stories, Baked Alaska takes center stage. I remember one year when I was young, standing on a chair to get a better view as my mother carefully crafted the dessert. The kitchen was filled with the sweet aroma of cake and sugary meringue. As we all gathered around the table, eyes wide with anticipation, Grandma's eyes sparkled with joy. The Baked Alaska was more than a dessert; it was our family's love, layered with memories of the past and hopes for the future. Even now, every bite transports me back to that warm kitchen, surrounded by love and laughter.


#### Difficulty Rating: 6/10


Creating Baked Alaska requires some skills, especially with the meringue and timing. However, with patience and practice, this dessert can become a beautiful centerpiece for any occasion.


#### Classification: Dessert


This spectacular creation is the quintessential dessert—a perfect blend of textures and temperatures that will leave a lasting impression on your guests.


---


Embrace the nostalgia and the sweet challenge of making Baked Alaska. Whether it's for a special occasion or simply to relive fond memories, this dessert promises to be a delightful journey for both the baker and those fortunate enough to enjoy it.

Read more about Appetizers

Read more about Main Dishes

Read more about Desserts

Roasted Pumpkin and Barley Risotto | Made by Meaghan Moineau

Roasted Pumpkin and Barley Risotto | Made by Meaghan Moineau

# Cozy Autumn Nights: Savoring Roasted Pumpkin and Barley Risotto


## A Hearty Dish That Warms the Soul


### Description:


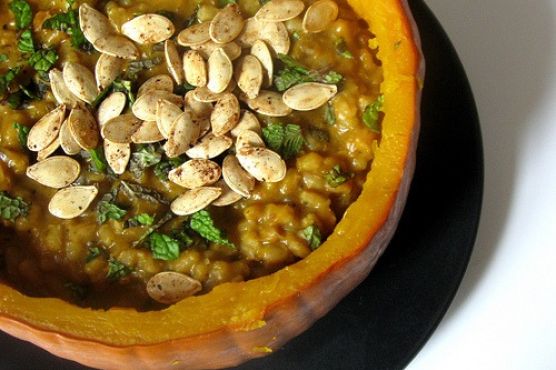
Experience the flavors of fall with our Roasted Pumpkin and Barley Risotto, a comforting main dish that combines the rich, earthy taste of roasted pumpkin with the nutty texture of barley. This recipe is not only a feast for the taste buds but also a nostalgic journey that brings back fond family memories. Rated 6 out of 10 in difficulty, it’s a rewarding culinary challenge fit for any home chef eager to create something special.


---


### Ingredients:


- 1 cup barley


- 2 tablespoons butter


- 4 cups chicken stock


- 1 teaspoon cumin powder


- 1 teaspoon dried thyme


- Fresh mint leaves for garnish


- 2 cloves of garlic, minced


- 1 small piece of ginger, grated


- 1 diced onion


- 1 teaspoon oregano


- 1 teaspoon pink peppercorns


- 2 cups pumpkin puree


- Salt and pepper to taste


- 1/2 cup sour cream


- 1 tablespoon Worcestershire sauce


### Instructions:


1. **Prepare the Pumpkin:**


- Preheat your oven to 400°F (200°C).


- Cut the pumpkin, removing the seeds and strings.


- Place the pumpkin halves cut side down in a baking dish with 1/4 inch of water.


- Bake for 45 minutes or until the flesh is soft and cooked through.


- Scoop out the cooked flesh and puree it with a splash of milk until smooth.


2. **Sauté and Season:**


- In a large skillet, melt the butter over medium heat.


- Add the diced onions and minced garlic, cooking until translucent.


- Stir in the barley, toasting lightly for about 2 minutes.


- Season with salt, pepper, cumin, thyme, and oregano.


3. **Cook the Risotto:**


- Add 2 cups of chicken stock to the skillet.


- Cook, stirring occasionally, until the liquid is nearly absorbed.


- Stir in the pumpkin puree.


- Gradually add the remaining stock, 1/2 cup at a time, allowing each addition to be absorbed before adding more.


- Continue to cook until the barley becomes creamy and tender.


4. **Finish and Serve:**


- Remove from heat and stir in the sour cream and Worcestershire sauce.


- Serve immediately, garnished with fresh mint leaves and a dollop of pumpkin-sour cream.


### A Trip Down Memory Lane


As the aroma of roasted pumpkin fills the kitchen, I am transported back to my grandmother's cozy house on chilly autumn evenings. She would prepare this comforting risotto with love, her hands skillfully working the ingredients into a symphony of flavors. The warmth of the dish, combined with the laughter and stories shared around the dinner table, made each meal a cherished memory. My grandmother always knew how to turn simple ingredients into a dish that not only nourished our bodies but also our souls. This Roasted Pumpkin and Barley Risotto is more than just a meal; it’s a reminder of family, love, and the beauty of home-cooked food.


---


### Conclusion:


Whether you're looking to impress guests or simply indulge in a cozy night in, this Roasted Pumpkin and Barley Risotto is the perfect main dish. With its blend of spices and creamy texture, it captures the essence of fall while offering a heartwarming nod to family traditions. Enjoy the process of creating this delightful dish and savor the memories it may bring to your table.

Read more about Appetizers

Read more about Main Dishes

Read more about Desserts