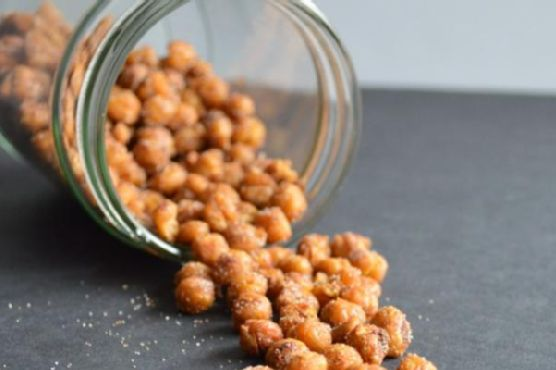
Cinnamon & Sugar Roasted Chickpeas
Intro
There’s something incredibly comforting about the aroma of cinnamon wafting through the air, evoking memories of cozy gatherings and delightful treats. I still remember the first time I tried roasted chickpeas at a family picnic. My grandmother, with her warmth and wisdom, had crafted a simple yet irresistible snack that captivated everyone. The subtle sweetness combined with a hint of spice was unlike anything I had tasted before. Today, I’m thrilled to share this cherished recipe with you: Cinnamon & Sugar Roasted Chickpeas. It’s a perfect blend of nostalgia and modern snacking.
Why You’ll Love It
This recipe combines the wholesome goodness of chickpeas with the delightful flavors of cinnamon and sugar. Whether you’re looking for a healthy snack to curb your cravings or a unique treat to impress your friends, these roasted chickpeas tick all the boxes. They’re crunchy, sweet, and just a bit spicy—everything you need in a satisfying snack.
Ingredients
- Canned garbanzo beans
- Olive oil
- Maple syrup
- Cinnamon
- Cane sugar
Instructions
- Preheat oven to 425°F (220°C).
- Line a baking sheet with parchment paper or a silicone mat.
- Drain and rinse the chickpeas.
- Place the chickpeas between two sheets of paper towels and rub them gently to absorb the excess water. Pick out any loosened skin from the chickpeas. Don’t worry if you can’t get all of them out.
- Pour the dried chickpeas into a small bowl and mix in the olive oil, maple syrup, and cinnamon until well incorporated.
- Place the chickpeas on the baking sheet and bake for 15 minutes.
- After 15 minutes, give the chickpeas a quick stir.
- Continue baking the chickpeas at 3-4 minute increments. When they are browned and look quite dried, take them out of the oven. The longer you leave them in the oven, the crunchier they will be, but be careful not to burn the chickpeas!
- Let them cool for a few minutes and sprinkle the sugar on the roasted chickpeas. Enjoy!
Tips
For the best results, ensure the chickpeas are thoroughly dried before roasting. This helps them achieve that desirable crunch. If you have time, let the chickpeas air-dry for a bit longer after patting them with paper towels.
Variations & Substitutions
Feel free to get creative with this recipe! You can substitute the maple syrup with honey or agave syrup for a different sweetness profile. If you’re in the mood for a spicy kick, add a pinch of cayenne pepper to the mix. You can also experiment with different spices like nutmeg or cardamom to create your unique blend.
Storage
Store your roasted chickpeas in an airtight container at room temperature for up to a week. They make a great grab-and-go snack, perfect for lunchboxes or afternoon pick-me-ups.
FAQ
Can I use dried chickpeas instead of canned?
Yes, you can! However, you’ll need to cook the dried chickpeas first. Soak them overnight and boil them until tender before starting the roasting process. This adds an extra step, but it’s a great way to use up pantry staples.
Are roasted chickpeas healthy?
Absolutely! Chickpeas are a fantastic source of protein and fiber, making them a nutritious snack option. Plus, by controlling the ingredients in this homemade version, you can ensure they fit your dietary needs.
Nutrition
While exact nutritional values can vary depending on the specific brands you use, this snack is generally low in calories yet high in protein and fiber. It’s a guilt-free way to satisfy your sweet tooth!
Conclusion
Cinnamon & Sugar Roasted Chickpeas are more than just a snack; they’re a delightful fusion of flavors that brings warmth and joy to any occasion. Whether you’re savoring them on a quiet afternoon or sharing them with loved ones, these chickpeas are sure to become a beloved staple in your home. Enjoy the delicious crunch and the comforting scent of cinnamon with every bite!
Related update: Cinnamon & Sugar Roasted Chickpeas
Related update: Curious George's Gluten-Free Banana Nut Bread