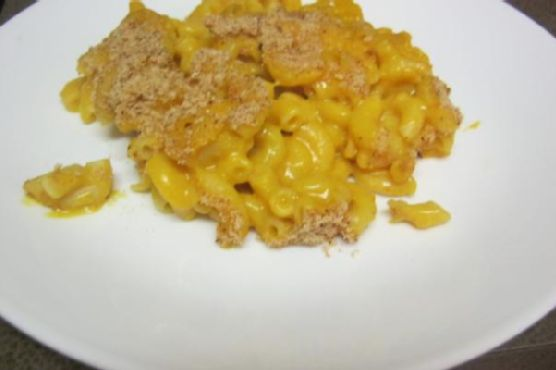
Creamy Vegan Butternut Squash Mac and Cheese
Intro
There’s something incredibly comforting about a warm bowl of mac and cheese. It takes me back to chilly autumn afternoons at my grandmother’s house, where the aroma of cheese and spices filled the air, making everything feel just right. As a child, I remember peeking into the oven, eagerly waiting for that bubbly, golden crust to form. Now, with a modern twist, I bring you a creamy vegan butternut squash mac and cheese that pays homage to those nostalgic days while embracing a more plant-based lifestyle. It’s a dish that wraps you in warmth and nostalgia, perfect for sharing with loved ones or enjoying as a cozy meal for one.
Why You’ll Love It
This creamy vegan butternut squash mac and cheese is a delightful twist on a classic comfort food that will satisfy your cravings without any dairy. Here’s why you’ll love it:
- Rich and Creamy: The butternut squash puree adds a velvety texture that perfectly mimics traditional cheese sauce.
- Healthy Ingredients: With nutritional yeast and butternut squash, this dish is packed with vitamins and minerals.
- Family-Friendly: It’s a hit with kids and adults alike, making it a perfect family dinner option.
- Easy to Make: With simple steps and readily available ingredients, you can whip up this dish any day of the week.
- Great for Entertaining: Impress your guests with a dish that’s both comforting and health-conscious.
Ingredients
- 1 cup breadcrumbs
- 1 cup pureed butternut squash
- 2 cups elbow macaroni
- 1/4 cup nutritional yeast
- 1/2 teaspoon black pepper
- 1 teaspoon salt
- 1 cup light soy milk
- 2 tablespoons vegan buttery spread
- 1 cup vegan cheddar shreds
- 1 cup water
Instructions
- Preheat your oven to 350°F (175°C).
- Bring a large pot of salted water to a boil over medium heat. Add in the elbow macaroni and cook until pasta is al dente, about 8-10 minutes.
- While waiting for the pasta to cook, begin preparing your sauce. In a medium-sized saucepan, melt the vegan buttery spread over medium heat.
- Add in the nutritional yeast and mix together to form a paste.
- Slowly add the soy milk, whisking continuously to ensure a lump-free sauce. Allow the mixture to simmer for about 5 minutes, or until the sauce begins to thicken.
- Stir in the pureed butternut squash, mixing thoroughly to ensure everything is well blended. The butternut squash will also help to thicken the sauce.
- Add the vegan cheddar shreds and let sit for 1 to 2 minutes, or until the sauce has a creamy, velvety smooth consistency.
- Remove the sauce from heat and let it sit for a moment.
- Drain the pasta and add it to the cheese sauce. Stir together until the pasta is well coated.
- Pour the mixture into a greased 9 x 9-inch baking pan.
- Sprinkle breadcrumbs over the macaroni and cheese.
- Bake for 15 minutes, or until the cheese begins to bubble and the breadcrumbs are golden brown.
- Serve warm and enjoy this creamy vegan home-style comfort food!
Tips
- For extra creaminess, add a splash more soy milk if the sauce is too thick.
- If you prefer a spicier kick, add a pinch of cayenne pepper to the sauce.
- To make your own breadcrumbs, simply toast some stale bread and pulse it in a food processor until fine.
Variations & Substitutions
This dish is versatile and adaptable to suit your preferences:
- Gluten-Free: Use gluten-free pasta and breadcrumbs to make this dish gluten-free.
- Nut-Free: Ensure that your vegan cheddar shreds and buttery spread are nut-free if allergies are a concern.
- Vegetable Add-ins: Stir in some cooked broccoli or peas for added nutrition and texture.
Storage
Store any leftovers in an airtight container in the refrigerator for up to 3 days. Reheat in the oven or microwave until warmed through. For longer storage, this dish can be frozen for up to a month. Thaw overnight in the refrigerator before reheating.
FAQ
Can I use a different type of plant-based milk?
Yes, you can substitute light soy milk with almond milk, oat milk, or any other plant-based milk of your choice. Just ensure it’s unsweetened to avoid altering the flavor of the dish.
What can I use instead of butternut squash?
If you don’t have butternut squash on hand, pureed pumpkin or sweet potato are great alternatives that will still provide that rich, creamy texture and a touch of sweetness.
Nutrition
This creamy vegan butternut squash mac and cheese is a nutritious meal option. The butternut squash provides a good source of vitamins A and C, while the nutritional yeast adds a boost of B vitamins. Plus, it’s lower in fat compared to traditional mac and cheese, making it a heart-healthy choice.
Conclusion
This creamy vegan butternut squash mac and cheese is more than just a meal; it’s a warm hug in a bowl, reminiscent of cherished memories yet perfectly suited for today’s culinary trends. Whether you’re gathering with family or enjoying a quiet night in, this dish promises to deliver comfort and satisfaction. I hope you enjoy making and eating it as much as I do!
Related update: Creamy Vegan Butternut Squash Mac and Cheese