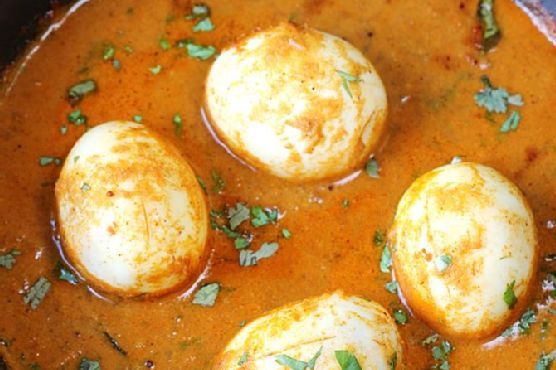
Chettinad Egg Curry
Intro
Growing up in a bustling South Indian household, weekends were often synonymous with the aromatic allure of traditional dishes wafting through the air. One such dish that always found its way to our dining table was the Chettinad Egg Curry. My grandmother, with her deft hands and generous heart, would conjure up this spicy, fragrant curry that would leave us all licking our fingers. Her secret? The perfect blend of spices and the love she infused into every meal she prepared. Today, as I share this recipe with you, I hope it brings the same warmth and joy to your table as it did to mine.
Why You’ll Love It
Chettinad Egg Curry is a delightful explosion of flavors that will transport you straight to the heart of Tamil Nadu. Its rich, spicy, and aromatic profile is a true representation of the Chettinad cuisine. This dish is not just about the taste; it’s a sensory experience. With the perfect balance of heat from the chilies and warmth from the spices, combined with the creamy texture of coconut, this curry is a feast for your taste buds. It’s versatile, pairs wonderfully with rice or roti, and is sure to be a crowd-pleaser at any gathering.
Ingredients
- 2-3 green cardamoms (elaichi)
- 4-5 red chilies
- 1 small cinnamon stick
- 1/2 cup grated coconut
- 2 tbsp coriander seeds
- 1 tsp cumin seeds
- A sprig of curry leaves
- 6 cooked eggs
- Fresh coriander leaves for garnish
- 1 tbsp ginger garlic paste
- 3 tbsp oil
- 1 large onion, chopped
- 1/2 tsp pepper
- 1 tbsp poppy seeds
- Salt to taste
- 2 large tomatoes, chopped
Instructions
- Heat a pan and dry roast the coriander seeds, cumin seeds, poppy seeds, red chilies, cinnamon stick, and cardamoms until aromatic. Allow them to cool before grinding them into a fine powder.
- Add the grated coconut to the grinder and blend everything into a smooth paste, adding a little water if necessary.
- In the same pan, heat oil and sauté the onions until they turn golden brown. Add the ginger garlic paste and sauté until the raw smell disappears.
- Add the chopped tomatoes and cook until they become soft and mushy.
- Mix in the ground spice paste and cook on a low flame until the oil begins to separate from the masala.
- Add the curry leaves, pepper, and salt. Stir well to combine.
- Gently place the cooked eggs into the curry and simmer for about 5-7 minutes, allowing the eggs to absorb the flavors.
- Garnish with fresh coriander leaves before serving.
Tips
For the best results, always use fresh spices. Toasting the spices before grinding enhances their flavor and aroma. Adjust the number of chilies based on your spice tolerance. If you prefer a thicker curry, reduce the amount of water added to the coconut paste.
Variations & Substitutions
You can substitute the eggs with paneer or tofu for a vegetarian version. For a creamier texture, add a splash of coconut milk towards the end of cooking. If poppy seeds are not available, you can use cashews as a substitute.
Storage
Store any leftover curry in an airtight container in the refrigerator for up to 3 days. Reheat on the stovetop or in the microwave before serving. This curry also freezes well for up to a month. To retain its flavors, thaw it in the refrigerator before reheating.
FAQ
Can I make this curry less spicy?
Absolutely! To make the curry less spicy, reduce the number of red chilies or use milder varieties. You can also add a splash of coconut milk to mellow the heat.
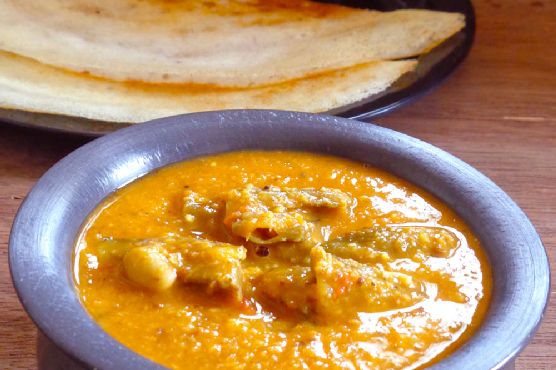
What can I serve with Chettinad Egg Curry?
This curry pairs wonderfully with steamed rice, biryani, or any flatbread like roti or naan. It can also be served with dosa for a delicious South Indian breakfast.
Nutrition
While the exact nutritional content can vary based on serving sizes and specific ingredients used, Chettinad Egg Curry is generally high in protein due to the eggs and rich in essential vitamins and minerals from the spices. It’s a wholesome dish that can be part of a balanced diet when enjoyed in moderation.
Conclusion
Chettinad Egg Curry is more than just a dish; it’s a culinary journey that takes you to the vibrant streets of Tamil Nadu. Its robust flavors and aromatic spices make it a standout dish that is sure to impress your family and friends. Whether you’re a seasoned cook or a beginner, this recipe is a delightful adventure in the kitchen. So, gather your ingredients and embark on this flavorful journey. Happy cooking!
Related update: chettinad egg curry
Related update: Oxtail Ragout