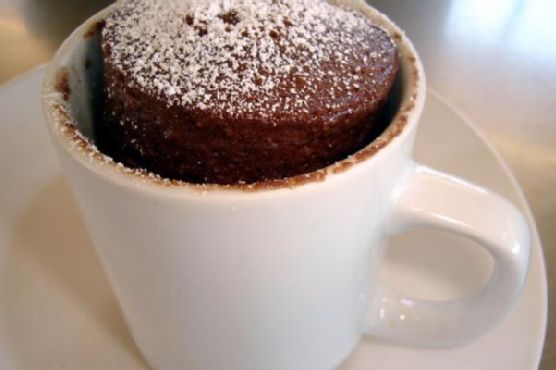
5 Minute Xocai Chocolate Mug Cake
Intro
There’s something undeniably comforting about chocolate cake. As a child, I remember the warm aroma of chocolate wafting through the house, signaling that a delightful treat was soon to be served. My grandmother would bake the most delicious chocolate cakes, and every bite was a taste of pure love. Fast forward to today, and while life has gotten busier, my love for chocolate cake remains. That’s why I’m thrilled to share this quick and easy recipe for a Xocai Chocolate Mug Cake. In just 5 minutes, you can enjoy a decadent dessert that will transport you back to those cozy, carefree days.
Why You’ll Love It
This Xocai Chocolate Mug Cake is perfect for those moments when you’re craving something delicious but short on time. Here are a few reasons why you’ll fall in love with this recipe:
- Quick and Easy: Ready in just five minutes, this mug cake is the ultimate quick fix for your chocolate cravings.
- Rich and Decadent: Made with high-quality dark chocolate, this cake offers a rich and indulgent flavor.
- Single-Serving Bliss: Perfect for when you want a treat without the temptation of a whole cake.
- Minimal Cleanup: Mixed and cooked in the same mug, it keeps the washing up to a minimum.
Ingredients
- 2 tablespoons dark chocolate (chopped)
- 1 large egg
- 3 tablespoons all-purpose flour
- 1 tablespoon honey
- 3 tablespoons milk
- 1/4 teaspoon vanilla extract
Instructions
- In a coffee mug, combine the egg, milk, honey, and vanilla extract. Mix together with a fork until well combined.
- Add the flour and chopped dark chocolate to the mug. Mix again until the batter is smooth and the chocolate is evenly distributed.
- Place the mug in the microwave and cook on high power for 3 minutes. The cake will rise slightly over the top of the mug as it cooks.
- Once cooked, allow the mug cake to cool for a minute or two. You can enjoy it straight from the mug or tip it out onto a plate if desired.
- Serve while warm, and enjoy your quick and delicious chocolate indulgence!
Tips
- Watch the Cooking Time: Microwave power can vary, so keep an eye on your mug cake as it cooks to prevent overcooking.
- Mix Thoroughly: Ensure all ingredients are well combined to avoid any pockets of dry flour.
- Choose Quality Chocolate: The better the chocolate, the richer the flavor. Opt for a high-quality dark chocolate for the best results.
Variations & Substitutions
This versatile recipe can be tweaked to suit your preferences:
- Chocolate Chips: Add a tablespoon of chocolate chips for extra gooeyness.
- Nut Butter Swirl: Swirl in a teaspoon of peanut butter or almond butter for a nutty twist.
- Gluten-Free: Substitute the all-purpose flour with almond or coconut flour for a gluten-free version.
- Sugar Substitute: Replace honey with a sugar-free alternative like stevia or monk fruit sweetener.
Storage
This mug cake is best enjoyed fresh and warm. However, if you have leftovers, you can store them in an airtight container in the fridge for up to two days. When ready to enjoy, reheat gently in the microwave for 20-30 seconds.
FAQ
Can I use a different type of chocolate?
Absolutely! While dark chocolate adds a rich flavor, you can use milk chocolate or even white chocolate for a different taste. Just keep in mind that the sweetness level will vary accordingly.
What if I don’t have honey?
No worries! You can substitute honey with maple syrup, agave nectar, or even regular sugar. Adjust the quantity to taste, as these substitutes may vary in sweetness.
Can I make this mug cake vegan?
Yes, you can make a vegan version by using plant-based milk (such as almond or soy), a flax egg (1 tablespoon ground flaxseed mixed with 2.5 tablespoons water), and a vegan chocolate substitute.
Nutrition
While I don’t have exact nutritional information, this mug cake is a sweet treat that should be enjoyed in moderation. If you’re mindful of your sugar or calorie intake, consider some of the substitutions mentioned above.
Conclusion
There you have it — a quick, easy, and absolutely delicious 5 Minute Xocai Chocolate Mug Cake. Perfect for a spontaneous treat or a cozy night in, this mug cake will satisfy your chocolate cravings in no time. So go ahead, indulge in a little sweet nostalgia, and enjoy every bite!
Related update: 5 Minute Xocai Chocolate Mug Cake