Ginger Molasses Rounds | Made by Meaghan Moineau

Ginger Molasses Rounds: A Classic Cookie Recipe

Intro

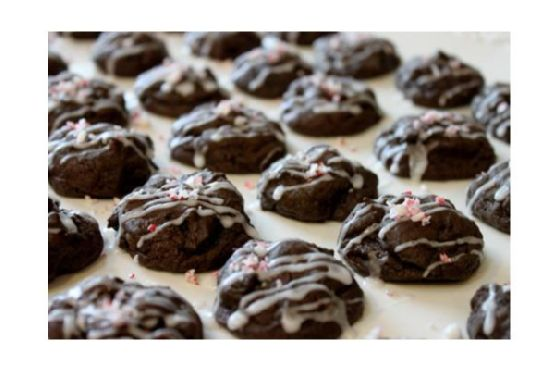
There’s something magical about the smell of ginger and molasses wafting through the house during the holiday season. It instantly transports me back to my grandmother’s cozy kitchen, where the warmth of the oven and the sound of gentle laughter provided a comforting backdrop to our baking adventures. These Ginger Molasses Rounds were always the star of the show, their spicy aroma and chewy texture making them irresistible to both young and old. This recipe has been passed down through generations, and I’m thrilled to share this family treasure with you.

Why You’ll Love It

These Ginger Molasses Rounds capture the essence of holiday cheer in every bite. You’ll love them because they’re:

  • Quick and Easy: With simple ingredients and straightforward instructions, these cookies come together in no time.
  • Perfectly Spiced: The combination of ginger and cinnamon creates a warm, inviting flavor that you’ll crave all year round.
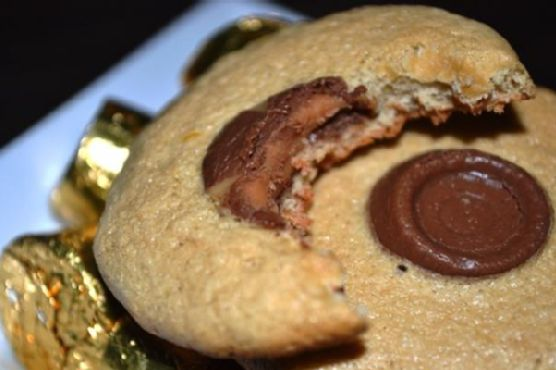
  • Chewy and Soft: Baked to perfection, these cookies maintain a soft, chewy texture that will melt in your mouth.
  • Family-Friendly: A fun baking project for kids and adults alike, creating memories that will be cherished forever.

Ingredients

  • 1 teaspoon baking soda
  • 1/2 cup butter, softened
  • 1 teaspoon cinnamon
  • 1 large egg
  • 2 cups all-purpose flour
  • 1/4 cup additional granulated sugar (for rolling)
  • 1 tablespoon ground ginger
  • 1/4 cup molasses
  • 1/2 teaspoon salt
  • 3/4 cup granulated sugar

Instructions

  1. Preheat your oven to 350°F (175°C) and line a baking sheet with parchment paper.
  2. In a large bowl, cream together the butter and 3/4 cup of sugar until the mixture is light and fluffy.
  3. Beat in the egg and molasses until fully incorporated and smooth.
  4. In a separate bowl, whisk together the flour, baking soda, salt, cinnamon, and ground ginger.
  5. Gradually blend the dry ingredients into the creamed mixture, stirring until just combined.
  6. Shape the dough into small balls, about 1 inch in diameter.
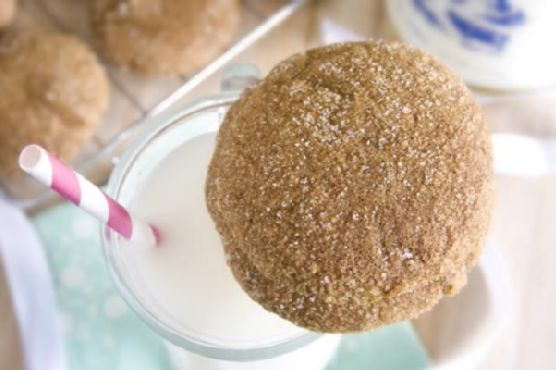
  7. Roll each ball in the additional granulated sugar to coat completely.
  8. Place the sugar-coated balls on the prepared baking sheet, spacing them 2 inches apart.
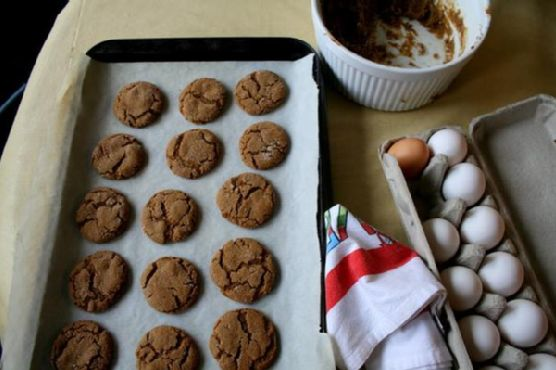
  9. Bake in the preheated oven for 8-9 minutes, or until the cookies are just set with slightly cracked tops.
  10. Remove from the oven and allow them to cool on the baking sheet for a few minutes before transferring to a wire rack to cool completely.

Tips

For the best results, make sure your butter is softened to room temperature before beginning. This will ensure a smooth and creamy dough. Additionally, avoid overbaking; removing the cookies when they are just set will deliver the perfect chewy texture.

Variations & Substitutions

Feel free to experiment with this recipe to suit your taste. You can:

  • Swap out half the flour for whole wheat flour for a nuttier flavor and added fiber.
  • Incorporate 1/4 cup of finely chopped crystallized ginger for an extra burst of ginger flavor.
  • Add a pinch of ground cloves or nutmeg for a subtle spice complexity.
  • Use dark brown sugar in place of granulated sugar for a richer, deeper molasses flavor.

Storage

Store your Ginger Molasses Rounds in an airtight container at room temperature for up to a week. They can also be frozen for up to three months; just be sure to let them thaw at room temperature before enjoying.

FAQ

Can I use margarine instead of butter?

Yes, you can substitute margarine for butter in this recipe, though the flavor and texture may vary slightly. Make sure to choose a high-quality margarine for the best outcome.

What can I use instead of molasses?

If you don’t have molasses on hand, you can use an equal amount of honey or maple syrup as a substitute. Keep in mind that this will alter the flavor profile slightly, but the cookies will still be delicious.

Why are my cookies spreading too much?

If your cookies are spreading too much during baking, it might be due to the dough being too warm. Try chilling the dough for 30 minutes before shaping and baking to help them maintain their shape.

Nutrition

Each cookie contains approximately:

  • Calories: 90
  • Fat: 3.5g
  • Carbohydrates: 14g
  • Protein: 1g
  • Sugar: 8g
  • Fiber: 0.5g

Conclusion

These Ginger Molasses Rounds are more than just cookies; they’re a delicious tradition that brings warmth and joy to any gathering. Whether you’re making them for a holiday feast or just a cozy night in, these cookies promise to be a hit with everyone who tries them. So gather your ingredients, invite some loved ones, and embark on a delightful baking adventure. Happy baking!

Related update: Ginger Molasses Rounds

Related update: Baked Cinnamon Apple Wedges

Related update: Lemon Poppy Seed Muffins

Peanut Butter Cookie Bars | Made by Meaghan Moineau

Peanut Butter Cookie Bars

Intro

There’s something incredibly nostalgic about the aroma of peanut butter wafting through the kitchen. It takes me back to my childhood, when my grandmother would bake her famous peanut butter cookies every holiday season. I remember watching her, apron-clad, as she skillfully mixed ingredients in her well-loved mixing bowl. Those moments spent in her cozy kitchen, with laughter in the air and flour on my cheeks, are some of my fondest memories. Inspired by her classic recipe, I’ve created these Peanut Butter Cookie Bars. They’re a delightful twist on the traditional cookie, combining all the peanut buttery goodness into a convenient bar form. Perfect for sharing at family gatherings or enjoying as a quiet afternoon treat, these bars are sure to become a new favorite in your home.

Why You’ll Love It

These Peanut Butter Cookie Bars are everything you love about peanut butter cookies, but in a simpler, more convenient form. Here’s why you’ll adore them:

  • Easy to make: With just a few simple steps, you can have these bars ready to bake in no time.
  • Perfectly chewy: The combination of rolled oats and chunky peanut butter gives these bars a chewy, satisfying texture.
  • Deliciously nostalgic: With every bite, you’ll be reminded of the classic peanut butter cookies you loved as a child.
  • Great for sharing: Cut them into bars and share with friends, family, or coworkers. They’ll thank you!

Ingredients

  • 1 teaspoon baking soda
  • 1/2 cup bran
  • 1 cup brown sugar
  • 1 cup butter, melted
  • 2 large eggs
  • 1/2 cup granulated sugar
  • 1 cup chunky peanut butter
  • 1 cup peanut butter candy pieces
  • 2 cups rolled oats
  • 1 teaspoon vanilla extract

Instructions

  1. Preheat your oven to 375°F (190°C).
  2. In a small bowl, combine the melted butter, brown sugar, granulated sugar, peanut butter, and eggs. Beat until smooth and well combined. Set aside.
  3. In a separate bowl, mix together the flour, bran, oats, and baking soda.
  4. Gradually stir the dry mixture into the wet butter mixture until fully incorporated.
  5. Press half of the dough mixture into each of two glass baking dishes.
  6. Sprinkle peanut butter candy pieces evenly across the top of the dough.
  7. Bake in the preheated oven for approximately 19 minutes, or until a toothpick inserted into the center comes out clean.
  8. Remove from oven and allow to cool on a wire rack.
  9. Cut into bars to serve. Enjoy!

Tips

  • For a richer flavor, use dark brown sugar instead of light brown sugar.
  • If you prefer a smoother texture, you can use creamy peanut butter instead of chunky.
  • Make sure to let the bars cool completely before cutting to ensure clean edges.

Variations & Substitutions

Feel free to customize these Peanut Butter Cookie Bars to suit your taste:

  • Nutty Addition: Add chopped peanuts or walnuts for extra crunch.
  • Chocolate Lovers: Mix in some chocolate chips or drizzle melted chocolate on top after baking.
  • Gluten-Free: Use gluten-free oats and substitute a gluten-free flour blend for the bran.

Storage

Store these cookie bars in an airtight container at room temperature for up to one week. For longer storage, freeze the bars in a single layer in a freezer-safe container for up to two months. Simply thaw at room temperature before serving.

FAQ

Can I use a different type of nut butter?

Yes, you can substitute almond butter or cashew butter for the peanut butter if you prefer. Keep in mind that this will alter the flavor slightly, but the bars will still be delicious.

What can I use instead of peanut butter candy pieces?

If you don’t have peanut butter candy pieces on hand, you can use mini peanut butter cups, chopped Reese’s cups, or even chocolate-covered peanuts as a substitute.

Nutrition

While these bars are a treat, you might be curious about their nutritional content. Each serving (1 bar) contains approximately:

  • Calories: 250
  • Fat: 12g
  • Carbohydrates: 30g
  • Protein: 5g
  • Sugar: 18g

Please note that nutritional values are approximate and may vary based on specific ingredients used.

Conclusion

These Peanut Butter Cookie Bars are a delectable treat that combines the classic flavor of peanut butter cookies with the convenience of a bar. Whether you’re sharing them with loved ones or indulging on your own, these bars are sure to satisfy your sweet tooth and bring a sense of nostalgia with every bite. I hope you enjoy making and eating them as much as I do!

Related update: Peanut Butter Cookie Bars

Related update: Layered Poppy Seed Pastries

Brown sugar & Spice Sugar cookie frogs | Made by Meaghan Moineau

Brown Sugar & Spice Sugar Cookie Frogs

Intro

There is something magical about the aroma of freshly baked cookies wafting through the house. It reminds me of my childhood, when my grandmother would let me sneak a taste of cookie dough while she carefully rolled and cut the cookies, her hands perfectly steady despite her age. Over the years, I have carried forward her tradition of baking for every special occasion, but with my own twist. These Brown Sugar & Spice Sugar Cookie Frogs are a tribute to those cherished memories. The warm spices combined with the sweetness of brown sugar create a delightful cookie that both kids and adults will love.

Why You’ll Love It

These cookies are not only cute and whimsical, but they’re also packed with flavor. The combination of cinnamon, ginger, nutmeg, and allspice gives them a warm, cozy spice, perfect for any season. The brown sugar adds a depth of sweetness that pairs beautifully with the buttery richness of the cookie. Plus, they’re incredibly fun to make, especially with little helpers who will enjoy cutting out the frog shapes. Whether you’re baking for a family gathering, a holiday, or just because, these cookies are sure to bring smiles to everyone who tries them.

Ingredients

  • 2 1/2 cups unbleached all-purpose flour
  • 1 teaspoon baking powder
  • 1 teaspoon ground cinnamon
  • 1/2 teaspoon ground ginger
  • 1/4 teaspoon ground nutmeg
  • 1/4 teaspoon ground allspice
  • 3/4 cup granulated sugar
  • 3/4 cup light brown sugar, packed
  • 1 cup unsalted butter, softened
  • 1 large egg
  • 1 teaspoon vanilla extract

Instructions

  1. Whisk the flour, baking powder, cinnamon, ginger, nutmeg, and allspice together in a medium bowl. Set aside.
  2. In a large bowl, cream the granulated sugar, brown sugar, and butter together until light and fluffy.
  3. Add the egg and vanilla extract to the butter mixture and mix until well-blended.
  4. Gradually add the flour mixture to the wet ingredients, beating just until combined. Be sure to scrape down the sides and bottom of the bowl to incorporate all ingredients. If necessary, knead in any stray bits of flour by hand.
  5. Roll the dough out on a floured surface to about 1/4 inch thickness. Cut into frog shapes using a cookie cutter.
  6. Place the cookies on parchment-lined baking sheets, leaving a bit of space between them.
  7. Bake in a preheated oven at 350°F (175°C) for 9-12 minutes, depending on the size of your cutters, until the edges are lightly golden.
  8. Let the cookies sit on the baking sheet for a few minutes before transferring them to a cooling rack to cool completely.

Tips

For the best results, make sure your butter is softened to room temperature before you start. This will help it cream more easily with the sugars, creating a smooth and fluffy texture. If the dough feels too sticky when rolling, lightly flour your rolling pin and work surface. Lastly, be sure to chill the dough for about 30 minutes if it’s too soft to handle; this will make cutting the shapes much easier.

Variations & Substitutions

If you want to switch things up, try adding some finely chopped nuts for a bit of crunch, or substitute part of the flour with whole wheat flour for a nuttier flavor. You can also experiment with different shapes if frogs aren’t your style—stars and hearts are always popular choices. For a holiday twist, add a pinch of cloves to the spice mix, or glaze the cookies with a simple icing made from powdered sugar and milk after they’ve cooled.

Storage

Store these cookies in an airtight container at room temperature for up to a week. If you want to keep them longer, you can freeze the baked cookies in a freezer-safe container for up to three months. Just make sure to separate layers with parchment paper to prevent sticking. To enjoy, simply thaw at room temperature.

FAQ

Can I make the dough ahead of time?

Yes, you can prepare the dough in advance. Wrap it tightly in plastic wrap and store it in the refrigerator for up to two days. When you’re ready to bake, let it sit at room temperature for a few minutes to make it easier to roll out.

What can I use if I don’t have a frog-shaped cookie cutter?

No worries! You can use any cookie cutter shape you like, or even cut the dough into squares or circles using a knife or a glass. The taste will be just as delightful, no matter the shape.

Can I use dark brown sugar instead of light brown sugar?

Yes, you can use dark brown sugar if that’s what you have on hand. It will give the cookies a slightly deeper molasses flavor, which can be a lovely variation.

Nutrition

These cookies contain approximately 150 calories per serving (2 cookies), with 8g of fat, 20g of carbohydrates, and 2g of protein. They are a delightful treat best enjoyed in moderation.

Conclusion

These Brown Sugar & Spice Sugar Cookie Frogs not only bring a touch of whimsy to your table but also fill your home with the comforting aroma of spices and sweetness. They’re easy to make, delightfully customizable, and perfect for sharing with loved ones. I hope this recipe becomes a cherished part of your baking traditions, just as it has in mine. Happy baking!

Related update: Brown sugar & Spice Sugar cookie frogs

Related update: Shortbread Lemon Bars

Creamsicle Cookies | Made by Meaghan Moineau

Creamsicle Cookies

Intro

There’s something magical about the combination of orange and vanilla that takes me back to my childhood. I remember those hot summer days when I would run to the ice cream truck, clutching my allowance, eagerly anticipating the creamy delight of a creamsicle. The tangy orange wrapped around the smooth vanilla ice cream was a taste of pure joy. Today, I’m thrilled to share a recipe that captures that nostalgic flavor in cookie form: Creamsicle Cookies. These delightful treats are perfect for a sunny afternoon or a cozy evening with a cup of tea.

Why You’ll Love It

If you’re a fan of the classic creamsicle, these cookies are sure to become your new favorite treat. They offer a delightful balance of flavors—the citrusy burst of orange zest paired with the rich sweetness of white chocolate chips. Not only are these cookies delicious, but they’re also incredibly easy to make. Whether you’re a seasoned baker or just starting out, you’ll find this recipe straightforward and rewarding. Plus, these cookies are perfect for any occasion, from family gatherings to a simple afternoon snack.

Ingredients

  • 2 cups all-purpose flour
  • 1/2 teaspoon baking soda
  • 1/4 teaspoon salt
  • 1/2 cup firmly packed brown sugar
  • 1/2 cup granulated sugar
  • 1/2 cup butter, softened
  • 1 large egg
  • 1 teaspoon vanilla extract
  • 1 tablespoon orange zest
  • 1 cup white chocolate chips

Instructions

  1. Preheat your oven to 375°F (190°C).
  2. In a small bowl, combine the flour, baking soda, and salt; set aside.
  3. In a large bowl, cream together the butter, brown sugar, and granulated sugar until light and creamy.
  4. Beat in the egg and vanilla extract until smooth and well combined.
  5. Gradually add the flour mixture to the wet ingredients, mixing until just combined.
  6. Stir in the orange zest and white chocolate chips until evenly distributed.
  7. Drop rounded teaspoonfuls of dough onto ungreased cookie sheets. Do not flatten the cookies; it will make them dry.
  8. Bake for 8-10 minutes or until the edges are golden brown. Avoid overcooking to keep the cookies plump and soft.
  9. Allow the cookies to cool on the sheets for several minutes before transferring them to a wire rack to cool completely.
  10. Store the cookies in an airtight container to maintain their freshness.

Tips

For the best results, make sure your butter is softened but not melted. This will help create that perfect creamy texture in your cookie dough. Also, be mindful of the baking time; slightly underbaking the cookies will keep them soft and chewy.

Variations & Substitutions

If you’re looking to switch things up, consider substituting half of the white chocolate chips with milk or dark chocolate chips for a richer flavor. For a nuttier texture, you can also add a half-cup of chopped nuts like almonds or pecans. If you don’t have fresh oranges, you can use a teaspoon of orange extract in place of the zest, though fresh zest will give the most vibrant flavor.

Storage

Store your Creamsicle Cookies in an airtight container at room temperature for up to a week. If you’d like to keep them longer, consider freezing the baked cookies or the dough. To freeze the dough, scoop it into balls and freeze on a baking sheet before transferring to a freezer bag. Bake from frozen, adding an extra minute or two to the baking time.

FAQ

Can I use margarine instead of butter?

While you can use margarine as a substitute for butter, it may alter the flavor and texture slightly. Butter provides a richer taste and a better texture for these cookies.

How can I make the cookies less sweet?

If you find the cookies too sweet, consider reducing the amount of white chocolate chips, or use a mix of white and dark chocolate chips to balance the sweetness.

Can I add more orange flavor?

Absolutely! You can increase the amount of orange zest or add a few drops of orange extract for a more pronounced citrus flavor.

Nutrition

These cookies are meant to be a treat, so while they are deliciously indulgent, remember to enjoy them in moderation. Each cookie (assuming the recipe makes about 24) contains approximately 120 calories, 6 grams of fat, 16 grams of carbohydrates, and 1 gram of protein.

Conclusion

Creamsicle Cookies are a delightful reminder of those cherished childhood memories wrapped in a deliciously modern twist. Whether you’re baking for family, friends, or just yourself, these cookies are sure to bring a smile to anyone’s face. I hope this recipe brings a bit of sunshine and nostalgia to your kitchen. Happy baking, and enjoy every bite!

Related update: Creamsicle Cookies

Related update: Pear and Walnut Coffee Cake

Related update: Brown sugar & Spice Sugar cookie frogs

Amaretto Almond Cookies | Made by Meaghan Moineau

Amaretto Almond Cookies

Intro

There’s something magical about the aroma of freshly baked cookies wafting through the house. It transports me back to my grandmother’s cozy kitchen, where she often had a batch of cookies in the oven. Her cookie jar, a charming porcelain piece shaped like a plump cat, was always filled with delightful treats. Among them, the Amaretto Almond Cookies held a special place in my heart. With their rich almond flavor and a hint of amaretto, these cookies were her signature recipe that she loved to serve with a warm cup of tea. Today, I’m excited to share this cherished recipe with you, hoping it brings the same warmth and joy to your home as it did to mine.

Why You’ll Love It

These Amaretto Almond Cookies are a delightful blend of softness and flavor that will surely become a staple in your baking repertoire. Here’s why you’ll love them:

  • Rich Flavor: The combination of almond extract and amaretto provides a deep, nutty flavor that’s truly irresistible.
  • Simple Ingredients: With ingredients you likely already have in your pantry, these cookies are easy to whip up at a moment’s notice.
  • Perfect Texture: These cookies strike the perfect balance between chewy and crispy, making them a delightful treat for any occasion.
  • Nostalgic Aroma: Baking these cookies will fill your home with a warm, inviting aroma that evokes a sense of nostalgia and comfort.

Ingredients

  • 1 teaspoon almond extract
  • 2 tablespoons amaretto
  • 2 eggs
  • 1 cup ground almonds
  • 1 teaspoon grated lemon rind
  • 2 tablespoons molasses
  • 1/2 cup unsalted butter, softened
  • 1 1/2 cups whole wheat pastry flour

Instructions

  1. Cream together the unsalted butter and molasses in a large mixing bowl until the mixture is smooth and well combined.
  2. Add the eggs, one at a time, beating well after each addition. Stir in the ground almonds, grated lemon rind, and almond extract, mixing until everything is well incorporated.
  3. Stir in the amaretto, alternating with the whole wheat pastry flour. Mix until the dough is smooth and all ingredients are thoroughly combined.
  4. Drop the dough by teaspoonsful onto unoiled cookie sheets, spacing them about 2 inches apart.
  5. Bake in a preheated oven at 350 degrees Fahrenheit (175 degrees Celsius) for 12-15 minutes or until the cookies are golden brown.
  6. Remove from the oven and allow the cookies to cool on the baking sheet for a few minutes before transferring them to a wire rack to cool completely.

Tips

To ensure your Amaretto Almond Cookies turn out perfectly every time, consider these helpful tips:

  • Use room temperature butter for easier creaming with the molasses.
  • For a stronger almond flavor, you can increase the almond extract by an additional 1/2 teaspoon.
  • If you prefer a slightly crispier cookie, let them bake for the full 15 minutes.
  • Feel free to sprinkle a touch of sea salt on top of the cookies before baking for an added depth of flavor.

Variations & Substitutions

This recipe is quite versatile, allowing you to modify it to suit your taste preferences or dietary needs:

  • Gluten-Free: Substitute the whole wheat pastry flour with a gluten-free flour blend to make these cookies gluten-free.
  • Vegan: Replace the eggs with a flax egg (1 tablespoon ground flaxseed mixed with 2.5 tablespoons water per egg) and use a vegan butter substitute.
  • Nut-Free: If you have a nut allergy, you can replace the ground almonds with oat flour and omit the almond extract, using vanilla extract instead.
  • Citrus Twist: Add a little extra lemon rind or a few drops of lemon juice for a more pronounced citrus flavor.

Storage

To keep your Amaretto Almond Cookies fresh and delicious, store them in an airtight container at room temperature. They will stay fresh for up to a week. For longer storage, you can freeze the cookies for up to 3 months. Simply thaw them at room temperature before serving.

FAQ

Can I use regular flour instead of whole wheat pastry flour?

Yes, you can substitute regular all-purpose flour for whole wheat pastry flour if you prefer. This will slightly alter the texture, making the cookies a bit denser, but they will still taste wonderful.

What can I use instead of amaretto?

If you don’t have amaretto on hand, you can use almond liqueur or even a bit of rum or brandy as a substitute. For a non-alcoholic version, replace the amaretto with almond syrup or additional almond extract.

How do I know when the cookies are done?

The cookies are done when they have turned a golden brown color around the edges. They may still be slightly soft in the center when you take them out of the oven, but they will firm up as they cool.

Nutrition

While these cookies are a delightful treat, it’s important to enjoy them in moderation. Each cookie contains approximately:

  • Calories: 80
  • Fat: 4g
  • Carbohydrates: 10g
  • Protein: 2g
  • Sugar: 2g

Conclusion

Baking these Amaretto Almond Cookies is more than just making a delicious treat; it’s about creating memories and sharing warmth with those you love. Whether you’re enjoying them with family, sharing with friends, or savoring one quietly with a cup of tea, these cookies are sure to bring joy and satisfaction. I hope this recipe becomes a beloved part of your baking traditions, as it has been in mine. Happy baking!

Related update: Amaretto Almond Cookies

Related update: Korean Honey Citron Tea Cheesecake

Related update: Almond Butter Slices

Watching What I Eat: Peanut Butter Banana Oat Breakfast Cookies with Carob / Chocolate Chips | Made by Meaghan Moineau

Watching What I Eat: Peanut Butter Banana Oat Breakfast Cookies with Carob / Chocolate Chips

Intro

Welcome to a delightful journey of taste and nostalgia with our Peanut Butter Banana Oat Breakfast Cookies with Carob / Chocolate Chips. Growing up, Saturday mornings were my sanctuary. I’d wake up to the sweet aroma of freshly baked cookies wafting from the kitchen, where my grandmother orchestrated her baking magic. These cookies capture the essence of those cherished mornings, combining wholesome ingredients with a touch of indulgence. Whether you’re looking for a healthy breakfast option or a comforting snack, these cookies will transport you back to simpler times with every bite.

Why You’ll Love It

These breakfast cookies are not just delicious; they are a perfect blend of nutrition and nostalgia. Here’s why you’ll fall in love with them:

  • They are packed with wholesome ingredients, providing a great start to your day.
  • The combination of peanut butter and banana is a timeless classic that delivers a rich, satisfying flavor.
  • Carob or chocolate chips add a touch of indulgence, making these cookies a delightful treat.
  • They are easy to make and perfect for meal prep, saving you time on busy mornings.
  • They’re versatile and can be customized to suit your taste or dietary preferences.

Ingredients

  • 2 ripe bananas, mashed
  • 1/4 cup butter flavor shortening
  • 1/2 cup chocolate or carob chips
  • 1/2 cup creamy peanut butter
  • 1/4 cup chopped nuts (your choice)
  • 1 cup oatmeal
  • 1/4 cup unsweetened applesauce
  • 1 teaspoon vanilla extract
  • 1/2 cup vanilla protein powder

Instructions

  1. Preheat your oven to 350 degrees Fahrenheit.
  2. In a large bowl, mix the mashed bananas and peanut butter until completely combined.
  3. Add the applesauce, vanilla protein powder, and vanilla extract to the mixture. Mix again until fully combined.
  4. Add the oatmeal and nuts to the banana mixture and combine thoroughly. If desired, add carob or chocolate chips at this stage to mix them throughout the dough.
  5. Let the dough rest for 10 minutes.
  6. Drop spoonfuls of cookie dough onto a parchment-lined baking sheet, flattening them into circles. If you prefer, add carob or chocolate chips on top of the cookies now.
  7. Bake for 20-30 minutes, depending on your preference for a softer or crispier cookie. Aim for a golden brown finish.
  8. Remove from the oven and let them rest on the cookie sheet for 5 minutes before transferring them to a cooling rack.
  9. If you like traditional fork marks, use a pizza cutter or sharp knife to score the tops while they’re still warm.
  10. Once completely cool, store in a covered container. Enjoy with a cup of tea or coffee!

Tips

Here are some handy tips to ensure your cookies turn out perfectly every time:

  • Use ripe bananas for a naturally sweet flavor.
  • If the dough feels too sticky, add a bit more oatmeal to achieve the right consistency.
  • For an even bake, make sure the cookies are of uniform size and thickness.
  • Experiment with baking times to find your preferred level of cookie softness or crispiness.

Variations & Substitutions

Make these cookies your own with these variations and substitutions:

  • Nut-Free: Omit the nuts or replace them with sunflower seeds for a nut-free version.
  • Gluten-Free: Use gluten-free oats and ensure all other ingredients are gluten-free.
  • Vegan: Replace butter flavor shortening with coconut oil and ensure your chocolate chips are vegan.
  • Sugar-Free: Use sugar-free chocolate chips or carob chips to lower the sugar content.

Storage

Store your peanut butter banana oat breakfast cookies in an airtight container at room temperature for up to 5 days. For longer storage, keep them in the refrigerator for up to two weeks or freeze them for up to three months. Thaw frozen cookies at room temperature before enjoying.

FAQ

Can I use almond butter instead of peanut butter?

Absolutely! Almond butter is a great alternative and will add a slightly different flavor profile to the cookies. Just ensure it’s creamy for the best texture.

What can I use instead of vanilla protein powder?

If you don’t have vanilla protein powder, you can substitute it with an equal amount of oat flour or almond flour. You might want to add a bit more vanilla extract to maintain the flavor.

Nutrition

Each cookie is approximately 150 calories, with 8g of fat, 18g of carbohydrates, and 5g of protein. These values may vary based on specific brands and measurements used.

Conclusion

These Peanut Butter Banana Oat Breakfast Cookies with Carob / Chocolate Chips are more than just a treat; they’re a connection to cherished memories and a step towards a healthier lifestyle. Whether you’re rushing out the door or enjoying a leisurely morning, these cookies are a perfect companion. I hope they bring joy to your mornings as much as they do to mine. Happy baking!

Related update: Watching What I Eat: Peanut Butter Banana Oat Breakfast Cookies with Carob / Chocolate Chips

Related update: 5-Minute Blueberry Chia Jam

Watching What I Eat: Peanut Butter Banana Oat Breakfast Cookies with Carob / Chocolate Chips | Made by Meaghan Moineau

Watching What I Eat: Peanut Butter Banana Oat Breakfast Cookies with Carob / Chocolate Chips

Intro

There’s something truly special about waking up to the aroma of freshly baked cookies wafting through the house. It takes me back to my childhood when weekend mornings were spent in the kitchen with my grandmother, mixing batter and eagerly awaiting the first batch to emerge from the oven. These Peanut Butter Banana Oat Breakfast Cookies are a delightful tribute to those cherished mornings, infused with the comforting flavors of creamy peanut butter and ripe bananas, with a modern twist of carob or chocolate chips for a hint of indulgence.

Why You’ll Love It

These breakfast cookies are not only delicious but also nutritious, making them the perfect start to your day. They are packed with wholesome ingredients like oats and bananas, providing a boost of energy and essential nutrients. Whether you’re rushing out the door or enjoying a leisurely morning, these cookies are a convenient and satisfying choice. Plus, they are incredibly easy to make, allowing even the busiest of us to enjoy a homemade treat.

Ingredients

  • 2 ripe bananas, mashed
  • 1/2 cup butter flavor shortening
  • 1 cup creamy peanut butter
  • 1/2 cup unsweetened applesauce
  • 1 teaspoon vanilla extract
  • 1/4 cup vanilla protein powder
  • 2 cups oatmeal
  • 1/2 cup nuts, chopped (optional)
  • 1/2 cup carob or chocolate chips (optional)

Instructions

  1. Preheat your oven to 350 degrees Fahrenheit (175 degrees Celsius).
  2. In a large bowl, mix the mashed bananas and peanut butter until completely combined.
  3. Add the applesauce, vanilla protein powder, and vanilla extract, then mix again until well combined.
  4. Stir in the oatmeal and nuts into the banana mixture until combined. If you want the carob or chocolate chips mixed throughout, add them now.
  5. Let the dough rest for 10 minutes to allow the oats to absorb some moisture.
  6. Drop spoonfuls of cookie dough onto a parchment paper-lined cookie sheet, flattening each into a circle. If you prefer, add the carob or chocolate chips on top now.
  7. Bake the cookies for 20-30 minutes, depending on your preference for a softer or firmer texture, until golden brown and done.
  8. Remove from the oven and let the cookies rest on the cookie sheet for 5 minutes before transferring them to a cooling rack.
  9. Optional: Use a pizza cutter or sharp knife to score the tops of the cookies while they are still warm for traditional fork tong marks.
  10. Once completely cool, store the cookies in a covered container and enjoy them with a cup of tea or your favorite morning beverage.

Tips

To ensure your cookies have the best texture, use ripe bananas as they mash easily and add natural sweetness. If you prefer a nut-free version, simply omit the nuts and consider adding sunflower seeds for a similar crunch. Adjust the baking time to find your perfect cookie texture, whether that’s soft and chewy or crispy and golden.

Variations & Substitutions

You can easily switch up this recipe based on your dietary preferences or available ingredients. Substitute the butter flavor shortening with coconut oil for a dairy-free version. For a nutty twist, swap creamy peanut butter with almond or cashew butter. If you’re short on vanilla protein powder, you can use an equal amount of almond flour or omit it entirely for a slightly different texture.

Storage

These breakfast cookies store beautifully, making them perfect for meal prep. Keep them in an airtight container at room temperature for up to 5 days or in the refrigerator for up to a week. For longer storage, freeze the cookies in a single layer on a baking sheet, then transfer them to an airtight container or freezer bag. They can be frozen for up to 3 months; simply thaw at room temperature or warm them in the oven before serving.

FAQ

Can I make these cookies gluten-free?

Yes, you can easily make these cookies gluten-free by using certified gluten-free oats. Ensure all other ingredients, especially the vanilla extract and protein powder, are also gluten-free.

What can I use instead of bananas?

If you don’t have bananas on hand or prefer not to use them, try substituting with an equal amount of pumpkin puree or sweet potato puree. Keep in mind that this will slightly alter the flavor and texture of the cookies.

Are these cookies suitable for vegans?

To make these cookies vegan, you can replace the butter flavor shortening with coconut oil and ensure your chocolate chips are dairy-free. Additionally, check that the protein powder is plant-based.

Nutrition

Each cookie is a powerhouse of nutrients, offering a good source of protein, healthy fats, and fiber. Bananas and oats provide essential vitamins and minerals, while the optional nuts add an extra boost of heart-healthy fats. Enjoy these cookies as part of a balanced breakfast or snack to keep you fueled throughout the day.

Conclusion

These Peanut Butter Banana Oat Breakfast Cookies are more than just a delicious treat; they are a delightful reminder of the joy found in simple, homemade pleasures. Whether you’re reminiscing about childhood memories or creating new ones with your loved ones, these cookies are sure to bring warmth and happiness to your morning routine. So, gather your ingredients, preheat your oven, and indulge in the comforting goodness of these wholesome breakfast cookies!

Related update: Watching What I Eat: Peanut Butter Banana Oat Breakfast Cookies with Carob / Chocolate Chips

Related update: Cheesy Potato Corn Scones

Medenjaci – Croatian Honey Spice Cookies | Made by Meaghan Moineau

Medenjaci – Croatian Honey Spice Cookies

Intro

Growing up in Croatia, the holiday season was always a magical time filled with family, laughter, and the distinct aroma of spices wafting through the house. One particular scent that signaled the beginning of festivities was that of Medenjaci, the Croatian honey spice cookies. These delightful treats were a staple in our home, lovingly prepared by my grandmother, whose recipe has been passed down through generations. As a child, I would eagerly wait by her side, watching as she skillfully mixed the ingredients, her hands moving with a rhythm that only years of practice could perfect. Now, I carry on this tradition, sharing these cherished cookies with my family and friends, hoping to evoke the same warmth and joy that I felt so many years ago.

Why You’ll Love It

These Medenjaci are more than just cookies; they are a bite of nostalgia, a piece of history, and a heartwarming treat perfect for any occasion. Packed with aromatic spices and the natural sweetness of honey, they offer a delightful balance of flavors that will transport you straight to the cozy kitchens of Croatia. Whether enjoyed with a cup of tea or as part of a festive holiday spread, Medenjaci are sure to be a hit among both kids and adults. Plus, the recipe is simple enough for anyone to follow, allowing you to create your own sweet memories in the kitchen.

Ingredients

  • 100g butter
  • 200g demerara sugar
  • 150g honey
  • 2 eggs
  • 1 teaspoon baking soda
  • 1 teaspoon ground cinnamon
  • 1/2 teaspoon ground cloves
  • 1/2 teaspoon ground nutmeg
  • 1/2 teaspoon powdered ginger
  • 200g all-purpose flour
  • 100g whole wheat flour
  • 50g cake flour
  • Whole walnut kernels, quartered

Instructions

  1. In a saucepan, heat the butter, demerara sugar, and honey over low heat, stirring constantly until the sugar and butter have melted completely. Set aside to cool for about 10 minutes.
  2. In a small bowl, lightly whisk the eggs.
  3. In a separate bowl, mix and combine the baking soda, ground cinnamon, ground cloves, ground nutmeg, powdered ginger, all-purpose flour, whole wheat flour, and cake flour.
  4. Add the lightly beaten eggs, flour, and spice mixture to the melted honey, sugar, and butter mixture.
  5. Mix and combine until you obtain a smooth and soft dough.
  6. Cover the dough with foil and leave it in a cool place for 1-3 days to allow the flavors to develop.
  7. After resting, divide the dough and roll it into long rolls approximately 1.5 cm in diameter. Cut them into smaller rolls, and shape each roll into a walnut-sized ball.
  8. Place the dough balls a few centimeters apart on a baking sheet lined with parchment paper or a silicone sheet.
  9. Insert, only halfway, a quarter of a walnut kernel at the top of each cookie.
  10. Bake the cookies in a preheated oven at 190°C for 10-12 minutes, or until golden brown.
  11. Allow the cookies to cool completely before storing them in an airtight container.

Tips

For the best flavor, let the dough rest for the full three days. This allows the spices to fully infuse into the dough, giving the cookies a richer taste. Be sure to cool the butter, sugar, and honey mixture before adding the eggs to prevent them from cooking prematurely. When shaping the cookies, ensure they are evenly sized to promote even baking.

Variations & Substitutions

If you’re looking to experiment with flavors, consider adding a pinch of ground cardamom for a unique twist. For a nut-free version, simply omit the walnut topping. You can also substitute the all-purpose flour with a gluten-free blend if desired, though this may slightly alter the texture of the cookies.

Storage

Medenjaci can be stored in an airtight container at room temperature for up to two weeks. They can also be frozen for up to three months, making them a convenient option for make-ahead holiday treats. Just be sure to let them return to room temperature before serving to preserve their delightful texture.

FAQ

Can I use regular sugar instead of demerara sugar?

Yes, you can substitute demerara sugar with regular granulated sugar. However, demerara sugar adds a subtle molasses flavor and a slightly chewy texture that complements the spices beautifully.

What can I use if I don’t have cake flour?

If you don’t have cake flour on hand, you can make a substitute by measuring 50g of all-purpose flour, removing 1 tablespoon, and replacing it with 1 tablespoon of cornstarch. Sift the flour and cornstarch together to ensure a uniform mixture.

Can I add other nuts or dried fruits to the cookies?

Absolutely! Feel free to customize your Medenjaci by adding chopped almonds, hazelnuts, or dried fruits such as raisins or cranberries. Just be mindful not to overcrowd the dough to maintain the cookies’ structure.

Nutrition

While exact nutritional values may vary based on specific ingredients and portion sizes, each cookie is approximately 100 calories. These cookies are a delightful treat, best enjoyed in moderation as part of a balanced diet.

Conclusion

Medenjaci, with their aromatic spices and rich honey flavor, truly encapsulate the essence of Croatian holiday baking. Whether you’re making them for the first time or continuing a family tradition, these cookies are sure to bring warmth and joy to your home. I hope this recipe becomes a beloved addition to your baking repertoire and that it fills your kitchen with the same delightful scents that have wafted through mine for generations. Enjoy every bite, and share the love with those you hold dear.

Related update: Medenjaci – Croatian Honey Spice Cookies

Related update: Coconut Cream Pie Vegan Milkshake

Chocolate Peppermint Cookies | Made by Meaghan Moineau

Chocolate Peppermint Cookies

Intro

Chocolate Peppermint Cookies are a holiday favorite in my household, a tradition that brings back fond memories of festive gatherings and cozy winter evenings. I remember the first time I baked these delightful treats was with my grandmother, who had a knack for creating magic in the kitchen. The aroma of chocolate and peppermint swirling through the house signaled the beginning of holiday celebrations. As we sat around the fireplace, enjoying these cookies with a cup of hot cocoa, it felt like all was right with the world. Today, I’m excited to share this cherished recipe with you, so you too can create sweet memories with your loved ones.

Why You’ll Love It

These Chocolate Peppermint Cookies are the perfect blend of rich chocolate and refreshing peppermint. They are soft and chewy with a slight crunch on the outside, making them irresistible to both kids and adults. Whether you’re looking to impress at a holiday party or simply want to treat yourself, these cookies are sure to become a staple in your dessert repertoire. With their delightful glaze and festive flavor, they capture the essence of the holiday season in every bite.

Ingredients

  • 1 teaspoon baking soda
  • 1 cup confectioners sugar
  • 2 large eggs
  • 2 cups all-purpose flour
  • 2 tablespoons half and half
  • 1 cup light brown sugar
  • 1 teaspoon peppermint extract
  • 1/2 teaspoon salt
  • 1 cup sweet semi chocolate chips
  • 1 cup granulated sugar
  • 1 cup unsalted butter, softened
  • 1/2 cup unsweetened cocoa powder
  • 1 teaspoon vanilla extract

Instructions

  1. Preheat your oven to 350 degrees F.
  2. In a medium bowl, sift together the flour, cocoa powder, baking soda, and salt. Set this aside.
  3. In a mixer, beat together the butter with the granulated and light brown sugars until fluffy, about 2 minutes.
  4. Add the eggs one at a time, beating until smooth after each addition and scraping the sides of the bowl as necessary.
  5. Add the vanilla extract and mix well.
  6. On a low speed, gradually beat in the flour mixture a little at a time until well combined.
  7. Gently fold in the chocolate chips with a spatula or wooden spoon.
  8. Drop teaspoons of the batter onto an ungreased cookie sheet, spacing them about 2 inches apart.
  9. Bake the cookies until just cracked on top, about 8 minutes, rotating the pan halfway through the cooking time.
  10. Remove from the oven and flatten the cookies slightly with a spatula. Allow them to cool completely on a wire rack.
  11. For the glaze, mix together the confectioners sugar, peppermint extract, and half and half in a small bowl until smooth.
  12. Transfer the glaze mixture to a medium resealable plastic bag and snip off a tiny bit of the corner.
  13. Drizzle the glaze over the cooled cookies and let them stand until set, about 10-20 minutes.

Tips

To ensure your cookies are perfectly soft and chewy, avoid overbaking. They should just be cracked on top when you take them out of the oven. Also, make sure your butter is at room temperature for easy mixing and a smooth batter. Using a cookie scoop can help in creating uniform cookies, ensuring even baking.

Variations & Substitutions

Feel free to experiment with this recipe to suit your preferences. If you prefer a stronger peppermint flavor, you can increase the peppermint extract in the glaze. For a different twist, try adding crushed candy canes on top of the glaze for extra crunch and color. You can also substitute white chocolate chips for the semi-sweet chocolate chips for a different flavor profile.

Storage

These cookies can be stored in an airtight container at room temperature for up to a week. If you want to enjoy them for longer, they freeze beautifully. Simply layer them between sheets of parchment paper in a freezer-safe container and they’ll keep for up to three months. Thaw at room temperature before serving.

FAQ

Can I use dark chocolate chips instead of semi-sweet?

Absolutely! Dark chocolate chips can provide a richer flavor and work wonderfully in this recipe. Adjust according to your taste preference.

Can I make the dough ahead of time?

Yes, you can prepare the dough in advance and refrigerate it for up to 48 hours. This can actually enhance the flavor as the ingredients have more time to meld together. Just be sure to let the dough come to room temperature before baking.

Nutrition

While these cookies are a treat and should be enjoyed in moderation, they do provide some nutritional value. Each cookie contains approximately 150 calories, 8g of fat, 20g of carbohydrates, and 2g of protein. The exact nutritional content can vary based on specific brands and measurements used.

Conclusion

I hope this Chocolate Peppermint Cookies recipe brings as much joy to your family as it does to mine. Whether you’re baking them for a holiday gathering or simply to indulge your sweet tooth, these cookies are sure to be a hit. With their perfect balance of chocolate and peppermint, they encapsulate the spirit of the season in every bite. Happy baking, and may your home be filled with warmth, love, and delicious cookies this holiday season!

Related update: Chocolate Peppermint Cookies

Related update: Dump Cake

Ginger Molasses Rounds | Made by Meaghan Moineau

Ginger Molasses Rounds

Intro

As the days grow shorter and the air crisper, there’s nothing quite like the comfort of a warm, spiced cookie straight out of the oven. These Ginger Molasses Rounds take me back to my grandmother’s kitchen, where the aroma of spices and the sound of laughter filled the air. Every year, as the first leaves turned gold, she would bake these cookies with me, guiding my young hands with her own seasoned ones. The magic of mixing simple ingredients to create something so delightful was a lesson in love and patience. This recipe has been passed down through generations, and it’s my pleasure to share it with you, hoping it brings warmth and joy to your home as it always has to mine.

Why You’ll Love It

These Ginger Molasses Rounds are more than just cookies; they’re little bites of nostalgia and comfort. Here’s why you’ll fall in love with them:

  • Perfectly Spiced: The combination of ginger and cinnamon provides a warming, aromatic flavor that’s perfect for the fall and winter months.
  • Deliciously Chewy: Baking them just right ensures a soft, chewy texture that melts in your mouth.
  • Simple Ingredients: You probably already have most of the ingredients in your pantry!
  • Quick to Make: With a short baking time, these cookies are perfect for last-minute gatherings or a cozy evening treat.

Ingredients

  • 1 teaspoon baking soda
  • 3/4 cup butter, softened
  • 1 teaspoon ground cinnamon
  • 1 egg
  • 2 cups all-purpose flour
  • 1/4 cup additional granulated sugar (for rolling)
  • 1 teaspoon ground ginger
  • 1/4 cup molasses
  • 1/4 teaspoon salt
  • 1 cup granulated sugar

Instructions

  1. Preheat your oven to 350°F (175°C). Line a baking sheet with parchment paper.
  2. In a large bowl, cream together the butter and sugar until light and fluffy.
  3. Beat in the egg and molasses until fully incorporated.
  4. In a separate bowl, whisk together the flour, baking soda, salt, cinnamon, and ginger.
  5. Gradually blend the dry ingredients into the creamed mixture until just combined.
  6. Shape the dough into small balls, about 1 inch in diameter.
  7. Roll each ball in the additional granulated sugar to coat.
  8. Place the balls 2 inches apart on the prepared baking sheet.
  9. Bake for 8-9 minutes, until the cookies are just set and their tops are slightly cracked.
  10. Remove from the oven and let them cool on the baking sheet for a few minutes before transferring to a wire rack to cool completely.

Tips

To achieve the perfect texture, be sure to remove the cookies from the oven while they’re still soft. They’ll continue to firm up as they cool. If you prefer a slightly firmer cookie, you can bake them for an additional minute, but be careful not to overbake, as they can quickly become too hard.

Variations & Substitutions

  • Spice it Up: Add a pinch of nutmeg or cloves for an extra layer of warmth.
  • Whole Wheat Flour: Substitute half of the all-purpose flour with whole wheat flour for a nuttier flavor and added nutrition.
  • Gluten-Free: Use a 1:1 gluten-free baking blend in place of the all-purpose flour for a gluten-free version.
  • Vegan Option: Replace the butter with a vegan buttery spread and the egg with a flax egg (1 tablespoon ground flaxseed mixed with 3 tablespoons water).

Storage

Store these cookies in an airtight container at room temperature for up to a week. For longer storage, you can freeze them for up to three months. To enjoy from frozen, simply let them thaw at room temperature or warm them in a low oven for a few minutes.

FAQ

Can I use blackstrap molasses in this recipe?

Blackstrap molasses has a stronger, more bitter flavor compared to regular molasses, which can affect the taste of these cookies. If you enjoy a more robust molasses flavor, you can use blackstrap, but I recommend sticking with regular molasses for the classic taste.

Why are my cookies not cracking?

If your cookies aren’t cracking, it might be because the dough is too warm. Try chilling the dough for 10-15 minutes before baking. Also, ensure your baking soda is fresh, as it helps create those beautiful cracks on top.

Nutrition

Each cookie (assuming the recipe makes about 24 cookies) contains approximately:

  • Calories: 110
  • Fat: 5g
  • Carbohydrates: 16g
  • Protein: 1g
  • Sugar: 10g

Conclusion

Baking these Ginger Molasses Rounds is more than just making a dessert; it’s creating memories. Whether you share them with loved ones or enjoy them with a warm cup of tea on a quiet afternoon, these cookies are sure to bring a smile to your face. I hope this recipe becomes a cherished part of your family’s traditions, just as it is in mine. Happy baking!

Related update: Ginger Molasses Rounds

Related update: Carrot Cake Snack Bites

Related update: Chocolate Peppermint Cookies

Brown Sugar Sponge Cookie with Chocolate Covered Caramels | Made by Meaghan Moineau

Brown Sugar Sponge Cookie with Chocolate Covered Caramels

Intro

There’s something magical about the aroma of freshly baked cookies wafting through the house, evoking cherished memories of childhood. I remember my grandmother’s kitchen, a place filled with love, laughter, and the sweet scent of her famous cookies. One of my fondest memories is helping her bake her signature brown sugar sponge cookies, each topped with a chocolate-covered caramel that melted just perfectly in the oven. Today, I’m thrilled to share this beloved recipe with you all, hoping it brings as much joy to your home as it did to mine.

Why You’ll Love It

This recipe combines the light, airy texture of a sponge cookie with the irresistible decadence of chocolate-covered caramels. The result is a delightful treat that’s both sophisticated and comforting. These cookies are perfect for a cozy afternoon with a cup of tea or as a sweet surprise in a lunchbox. Not only are they delicious, but they’re also simple to make, requiring just a handful of ingredients that you likely already have in your pantry.

Ingredients

  • 1 cup all-purpose flour
  • 1 teaspoon baking powder
  • 1 cup dark brown sugar
  • 4 large eggs, separated
  • 1 teaspoon lemon zest
  • 1/4 teaspoon salt
  • 1 teaspoon vanilla extract
  • 25 Rolos, unwrapped

Instructions

  1. Preheat the oven to 375°F (190°C). Line baking sheets with parchment paper and spray with nonstick cooking spray.
  2. In the bowl of a stand mixer on medium speed, beat the egg whites until foamy. Add the baking powder, salt, and sugar, and continue beating on medium speed until stiff peaks form.
  3. In another bowl, combine egg yolks, vanilla, and lemon zest. Beat with a fork until thoroughly mixed.
  4. Fold the yolks into the egg white mixture just until combined. Be careful not to deflate the egg whites.
  5. Sift the flour over the egg mixture and fold in until the batter is smooth and light.
  6. Drop about 2 teaspoons of batter for each cookie about 2 inches apart onto the prepared baking sheets.
  7. Top each cookie with a Rolo in the center and press down lightly.
  8. Bake for 12 minutes or until golden. Cool on the sheets for 5 minutes, then move to racks to cool completely.

Tips

To ensure your cookies have the perfect texture, make sure to sift the flour before adding it to the egg mixture. This helps keep the batter light and airy. Also, be gentle when folding the ingredients together to avoid deflating the egg whites, which are key to the cookie’s sponge-like texture.

Variations & Substitutions

If you’re looking to switch things up, consider using different flavored caramels or chocolates as toppings. You could also try adding a pinch of cinnamon or nutmeg to the batter for a warm, spiced flavor. For a nutty twist, sprinkle chopped nuts over the cookies before baking.

Storage

These cookies are best enjoyed fresh but can be stored in an airtight container at room temperature for up to three days. If you want to keep them longer, freezing is an option. Place the cookies in a single layer in a freezer-safe container, separating layers with parchment paper to prevent sticking. Thaw at room temperature before serving.

FAQ

Can I make these cookies without a stand mixer?

Yes, you can use a hand mixer or even whisk the egg whites by hand, although it will take more time and effort to achieve stiff peaks. Just be patient and make sure the egg whites are properly beaten before proceeding with the recipe.

What can I do if I don’t have lemon zest?

If you don’t have lemon zest, you can substitute with a small amount of lemon extract or even a bit of orange zest for a different citrus note. Alternatively, you can leave it out altogether; the cookies will still be delicious.

How do I know when the cookies are done?

The cookies are done when they are golden brown on the edges and feel set to the touch. They should easily lift off the parchment paper without sticking. Be careful not to overbake them, as this can make them dry.

Nutrition

While these cookies are a delightful treat, they should be enjoyed in moderation. Each cookie contains approximately 100 calories, 5g of fat, 13g of carbohydrates, and 1g of protein. Keep these in mind if you’re monitoring your daily intake.

Conclusion

These brown sugar sponge cookies with chocolate-covered caramels are more than just a sweet treat—they’re a little piece of nostalgia wrapped up in a delicious package. Perfect for sharing with loved ones or enjoying as a personal indulgence, they bring warmth and joy with every bite. I hope this recipe becomes a cherished tradition in your home, just as it has in mine. Happy baking!

Related update: Brown Sugar Sponge Cookie with Chocolate Covered Caramels

Related update: Lemon Squares

Fat Free Gingerbread Cookies | Made by Meaghan Moineau

Fat Free Gingerbread Cookies

Intro

There’s something magical about the aroma of gingerbread cookies wafting through the house during the holiday season, instantly transporting me back to my grandmother’s cozy kitchen. As a child, I would watch in awe as she skillfully rolled out the dough, her hands moving with practiced precision. She’d always let me sprinkle the cinnamon sugar on top, a task I took on with pride. Now, I carry on the tradition with my own twist—a fat-free version of her classic recipe that captures all the warm, spicy flavors without the added guilt. These Fat Free Gingerbread Cookies are a delightful treat that everyone can enjoy, and I’m thrilled to share them with you.

Why You’ll Love It

These cookies are a perfect blend of nostalgia and health-conscious baking. With their rich, spicy flavors and chewy texture, you won’t miss the fat at all. They’re perfect for holiday gatherings, or any time you’re craving a sweet treat. Whether you’re sharing them with family or enjoying them solo with a warm cup of tea, these cookies are sure to bring a smile to your face. Plus, they’re simple to make, requiring only a few pantry staples and some festive spices.

Ingredients

  • 1 cup all-purpose flour
  • 1 cup whole wheat flour
  • 1 teaspoon baking soda
  • 1/2 teaspoon salt
  • 1 teaspoon ground ginger
  • 1 teaspoon cinnamon
  • 1/2 teaspoon ground cloves
  • 1/4 teaspoon black pepper
  • 1/4 teaspoon fresh ground nutmeg
  • 1/4 teaspoon ground allspice
  • 1 cup dark brown sugar, packed
  • 1/2 cup blackstrap molasses
  • 1/4 cup unsweetened apple sauce
  • 1 teaspoon vanilla extract
  • 1/2 teaspoon maple extract
  • 1/4 cup chai concentrate
  • 2 egg whites
  • 1/4 cup chopped candied ginger
  • 1/4 cup granulated sugar
  • 1 teaspoon cinnamon

Instructions

  1. Sift together the all-purpose flour, whole wheat flour, baking soda, salt, ground ginger, cinnamon, ground cloves, black pepper, fresh ground nutmeg, and ground allspice. Set the mixture aside.
  2. In a large bowl, combine the dark brown sugar, blackstrap molasses, apple sauce, vanilla extract, maple extract, and chai concentrate. Beat with an electric mixer for about four minutes, until smooth.
  3. Add the egg whites and beat for another minute until well combined.
  4. Slowly whisk in the dry ingredients and beat until completely incorporated. Stir in the chopped candied ginger.
  5. Chill the dough for at least one hour. (For best results, chill overnight.)
  6. Preheat the oven to 350°F (175°C). Line a cookie sheet with parchment paper, or grease with cooking spray.
  7. In a shallow bowl, combine the granulated sugar with cinnamon.
  8. Scoop one tablespoon of cookie dough and place it in the shallow bowl. Using your hands, coat the dough with the cinnamon sugar and shape into balls.
  9. Place the cookie dough on the prepared cookie sheet, leaving about 3 inches between each cookie.
  10. Bake for 10-12 minutes. Remove from the oven and transfer to a rack to cool.

Tips

For the best flavor, make sure your spices are fresh. Spices lose their potency over time, so replacing them every six months to a year can make a big difference in your baking. When measuring flour, spoon it into the measuring cup and level it off with a knife to avoid packing it down, which can lead to dense cookies. Chilling the dough is key for these cookies, as it helps the flavors meld and prevents spreading during baking.

Variations & Substitutions

To make these cookies gluten-free, substitute the all-purpose flour and whole wheat flour with a gluten-free flour blend. If you’re not a fan of candied ginger, you can substitute it with finely chopped nuts or raisins for a different texture. For a touch of citrus, add a teaspoon of lemon or orange zest to the dough. If you prefer a sweeter cookie, consider drizzling melted dark chocolate over the cooled cookies.

Storage

Store the cookies in an airtight container at room temperature for up to a week. For longer storage, you can freeze the cookies for up to three months. Place them in a single layer in a freezer-safe container, using parchment paper between layers to prevent sticking.

FAQ

Can I use regular molasses instead of blackstrap molasses?

Yes, you can use regular molasses if you prefer a milder flavor. Blackstrap molasses provides a richer, more robust taste and a hint of bitterness that complements the spices beautifully.

Can I make the dough ahead of time?

Absolutely! You can prepare the dough up to two days in advance and store it in the refrigerator. Just be sure to wrap it tightly in plastic wrap to prevent it from drying out.

What should I do if my dough is too sticky?

If your dough is too sticky to handle, add a little more flour, one tablespoon at a time, until it reaches a manageable consistency. Be careful not to add too much, as this can make the cookies dry.

Nutrition

While these cookies are low in fat, they are still a treat best enjoyed in moderation. Each cookie contains approximately 80 calories, 18 grams of carbohydrates, and 1 gram of protein. They are a delightful indulgence that fits well into a balanced diet.

Conclusion

Baking these Fat Free Gingerbread Cookies is a heartwarming experience, reminiscent of cherished family traditions and the joy of sharing delicious food with loved ones. With their fragrant spices and soft, chewy texture, they’re sure to become a favorite in your household, just as they have in mine. Whether you’re serving them at a holiday party or enjoying them with a cup of chai on a quiet afternoon, these cookies are a testament to the magic of baking. I hope they bring you as much joy and satisfaction as they have brought to my family. Happy baking!

Related update: Fat Free Gingerbread Cookies

Cacao-Pecan Shortbread Cookies | Made by Meaghan Moineau

Cacao-Pecan Shortbread Cookies: A Delectable Treat for Every Occasion

Intro

There’s something magical about the aroma of freshly baked cookies wafting through the house. It instantly transports me back to my grandmother’s kitchen, where we spent countless afternoons baking and laughing. She had a knack for turning simple ingredients into the most delightful treats, and her shortbread cookies were always my favorite. Inspired by her love for baking and my passion for unique flavors, I’ve crafted these Cacao-Pecan Shortbread Cookies. They combine the rich, nutty aroma of toasted pecans with the sophisticated bitterness of cacao nibs, creating a cookie that’s both nostalgic and modern.

Why You’ll Love It

These cookies are a wonderful blend of textures and flavors. The shortbread’s buttery, melt-in-your-mouth consistency is perfectly complemented by the crunchy pecans and the subtle chocolatey notes of the cacao nibs. Whether you’re enjoying them with a cup of coffee in the morning or as a sweet treat after dinner, these cookies are sure to impress. Plus, they’re incredibly easy to make, making them a perfect recipe for both novice and seasoned bakers alike.

Ingredients

  • 1 cup unsalted butter, softened
  • 1/2 cup cacao nibs
  • 1 cup confectioners’ sugar
  • 1 large egg
  • 2 cups all-purpose flour
  • 1/2 teaspoon kosher salt
  • 1 cup pecans, chopped
  • Seeds from 1 split vanilla bean
  • 1 teaspoon vanilla extract
  • 1/4 cup vanilla sugar
  • 1 tablespoon water

Instructions

  1. Preheat the oven to 350°F (175°C). Set the butter out to soften.
  2. Spread the chopped pecans on a rimmed baking sheet and toast for about 4-6 minutes, until lightly browned and fragrant. Let cool.
  3. In a large bowl, beat the softened butter, confectioners’ sugar, vanilla bean seeds, vanilla extract, and salt at medium speed until fluffy.
  4. Add the flour, mixing in half at a time. Beat at low speed until just incorporated. Stir in the pecans and cacao nibs and mix well.
  5. Transfer the dough to a work surface and roll into a 1 1/2-inch-thick log. Wrap the log in plastic or parchment paper and refrigerate for 1 hour, until chilled.
  6. Line two large baking sheets with parchment paper. Spread the vanilla sugar on a platter.
  7. Mix the egg and water together to create an egg wash. Brush the log with the egg wash and roll in the sugar. Slice the log into 1/2-inch-thick rounds and place them on the prepared baking sheets, about 1 inch apart.
  8. Bake the cookies for about 15 minutes, until the edges are golden. Rotate the baking sheets from top to bottom and front to back halfway through baking. Transfer the cookies to a wire rack and let stand until completely cooled.

Tips

For the best results, make sure your butter is at room temperature before you start baking. This will help the dough come together more easily. Additionally, chilling the dough is key to achieving the perfect shortbread texture, so don’t skip this step! Finally, if you don’t have vanilla sugar, you can make your own by mixing granulated sugar with vanilla bean seeds, or simply use regular sugar in its place.

Variations & Substitutions

If you’re feeling adventurous, try adding some orange zest to the dough for a citrusy twist. You can also substitute walnuts or almonds for the pecans if you prefer a different nut flavor. If cacao nibs are hard to come by, mini chocolate chips make a great alternative, adding a sweeter chocolate note to the cookies.

Storage

These cookies can be stored in an airtight container at room temperature for up to one week. For longer storage, consider freezing the unbaked dough log. When you’re ready to bake, simply slice and bake from frozen, adding a couple of extra minutes to the baking time.

FAQ

Can I make the dough ahead of time?

Yes, you can prepare the dough up to three days in advance. Just keep it wrapped in plastic or parchment paper in the refrigerator until you’re ready to bake.

Are these cookies gluten-free?

As written, this recipe is not gluten-free due to the all-purpose flour. However, you can try substituting a 1:1 gluten-free baking flour for a gluten-free version.

What can I use if I don’t have a vanilla bean?

If you don’t have a vanilla bean, you can increase the vanilla extract to 1 1/2 teaspoons for a similar flavor profile.

Nutrition

While these cookies are an indulgent treat, it’s worth noting that they contain heart-healthy fats from pecans and antioxidants from cacao nibs. Moderation is key, so enjoy a cookie or two with your favorite beverage!

Conclusion

Baking these Cacao-Pecan Shortbread Cookies is not just about creating a delicious treat; it’s about crafting moments and memories that last a lifetime. Whether you’re sharing them with family or enjoying them on your own, these cookies are sure to bring warmth and joy to your day. I hope you find as much comfort and delight in baking and savoring these cookies as I do. Happy baking!

Related update: Cacao-Pecan Shortbread Cookies

Related update: Fat Free Gingerbread Cookies

Medenjaci – Croatian Honey Spice Cookies | Made by Meaghan Moineau

Medenjaci – Croatian Honey Spice Cookies

Intro

There’s something incredibly comforting about the aroma of spices wafting through the house, especially during the cooler months. Medenjaci, traditional Croatian honey spice cookies, are a delightful treat that encapsulates the essence of warmth and nostalgia. I remember making these with my grandmother in her cozy kitchen, the air filled with laughter and the sweet scent of honey and spices. These cookies not only hold a special place in my heart but also in the heart of Croatian culinary tradition.

Why You’ll Love It

Medenjaci are the perfect blend of sweetness and spice. The combination of honey, cinnamon, cloves, nutmeg, and ginger creates a symphony of flavors that dance on your palate. These cookies are not only delicious but also versatile—they can be enjoyed with a cup of tea, coffee, or even a glass of milk. Their slightly crisp exterior and soft, chewy interior make them irresistible. Plus, they keep well, making them an ideal treat to prepare in advance for gatherings or as a thoughtful homemade gift.

Ingredients

  • Butter
  • Demerara sugar
  • Honey
  • Eggs
  • Baking soda
  • Ground cinnamon
  • Ground cloves
  • Ground nutmeg
  • Powdered ginger
  • Flour
  • Whole wheat flour
  • Cake flour
  • Whole walnut kernels

Instructions

  1. Heat the butter, sugar, and honey in a saucepan over low heat, stirring constantly, until the sugar and butter have melted completely. Set aside to cool for about 10 minutes.
  2. In a small bowl, lightly whisk the eggs.
  3. In a large bowl, mix and combine the baking soda, ground cinnamon, ground cloves, ground nutmeg, powdered ginger, all-purpose flour, whole wheat flour, and cake flour.
  4. Add the lightly beaten eggs and the flour and spice mixture to the cooled honey, sugar, and butter mixture. Mix and combine to obtain a smooth and soft dough.
  5. Cover the dough with foil and leave it in a cool place for 1-3 days to allow the flavors to meld and the dough to firm up.
  6. Once ready, divide and roll the dough into long rolls approximately 1.5 cm in diameter, then cut them into smaller rolls.
  7. Shape each roll into a walnut-sized ball and place them, a few centimeters apart, on a baking sheet lined with parchment paper or a silicon sheet.
  8. Insert a quarter of a walnut kernel halfway into the top of each cookie.
  9. Bake in a preheated oven at 190°C (374°F) for 10-12 minutes, or until the cookies are golden brown.
  10. Allow the cookies to cool completely before storing them in an airtight container.

Tips

For the best medenjaci, ensure that your spices are fresh to maximize their flavor. Be patient and allow the dough to rest for at least a day—this step is essential for developing the cookies’ signature taste. If you notice the dough is too sticky when rolling, lightly flour your hands and the working surface.

Variations & Substitutions

While the traditional recipe is delightful, feel free to experiment! You can substitute the demerara sugar with brown sugar for a softer texture. For a nut-free version, omit the walnut kernels or replace them with seeds such as pumpkin or sunflower seeds. If you prefer a spicier kick, increase the amount of ginger or add a pinch of black pepper.

Storage

Store medenjaci in an airtight container at room temperature for up to two weeks. For longer storage, freeze the cookies in a freezer-safe container for up to three months. Simply thaw them at room temperature when you’re ready to enjoy.

FAQ

Can I make the dough ahead of time?

Yes, the dough can be prepared 1-3 days in advance and stored in a cool place. This resting period allows the flavors to deepen and results in a more aromatic cookie.

What can I serve with medenjaci?

Medenjaci pair beautifully with warm beverages such as tea, coffee, or mulled wine. They also make a lovely addition to a holiday cookie platter.

Are these cookies suitable for those with dietary restrictions?

While medenjaci are not gluten-free, you can experiment with gluten-free flour blends. For a dairy-free version, substitute the butter with a plant-based alternative.

Nutrition

While medenjaci are a treat, they offer the benefits of honey, which is rich in antioxidants. However, it’s important to enjoy them in moderation as part of a balanced diet.

Conclusion

Medenjaci are more than just cookies; they are a taste of Croatian heritage, a reminder of cozy kitchens filled with love and laughter. Whether you’re making these for a festive occasion or simply to enjoy with your afternoon tea, I hope they bring warmth and joy to your home. Happy baking!

Related update: Medenjaci – Croatian Honey Spice Cookies

Related update: PB Cup Stuffed Brownie Bites

Flour-Less Peanut Butter Cookies | Made by Meaghan Moineau

Flour-Less Peanut Butter Cookies | Made by Meaghan Moineau

Title: Nostalgic Flour-Less Peanut Butter Cookies: A Taste of Simplicity
Description: Dive into the world of simple yet delectable desserts with our Flour-Less Peanut Butter Cookies. With just a handful of ingredients, these cookies evoke cherished memories of family gatherings and cozy kitchen moments. Perfect for a sweet treat, these cookies are easy to make and impossible to forget.

In the hustle and bustle of modern life, there’s something truly comforting about a recipe that requires only a few simple ingredients yet delivers a taste that transports you back to cherished family moments. Our Flour-Less Peanut Butter Cookies are more than just a dessert; they’re a delicious reminder of the magic that happens when family comes together in the kitchen.

Ingredients:

– 1 cup peanut butter

– 1/2 cup honey

– 1 large egg

– 1 teaspoon baking soda

– 1 teaspoon vanilla extract

Instructions:

1. Preheat your oven to 350°F (175°C).

2. In a large mixing bowl, combine peanut butter, honey, egg, baking soda, and vanilla extract. Stir well until the mixture is smooth and creamy.

3. Using a spoon, drop spoonfuls of the dough onto a lightly greased cookie sheet, spacing them about 2 inches apart.

4. Bake in the preheated oven for about 12 minutes. The cookies will appear soft to the touch, but they will firm up as they cool.

5. Carefully transfer the cookies to a rack to cool completely before indulging.

A Nostalgic Twist:

Every time I bake these peanut butter cookies, I’m instantly transported back to my grandmother’s cozy kitchen. The scent of cookies baking would fill the air, mingling with laughter and stories shared around the kitchen table. I remember being a child, standing on tiptoes to sneak a peek at the golden cookies through the oven door, eagerly awaiting the moment they would be cool enough to enjoy.

These cookies were a staple at our family gatherings, often appearing at birthdays, holidays, and spontaneous weekend visits. My grandmother, a woman of simple but profound wisdom, taught us that the best recipes don’t require complicated ingredients or fancy techniques. Instead, they rely on the love and care poured into each step—a philosophy that these Flour-Less Peanut Butter Cookies perfectly embody.

Difficulty Rating: 2/10
Classification: Dessert

With a difficulty rating of just 2 out of 10, this recipe is perfect for bakers of all skill levels. Whether you’re a seasoned chef or a novice in the kitchen, these cookies are a delightful way to create something sweet and satisfying without any fuss. Enjoy them as an afternoon snack, a delightful dessert, or an indulgent treat any time of the day.

In a world that often feels fast-paced and overwhelming, take a moment to slow down, gather your loved ones, and share these cookies. After all, it’s these simple, nostalgic recipes that remind us of the joy found in togetherness and the timeless pleasure of homemade treats.

Read more about Appetizers

Read more about Main Dishes

Read more about Desserts

Related update: Medenjaci - Croatian Honey Spice Cookies

Dried Cranberry Chocolate Cookies | Made by Meaghan Moineau

Dried Cranberry Chocolate Cookies | Made by Meaghan Moineau

Nostalgic Delights: Dried Cranberry Chocolate Cookies


Description

Dive into the warm embrace of nostalgia with our Dried Cranberry Chocolate Cookies recipe. Perfectly nestled between the sweet tang of cranberries and the rich decadence of chocolate, these cookies are the ideal dessert to accompany cherished family moments. Simple to make yet irresistibly delicious, they promise to fill your home with the comforting aroma of love and togetherness.

Ingredients

- 1 cup unsalted butter, softened

- 1 cup granulated sugar


- 1 cup light brown sugar, packed


- 2 large eggs


- 1 egg yolk


- 2 teaspoons vanilla extract


- 3 cups plain flour


- 1 teaspoon baking powder


- 1 teaspoon baking soda


- 1/2 teaspoon kosher salt


- 2 cups old-fashioned rolled oats


- 1 cup semisweet chocolate chips


- 1 cup white chocolate chips


- 1 cup dried cranberries


Instructions

1. Preparation: Preheat your oven to 350°F (175°C). Line two baking sheets with parchment paper.
2. Mix Dry Ingredients: In a medium bowl, whisk together the flour, baking powder, baking soda, and kosher salt.
3. Cream Butter and Sugars: In a standing mixer fitted with the paddle attachment, beat the butter, granulated sugar, and brown sugar on medium speed until creamy and smooth.
4. Incorporate Eggs and Vanilla: Add the eggs one at a time, followed by the egg yolk, beating well between each addition. Mix in the vanilla extract.
5. Combine Ingredients: Gradually add the dry ingredients to the wet mixture, beating until just combined.
6. Add Oats, Chocolate, and Cranberries: Stir in the rolled oats, semisweet chocolate chips, white chocolate chips, and dried cranberries until evenly distributed throughout the dough.
7. Shape Cookies: Spoon heaping teaspoons of dough onto the prepared baking sheets, spacing them about 2 inches apart.
8. Bake: Bake for 12 to 15 minutes, or until the cookies begin to brown at the edges.
9. Cool: Allow the cookies to cool on the baking sheets for a few minutes before transferring them to a wire rack to cool completely.

Family Memory

Growing up, these Dried Cranberry Chocolate Cookies were a staple in our household, especially during the festive seasons. I vividly remember the first time my grandmother taught me how to make them. Her kitchen would transform into a wonderland of scents—sweet, buttery, and slightly tangy, with a hint of chocolate.

On chilly winter afternoons, my siblings and I would huddle around the kitchen table, eagerly awaiting our turn to mix or taste-test the dough. Grandma would always sneak a few extra cranberries and chocolate chips into our mouths, winking conspiratorially as if it were our little secret. Those moments, filled with laughter and the gentle hum of family chatter, are etched in my memory, reminding me of the love and warmth that food can bring to our lives.


Difficulty: 4/10

Classification: Dessert


Indulge in these Dried Cranberry Chocolate Cookies, and may they bring you as much joy and fond memories as they have brought to our family. Whether you're creating new traditions or celebrating old ones, these cookies are sure to become a beloved staple in your home.

Read more about Appetizers

Read more about Main Dishes

Read more about Desserts

Shortbread Lemon Cookies | Made by Meaghan Moineau

Shortbread Lemon Cookies | Made by Meaghan Moineau

Zesty Delights: Nostalgic Shortbread Lemon Cookies


A Journey of Taste: The Sweet and Tangy Embrace of Lemon Cookies


Imagine the vibrant zest of lemon mingling with the buttery goodness of shortbread, creating a perfect symphony of flavors that dance on your taste buds. Shortbread Lemon Cookies are not just a treat; they are a journey back to cherished family memories and sunny afternoons filled with laughter. With a difficulty rating of 4 out of 10, these delightful cookies are an easy yet impressive dessert to share with loved ones.


The Ingredients of Joy


To embark on this flavorful journey, gather these simple yet transformative ingredients:

- 1 cup butter, softened


- 2 eggs


- 1 tablespoon lemon zest


- 1 cup almond flour


- 1/2 cup caster sugar


- 1 1/2 cups all-purpose flour


- 2 tablespoons lemon juice


- Whole dried lemons, sliced


- Powdered sugar (optional)


A Recipe Steeped in Family Tradition


Growing up, the aroma of lemon cookies wafting through my grandmother’s kitchen signaled the start of summer. These cookies were more than just a treat; they were a symbol of our family’s love for gathering and sharing stories. I remember sitting on the porch, a plate of freshly baked cookies in my lap, as my grandmother recounted tales from her childhood.


The tradition was simple yet profound: each summer, we would make these cookies together, measuring ingredients and sharing laughter. The tangy aroma of lemon zest would fill the air as we shaped the dough into perfect rolls. These moments taught me the joy of baking and the importance of family bonds.


Crafting Your Own Memories: Instructions


1. Prepare the Base: Beat the softened butter with one egg until creamy. Gradually add the almond flour, caster sugar, all-purpose flour, and lemon juice, mixing on the lowest setting until a smooth dough forms.
2. Chill the Dough: Divide and shape the dough into two rolls, each about 2 inches in diameter. Wrap them in parchment paper and refrigerate for at least 3 hours to firm up the dough.
3. Ready the Oven: Preheat your oven to 350°F (175°C). While waiting, revel in the anticipation of the deliciousness to come.
4. Slice and Arrange: Once chilled, slice each log into cookies about 1/8 inch thick. Place them on a lightly greased baking sheet, leaving space for them to expand slightly.
5. Add a Golden Touch: Beat the second egg and gently brush the top of each cookie. Crown each with a slice of dried lemon and sprinkle with a touch of sugar.
6. Bake to Perfection: Bake in the preheated oven for 12-15 minutes. For a beautifully browned top, place the cookies under the broiler for the last 5 minutes. Allow them to cool on a wire rack.
7. Optional Elegance: Dust with powdered sugar for an added touch of elegance and a hint of sweetness.

A Sweet Conclusion


Shortbread Lemon Cookies are more than just a dessert; they are a gateway to cherished memories and the creation of new ones. Whether enjoyed on a warm summer day or as a treat during a cozy gathering, these cookies bring joy and connection to any occasion. So, gather your loved ones, embrace the nostalgia, and let the magic of lemon and shortbread transport you to a place of warmth and happiness.


Enjoy the journey, and happy baking!

Read more about Appetizers

Read more about Main Dishes

Read more about Desserts

Vanilla Bean Melting Moment Cookies With Caramel Filling | Made by Meaghan Moineau

Vanilla Bean Melting Moment Cookies With Caramel Filling | Made by Meaghan Moineau

Title: A Nostalgic Delight: Vanilla Bean Melting Moment Cookies with Caramel Filling
Description: Discover the irresistible charm of Vanilla Bean Melting Moment Cookies with Caramel Filling. This dessert, rich in flavor and steeped in family memories, is perfect for any occasion. With a difficulty rating of 5 out of 10, this delightful treat is accessible for bakers of all levels.

---


There's something truly magical about the aroma of freshly baked cookies wafting through the house, enveloping you in a warm, comforting embrace. Every time I bake these Vanilla Bean Melting Moment Cookies with Caramel Filling, I'm transported back to my grandmother's kitchen, where I first learned the art of baking.


A Walk Down Memory Lane


As a child, I spent countless weekends at my grandmother's house, eagerly awaiting the moment we'd don our aprons and transform simple ingredients into delectable treats. One particular recipe stands out in my memory: her beloved Vanilla Bean Melting Moment Cookies. These delicate cookies, paired with a luscious caramel filling, were always a highlight of our baking adventures.


I recall the gentle hum of the electric mixer as we creamed butter and powdered sugar, the sweet scent of vanilla bean paste filling the air. The joy of piping the dough onto baking sheets, watching the cookies rise and turn a perfect golden hue, was unmatched. Once cooled, the pièce de résistance was the silky caramel filling, a concoction of sweetened condensed milk, golden syrup, and butter, patiently stirred to perfection.


The Recipe


Ingredients


- 1 cup butter, softened


- 1/2 cup powdered sugar


- 1 teaspoon vanilla bean paste


- 1 1/2 cups all-purpose flour, sifted


- 1/2 cup cornstarch, sifted


- 1/2 cup canned sweetened condensed milk


- 1 tablespoon golden syrup


- 1/4 cup butter


Instructions


1. Prepare the Dough:

- Preheat your oven to 350 degrees Fahrenheit.


- In a large bowl, combine the butter, powdered sugar, and vanilla bean paste. Beat with an electric mixer until the mixture is light and fluffy.


- Gently fold in the sifted all-purpose flour and cornstarch until just combined.


2. Shape the Cookies:

- Transfer the dough to a piping bag fitted with a fluted tip.


- Pipe 1-inch rounds onto a baking sheet lined with parchment paper, ensuring enough space for the cookies to spread.


3. Bake:

- Bake in the preheated oven for 12-14 minutes or until the cookies achieve a lovely golden color.


- Allow the cookies to cool on the tray to maintain their delicate structure.


4. Create the Caramel Filling:

- In a saucepan, combine the sweetened condensed milk, golden syrup, and butter.


- Cook over very low heat, stirring continuously for 25-30 minutes, until the mixture is thick and pale golden.


5. Assemble:

- Once both cookies and caramel are cool, sandwich a generous spoonful of caramel filling between two cookies. Enjoy these nostalgic delights with a cup of tea or a glass of milk.


A Sweet Conclusion


These Vanilla Bean Melting Moment Cookies with Caramel Filling are more than just a dessert; they are a testament to the cherished moments spent with family in the heart of the home. With a difficulty rating of 5 out of 10, bakers of all skill levels can recreate these delightful cookies and perhaps start their own tradition of sweet memories.


Whether you're an experienced baker or a novice, I invite you to try this recipe. Create new memories with your loved ones, and let the warm scent of vanilla and caramel fill your home, just as it did mine so many years ago.

Read more about Appetizers

Read more about Main Dishes

Read more about Desserts

Chocolate Fudge Cookies | Made by Meaghan Moineau

Chocolate Fudge Cookies | Made by Meaghan Moineau

Title: "Nostalgic Chocolate Fudge Cookies: A Sweet Escape into Childhood Memories"


Description:

Dive into the world of rich, chocolatey goodness with our Chocolate Fudge Cookies recipe. This delightful treat is not just a dessert; it's a ticket back to cherished family moments and nostalgic kitchen adventures. Easy to make and impossible to resist, these cookies promise to be a hit at any gathering. Read on for the full recipe, a heartwarming family story, and tips to perfect your baking experience.

---


Chocolate Fudge Cookies Recipe
Ingredients:

- 1/2 cup butter, softened


- 1/4 cup canola oil


- 1 cup white dark chocolate chips


- 1 large egg


- 1 box Betty Crocker chocolate fudge cake mix


- 1/4 cup peanut butter


- 1/2 cup rolled oats


- 1 teaspoon vanilla extract


- 1/4 cup whole milk


Instructions:

1. Preheat your oven to 350°F (175°C).


2. In a stand mixer or food processor, combine the butter, canola oil, white dark chocolate chips, egg, chocolate fudge cake mix, peanut butter, rolled oats, vanilla extract, and whole milk. Mix until everything is well combined and the dough is smooth.


3. Spoon the dough onto prepared cookie sheets, spacing each dollop a few inches apart. Use the back of a spoon to gently press down on each cookie.


4. Bake in the preheated oven for 6-8 minutes, or until the edges are lightly golden.


5. Transfer the cookies to a wire rack to cool completely.


6. Enjoy these delightful treats with a glass of milk or a warm cup of coffee!


Difficulty Rating: 3/10
Classification: Dessert

---


A Sweet Journey Down Memory Lane


Growing up, weekends at my grandmother's house were always a time of joy and indulgence. The highlight of our visits was undoubtedly the moment we walked into the kitchen, greeted by the heavenly aroma of freshly baked cookies. My grandmother had a knack for creating the most delicious treats, and her Chocolate Fudge Cookies were a family favorite.


As a child, I would stand by her side, eyes wide with anticipation, as she expertly mixed the ingredients. She would let me stir the dough—a task I took very seriously—and sneak a taste of the chocolate chips when she wasn't looking. Each batch of cookies was a masterpiece, a perfect blend of creamy peanut butter and rich chocolate, with a delightful crunch from the oats.


Baking these cookies was more than just a culinary exercise; it was a bonding experience, filled with laughter and storytelling. My grandmother would share tales from her childhood, making each cookie session a bridge between generations. The kitchen was our haven, a place where love was measured in cups and memories were baked into every bite.


Even now, as I recreate this recipe in my own kitchen, I'm transported back to those cherished moments. The sweet scent of chocolate fudge wafts through my home, bringing with it a sense of comfort and nostalgia. These cookies are more than a dessert; they're a reminder of love, family, and the simple joys of life.


Whether you're looking to create new memories or simply indulge in a delicious treat, these Chocolate Fudge Cookies are sure to delight. Gather your loved ones, roll up your sleeves, and let the magic of baking bring you closer together.


---


Conclusion


This Chocolate Fudge Cookies recipe is a delightful way to bring a touch of nostalgia into your home. With simple ingredients and easy steps, you can create a dessert that's not only delicious but also a beautiful reminder of cherished family moments. So go ahead, bake a batch, and let the memories unfold with every bite!

Read more about Appetizers

Read more about Main Dishes

Read more about Desserts

Peanut Butter Sriracha Cookies | Made by Meaghan Moineau

Peanut Butter Sriracha Cookies | Made by Meaghan Moineau

Spice Up Your Sweet Tooth: Peanut Butter Sriracha Cookies


A Nostalgic Twist on a Family Favorite


When it comes to baking, few things evoke nostalgia like the comforting aroma of cookies wafting through the house. Growing up, cookies were a staple in our household, each batch a different adventure, each bite a fond memory. Among the myriad of recipes my family experimented with, one always stood out for its unique blend of flavors: Peanut Butter Sriracha Cookies. As unconventional as it sounds, this daring combination became a beloved treat, sparking laughter and curiosity every time we shared them with friends and family.


The Story Behind the Spice


My earliest memory of these cookies dates back to a rainy Sunday afternoon. My mom, ever the culinary adventurer, decided to put a twist on the traditional peanut butter cookie recipe by adding a hint of sriracha. The result was nothing short of magical—a perfect blend of sweet, salty, and spicy, topped with a classic Hershey's chocolate kiss. I remember the initial skepticism turning into surprise and delight as we all took our first bites. The cookies became a family staple, often requested at gatherings and cherished as a symbol of our family's love for creativity and adventure in the kitchen.


The Recipe: A Perfect Blend of Sweet and Heat


Ingredients:

- 1 cup unsalted butter, softened


- 1 cup crunchy peanut butter


- 1 cup sugar


- 1 cup brown sugar


- 1 tablespoon sriracha


- 2 large eggs


- 1 teaspoon vanilla extract


- 2 1/2 cups all-purpose flour


- 1 teaspoon baking powder


- 1/2 teaspoon salt


- 1 teaspoon baking soda


- Granulated sugar for rolling


- Hershey's chocolate kisses for topping


Instructions:

1. In a large mixing bowl, cream together the unsalted butter, crunchy peanut butter, sugar, and brown sugar until smooth and fluffy.


2. Gradually add in the sriracha, eggs, and vanilla extract. Beat the mixture until everything is well combined.


3. In a separate bowl, whisk together the flour, baking powder, baking soda, and salt.


4. Slowly incorporate the dry ingredients into the peanut butter mixture, stirring until fully combined.


5. Chill the dough in the refrigerator for 1 hour.


6. Preheat your oven to 375 degrees Fahrenheit.


7. Roll the dough into approximately 1-inch balls, or use a medium-sized cookie scoop for uniformity.


8. Dip the top of each dough ball into granulated sugar, then place them onto a cookie sheet.


9. Flatten each ball with a fork, creating a criss-cross pattern.


10. Bake for 8-10 minutes, ensuring not to over-bake them. The cookies should just begin to brown.


11. Once out of the oven, immediately press a Hershey's chocolate kiss into the center of each cookie.


12. Allow the cookies to cool on wire racks before indulging.


The Verdict


Difficulty Rating: 4/10
Classification: Dessert

These Peanut Butter Sriracha Cookies are more than just a dessert; they're a conversation starter. Easy enough for a novice baker yet intriguing enough for a seasoned one, they offer a delightful surprise with every bite. Whether you're looking to impress at a potluck or just craving something different, these cookies promise a unique experience that's sure to leave a lasting impression on anyone who tries them. So, why not spice up your sweet tooth and create some new, heartwarming memories along the way?

Read more about Appetizers

Read more about Main Dishes

Read more about Desserts