Red Velvet Cupcakes
Intro
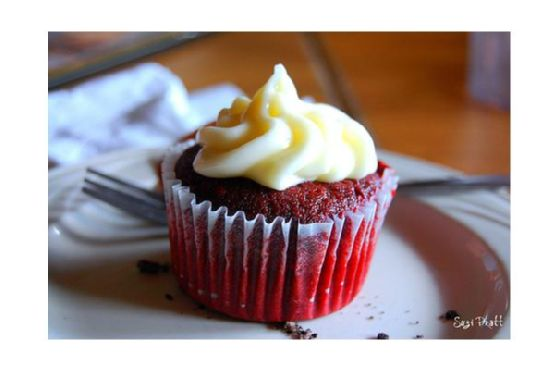
There’s something magical about red velvet cupcakes. The vibrant red hue, the rich cocoa flavor, and the creamy frosting come together to create a cupcake that’s as delightful to look at as it is to eat. I remember the first time I baked red velvet cupcakes with my grandmother. We spent the afternoon in her cozy kitchen, the air filled with warmth and the sweet aroma of baking. She taught me the importance of patience and precision when measuring ingredients, and how a simple cupcake can bring joy to those who share it. Today, I’m excited to share with you my beloved recipe for red velvet cupcakes, a treat that not only delights the taste buds but also brings back fond memories of time spent in the kitchen with loved ones.
Why You’ll Love It
These red velvet cupcakes are a perfect blend of color, taste, and texture. The deep red color makes them a show-stopper at any gathering, while the soft, moist cake paired with the creamy frosting ensures that each bite is a taste of heaven. They’re easy to make and even easier to enjoy, whether you’re a seasoned baker or a beginner. The slight tang from the buttermilk and vinegar perfectly complements the sweetness, making these cupcakes not too sweet, but just right.
Ingredients
- 1 teaspoon baking soda
- ¾ cup unsalted butter, softened
- 1 cup buttermilk
- 2 ½ cups cake flour, sifted
- 1 teaspoon cider vinegar
- 8 ounces cream cheese, softened
- 3 large eggs
- 4 cups powdered sugar
- 2 tablespoons red food coloring
- ½ teaspoon salt
- 1 ½ cups sugar
- ½ cup unsalted butter, softened (for frosting)
- 2 tablespoons unsweetened cocoa
- 1 teaspoon vanilla extract
Instructions
- Preheat your oven to 350°F (175°C). Grease and lightly flour two cupcake pans to make 24 cupcakes.
- In a small bowl, sift the cake flour and set aside.
- In a large bowl, use an electric mixer on medium speed to cream together the butter and sugar until very light and fluffy, about 5 minutes.
- Add the eggs one at a time, beating well after each addition.
- In a small bowl, whisk together the red food coloring, cocoa, and vanilla. Add this mixture to the batter and beat well.
- In a measuring cup, stir the salt into the buttermilk. Add to the batter in three parts, alternating with the flour. With each addition, beat until the ingredients are incorporated, but do not overbeat.
- In a small bowl, stir together the cider vinegar and baking soda. Add this to the batter and mix well.
- Using a rubber spatula, scrape down the batter in the bowl, ensuring the ingredients are well blended and the batter is smooth.
- Divide the batter evenly among the prepared pans.
- Arrange the oven racks in the upper and lower thirds of the oven and bake the cupcakes, switching positions of the pans halfway through, until a tester comes out clean, about 20 minutes.
- Cool the cupcakes in the pan for 10 minutes, then remove from the pan and cool completely on a rack before icing.
- To make the frosting, combine butter, salt, and cream cheese in a mixer and beat on medium speed for 2-3 minutes.
- Add powdered sugar gradually until just incorporated. Be careful not to overmix; the frosting should be thick but not fluffy.
- Add vanilla extract. If the frosting is too thick, add a splash of milk to achieve the desired consistency.
- To ice the cupcakes, mound about a cup of frosting on top of each cupcake and use an icing spatula to create a swirl on top. Decorate with colored sprinkles if desired.
Tips
For the best results, ensure all ingredients are at room temperature before you start. This helps them mix more evenly. When measuring flour, be sure to sift it to avoid lumps and ensure a light texture. Lastly, resist the temptation to open the oven door while baking, as this can cause the cupcakes to deflate.
Variations & Substitutions
If you’re looking to switch things up, consider using natural food coloring for a more subtle hue. For a different flavor profile, try adding a teaspoon of almond extract to the batter. You can also substitute the cream cheese frosting with a simple buttercream or a whipped cream topping for a lighter option.
Storage
Store the cupcakes in an airtight container at room temperature for up to 2 days. For longer storage, keep them in the refrigerator for up to a week. To freeze, wrap each cupcake individually in plastic wrap and place in a freezer-safe bag for up to 3 months. Thaw at room temperature before serving.
FAQ
Can I make these cupcakes ahead of time?
Yes, you can bake the cupcakes a day in advance and store them in an airtight container. Frost them on the day you plan to serve them for the best texture and flavor.
What can I do if I don’t have buttermilk?
If you don’t have buttermilk, you can make a substitute by adding 1 tablespoon of lemon juice or vinegar to 1 cup of milk. Let it sit for 5 minutes before using it in the recipe.
Can I use regular flour instead of cake flour?
Yes, you can substitute all-purpose flour for cake flour by using 2 ¼ cups of all-purpose flour plus ¼ cup of cornstarch. Sift them together before using in the recipe.
Nutrition
Each red velvet cupcake with frosting contains approximately 280 calories, 12g of fat, 37g of carbohydrates, and 3g of protein. Please note these values are estimates and can vary based on specific ingredients used.
Conclusion
These red velvet cupcakes are a true delight, offering a perfect balance of flavors and a stunning appearance that will impress your family and friends. Whether you’re baking for a special occasion or just because, they’re sure to bring smiles and fond memories. Happy baking!
Related update: Red Velvet Cupcake
Related update: Chocolate Caramel Cupcakes
Related update: Cherry Coke Float Cupcakes With Chocolate Shell