Rosemary Walnut Bread
Intro
There’s something magical about the smell of freshly baked bread wafting through the house, especially when it’s infused with fragrant rosemary and the earthy notes of walnuts. This Rosemary Walnut Bread is more than just a recipe; it’s a journey back to simpler times, evoking memories of baking with my grandmother in her cozy kitchen. I remember the way she would hum softly while kneading the dough, her hands rhythmic and steady, as if she were weaving a story into the bread. This recipe carries the essence of those cherished moments and brings warmth and comfort to any table.
Why You’ll Love It
You’ll fall head over heels for this Rosemary Walnut Bread for many reasons:
- Flavorful Fusion: The combination of rosemary and walnuts offers a delightful contrast of flavors, creating a unique and sophisticated taste.
- Texture Heaven: The bread boasts a perfect balance between a crunchy crust and a soft, fluffy interior.
- Versatile Delight: Whether you enjoy it as a standalone snack, a savory sandwich base, or paired with your favorite soup, this bread is incredibly versatile.
- Homemade Goodness: Baking your own bread is a rewarding experience, providing a sense of accomplishment and the joy of nurturing loved ones with homemade fare.
Ingredients
- Cream cheese
- Dry yeast
- Eggs
- Flour
- Honey
- Lemon zest
- Milk
- Olive oil
- Rosemary
- Salt
- Walnuts
Instructions
- In a large mixing bowl, combine cream cheese, dry yeast, eggs, and milk. Let the mixture stand for 5 minutes to activate the yeast.
- Stir in two cups of flour. Cover the bowl with plastic wrap and place it in a warm spot (about 85 degrees Fahrenheit) for 15 minutes to allow the dough to rise slightly.
- Add the remaining flour, walnuts, lemon zest, rosemary, and 2 eggs. Mix until the dough begins to stick together.
- Transfer the dough to a floured surface and knead for about 10 minutes until it becomes smooth and elastic.
- Rub the top of the dough with olive oil and place it in an oiled bowl. Cover with a damp cloth and let it rise in a warm area for about 1 hour until doubled in size.
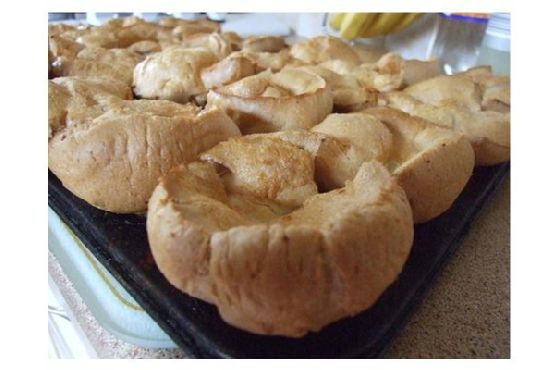
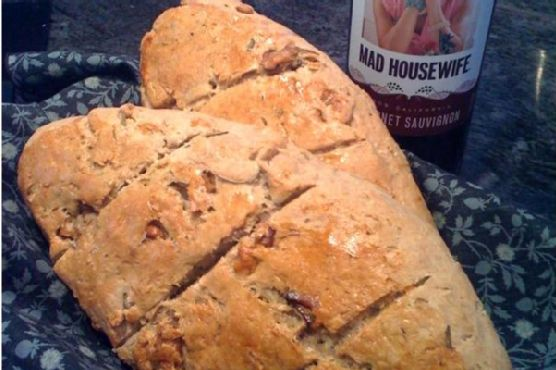
- Return the dough to the floured surface and divide it into two equal portions. Shape each portion into a leaf-shaped loaf.
- Make three diagonal slashes, each about 1/4 inch deep, on the top of each loaf. Brush with the remaining beaten egg.
- Allow the loaves to rise for another 30 minutes.
- Preheat your oven to 375 degrees Fahrenheit and bake the loaves for 40 minutes until they are golden brown.
- Let the bread stand for at least 20 minutes before slicing, if you can resist the tempting aroma!
Tips
- For best results, ensure that all your ingredients are at room temperature before you start mixing.
- Use fresh rosemary for a more vibrant flavor; dried rosemary can be used in a pinch, but it won’t offer the same fresh taste.
- If you don’t have a warm spot for rising, preheat your oven to the lowest setting, then turn it off and let the dough rise inside.
Variations & Substitutions
This Rosemary Walnut Bread is a versatile recipe that can be adapted to suit various tastes and dietary needs:
- Nut Substitution: Swap walnuts with pecans or almonds for a different nutty flavor.
- Herb Variations: Experiment with different herbs like thyme or sage for a unique twist on the original recipe.
- Gluten-Free Version: Use a gluten-free flour blend to make this bread suitable for those with gluten sensitivities.
Storage
To keep your Rosemary Walnut Bread fresh, store it in an airtight container or wrap it in plastic wrap at room temperature for up to 3 days. For longer storage, you can freeze the bread for up to 3 months. Simply wrap it tightly in aluminum foil or freezer wrap and place it in a resealable freezer bag. When ready to use, thaw the bread at room temperature and reheat it in the oven for a few minutes to regain its crusty texture.
FAQ
Can I use instant yeast instead of dry yeast?
Yes, you can use instant yeast as a substitute for dry yeast. Simply add it directly to the dry ingredients and proceed with the recipe. There’s no need to let it stand for 5 minutes as you would with dry yeast.
What can I serve with Rosemary Walnut Bread?
This bread pairs beautifully with a variety of dishes. Enjoy it with a bowl of hearty soup, as a base for your favorite sandwich, or simply toasted with a slather of butter or cream cheese.
How do I know when the bread is fully baked?
To check if the bread is done, tap the bottom of the loaf; it should sound hollow. Additionally, the crust should be a lovely golden brown color. If you have a kitchen thermometer, the internal temperature should be around 190-200 degrees Fahrenheit.
Nutrition
Each slice of Rosemary Walnut Bread is a delightful balance of taste and nutrition, offering healthy fats from walnuts, fiber from whole wheat flour (if used), and the aromatic benefits of rosemary. However, it’s important to enjoy in moderation as part of a balanced diet.
Conclusion
Baking Rosemary Walnut Bread is more than just creating a delicious treat; it’s about embracing the joy of homemade goodness and sharing moments of love and warmth with family and friends. Whether you’re an experienced baker or just starting, this recipe invites you to slow down, enjoy the process, and savor the delightful results. So, tie on your apron, gather your ingredients, and let’s bake some memories together.
Related update: Rosemary Walnut Bread