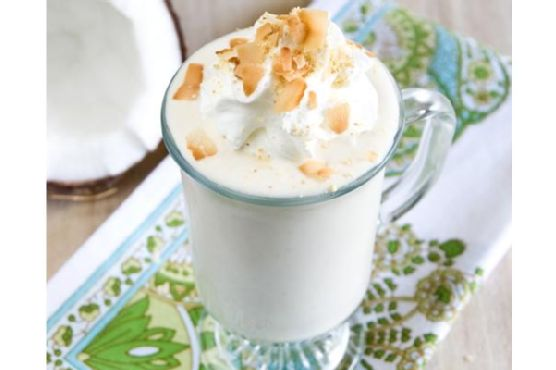
Coconut Cream Pie Vegan Milkshake
Intro
There’s something magical about the creamy, tropical sweetness of coconut. It takes me back to sun-drenched summer days spent at my grandmother’s house, where she would whip up her famous coconut cream pie. As a child, I would eagerly watch her mix the ingredients, my mouth watering in anticipation of the first bite. Now, as a vegan, I wanted to capture that nostalgic flavor in a refreshing new form. Introducing: the Coconut Cream Pie Vegan Milkshake. This recipe is a delightful fusion of nostalgia and modern plant-based cooking, perfect for those hot afternoons when you crave something cool and satisfying.
Why You’ll Love It
This Coconut Cream Pie Vegan Milkshake is a decadent treat that is both dairy-free and delicious. It combines the rich, creamy texture of coconut with the natural sweetness of bananas, creating a smoothie that feels indulgent yet is made with wholesome ingredients. It’s incredibly simple to prepare, requiring just a blender and a few minutes of your time. Whether you’re vegan or simply looking for a lighter, plant-based dessert option, this milkshake is sure to delight your taste buds.
Ingredients
- Fresh coconut meat
- Lemon juice
- Coconut oil
- Light coconut milk
- Frozen banana
- Vanilla extract
- Graham cracker crumbs
- Coconut flakes
- Ice cubes
Instructions
- In a blender, combine the fresh coconut meat, lemon juice, coconut oil, light coconut milk, frozen banana, and vanilla extract.
- Add the graham cracker crumbs to the blender.
- If you like your milkshake a little sweeter, you can add agave nectar to taste.
- Blend all the ingredients until smooth and creamy.
- Pour the milkshake into glasses and top with your choice of soy or dairy-based whipped cream.
- Sprinkle additional graham cracker crumbs on top.
- Garnish with toasted coconut flakes for an extra touch of coconut flavor.
- Serve immediately and enjoy! This recipe serves 2-3 people.
Tips
To ensure your milkshake is as creamy as possible, use fresh coconut meat and a high-speed blender. The frozen banana helps to thicken the shake, so make sure it’s well frozen before blending. For an extra frosty treat, chill your glasses in the freezer before serving.
Variations & Substitutions
If you want to play around with the flavors, there are plenty of options! Try adding a tablespoon of cocoa powder for a chocolatey twist, or a pinch of cinnamon for a warm spice note. You can substitute almond or oat milk for the coconut milk if you prefer, though it will slightly alter the flavor. If you’re gluten-free, ensure your graham crackers are gluten-free as well.
Storage
This milkshake is best enjoyed immediately to maintain its creamy texture. If you have leftovers, you can store them in the refrigerator for up to 24 hours, though the texture may become more liquid. Give it a good stir before drinking.
FAQ
Can I use canned coconut milk instead of light coconut milk?
Yes, you can use canned coconut milk, but it will result in a richer and creamier milkshake. If you prefer a lighter version, stick to the light coconut milk or dilute the canned coconut milk with water.
Is there a substitute for the banana?
If you’re not a fan of bananas, you can use a scoop of vegan vanilla ice cream to achieve a similar creamy texture. Keep in mind, this will alter the flavor profile slightly.
Nutrition
This milkshake is a great source of healthy fats from the coconut and provides natural sweetness from the banana. It’s a delightful treat that satisfies your sweet tooth without the need for refined sugars, especially if you omit the agave nectar. If you’re monitoring your intake, be mindful of the graham crackers and whipped cream toppings, as these add extra calories.
Conclusion
The Coconut Cream Pie Vegan Milkshake is not just a drink; it’s an experience that transports you to a tropical paradise with every sip. It’s a wonderful homage to traditional coconut cream pie, yet adapted for a modern, vegan lifestyle. Whether you’re serving it as a dessert at a summer gathering or enjoying it as a midday treat, this milkshake is sure to become a favorite. Enjoy the creamy, dreamy taste of coconut in a whole new way, and relish the joy that comes with every delicious sip.
Related update: Coconut Cream Pie Vegan Milkshake
Related update: Impossible” Coconut Pie
Related update: Cranberry Margarita