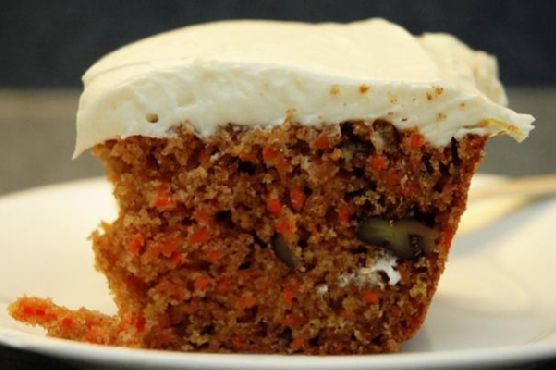
Classic Carrot Cake With Cream Cheese Frosting
Intro
There’s something magical about the aroma of a freshly baked carrot cake wafting through the kitchen. It takes me back to my grandmother’s cozy kitchen, where I first learned to bake. I remember the sound of her gentle voice guiding me as we grated the carrots together, my small hands eager to help. She would always let me lick the spoon, a sweet reward that made those afternoons unforgettable. This classic carrot cake with cream cheese frosting is a tribute to those cherished moments, combining tender, moist cake layers with the rich tang of cream cheese frosting.
Why You’ll Love It
This carrot cake is a timeless dessert that never goes out of style. It’s perfect for any occasion, from birthdays to casual get-togethers. Here’s why you’ll fall in love with this recipe:
- Moist and Flavorful: The combination of buttermilk, vegetable oil, and freshly grated carrots ensures a moist cake that’s bursting with flavor.
- Simple Ingredients: You likely have most of the ingredients in your pantry already.
- Rich Cream Cheese Frosting: The tangy frosting perfectly complements the sweetness of the cake.
- Versatility: Whether you’re making a layer cake or cupcakes, this recipe adapts beautifully.
Ingredients
- 2 cups all-purpose flour
- 2 teaspoons baking powder
- 1 teaspoon baking soda
- 1/2 teaspoon salt
- 2 teaspoons ground cinnamon
- 1 cup vegetable oil
- 1 cup buttermilk
- 4 large eggs
- 2 cups sugar
- 1 teaspoon vanilla extract
- 3 cups shredded carrots
- 1 cup chopped pecans
- 1/2 cup unsalted butter, softened
- 8 ounces cream cheese, softened
- 4 cups confectioners’ sugar
- 1 teaspoon vanilla extract
Instructions
- Preheat your oven to 350°F (175°C). Grease and flour two 9-inch round cake pans.
- In a medium bowl, whisk together the flour, baking powder, baking soda, salt, and cinnamon.
- In a large bowl, combine the vegetable oil, buttermilk, eggs, sugar, and vanilla extract. Beat until well mixed.
- Gradually add the dry ingredients to the wet ingredients, mixing until just combined.
- Fold in the shredded carrots and chopped pecans.
- Divide the batter evenly between the prepared pans and smooth the tops with a spatula.
- Bake for 30 to 35 minutes, or until a toothpick inserted into the center comes out clean.
- Allow the cakes to cool in the pans for 10 minutes, then turn them out onto a wire rack to cool completely.
- For the frosting, beat the softened butter and cream cheese in a large bowl until creamy and smooth.
- Gradually add the confectioners’ sugar, beating until well combined. Stir in the vanilla extract.
- Once the cakes are completely cool, spread a layer of frosting on top of one cake. Place the second cake on top and frost the top and sides of the cake.
- Decorate with additional pecans if desired. Serve and enjoy!
Tips
- Make sure the cream cheese and butter are softened to room temperature for a smoother frosting.
- To prevent the cake from sticking, line the bottom of the cake pans with parchment paper.
- For extra flavor, toast the pecans before adding them to the batter.
Variations & Substitutions
If you’re looking to switch things up, here are some variations and substitutions:
- Raisins or Pineapple: Add 1/2 cup of raisins or crushed pineapple for a fruity twist.
- Whole Wheat Flour: Substitute half of the all-purpose flour with whole wheat flour for a nuttier taste.
- Walnuts: Use walnuts instead of pecans for a different nutty flavor.
Storage
Store any leftover carrot cake in an airtight container in the refrigerator for up to 5 days. You can also freeze the unfrosted cake layers by wrapping them tightly in plastic wrap and aluminum foil for up to 3 months. Thaw overnight in the refrigerator before frosting and serving.
FAQ
Can I make this carrot cake gluten-free?
Yes, you can replace the all-purpose flour with a gluten-free flour blend. Make sure to choose a blend that contains xanthan gum or add it separately to help bind the cake.
How can I make this recipe vegan?
To make a vegan carrot cake, substitute the eggs with flax eggs (1 tablespoon of flaxseed meal mixed with 2.5 tablespoons of water per egg), use a plant-based milk with a tablespoon of vinegar instead of buttermilk, and replace the cream cheese and butter with vegan alternatives.
Can I make this cake ahead of time?
Absolutely! You can bake the cake layers a day in advance and store them in the refrigerator. Frost the cake just before serving for the best texture.
Nutrition
While I always encourage indulging in moderation, here’s a rough estimate of the nutritional content per serving (based on 12 servings):
- Calories: 450
- Protein: 5g
- Fat: 22g
- Carbohydrates: 58g
- Sugar: 43g
- Fiber: 2g
Conclusion
Our classic carrot cake with cream cheese frosting is more than just a dessert; it’s a celebration of flavors and memories wrapped into one delicious treat. Whether you’re savoring a slice with a cup of tea or sharing it with loved ones, this cake is sure to bring joy and nostalgia to your table. Happy baking!
Related update: Classic Carrot Cake With Cream Cheese Frosting
Related update: Triple Chocolate Whoppers