Berry & Ricotta Danishes
Intro
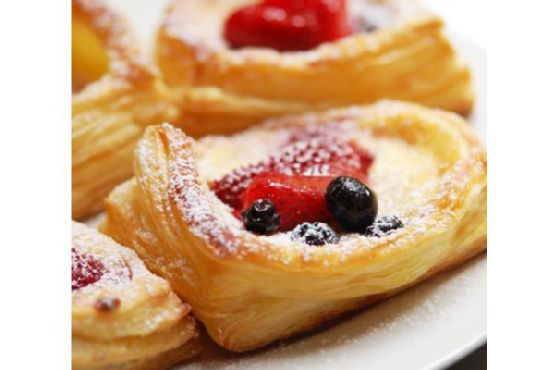
There’s something truly magical about the smell of freshly baked pastries wafting through the kitchen. It transports me back to my grandmother’s cozy kitchen, where every Sunday morning was a celebration of buttery, flaky goodness. One of my fondest memories is watching her skillfully craft the most delightful pastries, her hands moving with the grace of years of practice. Today, I want to share a recipe inspired by those cherished mornings: Berry & Ricotta Danishes. These danishes are a perfect blend of creamy ricotta, vibrant berries, and the light, airy texture of puff pastry, making them an irresistible treat for any occasion.
Why You’ll Love It
This Berry & Ricotta Danishes recipe is a must-try for several reasons:
- It’s quick and easy, perfect for beginners and seasoned bakers alike.
- The combination of creamy ricotta and juicy berries is simply divine.
- Each pastry is a beautiful, individual serving, making them perfect for entertaining guests.
- The ingredients are versatile and can be adjusted based on what’s in season or your personal preferences.
Ingredients
- Glaze
- Poached berries
- Blueberries
- Egg yolk
- Pastry
- Flour
- Icing sugar
- Fresh lemon juice
- Lemon zest
- Puff pastry
- Ricotta cheese
- Strawberries
- Castor sugar
- Vanilla extract
- Water
Instructions
- Place the berries in a saucepan over medium-low heat. Sprinkle on castor sugar and add water. Cover the saucepan with a lid and shake to coat the berries. Poach berries for about 5 minutes or until they soften but still retain their shape. Set aside to cool.
- Preheat the oven to 180°C (350°F).
- Make the ricotta filling by combining all ingredients in a mixing bowl. Mix well with a wooden spoon to thoroughly combine. Set aside.
- Prepare the glaze by mixing icing sugar and lemon juice together in a small bowl. Mix well and set aside.
- Remove the pastry from the refrigerator and place sheets on a clean, dry surface. Use a small, sharp knife to cut ten 8cm x 6cm (3″ x 2.5″) rectangles.
- Place 5 of the pastry rectangles on the lined baking sheet, ensuring there is space between them as they will expand. Lightly brush edges with a little water. These are your “pastry rectangle bases”.
- Cut smaller rectangles out of the remaining 5 pastry rectangles to create frames of about 1.5cm (1/2″) in width.
- Place the frames on top of the pastry bases on the baking sheet. Fill the middle of the frame with about 3-4 tablespoons of ricotta mixture. Top with several berries, reserving some for topping once the danishes are baked.
- Repeat the process with the remaining pastry frames. Place in the oven and bake for 15 to 18 minutes or until the pastry puffs up and is golden.
- Remove from the oven and cool on a wire rack. Top with remaining poached berries and sprinkle on a little icing sugar just before serving.
Tips
- Ensure your puff pastry is cold when you begin working with it to help prevent sticking and ensure the best rise.
- Use a sharp knife to cut the pastry for clean edges.
- Don’t overfill the pastries to prevent them from spilling over while baking.
Variations & Substitutions
Feel free to get creative with this recipe! You can substitute the berries for other fruits such as peaches or apples, depending on the season. If you’d like a bit more sweetness, add a tablespoon of honey to the ricotta mixture. For a zestier flavor, include a teaspoon of lemon zest in the ricotta filling. If you prefer a more traditional pastry, try using cream cheese instead of ricotta.
Storage
These danishes are best enjoyed fresh but can be stored in an airtight container at room temperature for up to two days. If you plan to keep them longer, refrigerate for up to five days and warm them in the oven before serving.
FAQ
Can I use frozen berries for this recipe?
Yes, you can use frozen berries. Just make sure to thaw and drain them well before using to prevent excess moisture in the pastries.
Can I prepare these danishes in advance?
Yes, you can prepare the components in advance. Poach the berries, make the ricotta filling, and cut the pastry rectangles a day ahead. Store them separately and assemble just before baking for the best results.
Nutrition
While exact nutritional values will vary based on specific ingredients and brands used, a single danish typically contains approximately:
- Calories: 250
- Protein: 5g
- Fat: 15g
- Carbohydrates: 25g
- Fiber: 1g
- Sugars: 10g
Conclusion
These Berry & Ricotta Danishes are a delightful way to bring a touch of bakery magic into your home. They’re not just a treat for your taste buds but also a feast for the eyes. Whether you’re making them for a special occasion or just because, I hope this recipe becomes a beloved staple in your kitchen. May each bite bring you as much joy as it does to me, and perhaps even inspire some fond memories of your own.
Related update: Berry & Ricotta Danishes
Related update: Green Tea Fruit Medley Smoothie
