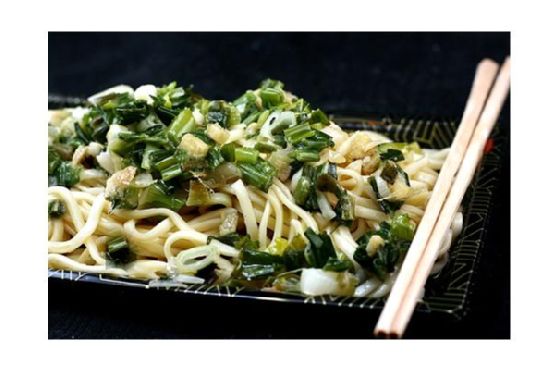
Not Momofuku Ginger Scallion Noodles | Made by Meaghan Moineau

Not Momofuku Ginger Scallion Noodles | Made by Meaghan Moineau

**Title: A Taste of Nostalgia: Not Momofuku Ginger Scallion Noodles**


**Description:** Dive into the comforting embrace of Not Momofuku Ginger Scallion Noodles, a delightful dish packed with vibrant flavors and warm memories. This recipe is your gateway to a symphony of taste and nostalgia, blending simple ingredients into a soul-soothing experience. Perfect for a cozy dinner, this dish will transport you back to cherished family gatherings, making it a must-try for any home cook.


---


**Blog Post:**


There's something magical about a recipe that evokes cherished memories with every bite. For me, Not Momofuku Ginger Scallion Noodles is more than just a dish; it's a bridge to my past, a flavorful reminder of family gatherings filled with laughter, love, and of course, delightful aromas wafting from the kitchen.


**Ingredients:**


- Soba noodles


- 1/4 cup grapeseed oil


- 2 cups green onions, finely chopped


- 2 tablespoons ginger, minced


- 4 cloves garlic, minced


- 2 shallots, thinly sliced


- 2 tablespoons fish sauce


- 1 tablespoon sesame seed oil


- 1 tablespoon rice wine vinegar


- 2 tablespoons wheat-free tamari sauce


- 1 tablespoon honey


- 1 red chile pepper, crushed


- Himalayan salt, to taste


**Instructions:**


1. Heat the grapeseed oil in a saucepan over high heat until shimmering and hot, but not smoking. This is where the magic begins.


2. Carefully add the green onions, ginger, garlic, and shallots to the pan. Watch as the ingredients sizzle and the aroma fills your kitchen, instantly transforming the space into a fragrant haven. The onions will wilt and turn a vibrant green almost immediately.


3. Remove the pan from the heat and stir the mixture with a wooden spoon. Feel the warmth of the moment as you add the fish sauce, sesame seed oil, rice wine vinegar, tamari sauce, honey, crushed red chile pepper, and Himalayan salt. Allow the sauce to sit for 15 minutes, letting the flavors meld together.


4. Toss with your favorite noodles. While I used fresh Chinese egg noodles for a traditional touch, soba noodles offer a splendid alternative, absorbing the sauce beautifully.


**A Nostalgic Connection:**


This dish always takes me back to my grandmother's kitchen. As a child, I spent countless weekends there, perched on a stool, watching her deftly chop green onions and ginger while regaling me with stories of her own childhood. She had a way of making the simplest ingredients sing, turning every meal into an event. The aroma of sizzling onions and ginger would fill the house, drawing everyone to the kitchen like moths to a flame. Every bite of her noodles was a testament to her love; a warm, comforting embrace on a plate.


**Difficulty Rating: 3/10**


Classified as a **Main Dish**, Not Momofuku Ginger Scallion Noodles is surprisingly straightforward to prepare, making it an ideal choice for both novice cooks and seasoned chefs alike. Its simplicity is its strength, allowing each ingredient to shine while wrapping you in a blanket of nostalgia and flavor.


---


There's an undeniable comfort in recreating a recipe that has stood the test of time in your family. Not Momofuku Ginger Scallion Noodles is more than just a meal; it's a journey back to those precious moments spent with loved ones. Whether you're cooking for a crowd or just for yourself, this dish is sure to bring a smile to your face and warmth to your heart. So, gather your ingredients, ignite your stove, and let the magic of nostalgia fill your kitchen once more.
Read more about Appetizers

Read more about Main Dishes

Read more about Desserts

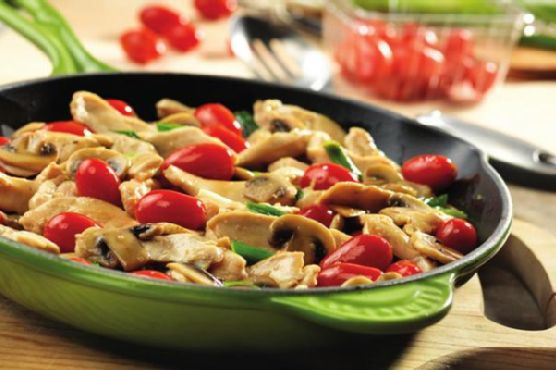
Chicken with Grape Tomatoes and Mushrooms | Made by Meaghan Moineau

Chicken with Grape Tomatoes and Mushrooms | Made by Meaghan Moineau

**Title: Savoring Memories: Chicken with Grape Tomatoes and Mushrooms**


**Description:** Dive into a heartwarming blend of flavors with our Chicken with Grape Tomatoes and Mushrooms recipe. Perfect for a cozy family dinner, this dish brings together juicy chicken, fresh mushrooms, and vibrant grape tomatoes in a delightful medley. With a touch of nostalgia, we'll whisk you away to cherished family moments while guiding you through this simple, yet satisfying main dish.


---


When I think about comfort food that warms both the heart and soul, Chicken with Grape Tomatoes and Mushrooms immediately springs to mind. This dish is not only a delightful blend of flavors but also a tapestry of fond family memories woven into each bite.


**The Ingredients that Tell a Story**


- 2 tablespoons olive oil


- 4 skinless, boneless chicken breast halves


- 8 ounces fresh mushrooms, sliced


- 2 cloves garlic, minced


- 1 pint grape tomatoes, halved


- 4 green onions, sliced


- 1 packet concentrated chicken broth


- 1/2 cup water


**A Journey Down Memory Lane**


Growing up, Sunday dinners were the highlight of my week. Our family gathered around the kitchen, the heart of our home, where laughter mingled with the aroma of delicious meals being prepared. My grandmother, the matriarch of our household, had a knack for turning simple ingredients into something magical.


One of her masterpieces was the Chicken with Grape Tomatoes and Mushrooms. I vividly remember her standing over the stove, her deft hands moving with practiced ease as she cooked. The sizzle of olive oil in the skillet was the opening note of a symphony that promised a comforting meal. The chicken, seared to a golden brown, filled the kitchen with an enticing aroma that drew us all closer.


**Cooking Instructions**


1. Begin by heating 1 tablespoon of olive oil in a 12-inch skillet over medium-high heat. Place the chicken breasts in the skillet and cook until well browned, stirring often. Once browned, remove the chicken from the skillet and set aside.


2. Add the remaining tablespoon of oil to the skillet and reduce the heat to medium. Introduce the sliced mushrooms, allowing them to cook until tender, stirring occasionally.


3. Add the minced garlic, halved grape tomatoes, and sliced green onions to the skillet. Stir for about a minute, letting the flavors meld together.


4. Return the browned chicken to the skillet. Mix in the concentrated chicken broth and water, ensuring everything is well combined. Continue cooking until the chicken is thoroughly cooked and the flavors have infused into the dish.


**A Nostalgic Note**


Every time I prepare this dish, I am transported back to those Sundays in my grandmother's kitchen. The vibrant colors of the grape tomatoes and the earthy aroma of mushrooms are not just ingredients; they are reminders of the stories and laughter shared around our family table. It's amazing how food can connect us to our past, creating a bridge to cherished memories.


**Difficulty Rating: 4/10**


This recipe is accessible for cooks of all skill levels, making it a wonderful choice for a quick yet impressive main dish. Whether you're a seasoned chef or a kitchen novice, this dish promises a rewarding experience.


As you savor each bite of Chicken with Grape Tomatoes and Mushrooms, may it bring you as much warmth and joy as it has brought to my family over the years. Enjoy this delightful main dish, and may it inspire your own cherished memories around the table.

Read more about Appetizers

Read more about Main Dishes

Read more about Desserts

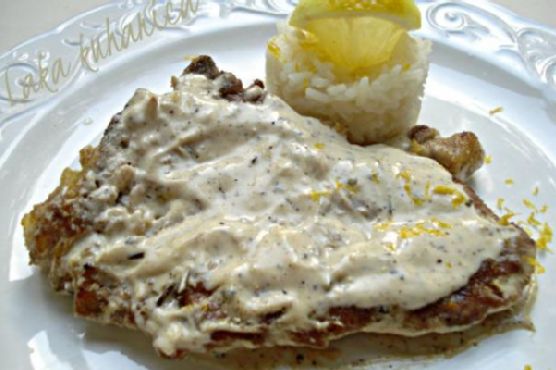
Lemon and pepper veal cutlets | Made by Meaghan Moineau

Lemon and pepper veal cutlets | Made by Meaghan Moineau

# Zesty Comfort: Lemon and Pepper Veal Cutlets


## A Family Classic with a Twist of Nostalgia


### Description


Dive into the delightful blend of tangy lemon and peppery zest with our mouth-watering Lemon and Pepper Veal Cutlets. This classic main dish, enriched with creamy rosemary-infused sauce, promises to tantalize your taste buds while evoking cherished family memories. Perfectly paired with pilaf and a fresh green salad, this recipe is a heartwarming reminder of Sunday dinners at grandma's house.


### Keyword-Rich Content


Whether you're a seasoned chef or a home cook looking to impress, these Lemon and Pepper Veal Cutlets are sure to become a favorite at your dining table. This recipe is straightforward yet sophisticated, offering a burst of flavors that are both comforting and refreshing. With keywords such as "veal cutlets," "lemon zest," "creamy sauce," and "family recipe," our guide will ensure your culinary adventure is a delicious success.


### Ingredients


- 4 veal cutlets


- 2 tablespoons corn flour


- Salt and black cracked pepper to taste


- 2 tablespoons butter


- 1 tablespoon olive oil


- 1 tablespoon lemon rind


- 2 tablespoons lemon juice


- 1/2 cup cream


- 1/4 cup sour cream


- 1 tablespoon fresh rosemary, chopped


- Pilaf and green salad, to serve


### Instructions


1. **Prepare the Veal**: Slightly flatten the veal cutlets using a meat mallet for even cooking. In a shallow dish, combine corn flour, salt, and pepper. Dredge each cutlet through the mixture, ensuring an even coat.


2. **Cook the Cutlets**: Heat butter and olive oil in a large pan over medium heat. Cook the cutlets for about 3 minutes on each side, or until browned and cooked to your liking. Remove the veal from the pan and set aside, covering them to keep warm.


3. **Make the Sauce**: In the same pan, add cream, sour cream, lemon rind, lemon juice, rosemary, salt, and additional black pepper. Mix well and bring to a boil. Lower the heat and let it simmer uncovered for about 5 minutes, allowing the sauce to thicken slightly.


4. **Combine and Serve**: Return the veal cutlets to the pan, gently coating them with the luscious sauce. Serve immediately with a side of pilaf and a crisp green salad for a complete meal.


### A Nostalgic Family Memory


Every time I prepare these Lemon and Pepper Veal Cutlets, I'm transported back to my grandmother's cozy kitchen. Sunday afternoons were a family affair, with everyone gathering around the large oak table, eagerly awaiting the fragrant dishes she prepared with love. Grandma would always say that the secret ingredient was a dash of nostalgia, and indeed, each bite brings back the warmth and laughter we shared. This dish is a tribute to those precious moments, capturing the essence of family and tradition in every savory bite.


### Difficulty Rating


This recipe is rated 6 out of 10 in difficulty. It's an approachable main dish that's perfect for cooks of all levels who are ready to create a flavorful, satisfying meal.


---


Embrace the blend of citrus and spice with our Lemon and Pepper Veal Cutlets, and create new family memories with this timeless recipe. Bon appétit!

Read more about Appetizers

Read more about Main Dishes

Read more about Desserts

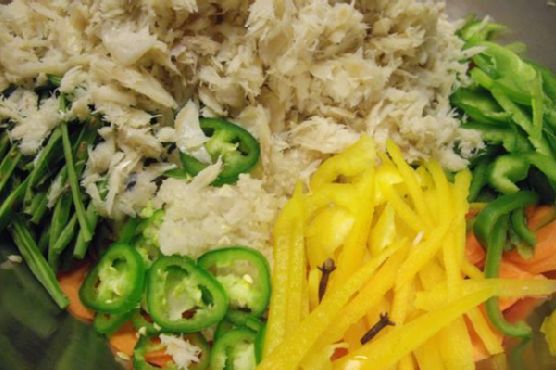
Chiquetaille: Cod Fish Salad | Made by Meaghan Moineau

Chiquetaille: Cod Fish Salad | Made by Meaghan Moineau

**Title: A Taste of Tradition: How to Make Chiquetaille, the Flavorful Cod Fish Salad**


**Description:** Dive into the rich flavors of Chiquetaille, a traditional cod fish salad that tantalizes the taste buds with its vibrant mix of fresh vegetables and salted cod. This dish, steeped in family history and nostalgia, makes for a delightful appetizer or main dish. Join me as I share a cherished family memory and guide you through the steps to create this captivating salad.


---


**Introduction:**


Cooking is often more than just a necessity; it’s a journey through memories and traditions. One dish that holds a special place in my heart is Chiquetaille, a cod fish salad that is as flavorful as it is meaningful. This dish has been a staple in my family for generations, and preparing it always takes me back to sun-drenched afternoons in my grandmother's kitchen.


**Ingredients:**


- Salted cod


- Onion


- Shallots


- Garlic


- Carrots


- Young green beans


- Green bell pepper


- Yellow and red bell pepper


- Green jalapeno


- Vinegar


- Olive oil


- Whole cloves


- Salt and pepper


**Instructions:**


1. **Prep the Cod:** Begin by soaking the salted cod in cold water in the refrigerator for 24 hours, changing the water three times. This process helps to desalinate the fish, ensuring a balanced flavor in the final dish.


2. **Cook the Cod:** In a large pot, bring enough water to a boil to cover the fish. Boil the cod for about 20 minutes. Once cooked, drain the fish in a vegetable strainer and allow it to cool.


3. **Prepare the Fish:** Once the fish is cool, remove the skin, bones, and any unsightly parts. Shred the cod by hand into bite-sized pieces.


4. **Mixing Time:** In a large bowl, combine the shredded fish with the chopped vegetables, olive oil, whole cloves, salt, pepper, and vinegar. Ensure everything is well-mixed to allow the flavors to meld together.


5. **Refrigerate:** For the best flavor, refrigerate the salad for at least four days. This allows the ingredients to marry beautifully, creating a dish that is greater than the sum of its parts.


6. **Serve:** Chiquetaille can be enjoyed in various ways. Spread it on baguette slices for a savory appetizer or serve it as a salad with lettuce, tomatoes, and hard-boiled eggs for a more substantial meal.


**A Family Memory:**


I was ten years old when my grandmother first taught me how to make Chiquetaille. It was a warm summer day, and the kitchen was filled with the aroma of fresh vegetables and briny cod. As we worked side by side, she recounted stories of her childhood in Haiti, where Chiquetaille was a beloved dish at family gatherings. She explained how it was more than just food; it was a symbol of togetherness and celebration.


The memory of her laughter and the joy of learning a cherished family recipe has stayed with me ever since. Every time I prepare Chiquetaille, I am transported back to that kitchen, reliving moments of love and tradition.


**Difficulty Rating:** 4/10


**Classification:** Appetizer / Main Dish


---


**Conclusion:**


Chiquetaille is more than a simple dish; it’s a culinary journey through flavors and memories. With its vibrant mix of ingredients and deep-rooted history, it's a recipe that promises to delight and inspire. Whether you're serving it at a family gathering or enjoying it as a personal treat, Chiquetaille is sure to bring a touch of tradition to your table. So why not try your hand at this flavorful cod fish salad and create your own memories today?

Read more about Appetizers

Read more about Main Dishes

Read more about Desserts

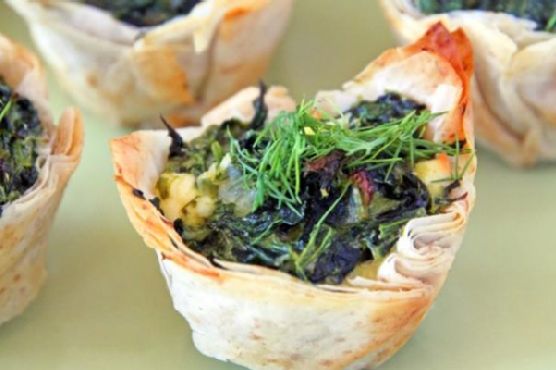
Spanakopita Cups | Made by Meaghan Moineau

Spanakopita Cups | Made by Meaghan Moineau

**Title: Spanakopita Cups: A Bite-Sized Greek Delight**


**Description:** Dive into the delightful world of Greek cuisine with our Spanakopita Cups! These bite-sized treasures bring together the rich flavors of spinach, feta, and dill enclosed in a crispy phyllo shell. Ideal as an appetizer, they are perfect for any gathering. Let the aroma of nostalgia and family warmth fill your kitchen as you recreate this cherished recipe.


---


Spanakopita Cups are not just a recipe; they are a journey. Imagine the scent of olive oil warming over a gentle flame, the sizzle of scallions dancing in the pan, and the vibrant green of spinach blending with the creamy tang of feta. These elements come together to create a harmonious symphony of flavors, all nestled in a perfectly crisp phyllo cup.


### Ingredients:


- 2 tablespoons olive oil


- 4 green white scallions, finely chopped


- 1 package frozen spinach, thawed and squeezed dry


- 2 tablespoons fresh dill, chopped


- 2 large eggs, beaten


- 1 cup crumbled feta cheese


- 1 teaspoon kosher salt


- 1/2 teaspoon black pepper


- 1 package frozen phyllo dough, thawed


- 1/2 cup unsalted butter, melted


- 1/4 cup dry plain breadcrumbs


### Instructions:


1. **Preheat the Oven:** Set your oven to 400°F (200°C) and let it warm up as you prepare the ingredients.


2. **Prepare the Filling:** Heat olive oil in a pan over medium heat. Add the chopped scallions and sauté for about 5 minutes until fragrant and tender. In a large bowl, combine the cooked scallions, squeezed spinach, dill, eggs, and feta cheese. Season with kosher salt and black pepper. Mix well to ensure all ingredients are evenly distributed.


3. **Prepare the Phyllo Dough:** Keep the phyllo dough sheets covered with a damp kitchen towel to prevent them from drying out. Unfold one sheet and brush with melted butter. Sprinkle lightly with breadcrumbs. Layer a second sheet on top, brush with butter, and sprinkle with breadcrumbs. Repeat this process until you have four sheets stacked.


4. **Form the Cups:** Using a round cutter, cut circles from the layered phyllo dough. These circles should fit perfectly into the molds of a mini muffin pan. Gently press each circle into the pan to form a cup.


5. **Fill and Bake:** Spoon the spinach and feta mixture into each phyllo cup. Continue until all the mixture is used. Bake in the preheated oven for 17 minutes, or until the phyllo is golden brown and crispy.


6. **Serve and Enjoy:** Allow the Spanakopita Cups to cool slightly before serving. Enjoy these cups as a delightful appetizer, or share them at your next family gathering.


### A Family Memory


Every time I make Spanakopita Cups, I am transported back to my grandmother's cozy kitchen, a place filled with laughter and the comforting aroma of home-cooked meals. During family gatherings, my grandmother would set out trays of her famous spanakopita. The sound of crispy phyllo breaking was a signal that the feast had begun. I remember sitting on the kitchen counter, my legs swinging as I watched her work her magic, her hands deftly layering phyllo, never rushing, always smiling. It was in those moments that I learned that cooking is an expression of love, a tradition I carry on with my own family today.


### Difficulty Rating: 5/10


**Classification:** Appetizer


Spanakopita Cups are a testament to the beauty of simplicity. With a few ingredients and some care, you can create an appetizer that not only pleases the palate but also serves as a bridge to cherished memories and traditions. Whether you're serving them at a party or enjoying them as a snack, their rich flavors and satisfying crunch are sure to leave a lasting impression.

Read more about Appetizers

Read more about Main Dishes

Read more about Desserts

White cake with marzipan and almonds

There's something special about family recipes that have been passed down through generations. They hold memories and nostalgia that can transport us back to simpler times. One such recipe that holds a special place in my heart is the white cake with marzipan and almonds.

This recipe originally belonged to my grandmother, who was known for her delicious baked goods. Whenever she made this cake, the whole house would be filled with the sweet aroma of almonds and amaretto. It was always a special treat when she would bring out this cake for family gatherings or holidays.

I remember watching her carefully mix the ingredients and lovingly pour the batter into the cake pan. She would always save a little extra marzipan to decorate the top with intricate designs, making the cake look almost too beautiful to eat. But of course, we couldn't resist diving into the moist and flavorful cake once it was ready.

The process of making this cake reminds me of the time spent with my grandmother in the kitchen, learning her techniques and soaking up her wisdom. It's a recipe that has been cherished in our family for years, and every time I make it, I feel a connection to her and the memories we shared.

Difficulty: 5/10

Dessert

Ingredients:

- 1 cup almonds, finely ground

- 1/4 cup amaretto liqueur

- 1 tsp baking powder

- 1/2 cup butter, melted

- 1/4 cup cornstarch

- 6 egg whites

- 1 cup flour

- 1 cup marzipan, divided

- 1 cup sugar

Instructions:

1. Beat egg whites and 2 tablespoons of sugar into stiff peaks.

2. In a separate bowl, mix the remaining sugar, flour, cornstarch, and baking powder.

3. Sift the flour and sugar mixture into the egg whites; stir gently until smooth.

4. Stir in the melted butter.

5. Add half of the marzipan and amaretto, mix to combine.

6. Pour the mixture into a suitable silicon mould or regular round shape greased and sprinkled with bread crumbs.

7. Sprinkle the top with the rest of the marzipan and sliced almonds.

8. Bake the cake in the oven at 180C for 30-40 minutes or until done.

9. Let it completely cool in the mould, then turn onto a serving plate.

This white cake with marzipan and almonds is a delightful dessert that will surely impress your family and friends. The sweet almond flavor combined with the subtle hint of amaretto makes it a truly special treat. Give this recipe a try and create your own memories to cherish for years to come.