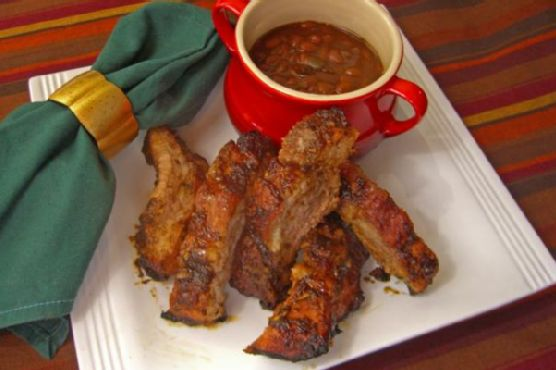
Barbecued Baby Back Pork Ribs and Bush’s Grillin’ Beans
Intro
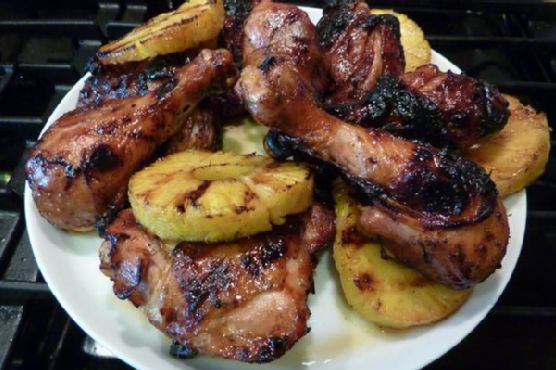
There’s something magical about the aroma of barbecued ribs wafting through a summer afternoon. Growing up, my family would gather in the backyard on warm weekends, the grill sizzling away as children played on the grass and adults shared stories. My grandfather, the grill master, was always at the helm, armed with his secret marinade and a knowing smile. Those days were filled with laughter, love, and the irresistible pull of the perfectly barbecued ribs he served. Today, I want to share with you a recipe that brings back those cherished memories and promises to become a favorite in your household as well: Barbecued Baby Back Pork Ribs paired with Bush’s Grillin’ Beans.
Why You’ll Love It
This recipe is the embodiment of comfort and culinary delight. The tender, flavorful ribs paired with the rich, hearty beans make for a dish that’s perfect for gatherings and grill-outs. The marinade, a blend of sweet, savory, and spicy notes, ensures the ribs are packed with flavor, while the beans add a robust side that complements the dish beautifully. Whether you’re a seasoned grill enthusiast or a novice, this recipe is straightforward and results in a dish that’s sure to impress.
Ingredients
- 1 rack of baby back pork ribs
- 2 tablespoons cooked black peppercorns
- 1/4 cup brown sugar
- 1/4 cup cider vinegar
- 1 tablespoon dried coriander
- 3 cloves garlic, minced
- 2 green onions, chopped
- 1/2 cup ketchup
- 1/4 cup molasses
- 1 tablespoon orange zest
- 1/4 cup soy sauce
Instructions
- Before you start marinating the ribs, remove the white membrane on the underside of the ribs. To do this, use a sharp knife to start the removal, then grab it with a paper towel and pull it off.
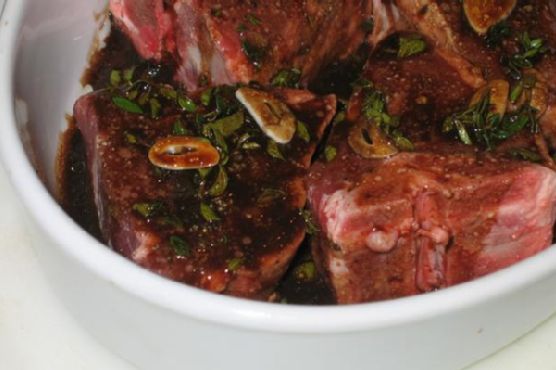
- In a bowl, combine the black peppercorns, brown sugar, cider vinegar, dried coriander, garlic, green onions, ketchup, molasses, orange zest, and soy sauce to create the marinade.
- Place the ribs in a large dish and pour the marinade over them, ensuring they are completely coated. Cover and refrigerate for at least 2 hours, preferably overnight.
- Preheat your grill to medium heat.
- Remove the ribs from the marinade and place them on the grill. Cook for about 25-30 minutes, turning occasionally and basting with the marinade, until the ribs are cooked through and have a nice char.
- While the ribs are grilling, heat Bush’s Grillin’ Beans according to the package instructions.
- Once the ribs are done, let them rest for a few minutes before slicing.
- Serve the ribs with Bush’s Grillin’ Beans and enjoy!
Tips
For best results, marinate the ribs overnight to allow the flavors to fully penetrate the meat. When grilling, keep an eye on the ribs to prevent burning. If you find the ribs are charring too quickly, lower the heat slightly. Additionally, letting the ribs rest after grilling is crucial as it helps the juices redistribute, ensuring the meat remains tender and flavorful.
Variations & Substitutions
If you’re looking to switch things up, try adding a teaspoon of smoked paprika to the marinade for a smoky flavor. For those who prefer a spicier kick, a pinch of cayenne pepper or a chopped jalapeño can be added. If you are out of cider vinegar, white wine vinegar or even lemon juice can be used as substitutes. Moreover, if you want to make this dish gluten-free, ensure that the soy sauce is a gluten-free variety.
Storage
Any leftover ribs can be stored in an airtight container in the refrigerator for up to three days. To reheat, place them in a preheated oven at 300°F (150°C) until warmed through. The beans can also be stored in a similar manner and reheated in a saucepan over low heat.
FAQ
Can I bake the ribs instead of grilling them?
Yes, you can bake the ribs if a grill is not available. Preheat your oven to 300°F (150°C), place the marinated ribs on a baking sheet, and cover with foil. Bake for approximately 2 to 2.5 hours, then remove the foil and bake for another 15-20 minutes to achieve a nice crust.
What type of beans are best served with these ribs?
Bush’s Grillin’ Beans are an excellent choice due to their robust flavor, which pairs well with the savory and sweet notes of the ribs. However, if you’re looking to make your own, a homemade baked bean recipe with bacon and brown sugar would also complement the ribs beautifully.
Nutrition
While specific nutritional values will depend on portion sizes and exact measurements, this dish is a hearty meal rich in protein and flavor. Be mindful of the sugar content in the marinade and beans, especially if you are watching your sugar intake.
Conclusion
These Barbecued Baby Back Pork Ribs with Bush’s Grillin’ Beans are more than just a meal—they are an experience, a throwback to simpler times filled with family, fun, and unforgettable flavors. Whether you’re recreating a cherished childhood memory or starting a new family tradition, this recipe is sure to delight and satisfy. Happy grilling!
Related update: Barbecued Baby Back Pork Ribs and Bush’s Grillin’ Beans
Related update: Cheesy Spinach Stuffed Shells