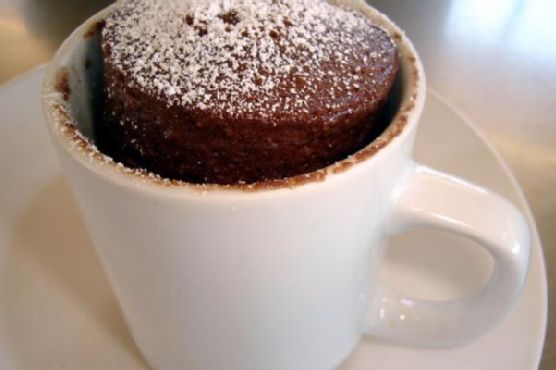
5 Minute Xocai Chocolate Mug Cake
Intro
There’s something utterly magical about indulging in a warm, gooey chocolate cake, especially when it can be whipped up in just five minutes. This 5 Minute Xocai Chocolate Mug Cake is the perfect treat for when you’re craving something sweet and decadent but don’t want to spend hours in the kitchen.
As a child, I remember baking chocolate cakes with my grandmother on Sunday afternoons. The kitchen would be filled with the aroma of melting chocolate and vanilla, and my heart would dance with anticipation. This mug cake brings back those cherished memories, but with a modern twist. It’s a quick fix for those nostalgic cravings, perfect for any chocolate lover.
Why You’ll Love It
- Quick and Easy: This recipe takes only five minutes from start to finish, perfect for those last-minute dessert cravings.
- Satisfyingly Chocolatey: Made with rich dark chocolate and Xocai’s unique chocolate blend, it’s a chocolate lover’s dream.
- Minimal Cleanup: All you need is a mug and a fork, which means you won’t be left with a pile of dishes.
- Customizable: Adjust the sweetness or add your favorite toppings to make it your own.
Ingredients
- 2 tablespoons of dark chocolate
- 1 large egg
- 2 tablespoons of flour
- 1 tablespoon of honey
- 3 tablespoons of milk
- 1/4 teaspoon of vanilla extract
Instructions
- Add the egg, milk, honey, and vanilla into a coffee mug.
- Mix together with a fork until well combined.
- Add the flour and dark chocolate (or Xocai Sipping Xocolate if using).
- Mix again until the batter is smooth and free of lumps.
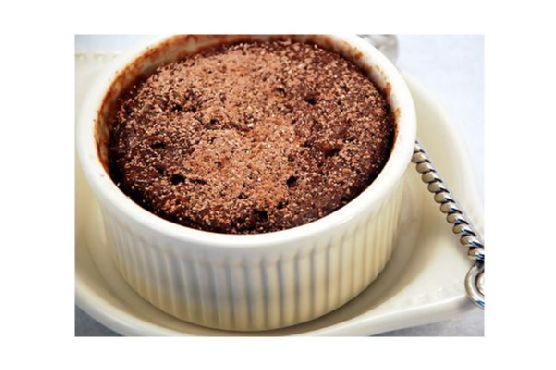
- Place the mug in the microwave and cook for 3 minutes at high power. The cake will rise slightly over the top of the mug.
- Allow the cake to cool a little before eating. Tip out onto a plate if desired.
- Enjoy while warm for the best taste. This recipe serves 2.
Tips
- Watch the Timing: Microwave times may vary, so check your cake after 2 minutes and add more time as needed.
- Mug Size: Ensure your mug is large enough to accommodate the cake rising, or it may overflow.
- Mix Thoroughly: Proper mixing is key to avoid lumps in your batter.
Variations & Substitutions
- Sweetener: Swap honey for maple syrup or agave nectar for a different flavor profile.
- Flour Alternatives: Use almond flour or coconut flour for a gluten-free option, adjusting quantities as needed.
- Add-ins: Consider adding a tablespoon of peanut butter, nuts, or dried fruit for extra flavor.
Storage
If you have leftovers (unlikely, but it could happen!), store the mug cake in an airtight container in the fridge for up to two days. Reheat in the microwave for about 15-20 seconds before enjoying again.
FAQ
Can I make this mug cake without eggs?
Yes, you can substitute the egg with a flax egg (1 tablespoon flaxseed meal + 2.5 tablespoons water) or a mashed banana. The texture may vary slightly, but it will still be delicious.
What if I don’t have a microwave?
If you don’t have a microwave, you can bake the mug cake in an oven-safe dish at 350°F (175°C) for about 15 minutes. Keep an eye on the cake, as cooking times may vary.
Is this recipe suitable for vegans?
To make this recipe vegan, use a plant-based milk, replace the egg with a flax egg, and ensure your dark chocolate is dairy-free. Swap honey with maple syrup or agave nectar.
Nutrition
This cake is a treat, so enjoy it in moderation. If you’re seeking a lower-calorie version, consider reducing the amount of chocolate or substituting some ingredients with their lighter counterparts.
Conclusion
This 5 Minute Xocai Chocolate Mug Cake is a delightful way to indulge your chocolate cravings without the fuss. Quick, simple, and utterly delicious, it’s the perfect recipe to have on hand when you need a sweet pick-me-up. So, next time you’re yearning for a touch of nostalgia and the comforting taste of chocolate, remember this mug cake. Happy baking!
Related update: 5 Minute Xocai Chocolate Mug Cake
Related update: Peanut Butter Cookie Bars