Home made coffee ice cream | Made by Meaghan Moineau

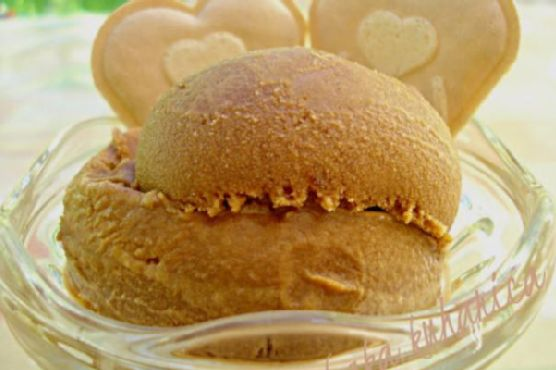
Homemade Coffee Ice Cream

Intro

There’s something magical about homemade ice cream. For me, it’s not only about the rich, creamy texture or the way it melts on your tongue, but it’s also about the memories it evokes. I remember summer afternoons spent at my grandmother’s house, where the scent of freshly brewed coffee mingled with laughter and the sound of churning ice cream. Those afternoons were a delightful blend of warmth, family, and the anticipation of a sweet treat. This homemade coffee ice cream recipe is a tribute to those cherished moments, a perfect blend of nostalgia and indulgence.

Why You’ll Love It

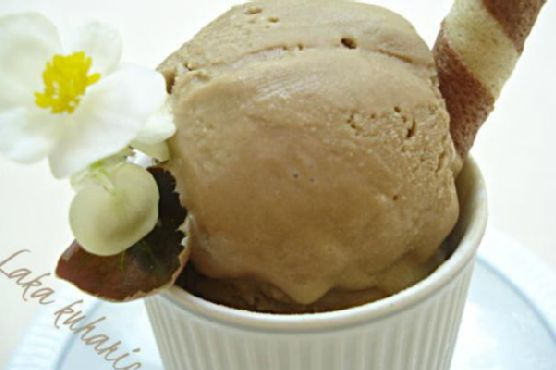
This coffee ice cream is a treat for coffee lovers and dessert enthusiasts alike. It’s rich, creamy, and perfectly captures the robust flavor of your favorite brew. Whether you’re enjoying it on a hot summer day or alongside a slice of warm pie in the cooler months, this ice cream is sure to delight. Plus, making it at home allows you to control the sweetness and the intensity of the coffee flavor, ensuring it’s just right for you. With its luxurious texture and bold taste, this recipe is bound to become a favorite.

Ingredients

  • 2 cups cream
  • 4 egg yolks
  • 2 tablespoons coffee granules
  • 1 cup milk
  • 3/4 cup sugar
  • 1 teaspoon vanilla extract

Instructions

  1. Combine the cream, milk, sugar, and coffee in a medium, heavy saucepan. Bring to a gentle boil over medium heat; remove from the heat and set aside.
  2. Beat the egg yolks in a medium bowl. Whisk 1 cup of the hot cream into the egg yolks. Add the vanilla extract.
  3. Gradually add the egg mixture in a slow, steady stream, to the hot cream. Cook over low heat, stirring constantly until slightly thickened, about 4-5 minutes.
  4. Remove from the heat and strain through a fine mesh strainer into a clean container.
  5. Cover with plastic wrap, pressing down against the surface to keep a skin from forming. Chill in the refrigerator for at least 2 hours.
  6. Pour the mixture into an ice cream machine and churn until frozen (according to the manufacturer’s instructions).
  7. Transfer to a plastic container and place in the freezer for a few hours before serving.
  8. Serving: take it out of the freezer for 5-10 minutes before serving, or longer, so it comes to the right scooping temperature.
  9. Easy suggestion: ice cream is best served in chilled glass or porcelain bowls. Scoop it with a hot, but dry, ice-cream spoon (soak it in boiling water, then wipe dry).

Tips

Here are some handy tips to ensure your homemade coffee ice cream turns out perfect every time:

  • Use high-quality coffee granules for the best flavor. Instant coffee works well, but freshly ground coffee can elevate the taste even more.
  • For a smoother texture, ensure that the custard mixture is strained well to remove any cooked egg bits.
  • Keep the mixing bowls and utensils chilled to ensure the ice cream base stays as cold as possible before churning.

Variations & Substitutions

If you’d like to experiment with this recipe, consider these variations and substitutions:

  • Decaf Option: Use decaffeinated coffee granules for a caffeine-free version.
  • Dairy-Free: Substitute the milk and cream with coconut milk for a dairy-free version. The coconut flavor pairs beautifully with coffee.
  • Add-Ins: Mix in some chocolate chips, crushed nuts, or a swirl of caramel or chocolate sauce during the last few minutes of churning for added texture and flavor.

Storage

Store your homemade coffee ice cream in an airtight container in the freezer. For the best texture and flavor, enjoy it within two weeks. To prevent ice crystals, press a piece of plastic wrap directly onto the surface of the ice cream before sealing the container.

FAQ

Can I make this ice cream without an ice cream maker?

Yes, you can make this recipe without an ice cream maker. Pour the chilled mixture into a shallow dish and place it in the freezer. Stir it every 30 minutes until it reaches the desired consistency. This method may result in a slightly less creamy texture, but it’s still delicious!

How can I make the coffee flavor more intense?

If you prefer a stronger coffee flavor, increase the amount of coffee granules by an additional tablespoon, or use espresso powder instead of regular coffee granules.

Nutrition

This ice cream is a rich and indulgent treat, so it’s best enjoyed in moderation. Each serving contains approximately:

  • Calories: 300
  • Fat: 20g
  • Sugar: 25g
  • Protein: 4g

Conclusion

Homemade coffee ice cream is a wonderful way to indulge your love for coffee and ice cream in one delightful scoop. Its creamy texture and deep coffee flavor are sure to satisfy any cravings you have. Whether you’re making it for a special occasion or simply to enjoy at home, this recipe is bound to become a favorite. So gather your ingredients, start churning, and prepare to savor every delicious bite. Enjoy the sweet nostalgia of homemade ice cream with this delightful coffee-flavored treat!

Related update: Home made coffee ice cream

Related update: Chocolate Pavlova with Winter Fruit

Caramel ice cream | Made by Meaghan Moineau

Decadent Homemade Caramel Ice Cream

Intro

There’s something truly magical about homemade ice cream, especially when it’s infused with the rich, buttery flavor of caramel. This recipe for caramel ice cream takes me back to summers spent in my grandmother’s kitchen, where the aroma of simmering sugar and cream would fill the air. We’d gather around the table eagerly waiting for the first scoop of freshly churned ice cream, savoring every bite as if it were a treasure. Today, I’m thrilled to share this delightful recipe that promises to evoke the same warm memories and smiles in your home.

Why You’ll Love It

This caramel ice cream is a creamy, indulgent treat that’s surprisingly simple to make. Its rich flavor profile will satisfy any sweet tooth, and the smooth texture is perfect for hot summer days or as a dessert for a cozy night in. Whether you’re an ice cream aficionado or a caramel lover, this recipe is sure to become a family favorite.

Ingredients

  • 2 cups sugar
  • 1 cup water, divided
  • 4 large eggs
  • 1 cup powdered sugar
  • 2 cups heavy cream
  • 1/2 teaspoon salt
  • 1 teaspoon vanilla extract

Instructions

  1. In a large skillet, combine the sugar and 1/2 cup of water over medium-high heat. Stir occasionally, allowing the sugar to dissolve and the mixture to come to a boil.
  2. Continue boiling the sugar mixture for about 5 minutes until it reaches a dark brown color. Be careful not to burn it.
  3. Remove the skillet from the heat and gradually stir in the remaining 1/2 cup of water. Allow the caramel to cool to room temperature and set aside.
  4. In a medium bowl, beat the eggs for 3 minutes until they are thick and light yellow in color.
  5. Gradually beat in the powdered sugar until well combined.
  6. Stir in the heavy cream, salt, and vanilla extract.
  7. Gently stir in the caramel mixture until smooth.
  8. Cover the mixture and chill in the refrigerator for at least 4 hours or overnight.
  9. Pour the chilled mixture into an ice cream machine and churn according to the manufacturer’s instructions until frozen.
  10. Transfer the ice cream to a plastic container and place it in the freezer for at least an hour before serving.
  11. Before serving, let the ice cream sit at room temperature for 5-10 minutes to reach the perfect scooping consistency.

Tips

For best results, serve your caramel ice cream in chilled glass or porcelain bowls. Use a hot, dry ice cream scoop for the perfect scoop every time—simply dip the scoop in boiling water and wipe it dry before using.

Variations & Substitutions

If you’re looking to switch things up, consider adding a pinch of sea salt to the caramel for a salted caramel twist. Alternatively, you could swirl in some chocolate chips or nuts during the churning process for added texture and flavor. For those who prefer a lighter version, substitute half of the heavy cream with milk.

Storage

Store your caramel ice cream in an airtight container in the freezer. It will keep for up to two weeks, although we doubt it will last that long! Just be sure to allow it to soften at room temperature before scooping.

FAQ

Can I make this recipe without an ice cream machine?

Yes! If you don’t have an ice cream machine, simply pour the mixture into a shallow dish and place it in the freezer. Stir every 30 minutes for the first few hours to break up ice crystals, then freeze until firm.

How can I prevent ice crystals from forming?

To prevent ice crystals, ensure that your mixture is thoroughly chilled before churning. Using an ice cream machine also helps achieve a smoother texture by churning air into the mixture as it freezes.

Nutrition

This recipe yields approximately 8 servings. Each serving contains about:

  • Calories: 350
  • Fat: 22g
  • Carbohydrates: 38g
  • Protein: 4g

Conclusion

Making caramel ice cream from scratch is a rewarding experience that brings joy to both the cook and those lucky enough to enjoy the results. With its rich flavor and creamy texture, this recipe is sure to become a staple in your culinary repertoire. Whether you’re serving it at a family gathering or enjoying a quiet night in, this homemade treat is sure to impress. So, gather your ingredients, channel your inner chef, and let the magic of caramel ice cream unfold in your kitchen!

Related update: Caramel ice cream

Coconut Guava Ice cream | Made by Meaghan Moineau

Coconut Guava Ice Cream: A Tropical Delight

Intro

There’s something magical about the fusion of tropical flavors that instantly transports you to a serene beach with every bite. Coconut Guava Ice Cream embodies this essence perfectly. As a child, I remember visiting my grandmother’s house every summer. She had a beautiful guava tree in her backyard, and we would spend lazy afternoons picking ripe guavas and concocting different treats. This ice cream recipe takes me back to those sun-dappled days, filled with laughter, tropical fruits, and the warmth of family gatherings.

Why You’ll Love It

This Coconut Guava Ice Cream is a luscious blend of creamy coconut milk, sweet guavas, and the delightful crunch of peanuts. It’s vegan-friendly, simple to make, and doesn’t require an ice cream maker. The refreshing taste of guava combined with the rich coconut base creates an indulgent yet refreshing dessert. It’s the perfect treat to beat the heat and impress your guests at any gathering.

Ingredients

  • 1 can of coconut milk
  • 1/2 cup condensed milk
  • 2 ripe guavas, chopped and de-seeded
  • 1/2 cup blueberries
  • 1/4 cup crushed peanuts

Instructions

  1. Place the can of coconut milk in the freezer and allow it to solidify. This could take 4-6 hours depending on the temperature of your freezer.
  2. Take out the can of coconut milk and open it completely. The milk and coconut water will have separated, and the coconut water part will be clearer than the milk.
  3. With a very sharp knife, cut through the frozen coconut milk to separate the milk from the coconut water.
  4. Place the frozen coconut milk part in the blender.
  5. Pour in your condensed milk and chopped de-seeded guavas. Blend for about 3-5 minutes at intervals until smooth.
  6. Pour the mixture into a bowl, add your blueberries, stir in, and pop it in the freezer.
  7. Allow your coconut ice cream to freeze for about 3-6 hours.
  8. Serve garnished with the crushed peanuts.

Tips

To ensure the best texture, make sure the coconut milk is fully solidified before opening. Use ripe guavas for maximum flavor. If you prefer a smoother texture, blend the blueberries with the coconut milk and guavas instead of stirring them in.

Variations & Substitutions

If you want to add a citrusy note, consider adding a tablespoon of lime juice before blending. For a nut-free version, skip the peanuts and garnish with toasted coconut flakes instead. If guavas are not in season, substitute with mangoes or papayas for a different tropical twist.

Storage

Store the Coconut Guava Ice Cream in an airtight container in the freezer for up to two weeks. Allow it to soften at room temperature for a few minutes before serving for the best texture.

FAQ

Can I use fresh coconut milk instead of canned?

While fresh coconut milk can be used, canned coconut milk is preferred for its creaminess and consistency, which enhances the texture of the ice cream.

Is this recipe suitable for vegans?

Yes, this recipe is vegan-friendly as long as you use vegan condensed milk or a homemade version made from coconut milk and sugar.

Can I make this recipe without a blender?

A blender is recommended for achieving a smooth texture. However, you can mash the guavas and mix them with the other ingredients using a fork if a blender is unavailable.

Nutrition

This Coconut Guava Ice Cream is a delightful indulgence. While exact nutritional values may vary based on specific ingredients used, it is generally a good source of healthy fats from the coconut milk and provides vitamins from the fruits. It’s a sweet treat best enjoyed in moderation.

Conclusion

Coconut Guava Ice Cream is a celebration of tropical flavors, nostalgia, and simplicity. With just a few ingredients and steps, you can create a delicious and refreshing dessert that will transport you to a sunny paradise with every bite. Whether you’re entertaining guests or treating yourself, this ice cream is sure to impress. So, why not give it a try and create your own tropical memories?

Related update: Coconut Guava Ice cream

Related update: Macaroni and Cheese Gratin