Cherry Coke Float Cupcakes With Chocolate Shell | Made by Meaghan Moineau

Cherry Coke Float Cupcakes With Chocolate Shell

Intro

There’s something undeniably nostalgic about the combination of cherries and cola. It takes me back to those summer afternoons at the local diner, sipping on a Cherry Coke while friends gathered around, sharing stories and laughter. When I first thought of combining this classic drink with the timeless joy of a cupcake, I knew I was onto something special. These Cherry Coke Float Cupcakes, with their delightful chocolate shell, encapsulate that feeling of playful indulgence and bring back those cherished memories with every bite.

Why You’ll Love It

These cupcakes are more than just a treat; they’re an experience. The fizzy sweetness of Coca-Cola, the richness of cocoa, and the surprise of biting into a cherry hidden within are complemented by a decadent chocolate shell. The result is a cupcake that’s both familiar and exciting, perfect for parties, family gatherings, or simply a sweet indulgence at the end of a long day.

Ingredients

  • 1 3/4 cups all-purpose flour
  • 3/4 cup unsweetened cocoa powder
  • 1 1/2 cups sugar
  • 1 teaspoon baking soda
  • 1/2 teaspoon salt
  • 1 cup Coca-Cola
  • 1/2 cup buttermilk
  • 1/2 cup unsalted butter, melted
  • 1 teaspoon vanilla extract
  • 1 large egg
  • 24 maraschino cherries, plus syrup
  • Ice-cream chocolate shell

Instructions

  1. Preheat your oven to 350°F (175°C) and line a cupcake pan with cupcake liners.
  2. In a large bowl, combine the flour, cocoa powder, sugar, baking soda, and salt.
  3. In another bowl, blend the Coca-Cola, buttermilk, melted butter, vanilla extract, and egg.
  4. Pour the liquid ingredients into the dry ingredients.
  5. Stir well with a wooden spoon until everything is blended smoothly.
  6. Spoon the batter into the cupcake liners, about two-thirds full.
  7. Push one maraschino cherry into the center of each cupcake.
  8. Bake for 15 minutes or until a cake tester comes out clean.
  9. Let the cupcakes cool completely on a wire rack.
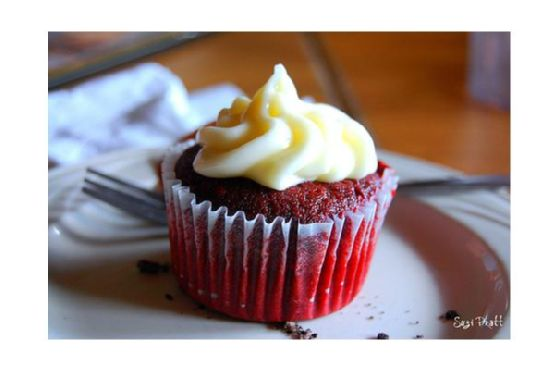
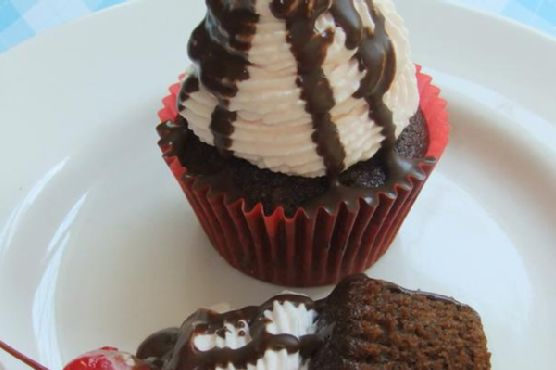
  10. Once cooled, frost each cupcake with whipped cream.
  11. Drizzle the ice-cream chocolate shell over the whipped cream.
  12. Top each cupcake with a maraschino cherry.

Tips

For the perfect cupcakes, make sure your ingredients are at room temperature before mixing. This ensures they combine more easily and evenly. When adding the cherries, make sure they’re well-drained to prevent the batter from becoming too moist. And remember, the key to a smooth chocolate shell is to be generous with the drizzle and allow it to set completely before serving.

Variations & Substitutions

If you want to mix things up, try using cherry cola instead of regular Coca-Cola for an extra burst of cherry flavor. You can also substitute the cocoa powder for a dark chocolate version for a richer taste. For a dairy-free option, replace the buttermilk with almond milk and the butter with coconut oil. If you prefer a less sweet frosting, a simple cream cheese frosting pairs wonderfully with the cherry and cola flavors.

Storage

These cupcakes are best enjoyed fresh, but they can be stored in an airtight container in the refrigerator for up to three days. If you plan to keep them longer, consider freezing them without the whipped cream and chocolate shell. When you’re ready to serve, thaw them in the refrigerator and add the toppings fresh.

FAQ

Can I make these cupcakes in advance?

Yes, you can make the cupcakes a day or two in advance. Store them in an airtight container at room temperature, and top with whipped cream and chocolate shell just before serving.

Can I use fresh cherries instead of maraschino cherries?

Absolutely! Fresh cherries can add a wonderful natural flavor. Just make sure to pit them before use, and consider cooking them slightly to soften, as they won’t have the syrupy texture of maraschino cherries.

What type of chocolate shell should I use?

Any ice-cream chocolate shell will work, but I recommend one made with real chocolate for the best flavor. You can find these in the ice cream toppings section of most grocery stores.

Nutrition

While these cupcakes are a treat, they’re surprisingly balanced for a dessert. Each cupcake provides a modest serving of indulgence, with the combination of chocolate, cola, and cherries offering a delightful array of flavors without being overly heavy. Remember, moderation is key when enjoying sweets as part of a balanced diet.

Conclusion

Cherry Coke Float Cupcakes with Chocolate Shell are a delightful fusion of classic flavors that are sure to impress. Whether you’re reminiscing about the good old days or creating new memories, these cupcakes are the perfect way to celebrate life’s sweet moments. I hope you enjoy baking and savoring them as much as I do!

Related update: Cherry Coke Float Cupcakes With Chocolate Shell

Related update: Lemon Mint Sorbet

Red Velvet Cupcake | Made by Meaghan Moineau

Red Velvet Cupcakes

Intro

There’s something magical about red velvet cupcakes. The vibrant red hue, the rich cocoa flavor, and the creamy frosting come together to create a cupcake that’s as delightful to look at as it is to eat. I remember the first time I baked red velvet cupcakes with my grandmother. We spent the afternoon in her cozy kitchen, the air filled with warmth and the sweet aroma of baking. She taught me the importance of patience and precision when measuring ingredients, and how a simple cupcake can bring joy to those who share it. Today, I’m excited to share with you my beloved recipe for red velvet cupcakes, a treat that not only delights the taste buds but also brings back fond memories of time spent in the kitchen with loved ones.

Why You’ll Love It

These red velvet cupcakes are a perfect blend of color, taste, and texture. The deep red color makes them a show-stopper at any gathering, while the soft, moist cake paired with the creamy frosting ensures that each bite is a taste of heaven. They’re easy to make and even easier to enjoy, whether you’re a seasoned baker or a beginner. The slight tang from the buttermilk and vinegar perfectly complements the sweetness, making these cupcakes not too sweet, but just right.

Ingredients

  • 1 teaspoon baking soda
  • ¾ cup unsalted butter, softened
  • 1 cup buttermilk
  • 2 ½ cups cake flour, sifted
  • 1 teaspoon cider vinegar
  • 8 ounces cream cheese, softened
  • 3 large eggs
  • 4 cups powdered sugar
  • 2 tablespoons red food coloring
  • ½ teaspoon salt
  • 1 ½ cups sugar
  • ½ cup unsalted butter, softened (for frosting)
  • 2 tablespoons unsweetened cocoa
  • 1 teaspoon vanilla extract

Instructions

  1. Preheat your oven to 350°F (175°C). Grease and lightly flour two cupcake pans to make 24 cupcakes.
  2. In a small bowl, sift the cake flour and set aside.
  3. In a large bowl, use an electric mixer on medium speed to cream together the butter and sugar until very light and fluffy, about 5 minutes.
  4. Add the eggs one at a time, beating well after each addition.
  5. In a small bowl, whisk together the red food coloring, cocoa, and vanilla. Add this mixture to the batter and beat well.
  6. In a measuring cup, stir the salt into the buttermilk. Add to the batter in three parts, alternating with the flour. With each addition, beat until the ingredients are incorporated, but do not overbeat.
  7. In a small bowl, stir together the cider vinegar and baking soda. Add this to the batter and mix well.
  8. Using a rubber spatula, scrape down the batter in the bowl, ensuring the ingredients are well blended and the batter is smooth.
  9. Divide the batter evenly among the prepared pans.
  10. Arrange the oven racks in the upper and lower thirds of the oven and bake the cupcakes, switching positions of the pans halfway through, until a tester comes out clean, about 20 minutes.
  11. Cool the cupcakes in the pan for 10 minutes, then remove from the pan and cool completely on a rack before icing.
  12. To make the frosting, combine butter, salt, and cream cheese in a mixer and beat on medium speed for 2-3 minutes.
  13. Add powdered sugar gradually until just incorporated. Be careful not to overmix; the frosting should be thick but not fluffy.
  14. Add vanilla extract. If the frosting is too thick, add a splash of milk to achieve the desired consistency.
  15. To ice the cupcakes, mound about a cup of frosting on top of each cupcake and use an icing spatula to create a swirl on top. Decorate with colored sprinkles if desired.

Tips

For the best results, ensure all ingredients are at room temperature before you start. This helps them mix more evenly. When measuring flour, be sure to sift it to avoid lumps and ensure a light texture. Lastly, resist the temptation to open the oven door while baking, as this can cause the cupcakes to deflate.

Variations & Substitutions

If you’re looking to switch things up, consider using natural food coloring for a more subtle hue. For a different flavor profile, try adding a teaspoon of almond extract to the batter. You can also substitute the cream cheese frosting with a simple buttercream or a whipped cream topping for a lighter option.

Storage

Store the cupcakes in an airtight container at room temperature for up to 2 days. For longer storage, keep them in the refrigerator for up to a week. To freeze, wrap each cupcake individually in plastic wrap and place in a freezer-safe bag for up to 3 months. Thaw at room temperature before serving.

FAQ

Can I make these cupcakes ahead of time?

Yes, you can bake the cupcakes a day in advance and store them in an airtight container. Frost them on the day you plan to serve them for the best texture and flavor.

What can I do if I don’t have buttermilk?

If you don’t have buttermilk, you can make a substitute by adding 1 tablespoon of lemon juice or vinegar to 1 cup of milk. Let it sit for 5 minutes before using it in the recipe.

Can I use regular flour instead of cake flour?

Yes, you can substitute all-purpose flour for cake flour by using 2 ¼ cups of all-purpose flour plus ¼ cup of cornstarch. Sift them together before using in the recipe.

Nutrition

Each red velvet cupcake with frosting contains approximately 280 calories, 12g of fat, 37g of carbohydrates, and 3g of protein. Please note these values are estimates and can vary based on specific ingredients used.

Conclusion

These red velvet cupcakes are a true delight, offering a perfect balance of flavors and a stunning appearance that will impress your family and friends. Whether you’re baking for a special occasion or just because, they’re sure to bring smiles and fond memories. Happy baking!

Related update: Red Velvet Cupcake

Related update: Chocolate Caramel Cupcakes

Related update: Cherry Coke Float Cupcakes With Chocolate Shell

Red Velvet Cupcake | Made by Meaghan Moineau

Red Velvet Cupcake Recipe

Intro

There’s something magical about a batch of red velvet cupcakes, with their rich, velvety texture and striking color. Growing up, my grandmother would often bake these delightful treats for special occasions, and the aroma of vanilla and cocoa would fill her cozy kitchen. It was a time when the whole family would gather around, eagerly waiting to taste the first cupcake, topped with a generous swirl of cream cheese frosting. Today, I’m excited to share this cherished recipe with you, so you can create your own sweet memories.

Why You’ll Love It

These red velvet cupcakes are not just beautiful to look at, but they also offer a perfect balance of flavors. The subtle hint of cocoa, combined with the tanginess of the buttermilk and cream cheese frosting, creates a taste that is both unique and irresistible. They’re perfect for any celebration or just a cozy afternoon tea. Plus, the recipe is simple enough for even novice bakers to master.

Ingredients

  • Baking soda
  • ¾ cup unsalted butter
  • Buttermilk
  • Cake flour
  • Cider vinegar
  • Cream cheese
  • Eggs
  • Powdered sugar
  • Red food coloring
  • Salt
  • Sugar
  • Unsalted butter
  • Unsweetened cocoa
  • Vanilla
  • Vanilla extract

Instructions

  1. Preheat your oven to 350°F (175°C). Grease and lightly flour two cupcake pans to make 24 cupcakes.
  2. In a small bowl, sift the cake flour and set it aside.
  3. In a large bowl, use the medium speed of an electric mixer to cream the butter and sugar until very light and fluffy, about 5 minutes.
  4. Add the eggs, one at a time, beating well after each addition.
  5. In a small bowl, whisk together the red food coloring, cocoa, and vanilla. Add this mixture to the batter and beat well.
  6. In a measuring cup, stir the salt into the buttermilk. Add this to the batter in three parts, alternating with the flour. With each addition, beat until the ingredients are incorporated, but do not overbeat.
  7. In a small bowl, stir together the cider vinegar and baking soda. Add this to the batter and mix well.
  8. Using a rubber spatula, scrape down the batter in the bowl, ensuring the ingredients are well blended and the batter is smooth.
  9. Divide the batter among the prepared pans.
  10. Arrange the oven racks in the upper and lower thirds of the oven. Bake the cupcakes, switching positions of the pans halfway through baking, until a tester comes out clean, about 20 minutes.
  11. Cool the cupcakes in the pan for 10 minutes, then remove them from the pan and cool completely on a rack before icing.
  12. To make the frosting, combine butter, salt, and cream cheese in a mixer and beat on medium speed for 2-3 minutes. Add sugar until just incorporated. Do not over mix. It should be thick but not fluffy. Add vanilla. If necessary, add milk to thin.
  13. To ice, mound about a cup of frosting on top of each cupcake and use an icing spatula to make a swirl on top. If desired, decorate with colored sprinkles.

Tips

For the best results, ensure all your ingredients are at room temperature before starting. This helps them blend more smoothly. Also, be gentle when mixing the batter to keep the cupcakes light and fluffy. Finally, don’t skip the step of switching the pans halfway through baking; it ensures even cooking.

Variations & Substitutions

If you’re looking to make these cupcakes a tad healthier, consider using whole wheat pastry flour in place of cake flour. For a fun twist, you can add a teaspoon of orange zest to the batter for a citrusy kick. If you prefer a less sweet frosting, reduce the powdered sugar by half and add a splash of lemon juice for a tangy flavor.

Storage

These cupcakes are best enjoyed fresh, but they can be stored in an airtight container at room temperature for up to two days. If you need to keep them longer, store them in the fridge for up to a week. Just bring them to room temperature before serving for the best texture and flavor. You can also freeze them without frosting for up to three months.

FAQ

Can I use all-purpose flour instead of cake flour?

While cake flour gives these cupcakes their tender crumb, you can substitute all-purpose flour if needed. Just be sure to measure carefully and sift it to ensure a light texture.

What can I use instead of buttermilk?

If you don’t have buttermilk on hand, you can make a quick substitute by adding one tablespoon of lemon juice or vinegar to one cup of milk. Let it sit for about 5 minutes before using it in the recipe.

How do I know when the cupcakes are done?

The cupcakes are done when a toothpick inserted into the center comes out clean or with just a few moist crumbs. If the toothpick is wet with batter, give them a few more minutes.

Nutrition

Each red velvet cupcake is approximately 250 calories, with 12g of fat, 33g of carbohydrates, and 3g of protein. These values can vary slightly based on specific ingredients used and portion sizes.

Conclusion

Red velvet cupcakes are a classic treat that never fails to impress. Whether you’re baking them for a special occasion or just because, they’re sure to bring smiles to everyone who tastes them. I hope this recipe brings as much joy to your kitchen as it has to mine. Happy baking!

Related update: Red Velvet Cupcake

Related update: Red Velvet Cupcake

Brownie Cupcakes | Made by Meaghan Moineau

Brownie Cupcakes | Made by Meaghan Moineau

Title: Decadent Brownie Cupcakes: A Timeless Dessert with a Dash of Nostalgia

Description:

Indulge in the rich, chocolatey goodness of Brownie Cupcakes, a dessert that marries the classic allure of brownies with the delightful convenience of a cupcake. This recipe not only promises a sweet treat but also takes you on a nostalgic journey down memory lane. Rated a 3/10 on the difficulty scale, these cupcakes are simple enough for any baking enthusiast and perfect as a dessert for any occasion.

There’s something incredibly comforting about the smell of chocolate wafting through the house, a sensory delight that instantly transports me back to my grandmother’s cozy kitchen. Every Sunday, without fail, my family would gather at her place for dinner, and the highlight of our meal was always Grandma’s famous Brownie Cupcakes. The recipe, though simple, was a treasured family secret, passed down through generations, each batch carrying with it a sense of warmth and togetherness.

Ingredients:

– Unsweetened chocolate

– Unsalted butter

– White granulated sugar

– Vanilla extract

– Eggs

– All-purpose flour

– Salt

Instructions:

1. Preheat your oven to 325 degrees F (170 degrees C). If using a turbo broiler, set it to 150 degrees.
2. Melt the chopped chocolate and butter in a stainless steel bowl placed over a saucepan of simmering water. Stir until smooth, then remove from heat and let cool slightly.
3. Mix in the sugar using a hand mixer or a sturdy spoon. Add the vanilla extract, followed by the eggs, one at a time, ensuring each is well incorporated before adding the next.
4. Combine the flour and salt, then gently fold into the chocolate mixture until well blended.
5. Divide the batter evenly between the muffin cups, ensuring each is filled about three-quarters full.
6. Bake in the preheated oven for 20 – 25 minutes. If using a turbo broiler, bake for 13-15 minutes. Check for doneness with a toothpick; it should come out with a few moist crumbs.
7. Cool the cupcakes on a wire rack. Once cooled completely, frost with your favorite icing.

These Brownie Cupcakes are rated a 3/10 in difficulty, making them an accessible dessert option for bakers of all skill levels. The simplicity of the ingredients and the straightforward steps mean you can focus on enjoying the process and, of course, the mouthwatering results.

As you take a bite of these delectable treats, let the rich, chocolatey flavor remind you of cherished family moments. Whether you’re creating new memories or reliving old ones, these Brownie Cupcakes are more than just a dessert; they’re a piece of history, a sweet slice of nostalgia that continues to bring joy to every gathering.

Read more about Appetizers

Read more about Main Dishes

Read more about Desserts

Related update: Red Velvet Cupcake

DAIRY-FREE COCOA CUPCAKES WITH PEANUT BUTTER FILLING, MARSHMALLOW FROSTING | Made by Meaghan Moineau

DAIRY-FREE COCOA CUPCAKES WITH PEANUT BUTTER FILLING, MARSHMALLOW FROSTING | Made by Meaghan Moineau

**Title: Nostalgic Delights: Dairy-Free Cocoa Cupcakes with Peanut Butter Filling and Marshmallow Frosting**


**Description:**


Indulge in these deliciously rich Dairy-Free Cocoa Cupcakes infused with a creamy peanut butter filling and topped with a fluffy marshmallow frosting. Perfectly moist and irresistibly decadent, these cupcakes are a delightful treat for any occasion. Dive into a nostalgic story that ties this delightful dessert to cherished family memories. Easy to make and sure to please, this recipe is a must-try for dessert lovers everywhere.


---


**Nostalgic Delights: Dairy-Free Cocoa Cupcakes with Peanut Butter Filling and Marshmallow Frosting**


There's something magical about the aroma of freshly baked cupcakes wafting through the house. It takes me back to lazy Sunday afternoons spent in the cozy kitchen of my grandmother's home. The warmth of the oven, the gentle hum of chatter, and the sweet anticipation of tasting a new creation are memories that forever hold a special place in my heart.


**A Whisk of Nostalgia**


My grandmother, a woman of simple pleasures, always believed in the power of food to bring people together. Every Sunday, she'd whip up a batch of her famous cupcakes. These were no ordinary cupcakes; they were a labor of love, a blend of flavors that danced in harmony. Her secret? A perfect marriage of bittersweet chocolate and creamy peanut butter, crowned with a cloud-like marshmallow frosting.


As a child, I would perch on a stool, eyes wide with wonder, as she deftly mixed ingredients. "The key is to let the batter remain a bit lumpy," she'd say with a wink, "that's where the magic happens." To this day, the smell of cocoa and the taste of peanut butter bring back those cherished moments, filled with laughter and love.


**Dairy-Free Cocoa Cupcakes with Peanut Butter Filling and Marshmallow Frosting**


**Ingredients:**


- 1 cup unbleached flour


- 1/2 cup Dutch cocoa powder


- 1 tsp baking powder


- 1/2 tsp baking soda


- 1/4 tsp salt


- 1 large egg


- 1/3 cup canola oil


- 1/2 cup granulated sugar


- 1/4 cup light brown sugar


- 1 tsp chocolate flavor


- 1 tsp vanilla extract


- 1/2 cup freshly brewed coffee, cooled


- 1/2 cup soy milk


**Peanut Butter Filling:**


- 1/3 cup Jif Natural Creamy Peanut Butter


- 2 tbsp maple syrup


**Marshmallow Frosting:**


- 2 egg whites


- 1/2 cup granulated sugar


- 1/4 tsp cream of tartar


- 1/4 cup light corn syrup


- 1/4 cup water


- 1 tsp vanilla extract


- 1/4 cup confectioner's sugar


**Topping:**


- 1/4 cup honey-roasted peanuts, coarsely chopped


**Instructions:**


1. **Prepare the Cupcakes:**


Preheat your oven to 350°F (175°C). Line a 12-cup muffin tin with paper liners. In a large bowl, whisk together cocoa powder, flour, baking powder, baking soda, and salt.


2. **Mix Wet Ingredients:**


In a medium bowl, whisk the egg, canola oil, granulated sugar, light brown sugar, chocolate flavor, vanilla extract, coffee, and soy milk.


3. **Combine and Fill:**


Stir the wet ingredients into the dry ingredients using a spoon or spatula. Remember, the batter will be somewhat lumpy—do not overmix. Using an ice cream scoop (about 1/4 cup), fill the paper liners.


4. **Bake:**


Bake in the preheated oven for 18-20 minutes, or until a toothpick inserted into the center comes out clean. Let the cupcakes cool completely before filling and frosting.


5. **Prepare the Peanut Butter Filling:**


In a small bowl, mix together the peanut butter and maple syrup until smooth. Once cupcakes are cooled, use a small knife to cut a cone-shaped piece out of the center of each cupcake. Fill the hole with the peanut butter mixture.


6. **Make the Marshmallow Frosting:**


In a medium heatproof bowl, combine egg whites, granulated sugar, cream of tartar, corn syrup, and water. Place over a pot of simmering water, whisking constantly until the mixture is warm and the sugar has dissolved. Remove from heat and beat with an electric mixer on high speed until stiff peaks form. Add vanilla extract and confectioner's sugar, beating until smooth.


7. **Frost and Garnish:**


Pipe or spread the marshmallow frosting over each cupcake. Sprinkle with chopped honey-roasted peanuts for a crunchy finish.


**Difficulty Rating:** 6/10


**Classification:** Dessert


These Dairy-Free Cocoa Cupcakes with Peanut Butter Filling and Marshmallow Frosting are more than just a dessert. They are a testament to the power of food to evoke memories and create new ones. Whether you’re making them for a special occasion or just because, they are sure to bring a smile to your face and a sweet warmth to your heart.

Read more about Appetizers

Read more about Main Dishes

Read more about Desserts