Lemon Mint Sorbet: A Refreshing Summer Delight
Introduction
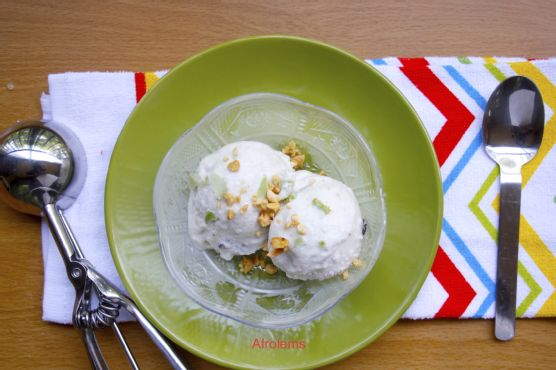
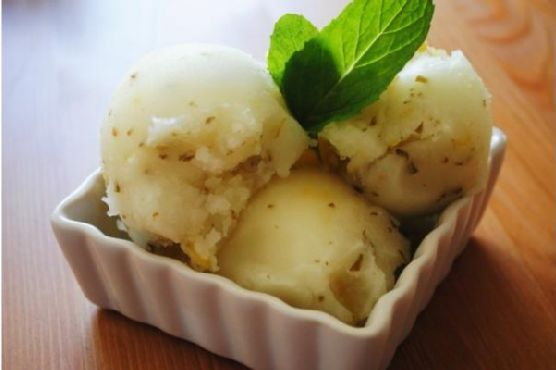
There’s nothing quite like the invigorating taste of lemon mint sorbet on a warm summer’s day. Growing up, my grandmother used to make a similar chilled treat for us kids during hot afternoons. Her secret was always a touch of fresh mint from her garden, which added a burst of freshness to the already tangy lemon. This recipe is my homage to those delightful summer memories, with a modern twist of limoncello to elevate the flavor profile. Whether you’re hosting a summer gathering or just looking for a cool dessert to enjoy in the backyard, this Lemon Mint Sorbet is sure to become a favorite in your household.
Why You’ll Love It
This Lemon Mint Sorbet is a perfect balance of sweet, tart, and refreshing. It’s incredibly easy to make, requiring simple ingredients that pack a punch of flavor. The combination of lemon and mint is universally appealing and brings a touch of sophistication to any meal. Plus, this recipe is versatile, allowing you to adapt it to your personal taste preferences or dietary needs. It’s a naturally gluten-free dessert, and with just a minor tweak, it can be made alcohol-free as well. Whether you’re serving it as an elegant palate cleanser between courses or as a light dessert, this sorbet is a crowd-pleaser.
Ingredients
- 2 cups water
- 1 cup sugar
- Zest of 2 lemons
- 1 cup fresh mint leaves, packed
- 1 cup fresh lemon juice
- 2 tablespoons limoncello
- 1/4 teaspoon kosher salt
Instructions
- Pour the water, sugar, and lemon zest into a pot over medium-high heat. Stir occasionally until the sugar has completely dissolved.
- Remove from heat and stir in the mint leaves. Set aside to allow the syrup to steep and absorb the mint flavor.
- In a separate bowl, whisk together the fresh lemon juice, limoncello, and kosher salt.
- Combine the lemon juice mixture with the minted simple syrup and allow it to cool completely.
- Chill the mixture in the refrigerator for at least 3 hours, or preferably overnight, to develop the flavors.
- Once chilled, pour the mixture into the frozen base of your ice cream maker. Cover with the lid and churn for 20-30 minutes, or until the mixture thickens to a sorbet consistency.
- Transfer the sorbet into a container and place it in the freezer for another hour or two, until it hardens to your desired texture.
Tips
For the best results, use freshly squeezed lemon juice and fresh mint leaves. The quality of these ingredients will directly affect the flavor of your sorbet. Also, make sure your ice cream maker base is fully frozen before you begin churning. This ensures that the sorbet achieves the right consistency. If you don’t have an ice cream maker, you can pour the mixture into a shallow container, freeze it, and stir it every 30 minutes until it reaches the desired texture.
Variations & Substitutions
If limoncello isn’t your thing, or if you’re making this for children, you can easily omit it from the recipe. The sorbet will be just as delicious with a pure lemon and mint flavor. If you prefer a sweeter sorbet, consider increasing the sugar to 1 1/4 cups. Conversely, if you like a more tart sorbet, reduce the sugar slightly. For a unique twist, try adding a splash of lime juice or a handful of basil leaves for a different herbal note.
Storage
Store any leftover sorbet in an airtight container in the freezer. It will keep well for up to two weeks. When you’re ready to serve it again, let it sit at room temperature for a few minutes to soften slightly for easier scooping.
FAQ
Can I make this sorbet without an ice cream maker?
Yes, you can! Pour the mixture into a shallow dish, such as a baking pan, and place it in the freezer. Stir the mixture every 30 minutes with a fork to break up ice crystals, continuing until it reaches the desired consistency.
What can I use instead of limoncello?
You can replace limoncello with an equal amount of additional lemon juice or water if you prefer an alcohol-free option. Alternatively, add a splash of any citrus-flavored liqueur of your choice.
How do I prevent ice crystals in my sorbet?
Ensure that the mixture is completely chilled before churning, and avoid opening the freezer frequently once the sorbet is setting. This helps maintain a consistent temperature, reducing the formation of ice crystals.
Nutrition
While exact nutritional information will vary based on your specific ingredients and serving sizes, a serving of this sorbet is generally low in calories and fat, making it a relatively healthy dessert option. It’s an excellent choice for those seeking a light, refreshing treat without overindulging.
Conclusion
Making Lemon Mint Sorbet is not only a nod to nostalgic summer days but also a celebration of fresh, vibrant flavors. With just a few simple ingredients, you can create a dessert that’s both elegant and refreshing. Whether you’re serving it at a dinner party or enjoying a quiet evening on the porch, this sorbet is sure to bring a smile to your face. So go ahead, embrace the simplicity of this delightful recipe, and create your own cherished summer memories.
Related update: Lemon Mint Sorbet
Related update: Oreo Hazelnut and Banana Cheesecake