Easy Key Lime Pie | Made by Meaghan Moineau

Easy Key Lime Pie | Made by Meaghan Moineau

A Taste of Sunshine: Easy Key Lime Pie Recipe


Description


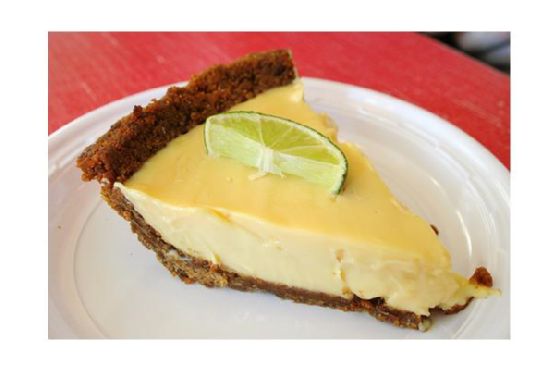
Dive into the zesty world of citrus delights with our Easy Key Lime Pie recipe. This classic dessert, infused with the tangy essence of lime and a rich, creamy filling, is perfect for any occasion. Whether you're looking to impress guests at a dinner party or enjoy a sweet treat on a lazy afternoon, this pie delivers a burst of flavor with every bite. Follow our step-by-step guide to create a pie that’s as delightful to make as it is to eat. Rated at a 3 out of 10 for difficulty, this dessert is accessible for all skill levels.


Ingredients


- 1/4 cup butter, melted


- 3 egg yolks


- 1 1/2 cups crushed graham crackers


- 1/2 cup lime juice


- 1/4 cup sugar


- 1 can (14 ounces) sweetened condensed milk


- 2 tablespoons water


- Whipped cream for topping


- Green food coloring (optional)


Instructions


Crust

1. Melt Butter: In a small bowl, melt the butter and stir in 1/4 cup of sugar.
2. Mix: Add the crushed graham crackers and toss the mixture until well combined.
3. Press: Spread the mixture evenly into a 9-inch pie plate and press it firmly onto the bottom and sides to form the crust.
4. Chill: Chill the crust in the refrigerator for 1 hour or until firm. For a crispier crust, bake in a preheated 375°F oven for 4-5 minutes and let cool before filling.

Filling

1. Beat Yolks: In a medium bowl, beat the egg yolks with a whisk or fork until smooth.
2. Combine Ingredients: Gradually whisk in the condensed milk, then add lime juice, water, and a few drops of green food coloring if desired. The mixture will thicken as you stir.
3. Fill Crust: Spoon the filling into the prepared crust, spreading it evenly.

Bake and Chill

1. Bake: Bake the pie in a preheated 350°F oven for 25 minutes.
2. Cool: Allow the pie to cool at room temperature for 1 hour.
3. Chill: Transfer to the refrigerator and chill for 3-4 hours.
4. Serve: Top with whipped cream before serving.

A Slice of Nostalgia


Growing up, my grandmother's kitchen was always full of the warm, comforting smells of baked goods. Among her vast array of culinary creations, her Key Lime Pie was a family favorite. I remember one summer afternoon when the whole family gathered for a backyard barbecue. The sun was shining, laughter filled the air, and, as always, Grandma’s Key Lime Pie awaited us at the end of the meal.


I vividly recall the moment she cut into the pie, the creamy filling gently yielding to her knife, releasing that unmistakable, citrusy aroma. Each bite was a burst of sunshine, its tartness perfectly balanced by the sweetness of the condensed milk and the buttery graham cracker crust. For me, that pie will forever be intertwined with memories of lazy summer days, family gatherings, and the warmth of my grandmother's smile.


Difficulty Rating: 3/10

Classification: Dessert


Enjoy making this Easy Key Lime Pie, and may it bring a slice of sunshine to your table and create cherished memories with each and every bite.
Read more about Appetizers

Read more about Main Dishes

Read more about Desserts

Orange-Fig Teacake with Caramel Glaze | Made by Meaghan Moineau

Orange-Fig Teacake with Caramel Glaze | Made by Meaghan Moineau

Title: "Savoring Sweet Memories: The Delightful Dance of Orange-Fig Teacake with Caramel Glaze"
Description:

Indulge in the harmonious blend of citrusy and fruity notes with our Orange-Fig Teacake, crowned with a luscious caramel glaze. This blog post will guide you through crafting this exquisite dessert while sharing a heartfelt family memory that adds a sprinkle of nostalgia to the mix. Discover the joy of baking and the magic of cherished moments wrapped in a delectable teacake.


---


The Orange-Fig Teacake with Caramel Glaze: A Slice of Nostalgia

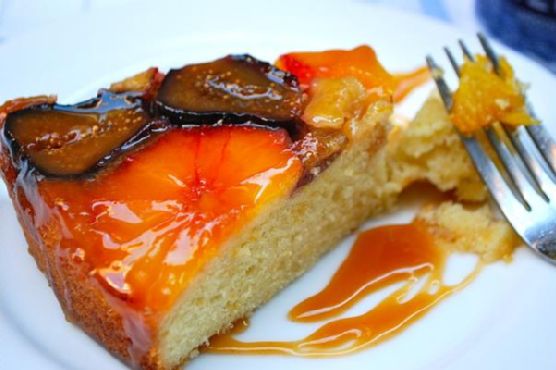
There's something undeniably comforting about the aroma of a freshly baked cake wafting through the house. Every year, as the summer sun began to mellow into the gentle warmth of autumn, my grandmother would prepare her legendary Orange-Fig Teacake. The enticing fusion of zesty oranges and sweet figs, complemented by a rich caramel glaze, made it a dessert to remember. It was more than just a cake; it was a tradition, a marker of seasons changing, and a canvas for family memories.


Ingredients:

- 2 cups all-purpose flour


- 1 1/2 teaspoons baking powder


- 1 teaspoon ground cardamom


- 1/2 teaspoon salt


- 1 cup unsalted butter, softened


- 1 cup sugar


- 3 large eggs


- 1/2 cup heavy cream, plus more for caramel


- 1 teaspoon vanilla extract


- 2 navel oranges


- 6-8 fresh figs


- 1 cup sugar (for caramel sauce)


- 1/4 cup water


- 2 tablespoons butter


Instructions:

1. Preheat your oven to 350°F (175°C). Prepare a 9" springform pan by spraying it with baking spray or buttering and sprinkling it with 2 tablespoons of sugar.


2. Zest one orange and add the zest to your mixing bowl. Peel both oranges, removing all pith, and slice into 1/4" rounds. Halve the figs.


3. In a large bowl, combine the softened butter, orange zest, and sugar. Beat until light and fluffy.


4. Add the eggs, heavy cream, and vanilla extract to the mixture. Beat well until smooth.


5. Sift together the flour, baking powder, cardamom, and salt. Gently incorporate the dry ingredients into the batter.


6. Arrange the fig halves and orange slices in the prepared pan. Spoon the batter over the fruit, spreading it evenly and tapping the pan to release air bubbles.


7. Bake for approximately 45 minutes, or until a tester comes out clean. Allow the cake to cool slightly before inverting it onto a rack to cool completely.


8. For the caramel glaze, combine sugar and water in a saucepan over medium-high heat. Once the sugar turns a golden amber, turn off the heat and slowly add the warmed heavy cream, stirring constantly.


9. Add the butter, stirring until smooth. Let the glaze cool for a few minutes before brushing it over the cake while still warm.


A Slice of Memory:

I vividly recall the annual family gatherings where my grandmother would serve this delightful creation. As children, my siblings and I would gather around the kitchen table, eagerly watching her expertly layer the figs and oranges before gently spreading the batter. The kitchen would fill with the sweet and spicy aroma of baking cardamom and citrus. The anticipation of that first bite, the sweet burst of orange and fig mingling with the creamy caramel, was pure bliss. Each slice of the teacake was a reminder of the love and warmth that bound our family together.


With every bite of this Orange-Fig Teacake, I am transported back to those cherished moments, surrounded by laughter and the comforting embrace of family. I hope this recipe brings the same joy and warmth to your home as it has to mine.


Difficulty Rating: 6/10
Classification: Dessert

Whether you're a seasoned baker or a novice in the kitchen, this teacake offers a delightful challenge that promises to reward you with a taste experience steeped in history and heart. Enjoy the journey of baking, and may each bite bring you as much joy as it has brought my family over the years.

Read more about Appetizers

Read more about Main Dishes

Read more about Desserts

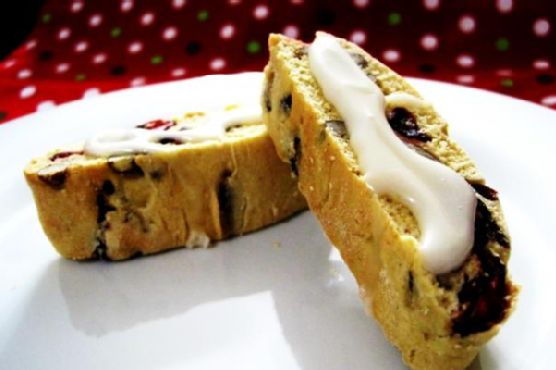
Cranberry Orange Biscotti | Made by Meaghan Moineau

Cranberry Orange Biscotti | Made by Meaghan Moineau

Title: "Cranberry Orange Biscotti: A Taste of Nostalgia and Citrus Delight"
Description: Dive into the delightful world of Cranberry Orange Biscotti, a perfect fusion of tart cranberries and zesty orange. This dessert not only serves as a delicious treat but also carries a nostalgic family memory, making it a cherished addition to any holiday gathering.

---


There's something magical about the aroma of freshly baked biscotti wafting through the house, especially when the flavors of cranberry and orange meld together in perfect harmony. This Cranberry Orange Biscotti recipe is more than just a delightful dessert; it's a journey back to cherished family memories and festive gatherings.


A Nostalgic Journey

Growing up, my grandmother's kitchen was the heart of every holiday season. The warmth of the oven and the vibrant scents of citrus and spices created an inviting atmosphere that drew everyone in. Every year, as the first cold snap of winter hinted at the approaching holidays, my grandmother would pull out her well-worn recipe card for Cranberry Orange Biscotti.


I remember sitting at the kitchen table, watching her expertly mix the ingredients—unsalted butter, sugar, and the zest of fresh oranges—while recounting stories of her childhood. She'd tell us how her mother, my great-grandmother, would bake these very biscotti during the festive season, using them as a means to bring the family together over laughter, stories, and the occasional cup of hot cocoa.


As a child, I was fascinated by the process. The transformation of simple ingredients like flour, whole wheat pastry flour, and baking powder into golden, slightly cracked logs seemed like magic. When she added the dried cranberries and pecans, I could hardly wait for the first taste. The tartness of the cranberries paired with the citrusy sweetness of the orange glaze was a combination that danced on the palate.


The Recipe

*Ingredients:*


- 1 tablespoon baking powder


- 1 cup confectioners' sugar


- 1 cup dried cranberries


- 3 large eggs


- 2 cups all-purpose flour


- 1/2 cup fresh orange juice


- 2 tablespoons orange zest


- 1 cup pecans, chopped


- 1/4 teaspoon salt


- 1 cup sugar


- 1/2 cup unsalted butter, softened


- 1 teaspoon vanilla extract


- 1 cup whole wheat pastry flour


*Instructions:*


1. Preheat the oven to 350°F (175°C), positioning racks in the upper and lower thirds. Line two baking sheets with parchment paper.


2. In a mixer, beat the butter and sugar until light. Add eggs one at a time, mixing well between each. Stir in orange zest and vanilla.


3. In a separate bowl, whisk together the flours, baking powder, and salt. Gradually add to the wet mixture, mixing until just combined. Fold in cranberries and pecans.


4. Transfer dough to a floured surface, divide into three pieces, and shape into 12-inch logs. Place on baking sheets.


5. Bake for 15-18 minutes, switching sheet positions halfway through. Let rest for 10 minutes. Reduce oven to 300°F (150°C).


6. Slice logs diagonally into 3/4-inch pieces. Lay slices on their sides and bake for 10-15 minutes until golden.


7. For the glaze, mix confectioners' sugar with orange juice to desired consistency. Drizzle over warm biscotti.


Difficulty: 6/10
Classification: Dessert

This biscotti is not just a treat but a tradition, a way to connect with loved ones both past and present. As I bake these biscotti today, I'm reminded of those cherished moments in my grandmother's kitchen, the stories shared, and the love that went into each batch. Every bite is a taste of nostalgia, bringing family and friends together, just as it always has.

Read more about Appetizers

Read more about Main Dishes

Read more about Desserts

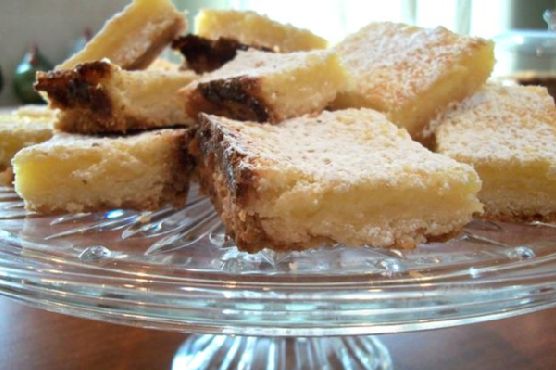
Luscious Lemon Bars | Made by Meaghan Moineau

Luscious Lemon Bars | Made by Meaghan Moineau

# Zesty Bliss: Mastering the Art of Luscious Lemon Bars


**Description:** Dive into the tangy world of Luscious Lemon Bars—a delightful dessert that captures the essence of sunny afternoons and cherished family traditions. With a perfect balance of tart lemon and sweet sugar, this recipe is a must-try for anyone looking to add a zesty twist to their dessert repertoire. Follow our step-by-step guide and discover the nostalgic tale behind this refreshing treat.


---


### Introduction


There’s something undeniably charming about a dessert that can transport you back in time. For me, Luscious Lemon Bars do just that. Every bite is reminiscent of warm summer days spent in my grandmother’s kitchen, where the sweet aroma of lemon would fill the air. These bars, with their vibrant citrus flavor, have become a family staple, cherished across generations. Today, I’m thrilled to share not only the recipe but also a slice of my family’s history with you.


### Ingredients


- **Crust:**


- 1 cup butter, softened


- 2 cups all-purpose flour


- 1/2 cup powdered sugar


- **Filling:**


- 4 large eggs


- 1 1/2 cups white sugar


- 1/4 cup all-purpose flour


- 1/2 teaspoon baking powder


- 1/2 cup fresh lemon juice (approximately 2-3 lemons)


- 1 tablespoon lemon zest


- **Topping:**


- Powdered sugar for dusting


### Instructions


1. **Preheat and Prepare:**


- Preheat your oven to 350°F (175°C).


- Grease a 9x13 inch rectangular cake pan to prevent sticking.


2. **Create the Crust:**


- In a mixing bowl, combine the butter, 2 cups of flour, and 1/2 cup of powdered sugar.


- Mix until crumbly, then press the mixture evenly into the bottom of the prepared pan using your fingertips.


- Bake in the preheated oven for 20 minutes or until the edges are lightly golden.


3. **Prepare the Filling:**


- While the crust is baking, whisk together the eggs, white sugar, 1/4 cup flour, and baking powder in a medium bowl.


- Add the lemon juice and zest, whisking until well combined.


4. **Combine and Bake:**


- Once the crust is done, remove it from the oven and pour the lemon filling over the hot crust.


- Return the pan to the oven and bake for an additional 23-25 minutes. Keep an eye on the top to prevent overbrowning.


5. **Cool and Serve:**


- Remove from the oven and place the pan on a wire rack, allowing it to cool for about 30 minutes.


- To remove from the pan, cut the bars in half and use a large flexible spatula to lift each half out. Then, cut into squares.


- Dust the bars with sifted icing sugar before serving.


### A Slice of Nostalgia


Growing up, my grandmother’s kitchen was the heart of our family gatherings. Every Sunday, after a hearty meal, she would unveil her famous Luscious Lemon Bars. I vividly remember the joy of helping her zest lemons, the anticipation building as the bars baked, and the satisfaction of that first tangy bite. These bars were more than just a dessert; they were a symbol of love and togetherness, connecting us through shared moments and cherished memories.


### Conclusion


Luscious Lemon Bars are more than a sweet treat—they’re a journey back to simpler times, filled with love and laughter. With a difficulty rating of 4/10, this dessert is accessible for bakers of all skill levels, making it a delightful addition to any gathering. Whether you’re enjoying them with a cup of tea or sharing them with loved ones, these lemon bars are sure to bring a smile to your face.


For more recipes and photos, visit my blog at [Lemon Drops Foodie](http://lemondropsfoodie.blogspot.com/2011/02/luscious-lemon-bars.html).


---


Rediscover the joy of baking and the power of family traditions with this refreshing and timeless dessert. Happy baking!

Read more about Appetizers

Read more about Main Dishes

Read more about Desserts

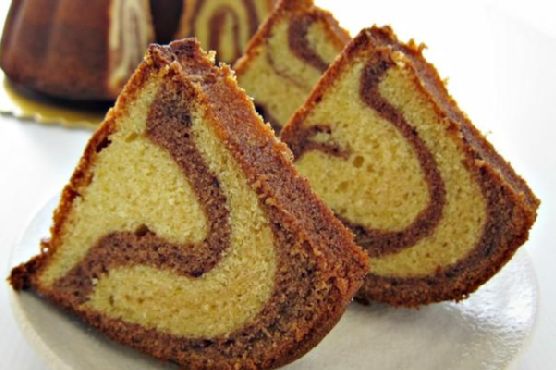
Orange Chocolate Cake | Made by Meaghan Moineau

Orange Chocolate Cake | Made by Meaghan Moineau

**Title: Zesty Indulgence: How to Make a Decadent Orange Chocolate Cake**


**Description:** Dive into the rich, citrusy world of Orange Chocolate Cake, a heavenly dessert that marries the tangy zest of oranges with the luscious depth of chocolate. This post not only provides a step-by-step guide to crafting this delightful treat but also shares a heartwarming family memory that makes this cake truly unforgettable.


---


**Orange Chocolate Cake Recipe: A Nostalgic Slice of Heaven**


When it comes to desserts, few combinations are as invigorating and indulgent as orange and chocolate. This Orange Chocolate Cake is a perfect balance of citrusy freshness and creamy, chocolatey goodness. As you embark on this culinary journey, prepare to be carried away by the luscious aroma that fills your kitchen and the heartwarming memories that bubble up with each bite.


**Ingredients:**


- 1 teaspoon baking powder


- 1 teaspoon baking soda


- 1 cup butter, softened


- 4 large eggs


- 2 1/2 cups all-purpose flour


- 1 cup sour plain natural yogurt


- 1/2 cup freshly squeezed orange juice


- 1 tablespoon orange rind, finely grated


- 1/4 teaspoon salt


- 1 cup semi-sweet chocolate, melted


- 2 cups caster sugar


- 1 teaspoon vanilla extract


**Instructions:**


1. Preheat your oven to 175°C (347°F). Grease a 9-inch bundt pan, then dust it with flour or coat it with a non-stick spray.


2. In a large mixing bowl, beat the butter until creamy. Gradually add the caster sugar, continuing to beat the mixture until it becomes light and fluffy.


3. Incorporate the eggs one at a time, ensuring each is well mixed before adding the next.


4. Stir in the orange rind, orange juice, and vanilla extract, beating at a low speed until the mixture is well combined.


5. Divide the flour, baking powder, and baking soda (Ingredient B) into four equal portions. Similarly, divide the sour cream into three portions. Alternately add the flour mixture and sour cream to the batter, beginning and ending with the flour. Beat well after each addition.


6. Separate half of the batter and gently fold it with the melted semi-sweet chocolate, being careful not to overmix.


7. Alternately spoon the plain and chocolate batters into the prepared bundt pan. Once all the batter is in the pan, gently shake it to settle any air pockets.


8. Bake in the preheated oven for 50-60 minutes, or until a skewer inserted into the center comes out clean.


9. Allow the cake to cool in the pan for 20 minutes before unmolding it onto a wire rack to cool completely.


**A Slice of Family Tradition**


Every time I bake this Orange Chocolate Cake, I'm transported back to my grandmother's kitchen, where the scent of oranges and chocolate was synonymous with family gatherings and joyous occasions. Grandma would lovingly prepare this cake for every holiday, its vibrant flavors and rich aroma a testament to her culinary prowess.


I remember one particular summer when the whole family gathered at Grandma's for a reunion. The kitchen was bustling with activity, laughter, and stories shared over cups of tea and warm slices of this cake. The mingling flavors of orange and chocolate symbolized not just a dessert, but a bond shared across generations. Grandma's Orange Chocolate Cake was more than a treat; it was a family heirloom passed down through the years.


**Difficulty Rating:** 6/10


**Classification:** Dessert


This cake, with its nostalgic roots and delightful flavor combination, is sure to be a hit at your next family gathering or special occasion. Whether you're a seasoned baker or a novice in the kitchen, the Orange Chocolate Cake promises a rewarding experience filled with cherished memories and irresistible flavors. Enjoy this journey of taste and tradition!

Read more about Appetizers

Read more about Main Dishes

Read more about Desserts

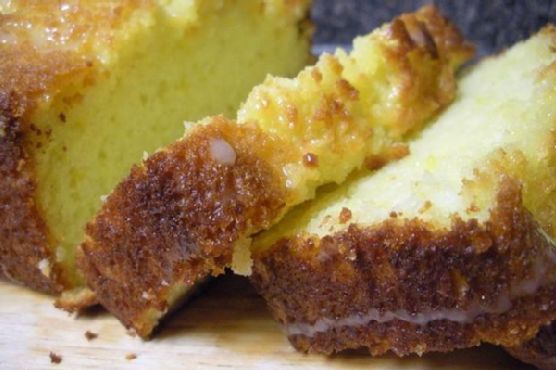
Triple Citrus Cake | Made by Meaghan Moineau

Triple Citrus Cake | Made by Meaghan Moineau

**Title: Zesty Delights: Crafting the Perfect Triple Citrus Cake**


**Description:** Dive into the refreshing world of citrus with our Triple Citrus Cake. This delightful dessert combines the vibrant flavors of lemon, lime, and orange, creating a symphony of taste that dances on your palate. Easy to make and even easier to enjoy, this cake is perfect for any occasion. Join us as we share the recipe, its heartwarming backstory, and tips to perfect your baking skills.


---


### Triple Citrus Cake: A Tangy Trip Down Memory Lane


When life gives you lemons, limes, and oranges, you make a Triple Citrus Cake! This dessert is more than just a sweet treat; it's a nostalgic trip to sunlit kitchens and family gatherings. The luscious combination of lemon zest, lime yogurt, and orange glaze offers a vibrant flavor profile that's both refreshing and satisfying.


#### Ingredients:


- 1 ½ cups all-purpose flour


- 1 ½ teaspoons baking powder


- ½ teaspoon salt


- 1 cup lime yogurt


- 3 large whole eggs


- 1 cup sugar


- 1 teaspoon vanilla extract


- ½ cup grapeseed oil


- 1 tablespoon lemon zest


- 1 cup powdered sugar


- 2 tablespoons orange juice


#### Instructions:


1. **Prepare Dry Ingredients:** Whisk together the flour, baking powder, and salt. Set aside.


2. **Mix Wet Ingredients:** In a large bowl, use an electric mixer to beat the lime yogurt, eggs, sugar, vanilla, grapeseed oil, and lemon zest until well combined.


3. **Combine Mixtures:** Gradually add the dry ingredients to the wet mixture, folding gently with a spatula until fully incorporated.


4. **Prepare the Pan:** Coat a 9 x 5-inch loaf pan with floured baking spray or line with parchment paper sprayed with baking spray.


5. **Bake:** Pour the batter into the prepared pan and smooth the top. Bake in a preheated oven at 350°F (175°C) for 40-50 minutes, or until a cake tester inserted in the center comes out clean.


6. **Cool:** Allow the cake to cool in the pan for at least an hour.


7. **Glaze:** Once cool, transfer the cake to a serving plate. Mix the powdered sugar and orange juice until smooth, then drizzle over the cake.


#### A Slice of Nostalgia


Every time I bake this Triple Citrus Cake, I'm transported back to sunny Sunday afternoons at my grandmother's house. As children, my siblings and I would eagerly wait in the kitchen, captivated by the zesty aroma wafting through the air. Grandma's kitchen was a sanctuary of love and laughter, where the magic of baking brought the family together.


The Triple Citrus Cake was a family favorite, especially during summer reunions. Grandma would slice generous pieces, serving them with a side of her famous homemade lemonade. Each bite was a burst of citrusy joy that perfectly complemented the warmth of family camaraderie. Those cherished memories of shared stories and laughter over slices of this cake are etched into my heart, making this recipe truly special.


#### Difficulty: 4/10


#### Classification: Dessert


Embrace the zest of life with this Triple Citrus Cake, a delightful dessert that promises to be the star of any gathering. With its easy-to-follow steps and a taste that transports you to sunlit family kitchens, this cake is a must-try for every dessert enthusiast. So gather your ingredients, channel your inner pastry chef, and create a nostalgic masterpiece that will surely delight your family and friends!

Read more about Appetizers

Read more about Main Dishes

Read more about Desserts