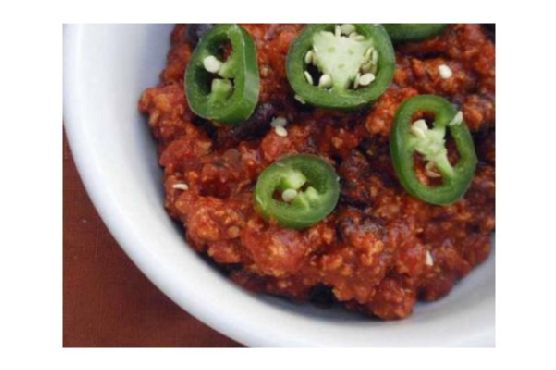
Drunken Turkey Chili
Intro
There’s nothing quite like a steaming bowl of chili to warm the soul and bring people together. My fondest memories are of chilly autumn evenings, sitting around the kitchen table with family, savoring the rich and hearty flavors of a well-crafted chili. This Drunken Turkey Chili recipe is not just a dish; it’s a nostalgic journey back to those cozy nights filled with laughter and love. The addition of beer gives it a unique twist, pairing beautifully with the smoky spices and tender turkey. Whether you’re preparing for a family gathering or a casual night in, this chili will quickly become a cherished staple in your home.
Why You’ll Love It
This Drunken Turkey Chili is a delightful combination of hearty and healthy. Here are just a few reasons why you’ll fall in love with this recipe:
- Unique Flavor Profile: The light beer adds a subtle malty sweetness that complements the spice blend perfectly.
- Healthy and Lean: Made with ground turkey and loaded with vegetables, this chili is a guilt-free comfort food.
- Simple Ingredients: Most ingredients are pantry staples, making this an easy and convenient meal to prepare.
- Customizable Heat: Adjust the jalapenos and chili powder to suit your spice preference.
- Perfect for Meal Prep: It stores well, so you can enjoy it throughout the week or freeze for later.
Ingredients
- 2 tablespoons extra virgin olive oil
- 1 large white onion, diced
- 1 red bell pepper, diced
- 3 cloves garlic, minced
- 2 jalapeno peppers, seeded and chopped
- 1 tablespoon smoked paprika
- 1 tablespoon chili powder
- 1 teaspoon ground cumin
- 1 teaspoon black pepper
- 1 teaspoon unsweetened cocoa powder
- 1 pound lean ground turkey meat
- 1 can (28 oz) peeled tomatoes
- 1 can (15 oz) black beans, drained and rinsed
- 1 cup light beer
- 2 tablespoons low sodium soy sauce
- Fresh cilantro, chopped
Instructions
- Gently heat the oil in a large pot. Do not let it smoke!
- Add the onion, bell pepper, garlic, and jalapenos. Saute over medium heat until soft, about 5 minutes.
- Add all powdered spices and stir to coat vegetables.
- Add turkey. Saute for three or four minutes, until just cooked through. Use your spoon or spatula to break it up.
- Drain the juice from the peeled tomatoes into your chili pot. Then finely chop the tomatoes and add them as well. Stir.
- Add the black beans, the beer, and the soy sauce. Stir.
- Add cilantro and stir well.
- Cover and allow to simmer over low heat for five to ten minutes.
- Then turn off the heat and let it rest for about fifteen minutes before serving.
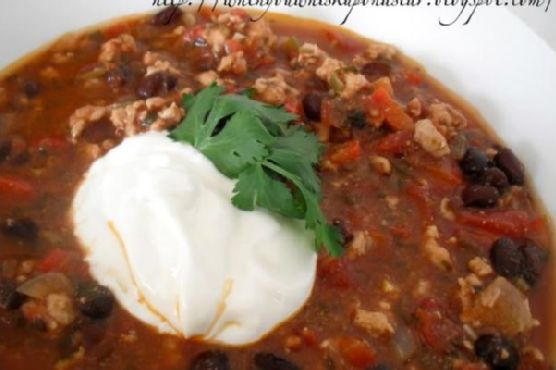
- Optional Garnishes: Top with low-fat sour cream, grated cheese, avocado slices, chopped green onions, or anything else that suits your fancy! I love to eat it with tortilla chips.
Tips
For best results, use fresh ingredients and adjust the seasoning to match your personal taste. Here are some additional tips to ensure your Drunken Turkey Chili turns out perfectly:
- Use a Heavy-Bottomed Pot: This will distribute heat evenly and prevent the chili from burning.
- Let It Rest: Allowing the chili to rest after cooking enhances flavor development.
- Pre-Prep Ingredients: Have all your vegetables chopped and spices measured before starting to cook for a smoother process.
Variations & Substitutions
Feel free to experiment with this recipe to suit your dietary needs or personal preferences. Here are some ideas:
- Vegetarian Option: Substitute the turkey with extra beans or plant-based meat alternatives for a vegetarian version.
- Different Protein: Swap turkey for lean ground beef or chicken if preferred.
- Spice Level: For extra heat, add more jalapenos or a dash of cayenne pepper.
- Beer Substitute: If you prefer not to use beer, you can substitute with chicken broth for a non-alcoholic version.
Storage
This chili is perfect for meal prep as it tastes even better the next day! Store any leftovers in an airtight container in the refrigerator for up to 4 days. For longer storage, freeze in individual portions for up to 3 months. To reheat, simply thaw in the refrigerator overnight and warm on the stove or in the microwave.
FAQ
Can I make this chili in a slow cooker?
Absolutely! To make this in a slow cooker, first saute the vegetables and turkey in a pan as directed, then transfer everything to the slow cooker. Cook on low for 6-8 hours or high for 3-4 hours.
Is this recipe gluten-free?
To make this recipe gluten-free, ensure your beer and soy sauce are certified gluten-free. Alternatively, use gluten-free broth instead of beer.
Can I make this chili spicier?
Yes, you can easily adjust the spice level by adding more jalapenos, chili powder, or even a pinch of cayenne pepper to increase the heat.
Nutrition
This Drunken Turkey Chili is not only delicious but also nutritious. Here’s a breakdown of the nutritional benefits:
- Lean Protein: Turkey is a great source of lean protein, low in saturated fat.
- Fiber-Rich: The black beans provide plenty of dietary fiber, which is essential for digestive health.
- Vitamins and Minerals: Rich in vitamins A and C from the bell peppers and tomatoes, and packed with iron and potassium.
Conclusion
Drunken Turkey Chili is more than just a meal; it’s an experience that brings warmth and comfort to your table. Whether you’re cooking for yourself, your family, or a gathering of friends, this recipe is sure to please even the pickiest of eaters. Its unique blend of flavors and hearty ingredients makes it a standout dish that you’ll want to enjoy all year round. So go ahead, try it out, and let the aroma of this delightful chili bring a sense of nostalgia and joy to your home. Happy cooking!
Related update: Drunken Turkey Chili
Related update: Beef Lo Mein Noodles