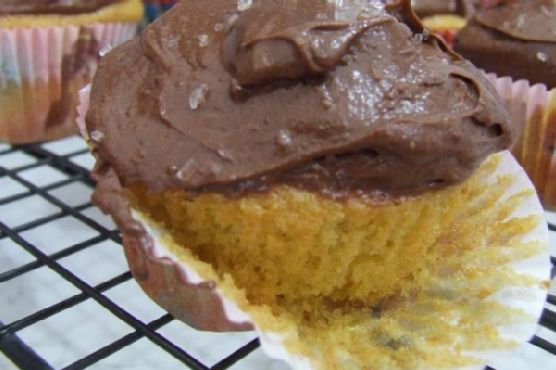
Gluten Free Yellow Cake And Cupcakes | Made by Meaghan Moineau
Title: Celebrating Family Traditions with a Scrumptious Gluten-Free Yellow Cake and CupcakesDescription: Dive into a heartwarming recipe for a Gluten-Free Yellow Cake and Cupcakes that promises to excite your taste buds while keeping dietary restrictions in mind. Perfect for family gatherings or a simple treat, this dessert boasts a delightful blend of coconut and tapioca flour with a rich vanilla essence. Indulge in a nostalgic journey as we share a cherished family memory tied to this delectable dessert. Rate difficulty: 5/10. Classified as Dessert.
---
There's something magical about the aroma of a cake baking in the oven. It evokes cherished memories and brings people together, serving as a centerpiece for celebrations and simple family moments alike. This Gluten-Free Yellow Cake and Cupcakes recipe is no exception—it's a testament to the power of food in creating lasting memories.
Growing up, Sunday afternoons at my grandmother's house were always a special occasion. The entire family would gather around her cozy kitchen, eagerly awaiting the treats she had lovingly prepared. Her signature yellow cake was always a highlight, and it became a family tradition to bake it together.
When my younger sister was diagnosed with gluten intolerance, my grandmother was determined to adapt her beloved recipe so everyone could enjoy it. After some trial and error, she created this delightful Gluten-Free Yellow Cake and Cupcakes recipe, using coconut flour and tapioca flour to achieve the perfect texture.
Ingredients:
- 1 cup coconut flour
- 1 cup tapioca flour
- 1/2 teaspoon salt
- 1 teaspoon baking soda
- 1 teaspoon baking powder
- 1 teaspoon xanthan gum
- 6 whole eggs
- 1 1/2 cups sugar
- 1 cup veganaise
- 3/4 cup milk alternative (just under)
- 1 tablespoon vanilla extract
- 1/2 cup Earth Balance butter, melted
- 1 cup dairy-free chocolate chips
- Pinch of salt
- 2 cups powdered sugar
Instructions:
1. Preheat your oven to 350 degrees Fahrenheit. If making a layer cake, grease two 8 or 9-inch round cake pans and dust with tapioca flour. Alternatively, line a muffin tin with baking cups for cupcakes.
2. In a bowl, combine the coconut flour, tapioca flour, salt, xanthan gum, baking soda, and baking powder. Set aside.
3. In a separate large bowl, beat the eggs, sugar, and veganaise until the mixture is light and fluffy.
4. Gradually add the vanilla extract, flour mixture, and milk alternative to the egg mixture, alternating between the dry ingredients and milk. This helps achieve a fluffy cake texture.
5. Pour the batter into the prepared cake pans or fill the baking cups 3/4 full. This recipe yields approximately 24 cupcakes.
6. Bake for 20-25 minutes for the cakes or 12-15 minutes for the cupcakes. The cakes are ready when they are nicely browned, spring back when lightly touched, or when a toothpick inserted in the center comes out clean.
7. Let the cakes or cupcakes cool completely before icing.
This recipe holds a special place in my heart, not just for its delightful taste but also for the memories it brings back. Every bite reminds me of those joyful Sunday afternoons, filled with laughter and the warmth of family. Baking this cake has become a way for us to honor my grandmother's legacy and continue creating new memories around the table.
Whether you're celebrating a birthday, a holiday, or simply the joy of being together, this Gluten-Free Yellow Cake and Cupcakes recipe is sure to become a cherished part of your family traditions. Enjoy the process, savor the taste, and create your own nostalgic moments with loved ones.