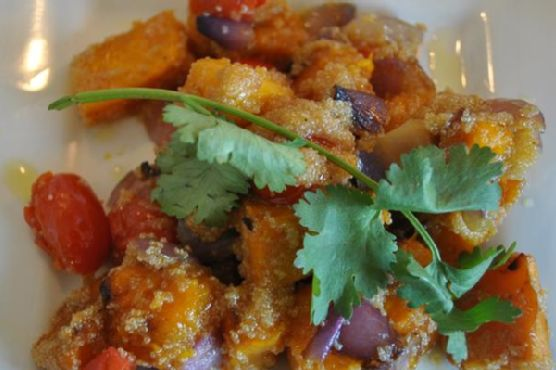
Amaranth and Roast Veggie Salad | Made by Meaghan Moineau

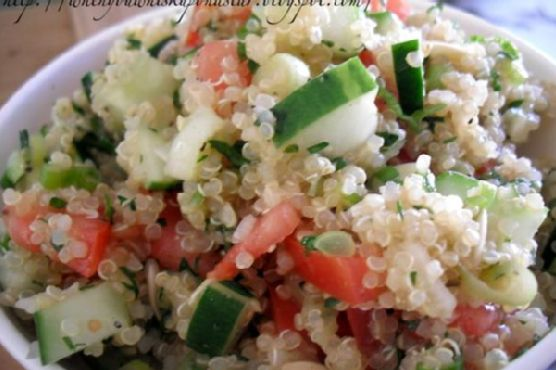
Amaranth and Roast Veggie Salad

Intro

There’s something magical about family gatherings, where the kitchen becomes a hub of activity, and the aroma of delicious dishes wafts through the air. I vividly remember one summer evening when my grandmother introduced us to a unique and delightful salad that quickly became a family favorite. Her secret? A generous helping of amaranth paired with roasted vegetables. Today, I’m excited to share this heartfelt recipe with you: Amaranth and Roast Veggie Salad. It’s a dish that not only fills the belly but also warms the soul, much like those cherished family moments.

Why You’ll Love It

This Amaranth and Roast Veggie Salad is a perfect blend of textures and flavors. The nutty amaranth pairs beautifully with the sweetness of roasted vegetables and the fresh peppery bite of rocket leaves. This salad is not only delicious but also packed with nutrients, making it an ideal choice for a healthy meal. Whether you’re looking for a satisfying lunch, a vibrant side dish, or a contribution to a potluck, this salad fits the bill. Plus, it’s vegan and gluten-free, catering to a wide range of dietary preferences.

Ingredients

  • 1 cup amaranth
  • 2 tablespoons basil-infused olive oil
  • 1 bell pepper
  • 1 cup diced pumpkin
  • 1 red onion
  • Handful of rocket leaves
  • 1 teaspoon herbal salt
  • 1 punnet baby tomatoes

Instructions

  1. Cook the amaranth with about a cup of water in a saucepan. Bring it to a boil, then reduce the heat and simmer until the water is absorbed and the amaranth reaches a sticky consistency. This usually takes about 15-20 minutes.
  2. Preheat your oven to 200°C (392°F).
  3. Roughly cut the onion into chunks.
  4. Place the diced pumpkin and onion chunks onto a tinfoil-lined baking tray.
  5. Drizzle the basil-infused olive oil over the vegetables and sprinkle them with herbal salt and a pinch of pepper.
  6. Roast the vegetables in the oven for about 30 minutes, or until the edges of the pumpkin become crispy. Stir occasionally to ensure even roasting.
  7. About 5 minutes before the veggies are done, add the baby tomatoes to the tray, allowing them to roast until just blistered.
  8. Once the veggies are roasted, remove them from the oven and combine them with the cooked amaranth in a large bowl.
  9. Gently tear a few rocket leaves and add them to the bowl.
  10. Toss everything together until well mixed. Serve the salad warm and enjoy!

Tips

To make the most of this recipe, consider these helpful tips:

  • Make sure to rinse the amaranth thoroughly before cooking to remove any bitterness.
  • If you prefer a little more crunch, add some toasted nuts or seeds like sunflower or pumpkin seeds.
  • For an extra burst of flavor, try adding a splash of balsamic vinegar or a squeeze of lemon juice just before serving.

Variations & Substitutions

This recipe is versatile and can be adapted to suit your taste preferences or the ingredients you have on hand.

  • Grains: If you don’t have amaranth, quinoa or couscous can be great substitutes.
  • Vegetables: Feel free to add other vegetables like zucchini or sweet potatoes for variety.
  • Herbs: If basil-infused olive oil isn’t available, use regular olive oil with a handful of fresh basil leaves instead.

Storage

This salad is best enjoyed fresh, but it can be stored in an airtight container in the refrigerator for up to 3 days. If you plan to store it, wait to add the rocket leaves until just before serving to keep them from wilting.

FAQ

Can I make this salad ahead of time?

Yes, you can prepare the components of the salad ahead of time. Cook the amaranth and roast the vegetables a day in advance, then store them separately in the fridge. Assemble the salad with fresh rocket leaves just before serving.

Is amaranth gluten-free?

Yes, amaranth is naturally gluten-free, which makes it a fantastic choice for those following a gluten-free diet. It’s also rich in protein and fiber, adding nutritional value to the salad.

Can I use canned tomatoes instead of fresh?

While fresh baby tomatoes are recommended for their vibrant flavor and texture, you can use canned diced tomatoes in a pinch. Drain them well and add them to the salad at the end.

Nutrition

This Amaranth and Roast Veggie Salad is a nutritious meal option. It’s high in protein and fiber from amaranth, packed with vitamins from the vegetables, and offers healthy fats from the olive oil. Each serving provides essential nutrients that support overall health and wellness.

Conclusion

There you have it, a warm and hearty Amaranth and Roast Veggie Salad that’s sure to impress your taste buds and nourish your body. This recipe combines the simplicity of wholesome ingredients with the vibrant flavors of roasted vegetables, making it a delightful addition to any meal. Whether you’re reminiscing about family gatherings or creating new memories, this salad is a perfect companion. Enjoy it with loved ones, and don’t forget to share your own twists and variations in the comments below!

Related update: Amaranth and Roast Veggie Salad

Related update: Chicken Parmesan Patty- Eat As A Burger OR On Pasta

Related update: Pear Salad With Walnuts and Blue Cheese
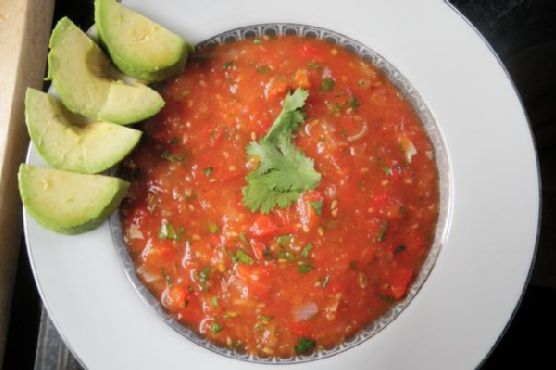
Roasted Red Pepper & Tomato Salsa | Made by Meaghan Moineau

Roasted Red Pepper & Tomato Salsa

Intro

There’s something truly special about making salsa from scratch, especially when it’s a vibrant, flavor-packed Roasted Red Pepper & Tomato Salsa. This recipe takes me back to sunny afternoons at my grandmother’s house, where she would whip up her legendary salsa for our family gatherings. I remember the smell of roasting peppers wafting through the kitchen and the laughter of my cousins as we devoured bowls of the salsa with crispy corn chips. Today, I’m excited to share this cherished recipe with you, bringing a taste of my family’s tradition into your home.

Why You’ll Love It

This Roasted Red Pepper & Tomato Salsa is a game-changer for your appetizer spread. It’s not just about the bold flavors of roasted peppers and tomatoes, but also the delightful hint of smokiness and the fresh kick from cilantro and lime juice. This salsa is perfect for any occasion, whether you’re hosting a summer barbecue, enjoying a cozy night in, or just want to elevate your snack game. Plus, it’s naturally vegan and gluten-free, making it a crowd-pleaser for all your guests.

Ingredients

  • Fresh cilantro
  • Cumin
  • Garlic
  • Jalapeno pepper
  • Lime (juice)
  • Olive oil
  • Onion
  • Red bell pepper
  • Smoked salt (I used sea salt)
  • Tomatoes

Instructions

  1. Preheat your oven to broil.
  2. Cut the tomatoes in half and the onions in quarters. Arrange them on a tin-foil lined baking sheet.
  3. Add the red bell pepper, whole garlic cloves (with skin), and jalapeno pepper to the baking sheet.
  4. Drizzle the vegetables with a bit of olive oil and sprinkle with salt.
  5. Broil for 10 minutes, or until the skin on the tomatoes and peppers begins to char.
  6. Allow the vegetables to cool for 5 minutes.
  7. Remove the skins from the tomatoes, pepper, and garlic.
  8. Place all the vegetables (except for the cilantro and lime) into a food processor.
  9. Pulse 2-4 times, ensuring the salsa remains a bit chunky.
  10. Transfer the mixture to a bowl and toss with fresh cilantro and lime juice.
  11. Add cumin and salt to taste.
  12. Serve with corn chips or toasted pita chips.

Tips

To make the most of this salsa, choose ripe tomatoes and a vibrant red bell pepper. The quality of your produce will significantly impact the flavor. If you prefer a milder salsa, remove the seeds from the jalapeno pepper before roasting. When broiling, keep an eye on your vegetables to avoid burning; a slight char is all you need for that smoky flavor.

Variations & Substitutions

This recipe is incredibly versatile. If you want to add a bit more heat, consider adding a serrano pepper or two. For a sweeter twist, try incorporating roasted corn kernels or diced mango. If cilantro isn’t to your taste, fresh parsley can be a great substitute, bringing a different but equally fresh flavor to the salsa.

Storage

Store any leftover salsa in an airtight container in the refrigerator for up to 5 days. The flavors will meld and deepen over time, making it even more delicious the next day. Just give it a good stir before serving.

FAQ

Can I freeze this salsa?

Yes, you can freeze this salsa! Place the salsa in a freezer-safe container, leaving some room for expansion, and freeze for up to 3 months. Thaw overnight in the refrigerator before serving. Keep in mind that the texture may change slightly after freezing, but the flavor will remain delightful.

Can I make this salsa ahead of time?

Absolutely! This salsa can be made a day or two in advance. Store it in the refrigerator, and the flavors will continue to develop, making it even more flavorful when you’re ready to serve.

What can I serve with this salsa besides chips?

This salsa is incredibly versatile and pairs well with many dishes. Try it as a topping for grilled chicken or fish, mix it into a taco filling, or use it as a flavorful addition to scrambled eggs or an omelet. The possibilities are endless!

Nutrition

This salsa is not only delicious but also a healthy option. Packed with vitamins from the fresh vegetables, it’s low in calories and fat. The olive oil adds a touch of healthy fats, and the spices provide additional health benefits, making this salsa a guilt-free indulgence.

Conclusion

Roasted Red Pepper & Tomato Salsa is a delightful addition to any meal or gathering, bringing a burst of flavor and a touch of nostalgia to your table. Whether you’re a salsa aficionado or trying your hand at making salsa from scratch for the first time, this recipe is sure to please. Gather your ingredients, fire up your broiler, and enjoy the process of creating this vibrant, flavorful salsa that will have everyone coming back for more. Enjoy!

Related update: Roasted Red Pepper & Tomato Salsa

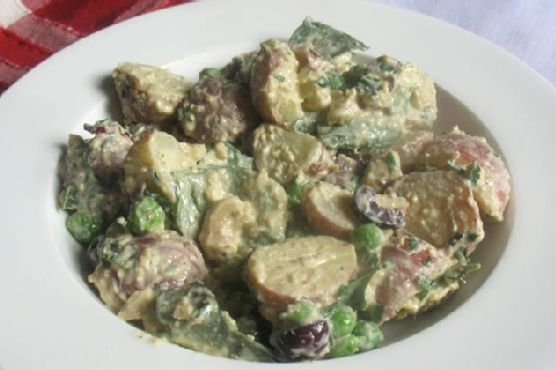
Creamy Potato Salad with Cashew Dressing and Fresh Basil | Made by Meaghan Moineau

Creamy Potato Salad with Cashew Dressing and Fresh Basil

Intro

There’s something deeply comforting about a bowl of potato salad. For me, it evokes memories of summer picnics with my family, where the air was filled with laughter and the smell of blooming flowers. My grandmother used to make her signature potato salad, which was a staple at every family gathering. Over the years, I’ve experimented with different variations, and today’s recipe combines those nostalgic flavors with a modern twist: a creamy cashew dressing, fresh basil, and vibrant vegetables. It’s a dish that bridges the gap between my childhood memories and my current culinary adventures.

Why You’ll Love It

This Creamy Potato Salad with Cashew Dressing and Fresh Basil is a delightful fusion of flavors and textures that offers something for everyone. It’s creamy yet light, thanks to the velvety cashew dressing, and it’s packed with fresh, vibrant ingredients. The combination of baby potatoes and fresh herbs creates a refreshing taste, while the addition of peas and kalamata olives adds a subtle complexity. Whether you’re looking for a side dish for your next barbecue or a comforting meal on its own, this potato salad is sure to please.

Ingredients

  • 1 cup almond milk
  • 2 pounds baby potatoes
  • 1 cup fresh basil leaves
  • 1/4 cup fresh chives, chopped
  • 1/4 cup fresh mint leaves, chopped
  • 1/4 cup trimmed fresh parsley, chopped
  • 1 cup fresh peas
  • 1/4 teaspoon black fresh ground pepper
  • 1 tablespoon dijon honey mustard
  • Juice of one lemon
  • 1/2 cup kalamata olives, pitted and sliced (optional)
  • 2 tablespoons nutritional yeast
  • 1/4 cup olive oil
  • 1 cup raw cashews, soaked for at least 2 hours
  • 2 tablespoons rice vinegar
  • 1 teaspoon sea salt
  • 1 tablespoon dijon grain mustard

Instructions

  1. Bring the baby potatoes to a boil in a large pot of water. Reduce the heat to medium and cook until they are fork-tender, about 10 to 12 minutes. Do not overcook.
  2. Drain the potatoes well and let them cool for 10 minutes or longer. Transfer them to a large bowl along with the peas, basil leaves, and olives if using.
  3. To make the dressing, combine the soaked cashews, almond milk, olive oil, rice vinegar, nutritional yeast, dijon honey mustard, dijon grain mustard, lemon juice, sea salt, and black pepper in a small blender or food processor. Pulse until smooth. If the dressing is too thick, add a bit more olive oil or almond milk.
  4. Taste the dressing for seasoning and adjust the nutritional yeast, salt, and pepper to taste.
  5. Toss the potatoes with the dressing until they are well coated.
  6. Garnish with fresh chives, mint, and parsley before serving.

Tips

For the best results, use baby potatoes as they have a creamy texture and cook evenly. Be sure to soak the raw cashews beforehand, as this will ensure the dressing is smooth and velvety. If you’re short on time, you can use frozen peas, but fresh peas will provide a firmer texture and sweeter flavor.

Variations & Substitutions

If you prefer a spicier flavor, consider adding a pinch of cayenne pepper or red pepper flakes to the dressing. You can also substitute the almond milk with another plant-based milk of your choice, such as oat or soy milk. For a more Mediterranean twist, add sun-dried tomatoes or artichoke hearts to the salad.

Storage

This potato salad can be stored in an airtight container in the refrigerator for up to 3 days. The flavors will meld together over time, making it even more delicious the next day. However, it’s best enjoyed fresh to maintain the vibrant texture of the herbs and peas.

FAQ

Can I make this salad ahead of time?

Yes, you can prepare the salad a day in advance. Simply store the potatoes and dressing separately and combine them just before serving to keep the potatoes from absorbing too much moisture and becoming mushy.

Is this salad suitable for vegans?

Absolutely! This salad is entirely plant-based, making it a wonderful option for vegans and anyone looking to incorporate more plant-based meals into their diet.

Can I use regular mustard instead of dijon?

While dijon mustard adds a specific tangy flavor, you can substitute it with regular mustard in a pinch. Keep in mind that the overall taste might differ slightly.

Nutrition

This salad is not just delicious but also packed with nutrients. It’s rich in healthy fats from the cashews and olive oil, vitamins from the fresh herbs and peas, and fiber from the potatoes. It’s a wholesome dish that satisfies both your taste buds and nutritional needs.

Conclusion

This Creamy Potato Salad with Cashew Dressing and Fresh Basil is more than just a side dish; it’s a testament to the power of fresh, wholesome ingredients coming together to create something truly special. Whether you’re reminiscing about family gatherings or simply looking for a new favorite recipe, this salad promises to be a delightful addition to your culinary repertoire. Gather your ingredients, channel your inner chef, and enjoy the comforting flavors of this vibrant potato salad.

Related update: Creamy Potato Salad with Cashew Dressing and Fresh Basil

Related update: Red Quinoa and Roasted Cauliflower Salad

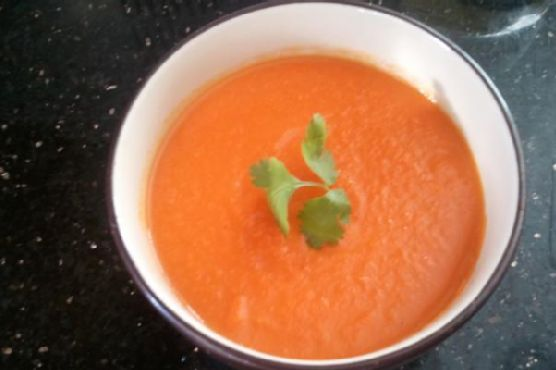
Carrot and Coriander Soup | Made by Meaghan Moineau

Carrot and Coriander Soup

Intro

There’s something undeniably comforting about a warm bowl of soup that not only satiates hunger but also soothes the soul. Growing up, I remember visiting my grandmother’s house on crisp autumn afternoons, where the inviting aroma of her signature carrot and coriander soup would welcome us at the door. It was more than just a meal; it was a hug in a bowl, filled with love and warmth that transcended generations. Today, I want to share this beloved recipe with you, so you can bring a bit of that warmth into your home too.

Why You’ll Love It

This carrot and coriander soup is not just a simple recipe; it’s an experience. Here’s why you’ll adore it:

  • Flavor-packed: The natural sweetness of carrots combines beautifully with the citrusy hint of orange juice and the earthy warmth of coriander.
  • Healthy: Packed with vitamins and antioxidants, this soup is as nourishing as it is delicious.
  • Easy to make: With just a handful of ingredients and simple steps, you’ll have a stunning soup on your table in no time.
  • Versatile: Perfect as a starter, side, or even as a light main dish.

Ingredients

  • 6 large carrots, peeled and roughly chopped
  • 1 large onion, chopped
  • 2 tablespoons olive oil
  • 1 teaspoon ground coriander
  • 1/2 cup fresh orange juice
  • 4 cups water
  • Salt, to taste
  • Pepper, to taste
  • Fresh coriander, for garnish

Instructions

  1. In a deep pot, heat the olive oil over medium heat. Add the chopped onions and sauté until they are soft and translucent.
  2. Stir in the carrots, allowing them to cook and soften slightly, about 5 minutes.
  3. Add the water, salt, and pepper. Cover the pot and let it simmer until the carrots are fully cooked and tender, about 20-25 minutes.
  4. Stir in the orange juice and ground coriander, letting it cook for an additional 2 minutes to blend the flavors.
  5. Carefully puree the soup in a blender until smooth and creamy. Adjust seasoning if necessary.
  6. Garnish with fresh coriander and serve the soup hot.

Tips

  • For an extra creamy texture, add a splash of coconut milk or cream before blending.
  • Use fresh coriander for garnish to add a pop of color and fresh flavor.
  • Always be cautious when blending hot liquids; allow the soup to cool slightly before blending, and do it in batches if necessary.

Variations & Substitutions

  • Spicy Kick: Add a pinch of cayenne pepper or a dash of hot sauce for a spicy version.
  • Herbal Twist: Try adding thyme or rosemary for an herbal aroma.
  • Low-Carb Option: Substitute half of the carrots with cauliflower for a lower-carb alternative.

Storage

This soup stores wonderfully, making it a great make-ahead option. Allow the soup to cool completely before transferring it to an airtight container. It can be stored in the refrigerator for up to 5 days. For longer storage, freeze the soup for up to 3 months. When ready to enjoy, simply thaw and reheat gently on the stove.

FAQ

Can I use vegetable broth instead of water?

Absolutely! Using vegetable broth will add more depth of flavor to the soup. Just be mindful of the salt content, as broth can be saltier than water.

Is this soup vegan?

Yes, this carrot and coriander soup is naturally vegan as long as you use olive oil for sautéing the onions. It’s a delightful plant-based option that everyone can enjoy.

How can I thicken the soup if needed?

If you prefer a thicker consistency, you can add a small potato when cooking the carrots. The potato will blend into the soup, adding body and creaminess without altering the flavor.

Nutrition

This wholesome soup is low in calories and high in nutrients. Carrots are an excellent source of beta-carotene, fiber, vitamin K1, and antioxidants. The addition of orange juice provides a boost of vitamin C. Overall, it’s a heartwarming dish that’s both nutritious and delightful.

Conclusion

Carrot and coriander soup is a classic recipe that brings warmth and joy to any table. Whether you’re looking to recreate a nostalgic family recipe or simply want to enjoy a healthy, delicious meal, this soup is sure to become a favorite in your household. Gather your ingredients, follow the simple steps, and indulge in the comforting flavors of this delightful soup. Bon appétit!

Related update: Carrot and Coriander Soup

Related update: Asian Salmon Burgers With Tangy Ginger Lime Sauce

Related update: Mashed Potatoes with Garlic, Sage & Goat Cheese

Related update: Baked Scallops With Parma Ham

Vegan Strawberry Shortcake served with Vegan Whipped Cream | Made by Meaghan Moineau

Vegan Strawberry Shortcake Served with Vegan Whipped Cream

Introduction

There’s something magical about the first bite of a strawberry shortcake that transports me back to my grandmother’s kitchen. I remember those warm summer evenings when we would gather around the wooden table, eagerly awaiting her famous dessert. Her recipe was a family treasure, but as I’ve embraced a plant-based lifestyle, I’ve recreated this classic with a vegan twist. Today, I’m thrilled to share this Vegan Strawberry Shortcake recipe served with a luscious vegan whipped cream. It’s a dessert that captures the essence of summer and love in every bite.

Why You’ll Love It

This Vegan Strawberry Shortcake is not only a delightful treat for the taste buds but also a heartwarming nod to traditional desserts with a modern, plant-based spin. Here’s why you’ll love it:

  • Simple Ingredients: Made with pantry staples, this recipe is both accessible and economical.
  • Quick and Easy: With minimal prep and bake time, you can whip up this dessert in under an hour.
  • Perfectly Balanced: The sweetness of the strawberries and the lightness of the shortcake are perfectly complemented by the creamy, dreamy vegan whipped topping.
  • Family-Friendly: This is a dessert that everyone, regardless of dietary preferences, can enjoy together.

Ingredients

  • 1 cup flour
  • 1/2 cup almond meal
  • 1/4 cup turbinado sugar
  • 1 teaspoon baking soda
  • 1/4 teaspoon salt
  • 3/4 cup almond milk
  • 1 teaspoon apple cider vinegar
  • 1/4 cup vegetable oil
  • Tiny drop of almond extract
  • 1 pint fresh strawberries, sliced
  • Vegan whipped cream (store-bought or homemade)

Instructions

  1. Preheat your oven to 400 degrees F (200 degrees C).
  2. Add the sliced strawberries to a glass bowl and refrigerate until ready to use.
  3. In a medium-sized bowl, combine the flour, almond meal, baking soda, and salt. Mix well.
  4. In a small bowl, combine 1 teaspoon of water with the turbinado sugar, stirring slightly to help dissolve the sugar.
  5. In a large bowl, whisk together the almond milk, apple cider vinegar, vegetable oil, sugar mixture, and almond extract.
  6. Make a well in the center of the dry ingredients and gradually add the wet ingredients. Mix until just combined.
  7. Line two baking sheets with parchment paper.
  8. Drop the batter by generous tablespoons onto the sheets, spacing them a few inches apart. You should aim for 5 per baking sheet.
  9. Bake for 10-12 minutes, or until the shortcakes are just slightly golden.
  10. Allow the shortcakes to cool completely before slicing them in half with a serrated knife.
  11. Add a generous dollop of vegan whipped topping to the bottom half of each shortcake, followed by a spoonful of strawberries.
  12. Top with the remaining shortcake half, adding a bit more whipped topping and a few strawberries on top.
  13. Serve on individual dessert plates and enjoy!

Tips

  • Chill Your Tools: For an extra fluffy whipped topping, chill your mixing bowl and beaters in the freezer for about 10 minutes before whipping.
  • Use Fresh Strawberries: Fresh, ripe strawberries will yield the best flavor. Avoid using frozen strawberries as they can become mushy.
  • Don’t Overmix: When combining wet and dry ingredients, mix just until combined to ensure light and fluffy shortcakes.

Variations & Substitutions

This recipe is versatile and can be easily adapted to suit your preferences or dietary needs:

  • Replace almond milk with any other non-dairy milk, such as soy or oat milk.
  • Substitute almond meal with oat flour for a nut-free version.
  • For a citrus twist, add a teaspoon of lemon zest to the batter.
  • Experiment with different fruits such as blueberries or raspberries for a new flavor profile.

Storage

These shortcakes are best enjoyed fresh, but if you have leftovers, store them in an airtight container at room temperature for up to 2 days. Assemble with the whipped topping and strawberries just before serving to maintain their texture and freshness. The vegan whipped cream can be stored in the refrigerator for up to 3 days.

FAQ

Can I make the shortcakes gluten-free?

Yes, you can substitute the all-purpose flour with a gluten-free flour blend. Ensure the blend contains xanthan gum to help mimic the texture of traditional flour.

What can I use instead of turbinado sugar?

If turbinado sugar is not available, you can use coconut sugar or light brown sugar as a substitute. Both will provide a similar flavor and texture.

How can I make homemade vegan whipped cream?

To make homemade vegan whipped cream, chill a can of full-fat coconut milk overnight. Scoop out the solid cream and whip it with a little powdered sugar and vanilla extract until fluffy.

Nutrition

Each serving of Vegan Strawberry Shortcake contains approximately:

  • Calories: 250
  • Fat: 12g
  • Carbohydrates: 32g
  • Protein: 4g
  • Fiber: 3g
  • Sugar: 14g

Conclusion

Whether you’re a seasoned vegan or simply looking to explore plant-based desserts, this Vegan Strawberry Shortcake is sure to delight. With its light and airy texture, juicy strawberries, and creamy topping, it’s a recipe that embodies the joy of summer. Gather your loved ones, share a slice, and create new sweet memories that will last a lifetime. Enjoy!

Related update: Vegan Strawberry Shortcake served with Vegan Whipped Cream

Related update: Baked Caramel Custard

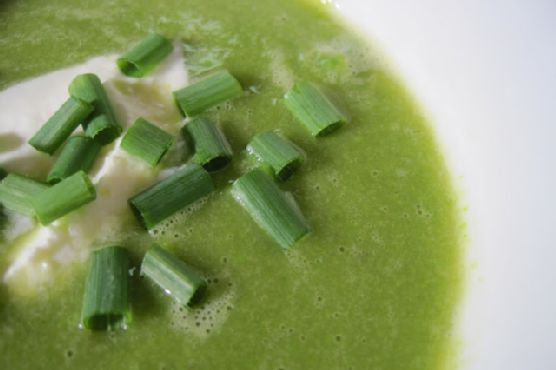
Asparagus and Pea Soup: Real Convenience Food | Made by Meaghan Moineau

Asparagus and Pea Soup: Real Convenience Food

Intro

Growing up, one of my fondest memories was gathering around the kitchen table with my family for a bowl of my grandmother’s homemade soup. The aroma of fresh vegetables simmering on the stove was a comforting promise of warmth and nourishment. Fast forward to today, I find myself reaching for those same comforts, but with the ease and simplicity that modern life demands. This Asparagus and Pea Soup is the perfect blend of nostalgia and convenience. It’s a recipe that brings back those cherished memories while fitting seamlessly into a busy lifestyle.

Why You’ll Love It

This Asparagus and Pea Soup is not just a treat for your taste buds but also a boon for your schedule. It’s quick to prepare, requiring minimal ingredients and time, yet it’s packed with flavor and nutrition. Whether you’re looking for a light lunch, a starter for a dinner party, or a comforting evening meal, this soup fits the bill. The vibrant color and fresh taste make it a dish you’ll return to time and again.

Ingredients

  • 1 bag of frozen asparagus
  • 2 tablespoons extra virgin olive oil (EVOO)
  • 2 cloves of garlic, chopped
  • 1 onion, chopped
  • 1 cup frozen peas
  • 4 cups low sodium vegetable broth
  • Salt and pepper to taste
  • Pinch of red pepper flakes (optional)
  • Chives, for garnish
  • Creme fraiche, sour cream, or Greek yogurt, for serving

Instructions

  1. Chop the garlic and onions.
  2. In a large pot, heat the EVOO over medium heat. Add the chopped onions and sauté for a few minutes until they start to become translucent.
  3. Add the garlic to the pot and continue to cook for another couple of minutes.
  4. Add the whole bag of frozen asparagus to the pot and pour in the vegetable broth until everything is covered.
  5. Season with salt, pepper, and a pinch of red pepper flakes if you’re using them.
  6. Simmer the mixture until the asparagus is bright green and tender. If the asparagus is thawed, this will only take a couple of minutes.
  7. Turn off the heat and use an immersion blender to puree the soup until smooth.
  8. Add the frozen peas to the soup. The residual heat will thaw them quickly. Puree again until the soup reaches your desired thickness.
  9. Serve hot, topped with chives and a dollop of creme fraiche, sour cream, or Greek yogurt.

Tips

To ensure the best flavor, be sure not to overcook the asparagus. As soon as it turns bright green and tender, it’s ready to be blended. If you don’t have an immersion blender, you can carefully transfer the soup to a regular blender in batches. Just be sure to let it cool slightly before blending to avoid any accidents.

Variations & Substitutions

Feel free to experiment with this recipe by adding other green vegetables such as spinach or kale. If you prefer a richer taste, substitute a portion of the vegetable broth with coconut milk or cream. For a more robust flavor, try roasting the asparagus before adding it to the soup. You can also add a handful of fresh herbs like basil or mint for an extra burst of flavor.

Storage

This soup stores beautifully, making it ideal for meal prep. Store any leftovers in an airtight container in the refrigerator for up to three days. For longer storage, freeze the soup in individual portions for up to three months. When ready to eat, thaw in the refrigerator overnight and reheat on the stove.

FAQ

Can I use fresh asparagus instead of frozen?

Absolutely! Fresh asparagus will work wonderfully in this recipe. Just be sure to trim the ends and cut them into smaller pieces before adding them to the pot. The cooking time may be slightly reduced, so keep an eye on the color and tenderness of the asparagus.

Is there a way to make this soup vegan?

Yes, this soup is naturally vegan as long as you choose to garnish it with a plant-based option like coconut yogurt or a drizzle of olive oil instead of creme fraiche or sour cream.

What can I serve with this soup?

This soup pairs well with crusty bread or a simple side salad. If you’re looking for something more substantial, try serving it with a grilled cheese sandwich or a quinoa salad.

Nutrition

This Asparagus and Pea Soup is a nutritious choice, providing a good source of fiber, vitamins A and C from the asparagus, and protein from the peas. The vegetable broth keeps it light and low in calories, while the optional toppings add a touch of indulgence without going overboard.

Conclusion

With its vibrant color and refreshing taste, Asparagus and Pea Soup is a delightful way to enjoy the flavors of spring year-round. Whether you’re reminiscing about comforting family meals or creating new traditions of your own, this recipe is sure to find a place in your culinary repertoire. So grab that bag of frozen asparagus and get ready to savor simplicity at its finest. Enjoy!

Related update: Asparagus and Pea Soup: Real Convenience Food

Related update: Pear and Pesto Crostini

Related update: Carrot and Coriander Soup

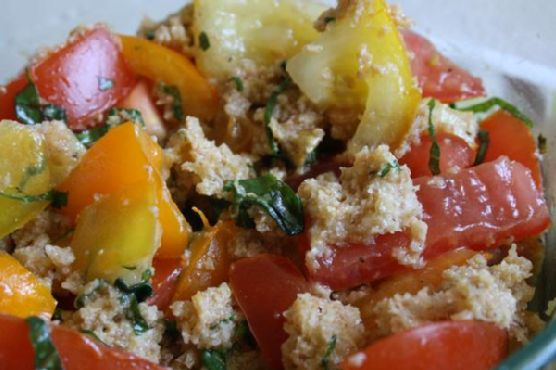
Traditional Panzanella | Made by Meaghan Moineau

Traditional Panzanella: A Taste of Tuscan Summer

Intro

Ah, Panzanella! This delightful Tuscan salad offers a bite of sun-drenched summer days and leisurely family gatherings. My first encounter with this classic dish was at my grandmother’s kitchen table in Italy, where every meal was an event, and every dish told a story. As a child, I eagerly watched her transform day-old bread and the ripest tomatoes from her garden into a flavorful masterpiece. The aroma of fresh basil mingling with olive oil and vinegar still transports me back to those cherished summer afternoons. Now, I invite you to experience the simple joys and deep flavors of this traditional Panzanella recipe, a dish that captures the essence of Tuscany in every bite.

Why You’ll Love It

Why will you love this Traditional Panzanella? Let me count the ways:

  • Simple Ingredients: This recipe calls for just a handful of ingredients, most of which you may already have in your pantry.
  • Quick and Easy: With minimal preparation and no cooking required, it’s a perfect dish for busy days.
  • Refreshing and Flavorful: The combination of juicy tomatoes, fragrant basil, and tangy vinegar is refreshing and full of flavor.
  • Sustainable: It’s a great way to use up day-old bread, preventing waste and creating something delicious.
  • Versatile: Easily adaptable to suit your taste preferences or dietary needs.

Ingredients

  • 6 slices of day-old Tuscan bread
  • 1/4 cup extra virgin olive oil
  • 1 cup fresh basil leaves, chopped
  • 1 red onion, thinly sliced
  • 2 tablespoons red wine vinegar
  • Salt and pepper, to taste
  • 4 ripe tomatoes, diced

Instructions

  1. In a large bowl, combine the bread with enough water to cover and let it stand for at least 20 minutes or until it’s soft.
  2. Drain the bread and squeeze out as much water as you can. Crumble the bread into a serving bowl.
  3. Scatter the diced tomatoes, sliced onions, and chopped basil over the crumbled bread.
  4. Dress the Panzanella with extra virgin olive oil and red wine vinegar. Season with salt and pepper and toss well to combine.
  5. Taste and adjust the seasoning with more olive oil, salt, or vinegar as needed.
  6. Leave the Panzanella to stand for about 15 minutes to allow the flavors to meld. Serve at room temperature.

Tips

For the best Panzanella, use high-quality ingredients. Opt for the freshest tomatoes you can find, and don’t skimp on the olive oil—it’s integral to the salad’s flavor. If your bread is very hard, allow it to soak a bit longer until it’s sufficiently softened. Lastly, Panzanella is best when served at room temperature, allowing the flavors to fully develop.

Variations & Substitutions

Panzanella is a wonderfully adaptable dish. Here are a few ideas to make it your own:

  • Add Protein: For a heartier salad, add some fresh mozzarella, grilled chicken, or canned tuna.
  • Vegetable Variations: Include cucumbers, bell peppers, or even olives for added crunch and flavor.
  • Herb Alternatives: If basil isn’t your favorite, try parsley or mint for a different herbal note.
  • Different Breads: While traditional Panzanella uses Tuscan bread, any crusty bread like ciabatta or a baguette will work.

Storage

Panzanella is best enjoyed fresh, but if you have leftovers, store them in an airtight container in the refrigerator for up to one day. Keep in mind that the bread will continue to absorb moisture and flavors, so you may need to refresh the salad with a bit more olive oil or vinegar before serving.

FAQ

Can I use fresh bread instead of day-old bread?

While you can use fresh bread, day-old or slightly stale bread is preferred as it holds up better to the dressing and maintains a pleasant texture. If using fresh bread, you might consider toasting it lightly first.

Can I make Panzanella ahead of time?

Panzanella is best made shortly before serving, as this allows the bread to soak up the flavors without becoming too soggy. However, you can prepare the vegetables and dressing a few hours in advance and combine them with the bread just before serving.

What kind of vinegar should I use?

Red wine vinegar is traditional for Panzanella, lending a tangy depth to the dish. However, feel free to experiment with other vinegars like balsamic or apple cider for a unique twist.

Nutrition

This traditional Panzanella is a nutritious addition to any meal. Rich in vitamins A and C from the tomatoes and basil, and healthy fats from the olive oil, it’s a wholesome and satisfying choice. The dish is naturally vegan and can be gluten-free if made with gluten-free bread.

Conclusion

Traditional Panzanella is more than just a salad; it’s a celebration of summer flavors and culinary heritage. With its simple preparation and fresh, vibrant ingredients, it’s no wonder this dish has been cherished across generations. Whether you’re hosting a garden party or enjoying a quiet family dinner, Panzanella brings a touch of Tuscany to your table. I hope this recipe finds a special place in your home, creating new memories as it has for me. Buon appetito!

Related update: Traditional Panzanella

Related update: Avocado Chicken Salad

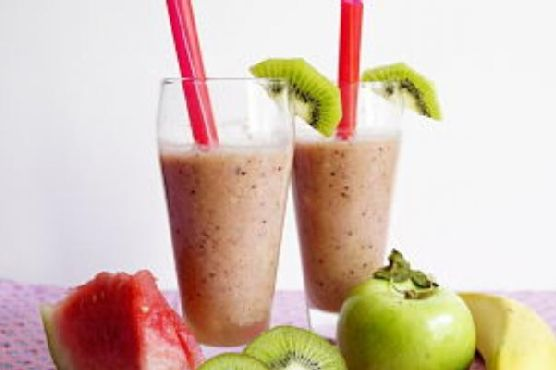
Watermelon, Kiwi, Apple and Frozen Banana Smoothie | Made by Meaghan Moineau

Watermelon, Kiwi, Apple, and Frozen Banana Smoothie

Intro

There’s something undeniably refreshing about a homemade smoothie, especially when it combines the vibrant flavors of summer fruits. I remember spending long summer days at my grandmother’s house, where she would often surprise me with her delightful fruit concoctions. One of my fondest memories is sitting on her porch swing, sipping a cool glass of her watermelon, kiwi, apple, and frozen banana smoothie. The taste was not just a treat for my taste buds but also a journey back to those carefree childhood afternoons. Today, I’m excited to share this nostalgic recipe with you, bringing a piece of my past into your present.

Why You’ll Love It

This smoothie is a celebration of fresh, fruity flavors that will invigorate your senses and brighten your day. It’s perfect for breakfast, a midday snack, or a post-workout refreshment. Not only is it delicious, but it’s also packed with vitamins and nutrients, giving you an energy boost without the guilt. With the natural sweetness of watermelon and the tangy twist of kiwi, this smoothie is a delightful way to enjoy the bounty of summer fruits all year round. Plus, it’s incredibly easy to make, requiring minimal prep time and just a handful of ingredients.

Ingredients

  • 1 cup apple juice
  • 1 frozen banana
  • 1 cup ice cubes
  • 2 kiwi fruits, peeled and chopped
  • 2 cups seeded or seedless watermelon, chopped

Instructions

  1. Place all the ingredients in a blender.
  2. Blend on high speed until the mixture is smooth and creamy.
  3. Pour the smoothie into a glass.
  4. Enjoy your refreshing and healthy drink!

Tips

For the best smoothie experience, make sure to use a ripe banana for a naturally sweet flavor. If you prefer a thicker texture, you can add more frozen banana or reduce the amount of apple juice. Adjust the sweetness by adding honey or agave syrup if needed. To enhance the flavors, consider adding a pinch of salt or a splash of lime juice.

Variations & Substitutions

Feel free to customize this smoothie to suit your taste and dietary needs. You can substitute apple juice with coconut water for a tropical twist or almond milk for a creamier texture. If kiwi isn’t your favorite, swap it for strawberries or blueberries. For added nutrition, consider sneaking in a handful of spinach or kale. You can also sprinkle some chia seeds or flaxseeds for extra fiber and omega-3 fatty acids.

Storage

This smoothie is best enjoyed fresh, but if you have leftovers, store them in an airtight container in the refrigerator for up to 24 hours. Give it a good shake or stir before drinking, as the ingredients may separate over time. For longer storage, you can freeze the smoothie in a freezer-safe container or ice cube tray. Thaw it in the fridge or blend it again before serving.

FAQ

Can I use fresh banana instead of frozen?

Yes, you can use a fresh banana, but keep in mind that the smoothie will be less thick and creamy. To compensate, you might want to add more ice cubes or reduce the amount of apple juice.

Is this smoothie vegan?

Yes, this smoothie is naturally vegan as all the ingredients are plant-based. As long as you don’t add any dairy products, it will remain vegan-friendly.

Can I make this smoothie ahead of time?

While it’s best to enjoy this smoothie fresh, you can prepare it ahead of time. Store it in the refrigerator for up to 24 hours or freeze it for later use. Just remember to give it a good shake or re-blend before drinking.

Nutrition

This smoothie is a powerhouse of nutrients. It’s rich in vitamins A, C, and K, thanks to the watermelon and kiwi. The frozen banana provides potassium and fiber, while apple juice adds additional vitamins and a touch of sweetness. This drink is also hydrating and low in calories, making it an excellent choice for a healthy lifestyle.

Conclusion

This watermelon, kiwi, apple, and frozen banana smoothie is not just a delightful beverage but also a nod to cherished memories and the simple joys of life. Whether you’re looking for a quick breakfast option or a refreshing treat on a hot day, this smoothie is sure to satisfy. Gather your ingredients, blend them to perfection, and indulge in a burst of fruity flavors that will transport you to sunlit afternoons and carefree moments. Enjoy each sip, knowing you’re nourishing your body and soul.

Related update: Watermelon, Kiwi, Apple and Frozen Banana Smoothie

Related update: Gluten Free Dairy Free Buttermilk Biscuits

Related update: Summer Fruit Sangria

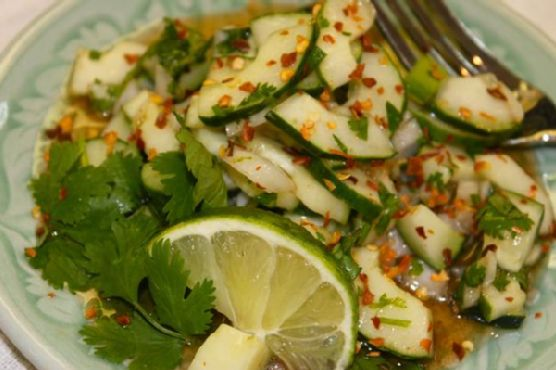
Thai Cucumber Salad (By Roz) | Made by Meaghan Moineau

Thai Cucumber Salad (By Roz)

Intro

Welcome to my kitchen! Today, I’m thrilled to share with you a recipe that’s close to my heart: Thai Cucumber Salad. This dish takes me back to my travels through Thailand’s vibrant markets, where the air was filled with the tantalizing aromas of fresh herbs and spices. I remember the friendly locals teaching me the art of balancing flavors, a skill essential to Thai cuisine. This salad is a celebration of those cherished memories, and I’m excited to bring a taste of Thailand to your home.

Why You’ll Love It

If you’re a fan of dishes that are quick, easy, and bursting with flavor, this Thai Cucumber Salad is for you. It perfectly balances sweet, spicy, tangy, and savory elements, making it a refreshing side dish or a light main course. This salad is not only delicious but also incredibly versatile, allowing you to customize it to your taste preferences. Plus, it’s a great way to impress friends and family with a dish that’s both simple and exotic.

Ingredients

  • Cilantro
  • Canned cucumbers
  • Jalapeno pepper
  • Lime juice
  • Lime zest
  • Red white onions
  • Red pepper flakes
  • Rice wine vinegar
  • Dry unsalted chopped roasted peanuts
  • Salt
  • Coconut oil
  • Sesame oil
  • Soy sauce
  • Sugar
  • Thai garlic chili pepper sauce
  • White pepper

Instructions

  1. Blend all the dressing ingredients together: lime juice, lime zest, rice wine vinegar, coconut oil, sesame oil, soy sauce, sugar, Thai garlic chili pepper sauce, and a pinch of white pepper.
  2. Mix in all of the chopped vegetables: canned cucumbers, jalapeno pepper, red white onions, and cilantro.
  3. Add in the dry unsalted chopped roasted peanuts, if desired, for a delightful crunch.
  4. Taste and adjust the flavors, adding more lime, sugar, soy sauce, or chili sauce as preferred, embracing the true Thai way of flavor balancing.
  5. Garnish each plate with fresh cilantro leaves and sliced limes.
  6. Serve with a platter of add-ins such as lime slices, red pepper flakes, chopped cilantro, chopped peanuts, Thai sweet chili sauce, sugar, and salt, allowing your guests to customize their salad.

Tips

For the best flavor, prepare the salad fresh. However, you can blend the dressing in advance and store it in the refrigerator for up to a week. This way, you can whip up the salad in no time whenever you’re ready to serve. If you prefer a milder salad, remove the seeds from the jalapeno before chopping. Remember, the key to a great Thai salad is balancing the flavors to suit your palate, so don’t hesitate to taste and adjust as you go.

Variations & Substitutions

This salad is wonderfully adaptable. You can substitute fresh cucumbers for canned ones if you prefer more crunch. For a nut-free version, simply omit the peanuts or replace them with toasted sunflower seeds. If you like more heat, swap the jalapeno for a spicier chili pepper or increase the amount of Thai garlic chili pepper sauce. For a touch of sweetness, add sliced mango or pineapple to the salad.

Storage

While this salad is best enjoyed fresh, you can store any leftovers in an airtight container in the refrigerator for up to two days. Keep the dressing separate if you plan to store it longer, as the vegetables may become soggy if left dressed for too long.

FAQ

Can I use fresh cucumbers instead of canned?

Absolutely! Fresh cucumbers will add a nice crunch to the salad. Just make sure to slice them thinly for the best texture.

Is there a way to make the salad less spicy?

Yes, if you prefer a milder salad, you can reduce or omit the jalapeno pepper and Thai garlic chili pepper sauce. Removing the seeds from the jalapeno also helps reduce the heat.

Can I make this salad vegan?

This salad is already vegan! Just ensure that the soy sauce you use is vegan-friendly, as some brands may contain animal products or by-products.

Nutrition

This Thai Cucumber Salad is a light and healthy dish. It’s low in calories and rich in vitamins from the fresh vegetables and herbs. The peanuts provide a source of healthy fats and protein, making it a nutritious choice that fits well into a balanced diet.

Conclusion

Thank you for joining me on this culinary journey to Thailand with my Thai Cucumber Salad. It’s a dish that embodies the vibrant flavors and spirit of Thai cuisine, bringing a touch of exotic flair to your table. I hope you enjoy making it as much as I do and that it becomes a beloved recipe in your kitchen. Whether you serve it as a refreshing side dish or a light meal, this salad is sure to impress and delight. Happy cooking!

Related update: Thai Cucumber Salad (By Roz)

Related update: Dairy Free Chicken Salad

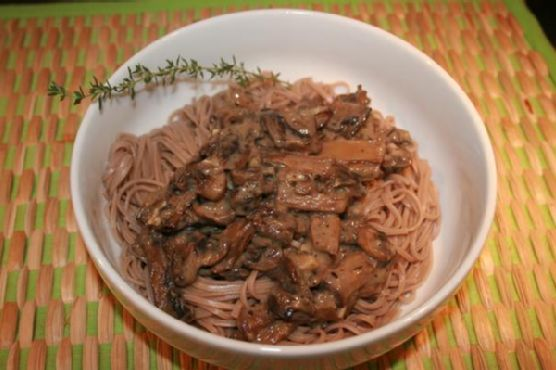
Creamy Mushrooms Over Soba Noodles (Vegan) | Made by Meaghan Moineau

Creamy Mushrooms Over Soba Noodles (Vegan)

Intro

There’s something incredibly comforting about a warm bowl of noodles topped with a creamy, savory sauce. This dish, Creamy Mushrooms Over Soba Noodles, brings me back to my childhood, when my grandmother would whip up her magical mushroom sauce on chilly autumn evenings. She’d let me stir the pot, watching in awe as the earthy aroma filled the kitchen. This vegan recipe is a modern twist on her classic, combining the deep flavors of mushrooms with the subtle nuttiness of soba noodles, all wrapped in a luscious, creamy sauce.

Why You’ll Love It

If you’re looking for a meal that’s both hearty and wholesome, this recipe is for you. The combination of creamy mushrooms with the slight chewiness of soba noodles creates a satisfying texture that is sure to please your taste buds. It’s vegan, making it a perfect choice for plant-based eaters, and packed with flavors that even non-vegans will love. Plus, it’s relatively quick to prepare, making it a great option for busy weeknights.

Ingredients

  • 2 tablespoons Earth Balance buttery spread
  • 1 pound of mushrooms (cremini, white, or your choice), sliced
  • 3 cloves of garlic, minced
  • 2 tablespoons all-purpose flour
  • 1 cup unsweetened soy milk
  • 1/4 cup white wine
  • 1 tablespoon fresh thyme, chopped
  • Juice of half a lemon
  • Salt and pepper to taste
  • 8 ounces soba noodles

Instructions

  1. In a sauté pan, melt 1 tablespoon of the Earth Balance buttery spread over medium heat.
  2. Add the sliced mushrooms and minced garlic to the pan, stirring occasionally until the mushrooms are dark and reduced. Set the mushrooms aside.
  3. In the same pan, melt the remaining tablespoon of Earth Balance buttery spread. Stir in the flour, cooking and stirring for about a minute to make a roux. This will help thicken your sauce.
  4. Slowly add the soy milk to the roux, stirring continuously until the mixture is smooth and thickened.
  5. Return the mushrooms to the pan, and add the lemon juice, fresh thyme, salt, and pepper. Stir well to combine.
  6. Add 1/4 cup of white wine to the mushroom mixture. Continue to cook until the sauce has reduced slightly and reached a pleasant consistency.
  7. Cook the soba noodles according to package instructions. Drain and divide the noodles into bowls.
  8. Ladle the creamy mushroom sauce over the soba noodles. Garnish with sprigs of fresh thyme if desired.
  9. Serve immediately and enjoy!

Tips

For the best results, use fresh mushrooms and cook them until they are well browned to enhance their flavor. If you prefer a thicker sauce, you can add a bit more flour to the roux. Make sure to stir continuously when adding the soy milk to prevent lumps from forming.

Variations & Substitutions

If you don’t have soba noodles on hand, feel free to substitute with whole wheat spaghetti or any other pasta of your choice. For a gluten-free option, use gluten-free flour and soba noodles made from 100% buckwheat. You can also play around with the mushroom variety; shiitake mushrooms add a unique flavor and texture.

Storage

Leftover creamy mushroom sauce can be stored in an airtight container in the refrigerator for up to 3 days. Reheat gently on the stovetop, adding a splash of soy milk if the sauce has thickened too much. Cooked soba noodles are best enjoyed fresh, but can be kept in a separate container for up to 2 days.

FAQ

Can I use a different type of milk?

Absolutely! While unsweetened soy milk works wonderfully in this recipe, you can substitute it with any plant-based milk such as almond, oat, or coconut milk. Just make sure it’s unsweetened to maintain the savory flavor profile.

What if I don’t have white wine?

No problem! You can substitute white wine with vegetable broth or even a little more soy milk. The wine adds depth to the sauce, but it’s not a dealbreaker if you don’t have it on hand.

How can I make this dish more filling?

To make this meal heartier, consider adding cooked chickpeas or tofu for extra protein. You can also toss in some spinach or kale for added nutrients and texture.

Nutrition

This dish is not only delicious but also packed with nutrients. Mushrooms are a great source of antioxidants, B vitamins, and minerals such as selenium and copper. Soba noodles, made from buckwheat, provide fiber and protein, making this meal both nourishing and satisfying.

Conclusion

Creamy Mushrooms Over Soba Noodles is a delightful vegan dish that combines rich flavors with wholesome ingredients. It’s a warm and comforting meal that will remind you of cozy family dinners while offering a modern twist. Whether you’re a seasoned cook or a kitchen novice, this recipe is approachable and rewarding. So, gather your ingredients and enjoy a bowl of creamy goodness that will surely become a favorite at your dinner table.

Related update: Creamy Mushrooms Over Soba Noodles (Vegan)

Related update: Creamy White Chili

Tropical Ice Pops | Made by Meaghan Moineau

Tropical Ice Pops

Intro

Growing up, summers meant long days of sunshine, backyard games, and the sweet relief of a frozen treat to cool us down. I fondly remember racing my siblings to the freezer, each of us hoping to grab the last homemade ice pop. There’s something magical about the burst of fruity flavors on a hot day. Those memories inspired this Tropical Ice Pops recipe, a delightful blend of exotic fruits and creamy coconut that takes me back to those carefree summer days.

Why You’ll Love It

These Tropical Ice Pops are more than just a treat; they’re a mini vacation in every bite. You’ll love the refreshing combination of creamy coconut and juicy tropical fruits. Not only are they delicious, but they’re also made with wholesome ingredients, so you can indulge guilt-free. Plus, they’re easy to make, customizable, and perfect for kids and adults alike. Whether you’re hosting a summer barbecue or just need a moment of bliss, these ice pops are sure to satisfy.

Ingredients

  • 3/4 cup unsweetened coconut beverage
  • 1/4 cup light coconut milk
  • 1 fresh mango, peeled and chopped
  • 1 1/2 tablespoons maple syrup, plus 2-3 tablespoons for coconut mixture
  • 1 fresh pineapple, peeled and chopped
  • Popsicle moulds

Instructions

  1. Puree the mango, pineapple, 3/4 cup of coconut beverage, and 1 1/2 tablespoons of maple syrup in a blender until smooth.
  2. Pour equal amounts of the fruit mixture into each of the popsicle moulds, filling them about halfway.
  3. In a small bowl, mix the light coconut milk with 1/4 cup of coconut beverage and 2-3 tablespoons of maple syrup. Adjust the sweetness to your taste.
  4. Pour equal amounts of the coconut mixture over the fruit puree in the moulds, filling them to the top.
  5. Insert a popsicle stick into each mould, leaving about a quarter of the stick above the mould.
  6. Freeze the popsicles for about 2 to 3 hours, or until solid.
  7. To remove the ice pops from the moulds, run them under warm to hot water for about 5 to 10 seconds before pulling them out.

Tips

For the best results, make sure your fruits are ripe and sweet. The natural sugars will enhance the flavor of the ice pops. If you prefer a smoother texture, strain the fruit puree before pouring it into the moulds to remove any fibrous bits. Remember to taste the coconut mixture before pouring it over the fruit puree and adjust the sweetness to your liking. Using a funnel or a jug with a spout can make pouring the mixtures into the moulds easier and less messy.

Variations & Substitutions

Feel free to get creative with your Tropical Ice Pops by trying different fruits or ingredients. Swap the mango or pineapple for passion fruit, kiwi, or papaya for a different tropical twist. If you prefer a creamier texture, use full-fat coconut milk instead of light coconut milk. For added texture, consider adding shredded coconut or chia seeds to the coconut mixture. If you’re watching your sugar intake, you can substitute maple syrup with honey or a sugar-free sweetener of your choice.

Storage

Store the Tropical Ice Pops in the freezer for up to two weeks. Keep them in the popsicle moulds or transfer them to a freezer-safe bag or container to save space. Be sure to separate each ice pop with parchment paper if stacking them to prevent sticking.

FAQ

Can I use canned fruits instead of fresh?

Yes, you can use canned fruits if fresh ones are not available. Just be sure to drain any syrup or juice before blending. Keep in mind that the flavor may vary slightly depending on the type of canned fruit used.

What if I don’t have popsicle moulds?

No worries! You can use small paper cups or silicone muffin cups as an alternative. Simply pour the mixtures into the cups and cover with foil. Make a small slit in the foil to insert the popsicle stick, then freeze as directed.

How do I make these vegan?

This recipe is already vegan-friendly as it uses maple syrup and coconut milk. Just ensure that any additional ingredients you use, like toppings or variations, are also plant-based.

Nutrition

Each Tropical Ice Pop contains approximately:

  • Calories: 70
  • Fat: 3g
  • Carbohydrates: 10g
  • Sugar: 8g
  • Protein: 1g

Note that these values are estimated and can vary based on the specific ingredients and quantities used.

Conclusion

Tropical Ice Pops are a delicious and refreshing way to enjoy the vibrant flavors of summer. With their simple ingredients and easy preparation, they make for the perfect homemade treat to share with family and friends. Whether you’re reminiscing about your own childhood summers or creating new memories, these ice pops are sure to bring a smile to your face. Enjoy the taste of the tropics and keep cool with every bite!

Related update: Tropical Ice Pops

Gluten And Dairy Free Peanut Butter Cups | Made by Meaghan Moineau

Gluten And Dairy Free Peanut Butter Cups

Intro

There’s something utterly comforting about the combination of chocolate and peanut butter, a pairing as timeless as a warm embrace on a chilly day. Growing up, I fondly remember my grandmother’s kitchen, a treasure trove of sweet aromas and delightful treats. She always had a stash of peanut butter cups tucked away in a tin, ready to be brought out during family gatherings. Over the years, I’ve embraced a gluten and dairy-free lifestyle, but my love for this classic treat remains unchanged. This recipe is my homage to those cherished moments with a modern twist, ensuring that everyone, regardless of dietary restrictions, can indulge in this nostalgic delight.

Why You’ll Love It

If you’re a fan of creamy, nutty flavors encased in rich, velvety chocolate, these gluten and dairy-free peanut butter cups will quickly become a staple in your dessert repertoire. They are simple to make, require minimal ingredients, and are free from gluten and dairy, making them accessible for those with dietary restrictions. More than just a treat, they are a delightful reminder that sometimes, the simplest things in life bring the most joy.

Ingredients

  • 1 cup Enjoy Life semi-sweet chocolate chips
  • 2 tablespoons non-hydrogenated shortening
  • 1/2 cup creamy peanut butter
  • 2 tablespoons agave nectar
  • 1/4 teaspoon salt

Instructions

  1. Line a mini muffin tin with paper liners or spray with cooking oil.
  2. In a small bowl, mix together the creamy peanut butter, agave nectar, and salt. Set aside.
  3. In a heatproof bowl, combine the chocolate chips and shortening. Set the bowl over a pot of simmering water, ensuring that the water does not touch the bottom of the bowl.
  4. Stir the chocolate and shortening gently until fully melted and smooth.
  5. Spoon 1 teaspoon of the melted chocolate into each of the prepared mini muffin cups.
  6. Top the chocolate with a scant teaspoon of the peanut butter mixture.
  7. Finish by topping each cup with another teaspoon of the melted chocolate.
  8. Refrigerate the peanut butter cups until they are set, about 1-2 hours.
  9. Store the set peanut butter cups in an airtight container in the refrigerator.

Tips

For the best results, ensure that the chocolate and shortening are melted gently. Avoid overheating, as this can cause the chocolate to seize. If you don’t have a double boiler, a heatproof bowl over a pot of simmering water works perfectly. Patience is a virtue when it comes to setting these cups, so resist the urge to peek too soon!

Variations & Substitutions

This recipe is wonderfully flexible. If you prefer a different nut butter, almond or cashew butter can be substituted for peanut butter. For a touch of texture, consider mixing in a handful of chopped nuts or seeds into the peanut butter filling. If agave nectar isn’t available, maple syrup or honey (if not strictly vegan) can be used as an alternative sweetener.

Storage

These peanut butter cups are best stored in an airtight container in the refrigerator. They’ll keep well for up to two weeks, making them a perfect make-ahead treat. For longer storage, you can freeze them and enjoy a quick indulgence straight from the freezer.

FAQ

Can I use a different type of chocolate?

Absolutely! While semi-sweet chocolate provides a balanced sweetness, you can opt for dark chocolate if you prefer a richer, more intense flavor. Just ensure it is dairy-free to keep the recipe compliant with dietary needs.

Is there a substitute for shortening?

If you don’t have non-hydrogenated shortening on hand, coconut oil can be a good alternative. It will help the chocolate set with a smooth texture, though it may impart a slight coconut flavor.

Nutrition

These peanut butter cups are rich in flavor and moderately indulgent, making them a treat best enjoyed in moderation. The use of natural ingredients like agave nectar and creamy peanut butter offers a slightly healthier twist on traditional versions, with healthy fats and a touch of protein. As always, it’s important to consider portion sizes to maintain a balanced diet.

Conclusion

Creating these gluten and dairy-free peanut butter cups is more than just a culinary exercise—it’s a way to rekindle the warmth of cherished memories while crafting new ones. Whether you’re preparing them for a family gathering or simply to satisfy a personal craving, their simplicity and rich flavor will undoubtedly make them a favorite. I hope this recipe brings as much joy to your kitchen as it has to mine, and that each bite transports you to your own happy memories of yesteryears.

Related update: Gluten And Dairy Free Peanut Butter Cups

Related update: Crispy Pineapple Fritters

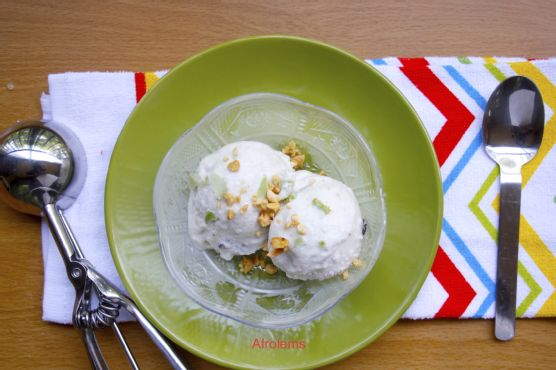
Coconut Guava Ice cream | Made by Meaghan Moineau

Coconut Guava Ice Cream: A Tropical Delight

Intro

There’s something magical about the fusion of tropical flavors that instantly transports you to a serene beach with every bite. Coconut Guava Ice Cream embodies this essence perfectly. As a child, I remember visiting my grandmother’s house every summer. She had a beautiful guava tree in her backyard, and we would spend lazy afternoons picking ripe guavas and concocting different treats. This ice cream recipe takes me back to those sun-dappled days, filled with laughter, tropical fruits, and the warmth of family gatherings.

Why You’ll Love It

This Coconut Guava Ice Cream is a luscious blend of creamy coconut milk, sweet guavas, and the delightful crunch of peanuts. It’s vegan-friendly, simple to make, and doesn’t require an ice cream maker. The refreshing taste of guava combined with the rich coconut base creates an indulgent yet refreshing dessert. It’s the perfect treat to beat the heat and impress your guests at any gathering.

Ingredients

  • 1 can of coconut milk
  • 1/2 cup condensed milk
  • 2 ripe guavas, chopped and de-seeded
  • 1/2 cup blueberries
  • 1/4 cup crushed peanuts

Instructions

  1. Place the can of coconut milk in the freezer and allow it to solidify. This could take 4-6 hours depending on the temperature of your freezer.
  2. Take out the can of coconut milk and open it completely. The milk and coconut water will have separated, and the coconut water part will be clearer than the milk.
  3. With a very sharp knife, cut through the frozen coconut milk to separate the milk from the coconut water.
  4. Place the frozen coconut milk part in the blender.
  5. Pour in your condensed milk and chopped de-seeded guavas. Blend for about 3-5 minutes at intervals until smooth.
  6. Pour the mixture into a bowl, add your blueberries, stir in, and pop it in the freezer.
  7. Allow your coconut ice cream to freeze for about 3-6 hours.
  8. Serve garnished with the crushed peanuts.

Tips

To ensure the best texture, make sure the coconut milk is fully solidified before opening. Use ripe guavas for maximum flavor. If you prefer a smoother texture, blend the blueberries with the coconut milk and guavas instead of stirring them in.

Variations & Substitutions

If you want to add a citrusy note, consider adding a tablespoon of lime juice before blending. For a nut-free version, skip the peanuts and garnish with toasted coconut flakes instead. If guavas are not in season, substitute with mangoes or papayas for a different tropical twist.

Storage

Store the Coconut Guava Ice Cream in an airtight container in the freezer for up to two weeks. Allow it to soften at room temperature for a few minutes before serving for the best texture.

FAQ

Can I use fresh coconut milk instead of canned?

While fresh coconut milk can be used, canned coconut milk is preferred for its creaminess and consistency, which enhances the texture of the ice cream.

Is this recipe suitable for vegans?

Yes, this recipe is vegan-friendly as long as you use vegan condensed milk or a homemade version made from coconut milk and sugar.

Can I make this recipe without a blender?

A blender is recommended for achieving a smooth texture. However, you can mash the guavas and mix them with the other ingredients using a fork if a blender is unavailable.

Nutrition

This Coconut Guava Ice Cream is a delightful indulgence. While exact nutritional values may vary based on specific ingredients used, it is generally a good source of healthy fats from the coconut milk and provides vitamins from the fruits. It’s a sweet treat best enjoyed in moderation.

Conclusion

Coconut Guava Ice Cream is a celebration of tropical flavors, nostalgia, and simplicity. With just a few ingredients and steps, you can create a delicious and refreshing dessert that will transport you to a sunny paradise with every bite. Whether you’re entertaining guests or treating yourself, this ice cream is sure to impress. So, why not give it a try and create your own tropical memories?

Related update: Coconut Guava Ice cream

Related update: Macaroni and Cheese Gratin

Monastery soup | Made by Meaghan Moineau

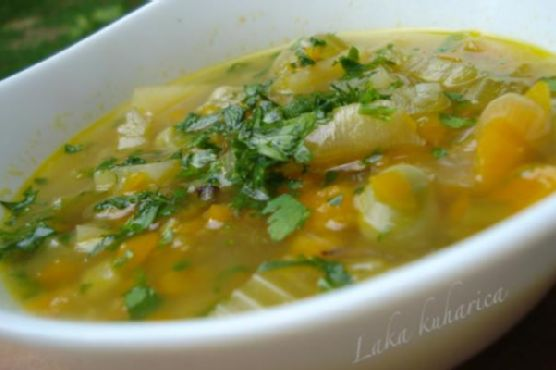
Monastery Soup: A Simple, Soul-Warming Delight

Intro

There’s something incredibly comforting about a bowl of hot soup, especially when it has a rich history and a story to tell. Monastery Soup is one such dish, with roots deeply embedded in the traditions of monastic cooking. I remember visiting a serene monastery nestled in the hills during my travels in Europe. The air was crisp, and the architecture, simplistic yet awe-inspiring. After a long day of exploration, I was offered a bowl of this humble soup by one of the monks. It was a moment of pure bliss, where the warmth of the soup matched the warmth in my heart. That moment has stayed with me, and today, I want to share this memory and recipe with you.

Why You’ll Love It

Monastery Soup is not just food; it’s an experience. Here’s why you’ll fall in love with this delightful dish:

  • Simplicity: With just a few wholesome ingredients, this soup is easy to prepare yet incredibly nourishing.
  • Heartiness: Packed with vegetables and beans, it’s a meal in itself, perfect for a satisfying lunch or dinner.
  • Customizable: You can easily adjust the ingredients to suit your taste or dietary needs.
  • Comforting: The aroma alone is enough to lift your spirits on a cold day.

Ingredients

  • 2 tablespoons sunflower oil
  • 2 medium potatoes, diced
  • 1 large onion, chopped
  • 3 cloves garlic, minced
  • 2 carrots, sliced
  • 1 leek, sliced
  • 2 stalks celery, chopped
  • 1 cup broad beans
  • 4 cups vegetable stock
  • Fresh parsley, chopped
  • Salt and pepper to taste

Instructions

  1. Heat the sunflower oil in a large pan over medium heat.
  2. Add the diced potatoes, chopped onion, and minced garlic. Sauté, covered, for about 10 minutes until the onions are translucent and the potatoes start to soften.
  3. Stir in the sliced carrots, leek, and chopped celery. Continue to sauté for another 5 minutes, allowing the vegetables to become tender.
  4. Add the broad beans and pour in the vegetable stock. Stir well, cover the pan, and let it simmer gently for another 10 minutes, or until the potatoes and broad beans are soft.
  5. Season with freshly chopped parsley, salt, and pepper according to your taste.
  6. Serve hot with crusty bread for a complete meal.

Tips

  • For a creamier texture, blend a portion of the soup and mix it back in.
  • Use fresh, seasonal vegetables for the best flavor.
  • Adjust the amount of garlic according to your preference for a more robust flavor.

Variations & Substitutions

Monastery Soup is wonderfully adaptable. Here are some variations you might want to try:

  • Vegetables: Swap out the potatoes for sweet potatoes or add some zucchini for a different taste.
  • Beans: If you don’t have broad beans, try using chickpeas or lentils instead.
  • Herbs: Experiment with adding thyme or rosemary for an aromatic twist.

Storage

Monastery Soup stores well, making it perfect for meal prep:

  • Refrigerate: Store in an airtight container for up to 4 days.
  • Freeze: You can freeze the soup for up to 3 months. Thaw in the refrigerator overnight before reheating.

FAQ

Can I make this soup in advance?

Absolutely! This soup tastes even better the next day as the flavors have more time to meld together. Simply reheat on the stove over low heat until warmed through.

Is Monastery Soup vegan?

Yes, as long as you use vegetable stock and avoid any animal-based additives, this soup remains vegan-friendly.

What can I serve with Monastery Soup?

A slice of crusty bread or a fresh green salad makes a perfect accompaniment to this hearty soup.

Nutrition

This soup is not only delicious but also nutritious. It’s packed with fiber from the vegetables and beans, and provides a good source of vitamins and minerals. It’s a guilt-free comfort food that’s perfect for any diet.

Conclusion

Monastery Soup is more than just a meal; it’s a bowl of comfort that carries with it a sense of history and tranquility. Whether you’re enjoying it on a cool evening or sharing it with loved ones, it’s a dish that warms both the body and soul. I hope this recipe brings as much joy to your kitchen as it does to mine. May it become a cherished part of your culinary repertoire, as it has become a staple in my own home.

Related update: Monastery soup

Related update: Corn Chowder with Potatoes, Poblanos, and Smoked Gouda

Summer Rolls | Made by Meaghan Moineau

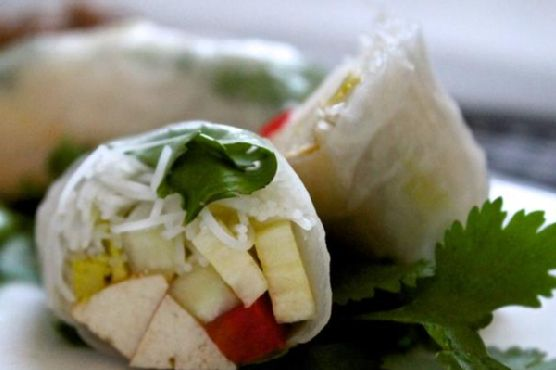
Fresh and Flavorful Summer Rolls

Introduction

There’s something undeniably nostalgic about the first bite of a fresh summer roll. For me, it brings back memories of lazy summer afternoons spent in my grandmother’s kitchen, where the air was filled with the aroma of fresh herbs and the gentle sound of rice paper softening in water. She would tell stories of her youth while expertly rolling each piece, her hands moving with a practiced grace that I longed to emulate. Now, every time I prepare this dish, I feel a connection to those cherished moments, and I’m thrilled to share this recipe with you.

Why You’ll Love It

Summer rolls are a delightful combination of fresh ingredients and vibrant flavors that are perfect for any occasion. They’re incredibly versatile, making them suitable for a light lunch, a refreshing appetizer, or even a fun party snack. The combination of creamy avocado, crunchy vegetables, and spicy tofu wrapped in delicate rice paper creates a textural harmony that’s both satisfying and refreshing. Plus, they’re naturally gluten-free and can be easily adapted for vegan diets, making them a crowd-pleaser for all your friends and family.

Ingredients

  • 1 avocado, sliced
  • 1 cucumber, cut into strips
  • Fresh cilantro sprigs
  • 2 cloves garlic, minced
  • 1 tablespoon pureed lemongrass
  • 1 cup pineapple, cut into strips
  • 1 red bell pepper, cut into strips
  • Rice paper sheets
  • 1 cup cooked vermicelli noodles
  • 2 tablespoons sesame oil
  • 3 tablespoons soy sauce
  • 1 tablespoon sugar
  • 8 ounces spicy tofu, sliced
  • 1 tablespoon sambal oelek

Instructions

  1. Place all marinade ingredients (garlic, pureed lemongrass, sesame oil, soy sauce, sugar, and sambal oelek) in a zip lock bag with the sliced tofu.
  2. Seal the bag and shake to coat the tofu thoroughly. Place in the fridge for at least half an hour or up to one day to let the flavors meld.
  3. When ready to assemble the rolls, fill a shallow pan with water and submerge a piece of rice paper in it. Leave it in the water, turning once, until the sheet is flexible.
  4. Place the softened rice paper on a flat, moist surface. Near the edge closest to you, arrange a piece of avocado and a piece of marinated tofu.
  5. Add 2-4 pieces each of cucumber, pineapple, and red bell pepper on top of the tofu and avocado.
  6. Top with a small amount of vermicelli noodles and a few sprigs of cilantro.
  7. Take the edge of the rice paper and, holding the filling tightly, begin to roll it as if rolling a burrito. Be sure to fold the sides inward as you go.
  8. Place the finished roll on a platter to dry. Repeat the steps until you run out of ingredients.
  9. Serve the summer rolls with Thai chili sauce or spicy peanut sauce for dipping.

Tips

To ensure your summer rolls come out perfectly, keep the following tips in mind:

  • Keep the rice paper moist but not too wet to prevent tearing.
  • Don’t overfill the rolls, as this can make them difficult to wrap.
  • Work quickly once the rice paper is softened, as it can become sticky if left for too long.

Variations & Substitutions

Summer rolls are incredibly flexible, allowing you to tailor them to your taste preferences or dietary needs. Here are some variations you might consider:

  • Protein: Swap out the spicy tofu for shrimp, chicken, or even tempeh for a different protein profile.
  • Vegetables: Feel free to add or substitute vegetables such as carrots, lettuce, or mint for additional flavor and texture.
  • Sauce: Try different dipping sauces like hoisin sauce, sweet chili sauce, or a simple soy-vinegar mix.

Storage

Summer rolls are best enjoyed fresh, but if you need to store them, wrap each roll individually in plastic wrap to prevent sticking, and place them in an airtight container in the fridge. They should last for up to two days. When ready to eat, let them come to room temperature for the best flavor and texture.

FAQ

Can I make summer rolls ahead of time?

Yes, you can prepare summer rolls a few hours in advance. Be sure to wrap them tightly in plastic wrap to keep them fresh and prevent them from drying out.

What can I use instead of rice paper?

If you can’t find rice paper, you might try using large lettuce leaves or collard greens as a wrap alternative, but note that the texture will be different.

Is there a way to make these rolls spicy?

Absolutely! You can add a bit of sliced fresh chili or increase the amount of sambal oelek in the marinade for an extra kick.

Nutrition

Each summer roll is approximately 150 calories, depending on the specific ingredients used. They are low in fat and packed with vitamins and minerals from the fresh vegetables, making them a nutritious choice for snacking or meals.

Conclusion

Summer rolls are a delightful way to savor the fresh flavors of the season, offering a perfect balance of taste and texture. Whether you’re a seasoned chef or a novice in the kitchen, this recipe is approachable and rewarding. I hope it brings as much joy and nostalgia to your table as it does to mine. Happy rolling!

Related update: Summer Rolls

Related update: Crunchy Prawn Skewers With Lemony Avocado Dip

Chapchae (Korean Stir-Fried Noodles) | Made by Meaghan Moineau

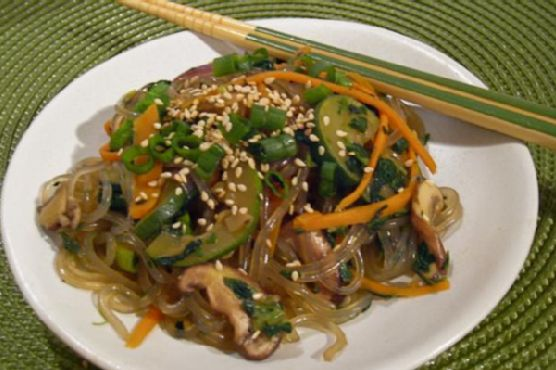
Chapchae (Korean Stir-Fried Noodles)

Intro

Chapchae, or Korean stir-fried noodles, has always been a beloved dish in our family. I remember as a child, watching my grandmother expertly toss the noodles with colorful vegetables in her large wok, the aroma of sesame oil and soy sauce filling the kitchen. It was a dish we often enjoyed during family gatherings and special occasions, a symbol of celebration and togetherness. The combination of sweet potato vermicelli noodles, fresh vegetables, and savory flavors makes it a comforting and satisfying meal. Whether you’re new to Korean cuisine or a seasoned enthusiast, Chapchae is sure to become a favorite in your household as well.

Why You’ll Love It

This Chapchae recipe is not only delicious but also incredibly versatile. It’s a perfect balance of sweet and savory, with a delightful mix of textures from the chewy noodles and crisp-tender vegetables. You’ll love how easy it is to customize with your favorite vegetables or protein, making it adaptable to your taste preferences and dietary needs. Plus, it’s a fantastic make-ahead dish that tastes even better the next day as the flavors meld together.

Ingredients

  • 200g sweet potato vermicelli noodles
  • 1 sweet onion, thinly sliced
  • 2 cloves garlic, minced
  • 2 cups baby spinach
  • 1 carrot, julienned
  • 2 scallions, sliced
  • 1 cup mushrooms, sliced
  • 1 zucchini, julienned
  • 2 tablespoons olive oil
  • 2 tablespoons sesame oil, divided
  • 3 tablespoons soy sauce
  • 1 tablespoon sugar
  • Salt, to taste

Instructions

  1. Cook the sweet potato vermicelli noodles according to the package directions. Drain and set aside.
  2. In a large pan or wok over medium heat, heat the olive oil and 1 tablespoon of sesame oil.
  3. Add the onion slices and minced garlic, sautéing for about 1 minute until fragrant.
  4. Add the rest of the vegetables: spinach, carrots, scallions, mushrooms, and zucchini. Cook for 4-5 minutes, until the vegetables are half-cooked and still a bit crispy.
  5. Turn the heat to low and add the cooked noodles, soy sauce, sugar, and the remaining sesame oil to the pan.
  6. Mix everything to combine and cook for another 2 minutes, allowing the flavors to meld.
  7. Season with salt or more soy sauce if needed. If you prefer a slightly sweeter taste, add a touch more sugar.
  8. If using sesame seeds, sprinkle them on top just before serving.

Tips

To ensure your Chapchae is a success, here are a few tips:

  • Use high-quality sesame oil and soy sauce for the best flavor.
  • Don’t overcook the vegetables; they should remain slightly crisp for the best texture.
  • If you’re adding protein, such as beef or chicken, cook it separately before adding it to the noodles.
  • For an authentic touch, garnish with sesame seeds and a sprinkle of sliced red chili for a bit of heat.

Variations & Substitutions

Chapchae is highly adaptable, so feel free to make it your own:

  • Vegetables: Use any vegetables you have on hand, such as bell peppers, broccoli, or bok choy.
  • Protein: Add beef, chicken, or tofu for extra protein. Simply cook it separately before mixing it with the noodles.
  • Sauce: For a gluten-free version, use tamari instead of soy sauce. You can also add a splash of rice vinegar for a tangy twist.

Storage

Chapchae can be stored in an airtight container in the refrigerator for up to 3 days. To reheat, simply warm it in a pan over medium heat, adding a splash of water or soy sauce if needed to prevent sticking. It’s an excellent option for meal prep, as the flavors continue to develop over time.

FAQ

Can I make Chapchae ahead of time?

Absolutely! Chapchae is a fantastic make-ahead dish. Prepare it up to a day in advance and store it in the refrigerator. Reheat gently before serving, and enjoy the enhanced flavors.

What can I serve with Chapchae?

Chapchae can be a standalone dish, but it also pairs well with other Korean dishes like kimchi, Korean BBQ, or a simple side salad. It’s versatile enough to complement a variety of meals.

Nutrition

Chapchae is a nutritious dish rich in fiber from the vegetables and sweet potato noodles. It’s naturally gluten-free when using gluten-free soy sauce and can be easily adapted to be vegan or vegetarian. The sesame and olive oils provide healthy fats, making it a well-rounded meal.

Conclusion

Chapchae is a delightful dish that brings a taste of Korean cuisine to your table. With its colorful array of vegetables and the unique texture of sweet potato noodles, it’s sure to impress family and friends alike. Whether you’re making it for a special occasion or a simple weeknight dinner, Chapchae is a versatile and delicious option. Give this recipe a try, and let it become a cherished part of your culinary repertoire, just as it has in mine.

Related update: Chapchae (Korean Stir-Fried Noodles)

Related update: A Post Thanksgiving “sopa De Tortilla”

Related update: Flemish Style Asparagus Side Dish

Watching What I Eat: Peanut Butter Banana Oat Breakfast Cookies with Carob / Chocolate Chips | Made by Meaghan Moineau

Watching What I Eat: Peanut Butter Banana Oat Breakfast Cookies with Carob / Chocolate Chips

Intro

There’s a special kind of comfort in the aroma of freshly baked cookies wafting through the house. It takes me back to Sunday mornings at my grandmother’s kitchen. She had a way of using the simplest ingredients to create the most magical treats that brought the family together. Today, I’m sharing a recipe that combines my love for those nostalgic flavors with a modern twist: Peanut Butter Banana Oat Breakfast Cookies with Carob or Chocolate Chips. These cookies are not only delicious but also packed with wholesome ingredients, making them a perfect start to your day or a delightful snack anytime.

Why You’ll Love It

These breakfast cookies are a wonderful blend of flavors and textures. The creamy peanut butter and ripe bananas create a rich, moist base, while the oats add a hearty texture. Whether you choose chocolate or carob chips, you’ll get a burst of sweetness that complements the nuttiness perfectly. Plus, these cookies are easy to make and require just one bowl, making cleanup a breeze. They’re also versatile, allowing you to customize them to your taste and dietary needs. You’ll love how they are both satisfying and nourishing, giving you a delicious way to fuel your day.

Ingredients

  • 2 ripe bananas, mashed
  • 1/4 cup butter flavor shortening
  • 1/2 cup chocolate chips or carob chips
  • 1/2 cup creamy peanut butter
  • 1/4 cup chopped nuts (optional)
  • 1 1/2 cups oatmeal
  • 1/4 cup unsweetened applesauce
  • 1 teaspoon vanilla extract
  • 1/4 cup vanilla protein powder

Instructions

  1. Preheat your oven to 350 degrees Fahrenheit.
  2. In a large bowl, mix the mashed bananas and peanut butter until completely combined.
  3. Add in the applesauce, vanilla protein powder, and vanilla extract. Mix until all ingredients are fully incorporated.
  4. Add the oatmeal and nuts to the banana mixture and combine thoroughly.
  5. If you want the carob or chocolate chips mixed throughout, add them now. Let the dough rest for 10 minutes.
  6. Drop the cookie dough by spoonfuls onto a parchment paper-lined cookie sheet and flatten them into circles. If you prefer the chips on top, add them now.
  7. Bake the cookies for 20-30 minutes, depending on your preference for texture, until they are golden brown and done.
  8. Remove from the oven and let them rest on the cookie sheet for 5 minutes, then transfer to a cooling rack.
  9. If you want traditional fork marks, use a pizza cutter or sharp knife to score the tops while they’re still warm.
  10. Once completely cool, store in a covered container. Enjoy them on their own or with a cup of tea.

Tips

For best results, use ripe bananas as they will be sweeter and easier to mash. Letting the dough rest allows the oats to absorb some of the moisture, which helps with texture. If you’re using chocolate chips, consider high-quality dark chocolate for added depth of flavor. And remember, baking times can vary depending on your oven, so keep an eye on the cookies to achieve your desired level of doneness.

Variations & Substitutions

If you’re looking to switch things up, try using almond butter instead of peanut butter for a different flavor profile. You can also swap out the nuts for seeds like sunflower or pumpkin seeds if you have nut allergies. For a vegan option, use plant-based butter and ensure your chocolate chips are dairy-free. Feel free to experiment with different types of oats, such as steel-cut or rolled oats, to find the texture you like best.

Storage

These cookies are best stored in an airtight container at room temperature, where they will stay fresh for up to a week. For longer storage, you can refrigerate them for up to two weeks or freeze them for up to three months. To enjoy frozen cookies, simply let them thaw at room temperature or give them a quick warm-up in the microwave.

FAQ

Can I make these cookies gluten-free?

Absolutely! To make these cookies gluten-free, use certified gluten-free oats. This will ensure that your cookies are safe for those with gluten sensitivities or celiac disease.

What can I use instead of vanilla protein powder?

If you don’t have vanilla protein powder, you can substitute it with an equal amount of flour or almond meal. Alternatively, you can omit it entirely, though this may slightly alter the texture of the cookies.

Are these cookies suitable for kids?

Yes, these cookies are a great treat for kids! They are made with wholesome ingredients and can be a fun and nutritious way to satisfy their sweet tooth. Just be sure to adjust the nuts and chocolate based on your child’s dietary needs and preferences.

Nutrition

Each cookie is approximately 120 calories, with 5 grams of protein, 15 grams of carbohydrates, and 6 grams of fat. These values may vary based on the specific brands of ingredients you use. Remember, they are a treat, so enjoy them in moderation as part of a balanced diet.

Conclusion

These Peanut Butter Banana Oat Breakfast Cookies are a delightful blend of nostalgia and nutrition, offering a perfect balance of flavors and textures that are sure to please. Whether you’re enjoying them fresh out of the oven or as a quick grab-and-go breakfast, they’re a testament to the fact that eating well doesn’t have to mean sacrificing taste. I hope these cookies bring a little bit of warmth and joy to your mornings, just as they do to mine. Happy baking!

Related update: Watching What I Eat: Peanut Butter Banana Oat Breakfast Cookies with Carob / Chocolate Chips

Related update: Peppermint Patties

Related update: Easy Cheesy Scrambled Eggs

Quinoa Tabbouleh Salad | Made by Meaghan Moineau

Quinoa Tabbouleh Salad

Intro

There’s something magical about the combination of fresh ingredients that come together in a tabbouleh salad. I remember my grandmother making a similar dish during summer picnics, where the scent of fresh mint and parsley would fill the air. Her version used the traditional bulgur, but I’ve found that quinoa adds a delightful twist while boosting the nutritional value. This Quinoa Tabbouleh Salad is a modern take on a beloved classic, perfect for those looking to enjoy a refreshing, healthy meal.

Why You’ll Love It

This Quinoa Tabbouleh Salad is a vibrant, nutrient-packed dish that’s perfect for any occasion. Here’s why you’ll fall in love with it:

  • Refreshing and Light: The fresh vegetables and herbs make this salad a refreshing choice for any meal.
  • High in Protein: Quinoa is a complete protein, making this salad an excellent option for vegetarians and vegans.
  • Quick and Easy: With simple ingredients and minimal prep time, this salad is easy to whip up even on the busiest of days.
  • Versatile: Enjoy it as a side dish, a light lunch, or a main course by adding your favorite protein.

Ingredients

  • 1 cup quinoa
  • 2 cups water
  • 4 green onions, sliced
  • 1 cup diced tomato
  • 1 cup diced cucumber
  • 1/2 cup fresh mint, chopped
  • 1/2 cup fresh parsley, chopped
  • 1/4 cup olive oil
  • 1/4 cup lemon juice
  • 1 tsp garlic powder
  • 1/2 tsp black freshly cracked pepper

Instructions

  1. Bring water to a boil in a medium saucepan.
  2. Add quinoa and stir. Cover and reduce heat to medium-low.
  3. Allow quinoa to simmer until all water is absorbed, about 20 minutes. Stir occasionally, ensuring it doesn’t burn.
  4. Once cooked, allow quinoa to cool completely.
  5. Transfer cooled quinoa to a large bowl with an airtight lid.
  6. Add green onions, diced tomato, diced cucumber, fresh mint, fresh parsley, olive oil, lemon juice, garlic powder, and freshly cracked pepper.
  7. Gently stir until all ingredients are very well-mixed.
  8. Cover and refrigerate for at least an hour to allow flavors to meld.
  9. Stir again before serving.

Tips

  • For extra flavor, try toasting the quinoa lightly before cooking. This will bring out a nutty flavor that complements the salad beautifully.
  • Ensure the quinoa is completely cool before adding the other ingredients to prevent wilting the fresh herbs and vegetables.
  • Use a sharp knife to chop the vegetables to maintain their texture and freshness.

Variations & Substitutions

This Quinoa Tabbouleh Salad can easily be adapted to suit your preferences:

  • Grains: Substitute quinoa with bulgur for a traditional touch or try couscous for a different texture.
  • Herbs: Add fresh dill or cilantro for an extra burst of flavor.
  • Protein: Add grilled chicken, chickpeas, or feta cheese to make it a more substantial meal.
  • Vegetables: Include chopped bell peppers or radishes for added crunch and color.

Storage

This salad is best enjoyed fresh but can be stored in the refrigerator for two to three days. Make sure to keep it in an airtight container to maintain its crispness and flavor. Stir well before serving leftovers to redistribute the dressing.

FAQ

Can I make this salad ahead of time?

Yes, you can prepare the salad a day in advance. In fact, allowing the flavors to meld in the fridge can enhance the taste. Just be sure to give it a good stir before serving.

Is Quinoa Tabbouleh Salad gluten-free?

Absolutely! This recipe uses quinoa, which is naturally gluten-free, making it a perfect choice for those with gluten sensitivities.

What can I serve with Quinoa Tabbouleh Salad?

This salad pairs well with grilled meats, fish, or even as part of a mezze platter alongside hummus, pita bread, and olives.

Nutrition

Quinoa Tabbouleh Salad is not only delicious but also packed with nutrients. Here’s a quick overview of its nutritional benefits:

  • High in Protein: Quinoa is a complete protein, providing all nine essential amino acids.
  • Rich in Fiber: The combination of quinoa and fresh veggies offers a good amount of dietary fiber.
  • Loaded with Vitamins and Minerals: Fresh herbs and vegetables provide vitamins A, C, K, and minerals like potassium and magnesium.
  • Healthy Fats: Olive oil offers heart-healthy monounsaturated fats.

Conclusion

Quinoa Tabbouleh Salad is more than just a dish; it’s a celebration of fresh flavors and wholesome ingredients. Whether you’re looking for a side dish to complement your meal or a light, nutritious option for lunch, this salad is sure to delight. Remember the days of picnics with loved ones and make new memories with this healthy twist on a classic. Enjoy every bite and share the love with those around you!

Related update: Quinoa Tabbouleh Salad

Related update: Crab Cakes Eggs Benedict

Related update: Strawberry Pretzel Salad

Vegan Banana Nut Muffins | Made by Meaghan Moineau

Vegan Banana Nut Muffins

Intro

There’s something magical about the aroma of freshly baked banana nut muffins wafting through the house. It takes me back to Sunday mornings at my grandmother’s, where the kitchen was always bustling with warmth and sweetness. She had a knack for making everything feel special, and her banana nut muffins were no exception. Drawing inspiration from her, I’ve crafted a vegan version of this classic treat that retains all the comforting flavors without any animal products. Whether you’re a long-time vegan or just exploring plant-based baking, these muffins are sure to become a favorite in your home too.

Why You’ll Love It

This recipe is a delightful blend of nostalgia and modern dietary preferences. These Vegan Banana Nut Muffins are incredibly moist, thanks to the combination of mashed bananas and apple sauce. The addition of walnuts offers a satisfying crunch, while the agave nectar provides natural sweetness without the need for refined sugars. Perfect for breakfast, a snack, or even dessert, these muffins are versatile and delicious.

Ingredients

  • 1 tablespoon ground flaxseed
  • 3 tablespoons water
  • 1/2 cup agave nectar
  • 1/2 cup apple sauce
  • 3 ripe bananas, mashed
  • 1 teaspoon baking soda
  • 1/2 teaspoon salt
  • 1 cup flour
  • 1 cup whole-wheat flour
  • 1 teaspoon vanilla extract
  • 1/2 cup walnuts, chopped
  • Additional 1/3 cup walnuts for topping

Instructions

  1. Preheat your oven to 325°F (163°C) and position the rack in the middle.
  2. In a small bowl, mix the ground flaxseed with water and set it aside to thicken.
  3. If you’re using a loaf pan, grease and flour a 9x5x3 inch pan. For muffins, line the muffin pan with liners or grease and flour the pan.
  4. In a medium bowl, whisk together the all-purpose flour, whole-wheat flour, baking soda, and salt.
  5. In a large bowl, combine the thickened flaxseed mixture, agave nectar, and apple sauce until smooth.
  6. Add the flour mixture to the wet ingredients, stirring until just combined.
  7. Mix in the vanilla extract and mashed bananas until everything is well combined.
  8. Fold in 1/2 cup of the chopped walnuts.
  9. Pour the batter into the prepared loaf pan or muffin cups. Sprinkle the remaining 1/3 cup of walnuts on top.
  10. For the loaf, bake for 45 to 60 minutes. For muffins, bake for 25-30 minutes. The muffins are done when a thin knife inserted in the center comes out clean.
  11. Allow to cool for 10 minutes on a wire rack before removing from the pan.

Tips

For the best results, use overripe bananas with plenty of brown spots; they’re sweeter and mash easily. If you prefer a smoother texture, you can pulse the walnuts in a food processor before folding them into the batter. Always let your muffins cool completely before storing them to prevent them from becoming soggy.

Variations & Substitutions

If you don’t have agave nectar, maple syrup is a good substitute. For a gluten-free version, swap the flour with a 1:1 gluten-free baking blend. To add some extra flavor, consider incorporating a teaspoon of cinnamon or nutmeg to the dry ingredients. If you’re not a fan of walnuts, try pecans or almonds instead.

Storage

Once your muffins have cooled completely, store them in an airtight container at room temperature for up to 3 days. For longer storage, you can freeze them for up to 3 months. To reheat, simply thaw at room temperature or warm them in a 300°F (150°C) oven for about 10 minutes.

FAQ

Can I use frozen bananas for this recipe?

Yes, frozen bananas work well in this recipe. Make sure to thaw them completely and drain any excess liquid before mashing and adding them to the batter.

What can I use instead of apple sauce?

If you don’t have apple sauce on hand, you can substitute it with an equal amount of mashed sweet potato or pumpkin puree. Both options maintain the moisture level of the muffins beautifully.

Are these muffins suitable for a nut-free diet?

To make these muffins nut-free, simply omit the walnuts or replace them with sunflower seeds or pumpkin seeds for a similar texture.

Nutrition

Each muffin (assuming 12 muffins) contains approximately:

  • Calories: 180
  • Fat: 5g
  • Carbohydrates: 32g
  • Fiber: 3g
  • Sugar: 12g
  • Protein: 3g

Conclusion

These Vegan Banana Nut Muffins are a testament to how simple ingredients can come together to create something truly delightful. Whether you’re enjoying them with a cup of coffee in the morning or sharing them with friends over tea, they are bound to bring a smile to your face. Give this recipe a try, and let the comforting aroma fill your home, just like it did mine on those cherished Sunday mornings.

Related update: Vegan Banana Nut Muffins

Related update: Blueberry Almond Crescent Rolls

Indian Lentil Dahl | Made by Meaghan Moineau

Indian Lentil Dahl: A Warm and Comforting Classic

Intro

Indian Lentil Dahl holds a special place in my heart. As a child, I would watch my grandmother lovingly stir a pot of simmering lentils, the aroma of spices wafting through the house. It was more than just food; it was a comforting embrace in a bowl. I remember sitting at the dining table, eagerly waiting for her to serve it, each spoonful filled with warmth and love. Now, I carry on the tradition, bringing the same comfort to my own family. This recipe is a tribute to her timeless kitchen wisdom, a dish that connects generations through its rich flavors and nourishing qualities.

Why You’ll Love It

This Indian Lentil Dahl is not just another dish; it’s a symphony of flavors that dances on your palate. You’ll love it for its simplicity and depth, a perfect blend of creamy coconut milk and aromatic spices like garam masala and fresh ginger. It’s a vegan delight that’s both hearty and wholesome, making it ideal for any meal. Plus, it’s incredibly easy to prepare, making it a fantastic option for busy weeknights or a cozy weekend dinner. Your home will be filled with the enticing aroma of spices, and your heart will be warmed by the comforting, savory taste of this classic dish.

Ingredients

  • 2 tablespoons canola oil
  • 1 medium onion, finely chopped
  • 1 teaspoon salt
  • 3 garlic cloves, minced
  • 1 tablespoon fresh ginger, grated
  • 1 teaspoon garam masala
  • 1 cup red split lentils, rinsed
  • 1 can (14 oz) coconut milk
  • 2 cups water
  • 2 tablespoons lime juice
  • 1/4 cup fresh cilantro, chopped
  • 2 plum tomatoes, diced

Instructions

  1. In a large saucepan, heat the canola oil over medium-high heat. Add the chopped onion and salt, cooking until the onion begins to brown, about 5 minutes.
  2. Add the minced garlic, grated ginger, and garam masala to the saucepan. Stir and cook until the mixture is fragrant, about 1 minute.
  3. Stir in the rinsed red split lentils, coconut milk, and water. Bring the mixture to a boil.
  4. Once boiling, reduce the heat to low and let it simmer, partially covered, until the lentils are tender and have broken down to an almost paste-like consistency, about 25-30 minutes.
  5. Stir in the lime juice and chopped cilantro, checking for seasoning. Adjust salt if necessary.
  6. Serve the dahl hot, topped with diced tomatoes. It pairs beautifully with rice or fresh naan.

Tips

For the best results, make sure to rinse your lentils thoroughly to remove any debris. Using fresh ginger and garlic will significantly enhance the flavor, and simmering the dahl partially covered allows for the perfect consistency. Don’t rush the simmering process; allowing the lentils to slowly break down will yield a creamy, rich texture.

Variations & Substitutions

If you’re in the mood for variation, you can add vegetables like spinach or kale towards the end of cooking for added nutrients and color. For a spicier kick, consider adding a chopped green chili with the garlic and ginger. If you don’t have garam masala, a mix of cumin, coriander, and cardamom can be a wonderful substitute. For a nut-free option, replace coconut milk with almond milk or a splash of coconut cream for a thicker consistency.

Storage

This dahl keeps well in the refrigerator for up to 4 days, making it a perfect make-ahead meal. Store in an airtight container, and reheat gently on the stove or in the microwave before serving. If you plan to freeze it, let the dahl cool completely, then store it in a freezer-safe container for up to 2 months. Thaw overnight in the refrigerator before reheating.

FAQ

Can I use other types of lentils?

Yes, you can use other lentils, but the cooking time may vary. Red split lentils cook faster and break down more than whole lentils, which is ideal for this dish’s creamy texture.

Is this recipe gluten-free?

Yes, this Indian Lentil Dahl is naturally gluten-free, making it a great option for those with gluten sensitivities or preferences.

Can I make this dish ahead of time?

Absolutely! This dish is perfect for making ahead. The flavors deepen over time, so it may taste even better the next day. Just store it properly as mentioned in the storage section.

Nutrition

This delightful dish is rich in protein and fiber, thanks to the red lentils. It’s a heart-healthy meal that provides essential nutrients without being high in calories. The coconut milk adds a touch of healthy fat, while the spices offer antioxidants and anti-inflammatory benefits. Enjoy a nourishing meal that’s as comforting as it is nutritious.

Conclusion

Indian Lentil Dahl is more than a dish; it’s a journey into the heart of Indian cuisine, rich in tradition and flavor. Whether you’re preparing it for a family dinner or enjoying it solo, each spoonful offers comfort and warmth. I hope this recipe brings as much joy to your table as it has to mine, connecting you to a legacy of love and nourishment. Enjoy this delightful bowl of goodness, and may it become a cherished part of your culinary repertoire.

Related update: Indian Lentil Dahl

Related update: Salmon Quinoa Risotto