Crock-Pot: Asian-Style Country Ribs with Black Bean Garlic Sauce | Made by Meaghan Moineau

Crock-Pot: Asian-Style Country Ribs with Black Bean Garlic Sauce

Intro

Growing up, Sundays were always my favorite day of the week. It wasn’t just because it marked a day of rest, but because it was the day my family gathered around a cozy meal, shared stories, and laughed until our bellies ached. One of the dishes that always graced our Sunday table was my grandmother’s Asian-Style Country Ribs, simmered slowly to perfection. The aroma of garlic and ginger would fill the house, inviting everyone to the kitchen even before it was ready. I remember the anticipation and the comforting warmth that this dish brought to our home. Today, I’m sharing this beloved recipe with you, hoping it will bring the same warmth and joy to your family gatherings.

Why You’ll Love It

This recipe is not only delicious but also incredibly easy to prepare. With just 10 minutes of prep time, you can have a hearty and flavorful meal ready in the slow cooker. The combination of savory black bean garlic sauce and tender pork ribs creates an irresistible dish that’s perfect for any occasion. It’s budget-friendly and yields multiple servings, making it ideal for family dinners or gatherings with friends. Plus, the crock-pot does all the work, allowing you more time to relax with your loved ones.

Ingredients

  • 2 lbs boneless pork country ribs
  • 1/4 cup black bean garlic sauce (from a jar)
  • 1/2 cup chicken stock
  • 1 tablespoon cornstarch
  • 1 tablespoon dark sesame oil
  • 3 cloves fresh garlic, minced
  • 1 tablespoon ginger root, minced
  • 2 tablespoons honey
  • 1 teaspoon coarsely cracked black pepper
  • 3 tablespoons low sodium soy sauce
  • 2 scallions, chopped (green and white parts)

Instructions

  1. Begin by trimming any excess fat from the boneless pork ribs. This will help the dish avoid becoming too greasy.
  2. In a large bowl, mix together the black bean garlic sauce, chicken stock, cornstarch, sesame oil, garlic, ginger, honey, black pepper, and soy sauce. Stir until the cornstarch is fully dissolved.
  3. Place the pork ribs in the crock-pot and pour the sauce mixture over them, ensuring each rib is well-coated.
  4. Cover and cook on low heat for 5 to 6 hours. Avoid cooking any longer to prevent the ribs from becoming mushy.
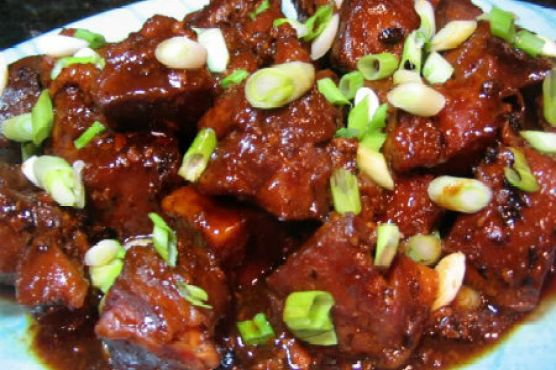
  5. Once cooked, gently remove the ribs from the crock-pot and place them on a serving platter.
  6. Garnish with freshly chopped scallions before serving.
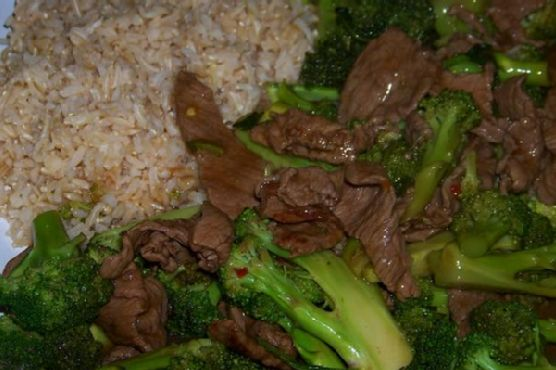
  7. Enjoy alongside steamed rice and snow peas for a complete meal.

Tips

For the best results, ensure that the ribs are submerged in the sauce as much as possible. This will ensure even cooking and flavor absorption. If your crock-pot has a hot spot, you may want to rotate the ribs halfway through the cooking process.

Variations & Substitutions

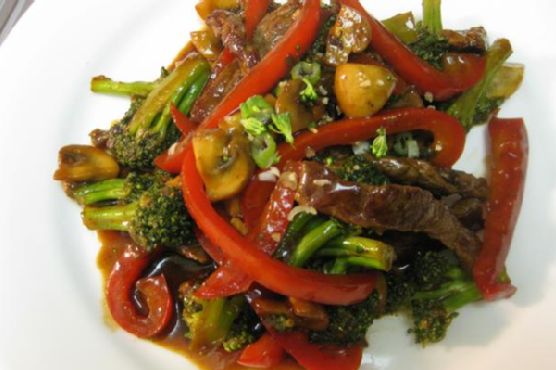
If you prefer a spicier kick, consider adding a teaspoon of chili garlic sauce or a few dashes of hot sauce to the mix. You can also substitute the pork ribs with chicken thighs or beef short ribs if desired. For a sweeter glaze, increase the amount of honey or add a tablespoon of brown sugar.

Storage

Store any leftovers in an airtight container in the refrigerator for up to 3 days. This dish can also be frozen for up to 2 months. To reheat, thaw in the fridge overnight and warm up in a saucepan over low heat until heated through.

FAQ

Can I use fresh black beans instead of jarred black bean garlic sauce?

While fresh black beans are nutritious, the jarred black bean garlic sauce provides a unique fermented flavor that is essential to this dish. For best results, I recommend using the jarred version.

How can I tell if the ribs are done?

The ribs should be tender and easily pull apart with a fork. If they’re still tough, they need more cooking time. However, be careful not to exceed the 6-hour mark to avoid mushiness.

Nutrition

This dish is a good source of protein and rich in flavors thanks to the garlic and ginger. It’s important to note that using low sodium soy sauce helps keep the sodium levels in check, making it a healthier option compared to traditional soy sauce.

Conclusion

There’s nothing quite like the comfort of a home-cooked meal that requires minimal effort yet delivers maximum flavor. This Crock-Pot Asian-Style Country Ribs with Black Bean Garlic Sauce is a testament to that. Not only is it a tribute to cherished family traditions, but it’s also a wonderful recipe to start new ones. I hope this dish brings as much joy and satisfaction to your table as it has to mine. Happy cooking!

Related update: Crock-Pot: Asian-Style Country Ribs with Black Bean Garlic Sauce

Related update: Tasty Easy Meatloaf

Korean Sweet n Sour Chicken | Made by Meaghan Moineau

Korean Sweet n Sour Chicken

Intro

There’s something about the combination of sweet and sour flavors that transports me back to my childhood. I remember the first time I tasted this delightful Korean Sweet n Sour Chicken; it was during a family gathering. My grandmother, who was an exceptional cook, had prepared this dish with so much love. As the aroma filled the house, we all gathered around the table, our mouths watering in anticipation. That first bite was a revelation — the perfect balance of crispy chicken, tangy sauce, and fresh vegetables. Today, I am thrilled to share this cherished recipe with you, hoping it becomes a favorite in your home as well.

Why You’ll Love It

This Korean Sweet n Sour Chicken recipe is not only delicious but also easy to make. It’s a wonderful fusion of flavors that takes your taste buds on a delightful journey. The crispy chicken pairs perfectly with the sweet and tangy sauce, and the colorful vegetables add a burst of freshness and nutrition. Whether you’re cooking for your family or hosting a dinner party, this dish is sure to impress.

Ingredients

  • 2 boneless chicken breasts
  • 2 tablespoons soy sauce
  • 1 cup flour
  • 1/2 cup cornstarch
  • 1 egg, beaten
  • 1 cup water (divided)
  • Vegetable oil for frying
  • 1 onion
  • 1 cup carrot slices
  • 1 cup edamame
  • 1/2 cup cider vinegar
  • 1/2 cup pineapple juice
  • 3 tablespoons sugar
  • 1/4 cup mixed corn starch and water

Instructions

  1. Cut the chicken into thin strips, about 1 or 2-inch pieces. Add soy sauce to the chicken for a short marination; mix well and set aside.
  2. Cut the vegetables into large bite-sized pieces. Set aside until the sauce is ready and thickened.
  3. Make the batter by mixing the flour, cornstarch, water, and beaten egg. Add more flour until a thick consistency is reached.
  4. Dip the marinated chicken strips into the batter.
  5. Bring vegetable oil to medium-high heat. Deep fry each of the strips for about 3 to 4 minutes per batch or until browned and cooked through.
  6. When finished, place on a paper towel-lined dish to remove excess oil. For extra crispiness, optionally re-fry the chicken strips for a second time.
  7. To make the sauce, bring 1 cup of water, 3 tablespoons of vinegar, 3 tablespoons of sugar, and 2 tablespoons of soy sauce to a rapid boil in a saucepan.
  8. Add the mixture of cornstarch and water to the saucepan. Add desired vegetables and let simmer for about 5 minutes or until it thickens.
  9. On a large plate, add the fried chicken strips, then pour over the sauce/vegetable mixture and serve while warm.

Tips

  • For best results, ensure the oil is at the right temperature before frying. Too low, and the chicken will absorb too much oil; too high, and it will burn.
  • Feel free to adjust the sweetness or sourness of the sauce according to your taste preferences.
  • Use paper towels to drain excess oil from the fried chicken, ensuring it stays crispy.

Variations & Substitutions

If you’re looking to switch things up, here are some variations and substitutions you can try:

  • Protein Swap: Substitute chicken with tofu or shrimp for a different protein option.
  • Vegetable Variety: Add bell peppers, snow peas, or broccoli for additional flavor and nutrients.
  • Gluten-Free Option: Use a gluten-free flour blend instead of regular flour for a gluten-free version.

Storage

Store any leftovers in an airtight container in the refrigerator for up to 3 days. To reheat, place the chicken and sauce in a skillet and warm over low heat until heated through. Alternatively, use a microwave, but be mindful that the chicken may not remain as crispy.

FAQ

Can I prepare this dish in advance?

Yes, you can prepare the sauce and marinate the chicken in advance. Store them separately in the refrigerator for up to 24 hours. When you’re ready to serve, fry the chicken and heat the sauce with the vegetables.

Is there a way to make this dish healthier?

To make this dish healthier, consider air frying the chicken instead of deep frying to reduce oil content. You can also use brown rice flour for the batter and serve with a side of steamed brown rice for added fiber.

Nutrition

While specific nutritional values can vary, this dish provides a good source of protein from the chicken and edamame. The vegetables offer dietary fiber, and the sauce, when used in moderation, can fit into a balanced diet. If you have dietary concerns, consider adjusting the sugar and oil quantities.

Conclusion

There you have it, a delightful and nostalgic Korean Sweet n Sour Chicken recipe that is bound to become a staple in your kitchen. Whether you’re making it for a special family gathering or a casual weeknight dinner, this dish is sure to bring smiles and satisfy cravings. Enjoy the harmonious blend of flavors and the joy of sharing a meal with loved ones. Happy cooking!

Related update: Korean Sweet n Sour Chicken

Related update: North Carolina-Style BBQ Pulled Pork

Chinese Potstickers | Made by Meaghan Moineau

Delicious Chinese Potstickers: A Culinary Adventure

Intro

Growing up, Chinese potstickers were a staple in my household. I remember the comforting aroma wafting through the kitchen as my grandmother expertly folded each dumpling with swift, practiced motions. We would gather around the kitchen table, sharing stories and laughter as we eagerly awaited the moment we could dig into these delectable treats. There’s something about these crispy, juicy dumplings that instantly transports me back to those warm family gatherings. Today, I’m excited to share this cherished recipe with you so you can create your own memories around the table with these scrumptious Chinese potstickers.

Why You’ll Love It

This Chinese potsticker recipe is a delightful blend of flavors and textures that will satisfy your cravings for a savory, mouthwatering treat. They’re not only delicious but also fun to make, especially if you involve family or friends in the dumpling-folding process. The fragrant filling, coupled with the crispiness of the wrapper, makes them an irresistible dish that you’ll want to make again and again. Plus, they’re perfect for serving at parties, family dinners, or simply as a comforting snack.

Ingredients

  • 200g lean ground pork (or ground chicken)
  • 100g canned water chestnuts (or spinach/cabbage)
  • 1 teaspoon sea salt
  • 1 teaspoon fine sugar
  • 1/2 teaspoon ground black pepper
  • 2 teaspoons light soy sauce
  • 2 teaspoons sesame oil
  • 1 tablespoon Shaoxing Huatiao wine
  • 2 to 3 tablespoons finely chopped scallions or spring onions
  • Dumpling wrappers
  • Plain flour, for dusting
  • 2 to 3 tablespoons vegetable oil
  • 1/3 cup water

Instructions

  1. Place 200g of ground pork in a large mixing bowl. If preferred, pork may be substituted with ground chicken.
  2. Add 1 teaspoon of sea salt, 1 teaspoon of fine sugar, 1/2 teaspoon of ground black pepper, 2 teaspoons of light soy sauce, 2 teaspoons of sesame oil, and 1 tablespoon of Shaoxing Huatiao wine.
  3. Place 100g of canned water chestnuts in a chopper/blender and chop them into small pieces. Add the chopped water chestnuts to the pork mixture. If preferred, use spinach or cabbage in place of water chestnuts.
  4. Add 2 to 3 tablespoons of finely chopped scallions or spring onions to the pork mixture. Combine all the filling ingredients well.
  5. Thaw the dumpling wrappers if they are frozen and keep them well covered until ready to use. Dust a dish and the table generously with flour.
  6. Fill each dumpling wrapper with about 1.5 teaspoons of the prepared pork filling. Prepare a bowl of water for sealing the wrappers.
  7. Dip a finger into the water and lightly wet the rim of each dumpling wrapper. Bring the wrapper together till the opposite ends meet, then gently push the filling into the wrapper and pinch the top tip to seal it.
  8. From the center, fold a pleat on one side and bring it to the other side of the dumpling. Repeat to create two more pleats, ensuring each side has three pleats. Repeat on the other end of the dumpling.
  9. Place the prepared dumplings in a well-floured dish, ensuring they do not touch each other. Set aside or freeze until ready to cook.
  10. To cook, add 2 to 3 tablespoons of vegetable oil to a very hot frying pan. Cook potstickers in batches, ensuring the flat surfaces face down.
  11. Pan fry until the bottoms are golden brown, then add 1/3 cup of water to the pan. Cover immediately and steam for 4 to 5 minutes.
  12. Once the water evaporates, remove the cover and let the dumplings sit in the hot pan for another minute to crisp up the base.
  13. Gently transfer the potstickers to a plate and serve immediately with a vinegar dip made with balsamic or black Chinese vinegar and thinly sliced ginger. Soy sauce, chili oil, or sesame oil can also be added to the dipping sauce.

Tips

When making potstickers, it’s important to ensure all the edges are sealed tightly to prevent the filling from spilling out. If you’re new to pleating dumplings, practice makes perfect! Don’t worry if your first few attempts aren’t perfect—each potsticker will still taste delicious. Additionally, make sure to use a non-stick pan to ensure the dumplings don’t stick during cooking. And remember, patience is key when frying and steaming to achieve that perfect crispy bottom.

Variations & Substitutions

This potsticker recipe is highly versatile and can be adapted to suit your tastes. You can swap the pork for ground chicken, turkey, or even shrimp for a different protein profile. Vegetarians can enjoy these dumplings by substituting the meat with finely chopped mushrooms or tofu. Feel free to experiment with different vegetables like finely chopped carrots or bell peppers for added color and texture in the filling. Additionally, you can spice things up by adding a pinch of chili flakes or a few drops of chili oil to the filling for a hint of heat.

Storage

Uncooked potstickers can be stored in the freezer for future enjoyment. Simply place them on a baking sheet in a single layer, making sure they don’t touch each other, and freeze until solid. Once frozen, transfer them to a zip-top bag or airtight container for long-term storage. Cooked potstickers can be refrigerated in an airtight container for up to three days. To reheat, simply pan fry them again until heated through.

FAQ

Can I make potstickers in advance?

Yes! Potstickers can be made in advance and stored in the freezer. Just follow the instructions up to the cooking step, then freeze the uncooked dumplings. When you’re ready to enjoy them, simply cook them directly from frozen, adding a couple of extra minutes to the steaming time.

What dipping sauce pairs well with potstickers?

Potstickers are traditionally enjoyed with a simple vinegar dipping sauce made from balsamic or black Chinese vinegar and thinly sliced ginger. You can also add soy sauce, chili oil, or sesame oil for extra flavor. Feel free to experiment with different combinations to find your perfect dipping sauce!

Can I use homemade dumpling wrappers?

Absolutely! Homemade dumpling wrappers can add a personal touch to your potstickers. If you have the time and inclination, making your own wrappers can be a fun and rewarding experience. Just make sure to roll them out thinly and evenly for best results.

Nutrition

While nutritional content can vary, a typical serving of Chinese potstickers (3-4 dumplings) may contain around 200 calories, with a balance of protein, carbohydrates, and fats. They’re a great source of protein and can be part of a balanced diet when enjoyed in moderation.

Conclusion

Chinese potstickers are more than just a delightful treat; they’re a gateway to cherished memories and shared experiences around the table. Making these dumplings at home allows you to bring a taste of traditional Chinese cuisine into your own kitchen. Whether you’re a seasoned home cook or a beginner looking to try something new, this recipe offers a wonderful opportunity to explore your culinary skills. So gather your ingredients, call your loved ones, and embark on a delicious adventure with these homemade Chinese potstickers. Enjoy the flavors, the process, and most importantly, the company as you savor every bite!

Related update: Chinese Potstickers

Related update: Korean Sweet n Sour Chicken

Asian Lettuce Wraps | Made by Meaghan Moineau

Asian Lettuce Wraps

Intro

There’s something magical about gathering around the table with family and friends, sharing a meal that’s not only delicious but also fun to eat. Growing up, I remember my grandmother’s kitchen filled with the tantalizing aroma of her homemade dishes. She had a knack for transforming simple ingredients into extraordinary meals. One of my fondest memories is of her lettuce wraps, which she prepared with love and care. Inspired by her culinary magic, I’ve created my own version of Asian Lettuce Wraps, a dish that brings back warm memories and is sure to create new ones for your family.

Why You’ll Love It

These Asian Lettuce Wraps are not just a meal; they’re an experience. Here’s why you’ll fall in love with them:

  • Healthy and Nutritious: Packed with lean protein and fresh veggies, it’s a guilt-free indulgence.
  • Quick and Easy: Perfect for busy weeknights, this recipe comes together in less than 30 minutes.
  • Customizable: Easily adapt the ingredients to your taste or dietary needs.
  • Perfect for Sharing: Ideal for family dinners, parties, or any gathering where good food and company are desired.

Ingredients

  • 1 pound extra-lean ground turkey
  • 2 cloves garlic, minced
  • 1/4 cup chicken stock
  • 2 tablespoons coconut aminos
  • 1 tablespoon thai fish sauce
  • 2 tablespoons orange marmalade
  • 1 tablespoon fresh lime juice
  • 1 teaspoon sesame oil
  • 1/2 teaspoon ground ginger
  • 1 tablespoon tapioca starch
  • 1 cup broccoli slaw
  • Large green lettuce leaves

Instructions

  1. Place the ground turkey and minced garlic in a skillet over medium heat and begin to brown, breaking up the meat as you cook. Use a hand-held potato masher to help break up the meat more evenly.
  2. While the turkey is cooking, prepare the sauce. In a bowl or using a magic bullet, combine the chicken stock, coconut aminos, fish sauce, orange marmalade, lime juice, sesame oil, ground ginger, and tapioca starch. Whisk or process until well blended.
  3. Add the sauce to the ground turkey and continue cooking until the turkey is fully cooked and the sauce has thickened, about 5-7 minutes.
  4. Serve the turkey mixture with broccoli slaw, wrapped in large green lettuce leaves. Enjoy!

Tips

To ensure your lettuce wraps are the best they can be, consider these helpful tips:

  • Use Fresh Ingredients: Fresh garlic and lime juice make a noticeable difference in flavor.
  • Choose the Right Lettuce: Opt for large, sturdy lettuce leaves like Romaine or Butter lettuce for easy wrapping.
  • Balance the Flavors: Taste the sauce before adding it to the meat and adjust the ingredients to your liking.

Variations & Substitutions

Feel free to get creative with your lettuce wraps! Here are some ideas to make them your own:

  • Protein Swap: Substitute ground turkey with ground chicken or even tofu for a vegetarian version.
  • Spice It Up: Add some sriracha or red pepper flakes for a spicy kick.
  • Different Veggies: Add diced bell peppers or shredded carrots for extra crunch and color.

Storage

To store any leftovers, keep the turkey filling and lettuce leaves separate. Store the turkey mixture in an airtight container in the refrigerator for up to 3 days. When ready to eat, simply reheat the filling on the stove or in the microwave, and then wrap it in fresh lettuce leaves.

FAQ

Can I make these wraps ahead of time?

Yes, you can prepare the turkey filling in advance and store it in the refrigerator until you’re ready to serve. Just reheat the filling and wrap it in fresh lettuce leaves when you’re ready to eat.

What can I use instead of tapioca starch?

If you don’t have tapioca starch on hand, you can substitute it with cornstarch or arrowroot powder. Both will work well to thicken the sauce.

Is there a vegetarian version of this recipe?

Absolutely! You can make a vegetarian version by substituting the ground turkey with crumbled tofu or tempeh. Just adjust the cooking time as needed.

Nutrition

These Asian Lettuce Wraps are not only delicious but also nutritious. With lean protein and fresh vegetables, they offer a balanced meal that’s low in calories and high in flavor. Each serving provides essential vitamins and minerals, making it a healthy choice for any meal.

Conclusion

Whether you’re looking for a quick weeknight dinner, a healthy lunch option, or a dish to impress your guests, these Asian Lettuce Wraps are a perfect choice. They’re easy to make, customizable, and packed with flavor. Plus, they bring the joy of shared meals and the nostalgia of cherished family recipes to your table. Enjoy the process of creating and savoring these wraps, and make them a part of your family traditions. Happy cooking!

Related update: Asian Lettuce Wraps

Related update: Barbecued Baby Back Pork Ribs and Bush's Grillin' Beans

Beef Lo Mein Noodles | Made by Meaghan Moineau

Beef Lo Mein Noodles

Intro

There’s something incredibly comforting about a warm bowl of noodles, and for me, Beef Lo Mein Noodles is a dish that’s steeped in nostalgia. I remember the first time I tasted this delightful dish. It was at a small family gathering, hosted by my grandmother. The aroma of garlic and ginger filled the air as she expertly tossed the noodles in her old, well-seasoned wok. Her kitchen was always a magical place, a haven where flavors came alive and stories were shared over food. Today, I want to share this special recipe with you, hoping it brings to your table the same warmth and joy it has brought to mine.

Why You’ll Love It

This Beef Lo Mein Noodles recipe is a perfect blend of savory flavors and satisfying textures. The dish is quick and easy to prepare, making it ideal for a weeknight dinner or a spontaneous gathering. The tender beef, flavorful sauce, and perfectly cooked noodles create a harmony that will leave you craving more. It’s a versatile dish that can be adapted to suit your taste preferences, and its hearty nature makes it a crowd-pleaser for both young and old alike.

Ingredients

  • Dried soba noodles
  • Lean flank steak
  • Oyster sauce
  • Chicken stock
  • Soy sauce
  • Sesame oil
  • Vegetable oil
  • Garlic
  • Ginger
  • Green onions

Instructions

  1. Drop noodles into a large quantity of boiling water and cook for 3-5 minutes, until barely tender to the bite. Drain, rinse with cold water, and reserve.
  2. In a bowl, combine the beef and oyster sauce; stir to coat and let stand for 10 minutes.
  3. In another bowl, combine the chicken broth, soy sauce, and sesame oil. Set aside.
  4. Heat a wok over high heat. When hot, add the vegetable oil, swirling to coat the sides.
  5. Add the garlic, ginger, and green onions and cook, stirring until fragrant, about 30 seconds.
  6. Add the beef and cook, stirring constantly, about 1 minute.
  7. Add the sauce and noodles. Gently toss until heated through and sauce has thickened. Serve immediately.

Tips

For the best results, use fresh ingredients and prepare everything ahead of time since the actual cooking process is quick. Make sure your wok is very hot before you start cooking to ensure a good sear on the beef. If you want to add more flavor, marinate the beef longer for deeper infusion. Lastly, always taste and adjust the seasoning before serving.

Variations & Substitutions

This recipe is highly adaptable. You can substitute soba noodles with any other type of noodles you prefer, such as egg noodles or udon. If you don’t have flank steak, you can use chicken or tofu for a different protein option. For a vegetarian version, replace the oyster sauce with a vegetarian oyster sauce or mushroom soy sauce. Feel free to add more vegetables like bell peppers, mushrooms, or snap peas to increase the nutritional value and add more texture.

Storage

Beef Lo Mein Noodles can be stored in an airtight container in the refrigerator for up to 3 days. To reheat, you can use a microwave or stir-fry in a pan. If reheating on the stove, add a splash of water or broth to prevent the noodles from drying out.

FAQ

Can I make this dish ahead of time?

Yes, you can prepare the components ahead of time. Cook the noodles and marinate the beef in advance, but it’s best to stir-fry everything just before serving to maintain the texture and flavor.

Is this dish spicy?

No, this Beef Lo Mein Noodles recipe is not inherently spicy. However, you can add a bit of heat by including some red pepper flakes or a dash of hot sauce if you like it spicy.

What can I serve with Beef Lo Mein Noodles?

This dish pairs well with a simple side salad or steamed vegetables. You could also serve it alongside dumplings or spring rolls for a more substantial meal.

Nutrition

This dish is a good source of protein and carbohydrates. The addition of green onions and ginger provides vitamins and minerals. To reduce the sodium content, consider using low-sodium soy sauce and chicken broth.

Conclusion

Beef Lo Mein Noodles is a classic dish that brings together comfort and flavor in every bite. It’s a recipe cherished for its simplicity and the joy it brings to the dining table. Whether you’re making it for a special occasion or a weekday meal, I hope this dish becomes a staple in your home, creating memories and stories of its own. Enjoy!

Related update: Beef Lo Mein Noodles

Related update: Creamy Vegan Coleslaw Dressed with Avocado

Related update: Classic French Onion Soup

Chili-Garlic Stir Fry | Made by Meaghan Moineau

Chili-Garlic Stir Fry

Intro

There’s something magical about the sizzling sound of a stir fry in the making. It takes me back to my childhood kitchen, where my grandmother would prepare her famous stir fries with a touch of chili and a hint of garlic. The aroma would fill the air, drawing us in with its enticing scent. This Chili-Garlic Stir Fry recipe is a homage to those cherished memories, blending the comfort of home-cooked meals with the vibrant flavors of Asian cuisine. It’s quick, full of color, and perfect for a busy weeknight dinner or a leisurely weekend meal.

Why You’ll Love It

This Chili-Garlic Stir Fry is not only delicious but also incredibly versatile and easy to make. Here are a few reasons why you’ll fall in love with it:

  • Quick and Easy: With just a few simple steps, you can have a flavorful meal ready in under 30 minutes.
  • Healthy and Nutritious: Packed with lean protein and fresh vegetables, this stir fry is a nutritious choice for any meal.
  • Customizable: You can easily switch up the ingredients based on what’s in your fridge or your personal preferences.
  • Deliciously Spicy: The hint of chili adds just the right amount of heat to keep things exciting.

Ingredients

  • 3 teaspoons sesame oil, divided
  • 1 pound skinless boneless chicken breast, sliced thin
  • 1 bunch bok choy, stalks separated from leaves
  • 1 cup snow peas
  • 1 cup carrots, sliced
  • 1 yellow bell pepper, sliced
  • 1 orange pepper, sliced
  • 3 green onions, chopped
  • 1 cup low sodium chicken broth
  • 2 tablespoons cooking sherry
  • 1 tablespoon cornstarch
  • 1 tablespoon sriracha, or to taste
  • 2 cloves garlic, minced

Instructions

  1. In a wok or large skillet, heat 1 teaspoon sesame oil over medium-high heat. Add chicken and sauté until cooked through, about 5-7 minutes. Remove from pan, set aside, and cover to keep warm.
  2. In the same pan, heat another teaspoon of sesame oil over medium-high heat. Add bok choy stalks, carrots, and snow peas. Sauté until just tender, about 3-5 minutes. Remove from pan, set aside, and cover.
  3. In a medium bowl, whisk together chicken broth, cooking sherry, cornstarch, and sriracha. Set aside.
  4. Heat the remaining teaspoon of sesame oil in the pan over medium-high heat. Add minced garlic and sauté until fragrant, about 30 seconds to 1 minute.
  5. Add the prepared sauce to the pan and bring to a boil. Stir continuously until the sauce thickens, about 1-2 minutes.
  6. Return the chicken and vegetables to the pan. Add the bok choy leaves and green onions. Stir until everything is well coated with the sauce and heated through, about 2-3 minutes.
  7. Serve hot, garnished with additional green onions if desired.

Tips

  • For best results, make sure to slice the chicken thinly for quick and even cooking.
  • Prep all your ingredients before starting to cook as the stir fry process moves quickly.
  • Adjust the sriracha to suit your spice preference. If you prefer less heat, start with half the amount and add more to taste.

Variations & Substitutions

This stir fry is incredibly versatile, and you can easily make substitutions based on your dietary needs or what you have on hand:

  • Protein: Swap the chicken for shrimp, tofu, or beef for a different flavor profile.
  • Vegetables: Feel free to add or substitute other vegetables like broccoli, bell peppers, or snap peas.
  • Sauce: You can replace the sriracha with another hot sauce or omit it altogether if you prefer a milder dish.

Storage

Store any leftovers in an airtight container in the refrigerator for up to 3 days. Reheat gently on the stovetop or in the microwave, adding a splash of water or chicken broth to loosen the sauce if needed.

FAQ

Can I make this stir fry ahead of time?

Yes, you can prepare the vegetables and sauce ahead of time. Store them separately in the refrigerator for up to two days. Cook the chicken and vegetables just before serving for the freshest taste.

What can I serve with this stir fry?

This stir fry pairs perfectly with steamed rice, quinoa, or noodles. You can also serve it with a simple side salad for a complete meal.

Nutrition

This stir fry is a healthy option, packed with protein, fiber, and vitamins. It’s low in calories and can be adjusted to fit low-carb or gluten-free diets by substituting ingredients as needed.

Conclusion

This Chili-Garlic Stir Fry is a delightful dish that brings together the warmth of nostalgic flavors with the freshness of vibrant vegetables. It’s a dish that celebrates simplicity and versatility, making it a staple in any kitchen. Whether you’re cooking for yourself, your family, or friends, this recipe is sure to impress with its bold flavors and beautiful presentation. I hope you enjoy making and sharing this dish as much as I do!

Related update: Easy Chicken Cordon Bleu

Thai Shrimp | Made by Meaghan Moineau

Thai Shrimp: A Flavorful Journey to the Heart of Thailand

Intro

There’s something truly magical about the aroma of Thai cuisine wafting through your kitchen. It reminds me of the first time I visited Thailand. I was wandering through the bustling streets of Bangkok when I stumbled upon a tiny street food stall. The vendor, with a warm smile, served me a dish that would forever change my culinary journey: Thai Shrimp. The combination of fresh basil, spicy chilies, and succulent shrimp immediately captivated my senses. This dish not only brings back fond memories but also allows me to share a piece of Thailand with my loved ones every time I make it. Join me as we recreate this vibrant and flavorful dish in the comfort of your own kitchen.

Why You’ll Love It

This Thai Shrimp recipe is a delightful symphony of flavors and textures. The fragrant basil leaves and spicy chilies create a perfect balance with the savory notes of soy sauce and fish sauce. The shrimp are cooked to perfection, tender yet firm, absorbing the rich broth that envelops them. What makes this dish stand out is its simplicity and quick preparation, making it a perfect choice for a weekday dinner or a special weekend treat.

Ingredients

  • Basil leaves
  • Chicken stock
  • Cooked rice
  • Fish sauce
  • Green onions
  • Peanut oil
  • Red green chilies
  • Cooked shrimp
  • Soy sauce
  • Sugar

Instructions

  1. Peel and devein the shrimp, ensuring they’re clean and ready for cooking.
  2. Wash and dry the basil leaves, then steam them until they are wilted and fragrant.
  3. Mince the garlic cloves and thinly slice the red green chilies, ensuring they are seeded for a milder heat.
  4. Mince the white part of the green onions and cut the green part into 1-inch pieces.
  5. Heat a wok over high heat until it’s hot, then swirl in the peanut oil, heating it almost to smoking point.
  6. Add the minced garlic, sliced chilies, and the white part of the onions to the wok, cooking for 10-15 seconds until aromatic.
  7. Add the shrimp to the wok and stir-fry for about 20 seconds or until they start to change color.
  8. Pour in the fish sauce, soy sauce, sugar, and chicken stock, bringing the mixture to a boil.
  9. Stir in the green parts of the onions and the basil leaves, cooking for another 20 seconds until the basil wilts and the shrimp are firm and pink.
  10. Serve the dish over hot cooked rice, ensuring some of the delicious soup is poured over the rice.

Tips

To ensure the best flavor, use fresh basil leaves and high-quality shrimp. Be cautious with the chilies if you prefer a milder dish, and consider wearing gloves when handling them to avoid skin irritation. If you’re short on time, prep the ingredients ahead of time and store them in the refrigerator until you’re ready to cook.

Variations & Substitutions

If you want to switch things up, consider these variations:

  • Swap the shrimp for chicken or tofu for a different protein source.
  • Use coconut milk instead of chicken stock for a creamier, richer sauce.
  • Add vegetables like bell peppers or snap peas for extra crunch and nutrition.
  • Substitute soy sauce with tamari for a gluten-free option.

Storage

Leftover Thai Shrimp can be stored in an airtight container in the refrigerator for up to 3 days. To reheat, gently warm it in a saucepan over medium heat, adding a splash of chicken stock or water if needed to maintain the soupy consistency. Avoid microwaving to prevent the shrimp from becoming rubbery.

FAQ

Can I make this dish ahead of time?

Yes, you can prepare the ingredients ahead of time and store them in the fridge. However, it’s best to cook the shrimp just before serving to maintain their texture and flavor.

How can I adjust the spiciness of the dish?

To adjust the spiciness, simply reduce the number of chilies or remove the seeds for a milder flavor. You can also add more chilies if you prefer a spicier kick.

What can I use if I don’t have a wok?

If you don’t have a wok, a large skillet or frying pan will work just fine. Ensure it’s hot enough to quickly stir-fry the ingredients, mimicking the wok’s high-heat cooking.

Nutrition

This dish is not only delicious but also nutritious. Shrimp is a great source of protein and low in calories, while basil and chilies provide vitamins and antioxidants. Served with rice, it offers a balanced meal with carbohydrates and essential nutrients.

Conclusion

Cooking Thai Shrimp at home is a wonderful way to bring the exotic flavors of Thailand into your kitchen. It’s a dish that resonates with nostalgia for me, and I hope it becomes a favorite in your household as well. Whether you’re a seasoned cook or a beginner, this recipe is approachable and rewarding. Enjoy the vibrant flavors and the joy of sharing a meal that’s as heartwarming as it is delicious.

Related update: Thai Shrimp

Chicken Lo Mein | Made by Meaghan Moineau

Chicken Lo Mein: A Delightful Homemade Classic

Intro

Growing up, one of my fondest memories is gathering around the kitchen table with my family every Friday night for our traditional takeout meal. Among the array of dishes, chicken lo mein was always the first to disappear. The way the flavors melded together in a harmonious blend of savory and slightly sweet was pure magic. Eventually, I set out to recreate this beloved dish at home, giving it my own twist while keeping it true to the flavors I cherished. Today, I’m excited to share with you this recipe for Chicken Lo Mein, a delightful dish that has become a staple in my home, brimming with vibrant vegetables and succulent chicken. Let’s dive into how you can bring this classic into your own kitchen.

Why You’ll Love It

This Chicken Lo Mein recipe is a perfect balance of taste and simplicity, making it an ideal choice for both busy weeknights and weekend feasts. Here are some reasons you’ll fall in love with this dish:

  • Quick and Easy: From start to finish, this dish comes together in just about 20 minutes, making it a lifesaver on hectic days.
  • Flavorful: The aromatic combination of ginger and garlic sets the stage for a deliciously savory dish that’s complemented by the gentle sweetness of sautéed vegetables.
  • Customizable: This recipe is highly adaptable to whatever you have on hand or prefer, making it perfect for using up leftover vegetables or trying new ingredients.
  • Healthier Takeout: With low sodium options and fresh ingredients, you can enjoy a meal that’s not only tasty but also better for you.

Ingredients

  • 1 tablespoon peanut oil
  • 1 tablespoon fresh ginger, minced
  • 2 cloves garlic, minced
  • 1 pound skinless boneless chicken breast, thinly sliced
  • 1 large carrot, julienned
  • 1 cup mushrooms, sliced
  • 1 cup bok choy, chopped
  • 1 cup bean sprouts
  • 4 scallions, sliced
  • 1 cup low sodium chicken broth
  • 2 tablespoons low sodium soy sauce
  • 8 ounces cooked spaghetti

Instructions

  1. In a large nonstick skillet, heat the peanut oil over medium heat.
  2. Add the minced ginger and garlic, cooking for about 1 minute until fragrant.
  3. Increase the heat to medium-high and add the sliced chicken and julienned carrot to the skillet. Cook, stirring occasionally, until the chicken is lightly browned, about 2-3 minutes.
  4. Add the sliced mushrooms, chopped bok choy, bean sprouts, and scallions to the skillet. Cook, stirring constantly, until the carrot is tender-crisp and the vegetables are just beginning to soften, about 3 minutes.
  5. Pour in the chicken broth and soy sauce, stirring well to combine with the chicken and vegetables.
  6. Finally, stir in the cooked spaghetti, tossing everything together to ensure the noodles are well-coated and heated through, about 1 minute.
  7. Serve immediately, garnished with extra scallions if desired.

Tips

  • Prep in Advance: Have all your ingredients chopped and ready to go before you start cooking. This will make the process seamless and stress-free.
  • Cooking Noodles: Cook the spaghetti just until al dente, as it will continue to cook a bit when you toss it with the hot ingredients.
  • High Heat: Stir-frying typically requires high heat. Make sure your pan is hot enough to quickly sear the chicken and vegetables.

Variations & Substitutions

This Chicken Lo Mein is wonderfully flexible. Here are some ideas to make it your own:

  • Vegetable Swaps: Feel free to add or substitute with bell peppers, snap peas, or broccoli for more variety.
  • Protein Options: You can replace the chicken with shrimp, beef, or tofu for a different protein source.
  • Noodle Alternatives: Try using rice noodles, udon, or whole wheat spaghetti for a different texture or dietary preference.

Storage

Leftover Chicken Lo Mein can be stored in an airtight container in the refrigerator for up to 3 days. To reheat, simply warm it in a skillet over medium heat, adding a splash of broth or water to loosen the noodles if necessary. Avoid microwaving as it can make the chicken rubbery and the noodles mushy.

FAQ

Can I make this dish vegetarian?

Absolutely! To make a vegetarian version, simply omit the chicken and replace the chicken broth with vegetable broth. You can add more vegetables or use tofu as a protein substitute.

What can I serve with Chicken Lo Mein?

Chicken Lo Mein is a complete meal on its own, but you can complement it with a side of egg rolls, dumplings, or a simple Asian cucumber salad for added freshness.

Is it okay to use pre-cooked chicken?

Yes, you can use pre-cooked chicken if you have leftovers or want to save time. Simply add the cooked chicken towards the end of the cooking process when you add the noodles to avoid overcooking.

Nutrition

While nutritional values can vary, a typical serving of Chicken Lo Mein is a good source of protein and provides essential vitamins and minerals from the vegetables. Opting for low sodium broth and soy sauce helps keep the sodium content in check, making this a healthier alternative to traditional takeout.

Conclusion

This Chicken Lo Mein recipe is a wonderful way to savor the delicious flavors of a beloved takeout dish while making it at home with wholesome ingredients. It’s quick, easy, and packed with flavor, ensuring it becomes a favorite in your kitchen just as it has in mine. So gather your ingredients, fire up the skillet, and enjoy the comforting taste of homemade Chicken Lo Mein. Whether it’s for a family dinner or a solo meal indulgence, this dish promises satisfaction in every bite.

Related update: Chicken Lo Mein

Related update: Indian Butter Chicken

Japanese Mabo Tofu With Eggplant | Made by Meaghan Moineau

Japanese Mabo Tofu With Eggplant

Intro

There’s something deeply comforting about a dish that brings back memories of family gatherings and laughter-filled kitchens. For me, Japanese Mabo Tofu with Eggplant is one such dish. I remember my grandmother preparing this delightful recipe when we’d visit her during summer vacations. The aroma of sizzling garlic and ginger, the vibrant colors of the eggplant and tofu, and the rich umami flavors of the sauce would fill her cozy kitchen, creating an atmosphere of warmth and love. This dish is not just food; it’s a cherished memory that I am thrilled to share with you now.

Why You’ll Love It

This Japanese Mabo Tofu with Eggplant is the perfect blend of savory, spicy, and sweet flavors. It’s a quick and easy meal that is both satisfying and nourishing, ideal for busy weeknights. The combination of soft tofu, tender eggplant, and flavorful ground beef makes it a delightful dish that will please even the pickiest eaters. Plus, it’s a wonderful way to introduce Japanese cuisine to your family and friends.

Ingredients

  • Japanese rice (such as Nishiki rice)
  • 1 eggplant
  • 1 onion
  • Fresh ginger
  • 2 garlic cloves
  • Ground beef
  • Spring onions
  • Oil
  • Sesame oil
  • Soy sauce
  • Cooking sake
  • Sugar
  • Water
  • Red to-ban-jan

Instructions

  1. Cook the rice according to the directions on the package. I personally prefer using Nishiki rice for its texture and flavor.
  2. Slice the eggplant lengthwise into four strips, then slice horizontally into quarters. Set aside.
  3. In a pan over medium/high heat, add 2 tablespoons of oil, minced garlic, grated ginger, chopped onions, and half of the sliced spring onions. Cook for 3 to 4 minutes, until the onions become translucent and fragrant.
  4. Add the ground beef, seasoning it with a pinch of salt and pepper. Cook until the meat is browned and fully cooked through.
  5. Stir in the red to-ban-jan, mixing well to incorporate its flavors with the beef.
  6. Add the sesame oil and eggplant to the pan. Cook for 5 to 7 minutes, or until the eggplant strips are soft and cooked through.
  7. Gently add the tofu, breaking it up delicately while mixing it in with the beef and eggplant.
  8. Pour in the sake, sugar, water, and 4 tablespoons of soy sauce. Stir and cook for a couple more minutes to let the flavors meld together.
  9. Finally, add the remaining 2 tablespoons of soy sauce and the rest of the spring onions. Stir to combine, then turn off the heat.
  10. Serve the Mabo Tofu over the freshly cooked rice and enjoy!

Tips

To enhance the dish’s flavor, consider using high-quality soy sauce and fresh, in-season eggplant. If you prefer a spicier kick, feel free to increase the amount of red to-ban-jan. Remember to handle the tofu gently to keep its texture intact while mixing.

Variations & Substitutions

If you’re looking to make the dish vegetarian, you can substitute the ground beef with mushrooms or plant-based meat alternatives. For a gluten-free version, use gluten-free soy sauce. You can also experiment by adding other vegetables like bell peppers or zucchini for extra nutrition and color.

Storage

Leftover Mabo Tofu can be stored in an airtight container in the refrigerator for up to 3 days. When reheating, add a splash of water to the pan to help restore its saucy consistency. This dish is also suitable for freezing, although the texture of the tofu may change slightly upon thawing.

FAQ

Can I make this dish ahead of time?

Yes, you can prepare the Mabo Tofu ahead of time. It’s a great dish to make in advance as the flavors deepen and improve after sitting. Simply reheat on the stove or in the microwave before serving.

What is red to-ban-jan, and where can I find it?

Red to-ban-jan is a spicy bean paste commonly used in Chinese and Japanese cooking. It adds a rich, spicy flavor to dishes. You can find it in most Asian grocery stores or online.

Can I use silken tofu for this recipe?

While silken tofu can be used, it is more delicate and may break apart more easily. For best results, use firm or extra-firm tofu to maintain its shape during cooking.

Nutrition

This dish is rich in protein from the beef and tofu, and it provides a good source of vitamins and minerals from the eggplant and onions. It’s a well-balanced meal that offers both flavor and nutrition, ideal for satisfying your taste buds and nutritional needs.

Conclusion

Japanese Mabo Tofu with Eggplant is not just a dish; it’s a heartfelt experience brimming with flavors and memories. Whether you’re a seasoned cook or a beginner, this recipe is approachable and rewarding, offering a taste of Japanese home cooking that you and your loved ones will cherish. I hope this dish brings warmth and joy to your table, just as it has to mine over the years. Enjoy every bite!

Related update: Japanese Mabo Tofu With Eggplant

Related update: Linguine with Prawns, Fresh Tomatoes and Spinach

Chili and Garlic Spiced Beef and Broccoli Stir Fry | Made by Meaghan Moineau

Chili and Garlic Spiced Beef and Broccoli Stir Fry

Intro

There’s something magical about the aroma of sizzling beef and vibrant broccoli dancing together in a pan. It takes me back to my childhood kitchen, where my grandmother would whip up the most delicious stir fry dishes. Her secret? A perfect balance of spices and a lot of love. This Chili and Garlic Spiced Beef and Broccoli Stir Fry is a nod to those cherished memories, combining the warmth of nostalgia with the excitement of bold flavors. Whether you’re looking for a quick weeknight dinner or a dish to impress your guests, this recipe is sure to become a favorite in your home too.

Why You’ll Love It

This stir fry is the perfect blend of spicy, savory, and slightly sweet flavors, making it a delightful dish for any palate. It’s quick to prepare, making it an ideal choice for busy evenings. Plus, it’s packed with nutrients, thanks to the broccoli, and offers a satisfying protein boost from the beef. The sauce, with its combination of soy sauce, rice vinegar, and Asian chili sauce, gives the dish a depth of flavor that’s both comforting and exciting. You’ll love how versatile it is, allowing for easy substitutions and variations to suit your tastes and dietary needs.

Ingredients

  • Beef steak, thinly sliced
  • Broccoli florets
  • Coconut oil
  • Low fat chicken broth
  • Cornstarch
  • Soy sauce
  • Rice vinegar
  • Mirin
  • Sesame oil
  • Sugar
  • Asian chili sauce
  • Cooked brown rice

Instructions

  1. In a small bowl, combine the chicken broth, cornstarch, soy sauce, rice vinegar, mirin, sesame oil, sugar, and Asian chili sauce. Stir until well mixed and set aside.
  2. Preheat a non-stick skillet over medium-high heat with 1/2 tablespoon of coconut oil.
  3. Add the beef slices to the skillet and stir fry until the beef is cooked through, about 3 to 4 minutes. Remove the beef from the pan and set aside.
  4. Add the remaining coconut oil to the skillet and sauté the broccoli for 3 to 4 minutes, until it is crisp-tender. Add a splash of chicken broth or water if needed to prevent the pan from drying out.
  5. Return the beef to the pan and pour the prepared sauce over the beef and broccoli.
  6. Stir continuously until the sauce thickens and coats the beef and broccoli, about 4 to 5 minutes.
  7. Serve the stir fry over a bed of cooked brown rice.

Tips

For the best results, ensure that your beef is thinly sliced. This will help it cook quickly and evenly. You can freeze the beef for about 20 minutes before slicing to make it easier to cut thinly. Adjust the level of chili sauce to suit your spice tolerance. If you prefer a milder dish, start with half the amount and adjust to taste. To keep the broccoli vibrant and crisp-tender, avoid overcooking it. A quick sauté is all it needs to maintain its texture and nutrients.

Variations & Substitutions

This stir fry is incredibly versatile. You can substitute the beef with chicken or tofu for a different protein option. Feel free to add other vegetables like bell peppers, carrots, or snap peas for added color and nutrition. If you’re gluten-free, swap the soy sauce for tamari. For a low-carb version, serve the stir fry over cauliflower rice instead of brown rice.

Storage

Store any leftovers in an airtight container in the refrigerator for up to 3 days. To reheat, add a splash of water or broth to the pan and gently warm the stir fry over medium heat until heated through. This will help maintain the sauce’s consistency and the broccoli’s texture.

FAQ

Can I make this stir fry in advance?

Yes, you can prepare the sauce and slice the beef and vegetables a day ahead. Store them separately in the refrigerator until you’re ready to cook. This can save you time on busy nights and make meal preparation a breeze.

What can I serve with this stir fry?

While it’s delicious on its own or with brown rice, you can serve this stir fry alongside a simple cucumber salad or some steamed dumplings for a complete meal. It also pairs well with a hot and sour soup if you’re in the mood for a multi-course dinner.

Nutrition

This dish is a great source of protein and fiber, thanks to the beef and broccoli. While the exact nutritional content will vary based on portion sizes and specific ingredient brands, you can expect a balanced meal that’s rich in essential vitamins and minerals. The use of coconut oil adds a healthy fat component, while the brown rice provides whole grains to keep you feeling full and satisfied.

Conclusion

This Chili and Garlic Spiced Beef and Broccoli Stir Fry is more than just a meal—it’s a warm embrace of flavors that brings comfort and joy to the table. With its perfect blend of spices and textures, it’s sure to become a staple in your culinary repertoire. So, gather your ingredients, channel your inner chef, and let this delightful dish transport you to a world of delicious nostalgia and culinary satisfaction.

Related update: Chili and Garlic Spiced Beef and Broccoli Stir Fry

Related update: Grilled Garlicky-Herbed Shrimp

chilli chicken | Made by Meaghan Moineau

Chilli Chicken: A Spicy Delight to Warm Your Heart

Intro

Growing up, there was always a dish that brought a gleam to my eyes and warmth to my heart: my grandmother’s Chilli Chicken. I remember the tantalizing aroma wafting through her cozy kitchen on chilly evenings, drawing us in like moths to a flame. The sizzle of the chicken hitting the hot pan was music to our ears, and her special blend of spices was the magic that made it all come together. Today, I’m thrilled to share this cherished recipe with you, so you too can bring a touch of spice and nostalgia to your home.

Why You’ll Love It

If you’re a fan of bold flavors and a little heat, this Chilli Chicken recipe is sure to become a favorite in your household. Not only does it pack a punch with its spicy kick, but it’s also incredibly versatile and can be customized to suit your taste preferences. Perfect for a cozy family dinner or a festive gathering, this dish is a surefire crowd-pleaser. Plus, it’s a great way to introduce a bit of culinary adventure into your weeknight meals with minimal fuss.

Ingredients

  • 2 boneless chicken breasts, cut into bite-sized pieces
  • 1 bell pepper / capsicum, sliced
  • 1 onion, sliced
  • 2 green chilies, slit
  • 2 tablespoons corn flour
  • 2 teaspoons red chili powder
  • 1 teaspoon pepper powder
  • 3 tablespoons oil
  • 2 tablespoons soya sauce
  • 2 tablespoons chilli sauce
  • 1 tablespoon vinegar
  • 1 tablespoon sugar
  • 2 cloves garlic, minced
  • Spring onions, chopped, for garnish

Instructions

  1. Find complete instructions on Swasthi’s recipes.

Tips

For the best results, use fresh ingredients wherever possible. Make sure to cut the chicken and vegetables into uniform pieces to ensure even cooking. Don’t overcrowd the pan when frying the chicken, as this will steam rather than sear the meat, resulting in a loss of texture. Lastly, taste as you go—adjust the seasoning and spice levels to suit your palate.

Variations & Substitutions

Feel free to experiment with this recipe by adding your favorite vegetables such as broccoli, carrots, or mushrooms. If you prefer a less spicy version, reduce the amount of chili powder or omit the green chilies. For a gluten-free alternative, use tamari instead of soy sauce. Vegetarian? Swap out the chicken for paneer or tofu for a delightful meat-free version.

Storage

Chilli Chicken can be stored in an airtight container in the refrigerator for up to three days. For longer storage, you can freeze it for up to a month. To reheat, simply thaw overnight in the refrigerator and gently warm in a pan over medium heat, adding a splash of water if necessary to maintain its saucy consistency.

FAQ

Can I make this dish ahead of time?

Absolutely! Chilli Chicken can be prepared ahead of time and stored in the refrigerator. The flavors will meld beautifully, making it even more delicious the next day. Just reheat and serve.

What can I serve with Chilli Chicken?

This dish pairs wonderfully with steamed rice, fried rice, or noodles. You could also serve it with a simple side of stir-fried vegetables for a complete meal.

Is there a way to reduce the spiciness?

If you’re sensitive to heat, you can tone down the spiciness by reducing the amount of chili powder and green chilies. Adding a little more sugar can also help balance the heat.

Nutrition

Chilli Chicken is a protein-rich dish with a moderate amount of carbohydrates and fats. The exact nutritional values will depend on the specific quantities and brands of ingredients used, but on average, a serving provides approximately:

  • Calories: 250
  • Protein: 20g
  • Carbohydrates: 15g
  • Fat: 10g

Keep in mind that nutritional values can vary, so it’s always a good idea to check the ingredients you use if you’re tracking your intake.

Conclusion

Chilli Chicken is more than just a dish; it’s an experience that brings people together with its vibrant flavors and comforting warmth. Whether you’re recreating cherished memories or forging new ones, this recipe is sure to become a staple in your culinary repertoire. So roll up your sleeves, gather your ingredients, and embark on a flavorful journey that promises to delight your taste buds and warm your heart. Enjoy every bite!

Related update: chilli chicken

Related update: Moroccan Carrot Soup

Shrimp & Crab Egg Rolls | Made by Meaghan Moineau

Shrimp & Crab Egg Rolls

Intro

When I was a child, my grandmother would invite the entire family over on Sunday afternoons for a feast. The kitchen was always bustling with energy, filled with the rich aroma of spices and the laughter of family members sharing stories. Amongst the many dishes, her Shrimp & Crab Egg Rolls were the highlight of our gatherings. She would always let me help with rolling the egg rolls, a task I took on with great pride. Today, I share this cherished recipe with you, hoping it brings the same warmth and joy to your home as it did to ours.

Why You’ll Love It

These Shrimp & Crab Egg Rolls are a delightful combination of succulent seafood and crisp vegetables, all wrapped up in a perfectly crispy exterior. They make for a fantastic appetizer or snack, and they’re sure to impress at any gathering. The balance of flavors is both comforting and exotic, making it a dish that everyone will adore.

Ingredients

  • 8 oz. dry bean sprouts, washed and patted dry
  • 1 cup shredded carrots
  • 1/2 lb imitation crab (or real crab if preferred)
  • 1/2 lb medium-sized shrimp, shelled and deveined
  • 2 garlic cloves, finely minced (or 1 tbsp garlic powder)
  • 1 tsp brown sugar
  • 3 green onions, finely chopped (green part only)
  • 10-12 (6 or 8-inch) egg roll wrappers
  • 1 beaten egg, for egg wash
  • Vegetable oil, for frying
  • 1 tsp salt and ground pepper
  • 1 cup sweet chili sauce, for serving

Instructions

  1. In a large bowl, combine the bean sprouts, shredded carrots, imitation crab, shrimp, minced garlic, brown sugar, and green onions. Season with salt and pepper to taste.
  2. Place an egg roll wrapper on a clean surface with one corner pointing towards you. Spoon about 2 tablespoons of the filling onto the center of the wrapper.
  3. Fold the bottom corner over the filling, then fold in the sides. Roll the wrapper tightly towards the top corner. Brush the top corner with a bit of the beaten egg to seal the roll. Repeat with the remaining wrappers and filling.
  4. Heat vegetable oil in a deep pan or fryer to 350°F (175°C). Carefully place the egg rolls in the hot oil, a few at a time, and fry until golden brown and crispy, about 3-5 minutes.
  5. Remove the egg rolls from the oil and drain on a paper towel-lined plate.
  6. Serve warm with sweet chili sauce for dipping.

Tips

For best results, ensure that the filling is well-drained before wrapping to prevent soggy egg rolls. Additionally, do not overcrowd the pan when frying, as this can lower the oil temperature and result in less crispy egg rolls.

Variations & Substitutions

Feel free to experiment with different fillings. You could add finely sliced cabbage or bell peppers for extra crunch. If you prefer a spicier kick, consider adding a dash of Sriracha or chopped chili peppers to the filling. For a vegetarian version, simply omit the seafood and add more vegetables or tofu.

Storage

Leftover egg rolls can be stored in an airtight container in the refrigerator for up to 3 days. To reheat, place them in the oven at 350°F (175°C) until warmed through and crispy. Avoid microwaving, as this can make the egg rolls soggy.

FAQ

Can I bake these egg rolls instead of frying?

Yes, you can bake them for a healthier alternative. Preheat your oven to 400°F (200°C), place the egg rolls on a baking sheet lined with parchment paper, and brush them lightly with oil. Bake for 15-20 minutes or until golden brown, flipping halfway through.

What dipping sauces pair well with these egg rolls?

Besides sweet chili sauce, these egg rolls pair well with soy sauce, hoisin sauce, or a spicy peanut sauce. Feel free to get creative and try different flavors to complement the egg rolls.

Can I prepare these in advance?

Absolutely! You can prepare the filling and wrap the egg rolls a day ahead. Store them in the refrigerator, covered with a damp cloth, to prevent the wrappers from drying out. Fry them just before serving for the best texture.

Nutrition

These Shrimp & Crab Egg Rolls are a source of protein and vitamins from the seafood and vegetables. While frying adds calories, you can opt for baking to reduce the fat content. As with any indulgent dish, moderation is key.

Conclusion

These Shrimp & Crab Egg Rolls are more than just a meal; they are a testament to family traditions and the joy of cooking together. Whether you’re making them for a special occasion or just a cozy night in, they are sure to become a favorite in your household. Enjoy the crispiness, the rich flavors, and the happiness they bring to your table. From my family to yours, happy cooking!

Related update: Shrimp & Crab Egg Rolls

Related update: Tomato Cutlets

Three-Cup Chicken | Made by Meaghan Moineau

Three-Cup Chicken: A Flavorful Taiwanese Classic

Intro

Ah, Three-Cup Chicken, a dish that always takes me back to my grandmother’s bustling kitchen. The aroma of aromatic garlic and ginger sizzling in sesame oil wafting through the air, the clamor of family members eagerly awaiting a meal, and the comforting warmth of a home-cooked feast. I remember watching her with wide eyes, captivated by the magic she created with just a handful of ingredients. This dish is more than just a meal; it’s a cherished family tradition passed down through generations, bringing with it a sense of nostalgia and love.

Why You’ll Love It

Three-Cup Chicken is the epitome of simplicity and flavor. With its roots in Taiwanese cuisine, this dish is named after its three main ingredients: soy sauce, sesame oil, and rice wine. It’s a dish that balances savory, sweet, and aromatic flavors perfectly. Whether you’re a seasoned cook or a beginner, you’ll appreciate how easy it is to prepare, yet how impressively delicious and aromatic it turns out. The caramelized chicken, infused with the bold flavors of garlic and ginger, will make your taste buds dance with joy.

Ingredients

  • 1 whole chicken, cut into pieces
  • 1 bulb of garlic, cloves peeled
  • Old ginger, sliced
  • 1 cup of rice wine
  • 1 cup of sesame oil
  • 1 cup of soy sauce
  • Spring onions, chopped
  • 2 tablespoons of sugar
  • A handful of fresh basil leaves

Instructions

  1. Marinate the chicken pieces with the soy sauce, sesame oil, and rice wine. Allow it to marinate for at least 6 hours, although overnight is best for maximum flavor.
  2. Before cooking, take the chicken out of the refrigerator to bring it to room temperature.
  3. Heat up some sesame oil in a wok or claypot until it is sizzling hot.
  4. Add the garlic, ginger, and spring onions to the wok. Fry briefly until they become fragrant.
  5. Add the marinated chicken to the wok and sear it until it is browned on all sides.
  6. Keep stir-frying and then pour in the marinade liquid along with the sugar.
  7. Continue to cook on medium heat until the mixture comes to a rolling boil.
  8. Cover the wok or claypot and let it simmer over a low flame until all the liquid has evaporated and the chicken is on the cusp of burning.
  9. Ensure that there is hardly any gravy left and that the chicken is caramelized (slightly charred in parts).
  10. Garnish with fresh basil leaves before serving.

Tips

To ensure the best taste, always use fresh ingredients. The quality of your soy sauce, sesame oil, and rice wine will greatly influence the flavor of the dish. Don’t rush the marinating process; it’s key to achieving a deep, rich flavor. Finally, keep a close eye towards the end of cooking, as the chicken can quickly go from caramelized to burnt.

Variations & Substitutions

While the traditional recipe calls for a whole chicken, you can use chicken thighs or drumsticks if you prefer. If you’re looking for a non-alcoholic version, substitute the rice wine with chicken broth. For a spicier kick, add some red chili peppers during the stir-frying step. Vegetarians can substitute tofu or eggplant for chicken, though the cooking time will need to be adjusted.

Storage

Three-Cup Chicken can be stored in an airtight container in the refrigerator for up to three days. To reheat, simply place it in a pan over low heat until warmed through. Avoid using the microwave, as it can alter the texture of the chicken.

FAQ

Can I make Three-Cup Chicken in advance?

Absolutely! This dish can be prepared a day ahead. In fact, the flavors develop even further when left to sit overnight. Simply reheat before serving.

What should I serve with Three-Cup Chicken?

Three-Cup Chicken pairs wonderfully with steamed jasmine rice or a side of sautéed greens. The rice will soak up the flavorful juices, making every bite irresistible.

Is this dish gluten-free?

To make Three-Cup Chicken gluten-free, use a gluten-free soy sauce. Always check the labels of your ingredients to ensure they meet your dietary needs.

Nutrition

While exact nutritional values can vary based on specific ingredients and quantities, Three-Cup Chicken is generally high in protein and rich in flavors thanks to the sesame oil and soy sauce. It’s a dish best enjoyed in moderation, particularly if you’re watching your sodium intake.

Conclusion

Three-Cup Chicken is a dish that not only delights the palate but also brings with it a sense of tradition and warmth. It’s perfect for family dinners, gatherings with friends, or even a quiet night at home. I hope this recipe brings as much joy to your table as it has to mine. Happy cooking!

Related update: Three-Cup Chicken

Related update: Kunna (A Delicious Chinioti Dish, Punjab, Pakistan)

Chili-Garlic Stir Fry | Made by Meaghan Moineau

Chili-Garlic Stir Fry | Made by Meaghan Moineau

Title: Spice Up Your Dinner: A Heartwarming Chili-Garlic Stir Fry
Description: Dive into a world of vibrant flavors and cherished family memories with our Chili-Garlic Stir Fry recipe. This delightful main dish is a harmonious blend of colorful vegetables, succulent chicken, and a savory sauce with a kick of heat. Perfect for a cozy family dinner or a solo indulgence, this stir fry is both a feast for the senses and a touchstone to nostalgic family moments. With a difficulty rating of 4 out of 10, it’s an ideal choice for both novice and seasoned home chefs looking to bring something special to the table.

---


When I think of comfort food, my mind drifts back to my grandmother's kitchen, where the air was always filled with the tantalizing aroma of sizzling ingredients and the warm laughter of family. One dish that stands out in my memory is her Chili-Garlic Stir Fry, an unassuming yet flavorful creation that brought us all together, especially on those cozy Sunday afternoons.


The magic began with the rich scent of sesame oil heating in her well-loved wok, a cue for us kids to gather around the table in anticipation. The sizzle of skinless boneless chicken breast meeting the pan was music to our ears, a promise of the delicious meal to come. As the chicken cooked to perfection, my grandmother would share stories of her own childhood, weaving tales that seemed as vibrant as the vegetables she skillfully chopped: crisp bok choy, sweet snow peas, crunchy carrots, and the vibrant yellows and oranges of bell peppers.


While we waited, the kitchen would fill with a new aroma—the pungent, mouthwatering smell of garlic sautéing in sesame oil. It was then that she would whisk together the sauce, a delicate balance of low sodium chicken broth, cooking sherry, and just the right amount of Sriracha for that extra kick. Watching her stir the sauce into a thick, glossy coating was like watching an artist at work, each movement deliberate and filled with love.


Finally, the moment we all waited for: the melding of flavors. The chicken and vegetables reunited in the wok, green onions adding their fresh, sharp note alongside the leafy tops of the bok choy. The sauce enveloped everything, transforming individual ingredients into a cohesive, delectable masterpiece.


Now, as I recreate this Chili-Garlic Stir Fry in my own kitchen, I am reminded not only of the deliciousness of the dish but of the joy and togetherness it represents. It's a testament to how food can transcend taste, becoming a bridge to memories and a celebration of family.


Ingredients:

- 3 teaspoons sesame oil, divided


- 1 pound skinless boneless chicken breast, sliced


- 1 bunch bok choy, stalks and leaves separated


- 1 cup snow peas


- 1 cup carrots, julienned


- 1 yellow bell pepper, sliced


- 1 orange bell pepper, sliced


- 3 green onions, chopped


- 1 cup low sodium chicken broth


- 2 tablespoons cooking sherry


- 2 teaspoons cornstarch


- 1 tablespoon Sriracha


- 3 cloves garlic, minced


Instructions:

1. In a wok or large skillet, heat 1 teaspoon of sesame oil over medium-high heat. Add the chicken and sauté until cooked through. Set aside and cover to keep warm.


2. Using the same pan, heat another teaspoon of sesame oil over medium-high heat. Add the bok choy stalks, carrots, and snow peas. Sauté until just tender, about 3-4 minutes. Set aside and cover.


3. In a medium bowl, whisk together the chicken broth, cooking sherry, cornstarch, and Sriracha until smooth.


4. Heat the final teaspoon of sesame oil in the pan over medium-high heat. Add the garlic and sauté until fragrant, about 30 seconds to 1 minute.


5. Pour the sauce mixture into the pan, bringing it to a boil. Stir continuously until it thickens, about 2 minutes.


6. Return the chicken and vegetables to the pan, adding in the bok choy leaves and green onions. Stir everything together until well-coated and heated through, about 2-3 minutes.


7. Serve hot, garnished with additional green onions if desired.


This Chili-Garlic Stir Fry is more than just a meal; it's a slice of family heritage, a dish that invites you to create your own memories around the dinner table. Whether serving it as a quick weeknight dinner or as part of a larger family gathering, this dish is sure to become a beloved tradition in your home, too.

Read more about Appetizers

Read more about Main Dishes

Read more about Desserts

Neoguri (Spicy Seafood Ramen) | Made by Meaghan Moineau

Neoguri (Spicy Seafood Ramen) | Made by Meaghan Moineau

A Nostalgic Bowl of Comfort: Neoguri Spicy Seafood Ramen Recipe


Introduction


In our fast-paced world, sometimes the simplest meals can bring the most comfort. Neoguri Spicy Seafood Ramen is one of those dishes, offering a perfect blend of spice, umami, and warmth. This delicious combination of flavors not only satisfies the taste buds but also evokes fond memories of family gatherings and shared laughter. Rated a 4 out of 10 in difficulty, this main dish is both an easy and delightful way to bring a little spice into your life.


Ingredients


To create this flavorful bowl of Neoguri Spicy Seafood Ramen, you will need the following ingredients:

- 1 egg


- 1 pack of Neoguri ramen


- 200 grams of mussels (fresh or frozen)


- 1 green scallion


- 1 sheet of gim (seaweed)


Instructions


1. Prepare the Broth: Begin by boiling water in a pot. Once boiling, add the mussels and the sauce packets from the Neoguri ramen pack. Allow this to boil for about 5 minutes. If you are using fresh mussels, boil until they open and discard any that remain closed.
2. Cook the Noodles: Add the ramen noodles to the pot and cook for 2 to 3 minutes until they reach your desired level of tenderness.
3. Add the Egg: For a flaky texture, beat the egg and stir it into the noodles in a circular motion. If you prefer a poached egg, gently add it to the side of the pot.
4. Garnish: Thinly slice the green scallion and cut the gim (seaweed) into small pieces. Transfer the ramen to a serving bowl and top with the scallion and seaweed for an added touch of flavor and crunch.

A Nostalgic Memory


Every time I make Neoguri Spicy Seafood Ramen, I am transported back to my grandmother's kitchen. As a child, I would watch her effortlessly prepare this dish, her deft hands creating magic in the pot. The aroma of the rich broth would fill the house, signaling the start of our family dinner. We would gather around the table, bowls in hand, savoring each spicy mouthful while sharing stories of our day.


One particular evening stands out in my memory. It was a rainy day, and we had just returned from a long walk through the local market. My grandmother, unfazed by the weather, decided to make her special ramen. As we sat down to eat, the rain pitter-pattered against the windows, and the warmth of the dish enveloped us, making the world outside fade away. It was in these moments that I learned the true power of food to bring comfort and connection.


Conclusion


Neoguri Spicy Seafood Ramen is more than just a meal; it is a vessel for cherished memories and a testament to the simple joys of life. Whether you're looking to recreate a beloved family dish or simply seeking a quick and satisfying meal, this recipe is sure to become a staple in your kitchen. So, gather your ingredients, embrace the heat, and let this flavorful dish transport you to a place of warmth and nostalgia.

Read more about Appetizers

Read more about Main Dishes

Read more about Desserts

chilli chicken | Made by Meaghan Moineau

chilli chicken | Made by Meaghan Moineau

Title: Spicing Up Memories: The Timeless Allure of Chilli Chicken
Description: Dive into the irresistible world of Chilli Chicken, a dish that marries bold flavors with cherished family memories. This mouthwatering journey not only brings to life a beloved recipe but also evokes the warmth of shared moments in the kitchen.

---


A Flavorful Journey into Nostalgia: Chilli Chicken


There's something about the spicy aroma of sizzling Chilli Chicken that takes me back to the heart of our family kitchen. As the days grow shorter and the air crisper, this dish becomes a beacon of warmth and comfort, a culinary masterpiece that tells a story as vibrant as its flavor.


The Ingredients of Tradition

At the core of this beloved recipe are simple ingredients, each carrying its own weight in tradition and taste. You'll need the crisp crunch of bell pepper, succulent boneless chicken breast, and the fiery kick of green chilies, slit for that perfect infusion of heat. Red chili powder, corn flour, and freshly minced garlic combine to form the aromatic base that makes this dish an unforgettable experience.


Oil and onions sautéed to golden perfection lay the groundwork for our journey, while the dual presence of soy sauce and its salty depth adds complexity. Don't forget the pepper powder, a dash of sugar to balance the heat, and a splash of vinegar for that signature tang. Finally, the dish is crowned with a scattering of vibrant spring onions, adding a pop of color and freshness to each bite.


A Family Memory Etched in Flavor

Growing up, Chilli Chicken was more than just a meal—it was an event. Every Sunday, the kitchen would transform into a bustling hub of activity, the rhythmic chopping and sizzling a comforting soundtrack to our family gatherings. My father, the designated chef of the day, would orchestrate his culinary symphony, each ingredient contributing its unique note to the melody of flavors.


I remember my younger self, perched on a stool, eager to help. My task was simple yet vital: stirring the pot. As the steam rose, carrying with it the spicy aroma, it felt like I was stirring more than just ingredients; I was blending laughter, stories, and the essence of family togetherness. The anticipation would build until, finally seated around the dining table, we'd savor each bite, the Chilli Chicken disappearing almost as quickly as it was made.


Crafting Your Own Memories

This dish, with its medium difficulty level of 6 out of 10, is not just about replicating a recipe. It's about creating a canvas for your own memories, a backdrop for laughter, and perhaps a bit of culinary chaos. It's the perfect appetizer to ignite conversation and whet the appetite for more.


For those eager to bring this dish to life in their own kitchens, the complete instructions await you on Swasthi's Recipes. There, you'll find the step-by-step guide to mastering this flavorful dish, ensuring your Chilli Chicken is as memorable as the ones served in kitchens around the world.


In Conclusion

Chilli Chicken is more than a dish; it's a testament to the power of food in bringing people together. Whether you're revisiting cherished family memories or creating new ones, this tantalizing recipe promises not just a feast for the senses, but a celebration of the bonds that tie us together through the universal language of food.

Read more about Appetizers

Read more about Main Dishes

Read more about Desserts

Chicken Lo Mein | Made by Meaghan Moineau

Chicken Lo Mein | Made by Meaghan Moineau

Title: "Savoring Memories: A Delicious Chicken Lo Mein Adventure"
Description: Dive into the delightful world of Chicken Lo Mein, a flavorful journey that combines tender chicken, vibrant vegetables, and a savory sauce. This recipe is a breeze to prepare, making it the perfect main dish for any occasion. Share in a nostalgic family memory as you recreate this beloved classic in your own kitchen.

---


There is something truly magical about the aroma of garlic and ginger sizzling in a skillet; it has the power to transport us back to cherished moments spent with family. For me, Chicken Lo Mein is more than just a dish—it's a culinary time machine, whisking me back to Sunday evenings at my grandmother's house. The kitchen was always bustling with activity, filled with laughter and the clatter of pots and pans, as we eagerly awaited the delicious meal to come.


Ingredients:

- 1 tablespoon peanut oil


- 2 cloves garlic, minced


- 1 tablespoon fresh ginger, minced


- 1 pound skinless, boneless chicken breast, cut into thin strips


- 1 large carrot, julienned


- 1 cup mushrooms, sliced


- 1 cup bok choy, chopped


- 1 cup bean sprouts


- 1/4 cup low sodium chicken broth


- 1/4 cup low sodium soy sauce


- 4 scallions, sliced


- 8 ounces cooked spaghetti


Instructions:

1. In a large nonstick skillet, heat the peanut oil over medium heat. Add the minced ginger and garlic, and let them cook for about 1 minute, releasing their fragrant aroma.


2. Increase the heat to medium-high and add the chicken strips and julienned carrot to the skillet. Stirring occasionally, cook until the chicken is lightly browned, approximately 2 minutes.


3. Introduce the mushrooms, bok choy, and bean sprouts to the mix. Pour in the chicken broth and soy sauce, stirring constantly. Cook until the carrot is tender-crisp, about 3 minutes.


4. Finally, stir in the cooked spaghetti and sliced scallions. Allow everything to heat through for about 1 minute, ensuring the noodles are well-coated in the savory sauce.


Nostalgic Memory:

Every time I make Chicken Lo Mein, I am reminded of my grandmother's kitchen—a place that was warm and welcoming, always buzzing with love and delicious food. One particular memory stands out: my grandmother teaching me how to julienne carrots, her hands guiding mine as we carefully sliced the vibrant orange vegetables. These lessons were not just about cooking; they were about patience, precision, and the simple joy of creating something with your own hands.


Back then, the kitchen was where stories were shared, and wisdom was passed down. Preparing meals together was a family affair, one that brought us closer and created a tapestry of memories that I cherish to this day. Chicken Lo Mein was often at the heart of these gatherings—a dish that embodies the love and care that went into every family meal.


Rate Difficulty: 4/10
Classification: Main Dish

This Chicken Lo Mein recipe is not only easy to prepare but also a delightful way to create new memories with your loved ones. Whether you're an experienced cook or a kitchen novice, this dish promises to deliver a burst of flavor and nostalgia, making it the perfect addition to any family meal. Enjoy the journey as you bring the tastes and stories of the past into your home.

Read more about Appetizers

Read more about Main Dishes

Read more about Desserts

Beef Teriyaki Stir Fry | Made by Meaghan Moineau

Beef Teriyaki Stir Fry | Made by Meaghan Moineau

Title: Savoring Memories with Beef Teriyaki Stir Fry: A Nostalgic Family Delight
Description: Dive into the flavors of our Beef Teriyaki Stir Fry—a savory blend of tender beef, vibrant vegetables, and a delectable sauce. This main dish not only tantalizes your taste buds but also brings back cherished memories of family gatherings. Rated a 6/10 on the difficulty scale, this recipe is perfect for both seasoned cooks and culinary novices looking to create a delicious and heartwarming meal.

---


Beef Teriyaki Stir Fry: A Flavorful Journey Through Time

The aroma of soy sauce mingling with ginger and garlic, the sizzle of beef in a hot pan, and the vibrant colors of fresh vegetables—these are the sensations that transport me back to my grandmother's kitchen. It was a place where magic happened, where every meal was a celebration of flavors and family. Today, I want to share a recipe that encapsulates those cherished moments: Beef Teriyaki Stir Fry.


Ingredients:

- 1 lb flank steak, thinly sliced


- 2 cups broccoli florets


- 1 red bell pepper, sliced


- 1 cup mushrooms, sliced


- 2 scallions, sliced


- 2 tablespoons soy sauce


- 1 tablespoon brown sugar


- 1 tablespoon dark sesame oil


- 2 cloves garlic, minced


- 1 inch fresh ginger, grated


- 2 tablespoons vegetable oil


- 1 tablespoon cornstarch


- 2 teaspoons cold water


- Sesame seeds for garnish


Instructions:
1. Marinate the Flavors: In a small bowl, whisk together soy sauce, brown sugar, sesame oil, garlic, and ginger. Add the sliced flank steak to the mixture, ensuring each piece is well-coated. Cover and refrigerate for at least 30 minutes, allowing the flavors to meld.
2. Sizzle and Sauté: Heat vegetable oil in a large frying pan over medium heat. Add the marinated beef, cooking for 3-4 minutes to brown it on all sides. Remove the beef from the pan and set it aside.
3. Vegetable Medley: In the same pan, add broccoli, red bell pepper, and mushrooms. Sauté for about 5 minutes, or until the vegetables begin to soften.
4. Saucy Symphony: Stir in the teriyaki sauce and bring the mixture to a simmer. Return the beef to the pan, including any flavorful drippings. Cook for another 5 minutes, stirring occasionally to ensure even flavor distribution.
5. Thickening Touch: In a small bowl, dissolve cornstarch in 2 teaspoons of cold water. Stir this mixture into the pan, allowing the sauce to thicken over 2 minutes. Toss the beef and vegetables to coat them evenly in the rich teriyaki sauce.
6. Serve and Enjoy: Sprinkle with sesame seeds and sliced scallions before serving. Pair it with steamed rice or noodles for a complete meal.
A Nostalgic Family Memory:

Every Sunday afternoon, my family would gather at my grandmother's house. The kitchen was always a hub of activity, filled with laughter, stories, and the enticing scent of her Beef Teriyaki Stir Fry. I remember standing on a stool, watching her expertly whisk the sauce, her hands moving with the grace of years of practice. The sizzling beef and vibrant vegetables were a feast for the senses, and as we sat around the table, each bite was a reminder of the love and care she infused into every dish.


These meals were more than just food; they were a celebration of our heritage and the bonds that held us together. Even now, whenever I make this dish, I'm reminded of those precious Sundays, and I feel a sense of gratitude for the culinary legacy she passed down to us.


Difficulty Rating: 6/10
Dish Classification: Main Dish
Conclusion:

Beef Teriyaki Stir Fry is more than just a recipe; it's an opportunity to recreate memories and share them with loved ones. Whether you're cooking for family or friends, this dish is sure to bring a sense of warmth and nostalgia to your table. Enjoy the symphony of flavors and the stories woven into each bite, and perhaps, create a few new memories of your own.

Read more about Appetizers

Read more about Main Dishes

Read more about Desserts

Chinese Potstickers | Made by Meaghan Moineau

Chinese Potstickers | Made by Meaghan Moineau

Deliciously Nostalgic: Crafting Perfect Chinese Potstickers at Home


Description

Dive into the rich flavors and textures of Chinese potstickers, a delightful culinary journey wrapped in a delicate dumpling. This detailed guide not only provides a step-by-step recipe but also shares a heartwarming family story that will inspire you to bring a taste of tradition to your kitchen. Perfect as an appetizer or a savory snack, these potstickers will soon become a family favorite.

---


A Taste of Tradition: Chinese Potstickers


The sizzling sound of dumplings hitting the hot pan, the aroma of sesame oil wafting through the kitchen, and the anticipation of that first bite—making Chinese potstickers is more than just preparing a meal; it's about creating memories. For me, these potstickers are a culinary heirloom passed down through generations, each fold and pleat crafted with love.


Ingredients


- 200g lean ground pork (or substitute with ground chicken)


- 100g canned water chestnuts, chopped (or substitute with spinach or cabbage)


- 1 teaspoon sea salt


- 1 teaspoon fine sugar


- 1/2 teaspoon black ground pepper


- 2 teaspoons light soy sauce


- 2 teaspoons sesame oil


- 1 tablespoon Shaoxing Huatiao wine


- 2-3 tablespoons finely chopped scallions


- Dumpling wrappers (thawed if frozen)


- Plain flour for dusting


- 2-3 tablespoons vegetable oil


- 1/3 cup water


Instructions


1. Prepare the Filling:

- In a large mixing bowl, combine the ground pork with sea salt, sugar, ground pepper, soy sauce, sesame oil, and Shaoxing Huatiao wine.


- Add the chopped water chestnuts to the mixture. For a twist, you can use spinach or cabbage instead.


- Stir in the finely chopped scallions and mix all ingredients well.


2. Assemble the Dumplings:

- Dust your working surface with flour. Carefully separate the dumpling wrappers and lay them out.


- Place about 1.5 teaspoons of the pork filling in the center of each wrapper.


- Lightly wet the edges of the wrapper with water. Bring the edges together and pinch at the center.


- Create pleats on one side of the dumpling, folding towards the center and pinching to seal. Repeat on the other side, ensuring three pleats per side.


3. Cooking the Potstickers:

- Heat vegetable oil in a frying pan over high heat.


- Place the dumplings flat-side down in the pan and fry until the bottoms are golden brown.


- Add water, cover the pan, and steam for 4-5 minutes. Remove the cover and let them crisp up for another minute.


4. Serving Suggestion:

- Serve the potstickers with a vinegar dip made of balsamic or black Chinese vinegar and thinly sliced ginger. Enhance the dip with soy sauce, chili oil, or sesame oil for extra flavor.


A Family Memory


Growing up, Sunday afternoons were reserved for dumpling-making in my grandmother's kitchen. Her nimble fingers would work magic, transforming simple ingredients into delectable bites. As children, my siblings and I would gather around the table, our hands dusted with flour, trying to mimic her expert pleats. Laughter and stories filled the room, each dumpling a testament to our shared love and heritage. These potstickers are more than a dish; they're a connection to those cherished days, a reminder that food has the power to bring families together.


Difficulty: 6/10

Classification: Appetizer


Creating Chinese potstickers is a rewarding experience that combines the art of cooking with the joy of tradition. Whether you're new to dumpling-making or a seasoned pro, this recipe promises delicious results that will delight your senses and bring a touch of nostalgia to your dining table. Enjoy!

Read more about Appetizers

Read more about Main Dishes

Read more about Desserts

chilli chicken | Made by Meaghan Moineau

chilli chicken | Made by Meaghan Moineau

Title: "Spicy Nostalgia: The Flavorful Journey of Chilli Chicken"
Description: Dive into the rich, aromatic world of Chilli Chicken—a dish that not only tantalizes your taste buds but also stirs heartwarming family memories. From the vibrant colors of bell peppers to the savory depth of soya sauce, learn how this dish has become a beloved staple at our family gatherings. Rated 6/10 in difficulty, this versatile delight can be served as an appetizer or a main dish. Discover a cherished family story intertwined with this recipe and find complete cooking instructions at Swasthi's Recipes.

---


Spicy Nostalgia: The Flavorful Journey of Chilli Chicken

There’s something magical about family recipes—they are time machines that transport you back to cherished moments, filled with warmth, laughter, and the comforting aroma of home-cooked meals. Chilli Chicken, with its spicy allure and vibrant colors, holds a special place in my heart, not just as a dish but as a treasured family memory.


A Burst of Flavors and Colors

The beauty of Chilli Chicken lies in its simplicity and the explosion of flavors it offers. The key ingredients—bell peppers, boneless chicken breast, and slit green chilies—create a colorful medley that is as pleasing to the eye as it is to the palate. The essential spices—red chili powder and pepper powder—bring a fiery kick, while garlic and onion add depth and aroma. The sticky, savory embrace of soya sauce, combined with the tangy notes of vinegar and the subtle sweetness of sugar, create a harmonious balance that is simply irresistible.


A Family Tradition

Every family gathering at our house was incomplete without a sizzling platter of Chilli Chicken. I vividly remember my grandmother bustling around the kitchen, her hands deftly working through the ingredients, her face lit with a loving smile. The air would fill with the intoxicating aroma of garlic sizzling in oil, mixing with the spicy scent of red chili powder. It was a sensory symphony that signaled the start of another memorable feast.


One particular instance stands out in my memory: a chilly winter evening when the entire family was gathered around the dining table, the warmth of laughter and stories enveloping us like a cozy blanket. My grandmother placed the dish in the center, and as the steam rose, so did our anticipation. With each bite of the tender chicken and crunchy bell peppers, we were transported to a world where flavors danced on our tongues and time seemed to stand still.


Creating Your Own Memories

While nostalgia adds a unique flavor to Chilli Chicken, creating your own memories with this dish is just as delightful. Rated 6/10 in difficulty, it’s accessible yet rewarding, making it perfect for a family dinner or a casual gathering with friends. Whether you choose to serve it as an appetizer or the main dish, Chilli Chicken promises to be the star of the meal.


For those looking to recreate this flavorful journey, detailed instructions can be found at Swasthi's Recipes. Embrace the joy of cooking as you experiment with the ingredients, perhaps adding your own twist to make it uniquely yours.


In the end, Chilli Chicken is more than just a dish; it's a connection to the past, a celebration of the present, and an invitation to create future memories. So, gather your loved ones, roll up your sleeves, and let the rich, spicy aroma of Chilli Chicken weave its magic into your family story.


---


Whether you're a seasoned cook or a culinary novice, Chilli Chicken is an adventure worth embarking on. So, why not dig in and let this dish become a delicious chapter in your own family’s story?

Read more about Appetizers

Read more about Main Dishes

Read more about Desserts