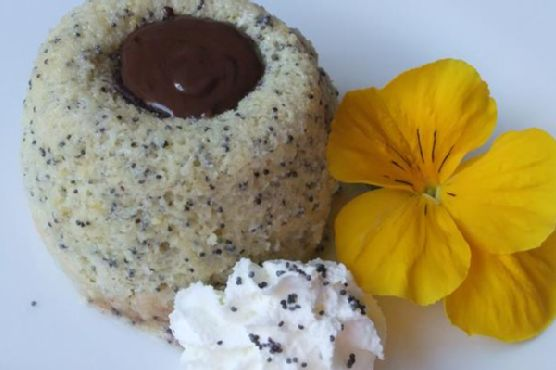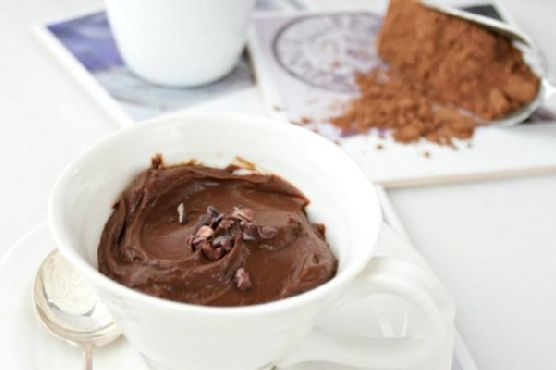
Vegan Dirty Chai Pudding
Intro
There’s something magical about the rich, aromatic allure of chai spices mingling with the robust earthiness of espresso. This Vegan Dirty Chai Pudding is a delightful fusion of these two beloved flavors, wrapped up in a creamy, chocolatey treat that will transport you to a cozy café on a brisk autumn afternoon.
As a child, I remember the first time I walked into a bustling coffee shop with my mom. The air was thick with the scent of freshly ground coffee beans and sweet, spicy chai. It’s a memory that has lingered with me, like a warm embrace on a cold day. This pudding is my homage to those comforting moments, capturing the essence of those flavors in a vegan dessert that is both indulgent and wholesome.
Why You’ll Love It
This Vegan Dirty Chai Pudding is not only delicious but also incredibly easy to make. It’s a dessert that feels decadent without any of the guilt, thanks to its wholesome ingredients. The blend of chai spices with a hint of espresso makes for a unique flavor profile that’s sure to impress. Whether you’re a seasoned vegan or just looking for a healthier dessert option, this pudding is perfect for satisfying your sweet tooth while offering a nourishing treat.
Ingredients
- 2 ripe avocados
- 1/4 cup agave nectar
- 1/3 cup unsweetened cocoa powder
- 1/2 cup chocolate almond milk
- 1 teaspoon vanilla extract
- 1/4 teaspoon sea salt
- 1 tablespoon espresso grounds
- 1 tablespoon chai spice blend
- Optional garnish: cinnamon, cardamom, ginger, nutmeg
Instructions
- Scoop the avocado into a food processor or blender.
- Measure in the agave nectar, cocoa powder, almond milk, vanilla, and sea salt.
- Pulse and blend until silky smooth, scraping down sides as needed.
- Scrape the mixture into a large bowl and stir in the espresso grounds and chai spice mix.
- Taste and adjust espresso and chai flavoring as desired.
- Scoop into smaller ramekins, cover with plastic wrap, and refrigerate for 30 minutes or overnight to set.
Tips
When making this pudding, the ripeness of your avocados is key. Ensure they are ripe enough for a creamy texture but not overripe. Adjust the sweetness to your liking by adding more agave nectar or a touch of maple syrup. For a thicker consistency, reduce the amount of almond milk slightly. The pudding can be enjoyed immediately, but chilling it allows the flavors to meld and the texture to firm up nicely.
Variations & Substitutions
If you prefer a different sweetener, maple syrup is a fantastic substitute for agave nectar. Keep in mind that you may need to adjust the almond milk to maintain the pudding’s creamy consistency. For a nut-free version, substitute the chocolate almond milk with a non-dairy milk of your choice, such as oat or soy milk. Spice lovers can experiment with the chai spice blend, adding extra cinnamon or ginger to enhance the flavor.
Storage
Store any leftover pudding in an airtight container in the refrigerator for up to 3 days. The flavors will continue to develop, making it even more delicious. However, keep in mind that the texture may thicken slightly over time, so give it a good stir before serving.
FAQ
Can I make this pudding without a food processor?
Yes, you can use a blender instead of a food processor. Just be sure to blend until the mixture is completely smooth. If you don’t have a blender, you can mash the avocados by hand and whisk in the other ingredients, though the texture may be less smooth.
Is there a substitute for espresso grounds?
If you’re sensitive to caffeine or prefer not to use espresso, you can substitute with decaf espresso grounds or omit it altogether. The chai spices will still provide plenty of flavor on their own.
What can I use if I don’t have a chai spice blend?
If you don’t have a pre-made chai spice blend, you can make your own by combining cinnamon, cardamom, ginger, and nutmeg. Adjust the proportions to your taste preference.
Nutrition
This pudding is not only vegan but also full of healthy fats from avocados, antioxidants from cocoa, and the invigorating qualities of chai spices and espresso. It’s a treat that nourishes your body while satisfying your sweet cravings.
Conclusion
This Vegan Dirty Chai Pudding is a delightful way to enjoy the comforting flavors of chai and espresso in a healthy dessert form. Whether you savor it as a mid-afternoon pick-me-up or a post-dinner indulgence, it’s sure to become a favorite in your dessert repertoire. With its easy preparation and rich flavors, this pudding is a testament to the joy of simple, wholesome ingredients coming together to create something truly special. Enjoy the journey of flavors, and may each spoonful bring back warm memories or create new ones.
Related update: Vegan Dirty Chai Pudding