Strawberry Shortcake with Homemade Donuts | Made by Meaghan Moineau

Strawberry Shortcake with Homemade Donuts | Made by Meaghan Moineau

Title: Indulge in Nostalgia with Strawberry Shortcake Donuts: A Sweet Family Tradition
Description:

Dive into the world of heavenly desserts with our Strawberry Shortcake with Homemade Donuts. This unique twist on a classic favorite is not just about the delightful flavors of strawberries and whipped cream—it’s a culinary journey down memory lane. Perfect for dessert lovers seeking a comforting treat that’s equal parts nostalgia and innovation. Whether you're a seasoned baker or a novice in the kitchen, this recipe is a delightful challenge worth every minute. Rated at a moderate difficulty of 6 out of 10, these donuts are sure to become a cherished addition to your dessert repertoire.


---


Strawberry Shortcake Donuts: A Recipe to Relive Memories

There’s something magical about the aroma of freshly baked donuts wafting through the kitchen. It takes me back to sunlit Saturday mornings in my grandmother’s warm, inviting home. Her kitchen was a place of wonder, filled with laughter, stories, and the irresistible smell of her famous Strawberry Shortcake. Today, I’m sharing a special version of this nostalgic treat: Strawberry Shortcake with Homemade Donuts.


Ingredients:

- 2 cups cake flour


- 1 tablespoon baking powder


- ½ teaspoon salt


- ½ cup shortening (or vegetable lard)


- ¾ cup granulated sugar


- 3 egg yolks


- 1 cup sour cream


- 1 teaspoon vanilla extract


- ½ cup whole milk


- 1 cup confectioners sugar


- Fresh strawberries


- Whipped cream


Instructions:
1. Prepare the Dry Ingredients: In a mixing bowl, combine 2 cups of cake flour, 1 tablespoon of baking powder, and ½ teaspoon of salt. If nutmeg is your muse, feel free to add a pinch, though I prefer the simple, clean taste without it. Set this mixture aside.
2. Blend the Wet Ingredients: Using a stand mixer, blend ½ cup of shortening and ¾ cup of granulated sugar on low speed until the mixture resembles fine sand. Gradually add in the 3 egg yolks, mixing on low speed for about a minute.
3. Combine and Chill: Alternate adding your dry ingredients with 1 cup of sour cream to the mixer, ensuring you scrape down the sides of the bowl occasionally. Add 1 teaspoon of vanilla extract and mix until just incorporated. Cover and refrigerate the batter for 15-20 minutes.
4. Preheat and Pipe: Preheat your oven to 350°F. Spoon the batter into a ziplock bag and cut a corner to create a makeshift piping bag. Pipe the batter into a greased donut pan.
5. Bake and Ice: Bake for 10-12 minutes until the donuts are light and fluffy. Meanwhile, in a saucepan over low heat, warm ½ cup of whole milk. Whisk in 1 cup of confectioners sugar until smooth to create a simple icing. Dip the cooled donuts in the icing or drizzle it over the top.
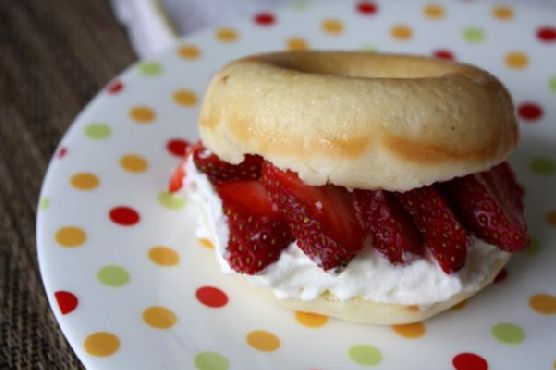
6. Assemble the Shortcakes: Slice the donuts in half, resembling an English muffin. Layer with freshly sliced strawberries and a generous dollop of whipped cream.

---


A Sweet Journey Back in Time

Every bite of these Strawberry Shortcake Donuts is a step back into cherished family moments. I vividly remember sitting at my grandmother’s kitchen table, the sun painting patterns on the floor as she regaled us with tales of her youth. Her strawberry shortcake was a staple at family gatherings, a symbol of love and togetherness. Now, with a modern twist, these donuts bring those cherished memories back to life.


This recipe is rated a 6 out of 10 in difficulty, making it a fun challenge for both baking enthusiasts and those new to the craft. Classified as a dessert, it’s perfect for ending a meal on a sweet note or indulging in a midday treat. So, roll up your sleeves, embrace the nostalgia, and create new memories with every delicious bite.
Read more about Appetizers

Read more about Main Dishes

Read more about Desserts

Berry & Ricotta Danishes | Made by Meaghan Moineau

Berry & Ricotta Danishes | Made by Meaghan Moineau

Sweet Nostalgia: Crafting Perfect Berry & Ricotta Danishes


A Delicious Journey Down Memory Lane


*Discover the magic of homemade Berry & Ricotta Danishes with this easy-to-follow recipe that brings a touch of nostalgia to your table. Perfect for dessert lovers and food enthusiasts alike, these delightful pastries are sure to become a family favorite.*


---


Ingredients


- Poached Berries: Blueberries, strawberries, and other berries of choice
- Glaze: Icing sugar, fresh lemon juice
- Ricotta Filling: Ricotta cheese, egg yolk, castor sugar, vanilla extract, lemon zest
- Pastry: Puff pastry, flour, water
- Optional Decorations: Additional poached berries, icing sugar
Difficulty: 4/10
Classification: Dessert

---


Instructions


1. Poach the Berries: Place a mix of your favorite berries in a saucepan over medium-low heat. Sprinkle with castor sugar and add a splash of water. Cover with a lid and gently shake to coat the berries. Poach for about 5 minutes until they soften but still hold their shape. Set aside to cool.
2. Preheat the Oven: Set your oven to 180°C (350°F) to prepare for baking.
3. Make the Ricotta Filling: In a mixing bowl, combine ricotta cheese, egg yolk, castor sugar, vanilla extract, and lemon zest. Mix well with a wooden spoon until thoroughly combined. Set aside.
4. Prepare the Glaze: In a small bowl, mix icing sugar and fresh lemon juice. Stir until smooth and set aside.
5. Prepare the Pastry: Remove puff pastry from the refrigerator. Cut into 10 rectangles, each measuring 8cm x 6cm (3" x 2.5"). Place 5 rectangles on a lined baking sheet, leaving space between them. Brush edges lightly with water.
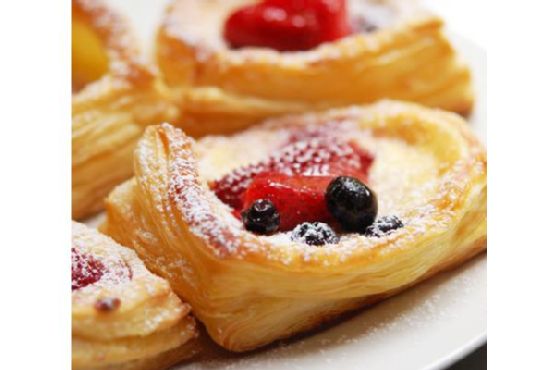
6. Assemble the Danishes: Cut smaller rectangles from the remaining 5 pieces, leaving frames about 1.5cm (1/2") wide. Place these frames on top of the pastry bases. Fill the centers with 3-4 tablespoons of ricotta mixture and top with poached berries.
7. Bake: Bake in the preheated oven for 15 to 18 minutes, until the pastry puffs up and turns golden brown. Remove and cool on a wire rack.
8. Finish and Serve: Top with remaining poached berries and sprinkle with icing sugar just before serving.

---


A Sweet Family Memory


Growing up, Sunday afternoons at my grandmother's house were a cherished tradition, where the aroma of freshly baked pastries filled the air. Her kitchen was a haven of warmth and love, and her berry danishes were the highlight of our visits. I remember peeking into the oven, eagerly anticipating that first bite.


Grandma would let me help with the simpler tasks – arranging the berries and dusting the pastries with icing sugar. It was in those moments that I learned the power of food to bring people together, to create memories that last a lifetime. The sweet, tangy taste of the ricotta filling, combined with the juiciness of the berries, was something magical. Every time I bake these danishes, I’m transported back to those sunny afternoons, surrounded by family, laughter, and the smell of home.


---


Whether you're a seasoned baker or just starting out, these Berry & Ricotta Danishes offer a delightful experience. With their flaky puff pastry, creamy ricotta filling, and juicy berries, they are sure to enchant your taste buds and evoke the warmth of cherished family memories. Enjoy making them and, most importantly, enjoy sharing them with those you love.

Read more about Appetizers

Read more about Main Dishes

Read more about Desserts

Peppermint White Chocolate Fudge | Made by Meaghan Moineau

Peppermint White Chocolate Fudge | Made by Meaghan Moineau

**Title: Peppermint White Chocolate Fudge: A Sweet Trip Down Memory Lane**


**Description:** Dive into the world of festive flavors with our Peppermint White Chocolate Fudge recipe. Easy to make, yet rich in taste and tradition, this dessert is perfect for the holiday season. Discover how this delightful treat not only satisfies your sweet tooth but also brings back cherished family memories.


---


The holiday season is a time for family gatherings, laughter, and, of course, indulgent treats that bring warmth and joy to our hearts. One such treat that has always held a special place in my family's holiday tradition is the Peppermint White Chocolate Fudge. This dessert isn't just a delightful blend of flavors; it's a sweet reminder of the love and joy shared in my grandmother's kitchen.


**Ingredients:**


- 2 cups white chocolate chips


- 1 container of vanilla frosting


- Red food coloring


- 1 teaspoon peppermint flavoring


- Fresh peppermint candies, crushed


**Instructions:**


1. Begin by lining an 8x8 pan with plastic wrap or wax paper, ensuring easy removal of the fudge later.


2. In a large microwave-safe bowl, melt the white chocolate chips. Microwave them in 30-second intervals, stirring between each session to ensure a smooth consistency.


3. Once melted, add the container of vanilla frosting to the bowl. Stir until the mixture is well combined.


4. Incorporate the peppermint flavoring, stirring thoroughly to distribute the flavor evenly. If the mixture begins to stiffen, reheat it for an additional 10 seconds to maintain a pourable consistency.


5. Pour the mixture into the prepared pan, spreading it evenly.


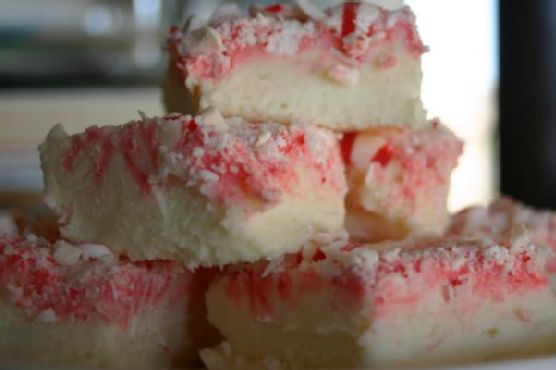
6. Place 6-8 drops of red food coloring on the surface of the warm fudge. Using a toothpick or knife, swirl the color into the top of the fudge to create a marbled effect.


7. Sprinkle the crushed peppermint candies over the top, adding a festive crunch to each bite.


8. Cool the fudge in the refrigerator until it hardens. Once firm, cut into squares and enjoy!


**Nostalgic Story:**


Every Christmas Eve, my grandmother would gather all the grandchildren around her worn, wooden kitchen table, the air filled with the sweet scent of vanilla and peppermint. We were her little helpers, eagerly waiting to swirl the red food coloring into the smooth, white canvas of fudge. As she gently guided our hands, she'd recount stories from her childhood—tales of snowy holidays and simple joys that seemed to dance around us like the snowflakes outside.


The swirling of red into white became more than just a step in a recipe; it was a ritual, a moment where time seemed to stand still, capturing the essence of family togetherness. The finished product, adorned with crushed peppermint candies, was not just a treat we shared, but a memory we cherished.


**Difficulty: 2/10**


**Classification: Dessert**


This Peppermint White Chocolate Fudge is an easy-to-make dessert that brings a bit of holiday magic to your table. With simple ingredients and fond memories infused in every bite, it's sure to become a cherished tradition in your home as well. Whether you're creating new memories or reliving old ones, this fudge is a testament to the sweetness of family and festive cheer.

Read more about Appetizers

Read more about Main Dishes

Read more about Desserts