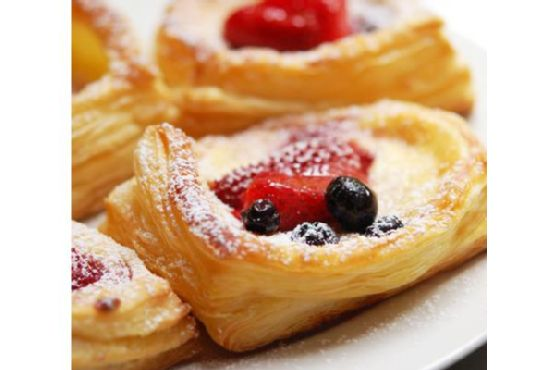
Berry & Ricotta Danishes
Intro
There’s something magical about the scent of freshly baked pastries wafting through the kitchen. I remember when I was a child, visiting my grandmother on Sunday mornings. Her kitchen was always filled with the aroma of sweet delights, and my favorite treat was her berry danishes. She would let me help her sprinkle the sugar over the berries, a task I took very seriously. This Berry & Ricotta Danishes recipe is a tribute to those cherished mornings, combining the tartness of fresh berries with the creamy richness of ricotta cheese, all encased in flaky puff pastry.
Why You’ll Love It
These Berry & Ricotta Danishes are a delightful addition to any breakfast or brunch spread. The balance of sweet and tart flavors is simply irresistible, while the creamy ricotta filling adds a luxurious touch. The best part? They’re surprisingly easy to make, even for those who aren’t seasoned bakers. Whether you’re serving them for a special occasion or just to treat yourself, these danishes are sure to impress.
Ingredients
- Glaze
- Poached berries
- Blueberries
- Egg yolk
- Pastry
- Flour
- Icing sugar
- Fresh lemon juice
- Lemon zest
- Puff pastry
- Ricotta cheese
- Strawberries
- Castor sugar
- Vanilla extract
- Water
Instructions
- Place the berries in a saucepan over medium-low heat. Sprinkle on castor sugar and add water. Cover the saucepan with a lid and shake it around to coat the berries. Poach the berries for about 5 minutes or until they soften but still retain their shape. Set aside to cool.
- Preheat the oven to 180°C (350°F).
- Make the ricotta filling by combining all ingredients in a mixing bowl. Mix well with a wooden spoon to thoroughly combine. Set aside.
- Prepare the glaze by mixing icing sugar and lemon juice together in a small bowl. Mix well and set aside.
- Remove the pastry from the refrigerator and place sheets on a clean, dry surface. Use a small, sharp knife to cut 10 8cm x 6cm (3″ x 2.5″) rectangles.
- Place 5 of the pastry rectangles on a lined baking sheet, ensuring there is space between them as they will expand. Lightly brush edges with a little water. These will be the “pastry rectangle bases”.
- Cut smaller rectangles out of the remaining 5 pastry rectangles to create small frames about 1.5cm (1/2″) in width.
- Place the frames on top of the pastry bases on the baking sheet.
- Fill the middle of each frame with about 3-4 tablespoons of ricotta mixture. Top with several berries, reserving some for topping once the danishes are baked.
- Repeat the process with remaining pastry frames.
- Bake in the oven for 15 to 18 minutes or until the pastry puffs up and is golden. Remove from oven and cool on a wire rack.
- Top with remaining poached berries and sprinkle on a little icing sugar just before serving.
Tips
For best results, ensure your puff pastry is cold before baking, as this helps achieve that signature flaky texture. If your kitchen is particularly warm, try chilling the assembled danishes for a few minutes before baking. Also, be sure not to overfill the center with ricotta mixture to prevent it from spilling over the edges during baking.
Variations & Substitutions
Feel free to get creative with the types of berries you use. Raspberries and blackberries make great alternatives or additions. If ricotta isn’t your favorite, try substituting it with cream cheese or mascarpone for a different flavor profile. For a touch of extra sweetness, drizzle some honey over the top before serving.
Storage
These danishes are best enjoyed fresh, but they can be stored in an airtight container in the refrigerator for up to two days. To reheat, place them in a preheated oven at 150°C (300°F) for about 5 minutes or until warmed through.
FAQ
Can I make these danishes ahead of time?
Yes, you can prepare the components separately ahead of time. Poach the berries and prepare the ricotta filling the day before, then assemble and bake the danishes when you’re ready to serve them.
Can I use frozen berries instead of fresh?
Absolutely! Frozen berries work just as well. Just be sure to thaw them and drain any excess liquid before using them in this recipe.
How do I prevent the pastry from becoming soggy?
To prevent soggy pastry, make sure the poached berries are well-drained and the ricotta mixture is not too wet. Baking the danishes on a wire rack after removing them from the oven also helps keep them crisp.
Nutrition
While the exact nutritional value will vary depending on specific brands and measurements, each danish is approximately 250 calories. They offer a delightful source of calcium from the ricotta cheese and antioxidants from the berries.
Conclusion
These Berry & Ricotta Danishes are a beautiful blend of flavors and textures, perfect for any occasion. Whether you’re reliving nostalgic memories or creating new ones, these pastries are sure to become a beloved part of your baking repertoire. Enjoy them with a cup of coffee or tea, and savor the simple pleasures of life. Happy baking!
Related update: Berry & Ricotta Danishes