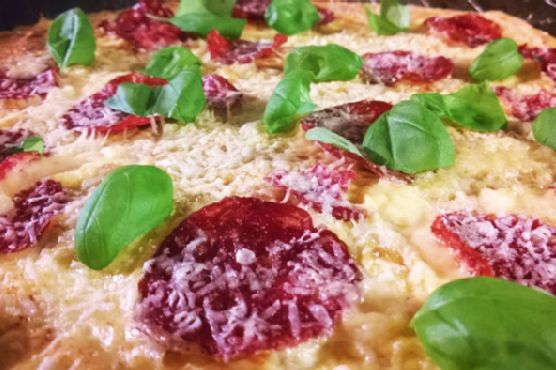
Pittata – Pizza Frittata: A Delicious Twist on Classic Breakfast
Intro
Growing up, Sunday mornings were a sacred time in our household. The aroma of freshly brewed coffee mingled with the sounds of sizzling bacon, creating a comforting symphony that signaled the start of a leisurely day. My mother, with her extraordinary culinary skills, would whisk together the most delightful dishes, but there was one that always stood out – the pittata. A clever blend of pizza and frittata, this dish was the embodiment of indulgence and creativity. Today, I’m thrilled to share this cherished recipe with you, bringing a piece of my family tradition to your kitchen.
Why You’ll Love It
The pittata is a versatile dish that combines the best of two worlds: the savory satisfaction of pizza and the fluffy, protein-packed delight of a frittata. It’s perfect for breakfast, brunch, or even a light dinner, offering a filling meal that’s both quick to prepare and utterly delicious. Whether you’re hosting a gathering or simply looking to treat yourself, this dish is sure to impress with its simple ingredients and depth of flavor.
Ingredients
- 6 large eggs
- 1/4 cup fresh basil, chopped
- 1/4 cup milk (optional)
- 1/2 cup grated parmesan cheese
- 1/4 cup sliced pepperoni
- 1/2 cup shredded mozzarella cheese
- Salt and pepper to taste
- Cooking fat (e.g., olive oil, butter)
Instructions
- Preheat your oven to ~450°F (230°C), using the top heat setting only.
- On the stove, heat your choice of cooking fat in a large oven-safe skillet over medium heat.
- In a bowl, beat the eggs with milk, salt, pepper, and any herbs or spices you desire.
- Add any additional ingredients (except cheese) to the skillet. For this recipe, we keep it simple, but feel free to include cooked or quick-cooking vegetables like bell peppers.
- Pour the egg mixture into the skillet, tilting it to evenly distribute around any add-ins.
- Distribute the shredded mozzarella cheese and pepperoni slices over the egg mixture.
- Allow the eggs to cook on the stove until the edges are set, leaving the center slightly jiggly.
- Generously top with parmesan cheese.
- Transfer the skillet to the preheated oven and bake until the eggs are puffed, browned, and the center is firm.
- Remove from the oven and let the pittata cool for a couple of minutes before slicing into wedges.
Tips
For the best results, ensure that your skillet is well-greased to prevent sticking. Keep an eye on the pittata as it bakes; it can go from perfectly puffed to overcooked quickly. Use a toothpick to check that the center is set if you’re unsure. Lastly, let it rest slightly before serving; this makes cutting it into neat wedges much easier.
Variations & Substitutions
One of the joys of a pittata is its adaptability. Feel free to experiment with different herbs, spices, or cheeses. Swap pepperoni for sausage, or go vegetarian with mushrooms and spinach. For a dairy-free option, skip the milk and use a plant-based cheese alternative. The possibilities are endless, ensuring every pittata is a unique creation.
Storage
Store any leftover pittata in an airtight container in the refrigerator for up to three days. To reheat, warm it in the oven or a skillet over low heat until heated through, or microwave individual slices for about 30 seconds. For longer storage, freeze individual portions and reheat directly from frozen for a quick and easy meal.
FAQ
Can I make the pittata ahead of time?
Yes, you can prepare the pittata a day in advance. Simply follow the instructions until baking, then cover and refrigerate the skillet. When ready to bake, allow it to come to room temperature before placing it in the oven.
What can I serve with pittata?
Pittata pairs beautifully with a simple green salad, fresh fruit, or crusty bread. For a heartier meal, consider serving it with roasted potatoes or a side of bacon or sausage.
Is there a way to make it spicier?
For a spicier kick, add crushed red pepper flakes, diced jalapeños, or a splash of your favorite hot sauce to the egg mixture before cooking.
Nutrition
While the exact nutritional content will vary with portion sizes and specific ingredients used, a typical slice of pittata (1/6 of the whole) provides approximately 200 calories, 15g of protein, and 15g of fat, making it a hearty, satisfying dish that’s also relatively low in carbohydrates.
Conclusion
The pittata is more than just a meal; it’s a nod to creativity and the joy of cooking. Whether you’re reliving cherished memories or creating new ones, this dish is sure to become a staple in your recipe repertoire. I hope you find as much comfort and joy in making and sharing this dish as I have over the years. Bon appétit!
Related update: Pittata – Pizza Frittata
Related update: Mixed Berry Yogurt with Almonds