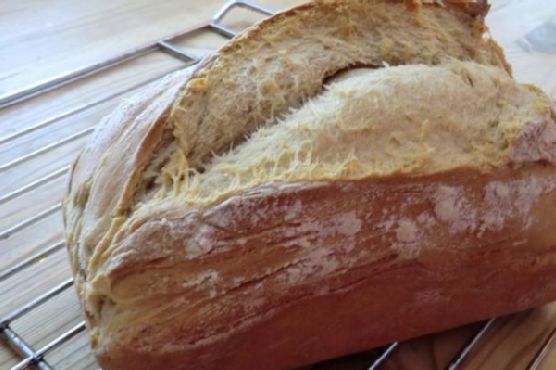
Butter-Bread | Made by Meaghan Moineau
Butter-Bread Bliss: A Nostalgic Journey Through Flavor and Family
Description
Uncover the secrets behind a delightfully soft and fragrant butter-bread that promises to transport you back to cherished family moments. This recipe combines the rustic charm of homemade bread with the creamy richness of butter, all while being deceptively easy to make. Whether you're a seasoned baker or a curious beginner, this guide will walk you through every step, ensuring a perfect loaf every time. Rated 6/10 in difficulty, this main dish is perfect for any occasion that calls for a touch of warmth and nostalgia.---
Ingredients
- 500g white strong bread flour- 150g butter, softened
- 15g fresh yeast
- 1 tbsp liquid malt extract
- 10g salt
- 20ml sunflower oil
- 300ml water, room temperature
For the Starter Dough (prepare a night before)
- 100g white strong bread flour- 5g fresh yeast
- 150ml water
---
Instructions
Preparation: The Night Before
1. Starter Dough: In a mixing bowl, combine the white strong bread flour, fresh yeast, and water. Mix until smooth. Cover the bowl and place it in the fridge overnight.Baking Day: Morning Rituals
2. Room Temperature Preparation: Remove the starter dough and butter from the fridge an hour before you begin baking, allowing them to reach room temperature.3. Yeast Mixture: In a small bowl, mix the yeast, liquid malt extract, and water until smooth and lump-free.
4. Combine Ingredients: In a large mixing bowl, add the white strong bread flour, salt, and softened butter. Pour in the yeast mixture and stir until combined.
5. Incorporate Starter Dough: Add the starter dough to the bowl and knead the mixture for 10 minutes. For best results, use a food processor with a dough hook attachment—knead on a slow speed for 5 minutes, then increase to a fast speed for another 5 minutes.
6. First Rise: Turn the dough onto a floured surface, dust generously with flour, cover, and let it sit for 30 minutes. Every 10 minutes, punch the dough down, stretch it, fold the edges over, and turn it.
Shaping and Final Rise
7. Prepare the Tin: Grease a loaf tin with sunflower oil. Shake off any excess flour from the dough, form it into a loaf shape, and place it in the tin.8. Score and Rise: Cover the loaf and allow it to rise for another 30 minutes. After 10 minutes, use a sharp knife to score a 2 cm line down the center.
Baking
9. Preheat and Steam: Preheat your oven to 230°C. Place the loaf on the middle shelf, and using a spray bottle, mist around the bread to create steam.10. Bake: Bake for 45 minutes. After 15 minutes, spray the bread again with water and reduce the temperature to 200°C.
11. Cool: Check for doneness with a skewer—it should come out clean. Allow the bread to cool completely on a wire rack before slicing.
---
A Taste of Memory
As the aroma of freshly baked butter-bread fills your kitchen, I'm reminded of my grandmother's cozy kitchen during crisp autumn afternoons. Every Sunday, she'd gather us around her wooden table, the centerpiece being her famous butter-bread. It was more than just a meal; it was a bond, a tradition passed down through generations. The soft, buttery texture and golden crust were the perfect companions to her stories of family adventures and heartfelt laughter. Baking this bread brings me back to those warm, love-filled days, proving that the best recipes are those that nourish both body and soul.
---