Lemon Squares | Made by Meaghan Moineau

Lemon Squares: A Zesty Delight

Intro

There’s something magical about the taste of lemon squares that takes me back to my grandmother’s kitchen. I remember spending lazy Sunday afternoons with her, the air filled with the scent of fresh lemons and the warmth of her love. She would always let me sift the flour and powdered sugar, an important task for a small child, and together we would create a batch of these delightful treats. Those moments are etched in my memory, and today, I’m excited to share this beloved lemon squares recipe with you.

Why You’ll Love It

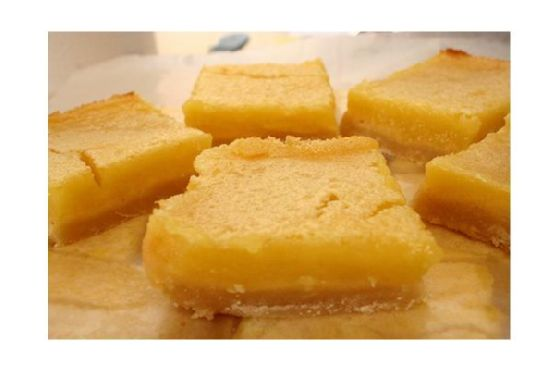
Lemon squares are the perfect blend of tart and sweet, making them a favorite for any occasion. Their bright, citrusy flavor and soft, buttery crust are irresistible. Whether you’re looking for a dessert to impress your guests or a comforting treat for yourself, these lemon squares deliver every time. Plus, they’re surprisingly easy to make with simple ingredients you probably already have in your kitchen.

Ingredients

  • 1 cup all-purpose flour
  • 1/2 cup powdered sugar, plus extra for sprinkling
  • 1/2 cup unsalted butter, chilled
  • 2 large eggs
  • 1 cup sugar
  • 1/2 teaspoon baking powder
  • 1/4 teaspoon salt
  • 1/3 cup fresh lemon juice
  • 2 teaspoons lemon peel, finely grated

Instructions

  1. Sift the flour and 1/2 cup of powdered sugar together in a medium bowl to remove any lumps.
  2. Cut in the chilled butter using a pastry cutter or your fingers until the mixture resembles coarse crumbs.
  3. Press the mixture evenly over the bottom of a 9 by 13 by 2-inch baking pan, forming the crust.
  4. Bake the crust at 300°F (150°C) for about 25 minutes, or until it is lightly browned.
  5. In a separate bowl, whisk together the eggs, sugar, baking powder, salt, lemon juice, and lemon peel until well combined.
  6. Pour the lemon mixture over the baked crust, spreading it evenly.
  7. Bake at 350°F (175°C) for 25 to 30 minutes, or until the filling is set.
  8. Allow the lemon squares to cool completely in the pan before sprinkling with additional powdered sugar.
  9. Cut into squares and serve.

Tips

For the best lemon squares, make sure to use fresh lemon juice and zest. It really makes a difference in the flavor. Also, when cutting the butter into the flour mixture, try to work quickly to keep the butter cold, which results in a flakier crust. Allowing the lemon squares to cool completely before cutting ensures clean cuts and helps the flavors meld together beautifully.

Variations & Substitutions

If you’re looking to switch things up, consider adding a layer of fresh berries on top of the lemon mixture before baking for a fruity twist. You can also substitute lime juice and zest for a different citrus flavor. For a gluten-free option, replace the all-purpose flour with a 1:1 gluten-free baking blend.

Storage

Store your lemon squares in an airtight container at room temperature for up to three days. If you prefer, they can also be refrigerated for up to a week. For longer storage, freeze the squares in a single layer, then transfer to a freezer-safe container for up to three months. Thaw at room temperature before serving.

FAQ

Can I make lemon squares ahead of time?

Yes, lemon squares are a great make-ahead dessert. You can prepare them a day or two in advance and store them in the refrigerator until you’re ready to serve. Just wait to sprinkle with powdered sugar until right before serving to keep them looking fresh.

What if I don’t have a pastry cutter?

No worries! If you don’t have a pastry cutter, you can use two knives or even your fingertips to cut the butter into the flour mixture. Just be sure to work quickly to keep the butter from melting.

Why is my filling runny?

If your filling is runny, it might not have baked long enough. Make sure the filling is set before removing from the oven. If needed, bake for a few additional minutes, checking frequently to avoid over-baking.

Nutrition

While these lemon squares are a delightful treat, they do come with a bit of indulgence. Each square (assuming you cut the batch into 16 pieces) contains approximately 150 calories, 7 grams of fat, 20 grams of carbohydrates, and 15 grams of sugar. Enjoy them in moderation as part of a balanced diet.

Conclusion

These lemon squares are a nostalgic treat that offer a perfect balance of tartness and sweetness. Easy to make and incredibly delicious, they’re a wonderful addition to any dessert table. Whether you’re enjoying them as a simple afternoon snack or serving them at a special gathering, they’re sure to bring a smile to anyone’s face. I hope this recipe brings you as much joy as it does to me, and perhaps even creates new cherished memories in your kitchen.

Related update: Lemon Squares

Related update: Fresh Peach With Goat Cheese Side Salad

Related update: Gluten Free Yellow Cake And Cupcakes

Fall Fruit Compote | Made by Meaghan Moineau

Fall Fruit Compote

Intro

There’s something magical about fall—the crisp air, the vibrant colors, and the comforting aroma of spices and fruits mingling together. Growing up, fall was always my favorite season. I remember sitting in my grandmother’s cozy kitchen, the windows fogging up as she cooked her famous fruit compote. The sweet and tangy smell would waft through the house, inviting everyone to gather around the table. Her secret? A touch of apple cider vinegar that added just the right amount of zing. Now, I carry on her tradition with my own version of this delightful Fall Fruit Compote, and I can’t wait to share it with you!

Why You’ll Love It

This Fall Fruit Compote is a hug in a bowl. Whether you’re serving it up as a side dish, a topping for potato latkes, or simply enjoying it on its own, this recipe is sure to warm your heart and soul. Here’s why you’ll absolutely love it:

  • Easy to Make: With just a few simple steps, you can have this delicious compote ready in no time.
  • Versatile: Serve it warm or cold, with breakfast or dessert—it complements any meal!
  • Full of Fall Flavors: The combination of apples, pears, and cinnamon captures the essence of autumn in every bite.
  • Customizable: Easily adjust the sweetness or tweak the spices to suit your taste.

Ingredients

  • 1 tablespoon butter
  • 2 cups diced honeycrisp apples
  • 1 cup diced pears
  • 1/2 cup dried cherries
  • 1 tablespoon apple cider vinegar
  • 1 cup apple juice, plus more as needed
  • 1/4 cup brown sugar
  • 1 cinnamon stick

Instructions

  1. Melt the butter in a medium saucepan over high heat.
  2. Add the diced apples, pears, cherries, vinegar, apple juice, brown sugar, and cinnamon stick.
  3. Cook for 5 minutes, stirring occasionally.
  4. Lower the heat to medium and cook for a few minutes more, until the fruit is tender and the liquid has boiled away.
  5. If necessary, add a bit more apple juice to keep the fruit from scorching.
  6. Remove the cinnamon stick and serve warm, ideally with potato latkes or your favorite dish.

Tips

Here are a few tips to ensure your compote turns out perfectly:

  • Choose the Right Apples: Honeycrisp apples are ideal for this recipe as they hold their shape well and add a natural sweetness.
  • Monitor the Liquid: Keep an eye on the liquid level to prevent the fruit from burning. Add more apple juice as needed.
  • Adjust Sweetness: Feel free to add more or less brown sugar based on your preference.

Variations & Substitutions

One of the best things about this compote is its adaptability. Here are some variations and substitutions you might consider:

  • Fruit Variations: Swap out the pears for peaches or add cranberries for a tart twist.
  • Sugar Alternatives: Use maple syrup or honey instead of brown sugar for a different sweetness profile.
  • Spice It Up: Add a pinch of nutmeg or cloves for extra warmth.

Storage

This delicious compote can be stored in an airtight container in the refrigerator for up to a week. Reheat gently on the stove or in the microwave before serving. You can also freeze it for up to three months—just thaw and warm it before enjoying.

FAQ

Can I use fresh cherries instead of dried?

Yes, fresh cherries can be used, though they will add more moisture to the compote. You might need to reduce the amount of apple juice slightly to compensate.

Is there a way to make this recipe vegan?

Absolutely! Simply substitute the butter with a plant-based alternative, such as coconut oil or vegan butter, and you’re good to go.

Can I make this compote in advance?

Definitely! This compote tastes even better the next day, as the flavors have more time to meld together. Just store it in the fridge and reheat when you’re ready to serve.

Nutrition

This Fall Fruit Compote is not only delicious but also packed with nutrients. Apples and pears are high in fiber and vitamin C, while cherries add antioxidants. While it does include sugar, you can easily adjust the amount to fit your dietary needs.

Conclusion

There you have it—a warm, comforting dish that captures the essence of fall in every bite. Whether you’re gathering with family or simply indulging in a cozy night at home, this Fall Fruit Compote is sure to be a hit. I hope it brings as much joy to your table as it does to mine. Happy cooking!

Related update: Fall Fruit Compote

Related update: Zabaglione with Roasted Plums

Summer Fruit Sangria | Made by Meaghan Moineau

Summer Fruit Sangria: A Refreshing Delight for Warm Days

Intro

There’s something magical about the long, sun-drenched days of summer that calls for a refreshing, fruity drink in hand. For me, nothing captures the essence of summer more than a chilled glass of homemade sangria. I vividly remember the first time I tasted this delightful concoction. It was a balmy afternoon at my grandmother’s house, where the garden was in full bloom, and the air smelled of sweet blossoms. She poured me a glass of her special summer fruit sangria, brimming with vibrant colors and flavors. That moment, with its playful mix of citrus and berries, became a cherished memory, a taste of joy and sunshine. Today, I’m excited to share with you this beloved recipe, hoping it brings as much happiness to your table as it has to mine.

Why You’ll Love It

Summer Fruit Sangria is the quintessential drink for any warm-weather gathering. Here’s why you’ll fall head over heels for this delightful beverage:

  • Easy to Make: With just a handful of ingredients and simple steps, it’s a breeze to prepare.
  • Vibrant and Refreshing: The combination of juicy fruits and rich red wine creates an irresistible, refreshing blend.
  • Perfect for Entertaining: Whether you’re hosting a backyard BBQ or a casual get-together, sangria is always a crowd-pleaser.
  • Customizable: You can tailor it to your taste with different fruits and spirits.
  • Make-Ahead: Prepare it the day before, letting the flavors meld beautifully overnight.

Ingredients

  • 1 bottle of dry red table wine
  • 1/4 cup brandy
  • 1/4 cup triple sec
  • 1/2 cup orange juice
  • 1/4 cup simple syrup
  • 2 ripe peaches, sliced
  • 1 orange, sliced
  • 1 cup raspberries
  • 1 cup blueberries
  • Ice, for serving

Instructions

  1. In a large jug or beverage container, combine the bottle of dry red table wine, brandy, and triple sec.
  2. Add the orange juice and simple syrup, stirring gently to blend.
  3. Introduce the sliced peaches, orange, raspberries, and blueberries into the mixture. Stir well to ensure the fruit is evenly distributed.
  4. Cover the jug and refrigerate for at least 24 hours. This resting time allows the flavors to meld and develop beautifully.
  5. When ready to serve, give the sangria a gentle stir and pour it over ice in individual glasses.

Tips

For the best sangria experience, keep these tips in mind:

  • Choose a wine you enjoy drinking on its own; its flavor will be prominent in the sangria.
  • For a less sweet version, reduce the amount of simple syrup or omit it entirely.
  • Use ripe, in-season fruits for the best flavor and juiciness.
  • Chill your wine and fruit beforehand to speed up the refrigeration process.

Variations & Substitutions

One of the joys of making sangria is its versatility. Here are some variations and substitutions to consider:

  • Fruits: Try adding strawberries, cherries, or pineapple for a tropical twist.
  • Wine: Swap the red wine for a white wine or rosé for a lighter version.
  • Spirits: Replace brandy with rum or vodka for a different kick.
  • Sparkling Sangria: Just before serving, top each glass with a splash of club soda or sparkling water for some fizz.

Storage

Sangria is best enjoyed within a couple of days. Store any leftovers in the refrigerator, covered. Be sure to remove any ice before storing to prevent dilution. The flavors will continue to develop, but the freshness of the fruit is best within the first couple of days.

FAQ

Can I use frozen fruit in sangria?

Yes, frozen fruit can be a convenient and budget-friendly option. It can also help chill the sangria, eliminating the need for extra ice. Just be aware that frozen fruit may release more juice, slightly altering the flavor balance.

What type of wine is best for sangria?

Opt for a dry red wine like a Cabernet Sauvignon, Merlot, or Tempranillo. These wines offer a rich flavor that complements the sweetness of the fruit and other ingredients. However, feel free to experiment with your favorite variety.

Can sangria be made non-alcoholic?

Absolutely! Substitute the wine with a combination of grape juice and cranberry juice, and leave out the spirits. You can still enjoy the fruity, refreshing essence of sangria without the alcohol.

Nutrition

While sangria is a delightful treat, it’s essential to enjoy it in moderation. The nutritional content will vary based on the specific ingredients and quantities used. Typically, a serving of sangria contains around 150-200 calories, depending on the sweetness and type of wine. Remember, the addition of fruits contributes vitamins and antioxidants, making it a slightly healthier indulgence.

Conclusion

Summer Fruit Sangria is more than just a beverage; it’s a celebration of summer’s bounty, a nod to carefree days, and the joy of sharing moments with loved ones. Whether you’re sipping it by the pool or serving it at a festive gathering, this sangria will surely bring smiles and sunshine to your day. So, gather your ingredients, embrace the simplicity of the process, and let the flavors transport you to a summer paradise. Cheers to good times and great company!

Related update: Summer Fruit Sangria

Related update: Lemon Drop Jello Shots

Related update: Spiced Apple Cider

Red Quinoa and Roasted Cauliflower Salad | Made by Meaghan Moineau

Red Quinoa and Roasted Cauliflower Salad

Intro

There’s something magical about the aroma of roasted cauliflower wafting through the kitchen. It transports me back to my grandmother’s cozy home, where the warmth of her cooking would fill every corner. She had a knack for taking simple ingredients and transforming them into something extraordinary. Inspired by her love for hearty, wholesome meals, I’ve created this Red Quinoa and Roasted Cauliflower Salad. It’s a dish that combines textures and flavors beautifully, making it a family favorite.

Why You’ll Love It

This salad is a delightful medley of nutty quinoa, sweet and chewy dried apricots, crunchy walnuts, and tangy feta cheese. The roasted cauliflower adds a savory depth, while the fresh green onions and parsley bring a burst of freshness. It’s a versatile dish that can be served warm or cold, making it perfect for any season. Whether you’re looking for a nutritious lunch, a side dish for dinner, or a potluck star, this salad fits the bill. Plus, it’s packed with protein, fiber, and healthy fats, ensuring you feel satisfied and nourished.

Ingredients

  • 1 head of cauliflower
  • 1 cup red quinoa
  • 1/2 cup walnuts, chopped
  • 1/2 cup dried apricots, chopped
  • 1/2 cup feta cheese, crumbled
  • 4 green onions, sliced
  • 1/4 cup fresh parsley, chopped
  • Salt and pepper to taste
  • Juice of 1/2 a lemon
  • 2 tablespoons olive oil

Instructions

  1. Cook the quinoa according to package directions. Set aside to cool slightly.
  2. Preheat the oven to 400°F (200°C).
  3. Cut the head of cauliflower into florets.
  4. Toss the cauliflower florets with olive oil, salt, and pepper. Arrange them on a baking sheet in a single layer.
  5. Roast the cauliflower in the preheated oven for 20 minutes or until tender and golden brown.
  6. Meanwhile, crumble the feta cheese and prepare the remaining ingredients: chop the walnuts, dried apricots, green onions, and parsley.
  7. In a large bowl, combine the cooked quinoa, roasted cauliflower, walnuts, apricots, feta cheese, green onions, and parsley.
  8. Drizzle with extra virgin olive oil and the juice from half a lemon. Toss to combine.
  9. Season with additional salt and pepper to taste.
  10. Serve immediately warm or chill in the refrigerator and serve cold.

Tips

For the best results, ensure your cauliflower florets are evenly coated in olive oil and spread out on the baking sheet to roast evenly. You can toast the walnuts for an extra layer of flavor. Simply place them in a dry skillet over medium heat, stirring frequently until fragrant. Be careful not to burn them! Finally, if you’re serving the salad cold, allow the flavors to meld by refrigerating it for at least an hour before serving.

Variations & Substitutions

This salad is highly adaptable to your preferences or dietary needs. You can swap the red quinoa for white or black quinoa, or even use farro or barley for a different grain base. If you’re not a fan of walnuts, try using almonds or pecans instead. For a vegan version, omit the feta cheese or replace it with a plant-based alternative. You can also add more veggies, like roasted cherry tomatoes or bell peppers, for extra color and nutrients.

Storage

This salad stores beautifully, making it an excellent option for meal prep. Place the salad in an airtight container and refrigerate for up to 4 days. If you’ve dressed the salad, the flavors will intensify over time, which many find delicious. However, if you prefer a fresher taste, consider storing the dressing separately and mixing it in just before serving.

FAQ

Can I make this salad ahead of time?

Absolutely! This salad is ideal for making ahead. Prepare all the components and combine them just before serving. This will keep the flavors vibrant and the textures perfect.

Is there a way to add more protein to this salad?

Yes, you can add grilled chicken, chickpeas, or tofu for additional protein. These options complement the existing flavors well and make the salad more filling.

What can I serve with this salad?

This salad is quite versatile and pairs well with grilled meats, such as chicken or fish. It’s also a great side dish for a barbecue or a potluck.

Nutrition

This Red Quinoa and Roasted Cauliflower Salad is not only delicious but also nutritious. It’s rich in plant-based protein from quinoa, healthy fats from walnuts and olive oil, and fiber from the cauliflower and dried apricots. It’s a well-rounded meal that will keep you energized and satisfied.

Conclusion

Whether you’re reminiscing about family meals or creating new memories, this Red Quinoa and Roasted Cauliflower Salad is a dish that brings people together. Its harmonious blend of flavors and textures makes it a standout choice for any occasion. I hope this recipe becomes a staple in your kitchen, just as it is in mine. Enjoy the journey of cooking and savor every bite!

Related update: Red Quinoa and Roasted Cauliflower Salad

Related update: Hush Puppies

Related update: Amaranth and Roast Veggie Salad

Crab Cake Stuffed Shrimp | Made by Meaghan Moineau

Crab Cake Stuffed Shrimp

Intro

There’s something truly magical about the combination of crab cakes and shrimp. It takes me back to summer evenings spent by the coastline, where the air was tinged with the saltiness of the sea and the gentle hum of waves provided the perfect backdrop to our family gatherings. My grandmother, ever the culinary wizard, would whip up this dish that was both an indulgence and a comfort. Her Crab Cake Stuffed Shrimp was the star of many a festive table, and today, I am thrilled to share her recipe with you. This delightful appetizer is sure to impress your guests, bringing a touch of the ocean’s bounty to your dining table.

Why You’ll Love It

This Crab Cake Stuffed Shrimp recipe is the perfect blend of elegance and comfort, making it ideal for both special occasions and casual gatherings. Here’s why you’ll fall in love with it:

  • Flavor-Packed: Each bite is a burst of rich, savory flavors with a hint of spice.
  • Textural Delight: The tender shrimp combined with the crispy crab cake offers a satisfying texture contrast.
  • Impressive Presentation: This dish looks as good as it tastes, making it a show-stopper on any table.
  • Make Ahead: The crab mixture can be prepared in advance, allowing you more time to enjoy with guests.
  • Customizable: Easily adjust the spice level or add your personal touch with various substitutions.

Ingredients

  • 10 tablespoons unsalted butter, divided
  • 1 onion, finely chopped
  • 1 green bell pepper, finely chopped
  • 1 red bell pepper, finely chopped
  • 1/4 cup dry white wine
  • 2 cloves garlic, minced
  • 1 pound crab meat
  • 1/2 cup round buttery crackers, crushed
  • 1/2 cup panko bread crumbs
  • 1/2 teaspoon red ground pepper
  • 1 teaspoon Old Bay seasoning
  • Salt and black ground pepper to taste
  • 16 large shrimp, peeled and deveined
  • Optional: Lemon wedges for serving

Instructions

  1. Line a baking sheet with parchment paper.
  2. In a skillet, melt 5 tablespoons of butter over medium heat. Add the onion and sauté until translucent.
  3. Add the green and red bell peppers, remaining 5 tablespoons of butter, white wine, and garlic. Cook until the vegetables are tender, about 4 minutes.
  4. In a large bowl, combine the crab meat, onion mixture, crushed crackers, panko bread crumbs, red pepper, Old Bay seasoning, salt, and black pepper. Stir to combine.
  5. Cover the crab mixture and refrigerate for at least 1 hour, or up to 24 hours for enhanced flavor.
  6. Preheat your oven to 350 degrees Fahrenheit.
  7. Using a sharp knife, butterfly each shrimp starting at the tail end, and place them on the prepared baking sheet, pressing gently to flatten.
  8. Form about 3 tablespoons of the crab mixture into a ball and place it on top of each shrimp, pressing the shrimp tail over the crab.
  9. Repeat with the remaining shrimp and crab mixture.
  10. Bake in the preheated oven for 10 to 15 minutes until the shrimp are cooked through and the tops are lightly golden.
  11. Optional: Squeeze fresh lemon juice over the cooked appetizers for a zesty finish.
  12. Serve immediately to enjoy the best taste and texture.

Tips

  • Choose Fresh Ingredients: Use the freshest crab meat and shrimp for the best flavor.
  • Chill the Mixture: Refrigerating the crab mixture helps it hold together better when forming the balls.
  • Don’t Overstuff: Be gentle when wrapping the shrimp around the crab mixture to prevent tearing.

Variations & Substitutions

Feel free to make this recipe your own by experimenting with these variations and substitutions:

  • Spicy Twist: Add more red pepper or a dash of cayenne for extra heat.
  • Herbal Infusion: Mix in some fresh herbs like parsley or chives for an aromatic touch.
  • Cheesy Delight: Fold in some grated Parmesan cheese into the crab mixture for a rich flavor.
  • Alternative Meats: Swap crab meat for chopped lobster or scallops for a different take.

Storage

If you have leftovers (which is rare because they’re so delicious!), store them in an airtight container in the refrigerator for up to 2 days. Reheat in a preheated oven at 350 degrees Fahrenheit until warmed through for best results. Avoid microwaving as it may make the shrimp rubbery.

FAQ

Can I use frozen shrimp?

Yes, you can use frozen shrimp, but make sure to thaw them completely and pat them dry before using to prevent excess moisture from affecting the texture of the dish.

What can I serve with Crab Cake Stuffed Shrimp?

This dish pairs beautifully with a fresh green salad, roasted vegetables, or a light pasta dish. You can also serve it as an appetizer with a dipping sauce like aioli or cocktail sauce.

How do I know when the shrimp are cooked?

The shrimp are done when they turn opaque and pink, and the crab mixture on top is lightly golden. Be careful not to overcook them to maintain a juicy texture.

Nutrition

This dish is a delightful indulgence, rich in protein from the crab and shrimp. While exact nutritional information will vary based on specific ingredients used, it is a good source of omega-3 fatty acids, vitamins, and minerals. For those watching their sodium intake, consider adjusting the amount of Old Bay seasoning and salt.

Conclusion

Crab Cake Stuffed Shrimp is more than just a recipe; it’s a celebration of flavors that brings happiness to the table. Whether you’re recreating cherished family memories or starting new traditions, this dish is bound to be a hit. Share it with loved ones, and let the taste of the sea make your culinary experience unforgettable. Happy cooking!

Related update: Crab Cake Stuffed Shrimp

Related update: Tuna Mexi Melts

Overnight Oatmeal | Made by Meaghan Moineau

Overnight Oatmeal

Intro

There’s something magical about waking up to the irresistible aroma of a warm breakfast already prepared and waiting for you. Overnight oatmeal has been a beloved tradition in my family, one that carries the comforting memory of my grandmother’s cozy kitchen. As a child, I would spend weekends at her place, and there was no greater joy than waking up to the smell of her special oatmeal. It was always piping hot, creamy, and filled with delightful surprises like dried figs and cranberries. This recipe is a heartfelt homage to those cherished mornings, and I hope it brings the same warmth and comfort to your kitchen.

Why You’ll Love It

Overnight oats are not just convenient; they are a delightful way to begin your day with minimal effort. Here are a few reasons why this recipe will become a staple in your morning routine:

  • Convenience: Set it up the night before, and breakfast is ready by morning. It’s perfect for busy lifestyles.
  • Hearty and Nutritious: Packed with fiber from steel-cut oats and the natural sweetness of dried fruits, this meal is both satisfying and nourishing.
  • Customizable: Easily adjust the ingredients to suit your taste preferences or dietary needs.
  • Comforting: There’s an undeniable comfort in starting your day with a warm, homemade meal.

Ingredients

  • 1 cup dried cranberries
  • 1 cup dried figs, chopped
  • 2 cups half-and-half
  • 1 cup steel-cut oats
  • 4 cups water

Instructions

  1. In a crock-pot, combine all ingredients.
  2. Set the crock-pot to low heat.
  3. Cover and let cook for 8 to 9 hours.
  4. Stir the oatmeal and remove to serving bowls.
  5. This method works best if started before you go to bed. This way your oatmeal will be finished by morning.

Tips

To ensure your overnight oatmeal turns out perfectly, consider these helpful tips:

  • Use steel-cut oats for the best texture. Rolled or quick oats may turn mushy in a slow cooker.
  • If you prefer a creamier texture, you can substitute the water with more half-and-half or milk.
  • Add a pinch of salt to enhance the flavors of the oatmeal.
  • For added sweetness, drizzle honey or maple syrup before serving.

Variations & Substitutions

Feel free to make this recipe your own by experimenting with different ingredients:

  • Fruits: Swap out dried cranberries and figs for raisins, apricots, or cherries.
  • Milk: Use almond milk, coconut milk, or soy milk in place of half-and-half for a dairy-free version.
  • Add-ins: Stir in some almond butter, vanilla extract, or a sprinkle of cinnamon for extra flavor.
  • Nuts and Seeds: Top with chopped nuts or seeds like almonds, walnuts, or chia seeds for added crunch and nutrition.

Storage

Leftover oatmeal can be stored in an airtight container in the refrigerator for up to 4 days. Reheat in the microwave or on the stovetop with a splash of milk or water to maintain the desired consistency.

FAQ

Can I make this recipe without a crock-pot?

Yes, you can! Simply combine all the ingredients in a large pot and bring to a boil. Reduce the heat to low and simmer, stirring occasionally, for about 30-40 minutes until the oats are cooked through.

Can I freeze the oatmeal?

Yes, you can freeze individual portions of the cooked oatmeal in airtight containers for up to 3 months. To reheat, simply thaw overnight in the refrigerator and warm on the stovetop or microwave, adding a bit of liquid if necessary.

Nutrition

While specific nutritional values can vary based on the exact ingredients used, here is an approximate breakdown per serving:

  • Calories: 300
  • Protein: 7g
  • Fat: 7g
  • Carbohydrates: 52g
  • Fiber: 8g
  • Sugar: 20g

Conclusion

Overnight oatmeal is more than just a breakfast; it’s a warm embrace to start your day. With its rich flavors and heartwarming aroma, it’s a simple pleasure that invites you to slow down and savor the morning. Whether you’re reliving fond childhood memories or creating new ones, this recipe is sure to become a beloved favorite in your home. Here’s hoping it fills your mornings with warmth and joy!

Related update: Overnight Oatmeal

Macaroni and Cheese Gratin | Made by Meaghan Moineau

Macaroni and Cheese Gratin

Intro

There’s something magical about the comforting embrace of macaroni and cheese. It’s a dish that transcends age, a warm hug on a plate for both the young and the old. I remember spending countless afternoons in my grandmother’s kitchen, the air filled with the tantalizing aroma of bubbling cheese and freshly baked bread crumbs. She always let me sprinkle the breadcrumbs on top, a task I took to with glee. This Macaroni and Cheese Gratin recipe has been passed down through generations in my family, and today, I’m thrilled to share it with you.

Why You’ll Love It

This Macaroni and Cheese Gratin is the epitome of comfort food, with a crispy, herbed breadcrumb topping that contrasts beautifully with the creamy, cheesy pasta beneath. It’s perfect for family gatherings, potlucks, or a cozy night in. The blend of cheddar and gruyere provides a rich, tangy flavor, while a hint of nutmeg and pepper sauce adds warmth and depth. You’ll love how the top gets golden and crunchy, making every bite a delightful experience.

Ingredients

  • 2 cups herbed bread crumbs
  • 4 tablespoons butter, divided
  • 2 cups grated cheddar cheese
  • 1 pound elbow macaroni
  • 1/4 cup all-purpose flour
  • 1 cup grated gruyere cheese
  • 4 cups milk
  • 1/4 teaspoon freshly grated nutmeg
  • 1/2 cup grated parmesan cheese
  • 2 tablespoons chopped fresh parsley
  • 1 teaspoon pepper sauce
  • Salt, to taste

Instructions

  1. Bring a large pot of water to a boil. Add a generous pinch of salt, then add the elbow macaroni. Cook until just shy of al dente, since the macaroni will continue to cook in the oven. Drain and set aside.
  2. In another pot, melt two tablespoons of butter over medium heat. Add the flour and stir with a whisk or wooden spoon for a couple of minutes to cook the raw flavor out of the flour.
  3. Gradually whisk in the milk, 1/2 cup at a time, allowing the mixture to thicken before adding more. Once all the milk is incorporated, reduce the heat to low and continue to cook, stirring constantly, until the sauce thickens.
  4. Stir in the grated cheddar, gruyere, and parmesan cheeses until melted and smooth. Add the nutmeg, pepper sauce, and salt to taste. Remove from heat and set aside.
  5. Return the drained macaroni to its pot and pour the cheese sauce over it. Stir gently with a wooden spoon to combine.
  6. Spoon the macaroni mixture into individual gratin dishes or a large buttered baking dish. Feel free to add a few tomato slices here and there, pressing them gently into the surface.
  7. To make the topping, melt the remaining two tablespoons of butter and mix it with the herbed bread crumbs until well combined.
  8. Sprinkle the breadcrumb mixture evenly over the macaroni and cheese. Do not smooth out the top; leave a few peaks for extra crispiness.
  9. Bake in a preheated oven at 375°F (190°C) for 20-25 minutes, or until the top is golden brown and the cheese is bubbly.
  10. Garnish with chopped fresh parsley before serving.

Tips

For best results, use high-quality cheeses for a richer flavor. Feel free to make the cheese sauce ahead of time and store it in the refrigerator. When ready to bake, simply reheat the sauce gently and combine with the pasta.

Variations & Substitutions

Feel free to experiment with different types of cheese. A combination of sharp cheddar and smoked gouda can add a delightful twist. For a gluten-free version, use gluten-free pasta and flour. You can also add cooked bacon or diced ham to the macaroni for a meatier version.

Storage

Store any leftovers in an airtight container in the refrigerator for up to 3 days. To reheat, place in a preheated oven at 350°F (175°C) until warmed through. You can also freeze the gratin before baking; just ensure it’s well-covered. When ready to enjoy, bake directly from frozen, adding an extra 10-15 minutes to the cooking time.

FAQ

Can I make this dish ahead of time?

Yes, you can assemble the gratin up to a day in advance and refrigerate. Just add the breadcrumb topping right before baking.

What can I use instead of gruyere cheese?

If you can’t find gruyere, you can substitute it with Swiss cheese or even a mild provolone for a similar texture and flavor.

Nutrition

While I don’t have exact nutritional information for this dish, keep in mind that it’s a rich and indulgent treat. Moderation is key, and pairing it with a light salad can help balance out the meal.

Conclusion

This Macaroni and Cheese Gratin is more than just a meal; it’s a celebration of cheesy, comforting goodness that brings people together. Whether you’re sharing it with loved ones or savoring it solo, know that each bite is a testament to the timeless joy of home-cooked comfort food. Enjoy!

Related update: Macaroni and Cheese Gratin

Zucchini & Basil Frittata | Made by Meaghan Moineau

Zucchini & Basil Frittata: A Delightful Breakfast or Brunch Dish

Intro

There’s something undeniably comforting about the aroma of a frittata wafting through the kitchen on a lazy Sunday morning. It takes me back to weekends spent with my grandmother, who had an uncanny ability to turn simple ingredients into magical meals. Her kitchen was a place of warmth, filled with laughter and the clatter of pots and pans. One of my favorite dishes that she made was a zucchini and basil frittata, a dish that seemed to capture the essence of summer in every bite. Today, I’m sharing this beloved recipe with you, hoping it brings as much joy to your table as it has to mine.

Why You’ll Love It

This Zucchini & Basil Frittata is a perfect blend of flavors and textures. The zucchini provides a tender, moist base, while fresh basil adds a burst of herby freshness. Cheddar cheese gives it a touch of richness, and green onions offer a hint of sharpness. It’s a dish that’s not only delicious but also incredibly versatile, making it perfect for breakfast, brunch, or even a light dinner. Plus, it’s a great way to use up any extra zucchini you might have on hand during the summer months.

Ingredients

  • 2 medium zucchini
  • 1/4 cup fresh basil, chopped
  • 1 cup cheddar cheese, shredded
  • 6 large eggs
  • 2 tablespoons grapeseed oil
  • 2 green onions, thinly sliced
  • Salt, to taste

Instructions

  1. Shred the zucchini using a box grater or a food processor.
  2. Place the shredded zucchini in a colander with a large bowl underneath. Sprinkle with a little salt and allow some water to seep out, about 20 minutes. You can squeeze some of the water out with your hands if you’re in a hurry. This step can be completed ahead of time, and the shredded zucchini can stay in your refrigerator overnight if you would like to do this recipe in stages.
  3. In a large mixing bowl, add the shredded zucchini, green onion, basil, cheddar cheese, and salt. Stir to combine.
  4. Crack the eggs in a separate bowl and beat them. Pour the egg mixture into the bowl with the veggies and stir to combine all ingredients.
  5. Preheat your oven to 350 degrees F.
  6. In a 10-inch cast iron skillet, heat 1 to 2 tablespoons of grapeseed oil (or olive oil). Spread the oil around, making sure the sides are nicely oiled as well.
  7. Heat to medium, then add the egg/zucchini mixture, ensuring the mixture is evenly distributed.
  8. Cook until the egg begins to set on the sides of the skillet, about 3 to 5 minutes.
  9. Use a potholder to place the skillet in the oven. Bake for 12 to 15 minutes until the center tests clean.

Tips

For the best results, make sure to thoroughly drain the zucchini to prevent the frittata from becoming too watery. If you’re in a rush, you can use a clean kitchen towel to squeeze out the excess moisture more quickly. Also, using a cast iron skillet not only helps with even cooking but also adds a beautiful rustic touch to your presentation.

Variations & Substitutions

Feel free to get creative with this recipe! You can substitute the cheddar cheese with feta or goat cheese for a tangier flavor. If you’re not a fan of basil, try using parsley or dill instead. For a bit of heat, add a pinch of red pepper flakes or a dash of hot sauce. This frittata is also a great way to use up other vegetables you have on hand, such as bell peppers or mushrooms.

Storage

This frittata can be stored in an airtight container in the refrigerator for up to three days. To reheat, simply pop it in the oven at 350 degrees F for about 10 minutes or until warmed through. Alternatively, you can reheat individual slices in the microwave for about 1 minute.

FAQ

Can I make this frittata ahead of time?

Yes, you can prepare the zucchini and store it in the refrigerator, then quickly assemble and bake the frittata when you’re ready to serve. The baked frittata also keeps well, making it a great make-ahead option for busy mornings.

Can I freeze the frittata?

While frittatas are best enjoyed fresh, you can freeze any leftovers. Simply wrap individual slices in plastic wrap and place them in a freezer-safe container. To reheat, bake in the oven at 350 degrees F until heated through, or microwave on a low setting.

What can I serve with this frittata?

This frittata pairs beautifully with a simple green salad or some crusty bread. If you’re serving it for brunch, consider adding a fruit salad or some roasted potatoes to round out the meal.

Nutrition

This zucchini and basil frittata is a nutritious option, packed with protein from the eggs and cheese, along with vitamins and minerals from the zucchini and basil. It’s a satisfying meal that will keep you fueled throughout the day.

Conclusion

The Zucchini & Basil Frittata is more than just a dish; it’s a celebration of simple, fresh flavors that come together to create something truly special. Whether you’re serving it for a leisurely weekend brunch or a quick weekday breakfast, it’s sure to become a favorite in your household. So, gather your ingredients, embrace the comforting process of cooking, and enjoy this delightful frittata with your loved ones. Bon appétit!

Related update: Zucchini & Basil Frittata

Related update: Grilled Garlicky-Herbed Shrimp

Coconut Almond Cheesecake | Made by Meaghan Moineau

Coconut Almond Cheesecake

Intro

Every family has that one dessert that makes its way to the table at every special gathering. For my family, it’s the Coconut Almond Cheesecake. I remember my grandmother pulling out her worn, handwritten recipe card every time we had a celebration. The rich, creamy cheesecake with a hint of coconut and the crunch of almonds was always the highlight of the meal. Eventually, she passed the recipe down to me, and now, I’m thrilled to share it with you. This cheesecake is more than just a dessert; it’s a cherished family tradition.

Why You’ll Love It

This Coconut Almond Cheesecake is a delightful twist on the classic cheesecake. Here’s why you’ll adore it:

  • Rich and Creamy: The filling is smooth and decadent, with cream cheese and a hint of coconut extract blending perfectly.
  • Nutty Crunch: The addition of almonds in both the crust and filling provides a satisfying crunch that complements the creamy texture.
  • Perfect for Any Occasion: Whether it’s a holiday, birthday, or just because, this cheesecake is guaranteed to impress.
  • Make-Ahead Friendly: It can be prepared in advance, making it a stress-free dessert option.

Ingredients

  • Crust:
    • 1 1/2 cups graham cracker crumbs
    • 1/2 cup sweetened coconut
    • 1/2 cup almonds
    • 1/4 cup sugar
    • 1/4 cup (1/2 stick) unsalted butter, melted
  • Filling:
    • 4 (8-ounce) packages cream cheese, softened
    • 1 1/4 cups sugar
    • 4 large eggs
    • 1/2 cup sweetened coconut
    • 1 teaspoon coconut extract
    • 1/2 cup almonds, chopped
  • Glaze:
    • 1 cup semisweet chocolate chips
    • 1/2 cup whipping cream
    • 1 teaspoon vanilla extract

Instructions

  1. Prepare the Crust: Preheat your oven to 350°F (175°C). Wrap the outside of a 9-inch-diameter springform pan with 2 3/4-inch-high sides with foil.
  2. In a food processor, finely grind the graham cracker crumbs, sweetened coconut, almonds, and sugar. Add the melted butter and process until moist crumbs form.
  3. Press the crust mixture onto the bottom and 1 inch up the sides of the prepared pan. Bake until the crust is set and beginning to brown, about 12 minutes. Let it cool completely.
  4. Reduce the oven temperature to 325°F (160°C).
  5. Make the Filling: In a large bowl, use an electric mixer to beat the cream cheese and sugar until smooth.
  6. Add the eggs one at a time, beating just until blended after each addition.
  7. Mix in the sweetened coconut and coconut extract. Fold in the chopped almonds.
  8. Transfer the filling to the prepared crust. Bake until the cake is puffed and no longer moves when the pan is shaken, about 1 hour and 15 minutes. Cool completely on a rack.
  9. Prepare the Glaze: In a small saucepan, combine the semisweet chocolate chips and whipping cream. Stir over low heat until the chocolate is melted and the mixture is smooth. Remove from heat and stir in the vanilla extract.
  10. Once the cheesecake is completely cooled, pour the chocolate glaze over the top, spreading it evenly.
  11. Refrigerate the cheesecake for at least 4 hours, or overnight, before serving.

Tips

  • Room Temperature Ingredients: Ensure your cream cheese and eggs are at room temperature for a smoother filling.
  • Cooling is Key: Allow the cheesecake to cool gradually to prevent cracking. Let it cool in the oven with the door slightly ajar for about 1 hour before moving it to a wire rack.
  • Springform Pan Tip: Wrapping the pan with foil helps prevent water from the water bath from seeping into the cheesecake.

Variations & Substitutions

Feel free to make this cheesecake your own:

  • Nuts: Swap almonds for pecans or walnuts for a different nutty flavor.
  • Flavor Extracts: Experiment with almond extract or vanilla extract instead of coconut extract for a subtle flavor change.
  • Chocolate Glaze: Try using white chocolate for a different twist on the glaze.

Storage

To store leftovers, cover the cheesecake with plastic wrap or place it in an airtight container and refrigerate for up to 5 days. For longer storage, freeze individual slices by wrapping them tightly in plastic wrap and placing them in a resealable freezer bag. They can be frozen for up to 1 month.

FAQ

Can I make this cheesecake ahead of time?

Absolutely! This cheesecake is perfect for making ahead. Simply prepare it up to 2 days in advance and store it in the refrigerator. Add the chocolate glaze on the day you plan to serve it for the best presentation.

What if I don’t have a food processor?

No problem! You can crush the graham crackers, coconut, and almonds in a resealable bag using a rolling pin until they are finely ground. Then, mix them with the sugar and melted butter in a bowl.

Nutrition

While I don’t have the exact nutritional breakdown for this cheesecake, it’s important to note that it is a rich dessert and should be enjoyed in moderation. For those watching their calorie intake, consider serving smaller slices or saving it for special occasions.

Conclusion

The Coconut Almond Cheesecake is a delightful and indulgent dessert that’s sure to become a favorite in your household, just as it has been in mine. Its creamy texture, nutty flavor, and irresistible chocolate glaze make it a standout treat. Whether you’re making it for a family gathering or simply to satisfy your sweet tooth, this cheesecake is bound to impress. Enjoy every rich and delicious bite, and perhaps, start a new tradition of your own!

Related update: Coconut Almond Cheesecake

Related update: Peppermint Hot Chocolate Cupcakes

Baked Chicken Thighs with Satay Sauce and Tomato Salad | Made by Meaghan Moineau

Baked Chicken Thighs with Satay Sauce and Tomato Salad

Intro

There’s something incredibly comforting about the aroma of spices wafting through the kitchen, taking me back to my childhood when family gatherings were centered around food. My grandmother had a knack for transforming simple ingredients into a feast, and her love for cooking was infectious. It was during one of those warm summer afternoons, with the sun streaming through the kitchen window, that I first tasted the magic of satay sauce. Today’s recipe for Baked Chicken Thighs with Satay Sauce and Tomato Salad is a tribute to those cherished moments, combining the rich flavors of the East with a fresh, vibrant salad that sings of summer.

Why You’ll Love It

This recipe is both a feast for the senses and a breeze to prepare. You’ll love the way the creamy satay sauce clings to the juicy chicken thighs, each bite offering a perfect balance of savory and spicy. The accompanying tomato salad provides a crisp, refreshing contrast, making this dish a perfect harmony of flavors and textures. Whether you’re cooking for family, hosting a dinner party, or simply treating yourself, this recipe will undoubtedly become a favorite.

Ingredients

  • 4-6 chicken thighs
  • Salt and pepper to taste
  • Cayenne pepper to taste
  • 2 tablespoons light soy sauce
  • 1 tablespoon apple cider vinegar
  • 2 tablespoons peanut butter
  • 1 teaspoon sesame oil
  • 4 tablespoons satay sauce
  • 1/4 cup chopped walnuts
  • 1 tablespoon grated ginger
  • 2 cloves garlic, minced
  • 1/4 cup water
  • 1 tablespoon smooth peanut butter
  • 1 tablespoon honey
  • 2 cups diced tomatoes
  • 1/4 cup celery leaves, chopped
  • 1 tablespoon mirin
  • 2 tablespoons olive oil

Instructions

  1. In a large bowl, combine the soy sauce, apple cider vinegar, peanut butter, sesame oil, satay sauce, chopped walnuts, grated ginger, minced garlic, water, smooth peanut butter, and honey. Mix until smooth.
  2. Add the chicken thighs to the bowl, ensuring they are evenly coated with the marinade. Season with salt, pepper, and a pinch of cayenne pepper to taste.
  3. Cover the bowl and let the chicken marinate for at least 15 minutes. For best results, refrigerate and marinate overnight.
  4. Preheat your oven to 180°C (356°F).
  5. Lay the chicken thighs on a baking rack placed over a baking pan. Cover the pan with foil to keep the moisture in.
  6. Bake in the preheated oven for 45 minutes to one hour, or until the chicken is fully cooked and the juices run clear.
  7. While the chicken is baking, prepare the tomato salad by combining the diced tomatoes, celery leaves, mirin, and olive oil in a bowl. Toss gently to combine.
  8. Once the chicken is done, serve warm with the tomato salad on the side. Enjoy!

Tips

To enhance the flavors, consider toasting the walnuts lightly before adding them to the marinade. This will bring out their natural oils and add an extra depth to the sauce. Additionally, if you prefer a spicier kick, increase the amount of cayenne pepper or add a dash of chili flakes to the marinade.

Variations & Substitutions

If you prefer, you can substitute chicken thighs with chicken breasts, though they may require a slightly shorter cooking time to prevent drying out. For a nut-free version, replace peanut butter with sunflower seed butter and omit the walnuts. The tomato salad can also be varied by adding cucumbers or avocados for extra creaminess.

Storage

Leftover chicken thighs can be stored in an airtight container in the refrigerator for up to 3 days. Reheat in the oven at 160°C (320°F) until warmed through. The tomato salad is best consumed fresh but can be stored separately in the fridge for up to 1 day.

FAQ

Can I make this recipe in advance?

Absolutely! You can marinate the chicken up to a day in advance, which will only deepen the flavors. Prepare the tomato salad just before serving to ensure it remains fresh and crisp.

Is this recipe gluten-free?

To make this recipe gluten-free, ensure you use gluten-free soy sauce. All other ingredients are naturally gluten-free.

Can I use store-bought satay sauce?

Yes, store-bought satay sauce works perfectly in this recipe. However, if you have the time and ingredients, making your own can add a personal touch and allow you to adjust the flavors to your liking.

Nutrition

This dish provides a balanced meal with protein from the chicken and healthy fats from peanut butter and walnuts. The tomato salad offers a good dose of vitamins and antioxidants, making this not only a delicious but also a nutritious option for lunch or dinner.

Conclusion

Baked Chicken Thighs with Satay Sauce and Tomato Salad is more than just a meal; it’s a celebration of flavors that tells a story of tradition and innovation. It’s a dish that invites you to share in the joy of cooking and savor the warmth of home-cooked goodness. I hope this recipe brings as much joy to your table as it does to mine. Happy cooking!

Related update: Baked Chicken Thighs with Satay Sauce and Tomato Salad

Related update: Three-Cup Chicken